#punk tutorials
Explore tagged Tumblr posts
Visit Tumblr Blog
Explore Tumblr blogs with no restrictions, modern design and the best experience.
Last Seen Tumblr Blogs


Fun Fact
69% of Tumblr users are millennials.
Text
hey punkz here's a tut for wrist cuffs/bracelets since some of u are new 2 tha scene

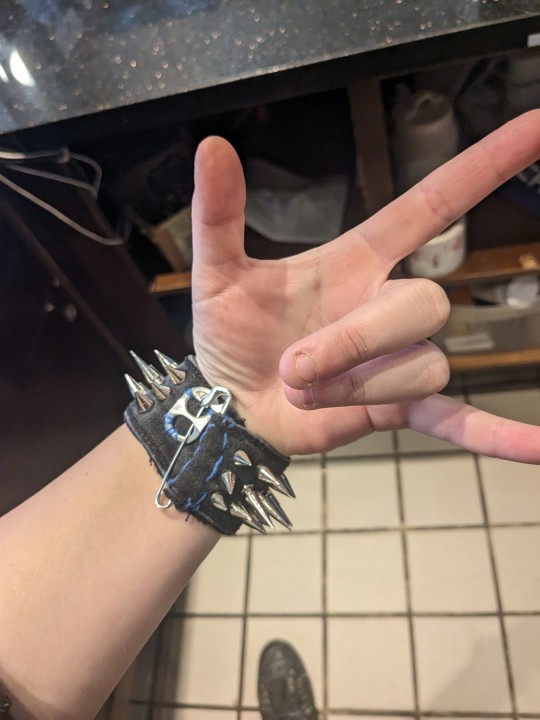
written out 4 ease of access
HOW TO: WRIST CUFFS DIY
Step 1: Old Jeans Waistband
- Cut off waistband from rest of pants
Step 2: Cut to Wrist Size (X2)
- measure around your wrist and cut
Step 3: Add Closure
-button + buttonhole or safety pin + soda tab works best imo
- Sew down soda tab to one side, safety pin to other
Step 4: Add Hardware
- good options are spikes, more safety pins, more soda tabs, staples, chains, and whatever else you can find
Step 5: SHOW OFF!!!!
feel free 2 add any other tuts on this thread or tag #punk tutorials
2K notes
·
View notes
Text
double mohawk tutorial by b1jlly on tiktok
supplies: hair clippers, head of hair, hair spray, maybe some hair dye
do you guys enjoy punk hair inspiration as well as clothes?
end result:

#punk#diy#punk hair styles#hair inspiration#double mohawk#bihawk#bihawk tutorial#double mohawk tutorial#hair styles#punk hair#hair spray
426 notes
·
View notes
Text
Soda tab flower tutorial post! 🌻🌼🌸 lots of pictures included. ****This is part one, check the reblogs for the other half!! *****
****also this is not my idea. It's been done before and I got inspired by pinterest where I saw really similar diys****
What you'll need: scissors, yarn or string (any color) and soda tabs. 6 tabs for one flower (or 7, but I use 6 personally)
Step 1: take 2 tabs and lay them over each other so that the hole on the bottom of one lines up with the hole on the top of the other, like this-


And tie them together. Then cut the short end of the string sticking up to get rid of the excess. You'll want to tie it with the back of he tabs facing up so the knot will be on the back side. Make sure to tie it tightly so the knot doesn't slip around when you're wrapping the tabs with the yarn
Step 2: wrap the side edges of the 2 tabs 3 times. You'll want to do it relatively tightly, but not as tight as possible. The tension is a little tricky to figure out because you want the flower to keep its shape well but also be loose enough to bend into a flower shape with ease. This takes practice.


Step 3: On the 3rd wrap, add another tab under the 2nd tab, like this-


And pull the string through the back of the new tab you put under the 2nd tab. And wrap 3 times to attach it to your other tabs. Pulling the string over the edges to the back, through the lined up holes, and pulling it out towards you. On every 3rd wrap, add another tab the same way until you have 6 tabs wrapped together like this-

#solarpunk#punk#solarpunk diy#punk diy#solarpunk fashion#solarpunk aesthetic#punk fashion#diy#fashion#tabistry#soda tabs#upcycled jewelry#goth jewelry#jewelry making#jewelry#punk jewelry#goth diy#goth#goth fashion#hatchet makes stuff#tutorial#long post#crafting#art#recycling#recycled jewelry#hopepunk#ecopunk
418 notes
·
View notes
Text
I MADE A DIY PIN TUTORIAL!!!


hope you enjoy :-)
538 notes
·
View notes
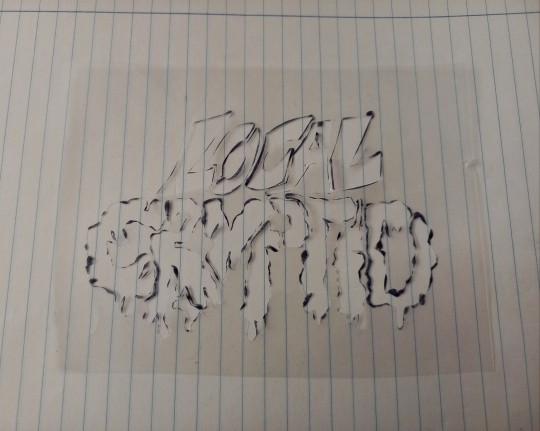
Note
Patch making tutorials?
and here i am once again, with a patch making tutorial
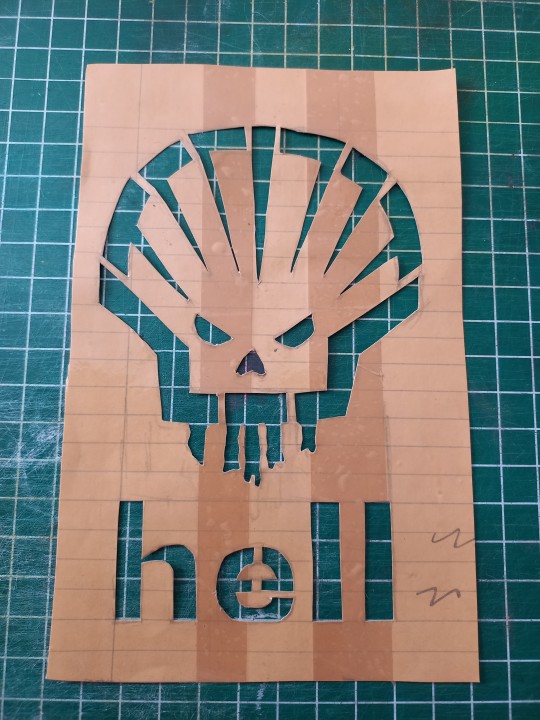
how to make stenciled patches:
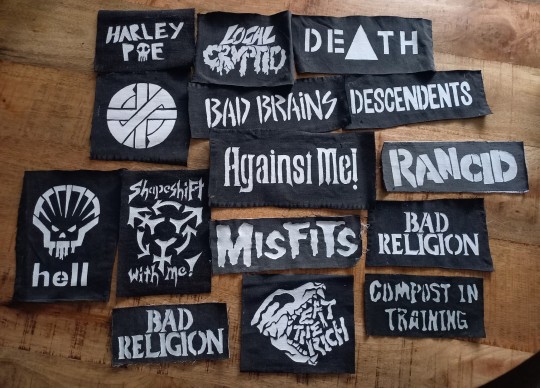
i'll post a part two in the future which will cover freehanding and stamping ur patches
-
first some general info that might be useful:
i get my patch design inspo from pinterest, etsy, and tumblr. if sell your patches make sure you arent ripping off another artists patch design when using etsy for inspo. anarchostencilism also has tons of stencils both on deviantart and reddit which are free to use.
i use acrylic paint for my patches, but if you can afford it id advise fabric paint. to seal paint into the fabric iron the patches, it helps em last longer. some acrylic paint survives very well in the washing machine, but wash your stuff by hand the first time to see how well it holds up.
if you make your patches multiple colors, dont first make the whole patch one color and then paint over it with the other colors. if the paint starts cracking the base color will show through. (if you like that however then dont mind this)
i paint my patches on jean fabric, cause it makes the patches sturdy yet flexible. but shirt fabric or canvas both work very well too. anything except really plasticy/slippery or textured fabric can be used
i pin my patches down with pins onto multiple layers of taped together cartboard, to prevent the fabric from moving around and distorting the print
-
there's two ways in which i make my stencils
1. with paper covered in tape
2. with the plastic folder you put in your binders
-
option 1:
draw out your design onto some paper, make sure there arent any "loose" parts in the design that will get lost when cutting out the stencil

cover the paper in tape front and back, make sure you can still see your design through the tape
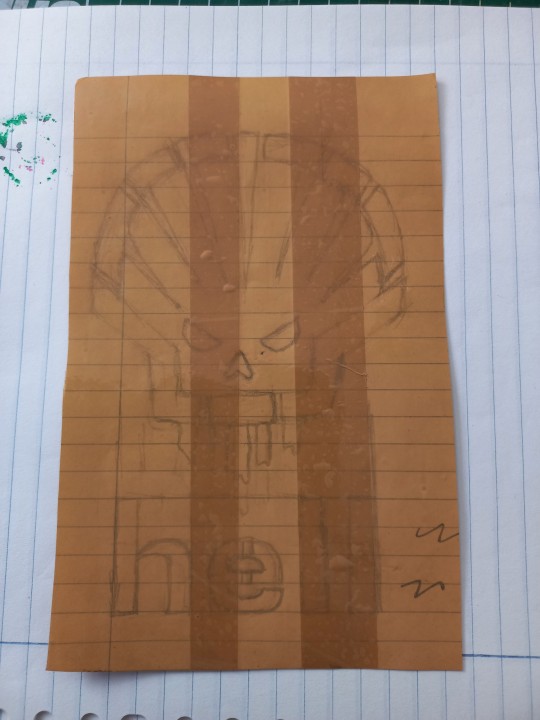
cut out your design, i use scissors and an exacto knife
-
option 2:
draw out your design (you can also draw the design directly onto the plastic folder)
cut a piece of plastic out of the folder big enough to cover your drawing and tape it down.
trace the design onto the plastic with pen or marker (any mistakes can be wiped out)
cut out your stencil
-
continuation from both option 1 and 2
after finishing your stencil you can pin them down on some fabric
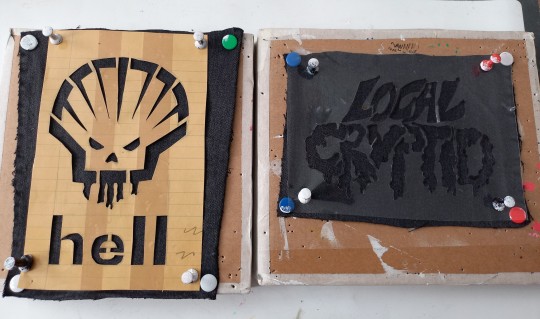
dap on your paint with the point of a big brush or a sponge, depending on the paint it'll take 2-3 layers.
make sure your previous layer dried completely before adding the next one

after the paint has fully dried you can carefully take off your stencil.
!!dont unpin the patch before it fully dried, or the drying paint may cause the fabric to warp!!

thats it, questions are always welcome, now go and make stuff!!
#punk diy#diy fashion#punk#queer punk#diy punk#punk clothes#punk style#punk patches#patches#tutorial#my stuff
2K notes
·
View notes
Text


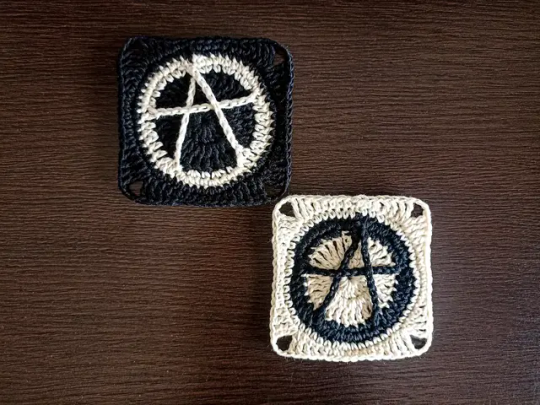
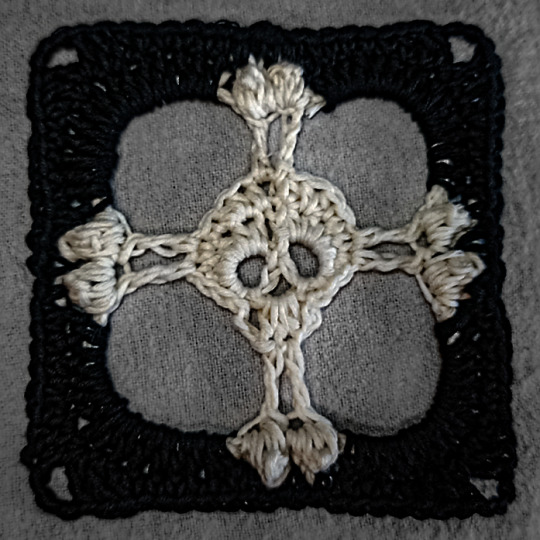
Alternative/Goth/Punk/Fairycore crochet patterns on my Etsy, RoseOfMayGreece!
#goth#punk#crochet#pattern#tutorial#pentagram#stained glass#fairycore#anarchy#patches#granny square#alternative#RoseOfMayGreece#etsy#forest#easy crochet#intermediate#beautiful#witchy#pagan#dark#moon#moon phases#night#elven
201 notes
·
View notes
Text
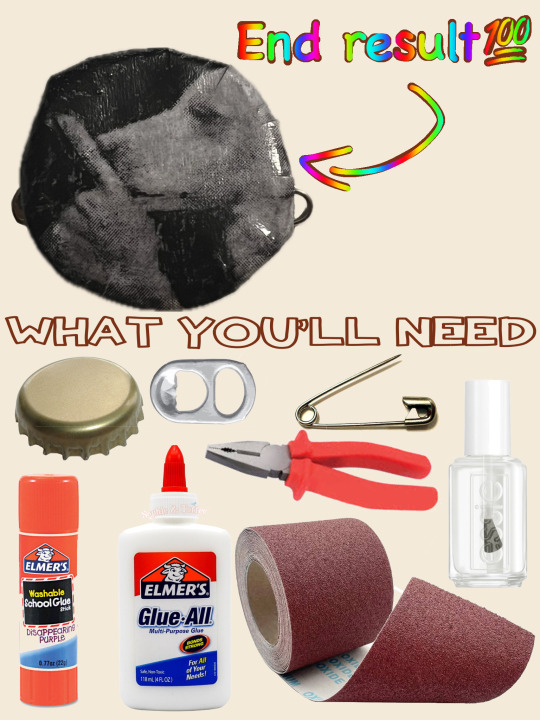
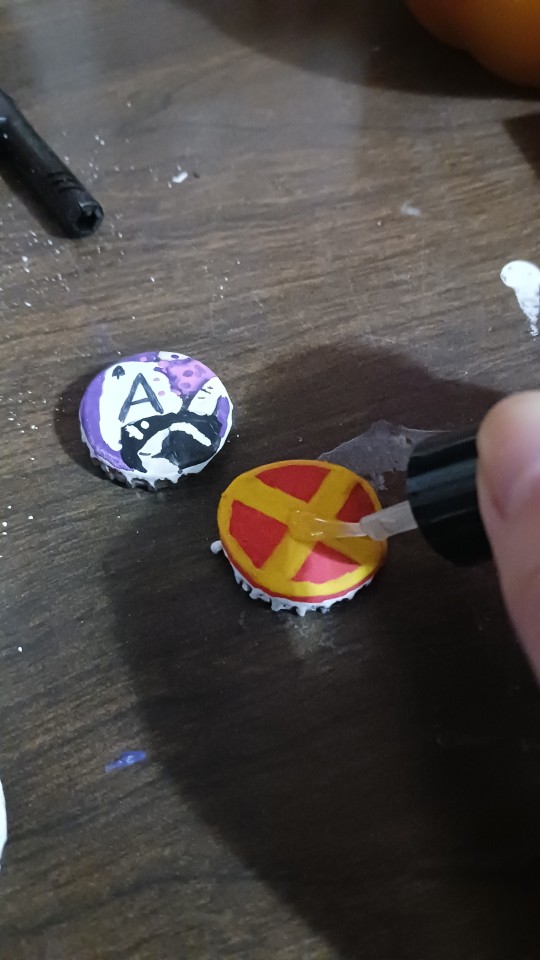
IDK WHO NEEDS THIS
But here's how to make diy pins with a bottle cap!
☆ You will need: A bottle cap, a soda tab, and a safety pin first
☆ Then: Pliers, paint (optional), and clear nail polish later

Put the safety pin through the soda tab like this, make sure the part of the safety pin that opens is facing up


Place the soda tab with safety pin in the bottle cap, double check to make sure the opening part of the safety pin is facing up!
Then use pliers to crunch the sides of the bottle cap down on the soda tab
This will keep the tab and safety pin in place!


Then you can paint whatever you want onto the bottle cap or keep it plain
If you paint it you might want to sand the surface first or cut it up lightly to make the paint stick better
After you're done painting you can use clear nail polish as a top coat!


#diy pins#bottle cap pins#diy pin tutorial#diy tutorial#punk diy#pin diy#pin making#traditional art#art#illustration#artists on tumblr#art tutorial#tutorial#how to make pins#how to make bottle cap pins#recycling pins#ace artist#trans artist#x man pins#recycling#recycling bottle caps#romanisweirdart
183 notes
·
View notes
Text
here's some punk diy tips and ideas
[other than crusty pants and battle jacket, although we still love those greatly.]
why should you diy, when you can just find decorated items everywhere, you can ask. what if you are clumsy at painting or anything?
firstly, good questions. we diy so we don't give credit to the big companies who rule the world. we diy to get more independent from the system we dislike. we diy so to save money. to express uniqueness, recognize eachother and be recognized. and especially to have fun and feel cool. diy is not only about clothing, but anything you can set your mind on. of course, one cannot make EVERYTHING for themselves, there isn't enough time and energy. but making at least small steps are already a statement and more than nothing. also, helping small artists by buying their products is also pretty punk.
that being said, i provide you with some tips of mine, all gained from experience:
anything you drew/painted on, you will WANT TO protect. acrylic paint/markers + acrylic paint varnish/transparent nail polish/textile medium are your best friends. read after anything that's new to you.
i highly recommend working with old clothing or thrift shop finds when it comes to textiles, as it is environmentally friendly and you will stay in budget. Anyways, always make sure that the material you use isn't gonna be problematic. for example, if you want to do some patchwork, the material shouldn't decay easily (if it does, it will come off so quickly.). if you want to paint on it, it shouldn't be rugged.
you can not only draw/paint on your canvas shoes, but can also sew, embroidery (just make sure to use a thimble, plus floss instead of thread could make your work more durable), and add beads and trinkets to your shoelaces. in the case of shoes, never use glue (neither hot nor instant glue) – it will come off quickly. for some inspiration, i'll show you my shoes!
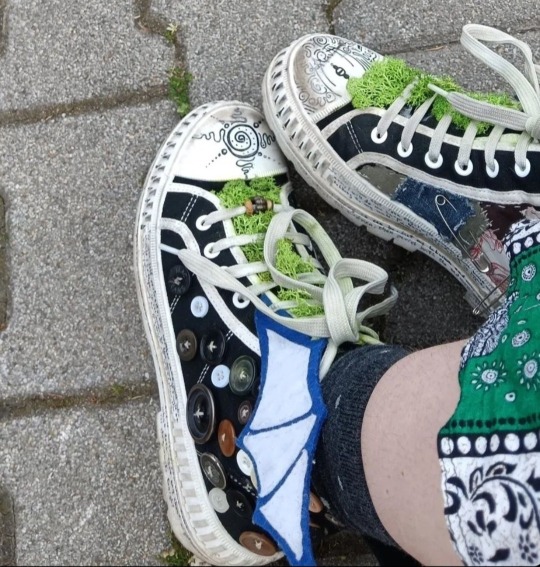
(the fake moss is literally unstoppable from falling off or getting dirty. risky idea.)
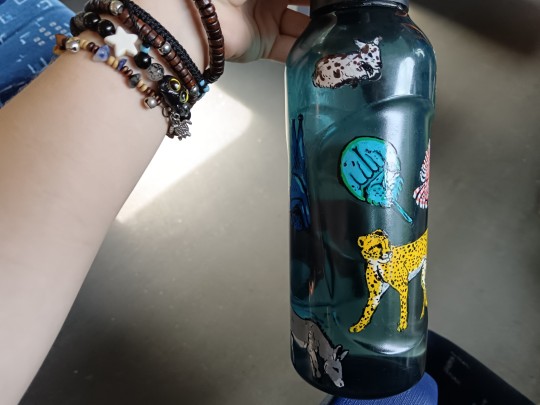
it's good to carry around water and food!! you don't even have to pay for decorative water bottles and food boxes, as you can draw on glass and plastic just fine with acrylic markers. just don't forget to paint transparent nail polish all over your drawing. in at least two layers. don't be lazy or laid-back. even posca comes off while washing the dishes. and you WANT TO save your reference pictures/final designs, as the case of emergency is likely. but after all, my water bottle is exactly fine after six months, with no accuring problem.
if your current best option to get stickers from is aliexpress or overpriced decor stores, search for local artists and shops on instagram and tiktok, as it may be their most efficent way of getting you to know them. if it seems like you have no chance, you may can still find a print shop with the option of printing on self-adhesive sheets (at least in hungary, those are pretty cheap). and if you want drawings to print out as stickers, you may use your own or –ONLY IF YOU GET PERMISSION– other artist's work. not only good for decorations for like, headphones, but for vandalism too. WAIT WAIT who said that. who said it. not me. no never
(in case that's also impossible, you can create stickers by printing out/drawing a picture, cover it up in transparent adhesive tape, and then put some two-sided adhesive tape on the white side of the pic. it won't be that durable, but it functions.)
if you want to bleach-paint clothing, get some plastic brushes!! any other brush dissolves. draw your design first with chalk!! never forget to put cardboard inside the clothing, and to wash the finished work in a washing machine before you'd put it on. prepare to be patient with the process. and it's not dangerous to touch 5%-9% household bleach, just wash your hands soon after.
if you want your crusty pants to last veryyy long, wax them. look up on youtube jeans waxing.
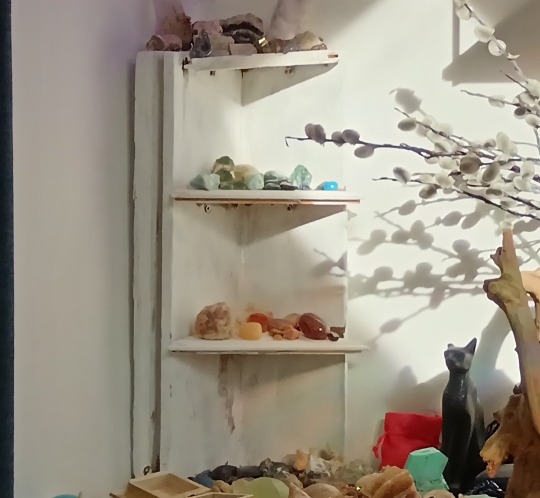
some more things i made for myself so to give you some inspiration: totebag with pockets, a small crystal holder cabinet, badges, and i decorated some t-shirts, button-ups, an id card case, phonecase, laptop.
theoretically speaking, there is nothing that an individual would be unable to learn how to make, when it comes to diy. you can't imagine how easy it is to bake bread at home. consuming-focused media makes people believe that it's hard to make anything. of course, everyone has to decide about their own priorities, i don't want to convince or change anyone in here. and if you have any questions, send an ask!! i hope i had been helpful.
#punk diy#tips#tutorial#clothes painting#do it yourself#bleaching#alternative clothing#soren's hoard of words#i hope you'll have fun with this#stay safe and drink water
219 notes
·
View notes
Text
How to Paint on Leather Jackets:
A Relatively beginner friendly guide.

Things you will need:
- A leather jacket.
-Card stock ($6 for 50 sheets at staples, or steal it from work)
-Xacto knife ($12 or wander around an art campus for a few minutes, and you'll find one)
- A surface to cut on (cutting mats are relatively affordable, but a flat piece of glass or ceramic will probably also work fine. The mat I use for this is a tempered glass one)
Paint markers. the main thing is to make sure you are NOT using oil-based paint. Some brands make both oil and water/acrylic based pens, and it can be hard to tell which is which at a glance.
Ok lets start!
Find an image you want to use. Once you get used to it, you can get extremely detailed results with this method, but for now we'll use a more simple example.

Ok, I don't really like the common Mischief Brew patch logo, so were using the twxt from this album instead. I'm doing this all at work, so you can also see that you don't need any fancy software for this. I'm using MS Photos for this whole process.

So crop the image close to your text

Fiddle with the settings in edit if you want, i usually think making it b&w with a higher contrast helps.

Now we're gonna cut. With stencils, start with fine details near the center of the design and work outward. This way you keep as much solid paper around your cuts as possible, which helps prevent ripping or deformation and mis-cuts. I also usualy cut in two stages, all horizontal cuts and vertical cuts.

Heres the big difference between what we're doing here and making a regular stencil. We don't care about islands. You see the empty spaces in the B, the e's, the S, etc. We arent cutting that out, we're taking the whole shape and we'll add that shit back in later.
So now we cut it out, we have something like this:

You can see how anything I came across that seemed mildly irritating to cut out, I ignored.
Thin lines connecting parts? We can draw a line. Islands? We can do the basic shape and refine it later. The point is that this stencil will put the right shapes together with the right scale and spacing.
Next we'll put it on the jacket.

Tape that shit down, you don't want if moving more than it's already going to. Next, trace the outline, that's it, then remove the stencil and burn it or something.
Should have somethong like this

Now by hand, fill in the stencil. I advise tracing the outline again as you fill. It helps prevent overflow. If you feel confident, try and build the empty space here instead of later.

So it's filled in and we have a general shape. I recommend at least two layers with 10-15 min dry time between. More layers might look a little better but also run the risk of cracking if it gets too thick (this ended up needing 3 layers).
You may have noticed that the outline looks kinda shit, here's the main thing we're gonna do here, editing.
I hit the photo limit here, so hang on for the next part.
73 notes
·
View notes
Text


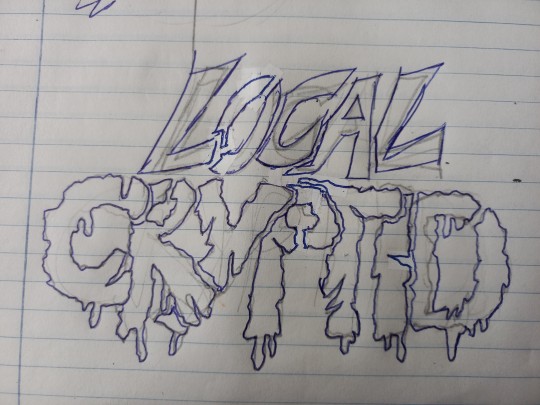
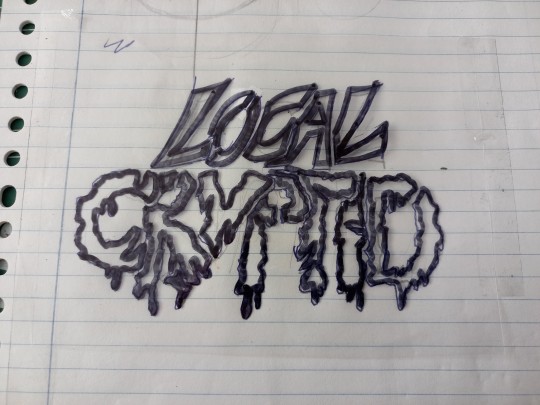
Heres a tutorial on how i make thease badges! Have fun yall🌟💖
#badges#diy#diy patches#diy projects#diy craft#diy punk#diy ideas#handmade#dbd craft#crafts#art and craft#craftblr#hand crafted#paper craft#easy crafts#tutorial#craft tutorial#fallout 4 fanart#fallout fanart#fallout#fallout art#fall out#fallout chems#fallout merch#dbd#dbd ghostface#ghostface fanart#ghostface#dbd fanart#dbd art
113 notes
·
View notes
Text
Turn your tiniest scraps into snazzy, stuffed bugs! - perfect for making a wall a little less boring
youtube
#solar punk#solarpunk#bugs#insects#scrap fabric#sewing#hobbies#crafts#crafting#art and craft#diy#diy projects#upcycle#upcycling#cute#beetles#tutorial#diy tutorial#diy sewing#no waste#Youtube
65 notes
·
View notes
Text
Hey yall please don’t roast me for this, but does anyone know how shoe polish works?
I work in very wet conditions, and my shoes are in fine condition but they get stripped cause of the water. I’m not gonna buy new ones and I want to keep these in good condition for as long as possible
I don’t know how to use it and what to do, and I’m too embarrassed to ask anyone in real life cause they always act like I’m fucking stupid for not knowing
Thanks, sorry
#punk#anti facist#punk rock#baby punk#crust punk#alt aesthetic#diy or die#punk fashion#punx#too scared to ask#leather#diy punk clothes#punk diy#diy tutorial#help#no buy
60 notes
·
View notes
Text
@mochibat here’s the full version of my zine on corpse paint! I’m hoping to make copies of my zines and find places to put them around my city, and do one every month or so. I might also make them available online somewhere.


#zine#art zine#punk zine#pelle ohlin#pelle mayhem#dead mayhem#mayhem#corpse paint#corpse paint tutorial#metal#metalhead#black metal
37 notes
·
View notes
Note
do u know any good ways to make a garment that no longer fits bigger? I gained some weight recently and now half my clothes don’t fit and I don’t have money for new stuff
hya anon, i am terribly sorry for only answering ur ask now i did not size up my garments until now.
this tutorial is specifically for pants i added width to in the legs but you could apply these basic techniques to anything really
how to make ur pants baggy exactly the way you want them to

!! cw: there are pictures and mentions of sharp objects in this tutorial !!
stuff you'll need:
pants you want to size up
fabric to sacrifice for your pants
scissors
pins (safety or just regular sewing pins)
sewing machine (or needle and thread)
something to mark ur fabric with (i used a pen with heat dissappearing ink)
not necessary but useful:
pants that are the right size to have as "stencil"
seam ripper
-
this tutorial wont be as detailed as the other ones cause i forgot to take a lot of pictures and my explainations dont make sense without them, and also cause some things are hard to explain, you gotta do em to know yk
put the pants that dont fit onto the pants that do

mark where you want to start adding in your panel, you can see i marked mine with safety pins on the side of the pants (dont focus on the ones on the knees they dont matter)

add in your fabric (folded onto itself!! as you can see above) so it is in between the two pairs or pants so you have:
top: pants that dont fit
middle: fabric
bottom: pants that do fit

you can see the fabric is lined up with the pants that do fit, you will draw a line of the fabric where it meets the pants that dont fit
flip the fabric (dont unfold) and do the same on the other side of the pants
cut our your triangle leaving about 2-3cm seam allowance, make other triangle so you have two (for both pantlegs)

you should end up with a triangle looking a bit like this: you can see the safety pin is where the panel stops (the size of your panels ofc depends on what youre going for)

time to rip stuff up! get out scissors or a seamripper and carefull rip the seam on the outside or your pantlegs, until the safetypin, it should look smth like this
turn your pants inside out
now youre going to pin and sew in your panel, make sure your pinning it down with the inside faceing you, otherwise when you flip your garment right side out again you panel will be inside out


in the left picture you can see a thin orange sewing line, this the the seam we ripped, and also the line we will sew on top of when sewing the panel into your pants
under this thin line you can see seam allowance that the pants have themselves, which makes it easy to pin your panel to your pants.

this is how it should look sewn together, you can see how the seam allowances are on one side of the stitching, and the pants on the other.
i also sewed the bottom seam of the panels into the other one, by opening one up, stuffing the other in and sewing over it a few times. you can also just sew them on top of eachother, if your sewing machine can handle that
after doing this on both sides you can flip your garment inside out, and you should be done!

finally you are free of the curse of leg hugging pants. now you can trip over your own pants and get them covered in mud like you always wanted.
#punk diy#diy fashion#diy punk#punk#punk clothes#punk style#my stuff#punk patches#queer punk#punx#tutorial
76 notes
·
View notes
Text
Yay my new friend hobie <33
#watched the movie yesterday finally <333#this is. my first time drawing him and I did this in half an hour and I don’t typically draw Crazily but now I did and I Get It#like. genuinely for half an hour this ain’t bad eh?#gotta learn how to draw wicks properly though which. hmmm I need to find a good tutorial#anyway. I’ll draw him better soon <33#across the spiderverse#hobie brown#spider punk#atsv fanart
371 notes
·
View notes
Text
vest update


i can and will put anything i like on a battle vest lol
#new patches are: follow your leader/npfo/the queers felix the cat#saw a cute skeleton embroidery stitch thing tutorial on here and had it for months then lost it#punk clothes#punk#battle vest#battle jacket#diy#diy patches#diy or die#punk fashion#diy punk#patches
45 notes
·
View notes