#sorry ray...
Explore tagged Tumblr posts
Visit Tumblr Blog
Explore Tumblr blogs with no restrictions, modern design and the best experience.
Last Seen Tumblr Blogs


Fun Fact
The average Tumblr user visits about 67 pages every month.
Text

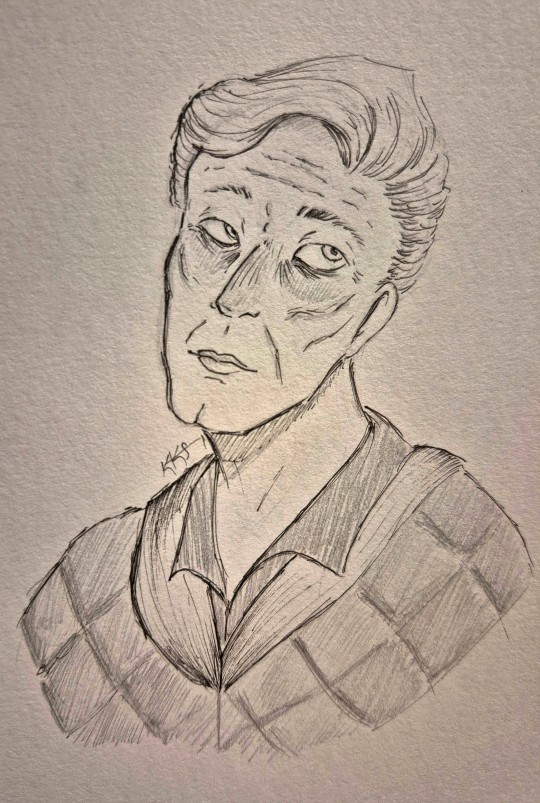
Kk_cats draws worst Chas ever, asked to leave Hellblazer fandom
( from left to right: Chas Chandler, Mev Hayes, Ray Monde )
Individual under cut!!


5 notes
·
View notes
Note
Sending a silly ask while half asleep, you can ignore this if you want...
You have affected me too much I have start typing rrrghh while messaging friends, I never used to do that.
How does one stop argh or rrgh?
hello im also hal f asleep. unfortunately ther is no way to stop arghhh and rrgh
my speech mannerisms infect absolutely rhrhrhrhr
apologies for the rhgrhrhrhr
5 notes
·
View notes
Text

#edit: i’m sorry so many of u guys relate :(#girlblogger#girlblogging#lana del rey#hell is a teenage girl#this is what makes us girls#girlrotting#girl interupted syndrome#girlcore#lana del ray aka lizzy grant#lana del ray aesthetic#2014 tumblr#femcel#coquette girl#coquette#manic pixie dream girl#coquette aesthetic#black swan#coquette grunge#divine feminine#jennifers body#just girly things#sofia coppola#dollette
17K notes
·
View notes
Text
anxiety is so embarrassing like what if something
…happens…
#girlblogging#girlhood#im just a girl#this is what makes us girls#this is a girlblog#girl interrupted#hell is a teenage girl#girly#girly tumblr#just girly things#just girly thoughts#just girly posts#girly stuff#girly aesthetic#girly girl#princesscore#im so tired#lana del ray aka lizzy grant#im going insane#im sorry#im bored#im just tired#im just saying#overthinking#anxitey#anxienty#what if i kms#what if i died#what if something happens#dear lord help me
6K notes
·
View notes
Text
Mikey having fun while his brother gets stabbed and fucking dies..he also gets kidnapped 😍
#tw flashing#this is so fucking funny sorry#MIKEY A CLOWN BEHIND YOU#gerard way#mikey way#frank iero#ray toro#mcrseattle
1K notes
·
View notes
Text
guess whos back

back again
#art#fanart#my art#my chemical romance#helena#my chem#mcr#gerard way#ray toro#mikey way#frank iero#bob bryar#my chem fanart#mcr fanart#sorry i was abscent for so long i. had a rough time
2K notes
·
View notes
Text
Needle Felt Siffrin Build Log: (oct 6 - nov 20, 2024)


Credits goes wholely to @insertdisc5 for creating ISAT and siffrin's design! I am just here to attempt to make cool fanart (and get more people to play isat.. my devious plans are going great so far :3) As always, this isn't a tutorial- it is just a log about how i go about approaching a sculpture and I hope this collection of resources can help others make their own sifs!!
PSA: this has some spoilers for endgame CGs/sprites on my references image board ( also might see it in the backgrounds of my process pics). And bc this is needle felting, you will see some sharp needles! beware!
my inspiration was the intro cutscene where Sif eats the star, so my main goal was to adhere to the style of ISAT as closely as possible while transfering it to 3D space. And I knew i also wanted to try making the cloak for stopmotion purposes, so my process was tailored towards having control over the fabric with wire inlaid within the cloak (more on that later).
I ended up not sticking eyebrows on top of siffrin's bangs lol but anyways, first order of business is Gather Reference! v important. pureref is free and an awesome program. I also do some sketches to visualize the pose and important details i wanted to include in the sculpt.
behold the isat wiki gallery page! tawnysoup wrote an awesome ISAT style guide that absolutely rings true in 3d space too!! adrienne made a sif hair guide here!! (sorry i couldnt find the original link, but it's on the wiki). It says ref komaeda hair so that's what i looked at, along with other adjacent hairstyles! I also like doing drawovers on in progress photos to previs shapes n stuff to get a better idea of the end result.
Also if you're like me and struggle with translating stuff into 3D space, take a look at how people make 3d models and figurines! sketchfab is also a great resource! I looked at the link botw model by Christoph Schoch here for hair ref. (I used Maya, but there's a blender version too ! you can pose characters too if your model has been rigged!)


Face:
Started off blocking out the main shapes of eyelids and iris, and then filling in the colour details in the iris and the star highlights before moving onto adding thin black outlines and eyelashes. I didn't take many in-progress photos cause i kept ripping stuff out to redo them many many times, sorry!! This eye took about 3 hrs bc i just wasn't happy with it!! Sometimes it do be the vibe to give up, go to bed and see how it looks in the morning (more often than naught, it looks fine and it was the "dont trust yourself after 9pm" speaking)

The Mouth:
Couldn't decide if i even wanted to add a mouth as per usual with all my humanoid sculptures.. but i did some drawover tests first to see what expression i liked and to try to visualize it from multiple angles. (I was also testing the placement of stars on the hat brim here)

And then I redid the mouth like 3 times cause the angle just wasn't right (this went on for about the course of a week yay!)
Hair: woe baldfrin be upon ye


I made the hair strands individually first, and then since Sif has some of the hair at the back dyed black, i covered some of the tips with black wool (manually) (I think it would go much faster if i just took a marker to it, but hahaha i love pain and detailing!! )
And then the rest of it was positioning strands with sewing pins layer by layer, always looking at it from different multiple angles- sometimes tailoring the angle or swoop of individual hair flippies. At one point I thought the back looked too cluttered, but the hat covers a lot of it anyways!! yay for hiding mistakes! (imo this is a similar process to how cosplayers style wigs, but on a smaller scale and the same level of time consuming)
As always, look to your reference for guides, and I always do a whole bunch of drawovers over in progress photos to ascertain what was working and what wasn't.
Hat:
A trick to get a super pointy tip, make another tip seperately while keeping the connection point unfelted, and then combine the two to make super pointy hat!! (this also helps if you made the hat too short and need it to be taller. ask me how i know)

The embroidery on the hat brim was done in a hoop and then invisible stitched to the felted top portion. Technically you don't need a hoop but it helps keep the fabric tension, so you avoid puckers in your embroidery. You can also use iron-on stabilizer if your fabric is loose weave or particularly thin. this is the tutorial i used for the stars embroidery! particularly the fly stitch one, french knots, and the criss-cross stitches. highly recommend needlenthread for embroidery stitches and techniques! i learned all my embroidery from this single site alone.

For fabric, I think I used a polycotton i had in my stash,, unsure of the actual fiber content bc i bought it a long time ago. I used DMC Satin floss which was nice and subtle shiny but frayed a lot so it was kind of a pain to stitch with... but keep a short thread length and perservere through it!! After the embroidery was done, I folded up the raw edges and invisible sewed it to the top portion of the hat.
General shape:
Ok general structure of the body is this: wire armature body covered with black wool -> cloak lining & wire cage -> edge of lining is invisibly sewn to the main cloak at the hem -> head

Don't be afraid to mess around with the pattern, it's essentially a pizza with a slice taken out of it to form a steep cone shape!! Use draft paper before cutting into felt to save material! (i think i made like 3 cloaks before i was happy with the shape lol).
You can also hide the seam of the cloak and collars by gently messing up the fibers of the felt with your fingers or a felting needle btw! you can also sandpaper the seams according to Sarah Spaceman in this vid (highly recommend them for their in depth cosplay/crafting builds holy smokes), though since sif cloak is at such a smol scale, I just blended the seam with my felting needle.
For the lining wire cage section, I sewed in wire around the cloak, so the main rotation point is at the top neck area under the collar. These paddles are used to keep whatever pose I need the cloak to be in for stopmotion purposes. Then after the wire is done, I invisibly sewed the lining to the cloak at the hem (same technique as the hat brim to the lining there).
In hindsight, I should've used a thinner fabric for the lining, but i only had sheer white in my stash so had to go with double felt, thus resulting in a really bulky lining but oh well!

Heels:
started with the general boot shape, then tacking on the diamond shape heel stack and also diamond shape sole bc we're committed to the bit here. I skewer the boot onto the armature which also conveniently hides the connection point into the base to keep the whole thing upright and also I can rotate the boot to tweak the angle if needed.

Pins:
I kinda just trial and error'd jewellery wire with pliers into the pin shapes. They're itty bitty!! had a whole bunch of fails before i got two nice ones. A hot tip is to use needle nose pliers and wrap the wire around the tip to get a smooth circle shape!

Base:
I smoothed out the edge of a circular wood base with a dremel, and then used wood stainer to get the black colour. It ended up kinda looking like I took a sharpie to it, but whatever.... now i have a whole ass can of black wood stainer........ I then made a rough mountain of black wool and stuck the feet armature in. And now he's standing!!

Normally at this point when I'm done felting everything, to get a smooth finish, I'd take a small pair of scissors and carefully snip away any flyaway fibers, but this time, I just left them fluffy cause i think that's what sif would do :3c
Photoshoot:
Normally I do shoots using daylight but it was winter so the sun was nonexistent. So I broke out the home lighting setup aka dollarstore posterboard for a nice smooth background, and then hit it with the overhead Fill, side Fill 2, and Rim light, and use white paper/posterboard for bounce light if one side feels too dark. But if things are overexposed, you can move the light sources away until the harshness dims down. I'm using a Olympus mirrorless camera (handed down to me by my sibling so i dont remember the model exactly), which can connect to my phone as a remote so I can avoid shaking the camera when i take photos. Pretty nifty for stopmotion purposes! (yes my camera stand is a stack of notebooks, a tissuebox and some eva foam under the lens, don't judge me)


Stopmotion animation:
I'm still figuring stopmo out on my part, but my process was straight ahead animation ... move the cloak a cm, take a pic.... move another cm, click.... and repeat until i get a version I was happy with. My ref was the cloak animation from Gris (beautiful game btw). The 2d star animation was also done straight ahead using procreate, exported in png with a transparent background, and finally stitched together with the stopmotion footage in photoshop.

My turnarounds are also stopmotion! also secret hack, the turntable is a fidget spinner sticky tacked to a cake platter.
And i think that's all! i mainly wanted to share how I go about thinking about taking a 2d concept and moving it to 3D. I also didn't go in depth into how to actually do the needle felting bc I don't think I''d be very helpful I'm a very good teacher by telling yall to just keep stabbing until it looks right (i'm self taught for this hobby),,, if anyone wants it though, i can share a bunch of tutorials and other felters' process that helped me learn more needle felting!
Hopefully this was helpful to someone! Feel free to send asks if ya got any questions or if anything needs clarification! Or show me your works! I love seeing other people's crafts :3
here have a cookie for making it this far 🥐
#in stars and time#siffrin#isat#isat siffrin#isat fanart#needle felt#soft sculpture#know that i am devouring all the nice words yall leave in the tags/comments of my posts :holding back tears:#I hesitate to call this a tutorial bc this is just how i fumble my way through crafting anything lmao#the only reason I know how long I worked on a project are timestamps on wip photos and however long the day's video essay or letsplay is#sorry time is immaterial when i get into crafting mode#reason why this log is so late is bc after i finish a project i'm perpetually hit with the ray of 'i dont ever want to look at this again'#hence why photos never get edited#AND THIS POST SAT IN MY DRAFTS FOR 2 MONTHS DUE TO BLOODBORNE BRAINROT SORRY#done is better than perfect!!!#sorry i dont control the braincell#sorry for using a million exclaimation points! i am not good at this.. conveying my anxiety in written form!!! my toxic trait
1K notes
·
View notes
Note
Mighty and Ray beloveds <3
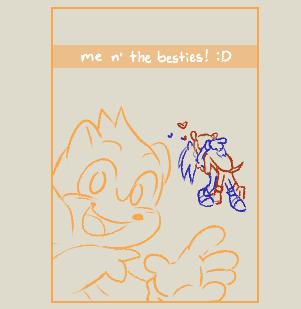
love those guys ! <3
Bonus:
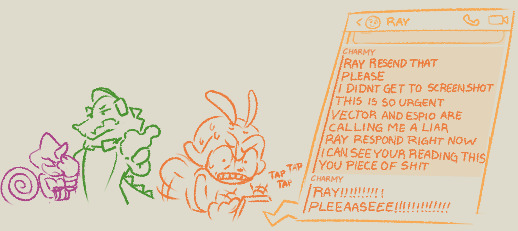
#sth#sth fanart#ray the flying squirrel#mighty the armadillo#sonighty#sonic the hedgehog#charmy bee#roonies doodles#roonie answers#charmy got grounded for lying and spreading rumours after that one. got his fortnite taken away for the week </3#also sorry for hijacking your ask with sonighty but ray being a third wheel is so so so funny to me. hes not even mad about it either
1K notes
·
View notes
Text
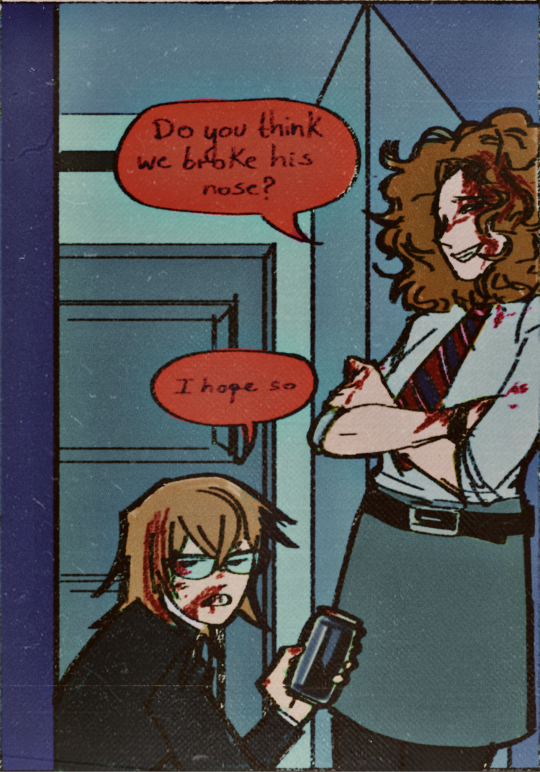
He deserved it
#so full of blood they actually could have killed him#lol#my chemical romance#femcr#I'm sorry my mind is full of women lately#mikey way#ray toro#my art
886 notes
·
View notes
Text

Reblog this if you're a crybaby, sensitive over everything, anxious, depressed, clingy, look prettiest after you've just cried, traumatised, and yearning for love and affection. ♡
#girl things#girlhood#girlcore#im just a girl#girlblogging#beauttiful girls#sadgirl#sad bbydoll#dolette#jirai kei#jirai lifestyle#2014 tumblr#jiraiblogging#jiraiblr#actually mentally ill#sorry guys im having a moment#landmine jirai#jirai#jirai girl#landmine type#landmine girl#landmineblogging#landmineblr#lana del rey#lana del ray aesthetic#im a sad girl#2014 grunge
853 notes
·
View notes
Text
bandom gay allegations
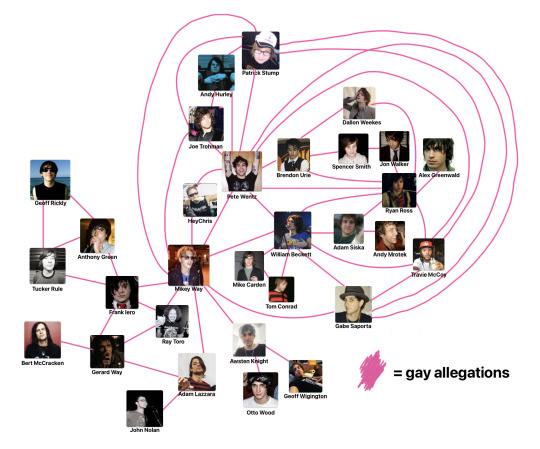
extended edition of this diagram i made some months ago. as always, feel free to scream at me about all the ones i missed
#i tried to find a way to make this less of a mess and i just couldnt so here you go#bandom#im Not tagging everyone im sorry#my chemical romance#decaydance#fall out boy#patrick stump#andy hurley#joe trohman#william beckett#pete wentz#gerard way#frank iero#mikey way#ray toro#panic! at the disco#ryan ross#awsten knight#travie mccoy
872 notes
·
View notes
Text

#i made a Supernatural version of this and it got popular#had to get creative so i added in Pete & Bert#Frank and Mikey could be swapped tbh#sorry if anyone's done this before i didnt see it#my chemical romance#mcr#pete wentz#fall out boy#bert mccracken#the used#gerard way#mikey way#ray toro#frank iero#petekey
636 notes
·
View notes
Text

#coquette#girlblogging#girlhood#im just a girl#lana del ray aesthetic#lana del ray aka lizzy grant#lana del rey#lana unreleased#born to die#lana core#sad grl#sadgirl#sad poem#sad thoughts#ldr#lizzy grant#ldr aesthetic#depressing shit#sorry for being depressing#melencholy
1K notes
·
View notes
Text

Here’s what I got…. Any input is welcome 💀 I feel like I’m going insane
#sorry for reposting this I made a mistake in the first one 💀#mcr hiring a language specialist to create a new alphabet for them oh I’m sure#mcr#gerard way#frank iero#my chemical romance#mikey way#ray toro#my chem#the black parade#tbp
1K notes
·
View notes
Text

📸: sfshameless
#ray toro#my chemical romance#mcr#ray#sorry i didn’t see this posted yet and i wanted to reblog it so ray be upon you all
1K notes
·
View notes
Text

The yearnerrr
#wip but idk if I'm ever finishing this 😔#my yuri..#mobile suit zeta gundam#mobile suit gundam#zeta gundam#gundam#quattro bajeena#amuro ray#char aznable#charmuro#amuchar#my first ever real drawing of them btw#they look a bit rough. especially amuros hair#but omg Quattros looks so good I'm so proud of myself#but yah. this is over a month old lol#I've already been drawing more dhshsh#unofficial char week in my brain apparently#so sorry anyone following me who doesn't know who the hell that is and is getting second hand plagued rn
439 notes
·
View notes