#thumbnail design tutorial
Explore tagged Tumblr posts
Visit Tumblr Blog
Explore Tumblr blogs with no restrictions, modern design and the best experience.
Last Seen Tumblr Blogs


Fun Fact
70% of Tumblr users say the Dashboard is their favorite place to spend time online.
Text
youtube
Just uploaded a new YouTube tutorial about how to design this CD (+ in a case) using Canva!! It's my first Canva tutorial! Make this for your friend, partner, or another loved one
#graphic design#virtual assistant#aesthetic#cd#album#diy#how to#portfolio#design#web graphics#digital art#easy tutorial#beginner friendly#pink#y2k#frutiger aero#frutiger aesthetic#frutiger aqua#video editing#thumbnails#png#gift ideas#relationship#partner#love#Youtube
3 notes
·
View notes
Text
I will design attractive eye catchy youtube thumbnail
Do you know?
Thumbnail is the most important part of your video. The all first impression coming from your thumbnail. Perfect thumbnail will gain you more views and subscribers for sure.
#poster#graphic design#3d printing#adobe#logo design#youtube thumbnail tutorial#thumbnail design#youtube thumbnail#youtube thumbnail design#how to make a thumbnail for youtube videos#how to make a youtube thumbnail#how to make thumbnails#thumbnail#how to make a thumbnail#thumbnail tutorial#how to make youtube thumbnails#thumbnail tutorial youtube#how to make custom thumbnails on youtube#how to make thumbnails for youtube videos#how to make a thumbnail for youtube#thumbnail design tutorial#canva thumbnail#thumbnails 2023#thumbnails canva#thumbnail erstellen#thumbnail photoshop#thumbnails erstellen#thumbnail erstellen gimp#thumbnail erstellen canva#thumbnail erstellen handy
1 note
·
View note
Text
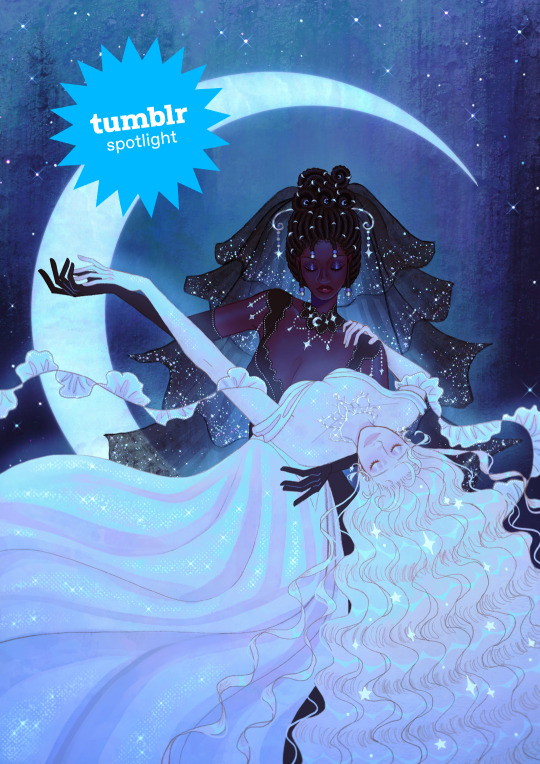
Creator Spotlight: @mimimar
Hi! I’m Michelle (Mimimar), an illustrator born and raised in Venezuela, currently based in Italy. I enjoy making colorful illustrations that reflect the things I love: fairy tales, fantasy, tenderness and queer (especially sapphic) stories. Occasionally, I also make paper dolls, comics and animatics. I have a lot of interest in book illustration and I’m currently developing my own stories that I hope to share as an author-illustrator someday!
Check out our interview with Michelle below!
Did you originally have a background in art? If not, how did you start?
I always enjoyed drawing when I was a kid, but it only became a hobby that I did almost every day when I was around 11. At first I only used traditional mediums, but I decided to make a serious effort to learn how to draw digitally when I was 15, and once I got the hang of it I never stopped!
I didn’t go to art school so all of my learning was done through studying the tutorials and resources that other artists generously share on the internet and lots of practice / trial and error.
How do you want to evolve as a creator?
I want to do many things but what I want to do the most right now is work on books! I want to make art for other authors’ stories and also my own stories as an author-illustrator. I want to grow as a storyteller and create art and stories that will really resonate with people emotionally. I’m always striving to improve my skills as well.
I also really love dolls, so working on doll box art or as a doll designer is something I would love to do someday. I actually have been designing paper dolls on my Patreon for the past few months, it’s been a fun project that is still ongoing right now!
What is one habit you find yourself doing a lot as an artist?
Probably using a lot of purple! It’s my favorite color so I find myself using it a lot. If I can find a way to sneak a little bit of purple into an illustration or a character design then I will.
Congratulations on finishing your Ivy Comic! Did the outcome turn out like how you expected or were there some unexpected bumps along the way?
Thank you! It’s a project that I worked on very slowly in between other art because I wanted to really take my time with every spread and make each of them a fully detailed illustration. I thumbnailed the full comic before starting but I kept changing the sketch for the final spread until the very end! Overall I’m really proud of the end result. I sprinkled a lot of hidden details in every page that I hope some of the readers will notice. For example: the meanings of the flowers in each page represent what the characters are feeling in that moment, and the colors of their wardrobe become gradually lighter as the story progresses to represent their emotions, as well as the changing of seasons.
We’ve noticed that you have created some amazing cover art for TGCF. Is there another series you would like to do something similar with?
That was another passion project that took some time to complete. Initially, I didn’t intend for them to be specifically covers, it was just a series of illustrations based on the 5 books/main arcs of TGCF. But since they were well-received and I had people telling me they wish they could use them as covers for their books, I decided to rework them into dust jackets for the english translation of TGCF!
I haven’t thought of any other specific series but I love doing cover art so maybe I’ll do something similar again in the future!
What’s your favorite part of your style? Why?
I’ve heard from other people that there’s a delicate quality to my art, this is something that I like a lot! I like pretty things, fairytales and vibrant colors. I think all of these things probably reflect in the art I make as well.
If there is one thing you want your audience to remember about your work, what would it be?
I hope that they remember how it made them feel. Feelings and colors are the two things I give priority to in my work. Most of the time I like depicting tenderness, softness and emotional intimacy. If that could reach the viewer and stay with them it would make me very happy.
I make a lot of art with queer (mainly sapphic) themes because they’re the kind of stories I personally like and want to see more of, so whenever people tell me that my art has helped them in their journey to discover and accept themselves, or that they see themselves and their partner in my art, it is always extremely meaningful to me. When art that I made to give myself comfort can provide comfort for others, no matter how small, it reminds me once again that despite any hardships art is genuinely worth pursuing.
Who on Tumblr inspires you and why?
So many artists! To name a few: I love @sakizo’s amazing eye for fashion and detail, @paneeps’ gorgeous style and striking colors, the sweetness of @bevsi’s art, @vickisigh’s pretty colors and concepts, @idledee’s warm and heartfelt art, @littlestpersimmon’s dreamy wonderful art, and @loish has been an inspiration for as long as I can remember.
Thank you so much for stopping by and sharing, Michelle! Be sure to check out their Tumblr blog over at @mimimar.
2K notes
·
View notes
Text
I am absolutely convinced that if James Potter was alive in the Year of our Lord 2025, he would be a alpha male pick-up-artist social media influencer. He would tell his followers things like "You don't have to accept a woman's no," and film tiktoks of himself in designer suits (he's wearing lifts in his shoes to make himself look taller), boarding his parents' private jet (that he's pretending is his), flanked by two models gushing over him (they're paid actors).
Sirius, of course, does pranks. His channel has stopped uploading for some time. The last two videos have one that says, "I THREW A PIE AT A BRIDE AS SHE WAS COMING OUT OF THE CHURCH! WATCH HER REACTION!" followed by the next one with one of those stupid reaction face thumbnails reacting to his own mugshot and the title "GOING TO JAIL LADS!" Because he didn't realize his pranks were classified as assault.
Remus has a lot of honestly helpful tutorials. Need help defeating that one boss in a video game? Here's a tutorial. Don't know how to use this one brush in Blender? Here's a tutorial. Except there is no voice-over explaining the process. It is dead silent and the only instructions are some text overlay that is damn near impossible to read.
Peter has a bunch of horribly edited, horribly filmed, cringy videos that are just exact copies of his friends' videos. He has only two followers.
Lily does reaction videos, specifically a lot of AITA reddit videos and messy drama tiktoks. This girl has a lot of opinions. Like a lot, a lot and one of her greatest joys in life is giving her never ending advice to strangers on the internet.
Severus has a true crime deep dive channel. He has an entire intro with creepy music, creepy images of like a raven in a misty field, a centipede crawling through the socket of a skull, and some shit and then the video starts and instead of showing his face its an emo anime avatar of himself sitting in a gothic library like it's Masterpiece Theatre as he narrates the crime because my boy is a fucking nerd drama queen.
188 notes
·
View notes
Note
Hello! Many people have said this but ill say it too, I LOVE YOUR COMIC SO MUCH ( ´ ▽ ` ).。o♡
I really wanted to ask you about how you do the backgrounds? (Something i struggle with) whats the process? Like from start to finish, also, to do the rise backgrounds do you use reference from the show and generally real photo of ny? Or do you come up with them? And last question- The shadow and light on the background- Like HOW
i know it’s a lot of questions but i’m just so curious qwq and wanna learn to be better, thank you again in case you read this and respond, in case you don’t, i hope you have a nice day and a wonderful life uwu keep up the great work! (≧◡≦) ♡
Backgrounds are a really broad subject and I'm always a little overwhelmed when asked this question. Just like drawing the human body, backgrounds take time, repetition, and practice!
My answer got a bit long, so it's going under a read more :) but if you digest info better in video format I found this on youtube
youtube
It pretty much goes over everything I wanted to say, but in a much better way. I wish I had found it before writing all this out lol
ok, first of all, I'm not a teacher nor was I built to be one of those cool helpful art tutorial people who do a full coloured tutorial filled with illustrations. This is just going to be a messy "how I do backgrounds / environment layouts from start to finish." kinda thing.
... lets start with a sight tangent.
Sketch from Life!!!
If you want to get better at backgrounds I recommend doing some sketching out in the real world!
When I was first getting into doing backgrounds I went to cafes and parks to just sketch the buildings and objects. Sketch rocks, flowers, clumps of grass, garbage cans, bottles, tables, street signs, etc. If you are drawing a tree observe how the trunks twist, how the bark flows, or how the leaves are bunched.
If you can't leave the house the same still applies! Sketch the interiors of your house, the walls, or common objects like chairs and bookshelves. How are objects stacked? items on the floor?
If you aren't comfortable with drawing outside or in public you can take some photos to draw from! They are good for practice and you can use them again as references later. Alternatively you can find pictures online of buildings and objects to sketch as practice.
All spaces have objects in them, it becomes easier to draw those kinds of spaces when you already have spent time observing and sketching them.
ALSO! They don't have to be good sketches! It's just to build out your mental catalogue and strengthen your perception of perspective.
now the actual thing...
BACKGROUNDS
(the pictures used for this are my own. I dug them out of my 2022 folder)
Backgrounds have slightly different rules based on what you are making them for. Videogame Environment Concept Art vs Animation Layouts vs Comic Backgrounds vs Illustration backgrounds.
They all follow the same basics, which I will go over here, but the intention and function of those designs are going to be different. It's all about how you set up the scene and what it's purpose is!
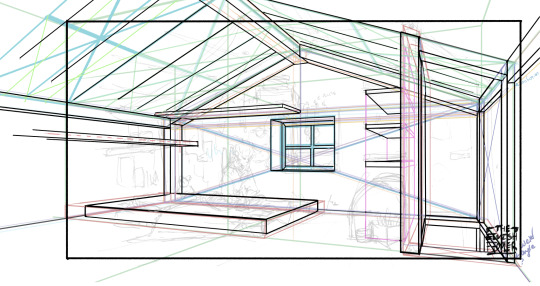
Brainstorming and Thumbnailing
I like to think about a location as though it is a character. An abandoned old house with creaky sagging floorboards is very different from a futuristic space ship with sharp metal floor panels. A gas station has a very different feeling from a library.
I usually start by asking what is this location's story? Why was it built and for what purpose? What kinds of things does this room need to fulfill that purpose? You don’t need solid answers, but its good to be thinking about it while you are working.
Next, sketch some ideas for how this place is going to look. For me, this usually involves drawing the idea from multiple angles and then making lists & small sketches of the objects I think should be filling the space.
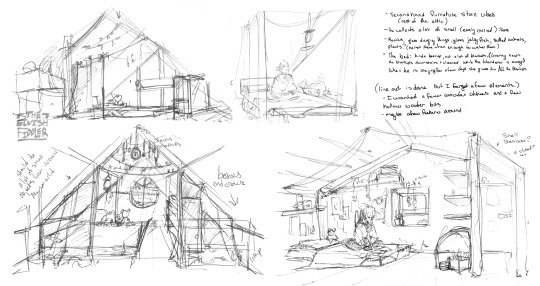
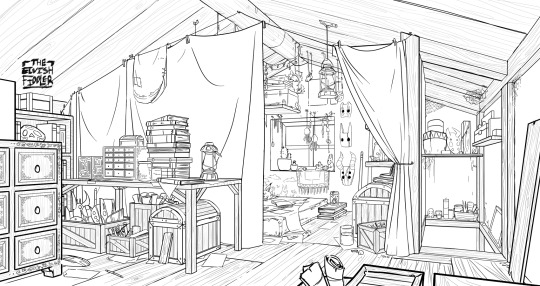
Example: The main character of my original work is a Wanderer. They collect a lot of things on their travels, but those items have to be small enough to be easily carried in a backpack. I wanted his room to be in the corner of an attic, walled off by curtains, and filled with trinkets. You can see some of my brainstorming above.
References
I only look for references after I've done some sketching and planning; this is to solidify my idea first so that I don't accidentally copy anyone else's work. I will make a moodboard with pictures of lighting, colours, items, rooms with specific ceiling beams, old chairs, etc. basically whatever I feel fits the vibe.
Honestly, I don't use references as much as I should. For ROTTMNT fanart I look at backgrounds and screenshots from the series to study the style. I also reference actual photos of NYC to get a feel for how Rise condenses the visual information.
In general, it's good to have references of real life objects/locations, because there are so many details like cracks in pavement, stickers on polls, crowning on buildings, fancy fencing, weird chair legs, etc. that you might not think of. It's the imperfect details that can make a location feel more alive.
Perspective
Once you have your chosen sketch we move to.... the infamous perspective boxes. Doing backgrounds is just learning to be comfortable drawing So Many boxes and carving items out of them.
Many better artists than myself have made videos on perspective, vanishing points, and all the technical bits. Videos like THIS ONE and THIS ONE are helpful (this post is great too!!). There are probably a lot of classes to be found on Skillshare or Schoolism. I learned a lot of this in my college art course, so I can't give you a specific video which helped me.
You can get by and be a good artist without learning this stuff. There are quite a few successful artists who have admitted they never bothered to learn perspective (one of these people even made a whole graphic novel series).
I personally avoided properly learning this stuff until I was in my 20s because I thought it would be boring and difficult to do. tbh I really wish I had learned it earlier because it's so much fun to make those silly little boxes imo. It looks scary and complicated but, just like drawing humans, it just takes time, repetition, and practice to develop the knowledge and skills.
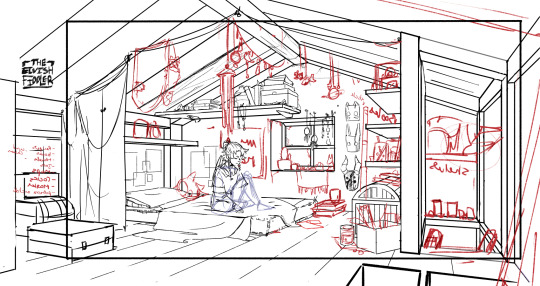
Cleanup
You have your boxes and lines! Cool! Now to make a scene out of it. Fill in the details, get everything placed were you want it! Generally, the lines of each item will point back towards the horizon line, but they can have different perspective points.
Generally you would want to clean it up and get your room completely sketched before doing the lineart. I tend to combine the steps (not recommended)
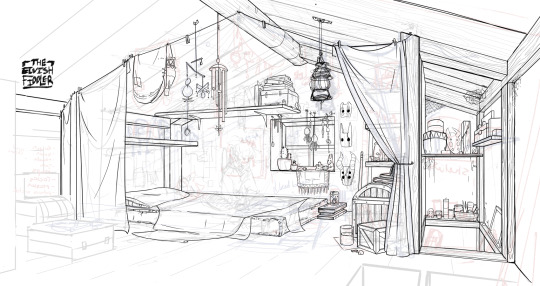
Lineart
I've mentioned how I do this before. Closer objects have thicker lines and more detailed inside. Further objects have thinner lines and less detail. I didn't quite achieve that balance with the image below, but it's close enough.
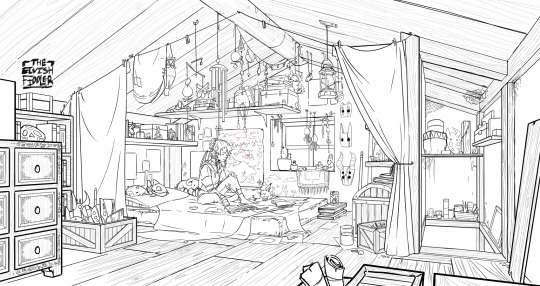
Colours and Shading will have to be a separate post. In the meantime, I highly recommend the book "Color and Light" by James Gurney. I used to borrow it from my local library and a good chunk of my knowledge was learned from it :)
#Artist's Comic Rambles#asks#art related asks#thank you for the ask!! I'm glad to hear you enjoy the comc :D#i hope this was somewhat helpful...#i get overwhelmed by broad questions very easily haha#if you would me to elaborate on something specific I mentioned feel free to ask#i wrote this all out weeks ago and then forgot about it... I just added a link or two but yeah here it is
315 notes
·
View notes
Text


Tattoo Parlor Decor Set for The Sims 4
This set was inspired by my personal experience getting tattoos. Some of the signs are those I remember from my friend’s tattoo parlor. While I was excited about getting tattooing in the Business & Hobbies Pack, I did want more in terms of décor objects. I did my best to keep the items as low poly as possible, but be sure to check the poly counts for what your computer can handle.
The building in my screenshots is one I downloaded from the gallery and made modifications so it resembled my friend's tattoo parlor. The username is MickeySimmers and the original build is a NY Pizzeria uploaded on 4/7/25.
When appropriate, objects are available in English and Simlish versions. Simlish font credit to Franzilla: https://modthesims.info/ For new meshes made by me, textures from Blenderkit were used.
SexyIrish7 Phoenix logo credit: © Liliia Marchuk via Dreamstime.com
All items are base-game compatible.
This set includes:
· Tattoo Counter
· Supply Cabinet
· Salty Signs – Small, Medium, and Large
· Tattoo ink bottles
· Tattoo ink cups – empty ink cup and cups with ink colors
· Tattoo ink cup holder
· Sharps container – Wall-mounted and counter versions
· Tattoo Coil Machine
· Foot switch
· Power Supply
· Stencil Machine
· Autoclave
· Non-sterile Nitrile Glove Boxes
· Portfolios
· Consent form
· Tip Jar
You may view an Imgur album with 31 screenshots of the set here
Creations by SexyIrish7
DOWNLOAD for FREE: SFS
OR at Patreon*
*You must be over 18 to access my Patreon page.
These cc objects are new 3d meshes created using Blender and Sims 4 Studio.
All CC have:
*Ability to search catalog using search terms: sexyirish7 and si7
*Customized thumbnail
*******
CREDITS:
Software credits:
Sims 4 Studio v. 3.2.4.3 (Star): https://sims4studio.com
Blender 4.0: https://www.blender.org/download/
GIMP v. 2.10.34: https://www.gimp.org/
Inkscape v. 1.2: https://inkscape.org/
Thank you to the creators and moderators producing tutorials and answering questions!
*******
TOU:
Do not re-upload and claim as your own
Do not re-upload and hide behind a paywall
Mesh and Image Credits along with descriptions of each item are below:
Tattoo Counter
I was dissatisfied with the number of slots and their placement on the tattoo counter that came with the Business & Hobbies pack, so I modified EA’s The Ultimate Nightstand so that it served as a larger counter and added décor slots to it. There are a total of 3 large slots, 9 medium slots, and 27 small slots. I made some minor modifications to the EA texture for The Ultimate Nightstand but did include all 20 swatches.
Polygon Count: 162
Supply Cabinet
I have long been disappointed with the lack of deco slots in various displays. For this object, I modified EA’s Carina Dining Hutch so that it would serve as an appropriate supply cabinet. I made some minor modifications to the EA texture but did include all 9 swatches. There are a total of 2 large slots, 15 medium slots, and 140 small slots.
Polygon Count: 114
Salty Signs
There are 3 files of what I call “salty” signs. The large signs are not as salty, but I wanted to stick with my theme overall. What do I mean by salty? Well, these are signs that are not for the faint of heart and for those with a darker sense of humor. They were inspired not only by signs that I saw at my friend’s parlor, but also by things he and his colleagues would say frequently.
Large Signs: 7 designs (11 total swatches)
Medium Signs: 9 designs (18 total swatches)
Small Signs: 10 designs (20 total swatches)
Polygon Count: 4
The following were used in several textures in all three files:
Caution/Warning Sign Templates by kenshinstock via Freepik https://www.freepik.com/free-vector/blank-label-warning-caution-sticker-template-set_30903862.htm
Large Sign Image Credits:
Swatches 1-2: Original Artist Unknown. Image from https://razorbacktattoosupply.com/tattoo-studio-feel-the-burn-wrapped-canvas-graphic-art/
Swatches 3-4: Original Artist Unknown. Image from https://www.creativefabrica.com/product/funny-tattoo-artist-hourly-rate-cut-file/
Swatches 5-6: Original Artist Unknown. Image from https://www.pinterest.com/pin/tattoo-artist--218917231881445322/
Swatch 7-8:
Hands, Soap, and Ointment Icons by rawpixel.com via Freepik https://www.freepik.com/free-vector/coronavirus-prevention-icon-set-vector_30086831.htm
Do Not Touch Icon Image by Myshopsigns https://all-free-download.com/free-vector/download/18_warning_signs_47669.html
No Swimming Icon by Fitri Handayani via Vecteezyhttps://www.vecteezy.com/vector-art/51936014-no-swimming-sign-illustration
Bathtub Icon by Fitri Handayani via Vecteezy https://www.vecteezy.com/vector-art/51406319-bathroom-icon-with-bubbles-and-soap
Sun and Breeze Icons Images by Freepik https://www.freepik.com/free-vector/weather-icons-set_709126.htm
Talking on Phone Icon by Mungujakisa Edmond via Vecteezy https://www.vecteezy.com/vector-art/25410803-do-not-talk-on-mobile-cell-phone-icon-sign
Swatches 9-10: Tarot Card Images designed by Eight (Elian-James Showell) https://www.eightco.in/
Swatch 11: Original Artist Unknown. Image from https://www.amazon.com/Tattoo-Artist-Tarot-Card-Sweatshirt/dp/B0D8JBHBFZ
Medium Sign Image Credits:
Background images for Swatches 5-8 by All-Free-Download.com https://all-free-download.com/free-vector/download/advertising_sign_templates_retro_shapes_sketch_6849470.html
Swatches 1-2 and 13-14: Tattoo Gun Image from IMGBIN https://imgbin.com/png/ZNRSzcqv/tattoo-machine-tattoo-ink-tattoo-artist-png
Swatches 3-4: Original Artist Unknown. Image from https://www.amazon.ca/Artist-Tattoo-Artist-Kitchen-Vintage/dp/B0B6DRXFZN
Swatches 5-6: Tattoo Gun Image from IMGBIN https://imgbin.com/png/36i2fKAG/tattoo-machine-body-piercing-tattoo-artist-old-school-tattoo-png
Swatches 7-8: Bullhorn image by All-Free-Download.com https://all-free-download.com/free-vector/download/megaphone_312061.html
Swatches 9-10: Border by Rawpixel.com via Freepik https://www.freepik.com/free-vector/vector-set-vintage-elements_3139397.htm
Picture by EA from Business & Hobbies release video
Swatches 11-12: Cheese Grater Image by Macrovector via Freepik https://www.freepik.com/free-vector/cooking-food-icons_1530806.htm
Saw image by EA
Swatches 15-16: Images by EA
Small Sign Image Credits:
Swatches 1-2, 5-12, 19-20: Caution/Warning Sign Templates by kenshinstock via Freepik https://www.freepik.com/free-vector/blank-label-warning-caution-sticker-template-set_30903862.htm
Swatches 3-4: Tip jar image by Freepik https://www.freepik.com/free-vector/jar-background-with-hand-drawn-money_1148170.htm
Swatches 13-14: Image by Printable Designs https://free-printable-signs.com/
Swatches 15-16: Image by by Mungujakisa Edmond via Vecteezy https://www.vecteezy.com/vector-art/25410803-do-not-talk-on-mobile-cell-phone-icon-sign
Swatches 17-18: Crying Emoticon Image from CLEANPNG https://www.cleanpng.com/png-smiley-emoticon-crying-clip-art-no-whining-clipart-546524/
Tattoo Ink Bottles
Due to file sizes, I split these up into 2 separate files. One file has all of the bottles in English, and the other has all of the bottles in Simlish. I modified the EA debug glue bottle. There are a total of 24 swatches.
Polygon Count: 126
Tattoo Ink Cups
There are 2 files for this object. One is an empty ink cup. The other has all of the ink colors as different swatches. There are a total of 24 swatches for the filled ink cups. I modified the water glass object to create these items.
Empty Cup Polygon Count: 107
Filled Cup Polygon Count: 162
Tattoo Ink Cup Holder
When an artist is using a few different inks for a piece, they can sometimes use a holder for the ink cups so the cups do not get knocked over or spilled. This is an original mesh made by me. I have the object set up so that the ink cups (full or empty) will snap to the holes in the holder. Once the ink cups are in, you can move the entire holder to where you want it and the ink cups will go along. Or you can place the holder and then add the cups. While the holders I tended to see were plastic, I decided to make mine a metal version with slight ink stains.
Polygon Count: 208
Sharps Containers
I created 2 versions of sharps containers for this set. I originally was only going to create the wall-mounted one, but then decided to add the counter version of it as well. These are original meshes made by me.
Biohazard symbol is a public domain image
Wall-Mounted Sharps Container Polygon Count: 268
Counter Sharps Container Polygon Count: 106
Tattoo Coil Machine
There are different types of tattoo machines available, but I find the coil machine to be the most recognizable and therefore wanted this version in my game. This is an original mesh made by me. There are a total of 5 swatches.
Polygon Count: 640
Foot Switch
I created a foot switch to operate the tattoo machine with. This is an original mesh made by me. There are 11 swatches.
Design inspired by FK Delta Foot Switch https://www.fkirons.com/products/delta-foot-switch-cosmic-storm
Polygon Count: 57
Power Supply
For this object, I modified the EA Retro Rock of Ages Stereo mesh and texture to create the power supply. I used a few other EA textures to make adjustments to the components of the object.
Polygon Count: 336
Stencil Machine
Unless you allow your artist to freely draw on your skin before tattooing, many use a stencil machine to create the stencil so you can make sure that your tattoo is placed correctly and looks correct before beginning. This is an original mesh made by me. There are a total of 6 swatches (3 designs in English, 3 designs in Simlish).
Design inspired by Vevor Tattoo Stencil Printer https://www.vevor.com/tattoo-machines-c_12593/
Phoenix Image: © Liliia Marchuk via Dreamstime.com
Claddagh Image: http://clipart-library.com/clipart/8iGbR5bbT.htm
Wolf Image: https://freepngimg.com/png/2674-tattoo-wolf-png-image
Polygon Count: 62
Autoclave
No tattoo parlor is complete without the sterilization equipment, namely the autoclave. For this object, I modified the EA The Schmapple Micro Microwave mesh.
Design inspired by Tuttnauer Valueklave 1730 https://tuttnauer.com/us/veterinary-practices/tabletop-sterilizers/manual/valueklave-1730
Polygon Count: 346
Non-sterile Nitrile Glove Boxes
For this object, I modified EA’s Softy Brand Tissues object. There are 2 box colors available, black and gray. There are a total of 12 swatches.
Non-Sterile symbol is a public domain image
Polygon Count: 40
Portfolios
A detail that I thought was missing was a display of the tattoo artist’s work. In real shops, they can be wall displays or portfolios. I decided to make a portfolio with different tattoo designs. There are 3 swatches of different tattoos. This is an original mesh made by me.
Polygon Count: 262
Image Credits:
Swatch 1: EA
Swatch 2:
Snake and Flying Swallow Images by dgim-studio via Freepik https://www.freepik.com/free-vector/new-style-tribal-tattoo-collection_1168313.htm and https://www.freepik.com/free-vector/colorful-flying-swallow-template_8136770.htm
Colorful Old School Images by Freepik https://www.freepik.com/free-vector/old-school-funny-tattoo-collection_1165044.htm
Tribal, Achor, Ship’s Wheel, Skulls, Roses, Dice, Cards Images by Macrovector via Freepik https://www.freepik.com/free-vector/tattoo-black-white-icons-set_9398078.htm
Tribal Images by Freepik https://www.freepik.com/free-vector/new-style-tribal-tattoo-collection_1168313.htm
Swatch 3:
Colorful Images on Left Page by Freepik https://www.freepik.com/free-vector/collection-hand-drawn-decorative-tattoos_1175499.htm
Colorful Vintage Images on Right Page by Freepik https://www.freepik.com/free-vector/pack-vintage-hand-drawn-tattoos_1194571.htm
Crossed Swords, Anchor, Skulls, Scorpion Images by Macrovector via Freepik https://www.freepik.com/free-vector/attoo-studio-flat-icons-collection_4430574.htm
Consent Form
I created a consent form on a clipboard. This is only available in Simlish. I modified some EA textures to create the form. The clipboard is an original mesh made by me.
Polygon Count: 90
Tip Jar
Tipping is heavily encouraged for getting tattoos, at least in the U.S. As such, I decided I wanted to make a tip jar for my parlor. I modified the EA debug jar and some different debug simoleon meshes. The result is a tip jar with both coins and bills inside.
Polygon Count: 579
#tattoo#inked#tattoo parlor#tattoo decor#tattoo studio#sims 4#the sims 4 cc#the sims 4#sims 4 cc#ts4cc#wall decor#ts4#sims 4 custom content#tattoo shop decor#build/buy#sexyirish7#featured
89 notes
·
View notes
Text

Through Thick and Thin Pose Pack (CF, Free)
I made these poses for my own story quite a while ago but never got around to polishing them up and sharing them. This is a large set of assorted poses for a wheelchair user and their best friend doing a bunch of things together, like playing basketball, bowling, doing physiotherapy, and just generally hanging out enjoying life. :) I hope you'll find them useful for your stories. While I designed these poses for a wheelchair, some of them should still work with any backless, armless chair.
WHAT'S INCLUDED
14 couple poses
Basketball accessory (stigmata, ring)
Bowling ball accessory (stigmata, ring)
Thumbnails and descriptions for all poses
WHAT YOU WILL NEED
Pose Player
Sim Teleporter
Windkeeper's Wheelchair (or any backless, armless chair)
Old Factory Fence from the Werewolves game pack (recommended but other fences may work)
HOW TO POSE
Check out my tutorial on Sims Community!
SUPPORT ME?
You already support me by choosing to download my content from CurseForge (thank you!) but if you really love what I do and wish to say thank you, here are some additional ways to support me. Donations are completely optional; all my content is free for everyone.
patreon
CurseForge (click the donate button on any of my project pages!)
TOU
DON’T reupload or edit!
DON’T put behind a paywall!
DON’T claim as your own!
DON'T download from any source that isn't directly from me. I do not host my content on SimFileShare so do not download from there. I have no issue with SFS itself but it is being used to steal and redistribute my content. This isn't necessary, as all my content is free from day one. If you do not wish to support me for other reasons, that is fine, I respect your choice but in that case, just don't download my content. It's not okay to destroy my livelihood.
(Optional) DO tag me if you use them! I love seeing other people enjoying the stuff I make!
DO use my accessories in your own poses but DON'T include them in your set. Link back here.
DOWNLOAD ON CURSEFORGE
@ts4-poses
43 notes
·
View notes
Text
SPRITE THEFT HALL OF SHAME: AN ARTIST'S SALT POST ON THEFT AND LACK OF CREDIT.
Okay I just went on a Journey and I'm going to post about it now because I think this warrants me dragging everyone else into my insanity.
SO. My Hat and Cloak Sprites. I knew they were often reposted and stolen, but some of the places where I've found them is--it's baffling.
So, hall of shame time because I'm done! I'm done and tired and salty!
First batch of the Hall of Shame: Pintrest is Theft Hell.


These sprites--both the discontinued old ones and the remakes, are everywhere on pintrest. Not a single one of them I've found has been credited back to me in ANY way. This is probably where most people who get the sprite uncredited get them, and why people think these sprites are "canon" without actually doing much research on the sprites themselves. Pintrest is by far the worst offender here, with dozens of reposts of the same sprites I edited.
Let's take a look at a few examples for funsies.

This specific sprite has been floating around for a while now, and it ALWAYS baffled me because--because I sure as hell didn't make this one.

Because this sprite is a fanon sprite. I sadly cannot find the actual creator of this sprite, even with google images because there are SO many reposts of it, but I know for a fact this is a fan-made sprite. So, then I ask--who took two fanmade sprites and mashed them together?
If anyone knows the original artist for this fan sprite, PLEASE let me know. I would love to give them credit too because their sprite has ALSO been reposted and stolen a bunch online and they deserve the credit for the edit!
EDIT: I FOUND IT I FOUND THE OG EDITOR HERE.
Anyway, this specific pintrest post has comments about people enjoying the design change on the hat, which is really disheartening to see as that was MY design choice, and I'm not getting any credit for it!
Anyway, next example on the Pintrest Hall of Shame:

This one is also an edit I did not make! I'm not sure if the base sprite is yet again another artist who got their work mashed up with mine, as I cannot personally find anything, but once again, this was made with no credit.

Eugh, an old sprite! But THIS one gets into the Hall of Shame because the comment saying the edit is cool. Why thank you! I wish this user knew who ACTUALLY MADE THESE SPRITES..

Kokichi Ouma Shames You For Your Art/Sprite Edit Theft.

Another old Sprite, Eugh! This one ALSO received a bit of praise. GEE, I WONDER WHAT THESE GUYS WOULD THINK OF THE FACT THAT THIS WAS REPOSTED/STOLEN.

Huh??? Huh???? You put him a school uniform, you did NOT make the hat and cloak! Don't imply you made the whole thing!

You grayed him out. All you did was gray him out.

I wonder if this one pintrest user knows that the Hat's symbols on the rerelease of these sprites has a different hat design...
I think that's enough Pintrest Hall of Shame, since it was the biggest offender and I could be here all day trying to find every single sprite reposted or edited without credit.
Second batch of the Hall of Shame: Redditors that Have No Shame

This Talent Swap Maki seems like she's wearing a very familiar hat and cloak.
And oh look! I asked for credit!

And none was Ever Given.

This one has a bunch of sprites with the stolen sprite being at the end of the set. One of the grayed-out sprites, I presume this person got it on Pintrest.

A personality swap that just, threw the hat on there, why not I guess?
Third batch of the Hall of Shame: Videos, Thumbnails, and Animations! All without Credit!
youtube
I found this video of animations a WHILE Ago and I'm pretty sure I asked for credit. The Comment of me asking for credit was promptly deleted.
youtube
No credit to be seen, at least not from where I'm standing!
youtube
This one only uses one sprite for a short moment but it still gets a spot in the Hall of Shame.
This one is just a tutorial on how to make your Roblox character look more like Kokichi with his hat and cloak. Like why is my sprite even here you HAVE the CG for it!
youtube
Eugh, old sprite alert! No credit regardless.
THIS one ESPECIALLY pisses me off because it sTOLE MY OLD TWINS AU SPRITES.
WHAT THE HELL.
THIS WHOLE ACCOUNT HAS VIDEOS OF MY TWINS AU SPRITES AND MY HAT AND CLOAK SPRITES.
WHAT THE HELL!!!!
While that pisses me off to no end, have some screenshots of thumbnails from BilliBilli because these sprites have gone INTERNATIONAL, BAYBEEE

Fourth batch of the Hall of Shame: Steam, Garry's Mod and--Huh???
youtube
This one is the one that made me laugh in despair--FNF??? Really??And while it's not quite a sprite edit theft, don't think I didn't notice that you just copy and pasted my Sprite's "Hat and Cloak" hat design onto Kokichi's hat and tweaked it! I know the design isn't easy to replicate, but at least draw it yourself, it's so obvious that you did not Draw That. It's not even in the Right Art Style. My God.

Ack, old sprite version jumpscare! This one is quite interesting as it appears to be a Garry's Mod thing?? Don't ask me. I don't understand it either.

Another Garry's mod thing, but THIS one is on STEAM!
Fifth batch of the Hall of Shame: The Misc Batch
This Batch of sprite thefts/reposts without credit are some ones I found that didn't match in any specific category. Let's go!
This sprite edit I found without credit a while back on my old blog, but I don't know where I found it. Pintrest? Reddit? Tiktok? Who the HELL knows.

This person is trying to pass off this edit of my "Hat and Cloak" sprites as THEIR OWN ART. They posted traced sketch lines to "show" they drew the art, but it's traced and faked.
They posted this on 07/15/19 as shown in the link and in this screenshot here:

I posted MY SPRITE EDIT REMASTER November 24th, 2018.

This one is especially egregious for ACTIVELY TRYING TO STEAL AND PASS OFF MY HAT AND CLOAK SPRITE ASSETS AS THEIR OWN ART. This isn't just ignorance, this is malicious theft.
Anyway. This has been a long... what, 7 years coming? Because it's been 7 years since I posted these sprites up for people to use WITH CREDIT, and they have been passed around without credit, mistaken as canon sprites (when a little bit of research would show that there are no sprites of him in his hat and cloak in canon) and maliciously stolen by people trying to pass off my work as their own!
And I am tired of it.
I'm tired of trying to laugh it off, I'm trying of trying to tell myself it's fine when it hurts me deep inside, when it discourages me from ever creating canon-like sprites again because I know they'll just get stolen and passed around without credit or consent. Thieves will try to pose it as their own edits or art, and ignorant people will just mistakenly believe it's canon or be too lazy to look up the original creator.
And I'm just. I'm tired. I don't want to resent these sprites as much as I do. I don't want to come across another pintrest post with an uncredited edit or repost. I don't want to come across tiktoks or youtube videos that use my sprites without credit.
When I made these sprites, I thought seeing people use them would bring me so much more joy. Now, I just feel extremely hollow and disappointed. Despair, even, if you will.
So yeah. Here's my Sprite Art Theft Hall of Shame for you all to enjoy and laugh at. because it's the only thing I can do at this point--to show off these thefts in a hall of shame so maybe on the off chance people will spread this around and maybe I'll get some credit. Who knows. Like this is just a mere fraction of the theft going around with these sprites. It's insane how far this has gone.
I'm frustrated. I'm angry.
But really, I'm just. Tired.
#Kokichi Ouma#Kokichi Oma#Danganronpa V3#New Danganropna V3#DRV3#Danganronpa#My Art#My Old Art#my sprite edits#Sprite Edits#Hall of Shame#Art Theft#Long Post#Youtube
32 notes
·
View notes
Note
do you have any advice on creating character designs? yours convey a lot of personality, and i wanna have that in my own designs but im not sure how
ah sorry, i've never taken any character creating classes or watched any videos or tutorials about it. i don't really have any advice to give. i know there's a lot of classes and rules out there about creating recognisable or fun or unique character designs, but tbh i dislike most of that stuff, which maybe that's wrong of me, but i'm making my characters mostly for me not for some cartoon i'm being hired on. i just draw what interests me or what i think looks nice. and the only things i have to draw up on is just consuming and looking at other people's work, whether that tv shows, games, comics, films, or even just scrolling deviantart (back when i was a teen) or tumblr or deviant art or toyhouse.
so if you think i've learnt anything or have good character design, then it can only be from just looking at other people's characters and getting inspiration from pintrest if i'm stumped. and and me having a very vivid imagination (like i rarely thumbnail or draw multiple designs for my characters, because i can see them so clearly in my head i just go through 20+ different outfits/hairstyles for them in my head and go 'no. no. no that doesnt work. oh i like those pants okay. maybe this hair. no. longer? okay.' and then i draw the final result from doing that. i clearly would not be allowed to design characters for anyone else, people wanna see you draw multiple designs to prove you thought of multiple, but idk i don't need to draw them down to see them clearly and know those designs wouldn't work so why would i waste time drawing them out aaa i know this is not how most people design things).
7 notes
·
View notes
Text

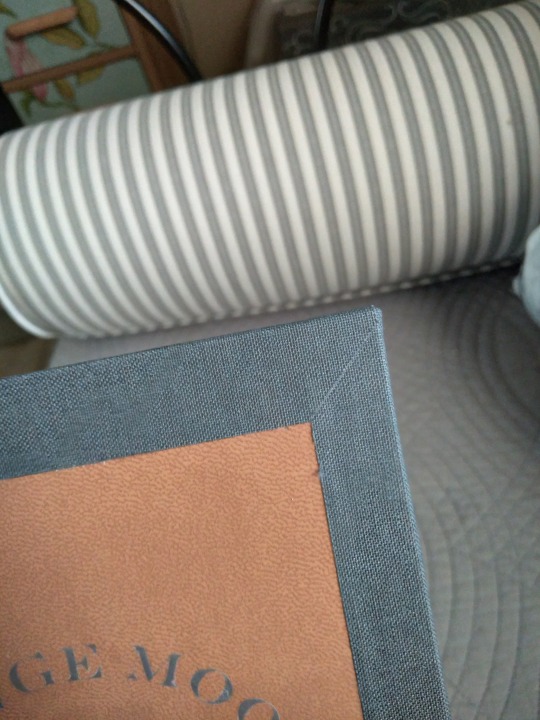
It is Monday, and Monday is for books. Look at these beautiful things! They took me five months to make. I tried so many new things in the process and I am extremely proud of them. This is a binding of @racketghost's amazing Good Omens fic Strange Moons (Hi. I hope it's ok I tagged you in this. Your fic has been one of my favorites since I found it in 2019.) The story is a series of short fics (and one long one) that really need no introduction from me. They're set throughout the 20th century, and they are beautiful and sensual and moody and you should definitely read them if you haven't already. This is the longest work I've bound so far, but I was fortunate that the word count on the shorter fics added up to almost exactly the length of the final, longest one, making them the perfect choice for a two-volume set. I tried very hard to get them to be an exact match, and they turned out even better than I pictured.
More pics under the cut! Two books means twice the pics, and all the stuff I tried here means it's a very long post, so be warned.
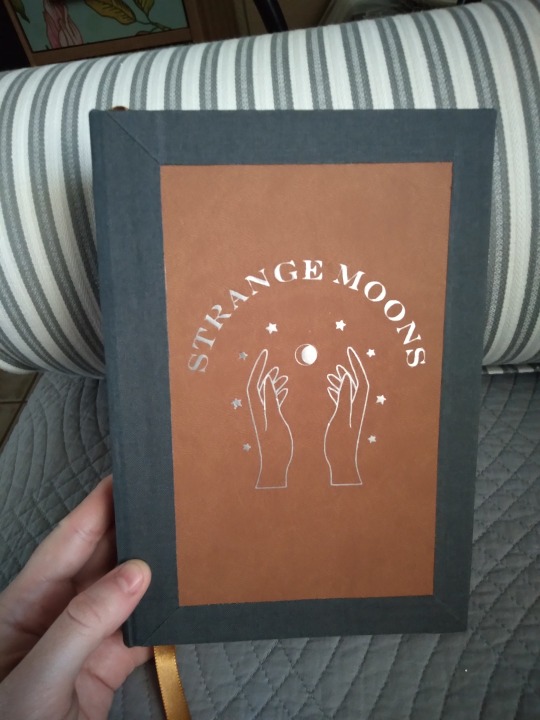
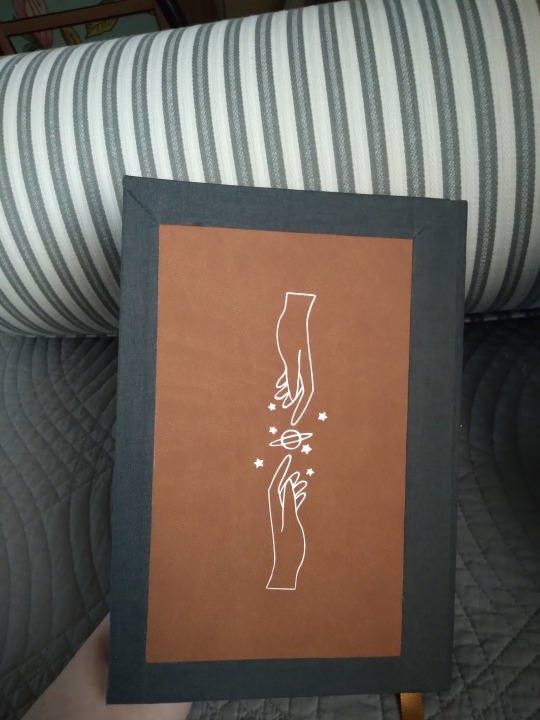
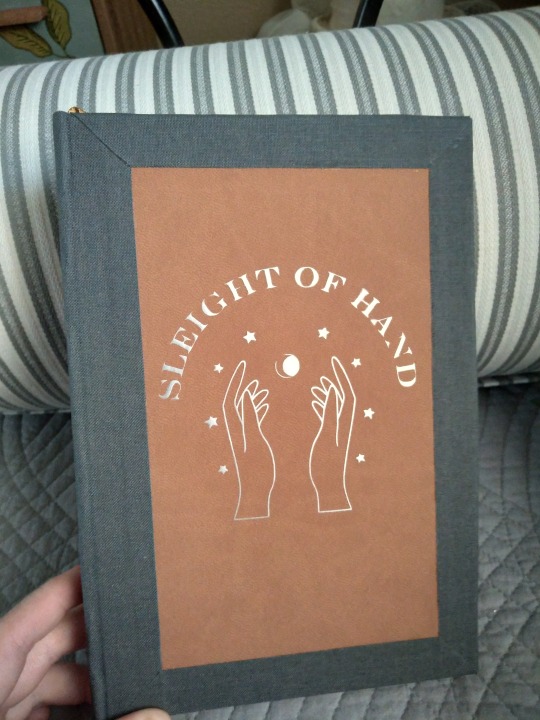
Individual images of the covers. The titles are done in silver htv over brown faux leather, edged in charcoal bookcloth. The graphics are the same on both, except for the title text, and they have the same image of the reaching hands on the back. All the art assets are from rawpixel, I just flipped and rotated some of them to make the back image.
The cover materials were an interesting challenge. I'd worked with both before and wanted to incorporate them both in the design, but after measuring and checking grain direction I found I didn't have enough of either of them to do a full book, or even a half bind. So they're actually made by affixing the faux leather to the book board, then layering strips of book cloth over the top. The corners are actually mitered at a 45-degree angle. Here's a close-up:
It's two long strips of cloth (spine and fore edge, not mitered) with two short strips (top and bottom, mitered) glued over the top. There was so much measuring, omg. I bought a new tool to make sure I got it right. Hilariously, I still didn't have enough leather and had to order another roll anyway. Also hilariously, I got the idea to do this after seeing an image of a leather-bound book made by a professional that appeared to have the same feature, i.e. multiple materials with an inset and mitered corners. Wow, I said, looking at a video thumbnail, I'm going to do that! So I did, even though I didn't watch the video. Much later, after I watched his tutorial, it was clear that the design was from leather dye and tooling, not the thing that I did at all. But I do like the effect, and now I know it's possible I think it'll be great for using up weird offcuts from making other covers.
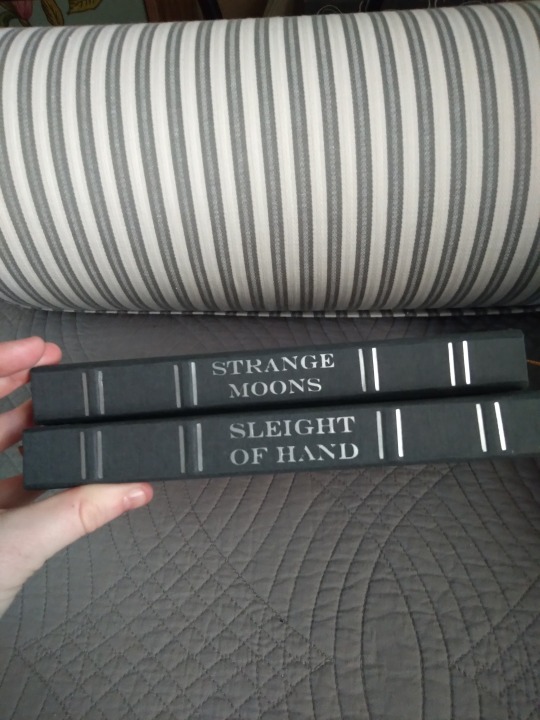
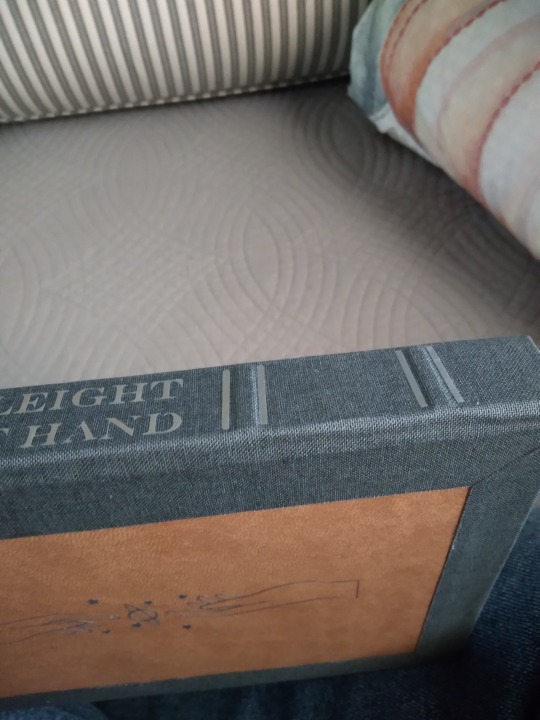
Look, spines! With TITLES on them! And LITTLE RIDGES! Both firsts for me. I'm a little obsessed with them. The cricut has opened up entirely new worlds, though I suspect the little silver lines might have been easier to do with a foil pen (which I don't have) than they were with a heat press. I did them by making the cricut cut out several "=" symbols that were the same width as the spine. The raised bands are false bands; I made them by layering little pieces of chipboard on the spine stiffener, then molding the book cloth around them when I covered them. I was worried it wouldn't work, since this is usually done with leather and book cloth is apparently way less stretchy, but it worked fine. Probably because it's a small straight design, no curves or fancy bits. I'd layer the chipboard thicker next time so they stand up higher (this is 2 layers, I'd do 3 in future) but I'm delighted by how this turned out. They look so professional.


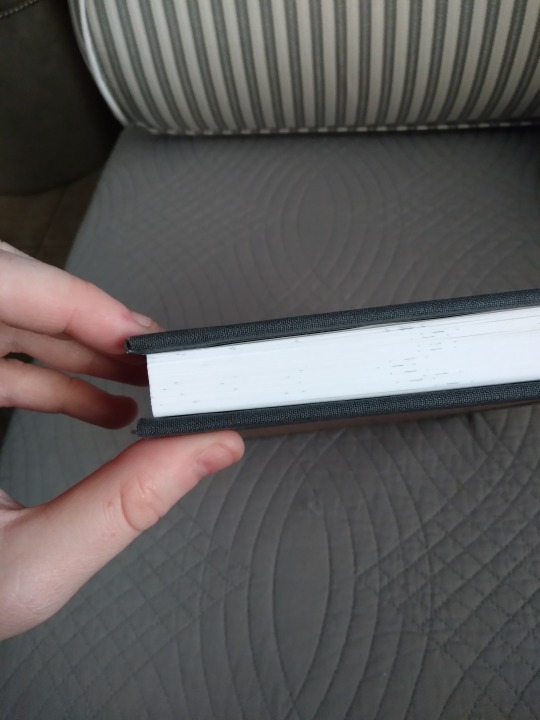
The endpapers on both books are a constellation print. I had a really hard time trying to find something to go with the typeset, and the only ones I liked were from an etsy seller who kept selling out of them. I got lucky eventually but it was one of many hassles that befell this project. I also made my own end bands using a tutorial from the Renegade Bindery discord. I had some issues and I didn't quite nail them but I think they're pretty good for a first time (ok, second time, the first one was on a practice text block, but my point stands). I had originally intended this to be a split boards binding, my first time trying that, but when I got the boards glued on I found that they were crooked. Really crooked. Completely misaligned. Much swearing followed this discovery. I ended up having to cut the boards free, cutting the mull and tapes in the process. The mull was easily replaced, but the parts of the tapes that are usually glued to the boards were a lost cause. I reused the boards, but flipped them so the edge with the cut tapes inside is at the fore edge so I could have a cleaner hinge. You can see in the last photo that the cover board is a little wider at the fore edge. On the plus side, there are no tapes to wrinkle my pretty endpapers and it combated the small bit of spine swell I had. On the downside, the hinge has less support and the only thing I learned was How Not To Make A Sewn Boards Binding.
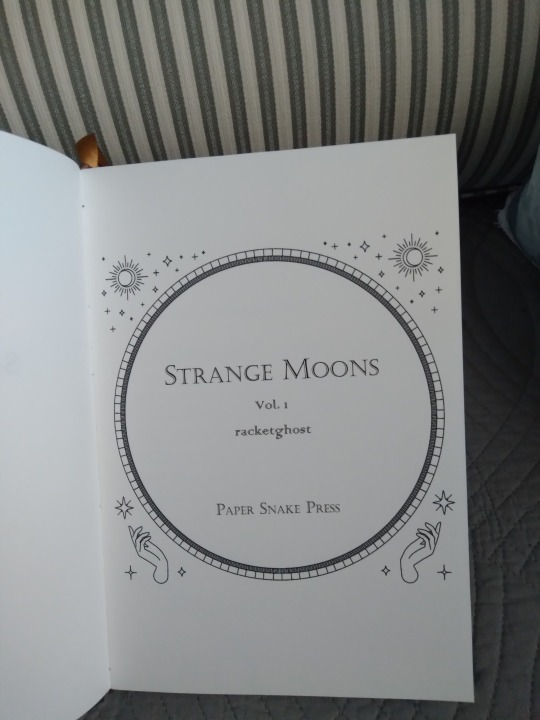

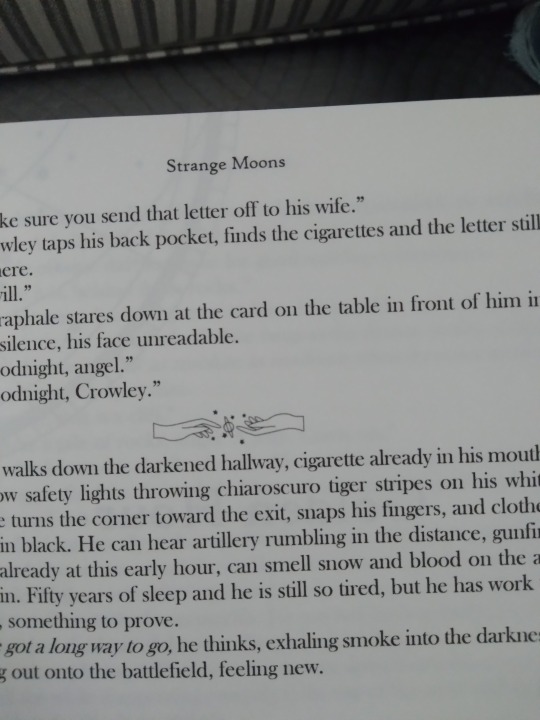
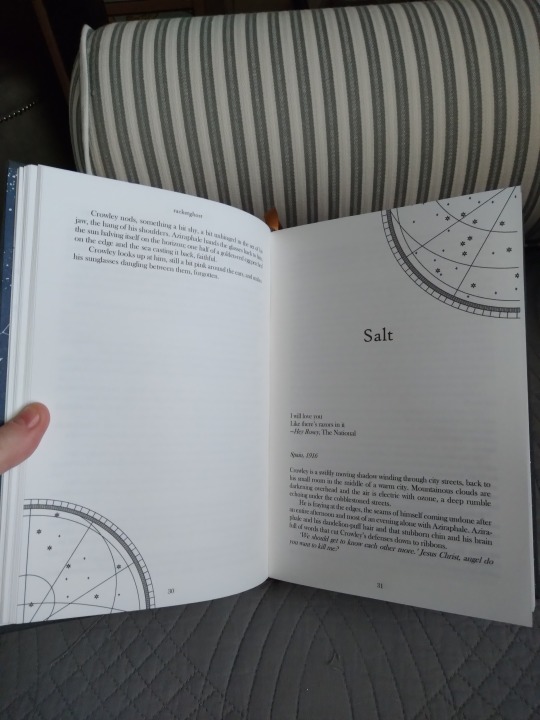

I may have gone a little nuts with the images in this typeset. In my defense they look very pretty. In order, that's the title page, table of contents, section break image (same as the back cover, just tiny), chapter header and ender (each chapter has one on its first and last pages, they just look particularly cool when you can get a full page spread like this), and the image on the last page of the book (same as the cover image, almost). The cover image was also supposed to have little rays coming off its moon like this one does, but the lines proved too thin for the cricut and it ate them. I still like how it looks though. The prose in this story is really rich and I was in the mood for opulence when I did it. I have absolutely no regrets.
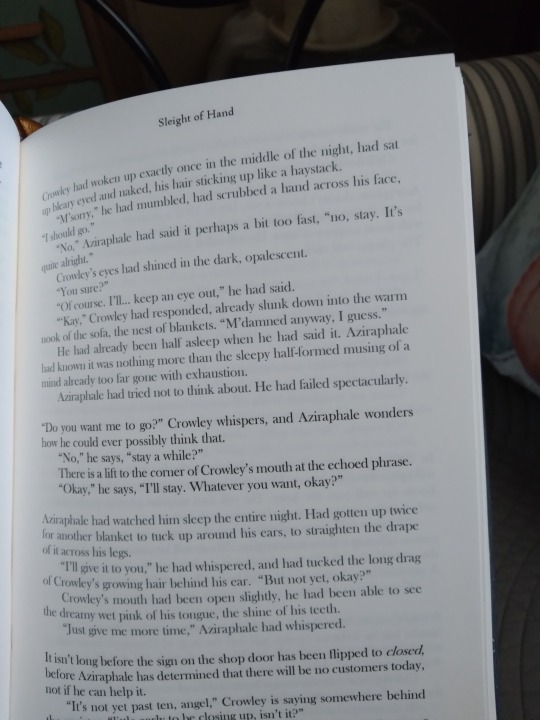

Here's a feature that's unique to this typeset. One of the chapters in the second volume has three alternating, interwoven timelines. I read them fine on Ao3 but had trouble following them when I formatted it for printing. Usually I'd use the section break image to denote when there's a scene skip but there are literally dozens in this chapter, like 40-60 breaks over the course of 10 or so pages, and it looked very busy with images in it. So I left them out, made the line skips single instead of double like they are elsewhere in the book, and I color-coded the text instead. One timeline is printed in black, one is dark gray, and one is dark blue. And it's a very surreal chapter, with the characters having some very confusing and conflicting emotions, so I feel like reading multicolored text when you're not expecting it (the rest of the book is all normal black and this bit is near the middle) sort of reflects that unbalanced feeling? I hope so anyway, because I love the way it looks so much.
I learned so many things in the course of making these. I'm absolutely doing all of them again. Part of the reason it took so long was that I wanted it to be perfect, or as near as I could get, and I had to take the time to solve all the puzzles it threw at me. But it stretched my creativity and ingenuity and I could not be more in love with the finished product.
#bookbinding#fanbinding#snek makes books#good omens#fic rec#this got super long#and considerably more journal-like than I planned#i guess when you work on something for five months it becomes part of you huh#there were more images too#i took so many photos of these
93 notes
·
View notes
Text
my thoughts on side order so far (after doing the tutorial run)
panicked a little at the beginning when it asked me to design 8 because i thought it was just going to pull it from splatoon 2 and then ask if i wanted to change any of it, not go through each step like i didn't already have existing agent 8 data. suspended it and looked on youtube to see if it did do something differently (trying to stick to people that probably played splatoon 2) (and covering the sidebar with my hand because i KNOW there's at least one "side order all bosses" thumbnail in there. i'm looking at you prosafiagaming. wait no i mean i'm NOT looking at you)
eventually i decided that they must not be pulling that data for some reason, since everyone i saw starting it had the same customization experience (though i noticed different options were highlighted by default for different people? and mine didn't 100% match up with my s2 agent 8 but it was close)
anyway uh. as far as the actual game. seems like it'll be fun. i do still have splatoon 1 nagging at me until i finish my business before it shuts down though (just 18 wins to S+ 99... and then 3 battles with each of the other 90 weapons i haven't used in 7-8 years, or ever)
found it interesting that they kept pearl's last name as houzuki. like... they only localized half of her name? calling her pearl houzuki all these years made sense because she didn't have a canon english name but um. i guess that's it now? (i won't argue with not leaving her first name alone because probably too many people would pronounce hime as "haim" or something)
this is almost like when octo expansion just casually dropped that actually the localization didn't change marina's name, the japanese version just uses her last name and english uses her first
21 notes
·
View notes
Note
Hi fish hi fish!! :] hope you're doing swell- wanted to ask for some advice
I've been trying to learn how to draw wheelchairs for a while now, hardest part has been finding refs with people in em, do you know what terms to search up to find stuff like that? All good if not, just know you're pretty well acquainted with drawing em so figured I'd ask
First off I'm going to state that I'm not a wheelchair user. I have researched them in the past and have asked a family member who uses one for advice, but still don't take my word as absoultely reliable. The majority of my knowlege/observations comes from watching family members with chairs so it may be biased. I'm going to be mostly talking about manual chairs but the same suggestions should apply to powered.
Searching up "wheelchair drawing reference" can help, but I discourage using google images. Often the images will be unrealistic due to them being stock images, or of the wrong type of wheelchair for what youre drawing. (One that comes up a lot are foldable wheelchairs which are more associated with hospitals than practical life).
Instead, try to use reference collections made by wheelchair users. This is a really good collection by Criptid Cosplayer in both manual and powered wheelchairs. They also have a small guide to designing fantasy wheelchairs which was interesting.
I also reccomend learning what the different parts of a wheelchair are and do. This will make it easier to understand how the user uses the chair, the shape of the chair and make it easier to remember the different parts while drawing. I don't have a specific source for this using photo reference since I looked at real wheelchairs for this. However @/calvin-arium has a good guide to drawing chracters with wheelchairs with drawn diagrams here.
Also ensure you observe how real people use wheelchairs. I find that tutorials for using wheelchairs are a good source for this since they break down how each movement works. This will make it easier to draw Wheelchairs in montion/natural posing. Wheels2walking has a good video explaining rolling and one here for wheelies.
Other tips:
Give your characters wheelchair gloves, especially if they're going to be going longer distances than just being inside. Not all users use gloves but they do help protect the hands.
Consider if the character needs additional support/what type of chair they're needing. E.G. Seatbelts, cushions, cupholders, additional storage space, hight of handles/if they have handles, back height ect.
Check what type of wheelchair your character needs. One of my OC's needed to always hold a megaphone as her main weapon, so I gave her a powered wheelchair with a headrest to ensure that I could still have her move around the battlefield without taking away her disability. Other times you will need to consider the type of chair around their disability rather than design/character function. Make sure you research the type of chair for the disability and adjust if needed.
Wheelchairs have different functions. Sports wheelchairs and off-road wheelchairs look very different to regular wheelchairs so keep that in mind. Always research the right wheelchair
Also consider if your character can move their legs or not while posing.
To draw the wheelchair start with a circle with the figure to get an idea of the pose. Treat the chair as an extension of the character while drawing. Don't worry about the anatomical accuracy of the chair before you have a good idea of the pose/a basic sketch or thumbnail
Remember to draw the wheelchair using perspective. or dont.
Wheelchairs are even cooler decorated. Some people use stickers, covers, lights, fabrics, spikes.
It's okay to draw wheelchairs badly. I see a lot of people avoid drawing them for fear of getting them wrong but thats just. counterintuative. Make sure you research (even further than this post links to) and stop avoiding them.
Okay yeah, thats all I can think of for now. Keep in mind that I'm not disabled and so not everything I say is guarenteed to be accurate. But this should be enough to help you out I think.
If anybody else wants to add on to this feel free
#drawing advice#wheelchairs#hiiii poke!!!#sorry this took a day#I wanted to make sure that I properly searched for some answers for you#again most of what I know about wheelchairs/my influence in drawing them comes from seeing family members use them#manual and powered#anyway yeah i hope this helps#i dont think i could draw a wheelchair with perfect accuracy but ithink. even just a little bit of knowlege is useful#I also have opinions about people drawing characters/people with mobility aids they dont use. But thats for another time and#also its ot really my buisness.#fish asks
13 notes
·
View notes
Text
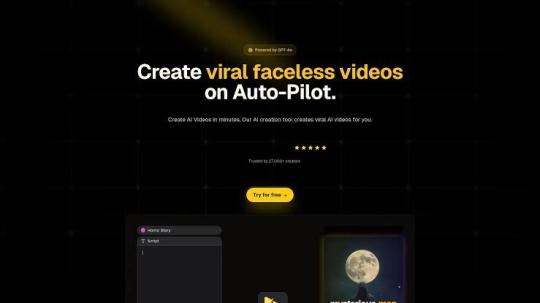
How to Create Viral Faceless Videos in a Minute
In today’s fast-paced digital world, creating engaging content that captures attention is more important than ever. But what if you don’t want to show your face on camera? What if you want to create viral videos quickly and effortlessly? Enter StoryShort Ai, a revolutionary tool that allows you to create faceless videos in just a minute. Whether you’re a content creator, marketer, or business owner, this guide will show you how to leverage StoryShort Ai to create viral faceless videos that resonate with your audience.
Why Faceless Videos?
Faceless videos are a growing trend in the digital space. They allow creators to focus on the content itself rather than their appearance, making them ideal for those who are camera-shy or want to maintain anonymity. Additionally, faceless videos are versatile and can be used for a variety of purposes, such as:
Explainer videos
Product promotions
Social media content
Educational tutorials
With StoryShort Ai, you can create these videos in a fraction of the time it would take using traditional methods. Let’s dive into how you can create viral faceless videos in just a minute.

Step 1: Choose Your Topic and Script
The first step in creating a viral faceless video is to choose a compelling topic. Your topic should resonate with your target audience and align with your goals. For example, if you’re promoting a product, focus on its benefits and how it solves a problem.
Once you’ve chosen your topic, it’s time to write a script. Keep it concise and engaging, as shorter videos tend to perform better on social media platforms. If you’re struggling to come up with ideas, StoryShort Ai can help. The platform offers AI-powered script suggestions based on your chosen topic, saving you time and effort.
Step 2: Use StoryShort Ai to Generate Your Video
Now that you have your script, it’s time to bring it to life. This is where StoryShort Ai shines. The platform uses advanced AI technology to transform your script into a professional-looking video in just a minute. Here’s how it works:
Upload Your Script: Paste your script into the StoryShort Ai platform.
Choose a Template: Select from a variety of templates designed for different types of content.
Customize Your Video: Add images, animations, and music to make your video unique.
Generate and Download: Click the “Generate” button, and within a minute, your video will be ready to download.
The best part? You don’t need any technical skills or video editing experience. StoryShort Ai does all the heavy lifting for you, allowing you to focus on creating content that resonates with your audience.
Step 3: Optimize for Virality
Creating a video is just the first step. To make it go viral, you need to optimize it for maximum reach and engagement. Here are some tips:
Use Eye-Catching Thumbnails: A compelling thumbnail can make all the difference in whether someone clicks on your video.
Add Captions: Many viewers watch videos without sound, so adding captions ensures your message gets across.
Include a Call to Action: Encourage viewers to like, comment, and share your video.
Leverage Trends: Incorporate trending topics or hashtags to increase visibility.
With StoryShort Ai, you can easily add these elements to your video, making it more likely to go viral.
Step 4: Share and Monitor Performance
Once your video is ready, it’s time to share it with the world. Upload it to your preferred platforms, such as YouTube, Instagram, TikTok, or Facebook. Don’t forget to promote it through your other channels, such as email newsletters or blog posts.
After sharing, monitor your video’s performance using analytics tools. Pay attention to metrics like views, engagement, and shares to determine what’s working and what’s not. This data will help you refine your strategy for future videos.
Conclusion
Creating viral faceless videos doesn’t have to be complicated or time-consuming. With StoryShort Ai, you can create professional-quality videos in just a minute, allowing you to focus on what really matters—engaging your audience and growing your brand.
Whether you’re a seasoned content creator or just starting out, StoryShort Ai is the ultimate tool for creating faceless videos that stand out. So why wait? Click here to try StoryShort Ai today and start creating viral videos in minutes!
Call to Action
Ready to take your content creation to the next level? Sign up for StoryShort Ai now and unlock the power of AI-driven video creation. Don’t miss out on the opportunity to create viral faceless videos effortlessly. Click here to get started!
2 notes
·
View notes
Note
I love how you draw backgrounds and cat designs
Do you have any tips?
ok second part, backgrounds. this is going to like... be long and i'll put it all under a readmore but as a heads up - i'm really sorry that my tutorial is just this image:

ok so as a heads up - you should not make backgrounds like I do. I love backgrounds, they are my favorite thing to draw in the world and I want to get to drawing them RIGHT AWAY so I spend very little time on setting up a proper foundation. For this example, I'm using a page from chapter two that hasn't been posted yet.
Here's my initial sketch.


And that's the final page. If I were to hand this off to literally anyone I don't think they would be able to work off my thumbnail visually at all. But I'll try to walk you through my progress as I work off my very bad sketch foundation.


I put down a base color and then I usually do the line art sep. from it. The lion statue is on it's own layer so I can move it around. Yes, I usually layer top plant stuff on the lineart layer to create depth when I paint the plants underneath it. You should not do this.

Then I focus primarily on the mid ground and foreground and I included a little diagram of how I broke up that up in the drawing. For me, a good background is like an onion, it contains layers. Your background is composed of 3 to 4 "layers" - a background where my details and colors are less focused and more loose. The mid-ground is where you can start painting in your details, and it usually hosts the focal point, that's what draws the eye and then the foreground - that's closest to the viewer. I usually paint the foreground first, and then work backwards, but I also know a few people who do the opposite - working back to front because working back from front is how you do it when you traditionally paint.
Once you sort of understand the layers, you can start to play with how you frame your focal point. Below is sort of a wip background for a job I'm doing.

The foreground is now being used to block the mid ground, the bg is used to help sort of cup the focal point and mid-ground.

This is our final image (without a blue gradient slapped on top bc that;'s just how i shade. I just slap gradients on these bad boys.) I added another small layer just to focus on plant details and when I planned the lineart, I had left that huge open space bc I wanted a panel to represent Dewbelly's expression. UHM. I HOPE. THAT ALL MAKES SENSE.
#author notes#letters to pawstbox#not updates#GOD I HOPE THIS HELPED.#if you want like a plant or grass tutorial or smth i can try and help#good lord i did all that talking but did i really say anything?? who can sya
2 notes
·
View notes
Text
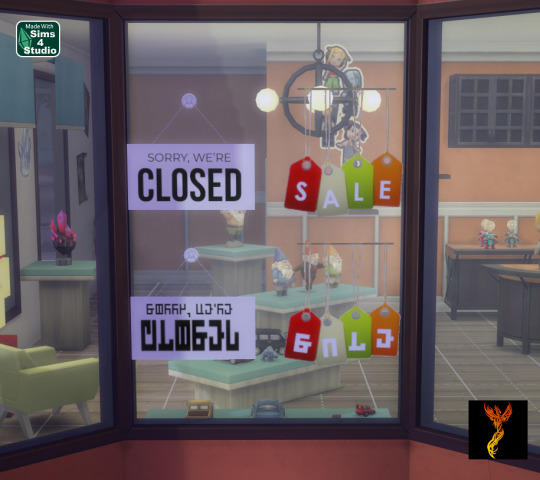

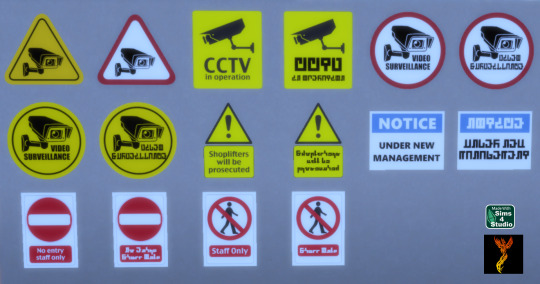
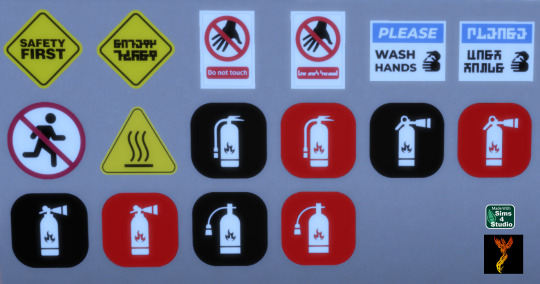
Retail and Safety Wall Decals - UPDATED 15 May 2025
I created two sets of wall decals for you to use. Each sign is available in English and Simlish, as appropriate. There are 30 swatches for the Retail Wall Decals and 16 swatches for the Safety Wall Decals. With decals, they can be placed on a variety of surfaces including windows, doors, etc.
To adjust the size of the decals: Enable the bb.moveobjects on cheat and then you can adjust the size of the item by depressing the Shift key and either [ (for smaller) or ] (for bigger) (on PC).
If you have not checked it out yet, I also have a set of Shop Sign Wall Lights. The SFS link goes to the folder with my shop sign cc, so you can access the shop lights from the same link here as in the wall lights post.
Enjoy!
DOWNLOAD for FREE: SFS
OR at Patreon*
*You must be over 18 to access my Patreon page.
Creations by SexyIrish7
These cc objects were produced as a selective clone using Sims 4 Studio.
Polygon Count: 4
All CC have:
*Ability to search catalog using search terms: sexyirish7 and si7
*Customized thumbnail
*******
CREDITS:
Software credits:
Sims 4 Studio v. 3.2.4.2 (Star): https://sims4studio.com
GIMP v. 2.10.34: https://www.gimp.org/
Inkscape v. 1.2: https://inkscape.org/
Thank you to the creators and moderators producing tutorials and answering questions!
*******
Retail Wall Decals Image Credits:
Swatches 1-2 Image by All-Free-Download.com https://all-free-download.com/free-vector/download/colorful_vector_tags_146737.html
Swatches 3-6: Image by studio4rt on Freepik https://www.freepik.com/free-vector/closed-open-white-signboards-hanged-suction-cup_22656027.htm
Swatches 7-14: Image by upklyak on Freepik https://www.freepik.com/free-vector/wooden-board-sign-with-open-closed-business-status_406436627.htm
Swatches 15-16 & 19-22: Image by freedesignfile https://all-free-download.com/free-vector/download/vector_video_surveillance_design_elements_532894.html
Swatches 17-18, 23-24, & 27-30: Image by Myshopsigns https://all-free-download.com/free-vector/download/18_warning_signs_47669.html
Swatches 25-26: Image by Printable Designs https://free-printable-signs.com/Re
Safety Wall Decals Image Credits:
Swatches 1-2: Image by Sumran Ali via Vecteezy https://www.vecteezy.com/png/16770597-safety-first-yellow-sign-on-transparent-background
Swatches 3-4: Image by Myshopsigns https://all-free-download.com/free-vector/download/18_warning_signs_47669.html
Swatches 5-6: Image by Printable Designs https://free-printable-signs.com/
Swatch 7: Image by juicy_fish on Freepik https://www.freepik.com/free-vector/no-running-prohibited-signs_132098936.htm
Swatch 8: Image by Joko Sutriso via Vecteezy https://www.vecteezy.com/vector-art/27841150-hot-surface-warning-sign-icon-vector
Swatches 9-16: Image by Bai Ha via Vecteezy https://www.vecteezy.com/vector-art/36140779-fire-extinguisher-icon-in-flat-a-fire-extinguisher-icon-design-stock-vector
*******
TOU:
Do not re-upload and claim as your own
Do not re-upload and hide behind a paywall
*******
Changelog:
15.05.2025 Updated swatches for compatibility with slotted signs.
For Retail Wall Decals: Edited appearance of swatches 1 and 2.
#retail signs#shop signs#wall decor#business#wall decals#decals#safety#caution#the sims 4 cc#ts4cc#sims 4 cc#sexyirish7#updated cc#featured
136 notes
·
View notes
Text

Finally A Family Pose Pack (CurseForge, Free)
A friend needed poses for an adoption ceremony in a courtroom setting so I made this for her. I hope it will help you tell more detailed and heartwarming adoption stories in your own game. Enjoy!
WHAT'S INCLUDED
8 group poses (2-3 adults and an infant)
4 couple poses (adults)
5 single poses (adult)
Thumbnails and descriptions for all poses
Adoption certificate accessory
Gavel accessory & object (by Nyuska; their blog seems to have been deleted so I'm including these items)
WHAT YOU WILL NEED
Pose Player
Sim Teleporter
Pen (right & left)
Buyable Adoption Certificate (Optional) - Not needed for the poses but it does match the certificate used in this pose set so you might want this to display on the wall after
Courtroom (Optional) - You can build your own courtroom if you want but I did design these poses using this courtroom I built
HOW TO POSE
Check out my tutorial on Sims Community!
OTHER INFO
Please see included images for teleporter placements
SUPPORT ME?
You already support me by choosing to download my content from CurseForge (thank you!) but if you really love what I do and wish to say thank you, here are some additional ways to support me. Donations are completely optional; all my content is free for everyone.
kofi
patreon
CurseForge (click the donate button on this page!)
TOU
DON’T reupload or edit!
DON’T put behind a paywall!
DON’T claim as your own!
DON'T download from any source that isn't directly from me. I do not host my content on SimFileShare so do not download from there. I have no issue with SFS itself but it is being used to steal and redistribute my content. This isn't necessary, as all my content is free from day one. If you do not wish to support me for other reasons, that is fine, I respect your choice but in that case, just don't download my content. It's not okay to destroy my livelihood.
(Optional) DO tag me if you use them! I love seeing other people enjoying the stuff I make.
DOWNLOAD ON CURSEFORGE
@ts4-poses
96 notes
·
View notes