#water tutorial
Explore tagged Tumblr posts
Visit Tumblr Blog
Explore Tumblr blogs with no restrictions, modern design and the best experience.
Last Seen Tumblr Blogs


Fun Fact
There were a total of 171.5 billion posts on Tumblr in 2019.
Text


Was asked how to draw water splashes so I made a tutorial covering how I made my splashes. Decided to share this tutorial here as well. It came out lengthier than I expected, but I hope it is useful!
#water#splash#tutorial#art tutorial#my art#i use this coloring method for majority of the water effects i did for my phantom comic
119 notes
·
View notes
Text

Water Tutorial by Seel (Seel's patreon is no longer active, but they can now be found at their Twitter)
#art#drawing water#water tutorial#digital art#painting water#how to draw water#how to paint water#seel#doxydoo#art help#art tutorial
208 notes
·
View notes
Text
cheesecake
#cred to @derekdomnicdsouza for the water tutorial#deltarune#deltarune fanart#kris deltarune#deltarune kris#utdr#fanart#deltarune chapter 2#deltarune chapter one#deltarune chapter two#deltarune art#deltarune susie#susie deltarune#deltarune noelle#noelle holiday#noelle deltarune#deltarune brainrot
8K notes
·
View notes
Text
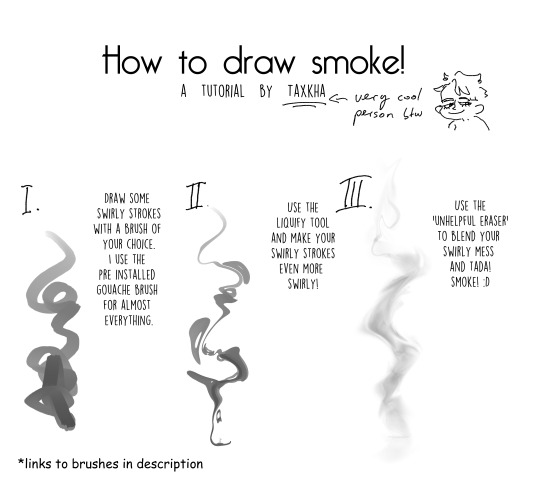

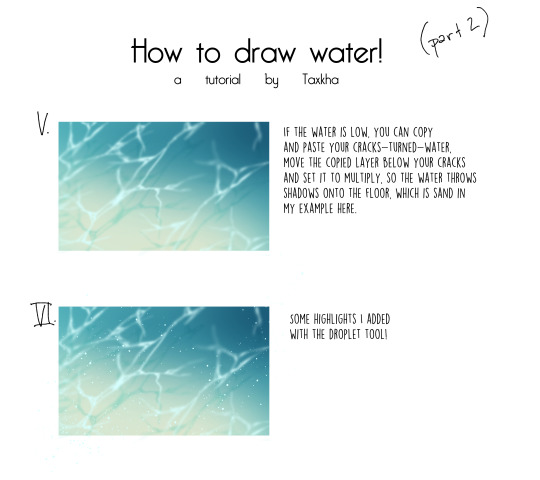
I was unsure about whether to post this or not because I'm not confident enough in my skills to post tutorials but I find these methods on how I draw water and smoke pretty useful and easy to do so maybe this helps someone. I hope I explained everything in an easy to understand way, forming sentences is tough. All brushes I used are pre installed except for the unhelpful eraser tool, which you can find here: Link edit: if you use any of these tipps I would love to see the result so feel free to tag me :)
328 notes
·
View notes
Text
Sorry about the water spam, ill need these for later.
1 note
·
View note
Text
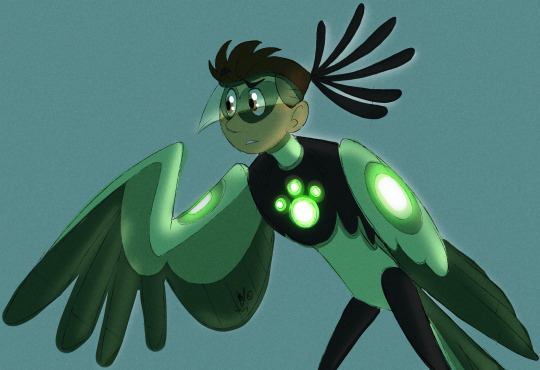
First have a Chris as a glowy confused secretary bird. I just think he's neat. X3

Next, have a MerMartin. I dreamed a villain wanted to use the creature power suits to show off at their freakshow with other "weird" animals, so they went to Zach for his disruptors and Martin got turned into half a goldfish by accident and became an instant hit being a cryptid and all. Too late for mermay I suppose. Might play around with this one.....
water tutorial
#wild kratts#chris kratt#martin kratt#freakshow au? mer au? goldfish au???#i just don't know yet lol#can't help but think about goldfish having bad memories and projecting my bad memory onto martin.......#also that one tumblr water effect tutorial works very well#my art
636 notes
·
View notes
Text
I always meant to post this here but I forgot until this very second
118 notes
·
View notes
Note
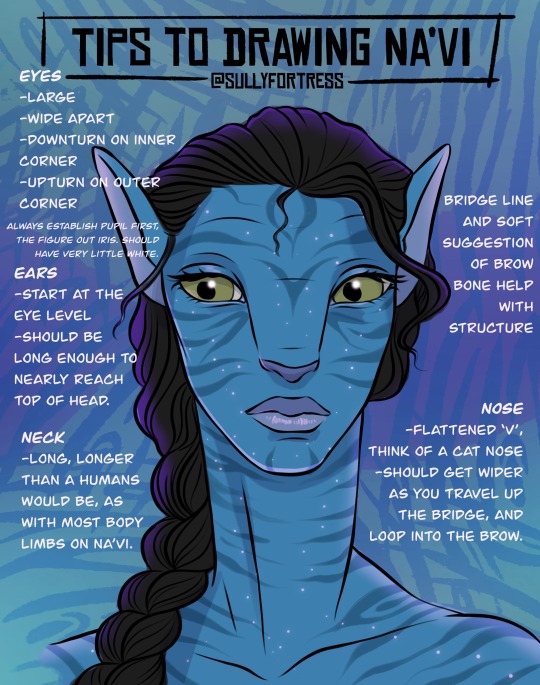
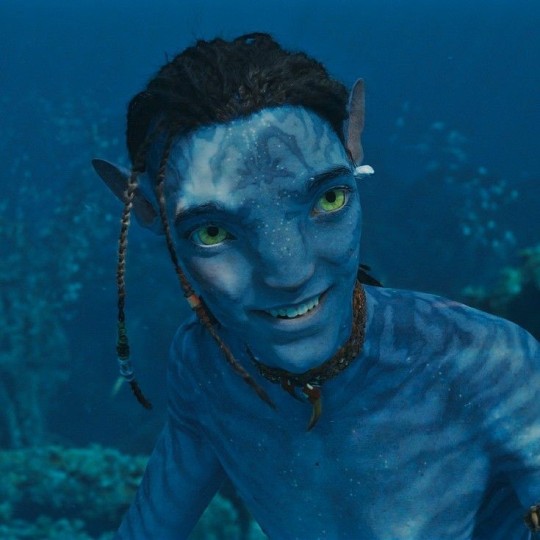
Excuse me, can I ask you something? How can you even draw Na'vi? I just can't draw this body and proportions.
Can you please show me how to draw it all correctly?
Hi! I saw this awhile ago… I plan to make more tutorials…. Expecially for bodies.


#drawing tutorial#na’vi#avatar the way of water#avatar fanart#my art#avatar way of water#avatar#art commissions
157 notes
·
View notes
Text
to the victor go the spoils
(followed @attyrocious's super helpful process explanation for this piece!!)
#one piece#trafalgar law#trafalgar d water law#law one piece#dressrosa bad ending btw.#implied doflaw#(yes he still has his arm because i hc doffy got the tontatta to sew him back up because he wanted law “intact” to enact his revenge upon)#(and/or use him to perform the perpetual youth surgery after sufficient brainwashing etc)#i referenced the sculpture the dying of abel by giovanni dupré#also the feather brush saved my life#my art#anyway. if you want to read a really really good dressrosa bad ending fic ft law doffy and vergo#go check out “a remedial education” by Doctor_Cyance#really good dead dove writing#i found attyrocious' tutorial so good it's helping me w improving my art sm#go check it out!!!
78 notes
·
View notes
Text
here's some punk diy tips and ideas
[other than crusty pants and battle jacket, although we still love those greatly.]
why should you diy, when you can just find decorated items everywhere, you can ask. what if you are clumsy at painting or anything?
firstly, good questions. we diy so we don't give credit to the big companies who rule the world. we diy to get more independent from the system we dislike. we diy so to save money. to express uniqueness, recognize eachother and be recognized. and especially to have fun and feel cool. diy is not only about clothing, but anything you can set your mind on. of course, one cannot make EVERYTHING for themselves, there isn't enough time and energy. but making at least small steps are already a statement and more than nothing. also, helping small artists by buying their products is also pretty punk.
that being said, i provide you with some tips of mine, all gained from experience:
anything you drew/painted on, you will WANT TO protect. acrylic paint/markers + acrylic paint varnish/transparent nail polish/textile medium are your best friends. read after anything that's new to you.
i highly recommend working with old clothing or thrift shop finds when it comes to textiles, as it is environmentally friendly and you will stay in budget. Anyways, always make sure that the material you use isn't gonna be problematic. for example, if you want to do some patchwork, the material shouldn't decay easily (if it does, it will come off so quickly.). if you want to paint on it, it shouldn't be rugged.
you can not only draw/paint on your canvas shoes, but can also sew, embroidery (just make sure to use a thimble, plus floss instead of thread could make your work more durable), and add beads and trinkets to your shoelaces. in the case of shoes, never use glue (neither hot nor instant glue) – it will come off quickly. for some inspiration, i'll show you my shoes!
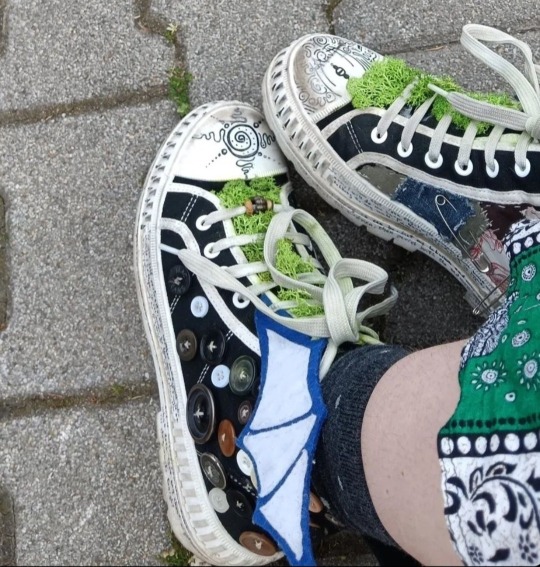
(the fake moss is literally unstoppable from falling off or getting dirty. risky idea.)
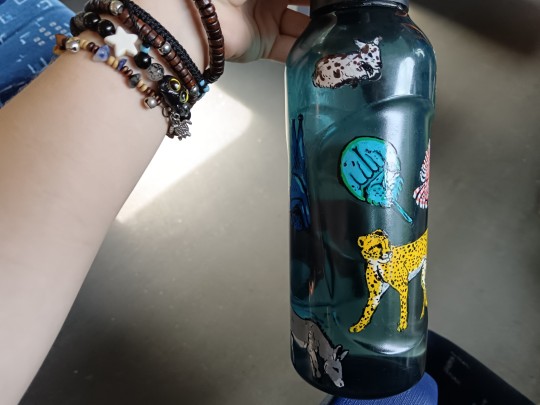
it's good to carry around water and food!! you don't even have to pay for decorative water bottles and food boxes, as you can draw on glass and plastic just fine with acrylic markers. just don't forget to paint transparent nail polish all over your drawing. in at least two layers. don't be lazy or laid-back. even posca comes off while washing the dishes. and you WANT TO save your reference pictures/final designs, as the case of emergency is likely. but after all, my water bottle is exactly fine after six months, with no accuring problem.
if your current best option to get stickers from is aliexpress or overpriced decor stores, search for local artists and shops on instagram and tiktok, as it may be their most efficent way of getting you to know them. if it seems like you have no chance, you may can still find a print shop with the option of printing on self-adhesive sheets (at least in hungary, those are pretty cheap). and if you want drawings to print out as stickers, you may use your own or –ONLY IF YOU GET PERMISSION– other artist's work. not only good for decorations for like, headphones, but for vandalism too. WAIT WAIT who said that. who said it. not me. no never
(in case that's also impossible, you can create stickers by printing out/drawing a picture, cover it up in transparent adhesive tape, and then put some two-sided adhesive tape on the white side of the pic. it won't be that durable, but it functions.)
if you want to bleach-paint clothing, get some plastic brushes!! any other brush dissolves. draw your design first with chalk!! never forget to put cardboard inside the clothing, and to wash the finished work in a washing machine before you'd put it on. prepare to be patient with the process. and it's not dangerous to touch 5%-9% household bleach, just wash your hands soon after.
if you want your crusty pants to last veryyy long, wax them. look up on youtube jeans waxing.
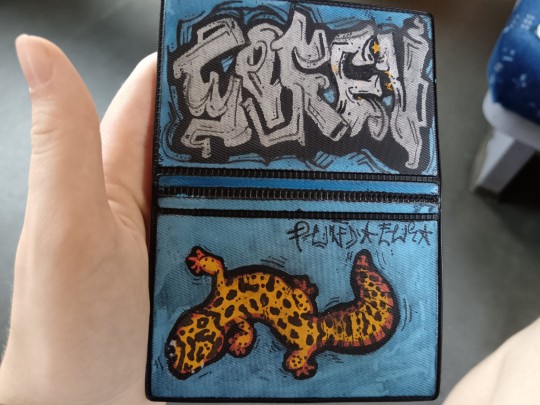
some more things i made for myself so to give you some inspiration: totebag with pockets, a small crystal holder cabinet, badges, and i decorated some t-shirts, button-ups, an id card case, phonecase, laptop.
theoretically speaking, there is nothing that an individual would be unable to learn how to make, when it comes to diy. you can't imagine how easy it is to bake bread at home. consuming-focused media makes people believe that it's hard to make anything. of course, everyone has to decide about their own priorities, i don't want to convince or change anyone in here. and if you have any questions, send an ask!! i hope i had been helpful.
#punk diy#tips#tutorial#clothes painting#do it yourself#bleaching#alternative clothing#soren's hoard of words#i hope you'll have fun with this#stay safe and drink water
219 notes
·
View notes
Text
trading bootlegs!!
third time's the charm so. is anyone interested in trading bootlegs? i have almost 600 musicals (and some plays too). if you want to trade dm me and i'll send my list
i am also selling my entire collection btw (individual shows too!!)
#musical bootlegs#slime tutorial#musical theatre#the outsiders#the great gatsby#beetlejuice#the book of mormon#cabaret#operation mincemeat#illinoise#suffs#sweeney todd#hadestown#newsies#merrily we roll along#water for elephants#into the woods#how to dance in ohio#in the heights#&juliet#wicked#lempicka#little shop of horrors#moulin rouge#next to normal#oklahoma musical#aaron tveit#jeremy jordan#the notebook#bonnie & clyde
221 notes
·
View notes
Text

Oh…when will summer arrive…
#mewtwo#pokemon#i keep looking for underwater tutorials on pinterest and ermmm#i found one#i really like it#ALSO I JUST REALLY MISS SUMMER AND I WANT IT BACK NEOW.#The Water Works
766 notes
·
View notes
Text
Na'vi Stripes Tutorial!
Tagging @eywaschild891, in case you were still interested in this! (note: this tutorial is about the digital process of adding the stripes, not actually designing the patterns)
I'm using MediBang Paint Pro, but this technique should work in any program that supports layers.

So you've drawn your Na'vi and now you want to add some stripes! First we'll have to start with a base color. Underneath your lineart layer, add two new layers: one as the main base color layer (for coloring hair, eyes, clothes, etc), and on top of that, a separate layer for the skin. Putting the skin on a separate layer is important because that way you'll be able to do the stripes as a clipping mask.
Your layer box should look something like this (you can ignore the gray background and extra folder, they're not important for this tutorial):

Now we can start on the base stripe layer. Create a new layer and set it as a clipping mask on your skin layer. This makes it so that you can't "color outside the lines", so to speak, while drawing the stripes. Then take a hard-edged brush and start drawing the patterns you want. I like to use MediBang's "mapping pen", which has a subtly textured edge, but the regular default Pen tool will work perfectly fine as well.


If you'd like, you can stop here and call this done: solid stripes are perfectly acceptable in a cartoonified stylization. However, if you look closely at Na'vi stripes on canon characters, you'll note that they're not completely solid: they have a subtle fading effect, where they're darker along the edges and a bit lighter in the middle, and in some places they fade out into the body. Sometimes it almost looks watercolor-ish.
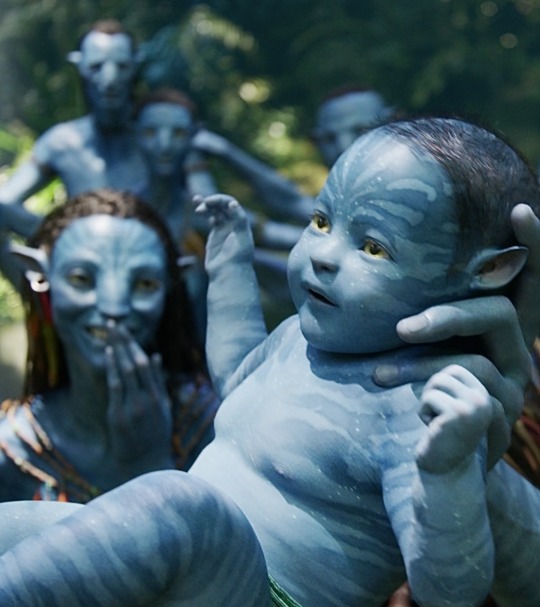
(I'm sure there are better examples out there than these but I'm not up to digging for them rn 😅)
So, let's continue! To fade our stripes, create another clipping mask layer above the main stripe layer. Use a brush with pressure-based opacity such as MediBang's "pencil" to loosely fill the insides of the stripes with the base skin color.


Once you have filled in all the stripes, use the gaussian blur filter to smooth out the fade. The filter doesn't need to be super strong—in fact, if you make it too strong you will loose the detail and the stripes will look solid again. With MediBang's version of the tool, I had it set to 7 (out of a max of 64) for this image, though of course the way it works may be different in other programs; mess around with different settings until you get something you like.
(sadly I do not have a screenshot of the blurred version because apparently the way my cintiq takes screenshots is dumb; it only captured the "gaussian blur" popup window instead of the whole screen. oh well. :P)
Now that we have the fade within the stripes, let's also make them fade into the rest of the body. The areas you'll want to do this with are the torso, inner arms, and inner/back of legs.
Create another clipping mask. Using the same pressure-opacity brush and base skin color as before, loosely block in where you want the stripes to fade into the body.

Once you've finished, gaussian blur the layer just like before. This one can be a little stronger than the inside-stripe one. For this image I had it set to 14.
Sometimes, the areas you block out will overlap with areas that shouldn't be faded—for example, here the fading from the back of the character's thigh is overlapping with her tail. To fix this, just erase it to remove the fade from where it shouldn't be (this is why we do this step on separate layers). Make sure you do this erasing after you've applied the gaussian blur.

Depending on the pose of your character, there may be places where one faded area overlaps with another. For example, in this drawing, the blocking for the arm fading overlaps with the blocking for the torso fading. Here it is with the torso fading turned off so you can see the overlap:

This makes it difficult to do both the arm and the torso on the same layer, because I won't be able to remove where the arm fading overlaps the torso fading without also removing the actual torso fading.
Luckily, there's a simple fix: just do the arm fading on a separate layer. Do this as many times with as many layers as you need to for your particular pose. Sometimes you'll only need one or two, like here; other times you'll need several.
BUT, fading the stripes is the last step! Regardless of how many layers you end up needing, once you're done, you're done! Now you have a Na'vi with nice natural-looking striping 😸

At this point you can go ahead and merge all the clipping masks into the main skin layer and even merge the skin layer with the other-base-colors layer if you're ready!
Hopefully that wasn't too hard to follow; feel free to ask if anything is confusing or unclear. Happy drawing! 😸
#avatar#avatar 2009#way of water#na'vi#na'vi oc#my art#tutorial#yes i draw every stripe individually yes it takes a long time 😭#anyways...#wanted to make this over the holidays but then i was sick the whole time and not up to it ;w; oh well#i suppose this is also technically a preview for a new ref sheet though 👀#i have made some changes to my sona's design since making her current ref so it was in need of an update#they're not *major* changes or anything; just some minor adjustments to outfits and stripe+sanhì patterns#but enough to want a new ref#so 👀
130 notes
·
View notes
Text

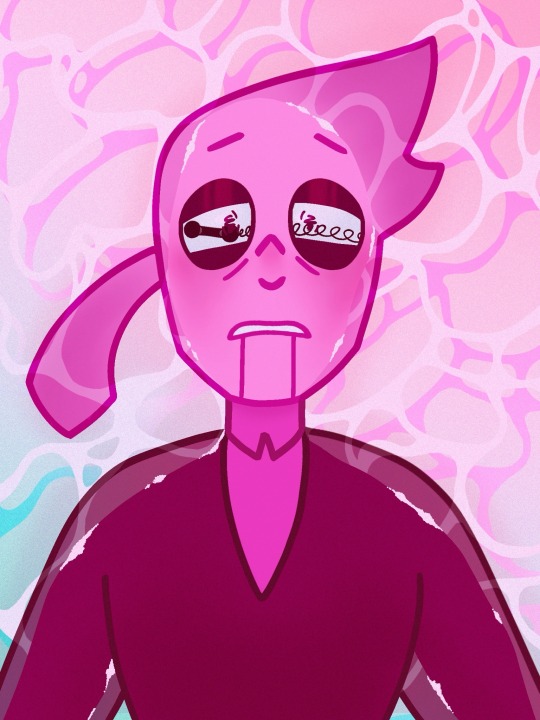
“Time is running out… make a move!”
Heh.. I guess you could say…. he’s drowning in his own tho- *I am forcibly removed from the stage and thrown into the Abyss*
I tried out a bunch of new things with this one… I’m really happy with how it turned out :)
Kinda wish it could flash to the beat though…
Clicky wicky (pink bastard) belongs to @brightgoat ! And there’s a veeeeery brief appearance of @e40536 ‘s Link (green) in there as well! Next art will be an actual browser history post… two browser doodles in a month (hopefully) guys… I’m on a roll!!!
Individual frames under the cut for your viewing pleasure (and because I had to kill the gif quality a little to make it fit in the post)


#deltarune#addisons#bush art#pink addison#green addison#spamton#deltarune addisons#fun fact! I drafted this and tumblr got rid of it to spite me#whatever#Anyways… Had that song on loop while following a tutorial for the water… very relaxing very fun#I was originally going to give click more of a dead-eyed stare but I kinda passed out and woke up to this instead so yeah#can you tell who my favorite addison is. can you tell. that I love everything about him. cAN YOU TELL#scrimblo…. I’d write essays about how normal I am about him#ANYWAYS time to. go stare at this some more#back into the moss hole I go :)
270 notes
·
View notes
Text

some custom phone cases i designed for myself lol
#digital art#puppyaday#the goal is to have one to match whatever outfit i wear. next up is grayscale and its gonna be space themed lol#also thank u catmask for ur water tutorial i cant draw water for shit!!
47 notes
·
View notes
Text
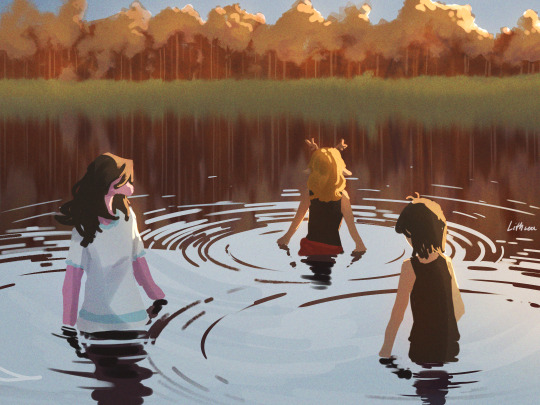
Two Fathers and their son

A recreation of this piece
#squirrel and hedgehog#bamsaegi#juldarami#geumsaegi#finished that redraw of the older sketch#Father’s Day#flower hill#This is all supposed to tie in to that other drawing I have of the hill and flowers#Reflection#shadows#ngl the older one might be cuter#Bit k had a lot of fun with the tails#sah#SaH#I figure since they are near water Geumsaegi has tucked in his pant legs#My SO actually helped with the water ripples because I could not understand the tutorial for water ripples lol#Our brushes were different in that regard#fishing#squirrels#flowers#The tree line is nice though
25 notes
·
View notes