
checkpnt-blog
Tech Points by Checkpoint
official blog of Checkpoint Services Inc.
16 posts
Don't wanna be here? Send us removal request.
Last Seen Blogs

juliakasab
Spy-ing life

junkyard-boy
My Junkyard

cucumber-of-doom
cucumber of doom

fluffyfatties
Lovely Fluffy BBW Booty & Shape is What I Live 4😍

competitively-yours
competitively-yours
Photo

All Macs on SALE for the rest of the month! Limited Time Sale ends on June 30th!
Great gift for Graduates and Dads!
0 notes
Photo

Win a free iPad! Like us on Facebook and fill out a quick survey and your automatically entered to win!
First 500 entrants only! So hurry up!
Survey link: http://www.surveymonkey.com/s/WJCRGBD
3 notes
·
View notes
Photo

Checkpoint Services • Super Spring Special!
If you buy any new Mac during this two week sale you get a FREE 8GB JUMP DRIVE! If you are one of the 1st ten customers you also get FREE HEADPHONES! We have Skullcandy and Maxell Headphones your choice of what's left! So hurry in!
The Mac Laptops and Desktops are on a great sale price! You really don't want to miss out!
We also have AppleCare, External Hard Drives and Mac Memory Upgrade for very very low prices!
#mac#apple#apple service#deals#sales#memory#mac memory#imac#macbook pro#macbook air#checkpnt#news#skullcandy#headphones#free
0 notes
Text
Quick Tip #3 • Customize System Preferences
• Customize System Preferences •
I got this tip from the awesome team over at Cult of Mac so I thought I would share it with you. I can't believe I never knew you could do this but I am glad I know kow to now.
This is a very easy tip just takes a few steps.
1. Launch System Preferences so you are looking at the a similar screen as the one below:

2. Click on the View menu, from the Top Menu Bar, and select Customize. You should then see check marks appear next to the icons, like you can see in the above screenshot. This allows you to uncheck the ones you don't want or need there. Once you are finished. Click Done to save your changes and those icons disappear.

3. That's it your done. Told you it was easy.
• If you want to find them again and add them back, simply select Customize again from the View menu and the now hidden icons will show up with a checkbox allowing you to select them if you choose so they can reappear in the System Preferences window.
• If you happen to not want the icons organized by Category then you can select Alphabetically and watch the icons shift around. Its actually a more minimal view.
Well that's it for Quick Tip #3, if you have a better hint about this or we missed something make sure to let us know at [email protected].
Thanks for checking out Tech Points by Checkpoint - Quick Tip #3
1 note
·
View note
Text
Double-Tap To Download ‘Waiting’ iOS Apps Right Away

Here is a quick tip I was not even aware of, so if you're like me this can be quite useful when downloading a lot of updates on your iOS Device. Thanks to Cult of Mac for the tip!
From Cult of Mac:
Yesterday, we showed you how to fix apps that get stuck “waiting” as you downloaded everything to your newly-restored iPad. That’s fine and all, but what if you really, really need to check your RSS reader of choice to read the latest Cult of Mac stories? With this incredibly simple tip, you can just tell the iPad to download that app right away.
To make your chosen app jump the line, just double tap it. That’s it. This simple gesture tells iOS that this app should be downloaded next. If you’re on a fast enough connection, it will seem to install right away.
I wish I’d known this last Thursday when I bought an iPod Touch and mistakenly restored it from an iCloud backup of my iPad and it started downloading almost 20GB worth of apps on the Apple Store’s Wi-Fi. Now all we need is a tip to just abort all of those downloads and start over. As it was I just panicked, reset the thing and started over.
[Via iPad Today]
0 notes
Text
Quick Tip #2 • Change Audio Settings Quickly from the Menubar
• Change Audio Settings Quickly from the Menubar •
If your someone who happens to use external speakers (USB speakers) or maybe even an external mic, then you're all to familiar with having to go to System Preferences to make changes to your audio or input settings. Well who wants to do that every time! Todays Tech Point will help you to easily change settings & have your audio blasting through you fancy new speakers in no time!
This tip is surely not obvious, but extremely simple! One of those hidden little tricks.
When you typically click on the sound icon in the menubar you get the volume slider like this:
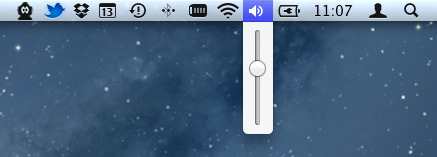
Now try holding the Option key down and then click on the same volume icon, you'll get the Input & Output options for your Mac. Like this:

You can now easily select the Input or Output option your looking for (I don't have anything extra plugged in right now so I don't see many options). So go ahead make the change you were looking for an your ready to go!
If you have any questions or need more instruction please feel free to let us know!
Thanks for checking out Tech Points by Checkpoint - Quick Tip #1
1 note
·
View note
Photo

March Memory Upgrade Special!
5 notes
·
View notes
Photo

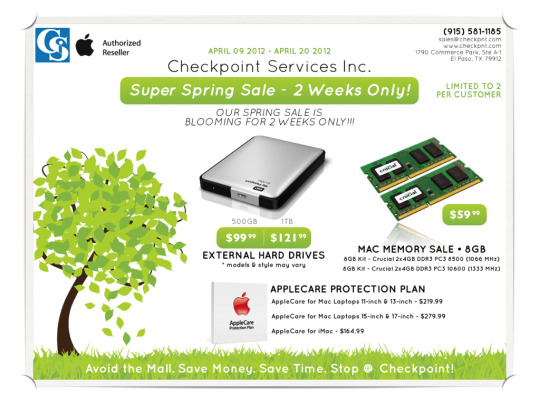
To all our followers out there we have two service specials going on right now, one for external hard drives and another for upgrading your memory. The next two posts will have the ads for those, so make sure to stop in or give us a call if you are interested. Here are the highlights for the ads:
• External Hard Drives on SALE - 500GB for $99.99 and 1TB for $121.99. Great prices and as an added bonus if you purchase one of these drives for only $15 more we will set up Time Machine on your Mac & External Drive.
• Memory on SALE - With the purchase of qualifying memory will install and verify your memory for only $15. Memory prices vary but for some 2009, 2010 and 2011 MacBook Pro, iMac and Mac mini systems upgrading your memory to 8GB (2x4GB) is only $59.99. So make sure to drop by or call in!
Both of these deals are only good through March 31st 2012 so hurry in and take advantage of the extra savings!
Avoid the Mall. Save Money. Save Time. Stop @ Checkpoint!
#apple#service#mac#apple service#hard drive#mac memory#memory#ram#el paso#local#checkpoint#news#500GB#1TB
7 notes
·
View notes
Photo

Apple has confirmed a Media Event on March 7th. Any one have a guess to what might be announced?
My guess is definiltey an upgraded or completely new iPad and possibly some announcement relating to a new AppleTV.
What do you think?
4 notes
·
View notes
Text
Q & A #1 • How to take a Screen Shot?
How do you take a screenshot or screen capture on a Mac?
Well there are actually a few ways you can do this and all are executed through a couple of key strokes.
Method 1 - Full Screen
Simply press these keys: Shift + Command + 3
• You should hear a camera shutter sound and a file named Screen Shot with the date and time should appear on your desktop. It will look similar to this:
Method 2 - Selection
Press these keys: Shift + Command + 4
• You should see cross hairs replace your mouse cursor, then you will want to click and drag to highlight what you want to capture and once you release the mouse, you will hear the camera shutter sound and the image will be automatically saved to the desktop.
Selected area.

Saved image.
Method 3 - Application Window Selection
Press these keys: Shift + Command + 4 + Spacebar
• Your cursor will then be replaced with a camera icon, and as your move the cursor over individual windows it will be highlighted blue. Once you are over the window you want to screen capture click and again your image will be saved to the desktop. The image captured will just be an image of the selected window, see the images below.
Highlighted window.

Saved image of the application window only.
Thats it. Pretty simple.
Pro Tip: If you add the control key to any of the above keystrokes the image will be saved to your clipboard, instead of the desktop so you can paste the screen shot into any application you want. Keystroke example: Control + Shift + Command + 4
You can also use the built in application called Grab for more screen capture options and tools. If you want extra tips on this let us know!
Thanks for checking out our 1st Q & A and keep checking back for more, if you any questions make sure send them our way!
3 notes
·
View notes
Photo

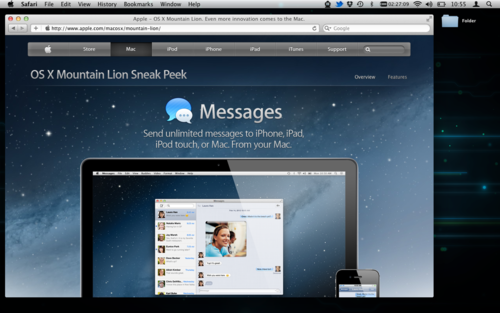
Huge announcement today! Apple introduces Mountain Lion. Bringing a ton of great iOS features over to the Mac. As an iOS user this is going to be awesome, I assume most iOS users are gonna love it. Make sure to follow the link to check out more. Love it? Hate it? Let us know what you think.
Also if your Mac is not running Lion and you need some help getting it ready, make sure to let us know!
• http://www.apple.com/macosx/mountain-lion/ •
3 notes
·
View notes
Photo

Valentine's Day Printer Sale! THIS WEEK ONLY! Bring this coupon into our store and you can purchase a Brand New All-In-One HP or Canon Printer for only $25, that is more than $50 off the original price. There is a limited supply so make sure to stop in and tell anyone you know too!
30 notes
·
View notes
Photo

For those of you looking for some fresh & new wallpapers, make sure to take a look at solidbase.tumblr.com. They feature some great wallpapers from a lot of great designers. If your looking for something a little different though, let us know. We have a good stockpile of wallpapers. We might post a wallpaper round up one of these days.
5 notes
·
View notes
Text
Quick Tip #1 • Custom Icons for your Folders
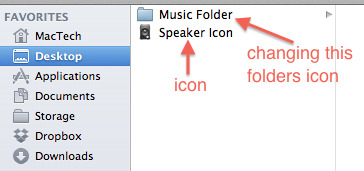
• Change your folders icon •
If your someone who really likes to keep files on your system very organized, and you really like visual indicators so you know whats in all of those folders, than changing your folders icon can be a big help.
For example, say you have a folder than contains only custom music tracks you created using GarageBand. So why not give that folder an icon that some how relates to music.
Like this icon below:

There are several ways to do this but one quick and easy way to do is to simply follow these steps.
1. Locate the icon that you want to use.
2. Locate the folder that will be getting the new icon.
3. Right Click (Ctrl + Click) on both the folder and the icon and select Get Info. You can also select the folder or icon and press Cmd+I, and that will do the same thing.

4. You then should have the same view as you see here:

5. Next click on the icon so its highlighted blue, and and press Cmd+C to copy the icon.

6. Finally select the folder's icon so it's now highlighted blue, and press Cmd+V.
7. Your folder should now have a custom icon!

Final notes:
• You can pretty much change any folder's or application's icon using these steps. Applications may default back to their original icon once you apply an update though, so you will have to follow these steps again.
• I would suggest testing this out on a new blank folder just to make sure it works for you.
If you have any questions or need more instruction please feel free to let us know!
- - -
Go to Iconfactory to find lots of great and free icons!
If you really like customizing your icons you might want to check out CandyBar, a great app that automates the process a little more.
If you have a better way to do this or any suggestions we would love to hear!
- - -
Thanks for checking out Tech Points by Checkpoint - Quick Tip #1
12 notes
·
View notes
Link
Chrome for Android devices ... finally. What is the best browser out there for any platform? My vote is Safari and Chrome very close race between them.
3 notes
·
View notes
Photo
Checkpoint's new Q & A section coming soon! If you have any questions just let us know!
(hint: click the ? mark at the top right of the page to ask questions)
You can also send us questions on Facebook & Twitter @Checkpnt
5 notes
·
View notes