
Statistics
We looked inside some of the posts by classic2magic and here's what we found interesting.
Average Info
Notes Per Post
2
Likes Per Post
2
Reblog Per Post
0
Reply Per Post
0
Time Between Posts
54 minutes
Number of Posts By Type
Text
2
Last Seen Tumblr Blogs


Fun Fact
Tumblr has been banned in Indonesia for providing people with access to pornographic content.
Text
Classic2Magic Review
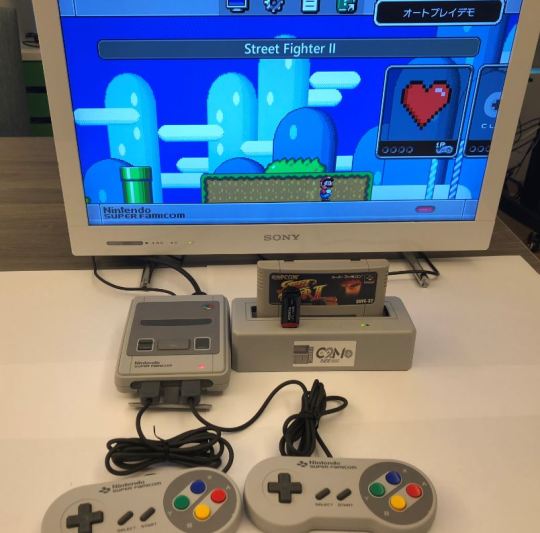
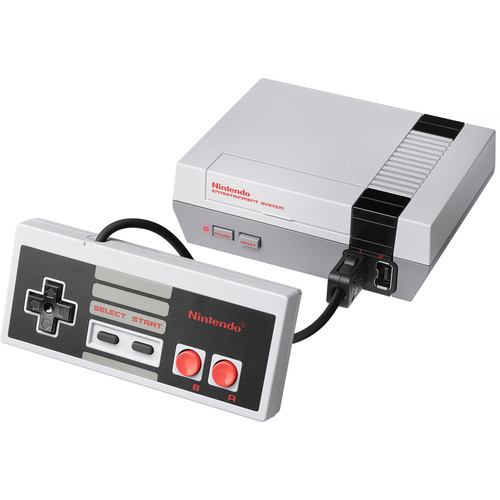
Are you truly playing with full power or is your SNES / NES Classic Version operating without a correct cartridge slot? Stress not, the C2M company has generated a remedy for you that intends to please those who intend to easily add even more functions to their console.
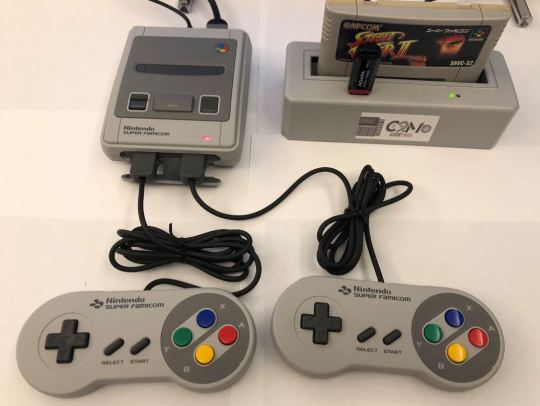
This is the Classic 2 Magic by team C2M that I purchased from by www.classic2magic.net for myself and GameDude to review. It is a full 16-bit SNES region-free cartridge slot which is meant to be compatible with all regions of SNES as well as Super Famicom game cartridges. This useful cumbersome little gadget connects directly right into the SNES Classic Edition or the NES Classic Version of your picking as well as sustains a vast array of classic 16-bit console game. It is meant to be user-friendly as well as foolproof. We will certainly place it through its paces in this testimonial.
Within this main review, the installation and also fundamental operations of this tool will certainly be covered in addition to a small amount of technical details to obtain you going. A few cartridges will certainly be evaluated along with some mimicked ROMs from numerous systems that it supports out of the package (well, nearly out of the package. You download all of its software from the main C2M product site, which lately just released v1.3 that improves compatibility!).
Let us initially have a look at the bundle and also components of the Classic 2 Magic:

This is the box. Though this thinner than the actual box we received.
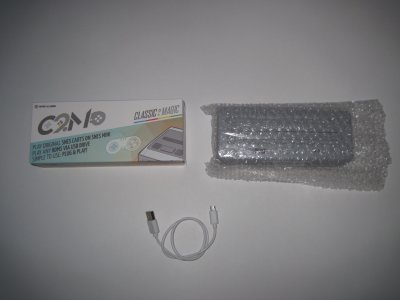
You get the classic2magic itself as well as a USB Cable. It does not come with a power supply.
Now let’s move on to how we set this thing up. It’s actually easy.. almost as easy as just inserting your favorite SNES Cartridge to play.
Plug in the device as follows:
Plug the included white USB A to the back of the Classic 2 Magic itself.
Next, you’ll need to plug the micro USB Side of the cable (the white cable that came with it) into the back of the SNES / NES Classic Edition console.
You’ll need to use your SNES Classic HDMI cable that came included for this next step. Plug the HDMI cable from the SNES / NES Classic Edition into the back of the console and from there to the back of your TV set or computer monitor.
Before you go ahead and turn on the SNES Classic (which will auto boot the Classic 2 Magic) you’ll want to prepare the USB Stick you will be using with the C2M.
You’ll want to make sure that you setup the USB Stick properly. To do so, just follow the steps below:
Format the USB memory stick as FAT32 file system.
Download C2M First Time Setup Files V1.1 and C2M USB Files V1.3 from www.classic2magic.net
De-compress both of these files to the root of the USB memory stick that was formatted using the FAT32 file system. You will need WinZip, Winrar or 7-Zip to de-compress the archive.
The C2M team recommends doing a “safe eject” on the USB memory stick from the PC. I know that “safe eject” is an automatic feature of Microsoft Windows since at least Windows 7, so I just wait until the files were copied completely to the USB memory stick and unplug it like I normally would. You can feel free to do the “safe eject” on it if you wish from your start menu bar.
There are 2 methods of using the Classic 2 Magic. One method is for those of you who have already modified your Snes Classic console with the use of hackchi and another install method for unmodified Snes Classic systems. Keep reading to find out how it works.
Software first-time installation process for consoles that were not previously modded with hackchi:
Put the USB memory stick into USB slot on the Classic 2 Magic. You will find the slot on the top of the Classic 2 Magic itself, by the cartridge port.
Now you’ll want to plug in the micro USB power to the back of the Classic 2 Magic. Note that a power supply of at least 1 amp at 5 volts DC is recommended, such as the one the SNES / NES Classic Edition shipped with. I have found that the power coming out of the USB 3.0 ports on my desktop were sufficient so I just used one of those but if you won’t be using it with a monitor then you will need to be able to be able to power the system, so you will want to get another power supply, they can be found online for just a couple of dollars.
Make sure to wait a couple of seconds for the green LED to slowly flash on and off. This will let you know that it is ready to go into installation mode.
Hold the Reset button on your console and power on the console, keeping the Reset button pressed for about 5 seconds and release it.
Be patient because it can take many seconds for the Classic 2 Magic to start installing. When it is initially stalling, the green LED light will flash two times then off and two times off and on again and then proceed to flashing three times, then four. During this part of the installation phase, there will be no video output through the HDMI port on the console.
Eventually you will see the Classic 2 Magic boot up screen and some installation text. More patience is required, as it can take up to five minutes to complete installation.
After installation is complete, you will see a new different menu with a few icons on your screen.
Once you have patiently done all of the above (patience is key here, it took me a few tries to realize that I needed to wait! So if you are stuck anywhere, that more than likely means that you did not wait long enough for the LED flashing routine to start the installation process), you are now able to use the full features of this product including but not limited to usage of the cartridge slot. The other features primarily are included emulators from the packages installed as well as the capability to run a random game or the games that were originally included on the console.
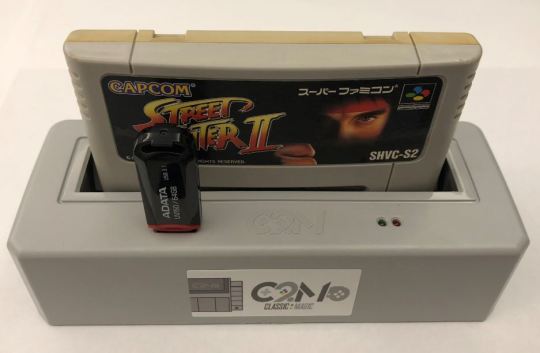
Next, let’s take a look at running a physical cartridge on this device. To run a retail game cartridge, do the following:
Unplug the power from the Classic 2 Magic device.
Plug a cartridge into its cartridge slot.
Plug the power back in to the Classic 2 Magic device.
Turn on the SNES / NES Classic Edition console.
Wait about 12 seconds for the retail game cartridge data to synchronize with the Classic 2 Magic.
You should see an icon to run the game cartridge.
Select run game cartridge.
Your game should now start fine.
Packed in emulators. Retroarch 1.7.3 with cores. In this part of the review, I will showcase emulators packed in from C2M’s website for the Classic 2 Magic as well as a few games running on each emulator core under Retroarch. Simply drag and drop uncompressed console ROMs and zipped arcade ROMS to the \C2M\roms\ folder on your USB memory stick and then plug it into the Classic 2 Magic and power on the SNES / NES Classic Edition console. The Classic 2 Magic will automatically import (nearly) all of your ROMs into the appropriate directory structure. This process will be displayed on a black background when starting the console with new ROMs for the first time of importing new files.
Watch for our next update when we go into the emulators in full and review each emulator for the classic 2 magic one by one.
0 notes
Text
Our SNES and NES Classic Blog
Hey there and welcome to our SNES and NES Classic blog on Tumblr. We are just a couple of guys that love gaming and love retro gaming the most. We’re also taken by the amazing classic systems that have come out.
So who are “we”. Well, I’m James (RetroKid) and my buddy is Rob (RetroGamerX9). We are going to be doing reviews of classic games, classic systems and focus on the hacks and upgrades you can do to your NES Classic and SNES / Super NES Classic systems. We will also be focusing on the new Playstation Classic.
When the NES Classic came out we jumped at the chance to have a mini NES classic system. My NES was failing and I was looking at getting another one anyway, so this was a nice alternative. Sure, I didn’t like that it didn’t have all of my games but it let me put a mini NES under my TV and play some of the best games.
So it was only natural that once the SNES Classic was announced we couldn’t wait to get out hands on a couple of them to add to the NES Classics we already had.
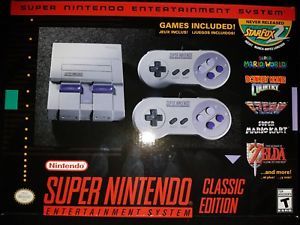
And we were not disappointed. It had some of our favorite games built right in and the never released Starfox 2 was an amazing bonus to have. I know reviews are mixed on that game but I loved the first one so having this second one to play was amazing.
But what I started feeling was that the game list just wasn’t enough. Even with the 2 systems, there were loads of games we really wanted to play but we were limited to just what was installed.
Not to mention we had about 112 Super NES games between the two of us that we had been collecting for the last couple of years and wanted to play them on the Snes Mini. Unfortunately, it doesn’t have a cartridge slot and it won’t work with cartridges.
And this was a bummer but was remedied by a cool add-on called the Classic2Magic or C2M for short. This accessory added the ability to actually plug in and play real Super NES Cartridges on the Snes Mini, making it possible to play every single one of our collected games.
More than just an add-on to allow playing real cartridges it also allowed us to backup each and every one of our cartridges to a USB drive that can be plugged in to the Classic2Magic.
So we decided we’d setup this blog to talk about and review the Classic2Magic so that other Snes mini owners can find out what this amazing add-on does and how it works.
So keep checking back for our full review of the Classic 2 Magic.
#snes mini#retro games#snes#super nes#nes classic#video games#classic gaming#super nintendo entertainment system#nintendo entertainment system
2 notes
·
View notes