
Don't wanna be here? Send us removal request.
Statistics
We looked inside some of the posts by contactform7toanyapi and here's what we found interesting.
Average Info
Notes Per Post
0
Likes Per Post
0
Reblog Per Post
0
Reply Per Post
0
Time Between Posts
23 days
Number of Posts By Type
Text
17
Last Seen Tumblr Blogs


Fun Fact
Women make up for the other 50% of Tumblr’s audience.
Text
Stop Losing Leads: How ContactFormToAPI Ensures Instant API Sync
In today’s fast-paced digital world, every second counts—especially when it comes to capturing and managing leads. Businesses invest heavily in marketing campaigns to drive traffic to their websites, but often overlook a critical step in the sales funnel: ensuring form submissions are instantly routed to CRMs, APIs, and automation tools.
If you’re relying on manual methods, email notifications, or delayed workflows, you may already be losing valuable leads. That’s where ContactFormToAPI comes in—a powerful solution to instantly sync your contact form submissions with any REST API or CRM.
In this blog, we’ll explore the importance of instant lead capture, the dangers of lead loss, and how ContactFormToAPI can automate and secure your data flow.
The Hidden Problem: Delayed or Lost Leads
Imagine a potential customer filling out your website’s contact form. They’re interested, ready to buy or inquire, and waiting for a response. But if that form submission isn’t sent to your sales CRM—or worse, gets lost in email—you might never hear from them again.
Common causes of lead loss include:
Forms that only send email notifications
Delayed integrations with third-party tools
Inconsistent data syncing between platforms
Lack of API connectivity with your CRM or automation stack
Each of these issues creates a bottleneck in your lead generation funnel and ultimately costs you business.
Why Instant API Sync Matters
Speed is the key to conversion. According to research, contacting a lead within the first 5 minutes increases conversion chances by up to 9 times. But this only works if your form data reaches your tools instantly.
Instant API sync enables:
Real-time lead capture and nurturing
Immediate follow-ups via email or CRM triggers
Accurate data logging across your stack
Better automation and analytics
That’s why syncing your contact form data with your backend systems through APIs is essential for any modern business.
Meet ContactFormToAPI: Your Form Automation Ally
ContactFormToAPI is a no-code tool that bridges your website forms and any REST API. Whether you use WordPress (WPForms, Contact Form 7), Webflow, Wix, or a custom site, this tool enables you to send data to your CRM, Google Sheets, email marketing tools, or any REST API.🚀 Key Features:
Instant form-to-API sync
No code setup for most platforms
Support for GET, POST, PUT methods
Custom headers, tokens, and authentication
Zapier and Pabbly Webhook compatibility
Works with WPForms, Elementor, CF7, and more
With ContactFormToAPI, there’s no need to worry about missed leads or complex development work. You configure your endpoint, map your form fields, and the tool handles the rest—instantly.
Real-World Use Cases
Let’s break down how businesses across industries use ContactFormToAPI to streamline their operations:
1. Marketing Agencies
Connect contact forms to HubSpot, Mailchimp, or ActiveCampaign instantly to launch follow-up campaigns.
2. E-commerce Stores
Send contact or inquiry form data directly to fulfillment or order management APIs.
3. Healthcare Clinics
Automatically sync appointment request forms to EHR systems via secure API calls.
4. B2B Service Providers
Push lead data into Salesforce or Zoho CRM for real-time lead assignment and nurturing.
5. Educational Institutions
Route student inquiries to Google Sheets, CRM, or email workflows without delay.
How It Works
Step 1: Choose Your Form
Whether it’s WPForms, Contact Form 7, Elementor, or any HTML form, you can use ContactFormToAPI with ease.
Step 2: Configure API Endpoint
Add your destination API endpoint URL, method (POST/GET), and required headers or tokens.
Step 3: Map Your Fields
Use the form field names and map them to your API’s field structure. You can also add static data or use smart tags.
Step 4: Test and Go Live
Use the built-in testing tool to validate the integration. Once confirmed, every form submission will be sent to your API instantly.
Security and Reliability You Can Trust
ContactFormToAPI ensures data is transmitted securely using HTTPS, with support for authentication headers, bearer tokens, and custom headers. You can also:
View logs of API calls
Retry failed requests
Get email notifications on integration errors
This reliability helps ensure that no lead is lost due to technical glitches.
⏱ Save Time and Cut Manual Effort
If your current workflow involves manually exporting form data or checking inboxes, ContactFormToAPI can save you hours every week. With automation in place:
Sales teams can respond faster
Marketers can trigger nurturing emails automatically
Business owners can track performance with confidence
Integrates With Everything
The tool is designed to be platform-agnostic, meaning it works with:
Any REST API (Zapier, Pabbly, Integromat, etc.)
Any CMS (WordPress, Webflow, Wix, Squarespace)
Any CRM (HubSpot, Salesforce, Zoho, etc.)
Google Sheets, Airtable, Notion, or email tools
This flexibility makes ContactFormToAPI ideal for startups, agencies, and enterprise teams alike.
Bonus: Tips for Better Lead Capture
Even with instant API sync, it’s important to ensure your lead capture strategy is optimized. Here are a few tips:
Keep your form simple (3–5 fields max)
Use smart field validation
Add form analytics to track conversion rates
Offer an instant confirmation message or email
Regularly test your form-to-API setup
Final Thoughts: Stop the Leak, Start Growing
Lead generation isn’t just about getting people to your website—it’s about capturing them efficiently and following up without delay. If you’re still relying on email notifications or manual processing, you’re likely leaving money on the table.
ContactFormToAPI offers a fast, reliable, and code-free way to ensure your contact forms talk directly to your tools, whether it’s a CRM, Google Sheet, or custom backend API.
Ready to Stop Losing Leads?
Visit ContactFormToAPI.com to set up your form integration in minutes. Try the free version or explore premium features for more complex workflows.
0 notes
Text
Simplify Data Integration: WPForms to Any API Made Easy
In today’s digital ecosystem, capturing and managing user data efficiently is more crucial than ever. Whether you're a marketer looking to automate lead management or a developer aiming to streamline workflows, integrating your contact forms with third-party applications is a must. WPForms, one of WordPress's most popular form builders, offers powerful features, and when paired with the right plugin, it can become a robust data automation tool. One such tool is the "Connect WPForm to Any API" plugin—a no-code solution that simplifies form-to-API integration.
This blog will walk you through why integrating WPForms with external APIs matters, how the plugin works, and how to set it up effectively.
Why WPForms to API Integration Matters
Modern businesses rely on a stack of tools—CRMs, email marketing platforms, payment gateways, helpdesk software, and more. Data captured via forms often needs to flow into these platforms instantly. Manual data entry is inefficient, error-prone, and counterproductive in an era of automation.
Here are a few real-world examples:
Marketing: Send lead data from a landing page to Mailchimp or HubSpot.
Sales: Route contact requests directly to Salesforce.
Support: Create helpdesk tickets from contact form submissions.
Custom Workflows: Trigger webhook-based workflows in tools like Zapier or Make.
Integrating WPForms with any REST API helps eliminate bottlenecks, ensuring data flows automatically and securely.
Introducing the "Connect WPForm to Any API" Plugin
The "Connect WPForm to Any API" plugin is a powerful and user-friendly solution for WordPress users who want to connect WPForms with virtually any third-party service. Whether you want to push form data to a CRM, an internal database, or a marketing tool, this plugin makes the process seamless.
Key Features:
No-Code Interface: Easily configure API connections without writing a single line of code.
Custom Headers: Add authentication or custom headers like Bearer tokens or API keys.
Flexible Payload: Customize the JSON structure and map form fields accordingly.
Support for REST APIs: Works with most RESTful services, including Zapier, Mailchimp, Salesforce, and more.
Multiple API Actions: Supports triggering multiple APIs from a single form submission.
Advanced Debugging: Helps identify and fix integration issues quickly.
How It Works: A Step-by-Step Guide
Step 1: Install and Activate the Plugin
Navigate to your WordPress dashboard, go to Plugins > Add New, and search for "Connect WPForm to Any API." Install and activate it.
Step 2: Create or Edit a WPForm
Using WPForms, either create a new form or edit an existing one. Make sure all the necessary fields (name, email, message, etc.) are included.
Step 3: Configure API Integration
Once your form is ready, go to the form settings tab and click on "Send to API". Here, you’ll configure the following:
API Endpoint URL: The destination where form data will be sent.
HTTP Method: Typically POST, but GET, PUT, and DELETE are also supported.
Headers: Include any required authentication (e.g., Authorization: Bearer token123).
Payload Structure: Map WPForm fields to JSON keys. Use smart tags to dynamically populate field values.
Example JSON Payload:
{
"name": "{field_id="1"}",
"email": "{field_id="2"}",
"message": "{field_id="3"}"
}
Step 4: Test Your Integration
Submit a test entry through the WPForm. Use the plugin’s debug console to verify if the API call was successful. If errors occur, the debug logs will provide helpful insights.
Common Use Cases
1. Connect to a CRM (e.g., Salesforce, HubSpot)
Automatically add leads to your CRM when someone submits a contact or signup form.
2. Trigger Webhooks (e.g., Zapier, Make)
Send WPForm data to automation platforms and connect with thousands of apps.
3. Create Support Tickets
Forward customer queries to helpdesk software like Freshdesk or Zendesk.
4. Store Data in External Databases
Push form submissions to custom back-end systems for advanced reporting or workflows.
Tips for Effective Integration
Use Smart Tags: WPForms offers dynamic tags (like {user_ip} or {date}) for greater flexibility.
Secure Your API: Always use HTTPS endpoints and secure tokens or keys.
Handle Errors Gracefully: Set up fallback actions or notifications if the API fails.
Test Thoroughly: Before going live, test with different inputs to ensure robustness.
SEO Benefits of Using API-Integrated Forms
From an SEO perspective, a better user experience translates to improved engagement metrics. Forms that work smoothly and provide instant feedback are more likely to be completed, thus reducing bounce rates and increasing conversions.
Additionally, API-integrated forms enable faster lead response times, which can improve your sales funnel performance and lead nurturing capabilities.
Conclusion
Integrating WPForms with external APIs doesn’t have to be a daunting task. With the "Connect WPForm to Any API" plugin, you can simplify your data workflows, eliminate manual processes, and connect your WordPress site to the broader digital ecosystem effortlessly.
Whether you're a solo entrepreneur, a marketer, or a developer, this plugin empowers you to automate, streamline, and scale your business processes. Say goodbye to copy-paste data entry and hello to a fully automated form pipeline.
Ready to simplify data integration on your WordPress site?Install the plugin now and start automating today!
0 notes
Text
How to Use Contact Form to Any API to Automate Your Lead Capture Process
In the modern digital landscape, capturing and managing leads efficiently is key to business growth. Whether you’re using a WordPress site, Webflow, or any custom-built landing page, the first interaction often begins with a simple contact form. But what happens after a visitor hits submit?
If your answer involves checking emails or manually copying data to your CRM or database — it’s time for an upgrade.
With Contact Form to Any API, you can instantly send form submissions to any endpoint — CRMs, Slack, Notion, Airtable, Google Sheets, or custom-built APIs — without writing any code. This blog will walk you through exactly how to automate your lead capture process with Contact Form to Any API, save time, and avoid costly lead leaks.
🚀 Why Automate Your Lead Capture?
Before diving into the how-to, let’s talk about the why.
Manual lead collection:
Increases the risk of human error
Delays follow-ups (hurting conversions)
Becomes unsustainable at scale
Automating your form-to-API workflow means:
Instant data delivery to your CRM or app
No missed leads, ever
Centralized tracking, so your marketing and sales teams can work faster
🔧 What Is Contact Form to Any API?
Contact Form to Any API is a lightweight, code-free solution that acts as a bridge between your website's contact form and any external REST API.
It works by:
Capturing the form submission
Mapping fields to your target API’s structure
Sending the data in real-time using POST/PUT requests
Optionally adding headers (for authentication or custom needs)
Unlike complex platforms like Zapier or Make, it’s built for developers and marketers who just need to send data — fast, simply, and affordably.
✅ Key Benefits
No code needed – works with WordPress, Webflow, HTML forms, and more
Supports any REST API – including custom ones
Customizable payloads – full control over JSON structure
Flexible headers & auth – works with Bearer tokens, API keys, etc.
Lightweight and fast – no bloat, no middlemen
📝 Step-by-Step Guide: Automating Your Lead Capture
Let’s walk through how to set up your automation using Contact Form to Any API.
Step 1: Create Your API Endpoint
Decide where your leads should go. This could be:
A CRM like HubSpot, Salesforce, or Zoho
Google Sheets via Apps Script
A Notion database
Your own backend or marketing automation platform
Each of these tools provides a public API endpoint to accept data.
Make sure you understand the required format and authorization method.
Step 2: Set Up Contact Form to Any API
Go to ContactFormToAPI.com and sign up.
Create a new endpoint integration.
Paste the API endpoint you want to send data to.
Choose the HTTP method (usually POST).
Add any required headers (Authorization: Bearer, Content-Type: application/json).
Define the request body using field variables from your form.
Example JSON Body:
json
CopyEdit
{
"name": "{{name}}",
"email": "{{email}}",
"message": "{{message}}"
}
The {{name}}, {{email}}, etc., are dynamic tags from your form fields.
Step 3: Connect Your Frontend Form
Now you need to make sure your contact form sends data to the Contact Form to Any API endpoint.
✅ For HTML Forms:
Use the provided action URL from the dashboard:
html
CopyEdit
<form action="https://contactformtoapi.com/your-endpoint-url" method="POST">
<input name="name" required>
<input name="email" type="email" required>
<textarea name="message"></textarea>
<button type="submit">Send</button>
</form>
✅ For WordPress:
Use any form plugin (Contact Form 7, WPForms, Gravity Forms) and set the action to Contact Form to Any API using a webhook or redirect logic.
✅ For Webflow:
Use the built-in Webflow form and update the form action URL in the embed code or via HTML override.
Step 4: Test and Verify the Integration
Submit a test form to ensure:
Data is being captured and sent
The API endpoint is responding successfully (e.g., 200 OK)
The fields are mapped correctly
You receive leads instantly in your destination app
You can use browser tools (Network tab) or your Contact Form to Any API dashboard logs to troubleshoot issues.
Step 5: Add Conditional Logic or Field Formatting (Optional)
Contact Form to Any API allows you to:
Add custom rules (e.g., only send data if email contains @company.com)
Format fields (e.g., convert names to Title Case)
Set default values for missing fields
These options help you clean and qualify data before it hits your backend.
🔄 Bonus: Multi-Destination Lead Sync
Need to send leads to multiple destinations?
For example:
CRM
Slack notification
Google Sheet backup
Contact Form to Any API lets you create multiple integrations from the same form — just duplicate your endpoint and route the data where you need it.
💡 Real-World Examples
1. Send Leads to HubSpot
Use HubSpot’s API endpoint /crm/v3/objects/contacts
Add a Bearer token in the header
Map form fields to HubSpot fields like firstname, email, phone
2. Send Leads to Slack
Use the Slack Incoming Webhook URL
Format the payload like:
json
CopyEdit
{
"text": "New Lead: {{name}}, {{email}}, {{message}}"
}
3. Send Leads to Notion
Use the Notion API to create a new page in a database
Authenticate with a Bearer token
Convert form fields to the Notion schema format
🔐 Security Best Practices
Use HTTPS for all endpoints
Validate fields (email, phone) before sending to API
Add CAPTCHA to your contact form to prevent spam
Monitor error logs and webhook failures
📈 What Happens Next?
Once your form is integrated with Contact Form to Any API, you can:
Track and store every submission
Build automations on top of your CRM (email sequences, sales tasks)
Analyze lead sources using UTM fields
Respond faster and close deals quicker
🏁 Conclusion
In today’s fast-moving digital world, speed and automation win. Manually processing leads slows you down, increases error rates, and leads to lost revenue.
With Contact Form to Any API, you can connect any form to any system — instantly and reliably. Whether you’re a solopreneur, agency, or SaaS team, this tool helps you create a seamless lead capture flow that scales with your growth.
0 notes
Text
Automate Your Lead Capture: Sync Contact Forms with APIs Effortlessly
In today’s fast-paced digital landscape, manual lead handling is a bottleneck you can’t afford. Every second lost copying contact form data into CRMs, marketing tools, or spreadsheets is a missed opportunity. Automating your lead capture process by syncing contact forms with APIs isn’t just a technical upgrade—it’s a business necessity.
In this blog, we’ll break down how you can automate your lead capture by connecting your website contact forms directly to any API. Whether you use WordPress, static HTML, or a page builder like Elementor, this guide will help you build a smarter, faster lead pipeline.
Why Automate Lead Capture?
Let’s start with the why. Most websites still rely on email notifications or manual spreadsheet entries from contact form submissions. That means:
Delayed response times
Human error in transferring data
Poor lead nurturing due to lack of automation
Automating this process ensures that every lead goes directly into your sales or marketing stack—like CRMs, email platforms, or customer databases—without delay.
Key Benefits:
📈 Faster lead response time
⚙️ Improved data accuracy
🧩 Seamless integration with CRMs like HubSpot, Salesforce, or Pipedrive
🕒 Massive time savings for your team
💬 Real-time engagement triggers via SMS, email, or chatbot
What Does “Syncing Contact Forms with APIs” Actually Mean?
At its core, syncing a form with an API means that when a user fills out a form on your site, the submitted data is sent directly to an external system using a POST request (or similar HTTP method).
For example:
A user fills in a contact form on your website.
The form data is sent automatically to your CRM’s API endpoint.
Your CRM instantly creates a new lead profile with that information.
No email check. No manual copy-paste. Just pure automation.
Common Use Cases for Contact Form to API Integration
The beauty of API integration lies in its flexibility. Here are just a few practical use cases:
Send Leads to a CRM (e.g., HubSpot, Zoho, Salesforce)
Trigger Email Campaigns (e.g., Mailchimp, Brevo, ActiveCampaign)
Update a Google Sheet or Airtable in Real-Time
Create Support Tickets Automatically (e.g., Zendesk, Freshdesk)
Send Notifications to Slack, Discord, or Microsoft Teams
Trigger Automations via Zapier, Make.com, or Pabbly
How to Sync Your Contact Form with an API: Step-by-Step
Let’s walk through the typical setup to connect a contact form to an API. This process can vary depending on your tech stack, but the principles are consistent.
Step 1: Choose a Contact Form Tool
Depending on your website platform, you may be using:
WordPress: WPForms, Contact Form 7, Gravity Forms
Page Builders: Elementor, Webflow
Static HTML Forms
Custom JavaScript Forms
Step 2: Identify Your Target API
Know where you want the data to go:
CRM
Marketing platform
Database
Third-party automation tool
Check their API documentation and note:
Endpoint URL
Required headers (API keys, tokens)
Expected payload (JSON format, field names)
Step 3: Build or Configure the Integration
You have three main options:
Option 1: Use a Middleware Tool
Tools like ContactFormToAPI, Zapier, or Make.com allow no-code connections between your contact form and an API.
Advantages:
No coding required
Easy to use
Works with most form builders
Option 2: Use Webhooks or Native Integrations
Some form plugins (e.g., Gravity Forms, WPForms) support webhooks or direct API integrations.
You configure a webhook URL where form data is sent. From there, you can forward the data to your desired API.
Option 3: Custom API Integration with Code
For developers or advanced users, you can write custom JavaScript or PHP code to send form data to an API.
Example (JavaScript):
javascript
CopyEdit
fetch('https://api.example.com/leads', {
method: 'POST',
headers: {
'Content-Type': 'application/json',
'Authorization': 'Bearer YOUR_API_KEY'
},
body: JSON.stringify({
name: document.getElementById('name').value,
email: document.getElementById('email').value,
message: document.getElementById('message').value
})
});
Security and Best Practices
When dealing with APIs and user data, security is essential.
Use HTTPS: Always send data over secure connections.
Validate Inputs: Sanitize and validate form inputs before sending.
Secure API Keys: Never expose keys in front-end code.
Rate Limiting: Protect your endpoints from abuse.
Testing Your Integration
Before going live, make sure to test thoroughly:
Send test submissions to check if data is reaching the target system.
Use tools like Postman or webhook.site to simulate API calls.
Monitor for errors and ensure all required fields are populated correctly.
Pro Tips to Enhance Your Lead Automation Flow
Add Lead Scoring Before API Submission
Use form logic to assign lead quality scores.
Use Hidden Fields to Track UTM Parameters
Send marketing campaign data with the lead.
Create Conditional Routing
Route B2B leads to a CRM and B2C leads to an email tool.
Use Delayed Webhooks for Follow-ups
Trigger follow-up emails 24 hours after submission via automation.
Tools That Make This Effortless
Here are top tools to simplify syncing contact forms to APIs:
Tool
Best For
Code Required?
ContactFormToAPI
Universal form-to-API bridge
❌
Zapier
Multi-platform automation
❌
Make.com
Visual workflow builder
❌
Gravity Forms + Webhooks
WordPress forms
⚠️ Minimal
Custom Code (JS/PHP)
Full control
✅
Real-World Impact: What Businesses Gain
A SaaS startup integrated their demo request form with their CRM using ContactFormToAPI. Result?
Lead response time dropped from 4 hours to under 30 seconds
Sales follow-up speed increased conversion by 27%
Marketing gained insights from synced UTM parameters
No developers were required—just smart automation.
Final Thoughts
In a world where speed and personalization matter more than ever, automating your lead capture process by syncing contact forms to APIs is a game-changer. Whether you're running a small business or managing enterprise-level lead flow, this approach ensures your team stays agile, efficient, and focused on what matters most—closing deals.
You no longer need complex infrastructure or a dev team to make it happen. With tools like ContactFormToAPI, this once-developer-only functionality is now accessible to marketers, freelancers, and founders alike.
Ready to Automate?
Start syncing your contact forms to APIs today and supercharge your lead capture process. Tools like ContactFormToAPI make it as easy as copy-paste.
0 notes
Text
Top Ways to Send Form Data to Any REST API Instantly
In today's fast-paced digital landscape, businesses rely on real-time data to drive decisions, automate workflows, and stay competitive. One of the most common—and often overlooked—data entry points is the humble contact form. But what if you could instantly send that data to any REST API, CRM, or business tool without writing a single line of code?
In this guide, we'll break down the top ways to send form data to any REST API instantly, whether you're a marketer looking to sync leads with HubSpot, a developer integrating with a third-party service, or a startup founder automating lead routing.
Why Send Form Data to a REST API?
Forms are the gateway to lead capture, support tickets, user feedback, and countless other business operations. Traditionally, form submissions are emailed to inboxes or stored in local databases. But modern businesses need more than static email notifications—they need automation.
Benefits of Sending Form Data to an API:
✅ Instant lead routing to sales CRMs
✅ Real-time notifications in tools like Slack or Discord
✅ Dynamic updates to Google Sheets, Notion, or Airtable
✅ Task creation in platforms like Asana or Trello
✅ Workflow automation via Zapier, Make, or custom APIs
Now, let’s look at the top methods to make this happen.
1. Use a No-Code Tool Like ContactFormToAPI
If you want the fastest, most flexible way to connect a contact form to any REST API, tools like ContactFormToAPI are ideal.
How It Works:
Create an endpoint using the platform
Add a form or use your existing one (e.g., Contact Form 7, WPForms, Webflow)
Map form fields to the API request
Instantly POST data to any REST API with custom headers, tokens, or JSON payloads
Key Features:
No coding or backend setup required
Supports authentication, headers, and retries
Works with any form builder (WordPress, Framer, custom HTML, etc.)
Best For: Non-technical users, marketers, and teams needing fast setup.
2. Connect Your Form with Webhooks
Webhooks are the go-to option for real-time communication between your form and an API. Most modern form builders support webhooks.
How It Works:
Add a webhook URL to your form settings
When the form is submitted, the data is sent (usually via POST) to the API endpoint
Customize headers and payloads depending on the API spec
Supported By:
Contact Form 7 (with Flamingo or webhook add-ons)
Gravity Forms (via webhook add-on)
Typeform, Jotform, and others
Example Use Case:
Send new form submissions to a custom CRM endpoint or a third-party lead processing API.
Pros:
Native in many platforms
Flexible and fast
Secure (especially with token-based auth)
Cons:
Requires some technical knowledge to configure headers and payloads
Error handling and retry logic must be managed separately
3. Zapier or Make (Integromat) Integrations
Zapier and Make are automation platforms that bridge your form and any REST API using visual workflows.
How It Works:
Connect your form app as a trigger (e.g., Webflow form submitted)
Use HTTP modules in Zapier/Make to send the data to your desired REST API
Customize payloads, authentication, and error handling visually
Great For:
Teams already using Zapier for other automations
Integrating multiple services in a chain (e.g., form → CRM → Slack)
Pros:
Visual editor makes the setup easier
Supports delays, conditions, and filters
1000s of integrations built-in
Cons:
Monthly cost based on task volume
Latency (not always instant on free plans)
Less flexible than custom code or backend solutions
4. Use JavaScript Fetch/AJAX in the Front-End
If you're building your own form and want to send data instantly to an API, you can do it directly using JavaScript.
Sample Code:
js
CopyEdit
document.getElementById("myForm").addEventListener("submit", async function(e) {
e.preventDefault();
const formData = new FormData(this);
const data = Object.fromEntries(formData.entries());
const response = await fetch("https://api.example.com/leads", {
method: "POST",
headers: {
"Content-Type": "application/json",
"Authorization": "Bearer YOUR_API_KEY"
},
body: JSON.stringify(data)
});
const result = await response.json();
console.log(result);
});
Pros:
Full control over how data is sent
Great for SPAs or static sites
Cons:
No fallback or retry logic
Exposes API keys unless properly protected
Not suitable for non-technical users
5. Build a Serverless Function or Backend Proxy
For more secure and robust form handling, use a serverless function (e.g., AWS Lambda, Vercel, Netlify Functions) or a backend API that proxies requests.
Flow:
Front-end form submits data to your serverless function
The function processes the data and calls the third-party REST API
You can log, sanitize, validate, and authenticate safely
Pros:
Secure: keeps tokens and logic server-side
Scalable and powerful
Supports retry and error handling
Cons:
Requires development time
Hosting knowledge needed
Use Case Example:
A startup that routes leads from multiple landing pages through a backend proxy to distribute them to various API endpoints based on rules.
6. Use Built-In API Integrations from Form Builders
Some advanced form builders include direct integrations with REST APIs or offer HTTP Request functionality.
Examples:
WPForms: With Webhooks or Zapier add-ons
Forminator (WPMU Dev): Built-in webhook support and API customization
Jotform: Can send submissions to any API endpoint via webhook
Best For: Users already using these platforms who don’t need additional tools
Final Thoughts
Sending form data to a REST API instantly doesn't have to be complicated. Whether you're a solo founder, growth marketer, or developer, there’s a method that fits your stack and your skill level.
If you're looking for the easiest and most flexible way to connect forms to any API, tools like ContactFormToAPI make it incredibly simple—no code, no backend, no hassle. With the right setup, your forms can become the starting point of fully automated, efficient business workflows.
0 notes
Text
Securing API Integrations: Best Practices for Contact Form Data Transmission
In today’s digital ecosystem, contact forms are more than just entry points for customer inquiries—they’re gateways to critical data that drive business operations. Whether the information is funneled into a CRM, ticketing system, or email marketing platform, the underlying mechanism that powers this is API integration. But with increasing cyber threats and stricter data regulations, securing the transmission of contact form data through APIs has never been more important.
This blog delves into the best practices for ensuring your contact form data is transmitted securely via API integrations, covering encryption, authentication, compliance, and more.

Why Securing Contact Form Data Matters
Contact forms often collect personally identifiable information (PII), such as:
Names
Email addresses
Phone numbers
Company names
Inquiry messages
Unsecured transmission of this data can lead to breaches, phishing attacks, or unauthorized access—exposing businesses to legal consequences and reputational damage. Secure API integration mitigates these risks and ensures data integrity, privacy, and compliance with laws like GDPR, HIPAA, and CCPA.
Common Threats to API-Based Data Transmission
Before diving into the best practices, it's important to understand the threats you’re defending against:
Man-in-the-middle (MITM) attacks – where data is intercepted between the contact form and the API.
Unauthorized access – due to poor authentication or exposed API keys.
Injection attacks – through unsanitized input, enabling attackers to manipulate API calls.
Data leakage – from insecure storage or logging mechanisms.
Replay attacks – where a malicious user resends legitimate API requests to gain unauthorized access or cause disruptions.
Best Practices for Securing API Integrations with Contact Forms
1. Use HTTPS with SSL/TLS Encryption
The first and most critical step is to ensure all communication between the form, your server, and any third-party APIs happens over HTTPS. HTTPS encrypts the data in transit, making it nearly impossible for attackers to intercept and read sensitive information.
Pro tip: Use strong TLS configurations and ensure your SSL certificate is up to date.
2. Implement Strong Authentication and Authorization
APIs must be protected by robust authentication mechanisms. Relying solely on static API keys can be risky if they’re not stored securely or become exposed.
Best practices include:
OAuth 2.0 – A widely accepted protocol for secure delegated access.
JWT (JSON Web Tokens) – Allows secure transmission of claims between parties.
IP whitelisting – Restrict API access to known IP addresses.
Role-based access control (RBAC) – Ensure only authorized applications and users have access.
3. Validate and Sanitize Input Data
Never trust data coming from a user-facing contact form. Always validate and sanitize inputs before processing or transmitting them to an API to prevent injection attacks.
Validation examples:
Use regex patterns to validate email formats.
Limit message length to prevent buffer overflows.
Sanitize inputs by removing or escaping special characters.
4. Rate Limiting and Throttling
Implement API rate limiting to protect your integration from abuse. Bots or attackers may try to flood your endpoints with traffic, potentially leading to denial-of-service (DoS) attacks or data scraping.
Suggested limits:
Max 60 requests per minute per IP
Max 1000 requests per day per user
Use appropriate HTTP response headers like 429 Too Many Requests to inform clients of limits.
5. Encrypt Data at Rest and in Transit
While HTTPS encrypts data in transit, you should also encrypt sensitive data at rest if you're storing it temporarily before pushing it to an API.
Encryption standards to consider:
AES-256 for data at rest
TLS 1.2 or higher for data in transit
Never store unencrypted form submissions on disk, in logs, or database tables.
6. Use Web Application Firewalls (WAFs)
A WAF helps filter out malicious requests to your contact form and API endpoints. They block suspicious IPs, detect bots, and protect against common OWASP Top 10 threats.
Features to look for:
SQL injection protection
Cross-site scripting (XSS) filters
Geo-blocking for unknown regions
Cloudflare, AWS WAF, and Sucuri are popular options.
7. Secure API Keys and Secrets
API credentials should never be hardcoded into frontend code or exposed in browser-accessible scripts. Instead:
Store secrets in server-side environment variables.
Use secret management tools like HashiCorp Vault or AWS Secrets Manager.
Rotate keys periodically and revoke unused credentials.
8. Enable Logging and Monitoring
Real-time monitoring can alert you to anomalies like spikes in traffic or repeated failed API calls, indicating an attack or integration issue.
What to log:
Timestamped request metadata
Status codes and error responses
Authentication failures
Ensure logs themselves do not store sensitive information, and secure them with proper access control.
9. Implement CSRF and CAPTCHA Protection
To prevent bots and malicious actors from abusing your contact form, use:
CSRF tokens to verify that a submission originated from your site.
CAPTCHAs or reCAPTCHA to block automated submissions.
This reduces the risk of your API being bombarded with spam or test payloads.
10. Follow the Principle of Least Privilege
Only allow the contact form integration to access what it absolutely needs. If the form only needs to create a lead in a CRM, don’t give it permission to delete or modify records.
This principle minimizes potential damage if credentials are compromised.
11. Secure Third-Party Services
If your contact form integrates with external APIs (e.g., HubSpot, Mailchimp, Salesforce), ensure these services:
Use HTTPS exclusively
Provide granular API scopes
Offer audit trails
Comply with regulations like GDPR and SOC 2
Always vet vendors for their security posture before integration.
12. Test for Vulnerabilities Regularly
Conduct regular penetration testing and vulnerability scans to uncover weak spots in your form and API integration. Include both automated tools and manual ethical hacking.
Tools to try:
OWASP ZAP
Burp Suite
Postman Security Testing
Fix any discovered vulnerabilities immediately and document the fixes.
13. Comply with Data Protection Regulations
Different regions have specific laws about how user data should be collected, stored, and transmitted. For example:
GDPR (EU): Requires explicit user consent and secure handling of PII.
CCPA (California): Grants users the right to know and delete their data.
HIPAA (US): Regulates health-related data.
Make sure your API-based contact form integration complies with relevant laws, especially if collecting data from users in regulated industries.
14. Include a Clear Privacy Policy
Your contact form should link to a privacy policy explaining:
What data is collected
How it will be used
Where it will be transmitted
How long it will be stored
This not only ensures compliance but also builds trust with users.
15. Fail Gracefully and Securely
Even with all protections, failures can occur. Ensure your contact form and API integration handle errors securely:
Don’t expose stack traces or internal server information in error responses.
Avoid leaking API credentials in logs or responses.
Inform the user of a failure without revealing system details.
Use secure error handling to maintain a good user experience while protecting your backend.
Conclusion
Securing API integrations for contact form data transmission is not optional—it’s a necessity in a world where data breaches are commonplace and user privacy is paramount. From implementing HTTPS and strong authentication to input validation and compliance, each layer of protection contributes to a robust, secure system.
Organizations that proactively secure their contact form integrations not only protect themselves from cyber threats but also enhance their credibility and user trust. By adopting these best practices, you're not just guarding data—you're safeguarding your brand.
0 notes
Text
Streamline Lead Management: How to Connect Any Contact Form to Your CRM or API in Minutes
In today's digital-first world, capturing leads efficiently and managing them seamlessly across marketing and sales tools can be the difference between closing a deal and missing an opportunity. If you're using contact forms to collect inquiries, feedback, or lead information, you’re sitting on a goldmine of data—yet most businesses still rely on manual processes or clunky integrations to make use of it.
What if you could instantly connect any contact form on your website to any CRM or API—without code, plugins, or third-party forms?
That's exactly what ContactFormToAPI makes possible. In this blog, we’ll walk you through how to automate lead management using ContactFormToAPI, explore its real-world use cases, and show you how to get started in just minutes.
Why Connecting Contact Forms to APIs Matters
When a visitor fills out a contact form, they expect a response—quickly. Businesses, on the other hand, want to ensure that the data doesn’t just land in an inbox. Instead, it should:
Go directly to a CRM like HubSpot, Salesforce, or Zoho
Trigger marketing automation in tools like Mailchimp or ActiveCampaign
Create support tickets in HelpDesk systems
Update custom databases or internal APIs
The problem? Out-of-the-box integrations are limited. Many website builders and form plugins don’t offer native support for the tools you use. Or worse, they require expensive subscription plans to unlock these features.
ContactFormToAPI solves this with a universal, no-code approach that connects any form on any website to any API endpoint.
What is ContactFormToAPI?
ContactFormToAPI is a lightweight, powerful service that lets you forward data from any HTML form to any third-party API or webhook. Whether you're working with a basic HTML form or a WordPress site using Elementor, WPForms, or Gravity Forms, ContactFormToAPI works silently in the background.
Key Features:
No-code setup: Works with any existing contact form
API-first: Supports REST, GraphQL, and webhook endpoints
Field mapping: Customize how form fields are sent to your API
Retry logic: Ensures your data is delivered, even if there's a hiccup
Security: Supports encrypted payloads and IP whitelisting
Benefits of Automating Contact Form Submissions
Faster Lead Response
Send new leads directly to your CRM or sales pipeline for instant follow-up.
Fewer Manual Tasks
No more copy-pasting email notifications into spreadsheets or CRM entries.
Better Data Accuracy
Eliminate human error and ensure every form submission is recorded correctly.
Improved Customer Experience
Trigger welcome emails, drip campaigns, or support workflows instantly.
Scalable Integration
Works across different forms and websites, making it perfect for agencies or enterprises.
Common Use Cases
1. Contact Form to CRM (e.g., HubSpot, Salesforce)
Imagine a visitor fills out your contact form. With ContactFormToAPI, their info is immediately added as a lead in your CRM, assigned to the right sales rep, and tagged for follow-up.
2. Quote Request to Slack or Microsoft Teams
Route high-value form submissions directly to your team’s Slack channel for instant visibility.
3. Job Application to Airtable or Notion
Hiring? Send applications from your form directly to your preferred candidate tracking system.
4. Event Sign-up to Mailchimp
Use a form on your landing page to collect email addresses and automatically add them to your Mailchimp list.
5. Feedback Form to Helpdesk
Turn feedback or bug reports into support tickets in platforms like Zendesk or Freshdesk.
How It Works: A Step-by-Step Setup Guide
Let’s walk through how to connect your contact form to an API in just a few steps.
Step 1: Create a ContactFormToAPI Account
Start by signing up at ContactFormToAPI. The platform offers a free tier with generous limits, making it ideal for startups and solo devs.
Step 2: Set Up a New Integration
Go to your dashboard and click “Create New Endpoint.”
Provide a name for the integration (e.g., Contact to HubSpot).
Enter the destination API endpoint or webhook URL.
Add authentication details (API keys, headers, etc.) if needed.
Step 3: Map Your Form Fields
Map the form fields (e.g., name, email, message) to the parameters your API expects. ContactFormToAPI provides a clean UI to handle field mapping and even allows transformation logic if your endpoint requires a specific format.
Step 4: Update Your HTML Form
Modify your existing form’s action to point to the ContactFormToAPI endpoint:
html
CopyEdit
<form method="POST" action="https://contactformtoapi.com/your-endpoint-id">
<input type="text" name="name" required />
<input type="email" name="email" required />
<textarea name="message"></textarea>
<button type="submit">Send</button>
</form>
No JavaScript required—ContactFormToAPI handles everything behind the scenes.
Step 5: Test & Monitor
Submit a test entry to ensure the integration is working. You can view logs, inspect payloads, and verify delivery status in your dashboard.
Real-World Example: Connecting a WordPress Form to HubSpot
If you’re using WPForms on your WordPress site, here’s how you can connect it to HubSpot using ContactFormToAPI:
Create a HubSpot API Key and set up a custom form endpoint.
Configure ContactFormToAPI with that endpoint and the necessary headers.
In WPForms, set the form’s action URL using the “Custom Form Action” plugin or a snippet.
Done! Now, every submission is routed to your HubSpot account automatically.
This avoids the need for third-party plugins or paid add-ons—saving money and reducing plugin bloat.
While tools like Zapier are great for certain workflows, they can become expensive quickly. Native CRM plugins often lack flexibility and may not support custom APIs or legacy systems. ContactFormToAPI bridges that gap.
Tips for a Smooth Integration
Use Hidden Fields: Pass metadata like source URLs, campaign IDs, or user roles.
Add Validation: Ensure required fields are checked before submission.
Handle Errors Gracefully: Customize the success and error redirect URLs.
Secure Your API: Use IP whitelisting, tokens, and SSL to secure data transfer.
Final Thoughts
Whether you're a solo entrepreneur, a growing startup, or a digital agency managing multiple clients, automating contact form submissions is a no-brainer. It boosts your efficiency, improves response times, and creates a professional experience for your users.
ContactFormToAPI empowers you to connect any contact form to any API in minutes—with zero technical hassle. It’s the ultimate glue between your website and the rest of your business tools.
0 notes
Text
Top Use Cases for ContactFormToAPI: From Webhooks to CRMs
In today’s fast-paced digital world, building and managing websites often comes down to finding tools that save time, cut complexity, and work seamlessly with your existing stack. One area where this is especially true is handling form submissions on static sites or headless front-ends. Traditionally, developers relied on server-side scripts or form handlers like PHP, but now there's a better way.
ContactFormToAPI is a modern, no-backend form submission tool that connects your HTML contact forms to any REST API—instantly. Whether you’re a developer, marketer, freelancer, or solopreneur, ContactFormToAPI gives you the freedom to send data anywhere you need it with minimal setup.
In this blog post, we’ll explore the top use cases for ContactFormToAPI, from integrating with CRMs and automating marketing workflows to triggering webhooks and sending Slack notifications. Let’s dive in.
1. Send Form Data to a CRM (Customer Relationship Management)
One of the most popular use cases for ContactFormToAPI is sending contact form submissions directly to a CRM system like HubSpot, Salesforce, or Zoho.
Why It Matters:
CRMs are essential for tracking leads, automating sales outreach, and managing customer relationships. With ContactFormToAPI, you can skip the backend development and send form data directly to your CRM’s API.
Example Use Case:
A real estate agent adds a “Schedule a Viewing” form on their static website.
Submissions are sent to HubSpot via ContactFormToAPI.
The lead is automatically created and added to a workflow.
Benefits:
Seamless lead tracking
Instant data sync
No server-side code or middleware
2. Trigger Webhooks for Real-Time Automation
Another powerful feature of ContactFormToAPI is its ability to send data to webhooks, which can then trigger downstream actions using tools like Zapier, Integromat (Make), or n8n.
Why It Matters:
Webhooks make automation fast and real-time. By sending form submissions to a webhook URL, you can kick off virtually any process—notifications, database updates, report generation, etc.
Example Use Case:
A user fills out a feedback form.
ContactFormToAPI sends the data to a Zapier webhook.
Zapier sends an email to the product team and stores the feedback in Google Sheets.
Benefits:
Automate repetitive tasks
Improve response time
Integrate with hundreds of apps
3. Collect Leads in Google Sheets
Many small businesses and solopreneurs still rely on Google Sheets for managing lead data. ContactFormToAPI makes it incredibly simple to populate spreadsheets with contact form submissions.
Why It Matters:
Not everyone needs a full CRM. Google Sheets offers a familiar, flexible, and shareable interface for tracking contacts, feedback, or sales inquiries.
Example Use Case:
A freelancer sets up a project inquiry form on their portfolio site.
Submissions are routed to a Google Apps Script webhook.
Each entry populates a row in their lead tracking sheet.
Benefits:
Cost-effective lead management
Easy to share and analyze
No need for additional software
4. Send Notifications via Slack or Discord
Need real-time alerts when someone submits a form? ContactFormToAPI can send data directly to Slack or Discord via incoming webhooks.
Why It Matters:
Keeping your team in the loop is easier when form responses appear where you already collaborate. This is ideal for support forms, team registrations, or bug reports.
Example Use Case:
A SaaS startup uses ContactFormToAPI to handle bug reports.
When a user submits a report, the data is sent to a Slack channel.
The product team sees it instantly and can follow up quickly.
Benefits:
Real-time alerts
Team collaboration
Fast customer support
5. Integrate with Email Marketing Tools
Want to grow your email list? You can connect forms to email marketing platforms like Mailchimp, ConvertKit, or ActiveCampaign using their APIs or webhooks.
Why It Matters:
Automated email list building ensures your marketing funnel stays active. ContactFormToAPI lets you push sign-ups directly from your site into your email tool—no backend required.
Example Use Case:
A blog has a newsletter subscription form.
ContactFormToAPI sends the email address to Mailchimp’s API.
The subscriber is added to a welcome campaign automatically.
Benefits:
Build your email list fast
Enable instant follow-ups
No integration headaches
6. Support Static Site Generators (SSGs) like Jekyll, Hugo, and Eleventy
Static site generators are popular for their speed and security, but they lack backend capabilities. That’s where ContactFormToAPI shines.
Why It Matters:
ContactFormToAPI turns any static form into a dynamic one—without breaking your architecture.
Example Use Case:
A developer builds a portfolio with Hugo.
They use ContactFormToAPI to handle form submissions without server-side logic.
Data is sent directly to a webhook or API.
Benefits:
Works with any static site
No need for backend hosting
Keeps your workflow JAMstack-friendly
7. Connect to Airtable for Visual Data Management
Airtable blends the familiarity of spreadsheets with database-like functionality. ContactFormToAPI can send form data directly into Airtable bases.
Why It Matters:
This is perfect for managing job applications, registrations, or project pipelines in a visually organized way.
Example Use Case:
A nonprofit collects volunteer sign-ups via a form.
ContactFormToAPI sends the data to Airtable’s API.
Volunteers appear as new entries in a kanban board.
Benefits:
Visual organization of form data
Easy collaboration
Lightweight CRM alternative
8. Trigger Backendless Workflows with Firebase or Supabase
If you're using tools like Firebase or Supabase for your backend, ContactFormToAPI can push data directly into their endpoints or cloud functions.
Why It Matters:
You can maintain a serverless architecture while still handling complex workflows.
Example Use Case:
A startup uses Supabase for user data.
ContactFormToAPI sends contact form data to a Supabase REST API.
A row is added to the database, and a confirmation email is sent.
Benefits:
Backend power, frontend simplicity
Supports real-time workflows
Scales easily with your project
9. Create Instant Support Tickets in Help Desk Tools
Connect ContactFormToAPI to platforms like Zendesk, Freshdesk, or Help Scout to generate support tickets automatically.
Why It Matters:
This streamlines customer support workflows and reduces response time.
Example Use Case:
A customer fills out a “Report an Issue” form.
ContactFormToAPI sends the data to Zendesk’s API.
A support ticket is created with the customer’s details.
Benefits:
Automate support intake
Improve team efficiency
Centralize issue tracking
10. Send Conditional Logic-Based Submissions
Though ContactFormToAPI itself is backendless, you can use it with frontend logic or no-code tools to route form data conditionally.
Why It Matters:
You may want different form submissions to go to different APIs based on form values.
Example Use Case:
A form asks users to choose a department (Sales, Support, Billing).
Based on the selection, the form routes the data to different webhook URLs using JS + ContactFormToAPI.
Each department gets only the relevant data.
Benefits:
Smarter form routing
Reduce manual sorting
Works with minimal code
Final Thoughts
ContactFormToAPI is more than just a form handler—it’s a powerful bridge between your website and the tools that power your workflows. Whether you're sending data to a CRM, triggering automation, or logging submissions in a spreadsheet, it offers a fast, secure, and code-light solution for modern developers.
If you're building static sites, headless frontends, or simply want to eliminate backend overhead, ContactFormToAPI is the tool you’ve been waiting for.
Ready to integrate your first form? Visit ContactFormToAPI.com and start connecting your HTML forms to the tools you already use—no backend required.
0 notes
Text
Unlocking Seamless Integrations: A Comprehensive Guide to the 'Contact Form to Any API' WordPress Plugin
In today's digital landscape, integrating your website's contact forms with various APIs is crucial for streamlined operations and enhanced user experiences. The Contact Form to Any API WordPress plugin stands out as a versatile tool, enabling seamless connections between your contact forms and a multitude of third-party services. This comprehensive guide delves into the features, benefits, and practical applications of this powerful plugin.

Understanding the Need for API Integration
Before exploring the plugin's capabilities, it's essential to grasp the significance of API integrations:
Enhanced Efficiency: Automating data transfer between your website and external platforms reduces manual tasks.
Improved Data Accuracy: Direct integrations minimize errors associated with manual data entry.
Real-Time Updates: Immediate data synchronization ensures up-to-date information across platforms.
Scalability: As your business grows, integrated systems can handle increased data flow without additional overhead.
Introducing 'Contact Form to Any API'
Developed by IT Path Solutions, 'Contact Form to Any API' is designed to bridge the gap between your WordPress contact forms and external APIs. Whether you're using Contact Form 7 or WPForms, this plugin facilitates the transmission of form data to various services, including CRMs, marketing platforms, and custom APIs.
Key Features
1. Broad API Compatibility
Supports Over 150 APIs: Seamlessly connect with platforms like Mailchimp, HubSpot, Zapier, Odoo CRM, and more.
Custom API Integration: Configure connections with virtually any REST API, providing unparalleled flexibility.
2. Flexible Data Transmission
Multiple HTTP Methods: Choose between POST and GET requests based on your API's requirements.
JSON Formatting: Send data in simple or nested JSON structures, accommodating complex API schemas.
Header Customization: Set custom headers, including Authorization tokens, to meet specific API authentication needs.
3. File Handling Capabilities
File Upload Support: Enable users to upload files through your forms.
Base64 Encoding: Automatically convert uploaded files to Base64 format for API compatibility.
4. Data Management and Export
Database Storage: Store form submissions within your WordPress database for easy access.
Export Options: Download submission data in CSV, Excel, or PDF formats for reporting and analysis.
5. Conditional Data Sending
Timing Control: Decide whether to send data to the API before or after the form's email notification is dispatched.
6. Authentication Support
Multiple Authentication Methods: Utilize Basic Auth, Bearer Tokens, or custom headers to authenticate API requests.
Pro Version Enhancements
Upgrading to the Pro version unlocks additional features:
Multi-API Support: Send form data to multiple APIs simultaneously.
Advanced JSON Structures: Handle multi-level JSON formats for complex integrations.
Priority Support: Receive expedited assistance from the development team.
OAuth 2.0 and JWT Integration: Facilitate secure connections with APIs requiring advanced authentication protocols.
Real-World Applications
The versatility of 'Contact Form to Any API' opens doors to numerous practical applications:
CRM Integration: Automatically add new leads to your CRM system upon form submission.
Email Marketing: Subscribe users to your mailing list in platforms like Mailchimp or Sendinblue.
Support Ticketing: Create support tickets in systems like Zendesk or Freshdesk directly from contact forms.
Project Management: Generate tasks in tools like Trello or Asana based on form inputs.
User Testimonials
The plugin has garnered positive feedback from the WordPress community:
"Does exactly what is needed – connects your contact form to API. Works great out of the box, and amazing support." — Olay
"I used the free plugin for a while already, recently stepped over to the pro and I must say the pro and agency version come with amazing new features and the support is quick and always there to help you with any questions!" — Samuellegrand
Getting Started: Installation and Configuration
Step 1: Installation
Navigate to your WordPress dashboard.
Go to Plugins > Add New.
Search for "Contact Form to Any API."
Click "Install Now" and then "Activate."
Step 2: Configuration
Access the plugin settings via the WordPress dashboard.
Choose the form (Contact Form 7 or WPForms) you wish to integrate.
Enter the API endpoint URL.
Configure the request method (POST or GET).
Set up headers and authentication details as required.
Map form fields to the corresponding API parameters.
Save your settings and test the integration.
Best Practices for Optimal Integration
Test Thoroughly: Use tools like Postman to test API endpoints before full integration.
Secure Sensitive Data: Ensure that authentication tokens and sensitive information are stored securely.
Monitor Logs: Regularly check logs for any errors or issues in data transmission.
Stay Updated: Keep the plugin and WordPress core updated to benefit from the latest features and security patches.
Conclusion
'Contact Form to Any API' stands as a robust solution for WordPress users seeking seamless integration between their contact forms and external services. Its flexibility, extensive feature set, and user-friendly interface make it an invaluable tool for enhancing website functionality and streamlining workflows.
Whether you're aiming to automate lead generation, enhance customer support, or synchronize data across platforms, this plugin offers the capabilities to achieve your goals efficiently.
0 notes
Text
How to Use ContactFormToAPI to Connect Your Static HTML Forms to Zapier
In the modern web development landscape, building fast, secure, and serverless websites is more popular than ever. Static sites are blazing fast, cost-effective, and often hosted on platforms like GitHub Pages, Netlify, or Vercel. But one lingering challenge remains: how do you handle form submissions without a traditional backend?

Enter ContactFormToAPI, a powerful no-code solution that connects static HTML forms directly to any API endpoint, including Zapier. By bridging this gap, you can easily automate workflows, capture leads, and integrate with countless apps—without spinning up a backend or writing server-side logic.
In this guide, we’ll walk through how to use ContactFormToAPI to connect your static HTML forms to Zapier, so you can trigger zaps every time someone submits a form on your website.
What You'll Need
A simple HTML website or static site (can be hosted anywhere)
A Zapier account (free or paid)
A ContactFormToAPI account (free tier available)
Step 1: Create Your HTML Form
Here’s a basic contact form you might include in your HTML site:
<form id="contactForm" method="POST" action="https://contactformtoapi.com/api/YOUR_UNIQUE_ENDPOINT">
<input type="text" name="name" placeholder="Your Name" required>
<input type="email" name="email" placeholder="Your Email" required>
<textarea name="message" placeholder="Your Message" required></textarea>
<button type="submit">Send</button>
</form>
Note: You’ll replace YOUR_UNIQUE_ENDPOINT with the actual endpoint provided by ContactFormToAPI. We'll set that up next.
Step 2: Create a Zap in Zapier
Zapier is an automation platform that connects your apps and services. Our goal here is to make a Zap that triggers when a form is submitted via ContactFormToAPI.
1. Log in to Zapier
Visit zapier.com and sign in.
2. Create a New Zap
Click the “+ Create Zap” button.
3. Set the Trigger App to "Webhooks by Zapier"
Select Webhooks by Zapier as your trigger app.
Choose Catch Hook as the trigger event.
Zapier will now generate a unique webhook URL. Copy this URL—we'll use it in the next step.
Step 3: Set Up ContactFormToAPI
Go to the Contact Form to Any API and sign in or create a free account.
1. Create a New Form Endpoint
Click “New Form” or “Create Endpoint.”
Name your form (e.g., "Zapier Contact Form").
In the Webhook URL, paste the Zapier webhook URL you copied earlier.
(Optional) Enable reCAPTCHA or set a redirect URL after submission.
Click Save to generate your unique endpoint URL.
2. Update Your HTML Form
Replace YOUR_UNIQUE_ENDPOINT in your form’s action attribute with the new endpoint URL provided by ContactFormToAPI.
Example:
<form action="https://contactformtoapi.com/api/abcd1234">
3. Test the Form Submission
Fill out and submit the form on your website.
Zapier should detect the test data, and you’ll be prompted to move to the next step in building your Zap.
Step 4: Configure the Zap Action
After Zapier catches the hook, you'll configure what happens next:
1. Choose an Action App
Select any app where you'd like the form data to go:
Gmail (send email notification)
Google Sheets (log new entries)
Slack (send a message to a channel)
Notion, Trello, Airtable, Mailchimp, etc.
2. Map the Form Fields
Zapier will show the form fields (name, email, message). Match these fields with the action app's fields.
3. Turn On Your Zap
Click Publish Zap to activate it. Your static form is now fully connected!
Real-World Use Cases
Here are some creative ways you can use ContactFormToAPI + Zapier:
Newsletter Signup: Collect emails and add them to Mailchimp.
Support Form: Create a ticket in Trello or Zendesk.
Lead Generation: Send qualified leads directly to your CRM.
Job Application Form: Upload applicant details to Google Drive and notify HR in Slack.
Survey Feedback: Append responses to a Google Sheet for analysis.
Benefits of Using ContactFormToAPI with Zapier
No backend needed: Eliminate server setup and maintenance.
No-code friendly: Ideal for marketers and designers.
Fast setup: Get working forms live in minutes.
Highly flexible: Connect with over 5,000 apps via Zapier.
Security ready: Includes spam protection and HTTPS by default.
Tips for Success
Use reCAPTCHA v2 to protect your forms from bots.
Set up redirect URLs for a smoother user experience.
Add error handling by showing fallback messages if the form fails.
Log form data to a Google Sheet as a backup.
Conclusion
Thanks to ContactFormToAPI and Zapier, static websites can now have fully functional, automated forms without a backend. Whether you're building a landing page, portfolio, or marketing site, this powerful combo enables you to collect and route form data with ease.
0 notes
Text
How to Handle File Uploads with Contact Form to Any API
Handling file uploads from Contact Form 7 can be tricky, especially when you want those files sent directly to another platform. Fortunately, the Contact Form to Any API plugin makes this process seamless by allowing file attachments to be transferred alongside form data to any external API.
Step 1: Set Up Your Contact Form 7 with File Upload Field
Begin by adding a file upload field to your Contact Form 7 form. Use the [file] tag, like so:
[file your-file limit:10mb filetypes:pdf|doc|docx|jpg|png]
This allows users to upload files up to 10MB with accepted formats like PDFs, Word documents, and images.
Step 2: Install and Configure Contact Form to Any API
If you haven’t already, install the Contact Form to Any API plugin. Once installed:
Go to your WordPress dashboard.
Navigate to Contact > Contact to API.
Choose the form you want to connect.
Enter the endpoint of the API you want to send data to (e.g., a CRM, file management service, or email API).
Step 3: Enable File Upload Handling
In the API setup section:
Make sure your external API accepts file uploads.
For the file field, use a key that matches what the API expects (e.g., file, attachment, etc.).
Reference the form file field by name (e.g., your-file).
Example JSON Body (if using multipart/form-data):
{
"name": "[your-name]",
"email": "[your-email]",
"file": "[your-file]"
}
If the API expects a base64 string, the Pro version supports converting the file content before sending.
Step 4: Test Your Integration
Submit a test form with a sample file. Check the external API or platform to ensure the file was received successfully. Look at the plugin’s log viewer to debug any issues—it will show the full request payload and response from the API.
Pro Tips for Better File Handling
Limit file sizes to ensure smooth uploads.
Restrict file types for security.
Use secure endpoints (HTTPS) to protect file data.
Consider file storage APIs like Dropbox, Google Drive, or AWS S3 if your primary platform doesn’t handle file uploads natively.
Final Thoughts
The ability to handle file uploads through Contact Form 7 and pass them directly to external APIs opens up a wide range of automation possibilities—from submitting resumes to syncing contracts and more.
With Contact Form to Any API, you can make file uploads part of a fully automated, secure, and professional workflow.
0 notes
Text
Twilio WhatsApp Business API Integration with Contact Form to Any API PRO
In today’s fast-paced world, businesses must adapt quickly to new communication channels that their customers prefer. WhatsApp, with over 2 billion users worldwide, has become one of the most popular platforms for businesses to engage with customers. Integrating WhatsApp Business API into your website's contact forms can help streamline communication, enhance customer service, and improve engagement. This article will guide you on how to integrate Twilio's WhatsApp Business API with Contact Form to Any API PRO, an advanced tool designed to send your form submissions to various APIs, including WhatsApp.
What is Twilio's WhatsApp Business API?
Twilio is a cloud communication platform that offers businesses a wide range of communication tools, including voice, messaging, and video. The WhatsApp Business API allows businesses to send and receive messages through WhatsApp. With this API, companies can offer personalized customer support, notifications, and messages at scale, automating communication to enhance customer satisfaction.
Unlike regular WhatsApp, the WhatsApp Business API offers more advanced features suited for businesses, such as:
Sending notifications (order updates, promotions, reminders)
Two-way communication for customer support
Rich media messages (images, documents, videos)
Automated chatbots for support
The API is essential for businesses looking to enhance their customer engagement and build strong relationships through WhatsApp.
What is Contact Form to Any API PRO?
Contact Form to Any API PRO is an integration tool designed to help website owners connect their contact forms to various external services or APIs. Unlike basic contact form plugins that simply submit form data via email, Contact Form to Any API PRO allows for more complex integrations, enabling data to be sent to third-party APIs, databases, or messaging services.
For example, you can easily send form submissions to CRM systems, email services, or even WhatsApp via Twilio's API, enabling real-time notifications and engagement. It’s an ideal solution for businesses that want to move beyond traditional email form submissions and engage customers on messaging platforms such as WhatsApp.
Why Integrate Twilio WhatsApp Business API with Contact Form to Any API PRO?
Integrating Twilio’s WhatsApp API with your website’s contact form via Contact Form to Any API PRO offers several benefits:
Real-time Notifications: Instead of waiting for an email response, customers can receive instant replies or acknowledgments through WhatsApp.
Personalized Interaction: Engage customers with personalized WhatsApp messages based on the information they submit via the contact form.
Automated Responses: You can set up automated responses to acknowledge form submissions, provide order updates, or answer frequently asked questions.
Better Customer Engagement: With WhatsApp's high open rates (over 90% of messages are read), you're ensuring your messages are seen and acted upon.
Two-Way Communication: The integration allows businesses to continue the conversation on WhatsApp, giving customers a more seamless experience.
Step-by-Step Guide to Integrating Twilio WhatsApp Business API with Contact Form to Any API PRO
Here’s how you can integrate Twilio's WhatsApp Business API with Contact Form to Any API PRO.
1. Set Up Your Twilio Account
To start using Twilio's WhatsApp Business API, you need to create a Twilio account. Here’s how:
Create an account on Twilio: Go to Twilio’s official website and sign up for an account.
Obtain your API credentials: After signing up, go to your Twilio Console and note down your Account SID and Auth Token. These credentials are essential for authenticating your API calls.
Apply for WhatsApp Business API: Twilio’s WhatsApp API isn’t available to everyone right away. You need to apply for access to the WhatsApp Business API in your Twilio Console. You’ll need to submit your business details, such as your Facebook Business Manager ID, phone number, and business name.
Wait for Approval: Once approved, you’ll be able to send and receive WhatsApp messages using Twilio.
2. Set Up WhatsApp Sender in Twilio
Once you have access to Twilio's WhatsApp API, you need to configure your WhatsApp sender. This involves:
Adding a WhatsApp number: Go to the Twilio Console, navigate to the Messaging section, and add your WhatsApp number to be used for sending and receiving messages.
Verify your WhatsApp Business Account: Twilio will require you to verify your WhatsApp Business number before you can start using it for communication.
3. Install Contact Form to Any API PRO Plugin
If you're using WordPress, you can install the Contact Form to Any API PRO plugin to facilitate the integration. Here’s how:
Install the plugin: Go to your WordPress dashboard, search for Contact Form to Any API PRO in the plugin section, and install it.
Activate the plugin: After installation, activate the plugin and proceed to the plugin settings.
4. Connect the Plugin with Twilio API
Now that the plugin is installed, you need to connect it with your Twilio WhatsApp API. This is where the Contact Form to Any API PRO comes into play:
Navigate to API Settings: Open the plugin settings page and find the section for external API integrations.
Enter Twilio API Credentials: In the relevant fields, enter the Account SID, Auth Token, and the WhatsApp number you’ve set up in your Twilio console.
Define the Endpoint: You’ll need to define the endpoint for sending WhatsApp messages. The endpoint should be set to Twilio’s WhatsApp API URL: https://api.twilio.com/2010-04-01/Accounts/{AccountSID}/Messages.json.
5. Map Form Fields to WhatsApp Message
To send relevant information from your contact form to WhatsApp, you need to map the form fields to the message that will be sent via WhatsApp:
Map form data: In the plugin, specify the form fields you want to send to WhatsApp. For instance, you can map the user’s name, email, and message from the contact form to the content of the WhatsApp message.
Customize the message template: Customize the WhatsApp message template to suit your business needs. For example, you can send an acknowledgment message like: "Hi {{name}}, thank you for contacting us! We’ll get back to you shortly."
Set triggers: Decide when the message will be sent. For example, after a form submission, an immediate WhatsApp notification can be sent to both the customer and your support team.
6. Test the Integration
Before going live, thoroughly test the integration to ensure everything works as expected. Submit a test form and check if the WhatsApp messages are being sent and received correctly. Make sure that all the necessary details, such as the customer’s information, are being captured and sent accurately.
Best Practices for Using WhatsApp API with Contact Form
Here are some best practices for using the WhatsApp API integration:
Personalize Your Messages: Use customer data captured in the contact form to send personalized WhatsApp messages. Personalized communication builds better customer relationships.
Automate Responses: Set up automated messages that acknowledge form submissions or provide instant information, such as order confirmations or ticket numbers.
Monitor Conversations: Keep track of ongoing conversations and responses on WhatsApp. Use a CRM to manage communication history effectively.
Comply with WhatsApp Policies: Make sure you comply with WhatsApp’s business policies, such as obtaining user consent before sending promotional messages.
Use Message Templates: For outbound notifications, ensure you’re using approved message templates to send updates or notifications.
Conclusion
Integrating Twilio's WhatsApp Business API with Contact Form to Any API PRO creates a powerful way to communicate with customers instantly. By moving from traditional email notifications to real-time WhatsApp messages, businesses can improve customer engagement, provide better support, and enhance overall satisfaction. This integration allows you to take full advantage of the rich features of WhatsApp, including automated responses, multimedia messages, and two-way communication. By following the steps outlined in this guide, businesses can seamlessly integrate WhatsApp into their website's contact forms, ensuring they stay connected with their customers on one of the most popular messaging platforms today.
0 notes
Text
5 Ways a Contact Form to Any API Can Save You Hours Every Week
In a world where time is money and efficiency rules, finding the right tools to automate repetitive tasks is essential. If you’re using WordPress and Contact Form 7, the Contact Form to Any API plugin is a game-changer. By bridging the gap between your website and external platforms, this plugin does the heavy lifting—so you don't have to.
Instead of wasting precious time copying and pasting form data into various tools, you can automatically route submissions exactly where they need to go. Whether it's a CRM, a helpdesk system, a mailing list, or a custom app, this plugin streamlines the entire process. Here are five impactful ways this plugin can save you hours every single week.
1. Instant CRM Lead Capture
Manually entering contact form submissions into your CRM is tedious and error-prone. With Contact Form to Any API, leads are automatically sent to platforms like Salesforce, HubSpot, or Zoho CRM the moment someone fills out your form.
Your sales team receives real-time updates and can act on hot leads faster, improving your response time and boosting conversions. Automation ensures that no lead slips through the cracks.
Time Saved: 5–10 minutes per lead, potentially several hours daily depending on traffic.
2. Automated Customer Support Ticketing
If you manage customer support via email, you're likely wasting time sorting messages and manually entering them into your helpdesk system. With this plugin, support requests can be instantly routed to tools like Zendesk, Freshdesk, or Help Scout.
Each form submission creates a fully formatted ticket with all the relevant data included. This speeds up your support workflow and ensures your team stays organized.
Time Saved: Up to 30 minutes per ticket by eliminating manual entry and routing.
3. Real-Time Email Marketing List Sync
Whether you're building a newsletter list or collecting leads for drip campaigns, syncing your form data to email marketing platforms like Mailchimp, ConvertKit, or ActiveCampaign is crucial.
This plugin enables you to automatically add new signups to your lists the moment a form is submitted—no more exporting CSVs or handling error-prone imports.
Time Saved: 1–2 hours per week, particularly valuable for marketers handling frequent list updates.
4. Centralized Data Collection for Internal Tools
If you're managing internal dashboards, analytics tools, or custom software, getting data from WordPress to those systems can be a chore. Contact Form to Any API enables you to push data directly to these tools without needing intermediate steps or spreadsheets.
This is ideal for reporting, internal workflows, or syncing with tools like Airtable, Notion, or custom-built systems.
Time Saved: 3–5 hours per week by eliminating the need for repeated manual exports and imports.
5. Multi-Platform API Integration (Pro Feature)
The Pro version of Contact Form to Any API allows you to go even further by sending data to multiple platforms from a single form submission. Imagine sending a new lead to your CRM, notifying your team on Slack, and logging the event in a spreadsheet—all from one form.
For agencies or businesses managing multiple integrations, this functionality saves time and ensures consistency across your tools.
Time Saved: Several hours per week, especially when managing multi-touchpoint workflows.
Final Thoughts
Manual processes are time-consuming and prone to error. With Contact Form to Any API, you can automate your workflows, reduce human error, and dramatically cut down on admin time. It’s more than a plugin—it’s a productivity powerhouse for WordPress users.
Whether you're capturing leads, routing support tickets, syncing marketing data, or feeding internal systems, this plugin offers a simple yet powerful solution. If you're ready to streamline your operations and focus on what truly matters, this tool is for you.
Ready to take back your time? Visit ContactFormToAPI.com and see what true automation feels like.
0 notes
Text
Automate Your Workflow: Using Contact Form to Any API Plugin
In today's fast-paced digital world, automation isn't just a luxury—it's a necessity. Whether you're running a business, managing a nonprofit, or building a personal brand, streamlining your processes can save you time, reduce errors, and boost productivity. One of the most effective ways to automate your WordPress site is by integrating your contact forms with external APIs. That's where the Contact Form to Any API plugin comes in.

What Is a Contact Form to Any API?
Contact Form to Any API is a powerful WordPress plugin that extends the capabilities of the popular Contact Form 7. It allows you to send form submissions directly to any RESTful API endpoint, giving you full control over where your data goes. Whether you're pushing leads to a CRM, sending support tickets to a helpdesk, or syncing subscribers with your email marketing tool, this plugin makes it easy.
Why Automate With This Plugin?
Manual data entry is time-consuming and error-prone. With automation, you eliminate the need to copy and paste form submissions into other platforms. Here's why Contact Form to Any API stands out:
Universal Compatibility: Works with any API that accepts JSON or URL-encoded data.
Custom Triggers: Send data before or after email notifications.
Advanced JSON Support: Supports multi-level and custom JSON structures.
Authentication Options: Includes support for Basic and Bearer Token authentication.
Data Logging: Keep track of all submissions and API responses with detailed logs.
Real-World Use Cases
Let’s take a look at how this plugin can transform your daily operations:
1. Lead Generation & CRM Integration
Imagine a user fills out your contact form. Instead of checking your email and manually entering the details into your CRM (like Salesforce or HubSpot), the data is instantly transmitted through the API. Your sales team gets notified in real-time and can follow up faster.
2. Customer Support Automation
Using platforms like Zendesk or Freshdesk? This plugin can forward user inquiries directly to your support system. Automatically create support tickets, assign them to the right department, and kick off workflows based on tags or priorities.
3. Email Marketing Sync
Add form data directly into your email lists on Mailchimp, Sendinblue, or ActiveCampaign. No more exporting CSV files or dealing with import errors.
4. Custom Dashboards and Internal Tools
If you've built a custom dashboard or internal tool, you can feed data into it in real time. This is especially useful for custom ERPs, analytics dashboards, or membership systems.
Key Features at a Glance
Here's a breakdown of some of the plugin's most impactful features:
Unlimited API Connections: No cap on how many APIs you can connect to.
File Upload Support: Convert uploaded files into Base64 and send them with your API request.
Conditional Logic: Send data to different endpoints based on user selections.
Webhook Compatibility: Works flawlessly with platforms like Zapier, Integromat, and Make.
Security First: HTTPS support and robust authentication methods to ensure data security.
How to Set It Up
Install the Plugin: Search for "Contact Form to Any API" in the WordPress Plugin Directory and activate it.
Create Your Contact Form: Use Contact Form 7 to design your form.
Add API Settings: Navigate to the plugin settings, input your endpoint URL, headers (for authentication), and body structure (JSON or form data).
Test Your Integration: Submit a test form and review the API logs to verify data transmission.
Go Live: Once you're confident in the setup, publish the form on your site.
Pro Version Perks
While the free version is robust, the Pro version takes things to the next level:
Multi-API Support: Send data to multiple APIs at once.
Advanced Mapping: Handle complex data structures with nested fields.
Priority Support: Get help faster with dedicated customer support.
Tips for Optimization
Use Postman or Insomnia to test your API endpoints before connecting them.
Sanitize User Input to prevent malformed data from causing issues.
Monitor Logs regularly to catch any transmission errors or failures.
Document Your APIs for team use and future integrations.
Final Thoughts
Contact Form to Any API is more than just a plugin—it's a game changer for anyone looking to streamline their WordPress operations. By automating the flow of information between your site and external platforms, you can focus on what really matters: growing your business, engaging your audience, and delivering value.
If you're tired of manual processes and want a smarter, faster way to handle form data, give this plugin a try. The time and energy you save will speak for itself.
0 notes
Text
Connecting a Contact Form to Any API: A Complete Guide for 2025
In today's rapidly evolving digital landscape, websites are no longer static pages. They are dynamic, interactive platforms designed to facilitate communication, gather leads, and create seamless user experiences. One of the simplest but most powerful tools for this interaction is the humble contact form.
However, handling form submissions simply by sending an email no longer cuts it. Modern businesses require automation, real-time data syncing, and integration with powerful backend systems. This is where connecting a contact form to any API becomes transformative.
In this comprehensive guide, we'll walk through why you should connect your form to an API, what you need to do it successfully, how it works in practice, and key considerations to ensure your integration is secure, scalable, and user-friendly.
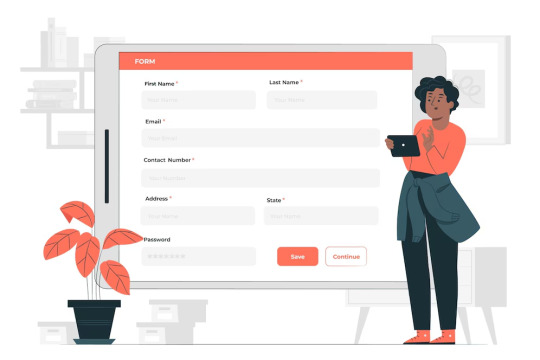
Why Connect a Contact Form to an API?
Traditional form handling usually means sending an email or saving submissions into a database. But this method can be limited, prone to errors, and slow when it comes to real-time data usage. By linking a form directly to an API, you unlock a wide range of possibilities that can enhance both user experience and business operations.
Here are several compelling reasons:
1. Instant Automation
Connecting forms to APIs enables instant actions like creating leads in a CRM, triggering marketing campaigns, sending internal notifications, or even launching onboarding workflows. Businesses can automate tasks that would otherwise require manual effort.
2. Real-time Data Sync
Rather than periodically checking email inboxes for customer messages, data is instantly available in your backend systems, CRMs, or support software, enabling faster responses and better service.
3. Scalability
As your business grows, manual methods of handling form submissions become less viable. API-based submissions scale effortlessly with increasing traffic and demand.
4. Enhanced Security
APIs allow encrypted communication, secure authentication, and controlled access. Sensitive customer information remains safer compared to traditional email-based systems.
5. Better Data Analytics
When form data flows into analytical or CRM platforms, it can be segmented, analyzed, and acted upon, leading to smarter business decisions based on real-time insights.
How Connecting a Form to an API Works
At its core, integrating a form with an API follows a simple and logical flow:
Form Completion: A user fills out and submits the form on a website.
Data Capture: The form data is captured using JavaScript on the frontend or processed server-side.
Structured Formatting: The captured data is formatted, typically as a JSON object.
Sending Request: The data is sent to the API via an HTTP request, most commonly a POST method.
API Response Handling: The API sends back a response (success, failure, errors), which the website handles appropriately, notifying the user or retrying if necessary.
Each of these steps is critical to a successful form-to-API connection, and neglecting any one of them can lead to errors or a poor user experience.
What You Need Before Connecting to an API
Connecting your contact form to an API is not difficult but requires a few critical elements:
API Documentation
Before anything else, ensure you have access to the API’s documentation. Good documentation will tell you:
Required endpoints
Authentication methods (API keys, OAuth, etc.)
Expected request and response formats
Error handling methods
Rate limits
Well-defined Form Fields
Your form fields should match or map closely to what the API expects. For instance, if the API needs a first_name, last_name, and email, your form must capture this information accurately.
Authentication Credentials
Most APIs require some form of authentication to verify that the request is legitimate. This could involve API keys, OAuth tokens, or signed headers.
Frontend or Backend Processing
Depending on your website setup, you may handle API requests directly via JavaScript or route them through a server or serverless function.
Step-by-Step Process to Connect a Form to Any API
Let’s break the process down further:
Step 1: Build and Design the Form
Your form should be user-friendly, responsive, and collect all necessary information. Fields like name, email address, phone number, and a message box are typical.
Step 2: Capture and Prepare Data
When the form is submitted, the data must be gathered and structured. Clean, trimmed, and validated data ensures that only meaningful information is sent to the API.
Step 3: Send the Data to the API
This involves creating an HTTP request (typically a POST request) with the appropriate headers and body. The body often contains the form data formatted as JSON or form-data, depending on the API’s requirements.
Step 4: Handle API Responses
Success messages, failure notices, and error details should be handled gracefully. Inform the user if their submission was successful, and if not, offer options to retry or contact support.
Step 5: Security Measures
Sensitive information such as API keys must be hidden from the frontend. This is usually done by processing the request server-side or using serverless functions.
Real-World Examples of Form-to-API Integration
To put it into perspective, here are some real-world use cases:
CRM Integration
When a customer submits a contact form, the data automatically creates a new lead in Salesforce, HubSpot, or Zoho CRM. Sales teams receive instant notifications, enabling faster follow-ups.
Helpdesk Ticket Creation
A form on a support page can automatically generate a ticket in helpdesk software like Zendesk, Freshdesk, or Jira Service Desk, streamlining customer support workflows.
Slack Notifications
Each time someone fills out a form, a message is sent directly to a company’s Slack channel, alerting the team in real-time about a new inquiry or opportunity.
Email Marketing Lists
Form submissions can add new subscribers to mailing lists in platforms like Mailchimp, SendGrid, or Klaviyo, kickstarting nurture email sequences.
Key Considerations for a Successful Integration
When connecting a form to an API, a few considerations can make a huge difference:
Validation
Always validate the form data both client-side and server-side to ensure no malformed or malicious data is submitted.
Error Handling
Network issues, incorrect API keys, or server outages can cause request failures. Prepare fallback mechanisms or retry options.
Rate Limits
APIs often impose rate limits. Ensure your form respects these limits, especially during high-traffic periods.
Data Privacy and Compliance
Depending on your business location and customer base, ensure that your form and data handling comply with regulations like GDPR, CCPA, or HIPAA.
User Feedback
Provide clear and immediate feedback to users after they submit the form — whether the submission was successful, pending, or encountered an error.
Advanced Enhancements for Contact Form APIs
After mastering the basics, you can explore advanced enhancements:
Serverless Functions
By using AWS Lambda, Vercel Functions, or Netlify Functions, you can create lightweight backend services to handle form submissions securely without managing your own server.
Multi-API Integrations
You’re not limited to one API! A single form submission could trigger multiple actions — such as adding a CRM lead, sending a Slack notification, and inserting a row into a database — simultaneously.
Spam Prevention
Adding CAPTCHA solutions like Google's reCAPTCHA or hCaptcha can drastically reduce spam submissions and protect your APIs from abuse.
Queuing Systems
For large-scale applications, it's often better to queue incoming form submissions (using systems like RabbitMQ, Kafka, or Amazon SQS) and process them asynchronously for maximum reliability.
Final Thoughts
Connecting a contact form to an API might sound complex at first, but it's one of the most rewarding upgrades you can make to your website’s infrastructure. It allows your website to not just collect information, but to act on it — pushing data into powerful systems where it can create real business value.
Whether you're integrating with a CRM, helpdesk, marketing platform, or internal communication tool, APIs empower your forms to become the first step in an automated, intelligent workflow.
In today’s fast-moving digital economy, real-time responsiveness and efficient data handling aren't optional — they are expected. By linking your contact form to an API, you’re not only keeping pace but setting your organization up for smarter, faster growth.
So, next time you add a “Contact Us” form to your site, don't just let it send an email. Connect it to an API — and unlock the full potential of your customer interactions.
0 notes
Text
Integrating a Contact Form to Any API: A Guide for Shopify App Builders
In the bustling world of e-commerce, maintaining efficient and seamless communication with customers is vital. One of the most effective ways to ensure this is by integrating a contact form within your Shopify store. For shopify form builder, making sure that contact forms connect seamlessly to various APIs (Application Programming Interfaces) can significantly enhance functionality and improve user experience. This blog will explore the process of integrating a contact form with any API, specifically targeting the needs of Shopify app builders.

The Importance of Contact Forms
Contact forms are essential tools for gathering customer inquiries, feedback, and support requests. They act as a direct communication channel between customers and businesses. When integrated with APIs, these forms can automate data collection, streamline workflows, and improve customer relationship management (CRM).
Steps to Integrate a Contact Form to Any API
1. Choosing the Right Contact Form Builder
For Shopify app builder, selecting a contact form builder that offers API integration capabilities is crucial. Some popular options include:
- Typeform: Known for its intuitive interface and powerful API capabilities.
- JotForm: Offers extensive customization options and seamless API integration.
- Google Forms: Free and easy to use, though it may require additional tools for advanced integrations.
2. Setting Up the Contact Form
Once you have chosen a contact form builder, the next step is to create the form. Key components include:
- Form Fields: Ensure you include fields such as name, email, phone number, and message.
- Design: Customize the design to align with your Shopify store’s branding.
- Validation: Implement form validation to ensure accurate data collection.
3. Obtaining API Credentials
To connect your contact form to an API, you will need API credentials (such as an API key, token, or client ID and secret). These credentials are typically obtained from the API provider's developer portal. The process generally involves:
- Sign Up: Create an account with the API provider.
- Create an App: Register your app within the API provider’s platform.
- Get Credentials: Obtain the necessary credentials for authentication.
4. Configuring the Integration
With the contact form set up and API credentials in hand, you can now configure the integration. Here’s a simplified outline of the process:
- API Endpoint: Identify the correct API endpoint to which the form data will be sent.
- Authentication: Set up the necessary authentication headers using your API credentials.
- Data Mapping: Map the form fields to the corresponding fields required by the API.
- Error Handling: Implement error handling to manage any issues that arise during the data transmission process.
Benefits of API Integration for Shopify Apps
1. Enhanced Customer Experience
Integrating contact forms with APIs can automate responses and ensure that customer inquiries are promptly addressed. This leads to a smoother and more efficient customer experience, enhancing overall satisfaction.
2. Streamlined Operations
API integration can automate the process of data entry and management, reducing manual workload and minimizing errors. For instance, integrating a contact form with a CRM API can automatically log customer inquiries into the CRM system, streamlining customer support operations.
3. Data-Driven Insights
By integrating contact forms with analytics or CRM APIs, Shopify app builders can gather valuable data on customer interactions. This data can provide insights into customer preferences and behavior, helping businesses to make informed decisions and improve their services.
4. Increased Efficiency
Automating workflows through API integration can significantly increase operational efficiency. For example, automatically routing support requests to the appropriate department or team can expedite response times and improve service quality.
Best Practices for API Integration
1. Ensure Data Security
When integrating contact forms with APIs, it's essential to ensure that customer data is securely transmitted and stored. Use secure protocols (such as HTTPS) and implement robust authentication mechanisms to protect sensitive information.
2. Regularly Update APIs
APIs are regularly updated by their providers to enhance performance, security, and functionality. Ensure that your integrations are kept up-to-date to take advantage of these improvements and avoid potential issues.
3. Monitor Performance
Regularly monitor the performance of your integrated contact forms to identify and address any issues promptly. This includes tracking response times, error rates, and user feedback.
Frequently Asked Questions (FAQ)
Q1: What is a contact form builder?
A: A contact form builder is a tool that allows businesses to create and customize forms for collecting customer inquiries, feedback, and other information.
Q2: Why should I integrate a contact form with an API?
A: Integrating a contact form with an API automates data collection, streamlines workflows, and enhances customer relationship management, leading to improved efficiency and customer satisfaction.
Q3: How do I choose the right contact form builder for my Shopify store?
A: Look for a contact form builder that offers API integration capabilities, is easy to use, and allows for extensive customization to match your branding.
Q4: What are API credentials?
A: API credentials, such as an API key, token, or client ID and secret, are used to authenticate and authorize your app’s access to the API.
Q5: How does API integration enhance customer experience?
A: API integration automates responses to customer inquiries and ensures timely communication, leading to a smoother and more efficient customer experience.
Q6: What should I consider for data security in API integrations?
A: Ensure that customer data is securely transmitted and stored using secure protocols (such as HTTPS) and robust authentication mechanisms.
Q7: How often should I update my API integrations?
A: Regularly update your API integrations to benefit from performance, security, and functionality enhancements provided by the API provider.
Q8: What should I monitor in my API integrations?
A: Monitor response times, error rates, and user feedback to identify and address any issues promptly, ensuring a smooth and efficient integration.
Conclusion
Integrating a contact form with any API is a powerful way for Shopify app builders to enhance customer communication, streamline operations, and gain valuable insights. By choosing the right tools, setting up forms correctly, and following best practices for API integration, businesses can ensure a seamless and efficient user experience. Whether you are a seasoned developer or new to Shopify app building, understanding and implementing API integrations can provide a significant boost to your e-commerce operations.
By focusing on these strategies, Shopify app builders can create robust, customer-friendly applications that not only meet but exceed user expectations, driving growth and success in the competitive world of e-commerce.
0 notes
Text
Contact Form To Any API: Bridging the Gap Between User Input and Backend Services
These forms facilitate communication between users and businesses, making them a fundamental aspect of websites, from general inquiries and feedback to support requests and lead generation. However, the true potential of contact forms is realized when integrated with APIs (Application Programming Interfaces). This integration transforms simple data collection into automated, efficient workflows.

In this blog, we'll delve into the process of connecting contact forms to any API, exploring the benefits of such integrations and the steps involved in setting them up. By the end, you'll have a comprehensive understanding of leveraging APIs to enhance the functionality and efficiency of your contact forms.
Why Integrate Contact Forms with APIs?
Enhanced Data Handling
Integrating contact forms with APIs allows for efficient data handling. Instead of manually processing form submissions, you can automate data transfer to various services such as CRM systems, email marketing platforms, support ticketing systems, and more. This automation reduces the risk of human error and ensures data is immediately available where it is needed.
Real-Time Communication
APIs enable real-time communication between your contact form and other systems. For instance, when a user submits a form, the data can be instantly sent to a CRM system, triggering immediate follow-up actions such as sending a confirmation email or creating a support ticket.
Improved User Experience
With APIs, you can provide a more responsive and interactive user experience. For example, you can use APIs to verify information entered by users (like validating email addresses or phone numbers) before submission. This immediate feedback helps users correct errors and improves the quality of the data submitted.
Scalability and Flexibility
APIs offer scalability and flexibility, allowing your forms to interact with various services without significant changes to your backend systems. Whether you are a small business or a large enterprise, APIs enable you to scale your operations smoothly.
Steps to Integrate Contact Forms with APIs
Step 1: Choose the Right Tools
Before starting, ensure you have the necessary tools and technologies:
- Web development environment (HTML, CSS, JavaScript)
- Server-side platform (like Node.js, Python, PHP, etc.)
- API documentation for the services you intend to integrate
Step 2: Design Your Contact Form
Begin by designing your contact form using HTML. Keep the form simple yet comprehensive to capture all necessary information from the users.
Step 3: Set Up Form Submission Handling
Next, set up a mechanism to handle form submissions. Typically, this involves capturing the form data using JavaScript and sending it to your server. Ensure your form validation logic is robust to prevent invalid data submissions.
Step 4: Create the Server-Side Script
On the server side, you need a script to receive the form data and interact with the API. This script will process the data and send it to the designated API endpoint. It's crucial to handle errors gracefully and provide feedback to users regarding the submission status.
Step 5: Testing and Debugging
Thoroughly test the integration to ensure successful data submission, correct API responses, and proper error handling. Use tools like Postman for API testing and browser developer tools to debug any issues.
Step 6: Deploy and Monitor
Deploy your application to a live server and continuously monitor its performance. Collect feedback and make necessary adjustments to improve the integration. Ensure the integration is secure and compliant with data privacy regulations.
Benefits of API-Integrated Contact Forms
Automation and Efficiency
Automating data transfer through APIs streamlines workflows, reduces manual work, and increases efficiency. This automation is particularly beneficial for businesses handling large volumes of form submissions.
Enhanced Customer Relationship Management
Integrating contact forms with CRM systems via APIs ensures that all customer interactions are logged and managed effectively. This integration allows for better tracking, follow-up, and management of customer relationships.
Improved Data Accuracy
Real-time validation and immediate feedback during form submission ensure higher data accuracy. APIs can check and correct user input, reducing the chances of errors and improving the overall quality of the data collected.
Seamless User Experience
APIs enable a seamless user experience by providing instant feedback and immediate responses. Users appreciate the efficiency and responsiveness of well-integrated contact forms, enhancing their overall experience with your website.
Scalability and Adaptability
API integrations make it easy to scale your operations. As your business grows, you can integrate additional services without overhauling your existing systems. This adaptability ensures that your contact form remains effective and relevant as your needs evolve.
Conclusion
Integrating contact forms with APIs is a powerful strategy to enhance your web applications' functionality and efficiency. By automating data handling, enabling real-time communication, improving user experience, and providing scalability, API-integrated contact forms offer significant advantages. Following the outlined steps, you can create robust contact form integrations that streamline workflows and deliver value to your users.
Frequently Asked Questions (FAQ)
1. What is an API?
An API (Application Programming Interface) is a set of rules that allows different software entities to communicate with each other. It defines the methods and data formats that applications can use to interact with external services or systems.
2. Why should I integrate my contact form with an API?
Integrating your contact form with an API automates the data submission process, reduces manual handling, ensures real-time data transfer, and can trigger automated workflows like sending confirmation emails or creating support tickets.
3. Do I need to know how to code to integrate a contact form with an API?
While some coding knowledge is beneficial, many platforms offer plugins or services that simplify the integration process for those with less technical expertise. Basic web development and server-side programming knowledge will help you customize and troubleshoot the integration.
4. What are some common APIs used with contact forms?
Common APIs used with contact forms include email marketing services (Mailchimp, SendGrid), CRM systems (Salesforce, HubSpot), customer support platforms (Zendesk, Freshdesk), and custom APIs for proprietary systems.
5. How can I ensure the security of the data submitted through my contact form?
To ensure data security, use HTTPS to encrypt data in transit, validate and sanitize user input to prevent injection attacks, and follow best practices for API security, such as using API keys and authentication tokens.
6. Can I integrate a contact form with multiple APIs?
Yes, you can integrate a contact form with multiple APIs by configuring your server-side script to make multiple API calls. This allows you to send the same data to different services simultaneously.
7. What should I do if an API integration fails?
If an API integration fails, implement error handling in your server-side script to manage such scenarios gracefully. Log errors for troubleshooting and notify users of issues in a user-friendly manner. Regularly test your integrations to ensure they remain functional.
By integrating your contact forms with APIs, you unlock a new level of functionality and efficiency for your web applications. This integration can significantly improve data handling, user experience, and overall operational efficiency, making it a valuable addition to any business's digital toolkit.
0 notes