
cooking-with-ram
Come cook with a ram
30's | This blog is about physical
and mental health,
gluten free cooking, nutrition,
and gardening
8 posts
Don't wanna be here? Send us removal request.
Last Seen Blogs


Text
Been a while since i posted here. But im back. My mental health has been up and down a lot the last few years and thus my health and cooking habits have taken a hit. I am back though.
Today i made turkey sausage patties.
Ingredients:
1lb lean ground turkey
1/2 teaspoon granulated garlic
1/4 teaspoon garlic salt
1/4 teaspoon fresh crack black pepper
1/8 cayenne (totally optional and can even increase to 1/4 if you like spice)
1 teaspoon italian seasoning
1/4 teaspoon fennel fronds or 1/8 teaspoon fennel seed
1/2 teaspoon smoked paprika
2 teaspoons minced dried onions
Mix your ground turkey with seasonings until well incooperated, then let it sit covered in the fridge for 2 hours minimum but preferably overnight. I made 2 oz patties with this batch but they plump up a lot and therefore shrink in circumference, so i recommend 3 oz patties. Warm your pan before adding the patties, and cook on medium low heat. Cook in extra virgin olive oil (other fats optional), and after you flip when they are browned on one side, cover the patty for 2-3 mins until it is finished cooking. Covering it allows it both to brown and steam, which helps it keep moist.
These freeze really well and i ended up turning them into sandwhichs with some cheese. Next time i will add some egg as well.
These are low in sodium, low in fat, and high protein. They are easy to make, so are perfect for your low energy days.
0 notes
Text
Simple shellfish avocado salad
I put this on bread, tortillas (make a wrap), eat it plain, with crackers (gluten free), eaten on salads, in slaws, or as a dip for chips. I use a lot of frozen shellfish in my house. Since I can't have white poultry fat (can only eat skinless chicken breast or skinless turkey) I try to meet my lean meat requirements with a lot of shellfish. Also shellfish is a great source of manganese (important for joint, muscle, and tendon health), selenium (important for salt and electrolytes), and also is a great source of natural iodine. It also has lots of healthy fats and a good ratio for omega 3 to omega 6 to help balance you out.
Usually what I use in this is shrimp, scallops, squid, or clams. Something mild and low in fat. I also use cheaper shellfish because its hard to afford crab and lobster. Though if you have extra lobster or crab this would work well. Shellfish tends to freeze well and for prolonged periods compared to fish. Though I think fatty firm fish may also be a good choice for this.
This recipe literally has one cooked component.
Ingredients-
Shellfish/fish- 1 lb
Lemon- half of one large one
Salt- 1/4 teaspoon about
Fresh cracked pepper- 8-10 grinds or less if you want
Smoked paprika- 1/2 teaspoon
Butter- 1 tablespoon
Avocado or olive oil- 1/2 tablespoon
Garlic salt- 1/2 teaspoon
Granulated garlic- 1 teaspoon
Dill- 2 teaspoons
Avocado- 1 large
Tomatoes- 2 medium
Melt your butter with your oil in a large sautee pan
Once the oil and butter are warm add your shellfish and cook it in a mix of your herbs and spices, only adding 1/4 teaspoon of the garlic salt, mix the herbs and spices well once you flip the shellfish.
Remove pan from the heat (and turn of your stove), let the shellfish cool until its handleable. Keep the cooking liquid. Once you can handle the shellfish cut it into small chunks, about a rough dice or a little larger.
Mash your avocado into a bowl and mix it with about 1/4 cup of your cooking liquid, add the tomatoes (cut into a rough chop) and then add the shellfish and mix well.

(I made this batch with scallops)
Now here you can add onions, spring onions, chives etc.
Add the rest of the garlic salt and add a quick squeeze of more lemon over the top.
Remember this is a simple dish, with lots of healthy fats, proteins, and depending on what you add to it to eat it with, carbs or/and veggies.
This makes enough for 2-3 meals. Its easy to add things to this to make it go to 4-5. Keep it in a sealed container in the fridge. This won't freeze well sadly. I hope this helps with using up any extra shellfish you have and makes a simple nutritious meal for you. Also don't be afraid to change things to how YOU like them. We celebrate diversity here and being independent cooks.
0 notes
Text
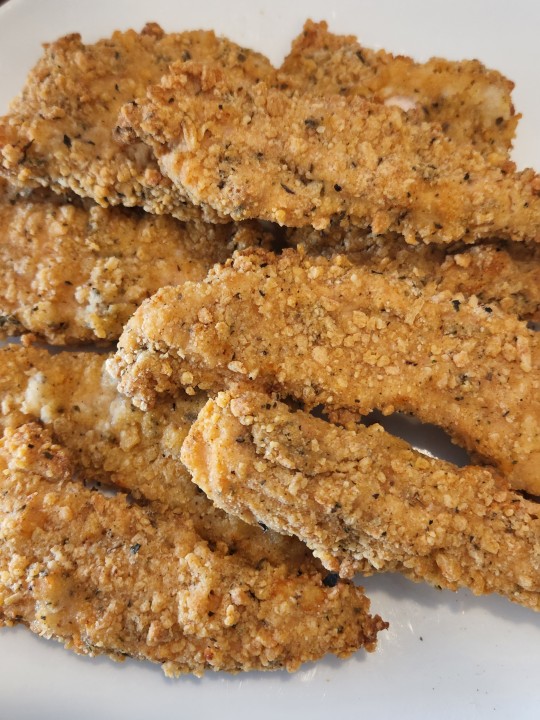
Gluten Free Oven-Baked Chicken Tenders
These chicken tenders are great, nice and crispy, and reheat well. I tend to make mine in a large batch and freeze, you can reheat either using the oven, a toaster oven, or the microwave. My go to is the microwave because I meal prep for the days when depression is hitting hard. Also making my own gluten free chicken tenders has saved me money, I buy most of my ingredients on sale and usually chicken tenders in my area that are gluten free and pre-made are 16.00+ USD a package (3 meals). Most of what’s below already have in the house and it makes 6-8+ meals.
Ingredients- This recipe is for multiple batches and can be paired down pretty easily by taste for smaller batches.
3-4 lbs of chicken breast
3 eggs (I prefer free range from my local farmer’s market)
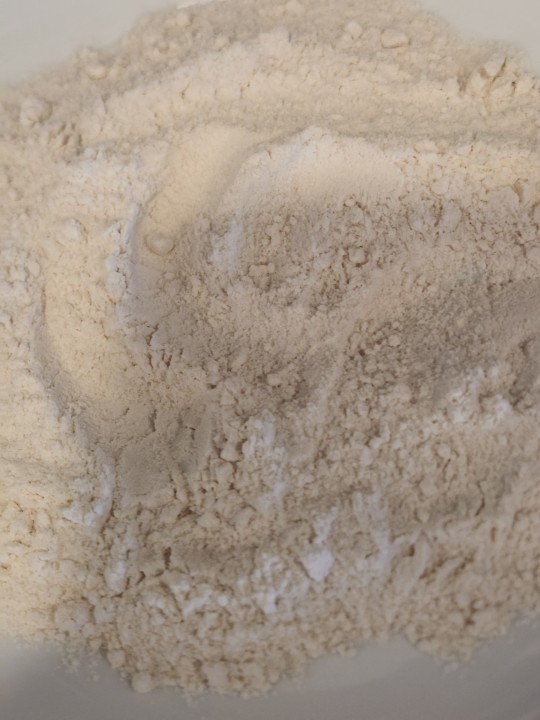
1 cup of brown rice flour
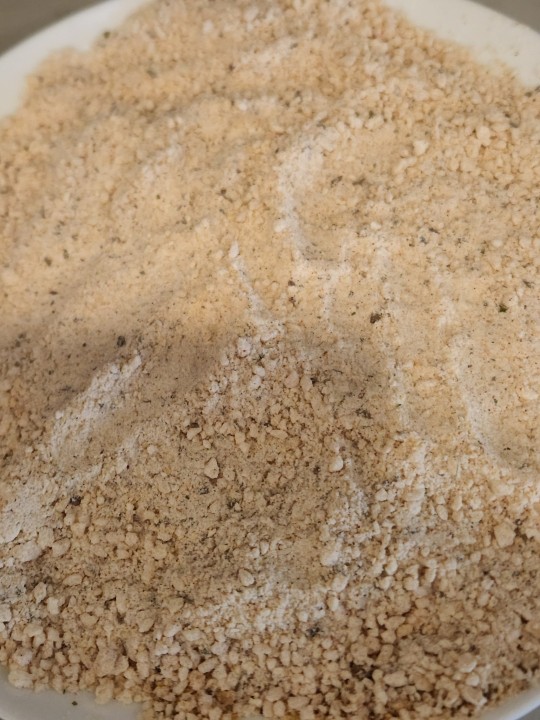
3 cups Gluten free panko or unsweetened rice puff cereal (slightly crushed)
1 cup Gluten free Italian bread crumbs or you can make your own
3 tbsp avocado or olive oil (I recommend putting this is a spray bottle or mister made for oils)
3 teaspoons of rubbed sage
1 tbsp of garlic salt to start
2 tsp of granulated garlic
1 teaspoon of fresh cracked pepper
3 teaspoons of basil
2 teaspoons of parsley
2 tbsp of smoked paprika
Take out two shallow dishes, one wide bowl, and one fork. These will be used for your breading station. Prep your pan where you will cook the chicken. I like cooking them on top of an oven safe cooling rack that fits inside a baking pan, I usually line the baking pan with tinfoil (you don’t need the rack for this recipe but it gets a better crisp). Spray some of your oil liberally on the rack/tin foil. Preheat your oven to 425 degrees Fahrenheit.
Mix your panko and bread crumbs, then add 1/4 cup of the brown rice flour to this mixture and mix well again. I recommend putting this mix in the shallow dish closest to your baking pan. Then in the other shallow dish you will put the rest of the brown rice flour and in the wide bowl you need to add your eggs, add 2-3 tablespoons of water to your eggs and beat until well combined.
Add 2 teaspoons of rubbed sage to your bread crumb mixture, all the garlic salt, all the garlic, 1/2 a teaspoon of pepper, 2 teaspoons of basil, all the parsley, and 1 and 1/2 tbsp of the paprika.
Put the rest of your spices and herbs into the brown rice flour. Mix everything well. Taste both mixes and adjust to your preference. I often go stronger on the garlic salt, and a second tbsp because we don’t season the chicken itself.
We have our stations set up, I use the wet dry technique for my hands. Meaning, only touch the wet chicken and egg wash with one hand and a fork, while you touch the dry flour or bread crumb mix with your other hand. (the crumb and flour amounts needed for this much chicken is eyeballed from my usual recipes. Sometimes I use more, sometimes less, you will do the same)
Cut your chicken breasts into strips, I don’t try to keep things similarly sized. I do however cut out the large piece of tendon running under the breast that would normally attach to near the breast bone. Cut out most of the larger piece, if you want tender meat, however it doesn’t make them taste any different.
Place several of the strips into the egg wash, and flip them using the fork until they are well coated. Coax a single strip up so that you can grab it with your wet hand and let it drain some of the egg back into the bowl before transferring into the brown rice flour. Make sure it is coated lightly on all sides and then when it is ready, shake a little extra off just in case. Put the strip back into the egg wash and get it covered with the help of the fork, then grab it to then put it in the bread crumb mixture. It will take several rotations and gently pressing the breading into the chicken until it is well covered. Give it a light shake to knock off any excess and then place on the baking sheet.
Repeat.

If you want a good browning and well cooked breading without dried out chicken I recommend lightly misting/spraying or brushing the chicken with oil. Put them into the oven once it reaches temp for 11-13 mins on one side and then flip them, once again brush/spray the new side with oil and then put them back in the oven for another 11-13 mins. I recommend watching the oven on the second bake, sometimes it takes certain ovens 2 mins less and until you know your timing for your oven I would check them after 10 mins just to know where they are. You want them lightly golden brown like the picture below. Remove and put them on a cooling plate. You can eat right away (after they are cool enough obviously) or you can freeze like I do for later.
Oven reheat: Temp 425 degrees F for 15-18 mins depending on your oven
Microwave reheat: 6 tenders for 1 min on one side, then flip and heat for another 1 min-1.5 mins
3 notes
·
View notes
Text
Beef Tongue
Beef Tongue
Figured I’d start with a recipe of something a little weird. I absolutely love beef tongue, tastes like the best steak and pot roast combined. This is a super easy recipe to cook, I prefer cooking it in a slow cooker of some type due to the consistency in temperature, but it can easily be done on the stove too.
This recipe is for a 2lb beef tongue, but a 3lb beef tongue works just fine just adds to the simmer time.
Ingredients-
2 lb- 3lbs of beef tongue
1/4 cup of blush or red wine
1 teaspoon of rosemary leaves
1/2 teaspoon of rubbed sage
2 bay leaves 3-4 cloves of garlic
1/2 an onion
2 healthy pinches of salt
1/2 teaspoon of freshly cracked pepper
8 oz of Beef Stock or 1 beef bouillon cube
Instructions
-Rinse beef tongue
-Put it in pot, cover with PLAIN water
-Bring to a boil for 20-30 mins and skim the foam from the top
-If you plan to use a slow cooker transfer here, using the same water is fine
-Add your other ingredients to the water
-Lower the heat/start the cooker until you reach a simmer
-Simmer for 4 hours for 2lbs, simmer for 5 hours for 3lbs, turning the tongue every 30 mins to an hour
-It will be ready when you can pierce it with a fork (there will be some resistance because of the skin but once you push past it and into the meat there should be minimal resistance)
-Remove and let cool just until it is bearable to the touch, then split the tongue with a knife down the middle just under the skin (the white layer that appears)
-Wiggle a fork between the skin and the meat to make it easier to start the peel and remove ALL of the skin from the meat
-Cut and serve, or store in the freezer or fridge. It warms up great. You can make a sauce from the stock though I never do. The tongue has plenty of flavor itself.
I like using this to make tacos, sandwiches, melts, stew, pretty much anything. Beef tongue has a good balance of saturated and unsaturated fats, and it’s trans fats is minimal. Which means it’s not considered a low calories protein but it does hold healthy balance of fats and won’t add a lot to omega 6 side of your balance.
For me it’s a great source of Zinc, Iron, Vit B’s and Potassium. It brings a ton more to the table but I won’t get into that now. But I struggle with my potassium levels and also have iron deficiency on and off. Taking all this into account is hugely beneficial to my meals.
If you have any questions please ask!
0 notes
Text
Bok choy from the store and sweet potato greens from the garden. For those of you who don't know sweet potato greens are very edible. They are bitter and a bit spicey raw, cooked they are actually more sweet with a bitter undertone.
They take to sauteeing well and are amazing in stirfries. I suggest clipping off the large stems but young/tender stems can be eaten as well as older or young leaves. They go great with garlic, pepper, chillies, and stand up to strong flavors. The plant also does well with regular harvesting (usually every other week depending on how large the plant is in small/medium amounts) and grows back just fine. A single sweet potato can produce up to 50 slips, i take my extra slips that I don't plant and grow them to harvestable size in a vase of water.
I love sweet potatoes because they are an extremely versatile plant. Remember regular potato greens are not edible.

2 notes
·
View notes
Text

Breakfast
Garlic, butter, cheese gluten free drop biscuits
Low moisture part skin mozarella cheese
Spicey mayo
Beef tongue
This was warmed up after being made and frozen.
1 note
·
View note
Text
Hey, yall with celiacs!
The FDA has allowed companies to not label things with gluten allergens. This means that, once again, the gluten free label can deceptive, and we need to start reading through all of the ingredients again (unless it has the verified label from GFCO). I'm not entirely sure how far this goes, but if looking for treats, do Not believe: cadbury cream eggs, newman o's. They are not gluten free. Stay safe!
Here is an example of the GFCO logo, they verify that advertised gluten free foods actually are:

Either of these logos means that a food has been verified by a third party company that is not the FDA (who has proven we cant trust them). I'm not sure about other verification companies, but I trust this one because they certify gluten free within celiac sensitivity standards. If you know of any other companies, feel free to add!
Once again, stay safe!
Non-celiac people are encouraged to reblog this.
32K notes
·
View notes
Text
I suppose my first post should be an introduction. I didn’t used to cook, not until I learned I had celiac disease and was forced to adjust my first year to not having ready-made meals or knowing what was safe or not. I was never diagnosed celiac, I eventually did an elimination diet and learned through that. I always recommend getting an official diagnosis if you can. By the time I learned I needed to eat gluten-free I had already been for well over several months.
So I started cooking. I learned to meal prep, I learned what could be frozen, how to make gluten free meals and bake gluten free things. How to tweak recipes the first time to my taste buds.
I also take psychiatric meds, which means it’s hard for me to lose weight, easy to gain, sometimes hard to make myself eat. Which means I need to make meals count with nutrients, cut back on calories without causing a calorie deficit and pair it with good exercise.
This year as Covid caused more issues with stocking and hard to find vegetables, I started my own garden. I grow everything from potatoes, yams, various onions, leeks, garlic, kale, lettuce, cabbage, spinach, tomatoes, squashes both winter and summer, carrots, and turnips.
I hope to share recipes here, the important of different macro and micro nutrients and how to get them naturally, organic gardening tips and tricks, and how to keep up the mental and physical health battle
3 notes
·
View notes