Statistics
We looked inside some of the posts by magpiemending and here's what we found interesting.
Average Info
Notes Per Post
51K
Likes Per Post
31K
Reblog Per Post
20K
Reply Per Post
62
Time Between Posts
11 days
Number of Posts By Type
Text
15
Photo
1
Video
1
Last Seen Tumblr Blogs


Fun Fact
Tumblr has 16.74 million mobile monthly users in the US.
Text
oh my god there is such a learning curve on new sewing machines. i did not know it mattered how the thread was wound on the spool
#some of them are zigzag-y and some arent???#trying to wind bobbins and Struggling because this is my first time using a horizontal spool pin lmao#magpiemending#i got a new sewing machine and im very excited but also Oh My God#4 tries at winding the bobbin. and i still havent got the colour i wanted wound#got a different one at least though
1 note
·
View note
Text
oh i never updated this! well the size medium PJ shorts were Way Too Big. i sewed them up and pinned the elastic on, and then didn't bother sewing it in place because they were clearly not the right size for me.
not sure when i'll get back to these, because with summer ending i have less need for PJ shorts, and i have a number of other things i want to make (drawstring bag, messenger bag, that sink skirt from ages ago...) but i did print and assemble the pattern for the size small. just gotta draw the pocket pattern and cut the fabric.
FINALLY SEWING ON THE MACHINE!!!
#magpiemending#sewing#machine sewing#the drawstring bag is high priority because it's easy(ish) and im interested in it rn#the messenger bag is medium priority because i really need a plain one but it's a little intimidating#i'm planning on replicating one i have that's bright colours#so i have both options#it's a simple design
11 notes
·
View notes
Text
VERY pleased to announce that after a year of half-assed ab exercises i can now carry the sewing machine around without fear 💪😤
ok what kind of workout do i need to do so i can carry a heavy object (sewing machine) up and down stairs safely
#not without difficulty! but without fear. which is all i needed#the 1970s singer is Solidly Built im guessing she weighs about 40 lbs#idk exactly i dont carry a lot of heavy objects around#might be closer to 30#magpiemending
5 notes
·
View notes
Text
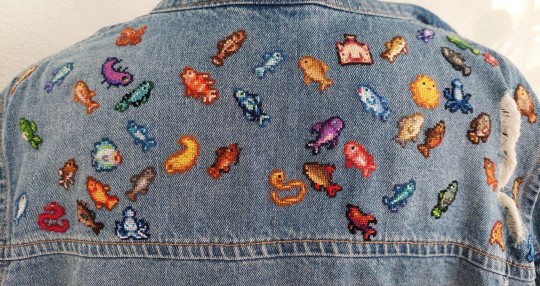
People! We're making progress! The Fish Jacket will definitely be ready for spring :)
Patterns here
5K notes
·
View notes


Text
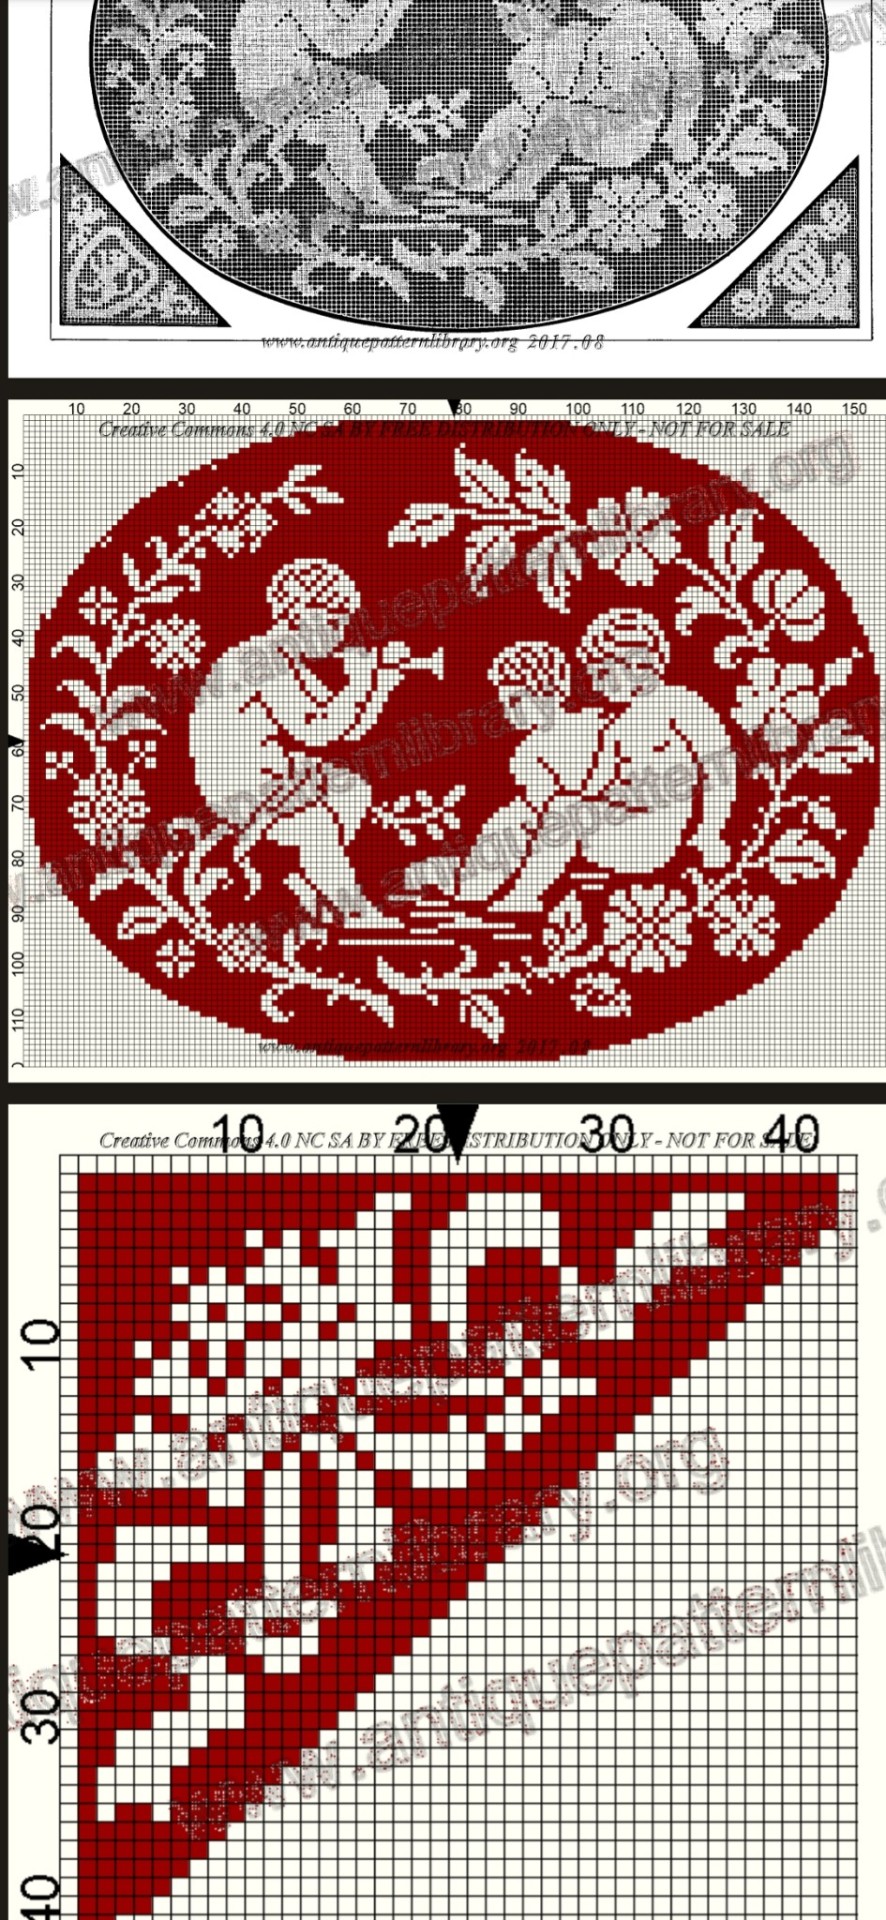
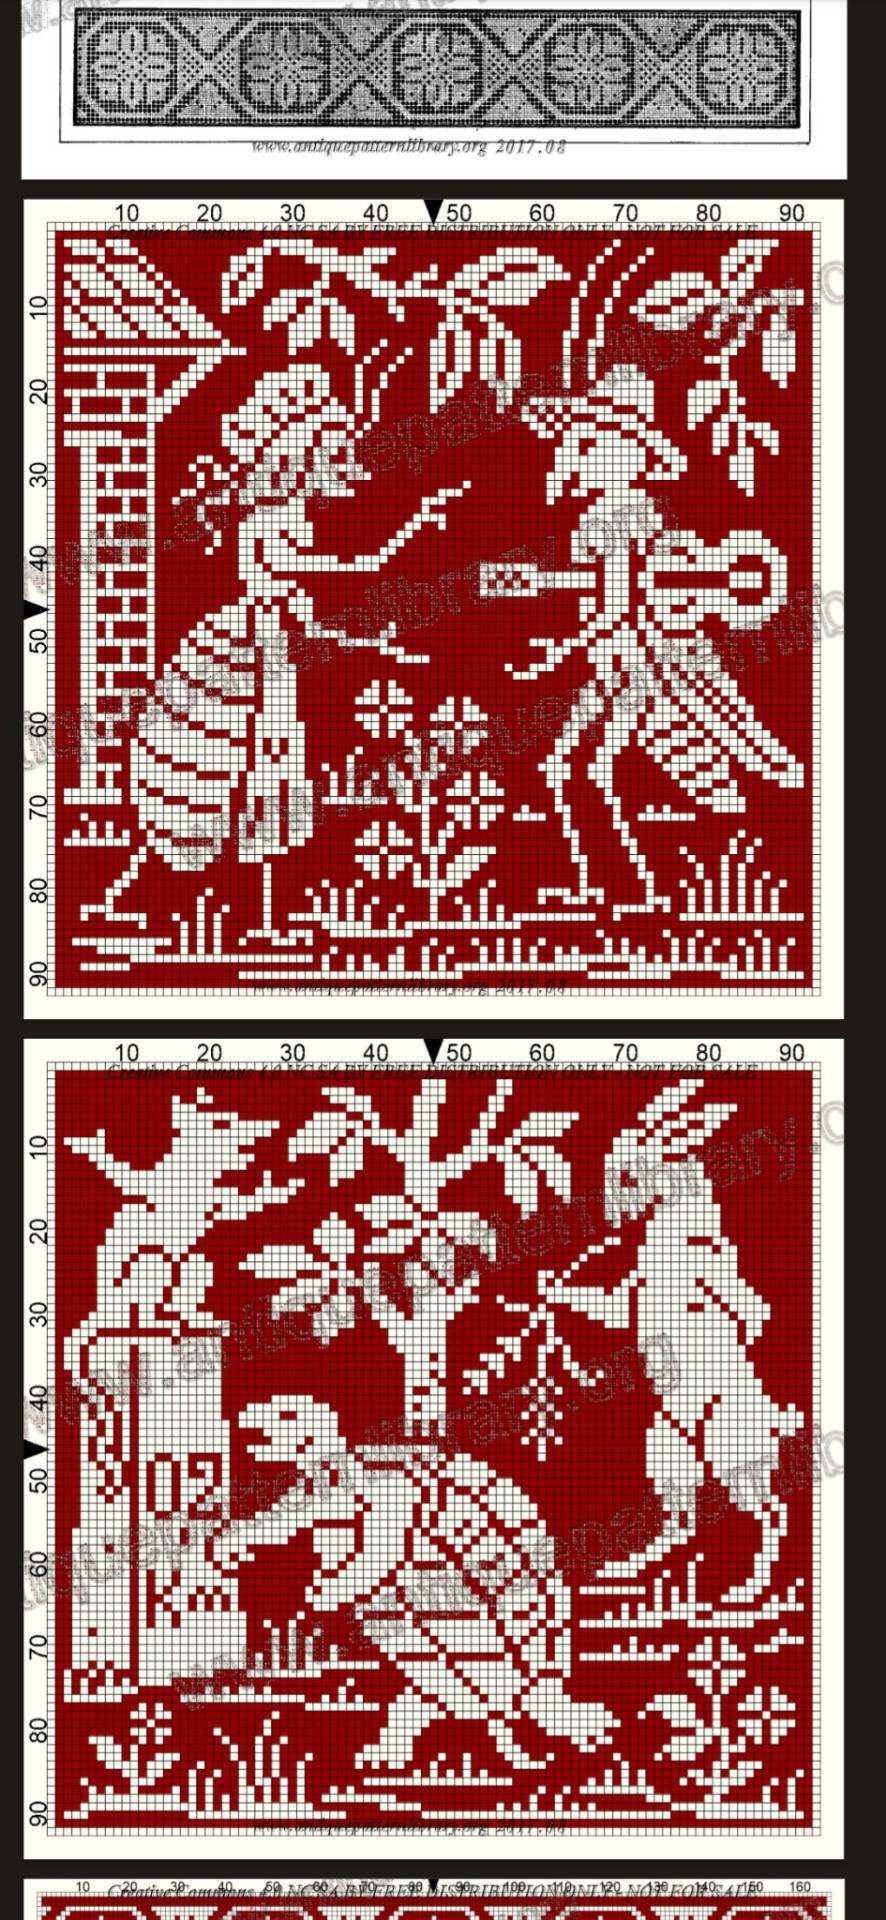
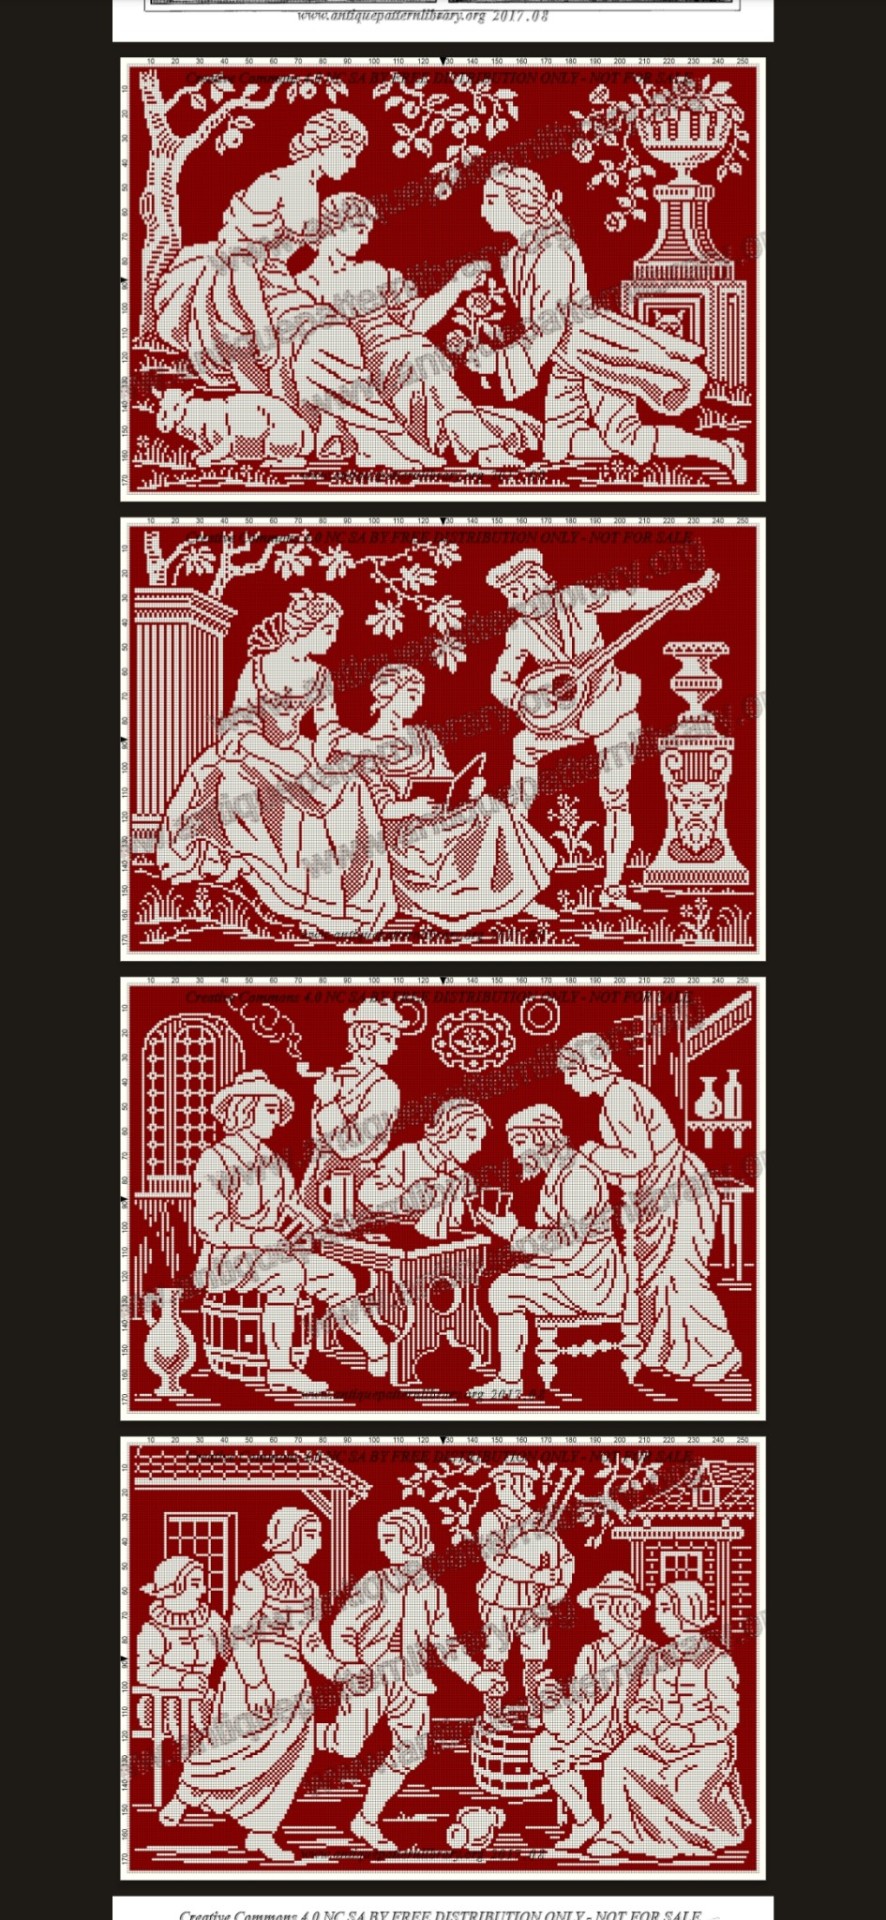
K so not to be dramatic or anything, but there's a free vintage French pattern book available on antiquepatternlibrary so if you like to crochet/weave/make pixel art/tie epic friendship bracelets don't walk- RUN.
It has scenes from aesop's fables! Cherubs doing things! Beheadings! Greek muses! Little farm people! Intricate floral pattern! Goth stained-glass window like patterns! Fun little corner pieces! Eeeeeeeeeeeeee
https://www.antiquepatternlibrary.org/html/warm/C-TT008-180.htm


32K notes
·
View notes
Photo

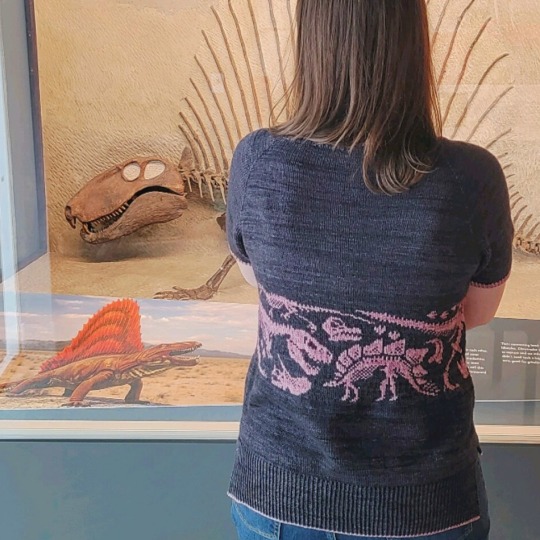

Fossil Frenzy Tee Pattern // Hunt Hand Knits
3K notes
·
View notes
Text

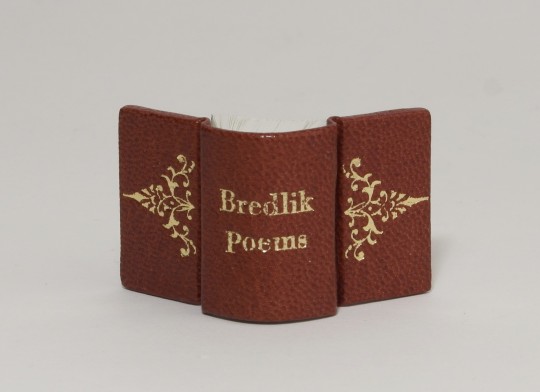
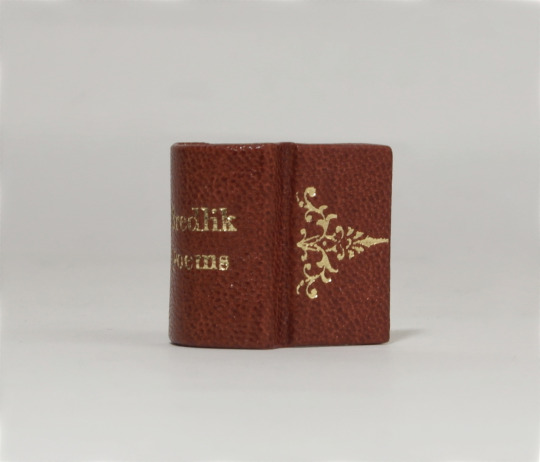

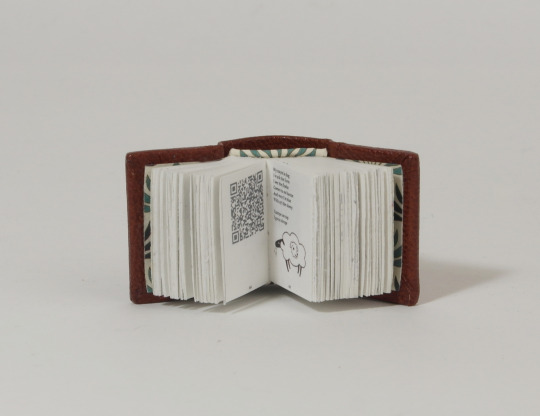
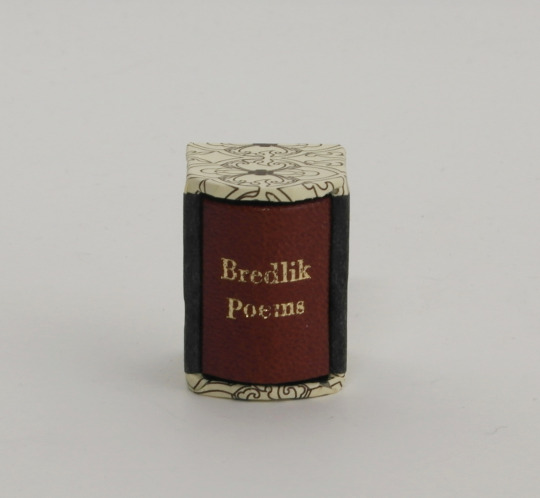

Bredlik Poems (anthology) - collected and credited by @marvinhere doodles by Jenny
This typeset was shared with me complete with doodles and QR-codes.
materials used
cover binders board, 1,5 (covers) cardboard (spine stiffener) leather, goat (covering material) heat activated foil (hot stamped title and decorations)
inner book Munken polar, 100gsm (book body) printed decorative paper (endpapers and endbands)
slipcase binders board, 1,5 decorative paper, printed (narrow sides) satogami paper, black (wide sides, inner lining)
dimensions 2,5cm x 2,5cm
557 notes
·
View notes
Text

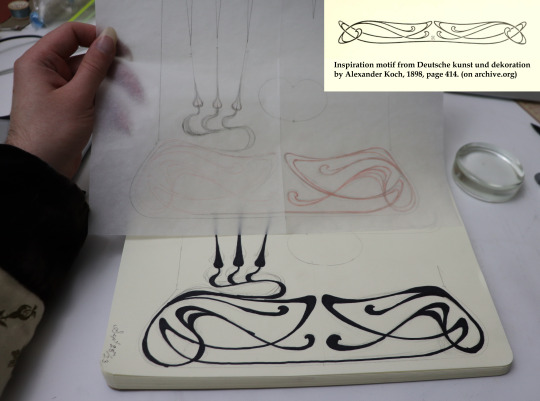
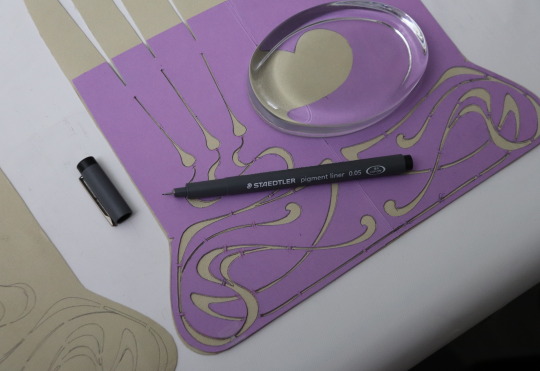


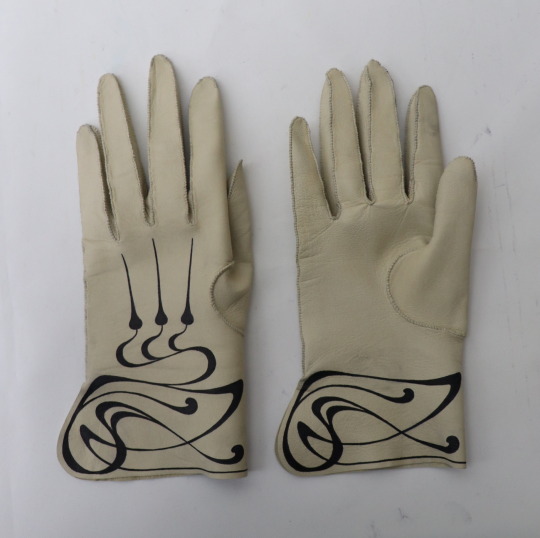
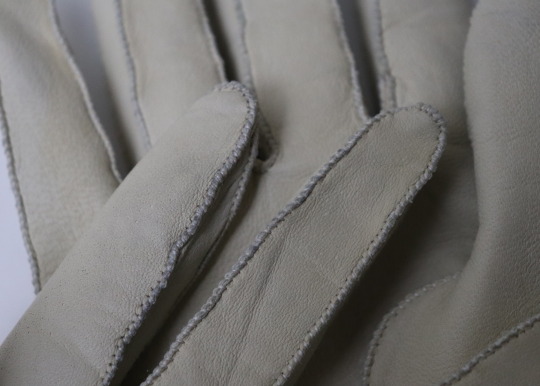
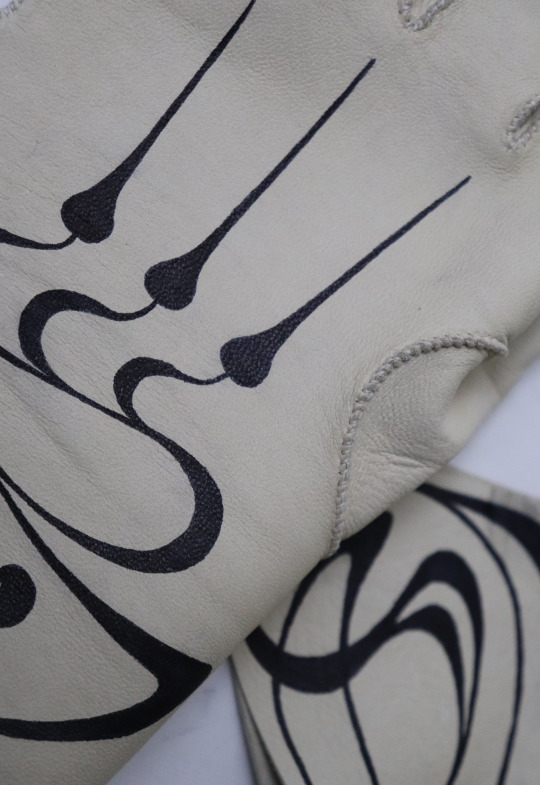
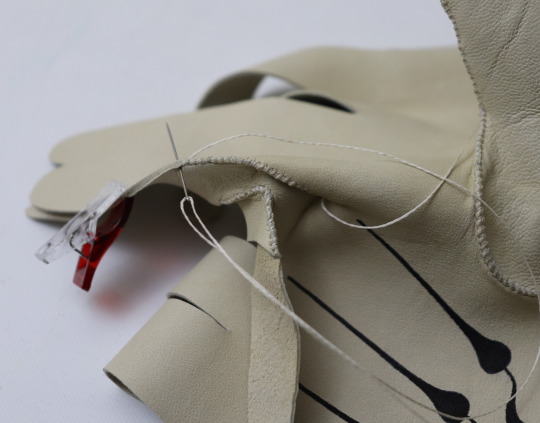
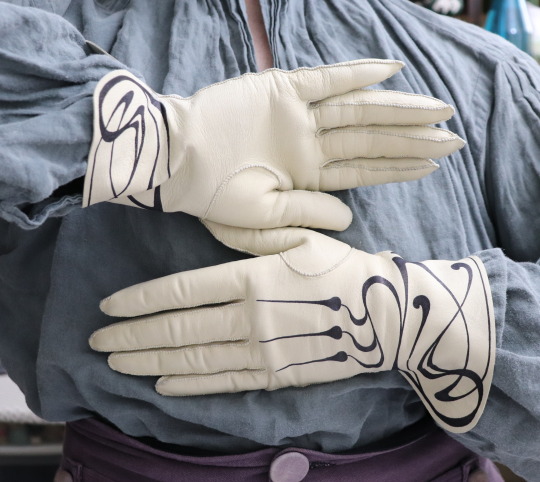
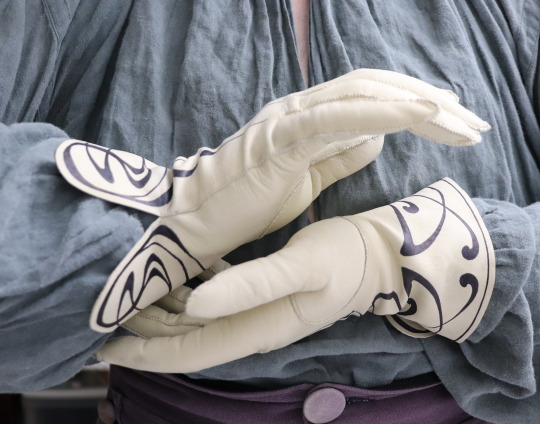


And another pair of gloves. I'm quite pleased with these ones.
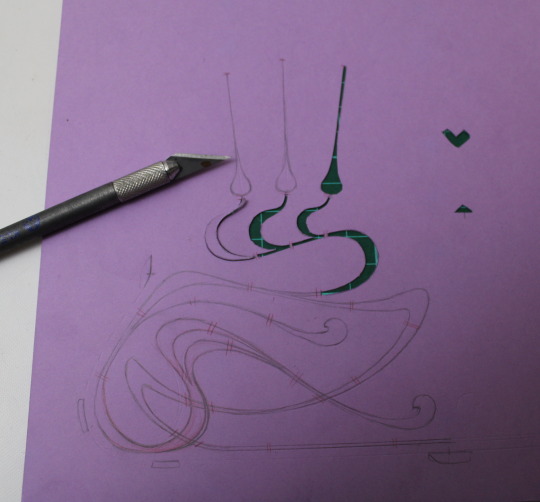
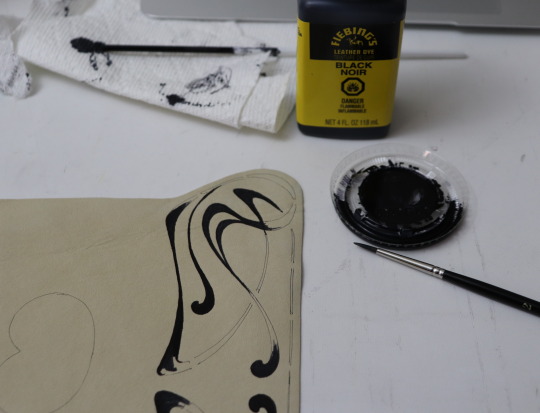
Back to the 1760's Diderot pattern cuff shape this time, and I wanted to try adding some decoration, so I painted art nouveau swirlies around the cuffs using leather dye. (Which is of course not historically accurate, but art nouveau and mid 18th century menswear go together so, so well.) My inspiration was a motif from an 1898 book, which I found on pinterest, and I re-drew it a few times until I had a version that I liked and that fit the glove.
I wasn't sure how to go about transferring the design accurately to the leather, so I ended up making a stencil and tracing it using a very fine tipped pen, then colouring it in with the dye. The dye was very easy to paint with, but putting it in a little dish made it dry out and thicken extremely fast, which was not so good. For the second glove I put the dye in a porcelain thimble, which was better, but next time I'll try to find something even smaller with even less exposed surface area to put the dye in. Or I could perhaps try leather paint instead. I'll have to hold off on wearing these until I've gotten some sort of finishing coating to protect the dye, because it's unfortunately smudged a bit from handling. I did do a sample specifically to test for this and it didn't smudge, but in the sewing up process the gloves got touched quite a bit more than the sample, alas. And it may be partly due to the aforementioned drying out and thickening, which left more dye on the surface.
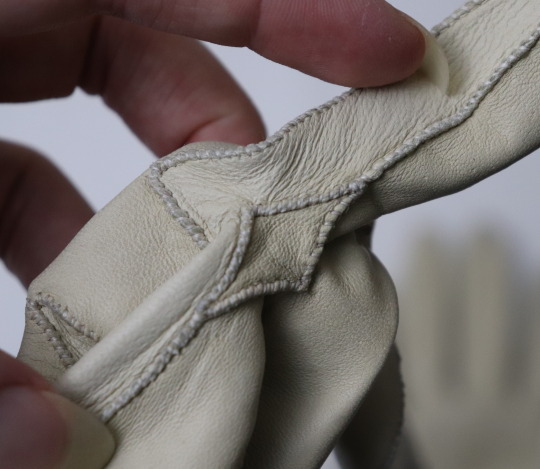
The leather is lambskin from ItalianSkins on etsy, and they're sewn up using silk yarn that my mother gave me. (With a regular needle again, because the only leather needles I have are too big.)
4K notes
·
View notes
Text

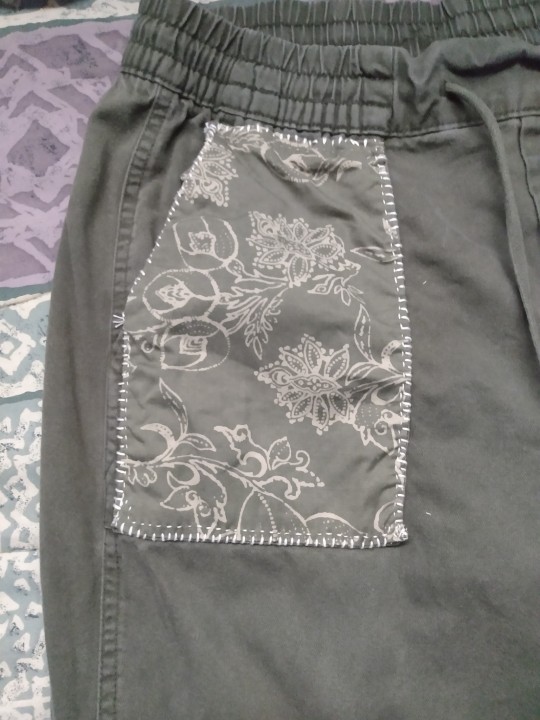

Here's a pair of pants I've been modifying!!! The pants were thrifted from goodwill I believe, the patches on the pockets were from a pair of shorts I got from the same store and I painted a sun on the knee ☀️
I still have to decorate the back and I want to add a patch underneath one of the pockets :)
300 notes
·
View notes
Text

Today's sewing lesson: if you think you can get away with not basting, no you can't.
#magpiemending#sewing#'i don't need to baste this' i said#'it will be fine' i said#whyyyyyyy#now i have to unpick it AND baste it#im using a piece of an old sheet and it's very high quality cotton#which means it is a COMPLETE PAIN IN THE ASS to sew by hand#such high quality it doesnt want to let the needle through -_-
3 notes
·
View notes
Text
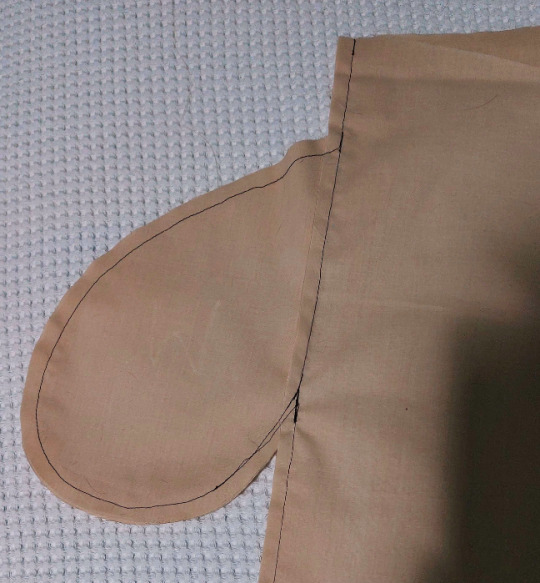
actually i got impatient about not knowing how these are going to fit, so i pinned everything together. turns out they are probably too big!
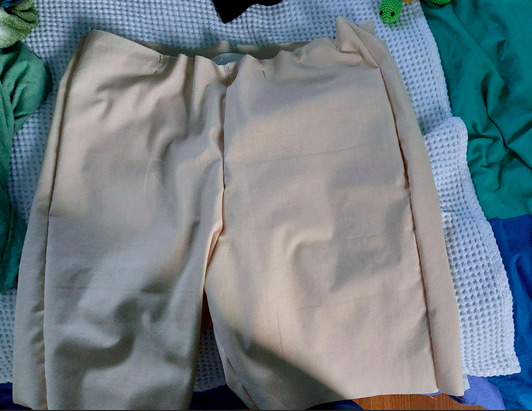
i wasn't sure if i was going to be a size M or size S. this is the M and they are very baggy. so this means:
no more ironing, i'm just going to sew them up fast to make sure they're too big
definitely no seam finishes
going to have to do a second mockup in size small... sigh... printing patterns on letter size paper is such an ordeal
more fabric tracing and cutting :(
on the bright side i will get the opportunity to mock up my modified pocket design
FINALLY SEWING ON THE MACHINE!!!
#based on the chart i might be between sizes. i really hope not though lol#magpiemending#sewing#machine sewing#i really should buy some pj pants for in the meantime. it's gonna be a while before i finish a pair
11 notes
·
View notes
Text
today's update: i sewed the side seam on the 2nd pant leg with the matching thread, & managed the tricky corner in one go this time. the basting definitely helped. also, currently winning at thread chicken.
next step is a bunch of ironing, which i may or may not get to tonight.
FINALLY SEWING ON THE MACHINE!!!
#i also have to decide how i want to finish the seam allowances. which is very annoying#it's a mockup... do i have to....#no. but i might regret not doing it because it's good practice. and im planning on wearing the mockup if it turns out ok#might just topstitch them down?#yknow what. im gonna pin everything together and try them on. and if the fit seems fine ill do some basic seam allowance finishing
11 notes
·
View notes
Text
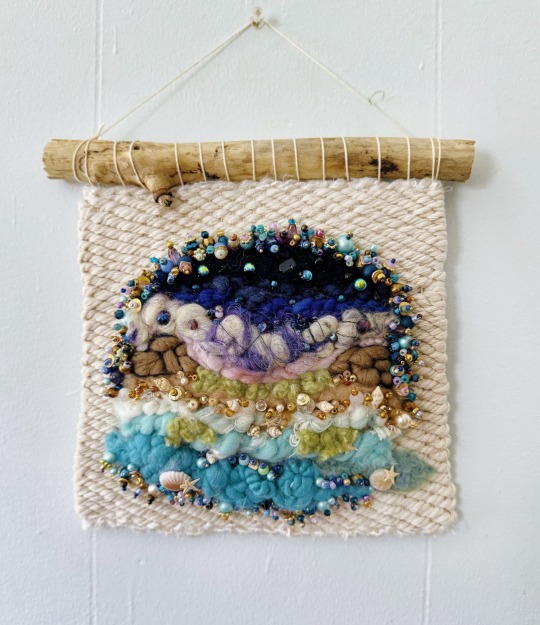


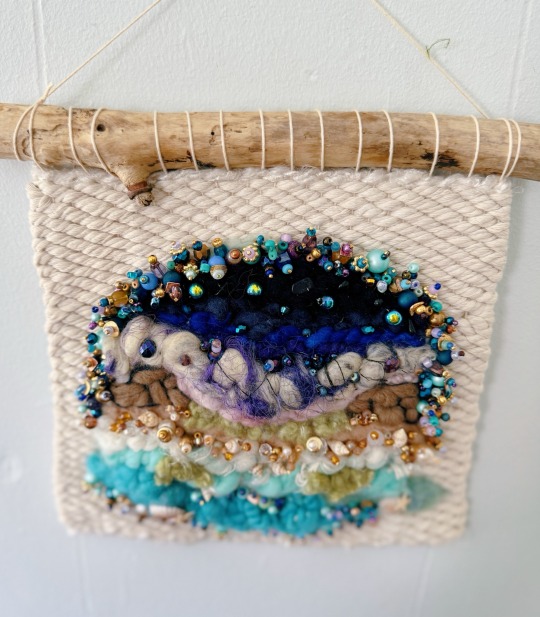

Beachy vibes 🏖️
Materials: wool, silk, recycled cotton rope. Includes handspun art yarn, beading sewn on.
179 notes
·
View notes
Text
today's update: my bobbin thread ran out at some point yesterday, possibly right after i finished that third pass at the pocket corner, so i changed to more or less matching thread. it was way easier than i remembered to rethread the sewing machine & i can do it by memory now.
i still don't know how to use the bobbin winder, & i don't think looking up instructions will help because this specific machine has a finicky one. i've scrounged some half-full bobbins from various sewing boxes & will be playing thread chicken when i start sewing again. doesn't look like i'll have much time, though, so that may be all for today.
FINALLY SEWING ON THE MACHINE!!!
#magpiemending#fullest bobbin ive found so far is a white one#which is good because i actually need white thread for a quilt hanging sleeve#but it does mean im just using random skimpy ones on the shorts because i need to save the white until ive finished the sleeve#after i do this 2nd side seam the shorts need ironing again so im going to do the quilt thing sort of in between steps
11 notes
·
View notes
Text

as predicted i don't really like the pocket design. i understand the logic of sewing the bottom corner like that - it means you can go right around without having to double back at all - but it was a pain in the butt to get the angle right & i ended up having to go over it 3 times.
before i sew the 2nd leg i'm going to baste that section of the pocket in place. for the final pants i will probably make a new pocket that's a bit deeper & joins up with the side seam at a right angle.
i think it also might have been nice to change thread colours between attaching the pocket pieces to the pants pieces & sewing up the side seam/pocket seam, just so i could more easily see the pocket opening from the inside. not sure if i will bother to do that, though.
FINALLY SEWING ON THE MACHINE!!!
11 notes
·
View notes