
Statistics
We looked inside some of the posts by mydirectx12demo-blog and here's what we found interesting.
Average Info
Notes Per Post
0
Likes Per Post
0
Reblog Per Post
0
Reply Per Post
0
Time Between Posts
9 hours
Number of Posts By Type
Text
17
Last Seen Tumblr Blogs


Fun Fact
69% of Tumblr users are millennials.
Text
DirectX Math
In this section, I would briefly describe how the DirectX Math is used in real time rendering. It consists of library of functions and types for math commonly used in graphical applications, like algebra, vector operations, and matrices. It is based on SSE2(Streaming SIMD Extension 2) instruction set with 128-bit wide SIMD(Single Instruction Multiple Data) registers.
For more on DirectX Math API, look into - MSDN, DigitalErr
0 notes
Text
Resource Binding
In this section, I would like to share on how resource binding takes place in DirectX 12 and how is it crucial? Resources are simply set of information, for instance, it may contain data related to textures, models, vertex and so on. They’re basically set of those items, that our application decides to display at the stage of rendering. They’re also popularly known as memory buffers. Well, there is another situation, if our application intends to use these resources, it needs to link it through graphics pipeline. How does it do that? In DirectX 12, the resources are bound by descriptors, descriptor tables and descriptor heaps. And this process is recognized as Resource Binding.

For more into resource binding, look into - MSDN, Braynzarsoft
0 notes
Text
Command List in DirectX 12
In this section, I would like to talk more about the next important feature of DirectX 12 which is Command Lists. They’re basically set of drawing and resource management calls generated from one or more threads, and then executed to render a scene; typically at the end of the Render function. They also seem to have performance benefit, as we can pre-compute the rendering tasks that can be executed and reused later on.

In the above code, as you can see that I haven’t directly send the commands to the GPU, but stored them in form of lists, namely, ‘m_commandList’. Further on, I call the RSSetViewport and ScissorRect to set up the view, clear Render Target View, configure the Input Assembler stage, and finally draw 36 vertices to form a cube.
For more on command list, look into - Braynzarsoft, MSDN
0 notes
Text
Pipeline State Object(PSO) - DirectX12
In this section, I would share in more detail the new features of DirectX 12 that are crucial to real time rendering. First, we are going to see what exactly is Pipeline State Object and what happens during that stage? Well, to put in simple words, it is a way to set a GPU to a state we want it to be, while rendering. When the GPU is doing its magic, we need to feed in sets of input and rendering settings before rendering can take place. It needs to know stuff like how to blend colors together if there are any overlapping pixels(blending), how to handle depth data(depth stencil state), how to read input data to build primitives, what shaders to use and the list goes on.
These PSO’s are usually created during the process of initialization and switched back & forth to rendering. If these are applied in right sense, it can act as benefit to the application by improving performance and speed.
Many of us like to think of them as different pieces of puzzles that need to be put to together in order to generate final image.

The two images that you see above is the same scene when it comes to rendering, using same vertex data, but different PSO’s.
For more of PSO, look into - MSDN, DigitalErr, Braynzarsoft
0 notes
Text
Further Learning
Well, as I come closer to the end of this month, I’ll take a little pause here, and dive more deeper into real time rendering specifically DirectX by exploring few advanced areas like collision detection, clipping, multi-threading, post-processing effect, and tessellation by looking into DirectX12 Development book by Frank Luna. So, hence the learning doesn't end here. After few more days of research and getting a good hand on DirectX12 libraries, I’ll post my learning’s too. And yes, in this journey of learning, I came across many resourceful books, one of them is Real-Time rendering, that gives good general background of components involved in 3D graphics, and then Frank Luna has amazing in-depth view of DirectX. The experience of dealing with SlimDX was handy, as of how comfortable it was to use high-end class libraries provided in c#, but it has its own advantages and disadvantages, when it comes to dealing with DirectX.
0 notes
Text
Testing 2D Tile Based Game World
In this section, I would like to share few issues I'm facing with regards to testing input from the joystick, sadly for some reason I’m not able to move my player and after few seconds of execution, SlimDX application points out that it is not able to accept the input key press. I’m still in process of digging into the functionality. I’m trying to look into the book, but code seems to be good, there is some issue with linking of classes. Online reference for SlimDX and DirectX is also sparse. But surprisingly, I was able to capture how it looked like, here is the glimpse.

0 notes
Text
Rendering Bitmaps
In this section of progress, I would like to share my experience in creating a small 2D tile-based world. In graphics, the term tile refers to a small bitmap image that represents one square of space in 2D world. A tile set or tile sheet refers to a single bitmap files that contains numerous tiles. And yes single 2D graphic tile is known as a sprite. Now I would to walk through couple of important parts in creating a bitmap.

First, loading bitmap method involves loading of graphics for individual sprites. In this method, I came across a term called as precalculated alpha which helps in adjusting red, blue, and green channels based on alpha value before rendering, and this important in our case to avoid having white color over transparent areas of our player sprite.

Secondly, rendering game world method is quite simple, as it involves two nested for loops, where-in earlier one loops through every tile in the game world and the other one’s task is to check which type of tile is suited at particular position going through the tile list and finally at the end the tile is generated.
For reference, look into - Game development with SlimDX by Micheal Fontanini
0 notes
Text
Testing a Direct2D Game Window
In this section of progress, I would like to test whether my application generates a Direct2D Game Window.
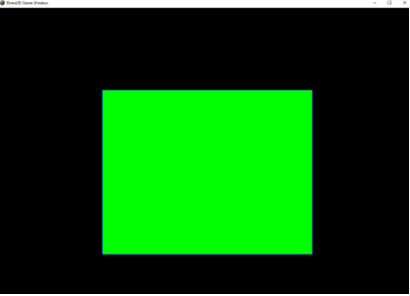
This is the green rectangle with blue border. In future post, we will look into 2D tile based game. Stay tuned!
0 notes
Text
Creating a Direct2D Game Window
In this section of progress, I would like to walk through important components of GameWindow2D class. The first task involved creating of rectangle - In the constructor method, we set up the aspects of geometry and the properties of render target in order to draw the rectangle on to screen. Then we move on to specify what colors we would like to fill rectangle with, the color for the stroke, i.e., at the edges of rectangle with help of SolidColorBrush. And finally we decide the width, height, bottom and top of the window.

The second task involved overriding few base class methods such as Update(), RenderScene(), Dispose().

For more reference, look into - Game Development with SlimDX by Micheal Fontanini
0 notes
Text
Testing Input from Joystick
In this section of progress, I would like to see if I’m able receive input from my playstation controller. This is how it appears to be -

This is visual representation of how Direct Input and XInput are reading input from the same game controller.
For more reference, look into - Game Development with SlimDX by Micheal Fontanini
0 notes
Text
Getting Input through Joystick
In this section of progress, I looked into creating methods to receive player’s input from joystick. GetJoysticks() method involves getting all desired controllers attached to the system, and then giving it maximum and minimum possible values for each axis on the game controller. Hence, if the joystick points all the way to the left, it’s horizontal position is -1000. And if the joystick points all the way to the right, it’s horizontal position is 1000.

Then I tried putting test code with bunch of if and else to test which button the user is pressing on the controller.

For more reference, look into - Game development with SlimDX by Micheal Fontanini
0 notes
Text
Mouse & Keyboard Input
In this section of progress, I tried to implement mouse and keyboard input which still plays major role in PC games despite players using other types of controllers. The purpose behind this setup is to bind certain key or button to a specific in-game action.
For more reference - Game development with SlimX by Micheal Fontanini

0 notes
Text
Direct v/s XInput
In this section of progress, I would like to devote some time on thinking whether to use DirectInput or XInput? I guess to use both. The reason behind that is we need to use Direct Input to support older input devices that don’t support the new features of XInput. On the other hand, why is it beneficial to use XInput? Because there is a situation where in Direct Input treats left and right trigger buttons on a gamepad as a single button. In order to avoid this, we could use combination of both. And yes, XInput only supports next generation controllers such as Xbox 360.
For more look into - Game development with SlimDX by Micheal Fontanini
0 notes
Text
Testing Game Window
In this section of progress I test to see if I’ m able to run or generate the Game Window for my application. But before that, I implemented main method which creates and object of Game Window class, to specify the window title, window width and height and lastly whether it should be toggled into fullscreen or not.

0 notes
Text
Game Loop
In this section, I have decided to walk through the second Game Loop method that helps in generating current time out of high performance timer.

Each time we call this function, we’re processing a new frame which means the value inside the current frame time is now the time for previous frame. And then we get the current time from the high performance timer and store it in current frame time variable through Stop Watch class that uses high performance hardware timer.
For more in depth understanding into this function, refer to - Game development with SlimDX by Micheal Fontanini
0 notes
Text
The Game Window
In this section of progress, I will share few insight on creating a class named as Game Window. This class provides basic game funcitonality. Important methods that we will need for the set up are a constructor to initialize, GameLoop(), UpdateScene(), RenderScene(), and finally a cleanup code for when the windows are closed.
Well, most of you’re thinking about what kind of role does each one play in setting up the application. A Game Loop, is essentially the heart of game engine. It is also called once per frame in order to run the code that helps in building the environment/surrounding of the game world. Eventually, it calls the UpdateScene() method, which updates the objects in the game world. Once UpdateScene() has finished updating the states of all objects, the Game Loop will then call the RenderScene() method to draw the current frame.

For more reference - Game development with SlimDX by Micheal Fontanini
0 notes
Text
Creating framework in SlimDX
In this section of progress, I’ll be talking about the process of creating basic framework in SlimDX which is a class library that will hold the engine code.
Creating Visual Studio project that will store the framework code and resources -

First thing we need is window on which we can display our demo. So here is visual representation of how to create a framework for game window -

For more in depth understanding look into - Game Development with SlimDX by Micheal Fontanini
0 notes