
Starting in 2011, I made a New Year's resolution to try one new recipe each week. I had such a good time and learned so many new recipes I didn't stop! This is my new blog dedicated to documenting all the trials and efforts and delicious, delicious discoveries along the way. Search #brickhousemenu in the corner to see all of my favorites!
Don't wanna be here? Send us removal request.
Statistics
We looked inside some of the posts by reciperesolutions and here's what we found interesting.
Average Info
Notes Per Post
1
Likes Per Post
1
Reblog Per Post
0
Reply Per Post
0
Time Between Posts
2 months
Number of Posts By Type
Text
11
Photo
6
Last Seen Tumblr Blogs


Fun Fact
Tumblr has been providing a Korean-language service since 2013.
Text


Mushroom French Dip. This was so satisfyingly good! Portobello and oyster mushrooms with onions and garlic—and amazingly, no S&P yet really great flavoring. The ratio of mushroom to bread (hollowed out) to cheese was perfect. The meal was tasty and I feel like hit a craving I often have for a satisfying, hot sandwich like this but is actually healthy compared to (literally) any alternative in the same category. Will definitely be going into the rotation.
Only really important edit is this was a perfectly good meal for TWO, not for four. So you only need 2 sub rolls (not 4), and be sure to double if there’s any company (or desire for leftovers)! I would also maybe specify regular or sandwich-sliced provolone (thin cut would be too thin).
0 notes
Text

Roasted carrots! WOW. I’m not super into carrots—I generally don’t mind them, but they’ve never been anything special to me—until now. Roasting them (as is the case with so many other veggies) is GAME CHANGING! They get so perfectly soft on the inside with this beautiful, flavorful caramelization and little bit of char texture on the outside.
The recipe is so simple, yet so delicious: 400 degrees, XVOO rubbed all around, S&P, then fresh dill once they’re done roasting. The only extra thing I do is to cut the carrots into even pieces during prep (so first, in half horizontally, then often cutting the root side into 2 or 4 pieces vertically) so they cook evenly.
Now I understand why people buy those giant bags of carrots: we’ll easily polish off a pound per person as a side with any meal!
0 notes
Text

Stuffed Cinderella pumpkin! This was such a great, satisfying autumn soup. The perfect meal once the weather has turned really into winter and you’re craving something healthy, filling, and deeply warming.
I took a lot of liberties with this recipe, some of which were intentional…most of which were not. The base recipe is at the end, but here’s what I did/would recommend for it (when there’s a range, the lower number is what I accidentally used but the higher number is the original and I think would work great, too):
SERVING: At least 6 as main entree. Could be 8 with crusty bread.
INGREDIENTS
1 Cinderella pumpkin (wait until it’s turned orange), ~10 pounds
2 packages cooked chicken sausage, ~20 oz. (I used roasted pepper+Assaggio and it was great)
2 onions
1/2 - 1 small cabbage, chopped with leaves separated
1 rutabaga (or 1 parsnip), peeled and chopped
2 - 3 carrots, peeled and chopped
1 - 2 celery ribs, chopped
1/2 c fresh parsley, chopped
1 1/2 - 2 c chicken broth
1 package dried French onion soup mix
1 1/2 c frozen corn
1 tbsp Italian seasoning
Hearty dash of red pepper flakes
Hardy dash of garlic powder (because I forgot to add the garlic)
S&P
INSTRUCTIONS
1. Preheat oven to 400 degrees. Line a rimmed cookie sheet with foil. [I didn’t do the latter and I totally should have]
2. Cut around the top of the pumpkin to make a lid. Use a large metal spoon to scoop out and discard the inside membrane and seeds. [This was surprisingly easy/quick compared to pie pumpkins]
3. Cover pumpkin with its cut out “lid” on top and bake for 3 hours. [I think 2 would be plenty if you don’t have the time. 3 was sort of an accident, though a happy one! Expect the pumpkin to release a LOT of water inside.]
4. Meanwhile [this can be done anytime in those hours], sauté the sausage in a SS pan over high heat until browned. Remove from pan. Stir in the carrots, celery, onion, and rutabaga; cook and stir until tender, about 5 minutes. Next add the cabbage; cook about 5 minutes. Add the corn and the chicken broth; stir to combine. Stir in the parsley, onion soup mix, and spices. Season to taste with hearty salt and pepper. Add the sausage back in and stir to combine. Test that carrots are tender.
5. Keeping the pumpkin on the baking sheet, spoon out two large ladles of the pumpkin liquid into a separate bowl and set aside. Then add the vegetable-sausage mixture into the pumpkin, and replace the lid.* (You may need an extra hand to scoop the filling into the sides of the pumpkin if it’s collapsing… I was surprised at how much I was able to fill this way!) THEN, add as much of the reserved pumpkin liquid back in as you can once filled.
*I actually didn’t replace the lid because mine was looking a little saggy, so I just kept it on the countertop while everything else was in for the final bake. Turned out great this way!
6. Reduce oven temperature to 325. Cook the filled pumpkin 30 - 60 minutes. (I did 60 out of personal convenience, and it worked out great but probably was not necessary!)
7. Remove from oven and place pumpkin, cookie sheet and all, on a flat surface. If you can, scoop some of the pumpkin flesh out from the sides and combine with the brothy vegetable mixture.
8. To serve, scrape the pumpkin flesh from the bottom of the lid and put at least half a cup at the bottom of individual soup bowls. Then proceeded to ladle in as much as you’d like from the pumpkin! I found it easiest to ladle first then scoop and add the flesh from the sides straight into the bowls; then loosely stir to combine.
The more you ladle out for the pumpkin, the more you’ll realize how much pumpkin flush there is to be distributed!
I’d already deliberately modified close to half the recipe’s ingredients before I even started cooking. But then on top of that, putting this post together made me realize how much I was not paying attention to the recipe while making it, haha. Somehow, this recipe was way more intuition than instruction following. But it worked out…for example, the original calls for baking the pumpkin only an hour to start, then multiple hours once the veggies are added. I don’t think this was necessary, as everything really got off to a great start on the stove and didn’t require hours more to be cooked enough.
I used a typically-sized Cinderella pumpkin, which is to say, it took up a full cookie sheet and about half of my oven height. When I bought the pumpkin in early October, it was a ghostly green and I honestly didn’t realize it would ripen to a bright, classic pumpkin orange, but it did!
I’ve tried a few whole-roasted-pumpkin recipes before, but I wasn’t really taken by any of them until this one. This was definitely a winner, at least the way I did it! The variety of fillings that I put inside were really great, but I could also see throwing in sage, different kinds of sausage, garlic (which I was supposed to but completely forgot), or really anything that feels like a good mix in the moment. Beyond the basics of making sure you cook the pumpkin long enough, this recipe is really much more art than science. :)
0 notes
Text


Chicken with green peppers and bamboo shoots. This tasted about how it looks: bland. The second photo is pretty telling because the cookbook photo looks rich and savory and well sauced…all the things that this dish was not.
The green peppers were pretty good, but that’s about all I can say for this dish. The sauce was runny and just sat at a pool at the bottom of the dish; the chicken was plain and bland, unseasoned with no sauce clinging to it.
I’m starting to question if the authors maybe were confusing woks with something else, like hibachi grills. Consistently in each recipe, and in the wok cooking instructions at the beginning of the book, they talk about pushing things to the side ‘where the wok is cooler,’ while cooking other ingredients in the middle where it’s hottest. Maybe this is just some kind of advanced technique, but I really struggled to keep ingredients separated on my high-walled, sloped-sided wok. (Even looking at the book’s photo for this recipe, their pan is not clearly identifiable as a wok to me…)
I feel I’ve given this cookbook, by all reasonable means, a fair trial and am comfortable (glad? enthusiastic???) to reclaim its space on my cookbook shelf.
**Cookbook recipe trial 3 of 3: Creative Wok Cooking**
0 notes
Text

Beef with mushrooms and bean sprouts. I love stir-fry beef, and of course I love mushrooms, and I've never cooked with bean sprouts but like the texture they tend to add, so I was excited when I picked this one out! (Perhaps it should be said that I picked out [and shopped for] three recipes at the beginning of this exercise, before I started cooking from this book...)
This was not great. Well--it wasn't bad, but it DEFINITELY was not 'authentic Chinese,' regardless of any qualifying hyphens you try and add in there. I was optimistic when I first picked out this recipe (see new quest noted here), but after recipe #1 from this cookbook, I went into this pretty skeptical.
As I started suspecting while cooking, the fresh ginger + soy sauce was not powerful enough to beat out the beef + sherry + mushrooms + celery [which I forgot to throw on top until after taking this pic] "stew" flavor profile. So, it's not that this tasted bad, it just felt wrong as a stir fry, and was definitely wrong as Chinese food. It also could have used double the mushrooms, IMO (though I often have that opinion, so I won't hold that against this book!).
Sooo this is 0 for 2 for me from this book. I thought three recipes would be a good minimum requirement--give it the good ol' college try--but I'm starting to question if I really need to test one more. The good news is, these are all pretty healthy meals--and carb free if you omit the rice (a current trend for my famed taste-tester), PLUS I have the ingredients on hand, so...I may use the old baseball gauge and see if the third recipe is a hit or another strike!
Recipe #2 from shelved cookbook Creative Wok Cooking
0 notes
Text

Chicken with peppers in a sweet and sour tomato sauce.
In an effort to clear out room on my cookbook shelf (let's be clear: to make room for a bunch more cookbooks recently acquired!), I've decided to test 3-5 recipes from every cookbook that I've used just once or never. (A smart approach would be to start with the largest unused cookbook and work my way down...buuuut I let my stomach guide me instead, and ended up starting with the slimmest of books, ha.) First up? Creative Wok Cooking.
This book is older than me, and I'm not sure where I got it from. But I have a big wok and often feel like I'm underutilizing it. Plus, been craving Chinese lately!
The cookbook claims to bring authentic Chinese cooking (which TBH, I assumed meant authentic Chinese-American cooking) to the home kitchen. But I can't say I felt that with this dish. I've had sweet and sour chicken with peppers and onions and pineapple before (or, at least, it sounds plausible), so I don't think that was the issue: it was all the sauce. The sauce wasn't bright or cloying or vibrant...it was thin and just kind of muddied the flavors together.
I was also pretty disappointed with the wok-use instructions at the beginning of the cookbook. The techniques all sounded very simple, but it just didn't work at all for me in execution, which led to severely uneven cooking (not good with chicken!).
I don't know that it's fair to judge an entire cookbook based on one single recipe, though--hence my commitment to make 3-5 recipes per book. So hopefully next time's will be better!
(No recipe this time, since it's from an old book!)
Recipe #1 from shelved cookbook Creative Wok Cooking
0 notes
Text

Avocado toast! I've had avocado toast a few times and, frankly, don't really understand what all the fuss is about. The last time I had it, it was from an airport restaurant, and I turned to the stranger next to me to ask their opinion on avocado toast and if they could explain to me what I obviously must be missing about it. (Turned out, that guy was a professional chef. He also didn't get the big deal about it, ha!)
But here I was, halfway through making guacamole, when I realized I didn't actually have not just one, but two (the recipe's other half!) of needed ingredients. Defeated, I gave up, and just mashed what I had and threw it on a piece of whole wheat toast. There you have it: messed up guacamole turned "avocado toast" (aka, A Food Trend's Origin Story).
But this was actually great! I think the problem is there's never enough avocado when I've ordered it out, whereas each piece of my toast was topped with a whopping full avocado, haha. And that was it! One avocado, mashed and mixed with a generous tablespoon of fresh chopped tomato, and salt to taste on top of a slice of whole wheat toast.
My only mods would be to omit the salt and instead top with Everything Bagel seasoning (or at least top with flaky salt, instead of mixing it in). Also, be sure your toast is EXTRA crispy, as it will soften quickly under the moisture of the topping!
The was tasty enough to actually be an enjoyable lunch! And convince me to never order this out again #notworthit
1 note
·
View note
Text

Warm peach cake! As our household has been driving to eat less carbs, the last couple of months, I haven’t done a lot of baking lately. But there were just too many beautiful peaches, still at their peak of ripeness at the farmers market this week! I just grabbed two extra cartons and figured I would figure the rest out later :)
I turned to my William Sonoma seasonal fruit desserts cookbook, and yet again, this was a winner! The star of the dish was the peaches (as they should be), drizzled with their own juices, sunken into a flavorful batter that was just enough to soak in all the goodness and hold things together. Lemon and ground ginger add beautifully to the flavor profile, and a dollop of fresh vanilla whipped cream was a great accent.
The recipe was easy to throw together pretty quickly (would’ve been easier if I read it correctly and peeled the peaches BEFORE slicing them, ha… but even that was really no problem, I just tossed them into boiling water as slices and they were easy enough to take care of after the fact!). I didn’t have a quick release spring pan, but I used a round pan with the removable bottom, and that worked well enough for me. 
I think this recipe, like their raspberry scone recipe, will make it into my regular seasonal rotation!
0 notes
Text

Oven-fried fish sticks! Completely true to its title: these tasted essentially just like a fresh version of the frozen variety. Rubbed with a Mayo-mustard base (which just added good moisture), coated in a seasoned panko blend, and finished with a light dose of cooking spray, these had good texture inside and out. A squeeze of lemon and a finishing sauce was definitely needed— I didn’t actually make the sauces original to the recipe, as I had some chipotle-mayo-lime spread from recent fish tacos still on hand :)
It wasn’t an earth shattering recipe, but I guess I’ve never been super into fish sticks: it definitely made for a satisfying lunch, though. I made a half portion and this was a great way to use up just a couple of odd fish fillets and at least a little bit of this leftover mayo!
0 notes
Text

Stuffed zucchini boats! Years ago, I took a cooking class where I swear we made these…but I never got the recipe for them, and I’ve never found one that even sounded familiar to it: a vegetarian recipe that didn’t have a marinara sauce and wasn’t heavily cheesy.
Tonight I wanted this kind of recipe—something healthy that would be filling but not weigh us down in this heat—but I just couldn’t find a recipe that fit the bill. So after having perused a whole bunch, I took elements that were appealing and made my own recipe up! :)
This was outright delicious. I thought ground turkey would add a little substance without being too heavy, but after mixing, I was worried a pound of it would be too much…it wasn’t, it was great!
The flavors all worked well (though I definitely under salted), the broil char at the end added the perfect amount of texture, and it was just the right amount for dinner for two (zero leftovers, though). The moisture from the zucchini worked really well with the (typical) dryness of the turkey. The only mod I think might be nice to try next time is deglazing the sauté pan with some white wine next time, maybe!
INGREDIENTS:
3 zucchini (small or medium)
1# ground Turkey
1 onion
1 large garlic clove
Handful of finely chopped fresh parsley
Shredded cheese (ie mozz)
Grated cheese (ie parm)
1 scant cup Panko breadcrumbs
GENEROUS S&P
DIRECTIONS:
Slice zucchini in half (long ways) and scoop out the insides, leaving thin walls. Sauté zucchini flesh, chopped onion, minced garlic in light oil (veg or grapeseed). (Deglaze with white wine??) Season HEAVILY with s&p (it needs more than you think). Add turkey, stir just to break turkey entirely up.
Turn off heat. Mix in 1/4 c of shredded mozz, 1/2 c grated parm, 1 rough cup panko. Mix in parsley.
Line cookie sheet with foil all the way and spray with Pam. Rub XVoo on skin side of zucchini boats. Season int with s&p. Fill entirely with mix (loose fill on first run, then mound up on second filling pass).
Bake on middle rack with foil on top (doesn’t need to be sealed closed) at 400 ~45 minutes or until any edges are starting to brown. Then remove foil and turn on broiler (keep on middle rack) for ~10 min until tops are nicely crisp. Serve! :)
0 notes
Text
Feast of the Seven Fishes!
I think from now on, each year, I’ll just copy notes from the year before’s post and add to/edit accordingly. That’ll make it much easier to track and then look up for reference in the next year to come! :)
Most of the courses were good enough that I just carried them over from last year. I did my big shop the Wednesday before and was going to plan out my day-of strategy ahead of time...but just ended up using the same guide I scribbled out last year. (It was so effective - no need to reinvent the wheel!) I started prepping/cooking at 9 am morning of…and basically didn’t stop until nearly 7 pm. It was a long - but stress-free - day, as I mostly had enough time to get everything done. We added arranged seating with name cards, which took a few minutes to work out - luckily, though, almost everyone was late, haha, so it all ended up working out fine. For a 6 pm dinner, though, better to start closer to 8:30 and limit breaks!
All of my notes from last year’s recipes + a few updates are included below, including how many multiples I recommend for each recipe based on number of guests (keeping in mind these portions are in the context of a 7-course dinner). General notes follow!!
COURSE 1: Drinks and appetizers - guest supplied! I considered trying a new recipe - like bite-sized crab cakes - but ultimately decided to just leave this to the guests. It turned out great! All apps were fish themed in one way or another, and asking for white wine worked out perfectly, too, to kick off the night (with extra bonus points for fish-theme-labeled wine)!
COURSE 2: Seafood Chowder. Based on recipe comments, I modified the original recipe by substituting the evaporated milk for 1 can of creamed corn + 1 cup of heavy cream, seasoned heavily with S&P (like, probably 1 tbsp of each - taste to confirm!), and 3 tbsp of Old Bay.
I didn’t peel the potatoes (totally fine!) and chopped rather than diced them - they and the fish will break up once you start mixing/transferring things. After it was basically done cooking, I transferred from the stove to the crockpot and kept on warm - this was great to free up my big pot, as well as get it at perfect serving temp. Ultimately transferred it to my soup serving bowl and had my sous chef walk around the table with me for serving: people served themselves from the bowl, then I topped with crumbled thick cut bacon (prepped the morning of) and a dash of Old Bay.
15 people or fewer = x1 recipe is plenty
https://www.allrecipes.com/recipe/12732/fish-chowder/?internalSource=hub%20recipe&referringContentType=Search&clickId=cardslot%203
COURSE 3: Caesar Kale Salad. This year I made the dressing in the morning and didn’t add it to the kale until right before serving. Julienning the kale was a great task for early party arrivers :) I also accidentally doubled the amount of garlic year 1 (half was supposed to be for the croutons) but it was just as fantastic as you’d expect - this is the only way to do it.
I just did a sheet pan of large-chopped sourdough bread to make fresh croutons. Right out of the oven, I tossed them with some XVOO, S&P, and a lot of parm. Might be better to toss them with XVOO before they go in the oven? But they were good, and one large loaf of bread from Wegman’s was the perfect amount to match 15 people.
Also, don’t bother trying to use tongs to mix the dressing with the kale and croutons. Just dig right in with your hands. Sooo much faster and more effective. I also used 100% of the dressing to dress the salad, not a spec leftover. This was perfect. If you change the proportions, just go generous on the dressing side of things and store anything that’s leftover for another meal. (#worthit - though it starts tasting a little weird after 1-2 days.)
15 people = x3 recipe for dressing (use all garlic and parm called for); 2 large bunches of kale; 6-8 cups of oven-baked croutons
6 people = x2 recipe for dressing; 1 large bunch of kale; 3-4 cups of croutons
https://www.allrecipes.com/recipe/14172/caesar-salad-supreme/?internalSource=hub%20recipe&referringContentType=Search&clickId=cardslot%2010
COURSE 3: Mediterranean stuffed, roasted red peppers with homemade ricotta. Always a win! I cooked these in the afternoon, then warmed the oven to 300 as we were nearing guest arrival time. That kept them good and warm (which is excellent), also out of the way. Tenting them with foil is also handy once they’re out if they aren’t served right away!
15 people = x2 recipe (genuinely only x1 recipe for ricotta, though)
https://reciperesolutions.tumblr.com/post/186616160460/roasted-red-peppers-and-cherry-tomatoes-with
COURSE 4: Charred asparagus with citrus bagna cauda sauce. This is a fantastic dish - but I HAVE to pay attention to making the sauce right! It’s sooo simple yet I keep misstepping (messed it up year 1 by adding the juice too early; messed it up this year by only doing one portion of juices or zest for an otherwise quadrupled recipe!).
Best way is to make the sauce a few hours ahead of time (up to the point of removing from heat THEN mixing in ALL the citrus juices) then just reheated it all right from the pan right before serving.
Don’t bother trying to broil the asparagus - it’s not worth it if you’re making more than one batch. Just do it all on the grill! Then throw the asparagus into the oven at 300 with the roasted red peppers to keep them warm prior to serving. Used my mini food processor to chop the almonds, and this worked really well for the right texture: a lot of little crumbles and just a few medium chunks. This is an AWESOME dish!
15 people = x4 recipe
6 people = x2 recipe
https://www.epicurious.com/recipes/food/views/char-broiled-asparagus-with-citrus-bagna-cauda
COURSE 5: Girelle and shrimp with sundried tomato cream sauce. Consistently a showstopper, no question!! For a double batch, I used the beer boil kettle (giant pot) on top of a stepstool with the giant beer brewing spoon we have in order to mix it all...this probably could have been managed in my regular pasta pot, though it would have been close.
Key is to remove the shrimp when they are about half cooked (and no more), as to really get the sauce to the right glistening consistency before serving, it requires ample time and patience stirring with the shrimp and pasta all together. I think next year, I might try sundried tomatoes in XVOO rather than from an airtight bag - maybe also throw in a little Romano to give the sauce some extra body. ¾# pasta to 1# medium shrimp is also the correct portion (I’ve done large shrimp in the past but I think med would be a little better), so this does require a little math given the unusual pasta bag sizes.
I used the wok for the shrimp, which worked perfectly, and basically cooked the shrimp as people were coming in (then tented the big beer pot I was mixing things into with foil). When I served the asparagus and peppers, I put the water on for the pasta and also started working on the sauce. All of this becomes super easy and pretty fast if you have the ingredients portioned out and ready to go before everyone sits down at the beginning of the feast!
15 people = x2 recipe
12 people or fewer = x1 recipe (by the time this course comes around, there’s not a lot of room left!)
https://www.epicurious.com/recipes/food/views/pasta-with-shrimp-in-tomato-cream
COURSE 6: Salmon with red pepper-walnut sauce. Definite crowd pleaser (even to the non-salmon-lovers)! For 11 fillets this year, I bought FRESH salmon from Wegman’s (never been frozen!) and I think it was worth it. We cut the fillets in half so they were square (a non-traditional cut from the traditional fillet shape) and this was great, both for cooking and serving (sauce on top). Came to 4-6 oz fillets per person. And you can definitely cook to the minimum times recommended for the fillets.
I prepped the fillets ahead of time (as people were arriving), and the sauce was whipped up in the blender, ready to be cooked down once the fillets were finished. This turned out great, as it meant minimal time away from the table for the final course prep. (Just tent the fillets as the sauce is cooking down.)
15 people = x4 recipe (just math it to max 1 piece of salmon per person - by the time we get to salmon, no one has room for anything more than that lol)
https://reciperesolutions.tumblr.com/post/613784150286237696/pan-seared-salmon-with-red-chili-walnut-sauce
General notes:
1) Prepping it all in advance is gold. Reusing my general schedule (reviewed the night before) of when I’m prepping/cooking what day-of is gold. Having salad stuff for people to help with upon arrival is gold. Having all cooking ingredients portioned out for the final two courses to just throw on the stove while everyone’s eating is gold.
3) When people ask what they can bring: “White wine or a fish-themed dessert! Or if you’re feeling really ambitious, an appetizer (but it’s gotta have fish in it)!” We also bought an extra box of white wine in advance, and that rounded us out perfectly.
4) Drinks at 5:30. Dinner at 6. Make sure this is included in the initial invitation so everyone knows when to show up!
5) I served the courses in waves again this year: app as people arrived, then soup + salad, then peppers + asparagus, then pasta + salmon. (I like the waves concept rather than just everything on the table at one time.) This year, thanks to good advanced prepping (/extra time since people almost all arrived late, haha) and things warming in the oven, I got lots of table time - and the break before the main entrees was barely noticeable! (Though we had a party game planned just in case.)
6) I used 46 cloves of garlic. Bought it peeled and ready to go. Worth it, lol.
7) Best to do the big shop Wednesday the week-of, at the earliest (Thursday is probably better). Gives you enough time in case they’re out of anything, yet ensures the integrity of some of the produce; if you do it Thursday, it also means you can buy the fish fresh instead of frozen (salmon and cod). The cod can probably be frozen no problem, but the fresh salmon was really excellent if a reasonable option. (If high quality frozen’s the only option - good option still! - just keep in mind it’s super annoying to tear apart individual wrappers.)
8) Expect leftovers. Reserve leftovers for us FIRST, then give away at will! :)
9) 15 is a big number to cook for. Double check all ‘staples’ being used: we had to do a last minute run/neighbor call for Old Bay and Vermouth, since my regular on-hand stash was only half of what was needed for so many portions. Also, I slept in an extra five hours the next day: Plan for nothing the next morning and a generally low-key Sunday.
10) We did seat arrangements this year with little handwritten nameplates. Took a few minutes to work it out; it turned out great to balance the table! With 11 people, people on opposite ends didn’t interact much with each other (good place for the introverts!) but basically everyone else had a larger interaction-radius than I expected (2 people L&R, 3-4 people across).
11) After all the main courses, I did a cute little trivia (‘guess how many pounds of fish,’ ‘guess how many anchovies,’ ‘guess how many cloves of garlic’), then had the people with the closest guesses reach under their chairs - for a little trinket prize! (Spoiler: all the seats had trinkets under them :) For people new to the table, there were cute little pop-open mini-cards. For veteran Feasters, I printed out little photos (~2″x3″) of them+us from sometime over the last year. Everyone got a little candy cane wrapped up, too. It was great! I was originally trying to find crackers to put on everyone’s place setting this year (since I’d done the pop-up cards last year - didn’t want to repeat) but couldn’t find any. Not a big deal, though - I really liked how the photos turned out! I liked this little layer added in, and the nameplates worked well to personalize everyone’s.
I’ve hosted a LOT of potlucks in my time but really liked the sit-down-dining style of this dinner party with the multi-courses. Definitely a lot of work to do regularly but worth it once a year! Also one of the most interesting observations for me was being very full by the end of the night but not totally overstuffed and feeling grossly overeaten. I like to think that’s a testament to the well designed menu and dishes that - save one or two with some cream - were really pretty healthy. We also had a GREAT turnout for appetizers (goldfish snack!) and dessert (two parties brought tiyaki)! All in all, a WILD success and I can’t wait until Christmas next year!!
0 notes
Photo
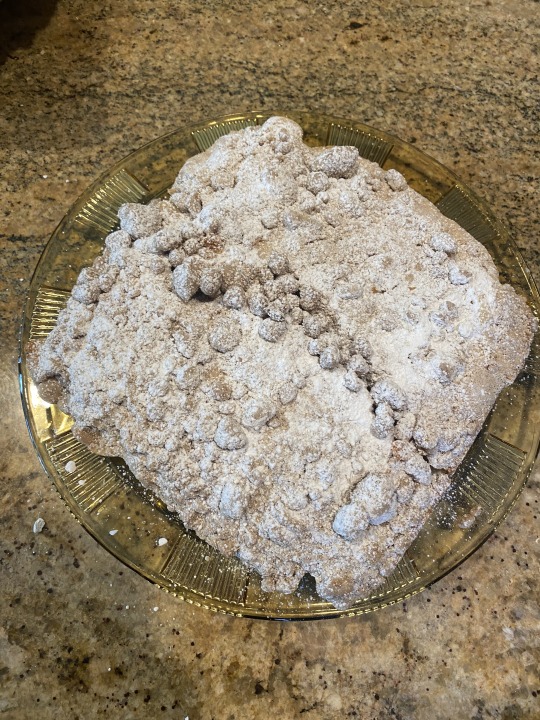
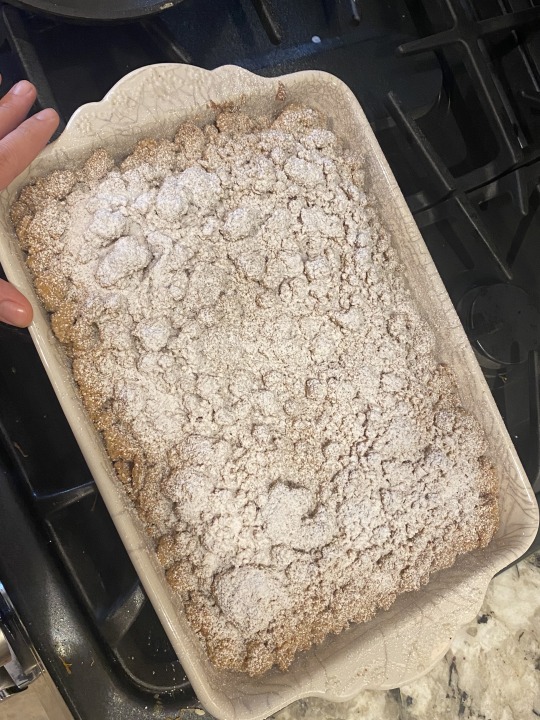
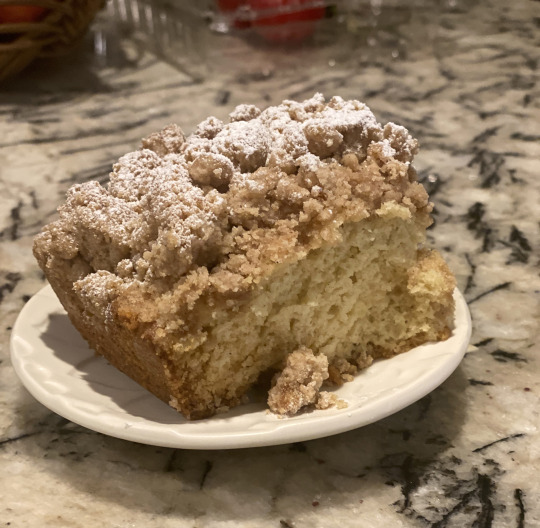
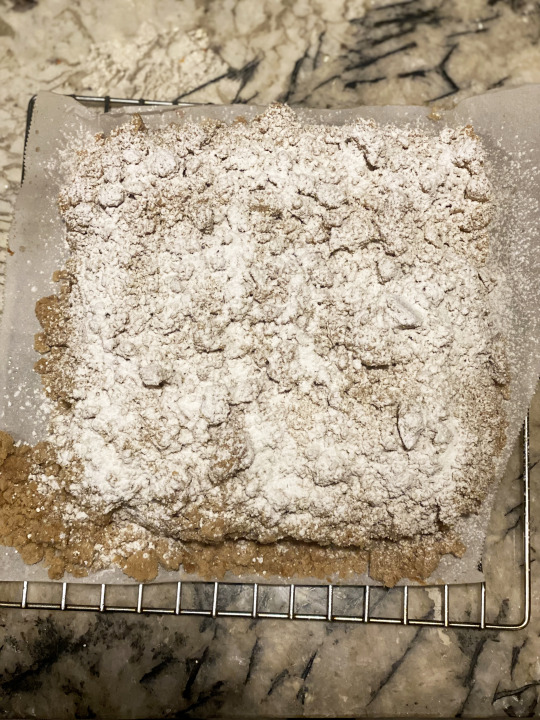

Crumb cake! As an extra special breakfast dessert this Thanksgiving, I wanted to recreate a favorite childhood treat. I scoured the internet and found two recipes that looked different (and good) enough to try, with the hopes that one or a combination of the two would yield the most delicious results.
The first one was quite simple to put together - took very little time or effort. I thought the crumbs were classically good but the cake was fine (just nothing to write home about). The second one took more effort (and actually only made a 9x9 cake, not a 9x13 cake like the first) - but I thought the cake was much better...though not as tasty on the crumb side.
My final crumb cake took the cake from recipe 1 and the crumbs from recipe 2! Future notes included below:
Crumb topping: https://www.smalltownwoman.com/crumb-cake/#tasty-recipes-51258-jump-target NOTE - cut this recipe in half when using the cake recipe below!
Cake: https://www.smells-like-home.com/2011/04/new-york-style-crumb-cake/#mv-creation-9-jtr NOTE - I used the regular flour conversion she referenced, but it would be a lot easier to just buy some cake flour in advance.
For my final version, I think I overmixed the crumbs (they just seemed too dry) - so be sure to have some extra melted butter available, rather than mix too much and have all bits and pieces crumble into tiny granules. This was definitely a winning coffee cake, though, and it was just as good a few days later (heated slightly in the microwave)!
0 notes
Photo

Chocolate pudding! I’ve never made pudding from scratch before, and this recipe involved miso and brown sugar and I was intrigued.
Would I be pleased if I got this at a restaurant? Yes. Would I make it again? No. It was good, but more interesting and complex than delicious. (It was also a fair amount of effort, for pudding.)
The miso cut the sweetness of this but was very forward as a flavor profile - and kind of as a texture, too? It didn’t quite have that silky smooth texture that I want in pudding, and I think I attribute that to the miso addition.
I will say, I threw together some homemade whipped cream to dollop on top and I REALLY liked that addition - whipped cream was definitely essential in my opinion, not optional.
For as much as I’m obsessed with them, Milk Street’s desserts have never really done it for me. This one is probably among the best I’ve made of theirs but still doesn’t really hit the mark I want for a dessert.
https://www.177milkstreet.com/recipes/chocolate-pudding-brown-sugar-miso
0 notes
Photo
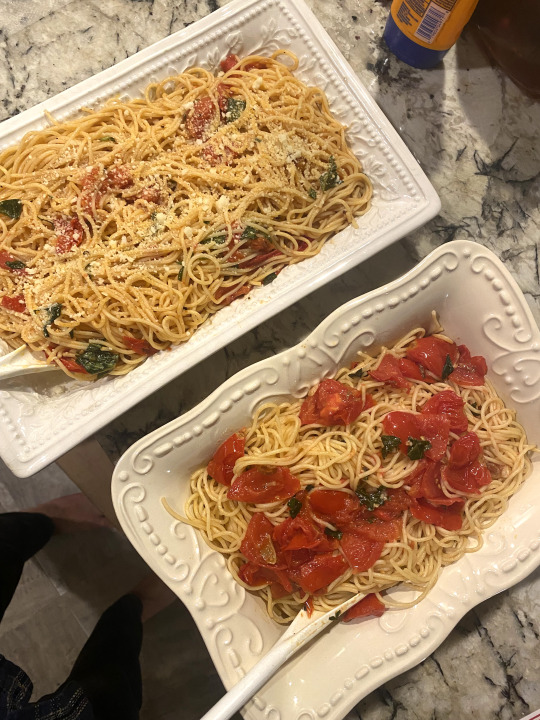
Double recipe trial...for science!
The search function on Milk Street’s website wasn’t working last week as I was writing one of my posts. So instead of just waiting it out, I scoured through their ‘entrees’ manually. Good/bad idea...ended up with about a dozen new recipes bookmarked, ha. Including two that made me do a double take: I’ve decided I’d like to find a really good go-to fresh tomato spaghetti recipe. Well these two both caught my eye, and then I realized they’re soooo close to identical...but not quite. Both recipes:
Fresh tomatoes (Left: grape toms cut in half, Right: toms cored, seeded, and chopped)
Pepper for spice (L: crushed red pepper flakes, R: jalapeno)
4 cloves sliced garlic
1/3 c olive oil
1/2 tsp salt, 1/2 tsp pepper
1/2 c fresh basil [or parsley, which I didn’t use for either]
1/2 c grated Romano [or parm, which I didn’t use for either]
The instructions were exactly the same, save for two minor discrepancies. They both started with cooking the spaghetti just shy of al dente, reserving 3/4 c pasta water, then sauteeing the spice peppers and garlic in XVOO 1-2 minutes in the old pasta pot.* Then:
L: Add [grape] tomatoes, cooked spaghetti, 1/2 c pasta water, S&P
R1: Add [c/s/c] tomatoes, stir to combine, then put half the tomato mixture into a small bowl on the side.
R2: Add cooked spaghetti, 1/2 c pasta water, S&P
Both said to add more pasta water as needed to better sauce the pasta. Then:
L: Remove from heat, add basil and toss. Serve sprinkled with the cheese on top.
R: Remove from heat, add basil and half the cheese and toss. Serve with reserved tomatoes spooned on top, and remaining cheese on the side.
Voila! So you can see, they sound remarkably similar, but I trusted the nuance differences had to be enough to warrant separate recipes. And (even just looking at the pics) I think they did. I was instantly drawn to the L spaghetti because of its better color - R spaghetti just looked dry (even though it wasn’t - but I love my sauces, so pasta looking dry is a big foodie turn off for me).
After going back and forth with a few bites from the L vs. R, I ultimately preferred the L texture more but actually the R flavor more. I think the tomato seeds and juices cooking down with the spaghetti just gave that edge for the sauciness that I crave, but you could actually taste the tomatoes “more” in the R dish. I think mixing the cheese in R ahead of serving also made a positive difference.
What I did learn were some foundations, and that’s what was most valuable to me from this. Generous XVOO, small amount of something with a kick, garlic. Then do a thing with tomatoes, and cooked spaghetti, and pasta water; follow with fresh herbs and cheese. It’s a flexible and adaptable recipe, and I hope to carry these lessons on as I continue my quest :) Also, to note, I used campari/cocktail tomatoes for both (but obliged by the cut in half vs. c/s/c instructions as written - because I do want something that’s versatile for whatever I have on hand/looks good).
Left (/upper) photo: https://www.177milkstreet.com/recipes/spaghetti-aglio-e-olio-with-tomatoes-and-basil (I used half the red pepper flakes called for)
Right (/lower) photo: https://www.177milkstreet.com/recipes/spaghetti-aglio-e-olio-fresh-tomatoes (I used about half of a tiny jalapeno)
*It actually would have been really helpful to break down the two recipes comparatively like this before making this dish :) It was a little annoying keeping the two straight while cooking them simultaneously, jumping back and forth between practically identical recipes. A helpful note for future endeavors!
0 notes
Photo
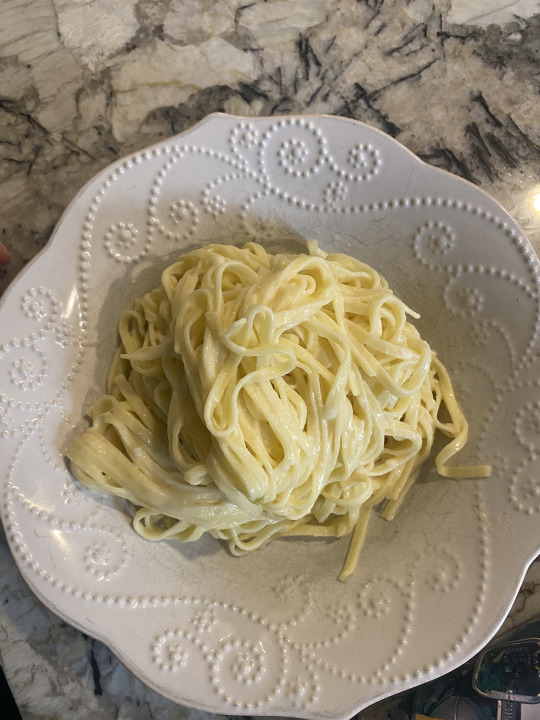
Fettuccine alfredo! Classic, though I don’t think I’ve actually tried this traditional technique before: basically padding a serving bowl with butter, then tossing the pasta with tongs in the buttered bowl while you throw in handfuls of parm. I liked the silken texture of the sauce - it was just enough to cling gracefully to each strand (rather than being globbed on). The technique is definitely legit, and it’s as much about using the pasta water (you don’t even drain the fettuccine, you just transfer it via tongs with water still clinging to it) as it is the cheese and high-quality butter.
This was good...but it was missing something to me. I tried a few grinds of black pepper (perhaps I was craving cacio e pepe with this?), but that didn’t do it. Maybe some crispy pancetta (perhaps I was craving carbonara with this?) - honestly, that was probably it. The alfredo tasted more like it was a foundation for something rather than able to stand on its own.
That said, I really liked the technique, so I think I’m going to try deriving a cacio e pepe and/or a carbonara from this in a new trial. Also, it was definitely perfect for fresh pasta (which I had frozen a few weeks ago).
https://www.177milkstreet.com/recipes/fettuccine-alfredo
0 notes
Photo

Eggplant-wrapped ricotta gnocchi* with sage brown butter! I continue to be impressed with the complex flavors and innovative combinations in the OTTOLENGHI cookbook - yet they’re surprisingly simple recipes to put together. This one required an overnight set in the fridge, but outside of that, it was actually pretty simple - but soooo impressive looking, sounding, and tasting! I’ve had this recipe bookmarked for a while, was excited to finally tackle it.
These were really interesting and tasty, though they were maybe a little *too* light and fluffy inside for me... I kind of wanted them to be just a little firmer. I’m pretty confident this is strictly a personal texture preference, though. They said the quality of the ricotta was paramount, so I homemade it, and I was surpised at how much I really liked the nuttiness the pinenuts added to the dough, especially in tandem with the sage brown butter - that was such a clever inside-outside complementary flavor profile from two totally different ingredients (I’m so impressed with their culinary expertise - I don’t often get to observe that in my own kitchen). And of course, I loved the light crunch of the sage. I was also 100% vibing with their call for 20 sage leaves: just enough so that nearly every bite of dumpling (gnocchi) gets a delectably crunchy little leaf!
This would be a really good dish to serve at a potluck (with a warm pad underneath, so the butter stays melted!) or have at a party. You don’t need something else with it for a single regular meal, but I kinda want something else...so leave that part to the other guests :)
From the OTTOLENGHI cookbook, so no link!
*I am slightly embarrassed to admit I don’t think I really understood the true definition of gnocchi until recently. (In my defense, I was never super into gnocchi.) I’m used to little potato gnocchi pillows not as the standard, but as the actual definition, and that’s it - but I’ve recently seen a huge deviation from this. Turns out (I just looked it up, ha), gnocchi are just little Italian dough dumplings, traditionally made with a little flour and potato - but not necessarily.
So, gnocchi are “dumplings” in the “Southern” sense of the word (‘chicken and dumplings’) - which, while we’re on the topic, also always confused me. I hear ‘dumplings’ and I think of Asian dumplings: hollow dough pouch filled with a distinctly non-dough filling (pork, veggies, etc.). This is totally different than a dollop of seasoned dough set in something to simmer! I’m not knocking any of the above, but why do we have the same word for such different kinds of foods?! That’s like calling a slice of sheet cake and a brownie the same thing.
0 notes
Photo
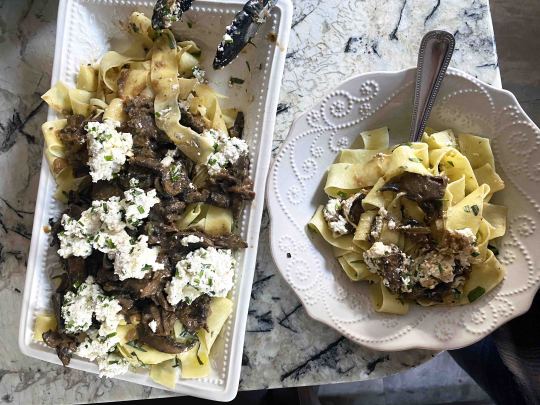
Tagliatelle with miso-mushrooms and fresh chive ricotta! WOW. I’ve been craving fresh pasta either expertly perfect in its simplicity or totally unique in its complexity lately and nothing’s quite done it for me...until this dish. Honestly, I always considered fresh tarragon a French herb more than Italian, but holy cow, you whip me up some fresh or bronze cut pasta with a little butter, starchy pasta water, and a handful of fresh tarragon...ah, it’s BEAUTIFUL. Who knew?!
But then you layer in the super savory, umami-saturated mushrooms (which I later realized tasted so familiar because of this recipe! ha) - and balance them with little puffs of perfectly herbed ricotta - just WOW. Combinations I never would have expected but they come together just divinely.
I was already making some homemade ricotta for another recipe this week, so I just portioned some of it out for this one, too (even though it didn’t call for fresh ricotta - can never hurt!). Probably not necessary though! It’s also good to truly measure out the miso (you don’t want its profile to be too strong).
Superb.
https://www.177milkstreet.com/recipes/tagliatelle-with-portobellos-and-chive-ricotta
0 notes