#10 Best Screen Recorders for Linux
Explore tagged Tumblr posts
Visit Tumblr Blog
Explore Tumblr blogs with no restrictions, modern design and the best experience.
Last Seen Tumblr Blogs


Fun Fact
130K people were victims of a chain letter scam that affected Tumblr in May 2011.
Text
Game Pile: The Beginner's Guide, Midjourney, and Praying to Coda
The Beginner's Guide, Midjourney, and Praying to Coda
Watch this video on YouTube
This is a rebuild and expansion of my article on The Beginner’s Guide from back in 2018, with a newly developed thesis about authenticity and access to artists.
And below is the script I worked from!
The Beginner’s Guide
The Beginner’s Guide is an interactive storytelling video game created by Davey Wreden under the studio name Everything Unlimited Ltd. The game was released for Linux, OS X, and Windows on October 1, 2015. The game is Wreden’s follow-up to the critically praised The Stanley Parable, his previous interactive storytelling title that was initially released in 2013.
The game is narrated by Wreden and takes the user through a number of incomplete and abstract game creations made by a developer named Coda. Wreden challenges the player to try to come to understand the type of person Coda is from exploring these spaces in a first-person perspective. Wreden has stated the game is open to interpretation: some have seen the game as general commentary on the nature of the relationship between game developers and players, while others have taken it as an allegory to Wreden’s own personal struggles with success resulting from The Stanley Parable. When the game sold, a reviewer – at least one, but I can’t find records of more than that – made a bit of a stir by suggesting that the fiction presented in the game is true, and that therefore, the game was built out of stolen material, and gamers buying it could hypothetically, get it refunded if they felt that were in any kind of moral quandrary.
This is, as best I understand it, the ‘story’ of The Beginner’s Guide, the entity in media, the confluence of reporting and reactions to a game. And now, in that same disjointed way of The Beginner’s Guide, I want to tell you about s1m0ne.
S1M0NE, stylised however you wanna, is a 2002 Al Pacino movie about a dude who creates a virtual actress. That’s not even how the movie goes in full, it’s way more involved than that and it includes bestiality, and it has this nasty kind of undercurrent about the fundamentally exploitable nature of women in media spaces. It’s an interesting film.
I didn’t say good.
Anyway, the thing is S1M0NE’s central premise is the virtual actress, Simone. In-movie, she doesn’t exist. To reinforce this, she isn’t credited as having an actress. The movie does do an extensive cgi sequence, showing Simone being constructed digitally, but it was… let’s say it’s very 2002, and leave it at that. Anyway, a bunch of people including representatives from the Screen Actors Guild believed it and they started a fuss about it. I think. It’s hard to find sources about it now, but I remember a fuss.
I mean it stands to reason, if you’re a union you want to oppose things that hurt the interest of your members, and that’s a perfectly valid concern to be worried about around about now with things like deep learning technology allowing us to transplant faces and details across multiple media works and the complex relationship between motion capture and voice actor and fully integrated action – like, if you weren’t aware, motion captured faces are not a 1:1 acting thing, they’re a structure for animators to work from. Gollum is not ‘Andy Serkis is amazing,’ they’re Andy Serkis and the fifty people doing all the rest of the work are amazing, and yes, Andy’s ability to disappear into the role and do the physical acting element is impressive. That’s a real conversation.
But it’s not the conversation they were having in 2002.
There were some people, in late 2002, who genuinely thought that an Al Pacino movie with Winona Ryder and a budget of $10 Million had successfully replicated the human form with complete authenticity, and that the much cheaper and easier tack of using an actor wasn’t more likely. Then they thought it’d involve, y’know, pig-doinking.
Simone was played by a Canadian actress, and the movie otherwise glanced over its very interesting questions of identity and artificiality and technology to instead tell a story about a dude who was very, very anxious about his inability to control women. The real story of the movie, then, is less about what the movie wanted to talk about and much more about the fact some people couldn’t tell where the movie was fiction and where it was fact. The boundary of the diegesis confused people, and there were some critics who were genuinely unsure of how confident they could be about dismissing the fears of people who thought the end of actors had come.
This comparison is because, yeah, it’s kinda stupid that videogame criticism was duped into believing that maybe an author stole all their work and then recorded themselves having a nervous breakdown then edited that nervous breakdown and cleaned up the audio and packaged it up and sold it on Steam without at any point considering that the art was stolen, it’s not like videogames are unique in this regard. We have a history of people not knowing the boundary between art and real and sometimes, when people play with that, especially in areas of new technology, people make mistakes. But also, like, yeah, we are now living in a time when the idea of ‘someone tried to sell entirely stolen assets on steam for $15’ isn’t even a joke or punchline, it might just be a fact of a thing that happens regularly.
As a game experience, The Beginner’s Guide is fine. I like it as a game because it needs the medium of games to make sense, complete with the idea of incomplete games and the way games are made not from a coherent single point but a sort of constantly exploding set of interconnected steps. Like, you couldn’t make this as a book because this isn’t how a book would look when you’re exploring its dismantled bits. The Beginner’s Guide, if it were a book about books and making books, would look like collected pieces of paper in different hands, with a sort of formalising hand over it all.
Funnily enough it’d look a bit like the book of Genesis.
(There’s a long reach of an academic poke)
It’s a perfectly interesting work about imposter syndrome and emotional boundaries and creative processes and a lot of other things you can see in your own inkblots. It’s an artistic piece that tells you a narrative in a really blunt way, but it uses its framing to create a blurred diegesis. It uses real world markers to confuse you about the actuality of its narrative, or it did at the time.
There’s a forking challenge here; on the one hand, I want to berate videogames, as a culture, for being so woefully ill-equipped to deal with meta art as to be convinced that the narrative presented in The Beginner’s Guide was actually real and have at least one actual journalist be so unsure of the reality of the presented narrative as to hedge their bets and mention seemingly unironically that refunds for this game were an option. On the other hand, it’s not like we’re drowning in meta-aware fiction and a cultural discourse that can treat this kind of thing seriously. Since the Stanley Parable and then Beginner’s Guide, the most recent big ‘oh everyone talks about it’ meta-game in my space has been Undertale, and I hate that.
Since the Beginner’s Guide’s original appearance, things have moved on a bit, and particularly, the word ‘parasocial’ has fallen to the common voice. People with platforms use the term to describe the behaviour of people who don’t have platforms, and the people without platforms follow their word, and now ‘parasocial’ has a sort of loose use around it, the idea that it’s pretty much just anything that annoys you about other people on the internet, especially if they’re talking about media. Then we got ‘plagiarism,’ which is, I understand, ‘mostly vibes.’
I want to compare Davey Wreden to Fred Gallagher, the author of Megatokyo. Megatokyo if you’re not familiar with it, is a webcomic that started in August 2000 and has never officially stopped updating since. It’s updated twice this year, which puts it ahead of the same time last year. What Megatokyo is about is not important here, what is is that Megatokyo was enormously succesful, incredibly popular, and has never once had an update schedule its authors were happy with.
I wrote a lot about Megatokyo last year and I still think that article is worth restructuring and presenting in some kind of long form read way. In the end my conclusion about it is that I don’t think ill of Fred Gallagher as a creative, as much as I think that he got to suffer a unique kind of problem that only capitalism can cause, where you can be too successful to handle your own success. That is, both Wreden and Gallagher made something that led to people having assumptions and expectations that don’t make any sense, because the value of what they created was associated with capital, which is to say, money, and rent, and food.
There’s this idea we’re all circling around right now on a platform that is probably by now mostly procedurally generated – not just the stuff made in the past few years by tools like Chatgpt and the midjourney thumbnails and all, but rather that the algorithm of youtube made a lot of people make media in a way that shaved the non-formulaic parts off it, until there was nothing but hash tag con tent. The stuff you like is a small egg floating on a vast and turbulent sea of piss. It’s now that people care a lot about a kind of authenticity from work which separates it from what I’m going to call Generative Media, and which other people are going to insist on calling ‘AI.’
The conversation around generative art is a real struggle sometimes because it feels like sometimes when people are talking about ‘ai art bros’ they’re dealing with a small pool of obnoxious people, and sometimes I can even tell the specific dickhead they mean. It’s Shad, it’s Shad, so often they mean Shad, and yeah sure, Shad sucks. But the conversation around generative media is so often structured in these really weird ways that seems to imply low-quality images don’t exist until generative media gets involved. That nobody cranks out bullshit, or that art is a transferrable property of a human agent, or that in the great days of the internet, nobody’s using pictures they didn’t draw to illustrate articles they wrote. In this very video I’m using gameplay footage from a game I don’t own, and the reason you’re not seeing the footage from S1m0ne to reinforce that point is because a robot would get mad at me and block the video if I did.
I’m even in defensive crouch saying this stuff here. Look: I think generative media tools have applications, particularly in zero-value situations. Nobody in the world is having their pocket picked if I copy art of Rin Matsuoka and use that for my D&D character. Similarly, someone with less image editing skill than mine using generative media to generate pictures of things they weren’t going to pay for in the first place are not hurting anyone unless you believe in a literal cosmic value of these things. In that case, you’re basically just like the generative media people who are functionally, praying to chat gpt. If you’re rapid prototyping, if you’re making a game and need temporary assets to give yourself tools to build around, if you need a powerpoint presentation for class, all of this stuff represents no lost value. This is a perfect place to put generative media. I’m sure purists will disagree, and I just do not care. But there’s my stance: Generative media is an interesting toy that should be used as such, and if it can replace your job, your job probably sucks and you should be doing something cooler and better that people value more. That’s a problem with jobs, and how we give people money to feed themselves, not the software that generates anime tiddy on demand.
Now, here is where things get tangled up.
It seems to me that generative media is being attacked right now by people I generally like and agree with on most things, because of very high concept, seemingly contradictory positions. People who dislike copyright law busting it out to attack midjourney, and people who hate Disney praying for them to fight Google. Ideas about the inherent nobility of art and stick figure illustrations being better than generative media on websites dedicated to sharing unsourced artworks of definitely not stick figures. People don’t have reasons that make a lot of sense for why these things should not be tolerated, but they are very real about their emotional hatred of them. Which, you know, given the people who defend generative media, makes sense, a lot of those people suck and are incredibly obnoxious. Particularly it seems a lot of them are the losers of the NFT wave who are trying to get in ground level as ‘prompt engineers’ as if the ecosystem they’re entering will value them at all.
One of the most sterling arguments against generative media, and one I personally like, is the idea that these tools represent potential precarity for artists who are already struggling to pay for things like, again, rent and food. Potential, in that, largely commission-based artistic survival under capitalism seems to be a bit of a dice roll as it is. My solution to this is not to shame people who weren’t going to pay for art for failing to be able to support a commission economy they weren’t partaking in in the first place, though, it’s things like massive overhauls of income inequality and universal basic income, but also I can understand how my idea is hard and yelling at strangers in hyperbolic language is really easy.
The pressure that created the Beginner’s Guide is also the pressure that meant someone talking about an artistic work of anxiety media couched it in terms of fucking refunds so people didn’t feel they’d ethically mis-stepped by buying fiction about exploitation, a thing that nobody otherwise does, and it’s the same pressure that means ‘someone is making cheap bad art with an exploitative method’ is a threat to the livelihood of a small number of people who have managed to make an extremely precarious living doing art in the first place. As if money is why artists make art, as if we aren’t all struggling in exploitative systems, as if the existence of bland corporate art pumped out in huge troves to pad resume drawers isn’t
Since these past few years, writing academically, a habit I’ve gotten into is always trying to attribute where I get ideas for. Sentences that are referring to someone else’s idea, with the little note of ‘hey, this is that person, at this date.’ It’s a thing that can create the habit of also starting sentences with ‘Wreden says this’ or ‘Gallagher’s work shows this,’ which creates in casual conversation an impression of a very specific kind of authorial access. Certainly here on Youtube, I don’t want to give you the impression because I’m pointing to their work that I can tell you what they think or feel. The idea that I can connect to these authors through a particularly big brained reading of their work is similar to how Christians think they can read god’s mind because they read the book of Daniel, and like, Fred Gallagher exists.
I don’t know what Davey Wreden was thinking about the Beginner’s Guide when he made it. Even if I asked him now, I won’t get an answer, I’ll get the answer of what he remembers of what he was thinking, which may be the same thing but can’t necessarily. I can try, and that’s a way to get at this authenticity, but it’s not a way to guarantee it.
The Beginner’s Guide is still an interesting game to me, because the conversation around it, and around ownership of work, and of unsourced material and exploiting artists hasn’t changed that much but all the people engaging in it have gotten new things to have to try and fit into their models. We are no closer to Coda.
Those opening paragraphs of this article are from from wikipedia.
Check it out on PRESS.exe to see it with images and links!
13 notes
·
View notes
Text
Price: [price_with_discount] (as of [price_update_date] - Details) [ad_1] Sadhwanis 4K HDMI Video Game Stick Console : Latest video game controller. Bringing you the best game content and gaming experience. Open Linux source code system, with 64GB card, built-in 21000 + games. Support Download Games By Yourself: games total 21000 + games 2. Game history, game record list, sorted by time entered the game 3. Game collection, you can use R2 button to collect or uncollect your favorite games 4. Game search, based on English full match or keyword query, Chinese first letter Query corresponding game 5. Game settings, key tone settings View local files, restore Default settings, system information, exit settings 6. The product is not charged, and the handles can be put into 2*AAA when using. 7. Language: Chinese/English, press and hold the [select key + start key] in the middle of the handle at the same time to enter the background to set. Download Game Steps : Step 1: Download game file Step 2: Connect the TF card to the computer with the card reader Step 3: Copy the game files to the corresponding folder (the name of the emulator) Step 4: Insert the card into the game console, close the game console and turn it on Step 5: Find your game and start playing (you can use the search function) Specifications: Product Type: Game console CPU: dual-core cortex-A7 Memory: 32G/64G (optional) Material: ABS Interface: HDMI Operating system: 64-bit Weight: 395g Power supply mode: 2*AAA (not included) Packing size: 28*18*7cm Support simulator: Package Included: 1 x Game Stick Console 1 x Wireless receiver 2 x Controller 1 x charging cable 1 x manual 1x HD cable Product type: Video Game Consoles Hide full description Upgrated -Smart Game Chip: wireless TV game console built-in more than 15000 Games,more than 9 Emulators are installed , and a 64GBTF card is attached which support you to game search functions, and can save/read game records.Use upgraded game chips to support 8-bit, 16-bit, 32-bit, 64-bit, 128-bit emulators. It perfectly meets your needs for image quality and game fluency. 2.4GHz Wireless Controllers, Support Two-Player Games:Equipped with two 2.4G wireless joysticks, Sensitive without delay, get rid of the shackles of the thread.the connection distance of the controller is 8-10 meters,Plug and play, comfortable feel, you can better Enjoy the fun of classic nostalgic games with family or friends. HDMI Output:This video game console supports HDMI connection ,Please make sure your screen has an HDMI input port.it has 1080P HD image quality, and can enjoy lively and interesting video games on the big screen. [ad_2]
0 notes
Text
Saturday Morning Coffee
Good morning from Charlottesville, Virginia! ☕️

Another week and month in the books. We’ve crossed into February and Punxsutawney Phil says six more weeks of winter. I’m ok with that. Coffees ready, let’s get going.
MARK KENNEDY • Yahoo
Carl Weathers, linebacker-turned-actor who starred in ‘Rocky’ movies and ‘The Mandalorian,’ dies
I remember seeing Rocky as a kid and I didn’t much like Apollo Creed. He was arrogant, cocky, and besides, the star of the show was Rocky, the underdog. Of course they eventually became friends and I liked him then.
I loved him as Al Dillon in Preditor and as Chubbs in Happy Gilmore.
R.I.P.
Amanda Richards • Netflix
NASCAR: Full Speed Is Coming to Your Screen at 200 Miles per Hour
I blew through the five episode season in a couple days. Why’d they only order up five episodes in the first season? I mean, F1: Drive to Survive has had 10 episode since season 1.
They focused on the playoffs but they could’ve done more leading into the playoffs. It’s a long season full of drama and I wanted more.
Overall it was really good and I hope we get a full 10 episodes in season 2.
Pkl
Define all your data in Pkl, and generate output for JSON, YAML, Property Lists, and other configuration formats.
Pkl is an Apple project. They’re trying to become a services company and having a better means of managing things sounds like a good idea.
It’s odd to see Apple using Java and Kotlin for this but it does make sense given it’s meant to be portable to different platforms. And by different platforms I mean actual different platforms like Linux, Windows, and Mac. Not Mac, iPhone, and iPad. 😄
Jason Parham • WIRED
Black Twitter Remains Unbothered in Elon Musk’s X
I’ve seen folks on Mastodon talking about how difficult it is for Black Mastodon to get started.
When I setup Curmudgeon Cafe there was a large contingent — and still is — of LGBTQ+ instances.
If memory serves it was more a matter of discoverability.
I’d love to see multiple BIPOC instances spring. We need more diversity, not less.
Miguel de Icaza • blog.la-terminal.net
My current effort is slightly different: how to build a native iPadOS (and hopefully VisionOS) experience for Godot. So rather than rewriting the existing Editor codebase with Swift, this effort is about making a SwiftUI on top of the existing Editor.
I don’t keep up with Godot but I do keep up with Miguel. It’ll be fun to watch his effort evolve into a finished product.
Robert Downen • Texas Tribune
Texas' standoff with the feds in Eagle Pass is igniting calls for secession and fears of violence
The MAGA crazed are ready for war and his orangeness is egging them on. Not only that he’s actively working with leaders in the House and Senate to blow up a bipartisan bill that would be the best deal the GOP has seen on the border. All to get that orange dumbass re-elected.

David Nield • Lifehacker
It’s 2024, and I’m here to extol the virtues of using an RSS reader.
Of course everyone should use an RSS reader! Might I recommend Stream for iOS? 😘
Yes, yes, it’s my app, but you should give it a try and if you like it, please, leave me a tip. 🙏🏼
Tim Hardwick • MacRumors
NHS App users in England can now collect medication from a pharmacy without having to visit a GP or health center, according to NHS Digital.
Man oh man would I love to have a national healthcare system that’s fully integrated and lets me manage how I interact with doctors and other healthcare providers.
I’d like it to work like Facebook. Doctors should invite me to join, or I invite them to join, my medical record.
American Healthcare is still stuck in the past. I’d love to see it fixed.

Nick Barclay • The Verge
Spotify accuses Apple of ‘extortion’ with new App Store tax
Spotify and others didn’t get what they really wanted. They don’t want to pay a single cent to Apple. Which from a business perspective makes perfect sense.
Guess we’ll see what the law says.
Aki Ito • Business Insider
In the two years I’ve been writing about Americans' changing relationship to work, there’s one theme that’s come up over and over again: loyalty. Whether my stories are about quiet quitting, or job-hopping, or leveraging a job offer from a competitor to force your boss to give you a raise, readers seem to divide into two groups.
There are so many factors to loyalty. The true believers exist and they have little to fear. Then there are the masses who quietly do their jobs and aren’t really seen.
We had a layoff at work last May and it destroyed morale, destroyed the company culture, and left loyalty at an all time low.
I hate to be so cynical but companies aren’t there for you. They’re there to make profit. Loyalty from the company only extends so far to the employee.
I still love my job and work hard at it everyday but I fear being laid off.
Jakub Porzycki • The Verge
Microsoft says Apple’s new App Store rules are ‘a step in the wrong direction’
Of course they think it’s going in the wrong direction! They’re a huge corporation in the business of selling software. They don’t want to hand any of it over to Apple.
Epic’s Tim Sweeney referred to it as “Malicious Compliance.”
Get out the popcorn! 🍿
Vadim Kravcenko
New libraries. New languages. New Frameworks. New Intern coming in and thinking he can rewrite better parts of the code himself. It’s easy to get swept away. But is the newest framework always the best choice? Is a rewrite really going to make everything better? Or is there wisdom in the code that has been around for years, has been tested with crazy edge cases, and has evolved together with the business?
I understand why folks are tempted to rewrite thing, I really do. When I wasn’t a dinosaur of a developer I hand that tendency. “I can make this better”, my brain would say. Sure, there’s occasion to “turn the soil” once in a while and I believe that’s good for a code base. But a full rewrite? No. 🌹
Nikita Prokopov
As you can see, even the checkmark wasn’t always there. But one thing remained constant: checkboxes were square.
A square checkbox is something us old timers are accustomed to seeing and changes can be confusing.
The Vision Pro’s checkboxes are confusing but I kind of like UIKit’s toggles as long as you don’t go crazy styling them. 😃
Nilay Patel • The Verge
It sounds amazing, and sometimes it is. But the Vision Pro also represents a series of really big tradeoffs — tradeoffs that are impossible to ignore. Some of those tradeoffs are very tangible: getting all this tech in a headset means there’s a lot of weight on your face, so Apple chose to use an external battery pack connected by a cable. But there are other, more philosophical tradeoffs as well.
I think Nilay did a great job balancing his review of Vision Pro.
It’s a great start but has a really long way to go as a general computing device. That’s my opinion having never used one.
I really believe we’ll get a sense for how we should be using it if we see pictures of Apple Executives wearing it daily to do their jobs. I kind of doubt we’ll see that for anything other than articles written about it.
The iPhone, Watch, and AirPods are devices those same executives probably use everyday. I just can’t see them using Vision Pro as much.
When/if they’re ever able to make them look like regular glasses and they cost around $500-800 I’d consider wearing them all the time. Until then they’re way too expensive for my blood. I would rather spend that kind of green on a new MacBook Pro.
Will Stream support Vision Pro? I think so. I have no idea when, but I think it will.

1 note
·
View note
Text
Short Cut Keys: How to take screenshot on Windows, iOS, Chromebook, Mac, Android
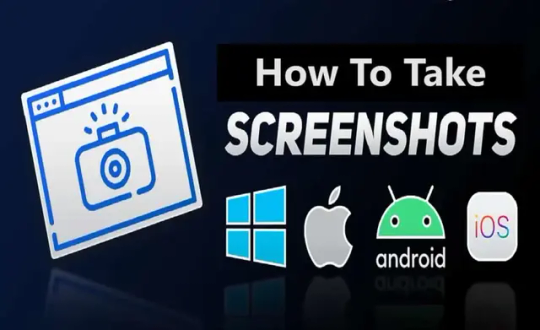
Screenshot is one of the best features in our devices, it allows us to capture important details at any time. In different devices, there are many ways to capture screenshots. Devices such as Windows, Mac OS, iPad, iPhone, Android, and even Linux have different ways to take screenshots. On different operating systems of devices, there are different ways to capture screenshots.
How to take screenshot on any device?
People use this feature to capture important documents and useful information. Mobile and laptops have different operating systems. Therefore, both devices have a distinct way to take screenshots. In this article, we will go through the details regarding this topic. So read this article till the end.

(Image Source: MySmartPrice) How to Take Screenshot on iPad, iPhone, Apple Watch? If you have an iPhone or iPad that doesn't have a Home button, then you must hold down the side button and volume up button together to capture a screenshot. If you have an iPhone or iPad that has a Home button, then hold down the sleep/wake button and press the Home button to capture a screenshot. Captured images will go directly to the Screenshot album. Once you capture the image, the device's markup tool will appear at the bottom of the screen where you can edit the captured image. To capture the entire web page, follow the simple steps. - Open Full Page Tab - Done - Save PDF to Files The file will be accessible via Apple's Files app. If you have an Apple Pencil, then you can easily take a screen grab with a drawing tool. If you are recording your screen through screen recording, then you can easily take screenshots, you can pause the video and take a screenshot this way. You can also use some software to emulate your screen onto a computer screen. Further, you can capture the screen on your computer. Software such as LonelyScreen, and AirPlay allow you to do such things. To take screenshots on the Apple watch follow the steps - Go to the 'My Watch - Go to the General - Click on Enable Screenshot - Hold the Side button and Digital Crown together The Screenshot goes to your iPhone, Yes, you heard it right, the captured screenshot appears on your connected iPhone. How to take Screenshot on an Android device? There are many Android devices available on the market. Therefore, the screenshot command may be different depending on which brand you are buying. However, most Android devices have the same ways of capturing screenshots, holding down the power and volume buttons together. Nowadays many devices have a screenshot button on the pull-down shade. You can easily take a screenshot by clicking on it. On Android 10 and 11, you get many screen recording options as well, you can record the video and capture the desirable portion of it. If you have Google assistance, then ask it to capture the screenshot. In Samsung devices, you can edit the captured image, just open the Air Command menu, then tab 'Smart Select' to choose the desired size and shape. In Samsung devices you can also take screenshots by just Ninja Chop game, just swiping your hand from left to right. Before doing it you have to bring change in your setting. - Go to the Setting - Go to the Advance Feature - Go to the Motion and Gesture - Select the Palm swipe to capture How To Take Screenshot on a Windows 10 PC? To capture screenshots on Windows 10, you must use the print Screen button. You can easily perform this task by just pressing the upper-right side. You just have to tab PrtSc once to copy the full screen. You can then paste it anywhere you want by just pressing Ctrl + V. If you have a big screen, and you want to capture only the window part, then press Alt + Print Screen. Use the Shift + Window Key + S keyboard shortcut to launch a small toolbar at the top of the screen where you can choose between capturing the full screen, a custom portion, or a specific window. There is another option available for those who prefer the snipping tool on Windows 10. Yes, you have heard it right, this app can be located at the start menu which has the same capturing functionality as Snip and Sketch. The Xbox Game Bar also gives a feature to capture the moments, it allows you to record gaming sessions. You have to start screen recording, Use the screen grab by pressing the Window Key + G. How To Take Screenshot on Windows 11? On Windows 11 there is a different way to capture screenshots. You just have to tab Alt + PrtSc to perform this task. Your screenshot is placed in the Picture folder in Screenshot by pressing Window Key + PrtSc. You have also another option using Onedrive. Follow the steps. - Go to the setting - Backup in OneDrive - Check Automatically Save Screenshots After applying these steps, your captured screenshot will go into the cloud. Microsoft provides you with a combined version of the Snipping Tool and Snip and Sketch tool, the Shift + Windows Key + S shortcut to get options for fullscreen, custom, and window capture. In Windows 11 you can easily assign the Snipping Tool to the PrtSc key - Go to the Settings - Go to the Accessibility - Keyboard. - Use the Print Screen Button to Open Screen Snipping The Xbox Game Bar gives a feature for screen recording too. You can do it with Window Key + G then tap on the camera button in the capture section to save a screenshot. Tablet users can capture screenshots by pressing the Volume up and Power buttons together. Captured screenshots will be placed in the screenshot album. How to take Screenshot on Mac? To initiate the screenshot tool, you have to either press Command + Shift + 5 or Launchpad - Other - Screenshot. You can do it from a keyboard shortcut because it preferable and easiest way to capture screenshots on Mac. To capture the entire screen press Command + Shift + 3. If you want the captured part just press Command + Shift + 4, then select the part you want to take. For specific window press Command + Shift + 5, if you have Mac with a touch screen, then press Command + Shift + 6. How to take Screenshot on Chromebook? Some model of Chromebooks has a screenshot button that looks like a camera. If you want to use the shortcut, then press Shift + Ctrl + Show Window, and select Screenshot to capture part of the window, full screen, and a specific window. If you are using an external keyboard, then the shortcut key changes a little bit, for the entire screen press Ctrl + F5, for the part of the screen press Ctrl + Shift + F5. In 2021, Google introduced in Chromebook a new feature that helped users capture screenshots very easily, Just pressing Screen Capture, you will be able to capture the entire screen, part of the screen, and a single window. How to capture Screenshot on Linux Device? There are many ways to capture screenshots on Linux devices. You can do it all by opening the Activities menu and selecting Screenshot. You can select your desired portion of the screenshot whether the whole screen or a single window. Linux operating system also allows you to do print Screen button, just press Alt + Print Screen shortcut for the specific window. Press Shift + Print Screen which allows you to select a custom area to capture.e Many programs can help you with it, for example, the GIMP program allow the user to capture screenshot you just have to perform the following steps. - Go to the File - Go to the Acquire - Press the Screen Shot button.
FAQs:-
How to use snipping tool in Windows? Use short cut key: Windows + Shift + S, to enable the snipping tool in Windows. Afterward, you need to select the area to take a screenshot. How to take a screenshot on Chromebook? Press Shift + Ctrl + Window to take a screenshot on Chromebook. If your keyboard does not have Windows button, use short cut key: Ctrl + Shift + F5 How to take a screenshot on Windows without Print Screen? If you do not want to use or do not have a "PrtScn" button to take a screenshot, you can use Fn + Window + Space Bar. Read the full article
#Howtotakescreenshot#HowtotakescreenshotonAndroid#Howtotakescreenshotonanydevice#HowtotakescreenshotonChromebook#HowtoTakeScreenshotoniPhone#HowtotakescreenshotonWindow#HowtotakescreenshotonWindow10#HowtotakescreenshotonWindows11
0 notes
Text
Specifications of Refurbished Laptops
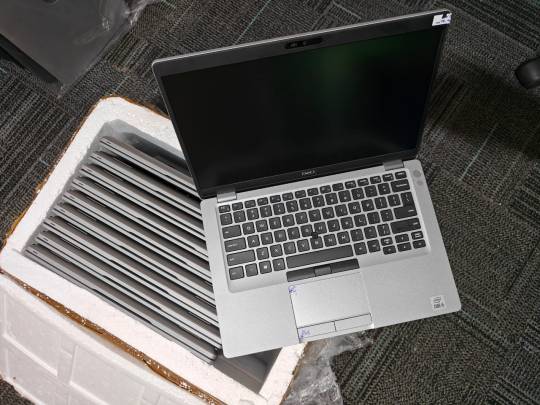
Specifications of refurbished laptops can vary widely depending on the specific model and the refurbishment process. Refurbished laptops are typically pre-owned devices that have been returned to the manufacturer or a refurbishment company for various reasons, such as defects, customer returns, or lease returns. These laptops are then inspected, repaired (if necessary), and tested to ensure they meet certain quality standards before being resold. Here are some key specifications to consider when evaluating a refurbished laptop:
1.Processor (CPU):
Look for a modern and capable CPU, such as Intel Core i5 or i7, or AMD Ryzen processors, depending on your performance needs.
2.RAM (Random Access Memory):
Ensure the laptop has an adequate amount of RAM for your intended usage. 8GB is a common minimum, but 16GB or more is preferable for multitasking and resource-intensive tasks.
3.Storage:
Check for the type of storage, whether it's a traditional HDD (Hard Disk Drive) or a faster SSD (Solid State Drive). SSDs are preferable for speed and responsiveness.
4.Graphics Card (GPU):
For gaming or graphic-intensive tasks, consider laptops with dedicated GPUs. Integrated graphics may suffice for general use.
5.Screen Size and Resolution:
Choose a screen size and resolution that suits your preferences. Common options are 13.3", 14", 15.6", and 17" with varying resolutions like Full HD (1920 x 1080) or higher.
6.Operating System:
Verify whether the laptop comes with an operating system pre-installed (e.g., Windows, macOS, Linux), or if you'll need to install it separately.
7.Ports and Connectivity:
Ensure the laptop has the necessary ports and connectivity options for your needs, such as USB ports, HDMI, Wi-Fi, and Bluetooth.
8.Battery Life:
Check the battery life to make sure it meets your requirements for portability.
9.Cosmetic Condition:
Refurbished laptops may have signs of wear or cosmetic imperfections. Some are graded as Grade A, B, or C based on their cosmetic condition. Grade A laptops are in the best cosmetic condition.
10.Warranty:
Investigate the warranty offered with the refurbished laptop. Some come with a limited warranty, which can provide peace of mind.
11.Price:
Compare the price of the refurbished laptop to similar new models to ensure you're getting a good deal. Refurbished laptops are typically more affordable.
12.Seller Reputation:
Buy from a reputable seller or refurbishment company with a track record of quality refurbishment and customer service.
13.Return Policy:
Check the return policy in case the laptop doesn't meet your expectations or has issues shortly after purchase.
It's essential to research the specific refurbished laptop model you're interested in and read reviews or user experiences to get a better understanding of its performance and reliability. Additionally, verify the refurbishment process and quality standards of the seller to ensure you're getting a reliable product.
1 note
·
View note
Text
6 Best PS2 Emulators for PC and Android (Play PS2 Games with Them)
Best PS2 EmulatorsPS2 is one of the most outstanding selling control center ever. All things being equal, numerous gamers actually need to play PS2 games on laptops. That's what to do, you want to set up a PS2 emulator for PC. In the event that you play the games on cell phones, get a PS2 emulator Android all things being equal Best PS2 Emulators.
Here, top 6 PS2 emulators for PC/Android/iOS are summed up. Pick one from them to play PS2 games on PC, Android, or iOS gadgets now.
#1. PCSX2
PCSX2, a free and open-source PS2 emulator, is viable with Windows, Linux, and macOS. It utilizes a blend of MIPs computer processor Translators, Recompilers, and a virtual machine to copy the equipment of PS2.
This PlayStation 2 emulator has accomplished practically 100 percent similarity for games (counting 2691 games) with the exception of Its Genuine Gold World because of regulator limits. Talking about regulators, PCSX2 is viable with all regulators (like PS3, Xbox 360, Logitech, etc) provided that the PC upholds them.
PCSX2 additionally incorporates additional enhancements to the PS2 including against associating, surface separating, and client indicated goals up to 8192 x 8192. These highlights can make all your old games look slicker and much more clean. Furthermore, this PS2 emulator for PC empowers you to share PS2 ongoing interaction by utilizing the inherent HD recorder.
Aside from that, you can partake in the advantages underneath on PCSX2.
Custom goal and upscaling
Virtual promotion sharable memory cards
Save-states
Fixing framework
Inner recorder to accomplish lossless quality at max throttle
Further perusing:
As one of the most amazing PS2 emulators, PCSX2 has been running for around 20 years. Past forms could run a couple of public space game demos, however more up to date renditions can run most games at max throttle. To get the PCSX2 download, click on the connection underneath.
PCSX2 Download
#2. PS2Emu
PS2Emu, a PlayStation 2 emulator, works with the two Windows and Linux. The graphical connection point of PS2Emu is fundamental and probably won't be reasonable for amateur PC clients to work. This PlayStation 2 emulator has a full-screen just mode with an alternate video yield (game) window for playing.
It is one of the most outstanding PS2 emulators, yet it is in the trial stage with improvement done consistently.
#3. AetherSX2
AetherSX2 is a PS2 emulator Android, and that implies it just works with Android frameworks. It is considered as the best Android PS2 emulator for the absolute best Android handheld games consoles available.
The new updates of AetherSX2 is useful for further developing execution. For example, you are permitted to stretch your gadget to the edge and get far better casing rates from the games you like. The specific outcome relies upon the gadget you are utilizing. With the appropriate gadget, you can get the majority of the PS2 games moving along as planned.
In addition, the update likewise added numerous choices to change settings, update goals, sync up regulators, and so forth. In the event that you are searching for a PS2 emulator Android, AetherSX2 is a decent decision.
#4. Play!
Play! is a PS2 emulator for PC accessible in both 32-digit and 64-cycle renditions. As a matter of fact, it works with Windows, Linux, macOS, iOS, and Android frameworks. No Profiles transfer is expected for running the emulator.
In excess of 1500 games are viable with this PlayStation 2 emulator and more games are being made viable consistently. What's more, you can embed up to 10 save states in the emulator for every ROM to make a nice game library within reach.
This PS2 emulator is likewise pertinent for Android and iOS cell phones. Thus, it can likewise be utilized as a PS2 emulator Android.
#5. DamonPS2
DamonPS2 is viewed as the speediest and most solid emulator for Android play. The game similarity pace of this PS2 emulator is around 90% with 20% of those playing impeccably. To be explicit, it offers gamers around 720 playable games.
Like most other free emulators, advertisements will upset the general progression of the program. To partake in the experience of advertisement free, get a genius form. Also, you can open additional elements like more memory spaces and widescreen interactivity.
With this PS2 emulator Android, you can increase outline rate and illustrations to make old PS2 games look over and above anyone's expectations.
#6. NeutrinSX2 (NSX2)
NeutrinSX2 is additionally called NSX2, which is one of the most outstanding PS2 emulators for PC. NSX2 can assist you with playing PS2 games, yet the number is little. The code of this PlayStation 2 emulator is clear and very much spread out.
Further perusing:
To have better interactivity or tackle game mistakes, if it's not too much trouble, visit MiniTool Parcel Wizard site. It offers you different aides and instructional exercises. Plus, you can increment circle space, really look at hard drive for mistakes (terrible areas and record framework blunders), change the configuration of plate by utilizing MiniTool Parcel Wizard - a complete segment director for Windows gadgets.
1 note
·
View note
Text
10 Best Screen Recorders for Linux
10 Best Screen Recorders for Linux
Screen recording is useful in both business, educational and personal environments. They allow you to create a range of presentations, video tutorials and tutorials for different purposes.
Here, we’ll take a look at the features, benefits, and limitations of the 10 best screen recording software for Linux and learn how to get the most out of your software.
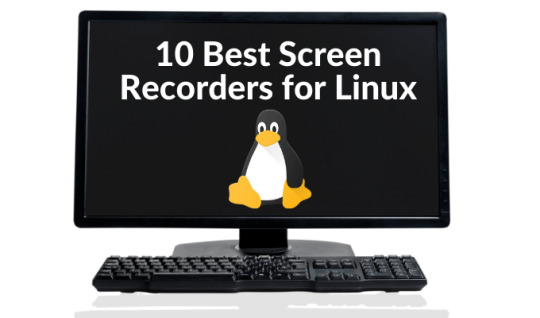
SimpleScreenRecorder
Simp…
View On WordPress
0 notes
Text
Free screen and webcam recorder windows 10

こたつパンチラしてる素人さんを盗撮したエ 画像21枚.
Best Free Screen Recorder with Audio for Windows 10, and Mac.
実家で妹を盗撮しまくった変態兄の秘蔵動画&画像集 | スクールガールレビュー.
Two Webcam Recorders for Windows 10 (Default and Suggested).
Free Screen Recorder - Screencast-O-Matic.
撮りためた姉ちゃんのこたつの中の黒タイツ①②パンスト見放題セット | 盗撮動画紹介所.
【坂口みほの】こたつの中でパンチラ・パンモロしてる無防備な下半身にこっそりイタズラ♡ニーハイ美少女jkは声出せずにピンクパンツに染みがつくほど.
シェアハウスで女子高生の着替えやオナニーを盗撮した激ヤバ動画 | 東京パンチラ通り.
盗撮動画ミッション - Part 2.
How to record screen and webcam on Windows 10 - AddictiveTips.
Screen Recorder - Webcam & Voice Recorder - VEED.
30ページパンチラav動画リスト。無料hdダウンロード | Avサンプル.
【熟女画像】人妻熟女のスカートの中を逆さ撮りしたパンチラ盗撮エロ画像 - 熟女画像ハメママ.
眠れるパンティ食い込み動画の美女 - 2nt.
こたつパンチラしてる素人さんを盗撮したエ 画像21枚.
Instructions for use: First, you can select the "Recorder" button in the startup interface to enter the recording interface. Second, Please adjust the area of the screen to be recorded, zoom in, zoom out, move by dragging the border. Third, click the "Record" button in the lower right corner of the interface. Recording begins..
Best Free Screen Recorder with Audio for Windows 10, and Mac.
All you need is a Microsoft Edge installed and you can record anything - tabs on Edge or other browsers, Desktop Screen, or your webcam. Just one click to open the gateway for narrating and sharing ideas, stories, and updates. → How to use StoryXpress to record screen video? - Download the Extension. - Choose from 3 recording modes - Screen. Filmora Screen Recorder. Our top pick to record video from webcam windows 10 is the. Apr 15, 2022 · Top 3. OBS (Windows & Mac & Linux) ⭐ Our Rating: 4.6/5. Open Broadcaster Software (OBS) is an open-source screen recording software that is free to use and can record screens without watermark and time limit. And it's compatible with multiple platforms including Windows 11/10/8.1/8/7, Mac, and Linux.
実家で妹を盗撮しまくった変態兄の秘蔵動画&画像集 | スクールガールレビュー.
パンチラ av動画リスト (30ページ) 02:18:00. mmus-010 - 美人性的妄想過剰セクシズム... 2017年4月27日. 04:00:00. okax-211 - 無防備パンチラ. 向かいの部屋の巨乳美女の生着替えを覗いていると… 平凡な日常、何気なく窓先を覗いて見るとそこには…卑猥でえげつない巨乳美女の生着替え���が!. Bandicam is a free screen recorder for Windows that enables you to capture any area of your screen either as a screenshot or screencast video file. You can record lectures, webinars, games, and Skype calls with the option to add narration from your microphone and video from your webcam, as well as share on YouTube or Vimeo.
Two Webcam Recorders for Windows 10 (Default and Suggested).
.
Free Screen Recorder - Screencast-O-Matic.
【こたつ】暖かくなってきたけどまだこたつの中はパンチラ天国 20枚... エロ画像美術館... 無料エロ動画 LOVEPOP R18 PANTY-LOVE DUGA FC2動画見放題 6ms カリビアンコム 天然むすめ 一本道 HEYZO のぞきっくす のぞきザムライ アダルトランキング SOKMIL Girl's Blue Fetish. 女子校生(女子高生・JK)専門のエロ無料動画まとめサイト。制服・美少女・ギャル・パンチラ動画が無料で見放題!スマートフォンにも対応 パンチラ盗撮(女子校生・JK・美少女)専門のエロ無料動画まとめサイト。制服・美少女・ギャル・パンチラ動画が無料で見放題!スマートフォンにも対応.
撮りためた姉ちゃんのこたつの中の黒タイツ①②パンスト見放題セット | 盗撮動画紹介所.
Webcam and Screen Recorder Logitech Webcam Software for Windows 10 Free Capture photos and videos, upload to Facebook with one-click, adjust camera settings. Windows Logitech Webcam Software for.
【坂口みほの】こたつの中でパンチラ・パンモロしてる無防備な下半身にこっそりイタズラ♡ニーハイ美少女jkは声出せずにピンクパンツに染みがつくほど.
.
シェアハウスで女子高生の着替えやオナニーを盗撮した激ヤバ動画 | 東京パンチラ通り.
Jan 13, 2021 · 3. ShareX - Free Webcam Capture. Supported OS: Windows. ShareX is a lightweight, free and open source Webcam recorder to record computer screen, Webcam video and take screenshots. The built-in video editing tool of ShareX helps users edit videos, add video effects and add watermark to photo..
盗撮動画ミッション - Part 2.
Version: 4.2.8 Updated: May 27, 2022 Support external device capture. This webcam screen recorder also provides the video editing option Debut Video Capture is also a great free webcam recording software for Windows 10. Super Webcam Recorder is a tool enabling users to capture streaming video and snapshots. Internet. 覗き大好きなあなたへ…素人女性の動画&画像がてんこ盛りサイト!... 街でolをストーキングしてパンチラを盗撮した映像! 目をつけたolにスッポンのごとく食い下がり盗撮! 街を歩いていて好みのタイプの女性とすれ違った時、思わずムラっときて後を.
How to record screen and webcam on Windows 10 - AddictiveTips.
京 府某温泉宿で隠し撮り 修学旅行女子学生たちのこたつパンチラ盗撮3 60人300分... 【動画配信限定特典映像付】部活合宿で出会った たわわな天使たちとただ欲望のままに…~ロリ巨乳、風呂・着替え盗撮、夜 い、乱交、猥褻映像~. Instructions for use: First, you can select the "Recorder" button in the startup interface to enter the recording interface. Second, Please adjust the area of the screen to be recorded, zoom in, zoom out, move by dragging the border. Third, click the "Record" button in the lower right corner of the interface. Recording begins.
Screen Recorder - Webcam & Voice Recorder - VEED.
こたつの中だからと安心しきって無防備にお股全開パンチラ美少女にイタズラ三昧♡。特にフェラに興味のある方、是���ご視聴下さい - 動画ちゃんねるの無料エロ動画。.
30ページパンチラav動画リスト。無料hdダウンロード | Avサンプル.
ゲーセンで椅子に座っている女の子の対面パンチラ動画w... こたつパンチラ画像101枚。こたつ布団で見えないからと大胆に股を開いて座ってるjkやミニスカギャルのこたつパンチラや人妻のテーブル下パンチラをお楽しみください!.
【熟女画像】人妻熟女のスカートの中を逆さ撮りしたパンチラ盗撮エロ画像 - 熟女画像ハメママ.
. ホーム パンチラ・逆さ撮り 【パンチラ】お花見で盗撮された座りパンチラ動画... 【パンチラ】セーラー服の女子高生の汚れたパンティーのしゃがみパンチラを対面から盗撮. Jan 12, 2019 · Click or tap on Cortana's search box from the taskbar and type in the word camera. Then, click or tap on the Camera app. To record videos with the Camera app from Windows 10, you first have to switch to Video mode. Click or tap the Video button from the right side of the app's window. Then, to start recording a video with the Camera app, click.
眠れるパンティ食い込み動画の美女 - 2nt.
More Than Just Free Screen Recording. Upload an existing video or record your own with the Vidyard Screen and Webcam Recorder. Embed your video on your website, send it in emails, or share it on social media with just a few clicks. Get notified the moment your video has been watched (and see who watched it, and for how long). そうやって盗撮された妹の着替え、お風呂、トイレ、オナニーの写真や動画をかき集めてみました。. パンチラやブラチラは言うに及ばず、さらに過激な部分が映ってしまってる映像も!. ロリコンでシスコンのあなたならきっとわかる家庭内盗撮の魔力. Supported OS: Windows, Mac. Price: Free but $30 for the PRO version. #5. Litecam HD. This is a great tool for recording your webcam and screen since it is designed to capture everything that appears on the screen. You can add your overlay in the settings. Pros.
Other links:
Macbook Pro Install Windows 10 From Usb
Scanner Software For Windows 10 64 Bit
Fl Studio Registration Key Generator
Mario 3Ds
Free Audit Programs Download
10 notes
·
View notes
Text
10 Ways to Enhance Your Gaming PC
Are you not able to enhance the gaming PC experience after trying everything? No need to give up on your favorite game but correctly optimize the gaming PC.
Let’s explore 10 efficient ways to optimize and enhance PC performance:
#1. Keep Your PC Dust-free
It is the first and foremost step to enhancing PC speed and performance. You do not need any technical skills for this job. Simple cleanliness can keep the PC running smoothly with fair airflow and no heating problem. All you need to do is to remove the dust from the computer, CPU, and every other component. Follow the specific and effective cleaning techniques for top gaming performance without a mucky screen.
#2. Upgrade Your PC From Time To Time
Upgradation of your PC is one potential way to enhance performance. Certain components can be upgraded easily - RAM, Storage, and Battery. RAM updates can provide additional memory to the gaming PC and make a massive impact. Using reliable hard drives or additional storage can improve gaming performance. You should be keeping a keen eye on the PC upgrades for optimum gaming.
#3. Update Your PC Drivers
Drivers play a vital role in ensuring the flawless performance of the gaming system. The PC running on macOS, Windows, and Linux OS comes up with almost similar sort of hardware. The drivers are the crucial factors making all the big differences. You should try to keep them updated to best gaming PC speed and performance.
#4. Update DirectX To Optimize Laptop Performance
DirectX is a vital factor facilitating the graphics in the video game. It facilitates the graphics quality in the PC. You should keep the latest version of DirectX on the laptop. It comes with various common yet useful libraries of Windows and Xbox gaming systems. You can check your system's DirectX version and keep it updated to your gaming PC system.
#5. Overclock the Laptop Graphics Card
It is one other manner in which a graphics card can contribute to improved PC performance. Overclocking the graphics card is going to extract additional performance for high-end gaming. Such useful graphics card tools are available for both AMD and Nvidia GPUs. You won’t need to face any trouble finding the right solution.
#6. Adjust System Power Settings
Power management is essential if you look forward to PC speed and performance. However, some laptops do not need it, yet consider checking them to stay on the safe side. The gaming PC can have detailed power management options for an uninterrupted and dedicated gaming experience.
#7. Switch Windows Gaming Mode On
Use this basic tip to enhance gaming PC performance in the long run. You can find a lot of gaming options and features like streaming, screen recording, and Game Mode. You can activate the mode and optimize the system for uninterrupted gaming and fun.
#8. Close Background Apps
Every game lover needs to make manual changes to gaming PC capabilities. Close background apps every time before launching the game. Keep a keen eye on the system tray and list of running applications in the background. Right-click and close it to match the relevance in the gaming experience.
#9. Check Your Network Speed
Make sure your internet speed is up to the mark for a high-end gaming experience. It is mostly based on the hardware, drivers, and computer configuration. A stable and faster internet connection is one of the crucial elements to gaming PC speed.
#10. Disable Automatic Updates
Whether you’re working on a laptop, automatic updates can be a big pain. The same applies when you’re using the system for gaming purposes. You should disable automatic Windows updates permanently to PC ability with no interruptions.
Final Word
Hence, these were 10 common tips to follow to enhance your gaming experience without compromising the fun time. If you’re not able to achieve the optimum gaming PC performance, follow the tricks to make it a fantastic experience.
2 notes
·
View notes
Photo


28.02.21 We watched Shrek (2001). IMDb link: https://www.imdb.com/title/tt0126029/ Shrek is a 2001 computer animated comedy film loosely based on the 1990 fairytale picture book by William Steig. The film was produced by DreamWorks Animation and is directed by Andrew Adamson and Vicky Jenson. It stars an incredible voice cast as follows: Mike Myers as Shrek Eddie Murphy as Donkey Cameron Diaz as Princess Fiona John Lithgow as Lord Maximus Farquaad Shrek premiered at the 2001 Cannes Film Festival where it competed for the Palme D'Or making it the first animated film to do so since Peter Pan in 1953. Shrek won the first ever Academy Award for Best Animated Feature and the films success established DreamWorks as the prime competitor to Pixar. Shrek is an anti-social green ogre who loves the solitude of his swamp. His life is disrupted after Lord Farquaad exiles multiple fairy tale creatures to Shreks swamp. For the full plot, follow this link: https://en.wikipedia.org/wiki/Shrek I found it very difficult to pick favourite scenes as the whole film is so enjoyable. However my favourite character is the Dragon who falls in love with Donkey! This clip shows a collection of romantic scenes between Dragon and Donkey from the franchise:
https://www.youtube.com/watch?v=NM_3y0yaykk&ab_channel=SnuffyDesifur The relationship Donkey and Dragon is an example of how the film targeted adult audiences as well as children. One of the most important scenes is where Shrek mishears Fiona and Donkey talking about him. He believes she doesn't like him, but the opposite was in fact true. Shrek was put into active development, but took a number of years to become formally structured. Initial ideas had Shrek living in a rubbish dump near a human village called Walt Creek. Art director Douglas Rogers visited a number of locations for inspiration including Stratford Upon Avon in the UK, the Dordogne in France and Charleston in South Carolina. Donkey was modeled after Perry, a real miniature donkey from Barron Park, California. During filming, Mike Myers completed the voice over for Shrek in 20 sessions. However he was unhappy with the outcome and re-recorded all the sessions with a Scottish accent. Shrek was originally set to be a live action/CG animation hybrid with background plates miniature sets. The test was screened in May 1997 and the results were very unsatisfactory. The studio turned to its production partner Pacific Data Images (PDI) who helped Shrek gain its final computer animated look. PDI used its own propriety software including fluid animation system to create the bulk of the film. For some elements of the film, they used Maya animation software to create realistic clothing movements and the hair of Fiona and Lord Farquaad. The surface animators used flow controls to enable Donkeys fur to move smoothly and react to the environment. The same software was used for grass, moss, beards and eyebrows. Shrek was the first major motion picture created using the Linux operating system. Follow this interesting link for technical information about Shreks production using Linux: https://www.cgw.com/Publications/CGW/2001/Volume-24-Issue-9-September-2001-/Linux-Invades-Hollywood.aspx Shrek has 31 sequences with 1288 total shots, this includes 36 separate in film locations.
Shreks musical score was composed by Harry Gregson Williams and John Powell. Powell does not feature in the other Shrek movies due to a conflict with Gregson Williams. The soundtrack for Shrek uses classic pop music to give the film a unique feel. This was unheard of at the time.
Shrek was a huge box office hit with an approval rating of 88%, 8/10. It was praised for its voice acting, funny script, smooth animation and ability to appeal to all generations. Shrek was released on VHS and DVD in November 2001. It was re-released on Blu-Ray in December 2010.
It remains one of the biggest selling animated films of all time. Shrek was followed with three commercially successful sequels in 2004 (Shrek 2), 2007 (Shrek the Third) and 2010 (Shrek Forever After). The aspect ratio for Shrek is 1.85:1, however the early version of the film was shown in the 1.66:1 aspect ratio. re-watching Shrek for the first time in a long time reminded me of what a great film it is! You can clearly see the profound influence it had on later animated films such as Over the Hedge (2006) and How to Train Your Dragon (2010). Shrek is a classic, a fact highlighted by its selection in the National Film Registry by the Library of Congress as been ''Culturally, historically or aesthetically significant'' in 2020.
In commemoration to the films 20th anniversary, a 4K UHD release is set for May 11th 2021 by Universal Pictures Home Entertainment.
14 notes
·
View notes
Text
Price: [price_with_discount] (as of [price_update_date] - Details) [ad_1] Viart Creation 4K HDMI Video Game Stick Console : Latest video game controller. Bringing you the best game content and gaming experience. Open Linux source code system, with 32GB / 64GB card, built-in 3000 + / 10000 + games. Support Download Games By Yourself: total 3000 + / 10000 + games 2. Game history, game record list, sorted by time entered the game 3. Game collection, you can use R2 button to collect or uncollect your favorite games 4. Game search, based on English full match or keyword query, Chinese first letter Query corresponding game 5. Game settings, key tone settings View local files, restore Default settings, system information, exit settings 6. The product is not charged, and the handles can be put into 2*AAA when using. 7. Language: Chinese/English, press and hold the [select key + start key] in the middle of the handle at the same time to enter the background to set. Download Game Steps : Step 1: Download game file Step 2: Connect the TF card to the computer with the card reader Step 3: Copy the game files to the corresponding folder (the name of the emulator) Step 4: Insert the card into the game console, close the game console and turn it on Step 5: Find your game and start playing (you can use the search function) Specifications: Product Type: Game console CPU: dual-core cortex-A7 Memory: 32G/64G (optional) Material: ABS Interface: HDMI Operating system: 64-bit Weight: 395g Power supply mode: 2*AAA (not included) Packing size: 28*18*7cm Package Included: 1 x Game Stick Console 1 x Wireless receiver 2 x Controller 1 x charging cable 1 x manual 1x HD cable Product type: Video Game Consoles 2.4GHz Wireless Controllers, Support Two-Player Games:Equipped with two 2.4G wireless joysticks, Sensitive without delay, get rid of the shackles of the thread.the connection distance of the controller is 8-10 meters,Plug and play, comfortable feel, you can better Enjoy the fun of classic nostalgic games with family or friends. Upgrated -Smart Game Chip: wireless TV game console built-in more than 15000 Games,more than 9 Emulators are installed , and a 64GBTF card is attached which support you to game search functions, and can save/read game records.Use upgraded game chips to support 8-bit, 16-bit, 32-bit, 64-bit, 128-bit emulators. It perfectly meets your needs for image quality and game fluency. HDMI Output:This video game console supports HDMI connection ,Please make sure your screen has an HDMI input port.it has 1080P HD image quality, and can enjoy lively and interesting video games on the big screen. Light and Easy to Carry:The protable mini game console has lightweight and compact body. Only 102mm long, 30 grams weight. does not take up space, and is easy to carry.special game rocker for arcade ,high sensitivity andantiskid design, comfortable feel, you can better share your fun with family or friends. Best Gift:game console is a perfect festival/ christmas/ thanksgiving/ halloween/ birthday gift for men, boy, dad, kids, husband and friends.If you are not completely satisfied with the game console, please contact us, we will definitely be able to provide you with the best service! [ad_2]
0 notes
Text
How To Make Your Own Website and Monetize it?

By following up with me in less than twenty-four hours, you will be ready to launch a Website that will undoubtedly earn you thousands of dollars every month! How to generate the money? Well, the website that we make will be offering SAAS service.
What is a SAAS service?
A SAAS (Software As A Service) service is essentially an online software or service that you pay to use.
For example, Mailchimp.com, which is a SAAS service, provides email marketing services that you pay for.

A SAAS service is anything you pay for to get an online service.
Now you can be the owner of a SAAS service, you will have your own Website, and people will subscribe to your service and pay you monthly recurring payments.
Let’s say you have 100 customers who use your SAAS service, and your service costs about $10 a month; you’d make $1000 per month!
All you have to do is sit at home and watch your passive income develop on your computer screen. It’s a fantastic and easy way to earn money.
How to get a SAAS service?

“How can I get my own SAAS service or software?” you might be wondering. The good news is that you don’t have to create one, learn to program, or even employ a programmer to do so.
You can simply buy it Online for $40–$60. You can buy software from a website called codecanyon
You can simply visit the website, click on the php scripts and search for SAAS and choose what kind of SAAS service that you preferred.
There are several types of SAAS applications available for purchase. Discount networks, accounting and billing software, email marketing systems, and employee management software are only a few examples. Take your time browsing the services and choose the one you like best, the one that fits you and you feel that you can be successful with.
Hosting Your Service
After you’ve created your SAAS service, the next move is to host it and make it public. To host it online, you’ll need a domain name and a server.
Now it is sounds hard since you don’t have any technical background in this term. Don’t worry, it is actually a simple and easy steps.
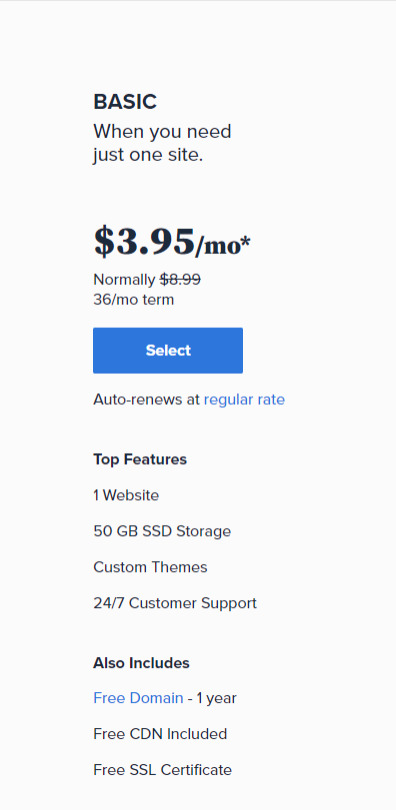
First you need a VPS server, you can visit and buy a cheap one from Bluehost. its only $3,95 permonth with and they give you free domain for 1 year! Check the price below. Buy the “LAMP” administration.
So What is VPS server? We do what we call “online hosting” when we want to publish a PHP page, script, or some other web application. This basically means uploading the files and database to a public server so that it can be accessed over the internet. On simple word, the place where you put the file is from VPS server.
In this tutorial we will used the shared server from Bluehost. Shared server only means that your server will be host with others website.
Now everything is ready, the only things that matter is how to install it. Let get to it.
Getting Started
After having your own server and domain on Bluehost, you need to connect them. Your VPS Server can be accessed now your Bluehost profile, but of course, we don’t want to access our website though an IP! we want to use our domain name. So simply, we are going to map the domain name to our VPS IP, so then we access the VPS and the WordPress website through both the domain and the IP.
Configure your DNS Records
Simply open DNS management zone in your Domain Provider and edit the main A record.
Than we need to create MySQL database for the application. So Let’s Create one. Connect to your VPS server using any SSH client like putty. and Let’s start!
Just open Putty and enter the Server IP or Name, and Press Open. It will ask you to login, just enter “root” as the user, then enter your password which is sent to you by email.
Note: while typing the password, putty will now show it for security reasons, but It’s there, just type it!
What’s nice, is that we have MySQL installed already as part of the LAMP Stack, but we need to create a database and a user for out application.
Note: Every MySQL statement must end in a semi-colon (;)
To get started, log into the MySQL root (administrative) account by issuing this command:
mysql -u root -p
You will be prompted for the root password, just write or paste it and press Enter.
First, create a separate database that your PHP application will use. You can call this whatever you want, but we will be using TestDb in this guide to keep it simple. Create the database by running this command:
CREATE DATABASE TestDb DEFAULT CHARACTER SET utf8 COLLATE utf8_unicode_ci;
Next, we are going to create a separate MySQL user account that we will use exclusively to operate on our new database. Creating one-function databases and accounts is a good idea from a management and security standpoint. We will use the name DbUser in this guide. Feel free to change this if you’d like.
We are going to create this account, set a password, and grant access to the database we created. We can do this by typing the following command. Remember to choose a strong password here for your database user:
CREATE USER 'DbUser'@'localhost' IDENTIFIED BY 'enter_a_custom_password_here';GRANT ALL ON TestDb.* TO 'DbUser'@'localhost';
You now have a database and user account, each made specifically for Your PHP application. We need to flush the privileges so that the current instance of MySQL knows about the recent changes we’ve made:
FLUSH PRIVILEGES;
Exit from it by typing :
EXIT;
Upload The Script Files To The Server.
To upload the files, you need an application called WinSCP.
It is a free tool and you can download it from here.
Connect to Your VPS Server using WinSCP, and Update the PHP Files to the server to this path: “/var/www/html”
In most cases, the files would be zipped, so we need to extract them.
Again to Putty SSH CLient and Let’s install the unzip utility using the following command:
sudo apt-get install unzip
Clear putty screen to make in clean using the following command:
clear
Change directory to /var/www/html using the following command:
cd /var/www/html
Unzip the “.zip” file using the following command:
unzip YOURFILENAME*.zip
*Note: the file name may be different in your case, so replace YOURFILENAME with your file name.
Now, Move the latest folder content to the upper directory so it can be accessed directly -> use WinSCP Just copy all the files inside “YOURFILENAME” folder and paste them directly in html folder.
Configure Apache to Publish PHP Website
Well Done, Now your files are uploaded and placed in the html folder, we just need to configure apache so we can our Publish PHP Website and access our script using our domain name. To do so, open WinSCP again and navigate to this directory: /etc/apache2/sites-available/
Now, create a new empty file and name it “yourdomain.conf” . You can replace “Scriptname” with any name you want
Open yourdomain.conf Then copy and paste the content below into the file and save.
<VirtualHost *:80> ServerAdmin admin@YOUDOMAINNAME DocumentRoot /var/www/html ServerName YOUDOMAINNAME ServerAlias YOUDOMAINNAME <Directory /var/www/html/> Options +FollowSymlinks AllowOverride All Require all granted </Directory> ErrorLog ${APACHE_LOG_DIR}/error.log CustomLog ${APACHE_LOG_DIR}/access.log combined </VirtualHost>
Replace with your own domain, in my case its “YOURDOMAINNAME”
Enable your script configuration in apache and restart the service.
Now simply, run the following commands to finish the setup:
sudo a2ensite yourdomain.conf sudo a2enmod rewrite sudo systemctl restart apache2.service
ALMOST DONE!
Connect to MySQL Database.
Open your web browser now and navigate to your server name.
Continue the setup by entering the database info and your admin login information. In our example, the database name is TestDb and the user is DBUser with the password set.
That simple!
Setup cronjobs.What are cronjobs?
cron is a Linux utility which schedules a command or script on your server to run automatically at a specified time and date. A cron job is the scheduled task itself. Cron jobs can be very useful to automate repetitive tasks.
For example, you can set a cron job to delete temporary files every week to conserve your disk space. Some PHP web applicaitons, may require you to set up a cron job to perform certain functions.
Setup cronjobs.
To setup cronjobs, you need to add all required jobs to the server. This depends on your script, so if you bought a script from code canyon, the script owner should provide the cronjobs.
To do this, open WinSCP and got to /etc Open crontab file using the editor And paste all the jobs from your script to this folder. (cronjobs are listed in the app documentation)
Make sure each job is on a line and an empty line in the end.
Secure with a Free SSL.
SSL certificates are used within web servers to encrypt the traffic between the server and client, providing extra security for users accessing your application. Let’s Encrypt provides an easy way to obtain and install trusted certificates for free.
Connect to your Server using Putty SSH client. and Let’s Start!
Install the Let’s Encrypt Client
Let’s Encrypt certificates are fetched via client software running on your server. The official client is called Certbot.
First, add the repository to install Certbot:
sudo add-apt-repository ppa:certbot/certbot
You’ll need to press ENTER to accept.
Then, Update the package list to pick up the new repository’s package information:
sudo apt-get update
Install Certbot’s Apache package:
sudo apt install python-certbot-apache
Certbot is now ready to be used.
Set Up the SSL Certificate
Generating the SSL certificate for Apache using Certbot is quite straightforward. The client will automatically obtain and install a new SSL certificate that is valid for the domains provided as parameters.
Simply run the following command: (change the domain)
sudo certbot --apache -d YOUR_DOMAIN_NAME
You will be asked to provide an email address for lost key recovery and notices, and you will be able to choose between enabling both http and https access or forcing all requests to redirect to https. It is usually safest to require https, unless you have a specific need for unencrypted http traffic.
That’s it!
Test your website now and it should be SSL encrypted.
This tutorial I used are originated and made by Hasan By H-educate, you can check his link Here : https://h-educate.com/ or check his youtube on H-educate.
Other tips to make money online, check here : https://ricky-kartiyanta.medium.com/
Cheers!!
#website#saas solutions#saas#monetize#passive income#business#workfromanywhere#easy money#gettingrichfromhome
2 notes
·
View notes
Text
Picpick For Mac Os

The PicPick for Laptop will functions normally on most current Windows OS. Q: What is the difference between PicPick 64 bit & PicPick 32 bit? A: Generally, 64 bit versions provide more stability, improved performance, better usage of high hardware capabilities (CPU & RAM). Add-ons Adobe Air apple blog-games Blogging contests deals finance Firefox freeware fun Gadgets gmail Google google maps greasemonkey gtd Household how to Linux mac os x mobile news open source phone photo portable apps reviews rss search security social media software tips n tricks tools travel tutorials twitter updates video web-design web.
Picpick For Mac Os 10.10
Picpick For Mac Os 10.13
Picpick Mac Os X
Picpick For Mac Os High Sierra
PicPick is a Windows program used for creating and editing screenshots. After installation, it resides in the taskbar where all its functions can be accessed via the context menu. It can either be installed or can be run as a portable app.
PicPick 一款全能的设计工具,并且这款工具适宜每个人使用.
PicPick - All-in-one Graphic Design, Best Screen Capture Software, Image Editor, Color Picker, Pixel Ruler and More.
Jan 4,2019
Screenshots are the great media which can help us save the contents shown as images on our computers' screens conveniently as well as quickly. Furthermore, with the screenshots, the saved contents can be displayed vividly and clearly, which is good for sharing especially. Although there are hot keys for us to capture screenshots in Windows, it can't meet our needs in some ways. Therefore, it's necessary for us to choose the suitable screenshot tool so that we compare the 4 free screenshot software for Windows from four aspects here: using interface, capure methos, edit methods and share function.
Basic Introduction
SizeSupported PlatformsLightshot2.6MBWindows, Mac OSShareX(12.3.1)5.3MBWindows 7, 8.1 and 10Snipping Tool1.24KB(Windows 7)Windows 7 and laterPicPick14.7MBWindows
Note: The four software can be downloaded by clicking their names in the form above, except Snipping Tool which can be opened by searching in the start menu of Windows.
The Unique User Experience of the Screenshot Software
1. Using Interface
Actually, Snipping Tool, Lightshot, PicPick, and ShareX are far apart in the interface. Let's see which one fits you better.
Snipping Tool
When it comes to Snipping Tool, it is a familiar to us because it is a Windows built-in feature with a simple interface. It can satisfy the basic needs of ordinary users.
Lightshot
To my surprise, the Lightshot is simpler than Snipping Tool in that there is no interface before capturing. After launching the software, you can create a screenshot of the custom area.
ShareX
ShareX's interface is complex in some way because of its left panel and I was confused about the panel at the first time. After using it a few times, I have to admit that it is a great piece of software.
PicPick
Picpick For Mac Os 10.10
I'm most impressed by the interface of PicPick which is like that of Microsoft Word and shows options clearly. It is one of the more advanced and feature rich screen capture programs.
2. Capture Methods
Picpick For Mac Os 10.13
The capture methods of Lightshot are the least among those of four software while ShareX has 13 capture methods, including some advanced options like scrolling capture, webpage capture, and etc. There are several methods in PicPick, which is three more than that of Snipping Tool.
At the same time, there are different ways to use the four software. When we want to capture screenshots by Snipping Tool or Lightshot, we can just click the icons of them to begin. If we capture screenshots by ShareX or PicPick, the first step is to open the interfaces of them. And I will prefer to the ways of Snipping Tool as well as Lightshot, which are convenient and direct.
Capture MethodsLightshotRectangular, Full screenShareX(12.3.1)Full screen, Window, Monitor, Region, Region(light), Region(transparent), Last region, Screen recording, Screen recording(gif), Scrolling capture, Webpage capture, Text capture, Auto captureSnipping ToolRectangular, Free form, Window, Full screenPicPickFull screen, Active window, Window control, Scrolling window, Region, Fixed Region, Freehand

3. Edit Options
It's available to edit the screenshot by pen, line, marks or other ways in Lightshot. The edit ways of Snipping Tool include pen and marks methods. There are various and advanced edit ways in ShareX, including stickers, watermark, blur, etc. And PicPick also has the advanced edit options like watermark, blur, but the options are less than those of ShareX.
Picpick Mac Os X
The screenshot can be cropped in ShareX as well as PicPick, and PicPick can also cut the screenshot. It's a pity that there isn't the crop and cut option in the Snipping Tool as well as Lightshot.
4. Share Functions
There is a single way which is sending e-mails in Snipping Tool to share screenshots with others. And we can share our screenshots in Lightshot by four popular social platforms, including Twitter, Facebook, VK and Pinterest. The ways to share screenshots with others in PicPick are various, because we can not only share screenshots by e-mails, but also by social media like Facebook and Twitter. Sharing screenshots with others in ShareX is special, because we need to upload the screenshot first and then send the screenshot's URL to social platforms.
Recommendation
In my opinion, it's worth trying the PicPick, because it is easy to use with its clear as well as compact interface and it also has features which aren't limited to common capture and edit options. It can keep pace with our daily use. However, if you need a professional as well as multifunctional screenshot tool, I think that ShareX is a good option, though it might cost you some time to explore its features.
Score
ScoreShareX9 pointsPicPick8 pointsLightshot6 pointsSnipping Tool6 points
Picpick For Mac Os High Sierra
Related Articles:
5 Best and Free Desktop Media Players
How to Pick a Graphics Card
1 note
·
View note
Text
ADB Driver for Mac
What is ADB Driver?
The (ADB Driver for Mac) Android Debug Bridge is a versatile command line tool to communicate and control, copy back and forth files, install and uninstall applications, execute shell commands, and more on a smartphone, a tablet, a smartwatch, a set-top box, or any other device that can even use a USB connection to run the Android operating system. In conjunction with the Android Software Development Kit (SDK), they feature other helpful tools and code. Some work by itself and some commands are integrated into the binary. It is a client-server program that includes three components:
A client sending commands. Client runs for development on your machine. You can call a client from a terminal on a command-line by sending an adb command.
A daemon (adbd) running commands on a device. The daemon runs on each device as a background process.
A server which manages client-daemon communication. The server is running as a background on your development machine.

Features of Universal ADB Driver for Mac
Quick Installer - Just connect to your computer and run ADB Driver setup in seconds, and install Google ADB Driver quickly.
Supports Every Device - Every device is supported, from huge brands like Samsung, HTC, Sony, Nokia, Huawei, Vivo , Oppo, Xiaomi or from any other small brand like Amazon. The chipset is detected and the driver is installed automatically.
Detects Manufacture Name and Model - Automatically identify and show the name of the manufacturer and the model number in the manufacturer and description list.
Refresh Button - You can quickly update the list of devices attached to your computer.
Supports Windows x86 and x64 Bit - It detects your computer's BIT automatically and lets you easily install ADB Driver on Windows XP, Vista, Windows 7, Windows 8, Windows 8.1 and Windows 10 easily.
How to Install ADB Driver for Mac
Download the ADB Driver for Mac ZIP file for macOS.
Extract the ZIP to an easily-accessible location (like the Desktop for example).
Open Terminal.
To browse to the folder you extracted ADB into, enter the following command: cd /path/to/extracted/folder/
For example, on my Mac it was this: cd /Users/Doug/Desktop/platform-tools/
Connect your device to your Mac with a compatible USB cable. Change the USB connection mode to “file transfer (MTP)” mode. This is not always required for every device, but it’s best to just leave it in this mode so you don’t run into any issues.
Once the Terminal is in the same folder your ADB tools are in, you can execute the following command to launch the ADB daemon: adb devices
On your device, you’ll see an “Allow USB debugging” prompt. Allow the connection.
The Difference Between Windows And Mac/Linux
The difference between Windows and Mac or Linux is a small but essential one. On the latter two, every ADB and Fastboot command must be preceded by a dot-slash.
So, where you type ADB on Windows, you must type ./adb on Mac and Linux. And fastboot on Windows needs to be ./fastboot on Mac and Linux.
What can you do with ADB Driver for Mac?
Create a Full Backup of Your Phone
Reset and backup your phone with Android recovery mode. The backups can be saved only on your phone or on your SD card. With the help of ADB, you can create the full backup on your computer.
Backup a Specific App and Its Data
ADB can also help you save only a particular application and its data. This can be useful if you wish to play the game on a different phone from your previously saved one. It also saves the cache for applications like YouTube, which offline cache videos.
Install Multiple Apps
You can easily batch install multiple apps (apk files) in a folder on your phone with ADB. One thing you need to know is that your phone does not have a prompt screen. Please be careful with the apps that you are installing. Make sure they don’t contain malware (or a malware app).
Extract APK from Your Phone
ADB can easily remove APK from an app from your phone, for some reason.
Record Screen
There are a lot of apps available for this on the Play Store, but ADB always works coolly. This also saves your phone space because no other app for the task is needed for you to install.
Change DPI of the Screen
DPI (Dots per Inch) is a value used by Android to determine the perfect image and app icon size to display on the screen. Depending on your needs, you may change this value to a larger, zoom-in or smaller display.
Connect ADB Driver for Mac Over WiFi
Why not wirelessly connect to ADB Driver for Mac in the world today? Wireless, where everything is going. It's pretty easy to do that. But you first need to connect your phone via USB to allow it. Turn on the WiFi on your phone and computer and make sure you are on the same WiFi network on your phone and computer.
Get System Stats and Info
A shell command is provided which developers use when their app is running to check the system behavior. You can use this command to learn more about your phone system and check for various other hardware information in your knowledge.
How does ADB Driver for Mac work on Android?
ADB has 3 components (client, daemon and server), which first require the installation and execution of certain components. Thus if you freshly boot your computer, you will have to execute it before connecting to the Android device (and not to start a daemon). When a daemon is checked, this message appears in the command prompt.
If the daemon does not work, the process will start and tell you about the TCP port that is running locally. The commands forwarded to ADB customers will remain listened to on that particular port once the ADB Driver for Mac service is started. It connects all operating devices ( e.g. emulators) connected to the computer. At this time, if your computer was not allowed, you receive a request for permission in your Android device.
#download adb#adb android#adb driver#adb download#adb driver for mac#adb driver for windows#adb for windows#adb for mac
1 note
·
View note
Text
Digital Video Editing Fundamentals
The professional software for Windows, Mac and Linux brings full NLE editing power, but remains relatively easy to get started with. Although the free version is significantly restricted in export, it is always sufficient to cut and publish videos on YouTube and Vimeo. If you need more, you can take out short-term subscriptions. The VideoPad Video Editor is a little less extensive, but not quite as complex. The test version of the tool is ideal for small edits in between - and not only on Windows and Mac but also on iOS and Android devices. Unlike Movie Maker, OpenShot is a non-linear video editor that instantly makes it twice as powerful. Be sure you're not alone in your search - and welcome to the club of thousands of Windows 10 users around the world. The VSDC Free Video Editor in turn offers an even greater range of functions, but can quickly overwhelm beginners with the abundance of menus and settings. Dozens of effects are available, from color correction to audio adjustments to all standard transitions. Most of the video processing is done by the MLT framework, which works on many other open source projects like FFmpeg, frei0r, movit, ladspa, sox, etc. With intelligent Magisto video editing, you can create great social videos in minutes. This is useful, for example, for creating tutorials for friends or for YouTube. VSDC can also record video from a number of video cards, webcams and surveillance cameras. Do you already have experience in editing and editing videos and are looking for a program that offers advanced functions but does not take long to familiarize yourself with creating a great video?
The Right Tool for the Golden Ratio
With the free program "OpenShot Video Editor" you can edit your videos in no time. The freeware has many video effects and other practical features. Quickly crop your videos and find all those perfect moments. OpenShot has many easy ways to cut your video.
For intro / outro sequences, it has area and title generators.
The software is not only easy to use, but also offers all the necessary functions to easily edit your own videos.
To be honest, there are few filters at the configuration level - like interlacing, noise, or sharpness - but they seem to be technically more inclined to serve creative purposes.
I have I saw the best freeware for editing and editing videos and compared them for you.
ul >

These are not only much easier to use with a large screen, mouse and keyboard, but also offer significantly more functions and options. VideoPad Video Editor comes with more than 50 visual effects that you can use for transitions between clips, title animations and credits. The Windows program also masters advanced techniques such as green screen and subtitles. Videos can be customized with optical effects, supplemented with VoiceOvers (spoken text) and audio effects. Lightworks plays in a league similar to Adobe Premiere and Co. - but it is free and only requires registration.
Looking for Windows 10 Video Editor? Check out the list of 7 free programs
If you want to do more than just cut your videos and make simple edits, you should look for an alternative to OpenShot. High-end video editing programs such as Adobe Premiere Pro and Final Cut Pro are very powerful and have many professional features on bing . However, the applications are also expensive and oversized for many tasks, such as editing private video material. The "OpenShot Video Editor" is available free of charge and has all the important tools for editing, setting and editing. Windows Media Player was part of the Windows Essentials, which Microsoft discontinued in 2017. Nevertheless, Windows Movie Maker has survived the setting and is still available for free download on many websites, including WinTotal. To the right are the resource window and an effect window. Additional windows such as the project window, object window etc. can be faded in and quickly overload the surface.
1 note
·
View note