#192.168.10.1 wifi repeater setup
Explore tagged Tumblr posts
Visit Tumblr Blog
Explore Tumblr blogs with no restrictions, modern design and the best experience.
Last Seen Tumblr Blogs


Fun Fact
BuzzFeed published a report claiming that Tumblr was utilized as a distribution channel for Russian agents to influence American voting habits during the 2016 presidential election in Feb 2018.
Text
How to Set Up Your Macard RE1200 WiFi Extender

Macard Wireless Extender Setup
via WPS
Connect the Macard extender to a power outlet located near your router. Wait until the Power LED turns solid.
Find the WPS button and press it.
This means that the WPS light should begin blinking. The WPS light on the router should start blinking.
Press the WPS button of your Macard extender within 2 minutes after pressing the WPS button of the router.
The WPS light should start blinking on the extender.
The extender should be solid after about 30-60 second, indicating that the connection was successful. You can move the device anywhere within range of your router after the connection.
Via Gomacard.online
Connect the Macard extender to a power outlet close to your router. Wait until the LED becomes stable (this could take a few minutes).
Go to WiFi settings on your computer, tablet or phone.
Connect to the network by searching for its name. There may not be a password required.
Go to gomacard.online in your browser. Log in to the device using the default admin credentials.
Login with the default password
Username : admin
Password : admin
Select "Repeater Mode" from the menu. The app will search for WiFi networks nearby.
Choose your primary WiFi network. Enter the WiFi password for your router.
You can choose to name your extended network or leave it at the default.
Via the 192.168.10.1
Macard WiFi extender should be placed in the middle of your wireless router, and the area you wish to extend Wi-Fi. Connect it to a power outlet, then connect to its WiFi network.
Go to the WiFi settings to connect your computer. The manual of the extender will usually mention this network name (SSID). This initial connection is unlikely to require a password.
Open any browser on the connected device.
Enter 192.168.10.1 into the address bar.
Now you should see the login page for your Macard wifi extender.
Often, the default username and password for both fields is admin.
Click Login and enter your credentials.
A setup wizard will guide you once you log in. Follow the instructions on screen.
Search for Wi-Fi networks nearby. Select the name (SSID), of your home Wi-Fi network.
Enter the password to your home Wi-Fi.
You may be asked to create a new Wi-Fi extended network name (SSID).
You can keep the name of your main network, or you can create a different one so that the extended network is easily identifiable.
When you click Save, the extender will attempt to connect to an existing Wi-Fi network to broadcast your extended network.
Where Should the Extender Be Relocated After Installation?
Connect your device to the newly extended WiFi network by disconnecting it from the setup WiFi network. Use the password that you entered when configuring the extender. To relocate the extender to another location, make sure it is within the range of the main router.
Troubleshooting tips
Rebooting Extender Network
Remove the extension cord from the outlet. Unplug the extender for 15-30 seconds. It will then shut down completely. Reconnect the device to the outlet.
Wait a few moments for the extender's power to come back on, re-establish a connection with your router main and broadcast its expanded network. You will typically see the indicators lights cycle, and then return to their normal state.
Resetting Macard WiFi Extender
Make sure that your Macard WiFi extender has been plugged in and turned on.
Use a paperclip or an object with a thin, pointed tip. Insert the paperclip gently into the reset pinhole. Hold the reset button down for 8-10 seconds. Release the reset button after 8-10 seconds.
Now, the extender will reboot by itself. It may take a couple of minutes for this process to complete. When the indicator lights return to their default settings, you'll know that it's done.
The Summary
It is easy to set up the MACARD RE1200 wifi extender by using IP address or WPS. You have hopefully chosen the correct setup method and installed the device successfully.
FAQs
How do I set up Macard model RE1200 WiFi extender?
Install the device using WPS, IP address or interface. The blog post contains all the instructions for each setup method.
How do I change the password on Macard RE1200 Wireless Extender?
Use the IP or URL address to access the interface of the extender. Select Wireless Settings in the settings. Enter the new WiFi password after selecting SSID. Apply it by saving.
0 notes
Video
youtube
Uppoon WiFi Extender Setup -192.168.10.1 | Uppoon WIFI Repeater Setup
0 notes
Text
Altice Extender Setup Using WPS or Ethernet
If you're searching for a reliable and straightforward guide to set up your Urant WiFi Extender, you've come to the right place. This article provides clear, step-by-step instructions to help you install and configure your extender effortlessly at home.
Urant WiFi Extender Installation Guide
You can easily install and configure your Urant WiFi Extender without professional assistance. The setup involves connecting the extender to your existing router and configuring it through its web interface.
How to Install the Urant WiFi Extender
Power off your modem and main router before starting.
Place the extender close to your router for a strong connection.
Use an Ethernet cable to link the extender to the router.
Plug the extender into a power outlet.
Turn the modem and router back on.
Once you've completed these steps, proceed to configure the extender through your computer.
Configuring the Extender Using a Computer
Connect your computer to the extender's network, typically named “WiFi-Repeater.”
Open a web browser and enter 192.168.10.1 in the address bar.
When prompted, input the default username and password (these are usually found on a label on the extender).
Click the login button to access the settings dashboard.
Choose "Repeater Mode," select the WiFi network you want to boost, and enter its password.
Click "Apply" and set a password for the extended network.
After completing the setup, relocate the extender to an area where your WiFi signal is weak or doesn't reach well.
Setting Up the Extender Using the WPS Button
If you don’t have an Ethernet cable available, you can connect the extender wirelessly using the WPS (Wi-Fi Protected Setup) method. Both your router and extender must have WPS buttons.
WPS Setup Steps:
Turn on both the router and the Urant WiFi Extender.
Press the WPS button on your router.
Within two minutes, press the WPS button on the extender.
Wait a few seconds for the devices to establish a wireless connection.
Once paired, the extender will use your router’s existing password, allowing you to connect your devices to the extended network seamlessly.
Final Thoughts
This guide has walked you through the entire process of setting up and logging into your Urant WiFi Extender. As you’ve seen, the installation is straightforward and can be completed in just a few minutes, whether through a wired connection or the WPS method.
1 note
·
View note
Text
How to Macard WiFi Extender Setup?

To perform the Macard WiFi Extender Setup, open the web browser and type the 192.168.10.1 IP address in the browser bar. Then, a login window appears to you. Now, log into your account using admin credentials. Now, select the ‘Repeater Mode’ as the operation mode, and customize your settings as per your preferences. Visit us for more!
0 notes
Text
192.168.10.1 wifi repeater setup
1 note
·
View note
Link
In this guide, you will easily get to know How to Access 192.168.10.1, and also you can change your WiFi password, SSID, and default router settings by using the information provided. For more info, 192.168.10.1 wifi repeater setup then you visit the webpage.
1 note
·
View note
Text
Explain Easy Steps To Setting Up the Wireless Repeater
A wireless repeater has become an important part of our daily life. It helps you to extend the range of the wireless network. In case your house is a large or complex office, then you can use wireless repeaters in order to extend the reach of the wireless signal. The company uses the best technology to design the Repeaters or Extenders. This invention is proved quite useful to boost the WiFi Signal. If you have any queries related to the 192.168.10.1 WiFi Repeater Setup, then approach the professionals. The technicians will surely provide you a satisfactory solution to your every problem. For better assistance, you may visit the official website.

Simple Steps To Setting Up the Wireless Repeater
Here are the easy steps that you can perform to Setting Up the Wireless Repeater as follows:
The thing is that you need to do is to plugin the repeater to the wall which is next to the PC with the power cord.
Connect your repeater to the PC’s Internet/LAN input.
Here you need to type ‘Network and Sharing Center’ into the Start Menu search box, and then click on the enter button.
Once your wireless repeater is recognized by the PC, you can see it as a wired network under the ‘View your active networks’ option.
Left-click on the connection button, and then choose the ‘Properties’.
Now choose the Internet Protocol Version 4 and after that click on ‘Properties’.
You can change the ‘Obtain an IP address automatically’ to ‘Use the following IP address’. Then you have to carefully enter the IP Address and all other required specifications according to the requirements.
Now you need to browse to the IP address of the repeater.
After that, you have to enter the wireless repeater user ID & password.
Now Browse to Basic and then Wireless.
Enter the SSID which exactly matches the name of the wireless network.
Choose the network band.
Then click on ‘Site Survey’.
You need to Find the SSID of the wireless network and then choose the ‘Connect’ button.
If the process has been performed perfectly, then you will receive a message that you connected successfully.
If you find yourself stuck with 192.168.10.1 WiFi Repeater Setup, then approach the experts. All the professionals are known to most of the issues that people usually face. Our experts are known to most of the issues that people usually face. The solutions provided by the experts are easy to understand and implement. The technicians put in all their effort to fix the problems of the customers. Our team members are known to most of the technical glitches that people usually face. Are you looking for help? If yes, then approach the experts right away!
0 notes
Text
What are the steps to perform WiFi repeater admin setup via 192.168.10.1 login?
192.168.10.1 login is the default IP address mainly used to log in and configures the wireless repeater. For configuration, it works in the same way as the other devices. The user may easily access and manage the WiFi repeater admin setup page by using the http /192.168.10.1 login web address. You can use this to access the wireless repeater setup page on your system while configuring your device for the first time. If you're looking for instructions on how to set up your repeater using 192.168.10.1, scroll down to the bottom and read the steps carefully to avoid mistakes. Let's get started.
Step 1: From your browser visit the 192.168.10.1 Login page and enter the username and password of your router. Step 2: Place the router in the correct location and connect the computer with your repeater using an ethernet cable. Step 3: Open the LAN properties on your PC and enter common number strings of the subnet mask as the default gateway. Step 4: Visit 192.168.10.1 and select the repeater mode and select the wifi network you want to connect the repeater with.

#192.168.10.1 login#WiFi repeater login#192.168.10.1 setup#access 192.168.10.1 admin#Wifi repeater admin setup
4 notes
·
View notes
Link
wifi.wavlink.com
In order to login wifi.wavlink.com users have to follow some steps. First one user must Connect a computer to the router using an Ethernet cable or the SSID (network name) and password written on the router's bottom mark. At http://wifi.wavlink.com or http://192.168.10.1, choose the language you want to use, and then use admin as the username and password. Then, on the next screen, click Log In. Visit our site for more troubleshooting steps.
#wifi.wavlink.com#wavlink extender setup#wavlink repeater setup#wavlink mesh wifi setup#wifi.wavlink.com login#wifi.wavlink.com setup
1 note
·
View note
Text
Wifi Repeater 192.168.10.1 Admin Setup

Get complete details about Wifi Repeater 192.168.10.1 Admin Setup just Wifi Repeater. Contact our customer support team for any query. Call us now!
1 note
·
View note
Text
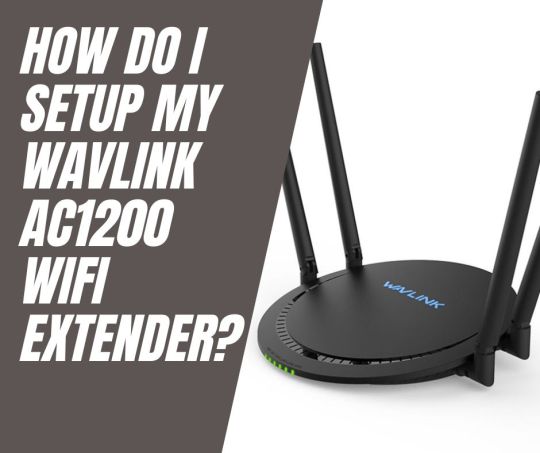
How Do I Setup My Wavlink AC1200 Wifi Extender?
Wavlink AC1200 provides fast speeds and reliable connections for multiple devices. With two high-gain antennas, it provides wide coverage and stable connections. A USB port allows users to access shared files easily. The device is easy to set up and use and works with most wireless devices. You can also set up parental controls to keep your children safe online. It takes a few minutes to complete the Wavlink AC1200 setup. You can use the WPS and web browser to start the setup process of the Wavlink AC1200 wifi extender.
WPS Method To Wavlink AC1200 Setup
A step-by-step guide to Wavelink AC1200 Setup WPS is here.
Your extender's power adapter can be connected to a power outlet.
Isolate all wires before connecting them.
When the extender is powered on, a blue light will appear.
The Wavlink extender can be connected to your WiFi router.
You must press the WPS button on both the router and the extender at the same time.
The two buttons need to be pressed together for two minutes for this step.
Ensure that the LED light is solid blue.
When the router and extender are both connected, a solid blue LED will illuminate.
Whenever an extender is connected to a wireless network, it automatically boosts it. Both devices will have the same SSID and password.
It will be possible for you to log in using the same password.
You can use your Wavlink AC1200 device after you complete the setup process.
Using a Web Browser for Wavlink AC1200 Setup
The Wavlink AC1200 setup can also be done via a web browser. It also depends on users' preferences which they want to use. Here are the steps for setting up the system.
Wavlink AC1200 devices must be plugged into power outlets.
You will need to configure your device to repeat the connection.
You can find the network settings on your laptop by going to the settings menu.
By finding the network, you can connect to Wavlink.AC 1200.
To access 192.168.10.1, launch any web browser and type the address in the address bar.
There will be a configuration page for the Wavlink AC1200.
By following the instructions on the screen, you can now connect your home's network to the extender.
The Wavlink AC1200 setup is now ready for use. Once the router is plugged in, the LED lights will indicate when the router is properly connected to the modem. After that, users can access the router's settings page via any web browser to customize their network setup and connect their devices to the internet.
Once the LED lights are lit, users will be able to connect their devices to the router's network and access the internet. They can also access the router's settings page, which will allow them to customize their network setup and adjust settings such as the network name and password.
Wrapping Up
You can use above both methods for the Wavlink AC1200 setup. Users need to read all the instructions so they can follow all steps perfectly.
0 notes
Text
Wavlink WING 12M Extender Setup
You may connect the extender to your wireless router or modem by following the Wavlink AC1200 WING 12M setup guide. By using a WIFI setup you can improve the signal of your existing wireless network and guarantee continuous access to far-reaching devices.
Installation of the Wavlink WING 12M extender
Instruction manual for The Wing AC1200 12m Range Extender:
Connect the wireless devices to the Wing Extender.
To launch the browser, type ap.setup or the IP address 192.168.10.1.
To access the setup page, log in using the default username and password.
The repeater looks around for indications.
Click it to select the WiFi network at your residence.
After entering the WiFi setup, click Next.
Before linking the amp to your home network, wait 30 seconds.
Now that installation of the Wing 12m Extender units is complete.
To improve connectivity, put the extender near the area without internet.
Manual setup for the Wavlink WING 12M Extender
how to get to the manual setup page for the Wing 12m wifi extender:
The Wing 12m extender must be inserted into the outlet after the package has been opened.
Press the power button as soon as the power LED light goes green.
Now connect your WiFi device to the Ap extender configuration _Ext network.
In any active online browser, type Ap.setup.
You are presently on the setup page for the Wavlink Wing 12m Ac1200.
After creating your account, follow the AP Login procedures.
Note: If you need any assistance regarding your Wing 12m wifi extender so contact our technician or visit the official website that is ap setup login.
Wavlink Wing 12m Extender WPS Setup
One of the most common methods to connect the extender to an existing wifi network during installation is by pressing the wireless protected setup (W.P.S) button.
To install the extender, set up your Wing ac1200 according to by the following instructions:
Place the extension near to the main wifi modem or router as a first move.
The Wavlink wifi extender is working right now.
then watch for an important green power edge to appear.
To switch on the extension's power light, press the W.P.S button.
Click the W.P.S icon on the modem or network now.
Your extender and router's green light is blinking.
Allow 1-2 minutes for the extender and home wifi to join.
meets the specifications of IEEE 802 11a, b, g, and n.
The Dual-Band RJ45 Connection with setup Integrated Passive Power Over Ethernet (PoE), Up to 2.4GHz 300Mbps and 5GHz 867Mbps Speeds, and is intended for flexible placement based on its antenna offers excellent long-distance performance.
can generate 1000mW of energy and has a superior receiver design.
A sturdy, waterproof receptacle can withstand severe weather.
WPA and WPA2 3 LED Lightning Adapter with Built-in Bluetooth Signal Power and Maximum Security (15kV ESD)
Wavlink WING 12M access mode setup
You can begin the installation process once the real connection and wavlink ac1200 login steps are complete. Follow these simple guidelines:
The Wavlink AC1200's display will show the settings signs.
By using the drop-down options, you can select your time zone and country/region.
To access your web interface page, log in using the updated information.
After selecting the "Access Point" operating mode, adhere to the directions shown on the screen.
Choose the wifi network that is linked to the primary device and to which you want to add a second connection.
You should use the same wifi password for your external extender as you did for your home network.
Give the change a chance to take effect. There could be some labour necessary.
0 notes
Text
Find The Solution: Galaway Wifi Extender Setup
Galaway wifi extender setup is a wireless device used to extend wifi coverage and improve the signal strength of the existing networks. It is situated between the router and the device. It is a wireless repeater and is also called a range extender.
Methods for Galaway Extender Setup:
If you are suffering from a weak and slow internet connection then follow the Galaway wifi extender setup following steps.
1. Installation through PC:
Galaway extender setup also works as an access point, which shows that you will get one wireless access point and one LAN (local area network) port in the device.
After this, you could connect with a PC through the wire or with the help of the SSID name “Galaway” to connect wifi.
Now simply open the homepage of your internet browser and type “http:/192.168.10.1” to login into the Galaway wifi extender.
In order to start the wizard setup, type “admin” as the password.
Then start the setup wizard to scan and find all available networks.
Then choose the network, click on the next button, and name the Galaway extender setup.
Save the setting on your device and reboot the extender.
2. wireless installation:
Take out your device and plug it in, turn on the power, and set the time till The green LED light is solid green on the extender.
Then turn on the wifi of your phone or PC and connect with the new Galaway wifi extender.
After this open the web browser on your phone or PC and enter the IP address from the instruction booklet.
Then log in with your details mentioned in the booklet, username, and password both for the Galaway device will be “admin”.
After logging in go to the repeater wizard and it will guide you.
Select the name of the user and enter the password and then click apply.
The default wifi extender will be disabled and you will be logged out.
Now Galaway wifi extender is ready to use.
Sum up:
Hopefully, the above method will help you with the Galaway wifi extender setup.
1 note
·
View note
Text
Steps for Comfast Extender Login

Start by logging into the Comfast extender and opening a web browser on a PC or wireless device.
Enter the Comfast sign and the IP address for the default web browser, which is http://192.168.10.1, in the address bar field.
The Comfast wireless repeater setup login window will now display on the screen and request the default login information.
Enter "admin" in the username and password fields to access the Comfast login page, then hit the Enter key.
Make the adjustments with the settings you want to make to finish the Comfast wifi repeater configuration.
Your Comfast setup is finished by following these instructions for the Comfast wifi repeater.
0 notes
Text
Wavlink AC1200 Setup
Wavlink AC1200 setup is very easy and will be done in different ways. It extend the range of your current wireless connection to the farthest corner of your home or office.
How to Use the Wavlink AC1200
With the Wavlink AC1200 wireless range extender, you can easily extend the range of your current wireless network anywhere. Four antennas are set up in a way that makes them work in all directions. This makes your existing network better and more reliable. With the help of the Wavlink AC1200 dual-band wireless range extender, you can slowly improve your wireless network. Because it is small and easy to use, it lets you set it up without much trouble. Also, its sleek design makes it easy to fit in with the rest of your home or office decor.
You can connect all of your devices from anywhere in your house because the antennas are so good. Also, the Wavlink setup connects to your router wirelessly. So, it automatically finds your router's signals and starts to boost them.
Wavlink AC1200 Setup using WPS
Follow the step-by-step instructions below for Wavlink AC1200 Setup using WPS:
Plug the Wavlink AC1200 into a power source.
Wait until the solid blue light comes on. This shows that the extender is working.
Now, push the WPS button on the extender as well as the wireless router or modem.
Don't unplug the AC1200 while the extender's light is blinking.
The WPS method for setting up the Wavlink AC1200 has now been completed successfully.
On the WIFI repeater, the power, client, device, and WPS lights will all be solid green.
Now, put the Wavlink extender in the spot where the signal is weakest. And make sure your WIFI works well.
Wavlink AC1200 Setup with wifi.wavlink.com web URL?
To finish setting up the AC1200 WiFi extender, you just need to plug the repeater into a power outlet.
Check to see if the button on the extender is set to the repeater mode.
Once the extender's power led light is on, you can move on.
Get all of your wireless devices together, go to the WiFi settings option in the menu, and then connect to the Wavlink network.
After connecting, open any browser and type wifi.wavlink.com into the address bar.
You are now on the screen where you can set up the Wavlink AC1200 extender.
Make sure to follow the on-screen instructions when connecting your Wavlink WIFI AC1200 Dual-band repeater to your home's WiFi router or modem.
How to setup my Wavlink AC1200 WIFI Range Extender?
Follow the steps below in order to connect the Wavlink AC1200 extender using a web browser:
Use the plug that came with your AC1200 Range Extender to connect it to a power source.
At this point, you will need to set your extender to work in the repeater mode.
Get a portable computer, like a laptop or tablet, and go to the WIFI settings.
Also, look for the Wavlink-N network and set up a connection to it.
Once you're connected to the extender network, open a web browser like Google Chrome, Mozilla Firefox, Microsoft Edge, or another one.
Then, type 192.168.10.1 or wifi.wavlink.com where it asks for the address.
You have reached the page for setting up the Wavlink AC1200.
Follow the steps that show up on the screen to add your extender to your home network.
How to reset Wavlink AC1200 Dual-band WIFI extender?
To start resetting the Wavlink AC1200, plug it into a power outlet.
When the extender's power led light is on, move on to the next step.
Use something like a toothpick or a paperclip.
You can let go of the pinhole after you press and hold the reset button for ten to fifteen seconds.
At this point, you have to wait until the power led light turns solid green.
You have now set the extender back to how it was when it came out of the factory.
Follow the steps for setting up the Wavlink AC1200 to put the WiFi extender back in place.
Wavlink AC1200 setup using Wifi.wavlink.com
Plug the Wavlink AC1200 wifi extender into an outlet.
Make sure the repeat button is set on the extension button.
When the power led light on the extender is turned on.
You can connect to the Wavlink network on any wireless device by going to the WIFI settings menu.
Once you're connected, open any web browser and type wifi.wavlink.com into the address bar.
You have reached the screen for setting up the Wavlink AC1200 extender.
Follow the steps on the screen to connect your Wavlink WIFI AC1200 Dual-band repeater to your home WiFi network or modem.
Troubleshooting steps for Wavlink AC1200
By default, the WPS button is turned off on some IP 192.168.10.1 gateways. If you can't connect using the WPS button, you can go to the Wavlink wifi extender setup management website for your extender and set it up there.
Make sure that your wireless router is close to where you put your extender.
If you don't, the way your improved network works will be very different. Keep the extender one metre away from your router.
Make sure that your extension is far away from any electronic equipment that could cause trouble. Things like baby monitors, microwaves, and cordless phones that use Bluetooth should be avoided.
How do I set up Wavlink AC1200 as an access point?
After you've connected the hardware and registered into the WAVLINK AC1200, you can start the installation process.
Follow these simple, straight-forward steps:
You will be taken to the page for setting up the wavlink ac1200.
Use the drop-down menus to choose your country/region and time zone.
Fill in the new login information for your page's web interface.
After choosing the "Access Point" mode of work, follow the instructions on the screen.
Choose the primary router's wireless network that you want to add an extension to.
Enter the same wifi password you used for your home router into your outdoor extender.
Give the setting some time to take effect. This might take some time.
Then, look up the name of your outside ap wireless network and use its wifi password to connect to it.
Your wavlink ac1200 outdoor extender is now set up the way you want it. Now you can put the thing wherever you want.
Wifi Extender Setup is an independent third-party service provider. Wifi Extender Setup is not connected to any of the companies whose trademarks, brands, products, or services are used on this site, unless that connection is made clear. All of these references are just there to give you information.
#Wavlink AC1200 Setup#Wavlink AC1200 Setup with wifi.wavlink.com web URL#Wavlink AC1200 setup using Wifi.wavlink.com
1 note
·
View note
Text
Wavlink AC1200 Setup
Wavlink AC1200 setup can be easily performed in a variety of ways. And improve the range of your current wireless connection all the way to the farthest corner of your home or office.
Wavlink AC1200 Instructions
With the help of the Wavlink AC1200 wireless range extender and the Wavlink AC1200 Setup, you will be able to easily extend the range of your existing wireless network to any location. In order to improve the quality and dependability of your current network, we have incorporated four antennas into our one-of-a-kind and patent-protected wide band design. With the assistance of the Wavlink AC1200 dual-band wireless range extender, you can gradually improve the performance of your wireless network. Because of its extremely compact and user-friendly design, it enables you to enjoy a placement process that is devoid of any complications. In addition, because of its simple layout, it can easily be incorporated into the décor of your existing home or office.
As a result of the high-performance antennas, you are able to connect any and all of your devices from anywhere in the home. In addition, the Wavlink installation process establishes a wireless connection with your router. As a result, it will search for the signals coming from your router and begin to boost them automatically.
Wavlink AC1200 Extender Setup
To install the Wavlink AC1200 using the WPS method, please follow the step-by-step instructions that are provided below:
Establish a connection between the Wavlink AC1200 and the power source.
Wait for the extender to be powered on, which will be indicated by the solid blue light that will illuminate.
At this point, press the WPS button located on the extender.
After that, you need to press the WPS button located on your wireless router or modem.
It is important to remember not to unplug the AC1200 while the light is flashing on the extender.
The WPS method used to set up the Wavlink AC1200 has now been successfully finished.
On the WIFI repeater, you will notice that the power, client, device, and WPS indicators have all turned solid green.
Now position the Wavlink extender in the area where the signal strength is lowest. Make it confirm that your WIFI connection is strong.
How to install Wavlink AC1200 with wifi.wavlink.com web URL
To complete the setup for the AC1200 WIFI extender, simply connect the repeater to an available electrical outlet.
Check to see that the button on the extender is set to the repeater mode.
Once the power led light on the extender is lit up, you can proceed.
Gather all of your wireless devices, navigate to the menu option for the WiFi settings, and then connect to the Wavlink network.
After connecting, open any browser and type in wifi.wavlink.com on the address bar.
You have now arrived at the setup screen for the Wavlink AC1200 extender.
When installing your Wavlink WIFI AC1200 Dual-band repeater to your home WiFi router or modem, make sure to follow the instructions that appear on the screen.
How to setup my Wavlink AC1200 WIFI Range Extender?
To connect the Wavlink AC1200 extender using a web browser, please follow the steps below in order:
Connect your AC1200 Range Extender to the power source using the plug provided.
At this point, you will need to set your extender to operate in the repeater mode.
Obtain a portable computing device, such as a laptop or tablet, and navigate to the WIFI settings options.
Additionally, search for the Wavlink-N network and establish a connection with it.
Open a web browser, such as Google Chrome, Mozilla Firefox, Microsoft Edge, or another one, once you have successfully connected to the extender network.
Then, in the space designated for the address, type 192.168.10.1 or wifi.wavlink.com.
You have arrived at the setup page for the Wavlink AC1200.
How to reset Wavlink AC1200 Dual-band WIFI extender?
To install your extender onto your home network, follow the instructions that appear on the screen.
To begin the process of resetting the Wavlink AC1200, first plug the extender into an available power outlet.
When you have the power led light on the extender, proceed to the next step.
Find a toothpick or a paper clip and use those.
After pressing and holding the reset button for ten to fifteen seconds, you can let go of the pinhole.
The light on the power led changes to an amber colour; at this point, you must wait for the light on the power led to change to a solid green.
You have now successfully returned the extender to its original settings from the factory.
To reinstall the WiFi extender, follow the steps outlined in the setup process for the Wavlink AC1200.
Wifi Extender Setup is a third-party service provider that operates on its own.Wifi Extender Setup is not associated with any of the companies whose trademarks, brands, products, or services are used on this site unless that connection is made explicitly clear. Any and all such references are merely for informational purposes.
#Wavlink AC1200 Setup#how to setup wavlink ac1200 extender?#ap.setup#192.168.10.1#wavlink extender setup
0 notes