#AWSRegions
Explore tagged Tumblr posts
Visit Tumblr Blog
Explore Tumblr blogs with no restrictions, modern design and the best experience.
Last Seen Tumblr Blogs


Fun Fact
Tumblr was attacked by a cross-site scripting worm deployed by the Internet troll group GNAA on Dec 3, 2012.
Text
EKS Dashboard: Kubernetes cluster Access over AWS Regions

Kubernetes cluster visibility may be centralised across AWS regions and accounts using EKS Dashboard.
EKS Dashboard
EKS Dashboard is a new AWS feature. A centralised display allows cluster administrators and cloud architects monitor their Kubernetes clusters organisationally. Its major goal is to give clients a single view of clusters across AWS Regions and accounts. This single view helps track cluster inventories, compliance, operational activity planning, and version updates.
The EKS Dashboard helps companies scale Kubernetes deployments. Multiple clusters are often run for data sovereignty, business continuity, or better availability. This distributed technique makes visibility and control difficult, especially in decentralised systems with several regions and accounts. Clients have traditionally used external products for centralised cluster visibility. Third-party solutions' identification and access setup, licensing costs, and ongoing maintenance added complexity.
The EKS Dashboard simplifies this procedure with native AWS Console dashboard features. It offers data about clusters, regulated node groups, and EKS add-ons. Dashboard insights include cluster health indicators, predicted extended support EKS control plane charges, support status, account, version, and cluster distribution by region. Automatic filtering lets users explore certain data points. This feature makes clusters easier to find and focus on.
A brief tour of the EKS Dashboard shows tabular, graphical, and map representations of Kubernetes clusters. Advanced search and filtering are offered. There are several widgets for cluster visualisation. You can visualise managed node groups by AMI versions, launch templates, and instance type distribution. You can also map your clusters worldwide. Data from the dashboard can be exported for study or custom reports.
Setting up EKS Dashboard
According to reports, EKS Dashboard setup is easy. AWS Organisation management and administrator accounts grant clients access to the EKS interface Dashboard. Turning on trusted access on the organization's Amazon EKS settings page is the only setup requirement. Dashboard settings allow trusted access. The management account can view the Dashboard with trusted access. The official AWS Documentation provides setup and configuration details.
Importantly, the EKS Dashboard is not limited to Amazon EKS clusters. It can also provide visibility into linked Kubernetes clusters on-site or on other cloud providers. Even while hybrid or multi-cloud clusters may have inferior data quality than native Amazon EKS clusters, this functionality provides uniform visibility for enterprises.
Availability
The EKS Dashboard is currently available in the US East (N. Virginia). Use it to integrate data from all commercial AWS Regions. No additional fees apply to the EKS Dashboard.
This new functionality emphasises AWS's commitment to simplifying Kubernetes operations. To let clients focus on app development and growth, infrastructure management is removed.
Finally, the native AWS EKS Dashboard provides a unified view of Kubernetes clusters across accounts and regions. It provides basic visibility for linked non-EKS clusters, comprehensive visualisations, extensive insights, and quick setup at no additional cost.
#EKSDashboard#Kubernetesclusters#AmazonEKS#AmazonEKSclusters#AmazonEKSDashboard#AWSRegions#technology#technews#technologynews#news#govindhtech
0 notes
Link
You will learn into this regarding cloud computing and their six advantages as well as types of cloud computing in detail.
Read More : https://www.info-savvy.com/introduction-to-cloud-computing-and-aws/
#types of cloud computing#AvailabilityZones#AWSRegions#AWSSecurity#BenefitsofAWSSecurity#CloudComputing#CloudComputingDeploymentModels#CloudComputingModels#GlobalInfrastructure#InfrastructureasaService#ITresources
0 notes
Text
Amazon DynamoDB now supports audit logging and monitoring using AWS CloudTrail
Amazon DynamoDB is a fully managed, multi-Region, multi-master database that delivers reliable performance at any scale. Because of the flexible DynamoDB data model, enterprise-ready features, and industry-leading service level agreement, customers are increasingly moving sensitive workloads to DynamoDB. Regulated industries (e.g., education, media, finance, and healthcare) may require detailed information about data access activity to help implement security controls and meet industry requirements, including compliance, auditing, and governance of their AWS accounts. Previously, you could use AWS CloudTrail to log control plane activity on your DynamoDB tables and glean information such as who created or deleted a table and when a table was changed. You can now enable data plane activity logging for fine-grained monitoring of all DynamoDB item activity within a table by using CloudTrail. If you’re a database administrator or security professional, you can use this information as part of an audit, to help address compliance requirements, and to monitor which AWS Identity and Access Management (IAM) users, roles, and permissions are being used to access table data. CloudTrail records DynamoDB data events and publishes the log files to an Amazon Simple Storage Service (Amazon S3) bucket. Each event carries information, such as who performed an action and when, which resources were impacted, and many other details. Events are combined in JSON format and saved in CloudTrail log files. With these files, you can track and understand when, for example, an IAM user accessed sensitive information stored in a DynamoDB table. In this post, we show how to create a new trail on the CloudTrail console and enable data event logging for a DynamoDB table. You can use this trail to monitor, alarm, and archive item-level activity on a table. Solution overview This walkthrough provides a step-by-step example of how to create a DynamoDB table, create a CloudTrail trail, enable data events for DynamoDB, create a DynamoDB item, and then review the CloudTrail event. The post assumes that you’re working with an IAM role that can access DynamoDB, CloudTrail, and Amazon S3. If you don’t have an IAM role to access these resources, it’s recommended that you work with your AWS account administrator. The AWS usage in this post alone falls within the Free Tier, but if you consume resources beyond the walkthrough, you could incur associated costs. It’s recommended that you remove resources after the walkthrough. Creating a DynamoDB table To log DynamoDB data events in CloudTrail, you first need a DynamoDB table. For the purposes of this blog post, we create a basic table to follow along with this post. On the DynamoDB console, in the navigation pane, choose Dashboard. Choose Create table. For Table name, enter DynamoDB-CloudTrail. For Partition key, enter pk. Leave Sort key Select Default settings. Choose Create to create the table. Now that you have created the DynamoDB table, you can create and configure the CloudTrail trail to log the data events on the table. Creating a trail Before you enable data event logging in CloudTrail so that you can monitor item-level activity on the DynamoDB table, you must first create a new CloudTrail trail. For a detailed explanation about trail attributes, see Creating a Trail. On the CloudTrail console, choose Create a trail. Choose Trails in the navigation pane. Choose Create trail. For Trail name, enter DynamoDB-DataEvents-Trail. For Storage location, select Create new S3 bucket. For Trail log bucket and folder, enter an S3 bucket name. The console suggests a new bucket name, which must be unique across all existing bucket names in Amazon S3. You also can choose to make your own unique bucket name. Log file SSE-KMS encryption is an additional setting that, if required by your security controls, requires you to use either a new or existing AWS Key Management Service (AWS KMS) customer managed CMK. The remaining configurations are optional enhancements. 9. Choose Next. You’re redirected to the Choose log events page of the Create trail wizard. Enabling CloudTrail data event logging To enable CloudTrail data event logging for items in your DynamoDB table, complete the following steps: On the Choose log events page, choose Data events. Deselect Management events. Select Data events. DynamoDB data event logging is enabled on a per-table basis in CloudTrail and is disabled by default. This resource-specific configuration allows for data events to be logged on sensitive tables for security and compliance requirements or audit purposes. For Data event source, choose DynamoDB. The default option is to log data events for all DynamoDB tables, but you can deselect the Read and Write check boxes to select individual tables in the subsequent section. Choose Browse to choose the DynamoDB table that you created initially. Choose Next. On the Review and create page, review the configuration and choose Create trail. Now that you have a new trail, you can create and delete an item in the DynamoDB table. On the details page for DynamoDB table you created, choose Create item. Enter the data to insert as a table item. For simplicity, you can disable View DynamoDB JSON and enter values to correspond with the item pk, as shown in the following screenshot. Choose Create item. You can see the new item you created in the Items preview section. You also can delete this item by selecting the item and choosing Delete item(s) from the Actions menu. Understanding and using data event records Creating and deleting items creates data event records in the newly created trail, which you can view in CloudTrail. The following code example shows a CloudTrail record of a DeleteItem action, which is the action you performed in the previous step: { "eventVersion": "1.06", "userIdentity": { "type": "AssumedRole", "principalId": ":", "arn": "arn:aws:sts:: :assumed-role//", "accountId": "", "accessKeyId": "", "sessionContext": { "sessionIssuer": { "type": "Role", "principalId": "", "arn": "arn:aws:iam:: :role/", "accountId": ", "userName": "" }, "attributes": { "creationDate": "2020-10-01T20:00:25Z", "mfaAuthenticated": "false" } } }, "eventTime": "2020-10-20T15:00:25Z ", "eventSource": "dynamodb.amazonaws.com", "eventName": "DeleteItem", "awsRegion": "us-east-1", "sourceIPAddress": "", "userAgent": "console.amazonaws.com", "requestParameters": { "tableName": "", "key": { "key": "" }, "returnValue": "NONE", "returnConsumedCapacity": "NONE" }, "responseElements": null, "requestID": "", "eventID": "", "readOnly": false, "resources": [ { "accountId": "", "type": "AWS::DynamoDB::Table", "ARN": "arn:aws:dynamodb:us-east-1::table/" } ], "eventType": "AwsApiCall", "apiVersion": "2012-08-10", "managementEvent": false, "recipientAccountId": "", } The preceding CloudTrail record is for a single request to DynamoDB, and it details the user and data request information. The record includes a detailed attribution of the principal and the assumed role sessionContext that sent the request, as well as the sourceIPAddress and userAgent (in this case, the console), and whether the user was mfaAuthenticated (not in this case). In addition to the user identity, each record contains detailed information about the data event on DynamoDB. These details include requestParameters, tableName, key, eventName, and more. If a request fails, the error code also is logged. The record combines user and activity, which makes monitoring, alarming, and archiving possible for security and compliance requirements. This record’s user and data event attribution is the information your security team needs to identify a bad actor and build an authoritative reference of compromised activity. Security teams across industries, including finance, healthcare, education, and social media, use these attribution systems not only as detective and preventive controls (identifying and blocking access), but also as a corrective control (impact analysis). Given the potentially high volume of requests per second on a DynamoDB table, it’s important that you consider how you use your data event logs. If your logs are for audit purposes, you should keep the logs active all the time and apply appropriate data lifecycle policies to the data in the S3 bucket. However, if you need the data event logs only for specific activities, such as user access audits, user behavior validation, or troubleshooting, you can enable and disable data event logging situationally in CloudTrail. For robust monitoring and alerting, you also can integrate data events with Amazon CloudWatch Logs. To enhance your analysis of DynamoDB service activity and identify changes in activities for an AWS account, you can query AWS CloudTrail logs using Amazon Athena. For example, you can use queries to identify trends and further isolate activity by attributes, such as source IP address or user. Cleaning up After you create a DynamoDB table and CloudTrail trail, enable data events, create a DynamoDB item, and review the result in CloudTrail, you should remove any resources that you created in this process. Resources that remain active can incur associated costs. Conclusion In this post, we showed how you can use CloudTrail to enable data plane event logging on DynamoDB tables so you can extract invaluable insights to help meet your organization’s security practices for compliance and auditing purposes. To learn more about DynamoDB data plane event logging, see Logging DynamoDB Operations by Using AWS CloudTrail. Additional charges apply for data events. For more information, see AWS CloudTrail pricing. About the Authors Mazen Ali is a Senior Technical Product Manager on the Amazon DynamoDB team. https://aws.amazon.com/blogs/database/amazon-dynamodb-now-supports-audit-logging-and-monitoring-using-aws-cloudtrail/
0 notes
Text
Add AWS Transcribe to Spring boot App
Amazon Transcribe uses a deep learning process called automatic speech recognition (ASR) to convert speech to text quickly and accurately. Amazon Transcribe can be used to transcribe customer service calls, to automate closed captioning and subtitling, and to generate metadata for media assets to create a fully searchable archive. Check here.
Steps for Integration
1.Create A transcribe Account and setup credentials 2.Setup SDK for Transcribe and S3(Required for upload) com.amazonaws aws-java-sdk-s3 1.11.759 com.amazonaws aws-java-sdk-transcribe 1.11.759 3. Create A java Service file to add code 4. Initialize Clients for Transcribe and S3 AmazonTranscribe transcribeClient() { log.debug("Intialize Transcribe Client"); BasicAWSCredentials awsCreds = new BasicAWSCredentials(awsAccessKey, awsSecretKey); AWSStaticCredentialsProvider awsStaticCredentialsProvider = new AWSStaticCredentialsProvider(awsCreds); return AmazonTranscribeClientBuilder.standard().withCredentials(awsStaticCredentialsProvider) .withRegion(awsRegion).build(); } AmazonS3 s3Client() { log.debug("Intialize AWS S3 Client"); BasicAWSCredentials awsCreds = new BasicAWSCredentials(awsAccessKey, awsSecretKey); AWSStaticCredentialsProvider awsStaticCredentialsProvider = new AWSStaticCredentialsProvider(awsCreds); return AmazonS3ClientBuilder.standard().withCredentials(awsStaticCredentialsProvider).withRegion(awsRegion) .build(); } 5. File upload/delete methods for S3. Skip if you want to use the file present on S3 public void uploadFileToAwsBucket(MultipartFile file) { log.debug("Upload file to AWS Bucket {}", file); String key = file.getOriginalFilename().replaceAll(" ", "_").toLowerCase(); try { s3Client().putObject(bucketName, key, file.getInputStream(), null); } catch (SdkClientException | IOException e) { e.printStackTrace(); } } public void deleteFileFromAwsBucket(String fileName) { log.debug("Delete File from AWS Bucket {}", fileName); String key = fileName.replaceAll(" ", "_").toLowerCase(); s3Client().deleteObject(bucketName, key); } 6. Start Transcription Process method StartTranscriptionJobResult startTranscriptionJob(String key) { log.debug("Start Transcription Job By Key {}",key); Media media = new Media().withMediaFileUri(s3Client().getUrl(bucketName, key).toExternalForm()); String jobName = key.concat(RandomString.make()); StartTranscriptionJobRequest startTranscriptionJobRequest = new StartTranscriptionJobRequest() .withLanguageCode(LanguageCode.EnUS).withTranscriptionJobName(jobName).withMedia(media); StartTranscriptionJobResult startTranscriptionJobResult = transcribeClient() .startTranscriptionJob(startTranscriptionJobRequest); return startTranscriptionJobResult; } 7. Get Transcription Job Results Method GetTranscriptionJobResult getTranscriptionJobResult(String jobName) { log.debug("Get Transcription Job Result By Job Name : {}",jobName); GetTranscriptionJobRequest getTranscriptionJobRequest = new GetTranscriptionJobRequest() .withTranscriptionJobName(jobName); Boolean resultFound = false; TranscriptionJob transcriptionJob = new TranscriptionJob(); GetTranscriptionJobResult getTranscriptionJobResult = new GetTranscriptionJobResult(); while (resultFound == false) { getTranscriptionJobResult = transcribeClient().getTranscriptionJob(getTranscriptionJobRequest); transcriptionJob = getTranscriptionJobResult.getTranscriptionJob(); if (transcriptionJob.getTranscriptionJobStatus() .equalsIgnoreCase(TranscriptionJobStatus.COMPLETED.name())) { return getTranscriptionJobResult; } else if (transcriptionJob.getTranscriptionJobStatus() .equalsIgnoreCase(TranscriptionJobStatus.FAILED.name())) { return null; } else if (transcriptionJob.getTranscriptionJobStatus() .equalsIgnoreCase(TranscriptionJobStatus.IN_PROGRESS.name())) { try { Thread.sleep(15000); } catch (InterruptedException e) { log.debug("Interrupted Exception {}", e.getMessage()); } } } return getTranscriptionJobResult; } 8. Download Transcription Result method to fetch result from URI TranscriptionResponseDTO downloadTranscriptionResponse(String uri){ log.debug("Download Transcription Result from Transcribe URi {}", uri); OkHttpClient okHttpClient = new OkHttpClient() .newBuilder() .connectTimeout(60, TimeUnit.SECONDS) .writeTimeout(60, TimeUnit.SECONDS) .readTimeout(60, TimeUnit.SECONDS) .build(); Request request = new Request.Builder().url(uri).build(); Response response; try { response = okHttpClient.newCall(request).execute(); String body = response.body().string(); 9. Delete the Transcription Job Method. To delete after processing is done, or it will automatically get deleted after 90 days. void deleteTranscriptionJob(String jobName) { log.debug("Delete Transcription Job from amazon Transcribe {}",jobName); DeleteTranscriptionJobRequest deleteTranscriptionJobRequest = new DeleteTranscriptionJobRequest() .withTranscriptionJobName(jobName); transcribeClient().deleteTranscriptionJob(deleteTranscriptionJobRequest); } 10. Combined method ExtractSpeechToText to Get Result of Transcription As a DTO public TranscriptionResponseDTO extractSpeechTextFromVideo(MultipartFile file) { log.debug("Request to extract Speech Text from Video : {}",file); uploadFileToAwsBucket(file); String key = file.getOriginalFilename().replaceAll(" ", "_").toLowerCase(); StartTranscriptionJobResult startTranscriptionJobResult = startTranscriptionJob(key); String transcriptionJobName = startTranscriptionJobResult.getTranscriptionJob().getTranscriptionJobName(); GetTranscriptionJobResult getTranscriptionJobResult = getTranscriptionJobResult(transcriptionJobName); deleteFileFromAwsBucket(key); String transcriptFileUriString = getTranscriptionJobResult.getTranscriptionJob().getTranscript().getTranscriptFileUri(); TranscriptionResponseDTO transcriptionResponseDTO = downloadTranscriptionResponse(transcriptFileUriString); deleteTranscriptionJob(transcriptionJobName); return transcriptionResponseDTO; } 11. Now, you can use the above methods to get your video/audio file processed and get the text from Speech. The complete code Link is Here >>> Link to Gist and for the response DTO check Link to Gist Some references were taken from Edgardo Genini comment on StackOverflow here I hope the code helps you, if yes please do share your support by Writing in the comments below. Keep Sharing and visiting back. Thanks Read the full article
0 notes
Video
AWS Global Infrastructure - AWS Tutorial Videos
Get Free Access On 50+ Tutorial Videos, Subscribe to our channel
Watchnow:- https://goo.gl/o1fPVZ
For more Details: Call or WhatsApp:- +91 95025 90066 https://www.svrtechnologies.com
#AWSTutorialVideos #AWSGlobalInfrastructure #SVRTechnologies #AWSRegions
0 notes
Text
Introducing Gen 2 AWS Outpost Racks with Improved Speed

Outpost Racks
Amazon's latest edge computing innovation, second-generation Outpost racks, are now available. This new version supports the latest x86-powered Amazon Elastic Compute Cloud (Amazon EC2) instances and features faster networking instances for ultra-low latency and high throughput applications and simpler network scalability and deployment. These enhancements boost on-premises workloads including telecom 5G Core and financial services core trading platforms.
For on-premises workloads. The second-generation at outpost racks process data locally and has low latency for multiplayer online gaming servers, consumer transaction data, medical records, industrial and manufacturing control systems, telecom BSS, edge inference of diverse applications, and machine learning (ML) models. Customers may now choose from the latest processor generation and Outposts rack configurations with faster processing, more memory, and more network bandwidth.
The latest EC2 instances
In AWS racks are compute-optimized C7i, general-purpose M7i, and memory-optimized R7i x86 instances. Older Outpost Rack C5, M5, and R5 instances had 40% less performance and double vCPU, RAM, and Internet bandwidth. Larger databases, real-time analytics, memory-intensive apps, on-premises workloads, CPU-based edge inference with complicated machine learning models. benefit tremendously from 4th Gen Intel Xeon Scalable CPUs. Newer EC2 instances, including GPU-enabled ones, will be supported.
Easy network scalability and configuration
Amazon has overhauled networking for its latest Outposts generation, making it easier and more scalable. This update centres on its new Outposts network rack, which centralises compute and storage traffic.
The new design has three key benefits. First, you may now grow compute capacity separately from networking infrastructure as workloads rise, increasing flexibility and lowering costs. Second, it started with network resiliency to keep your systems running smoothly. Network racks handle device failures automatically. Third, connecting to on-premises and AWS Regions is simple. You may configure IP addresses, VLANs, and BGP using a revamped console interface or simple APIs.
Amazon EC2 instances with faster networking
Enhanced Amazon EC2 instances with faster networking are being launched on Outpost racks. These instances are designed for mission-critical on-premises throughput, computation, and latency. A supplemental physical network with network accelerator cards attached to top-of-rack (TOR) switches is added to the Outpost logical network for best performance.
Bmn-sf2e instances, designed for ultra-low latency and predictable performance, are the first. The new instances use Intel's latest Sapphire Rapids processors (4th Gen Xeon Scalable) and 8GB of RAM per CPU core to sustain 3.9 GHz across all cores. Bmn-sf2e instances feature AMD Solarflare X2522 network cards that link to top-of-rack switches.
These examples provide deterministic networking for financial services customers, notably capital market companies, employing equal cable lengths, native Layer 2 (L2) multicast, and precision time protocol. Customers may simply connect to their trading infrastructure to meet fair trading and equitable access regulations.
The second instance type, Bmn-cx2, has low latency and high throughput. This example's NVIDIA ConnectX-7 400G NICs are physically coupled to fast top-of-rack switches, giving 800 Gbps bare metal network bandwidth at near line rate. This instance supports hardware PTP and native Layer 2 (L2) multicast, making it ideal for high-throughput workloads including risk analytics, real-time market data dissemination, and telecom 5G core network applications.
Overall, the next Outpost racks generation improves performance, scalability, and resilience for on-premises applications, particularly mission-critical workloads with rigorous throughput and latency constraints. AWS Management Console lets you pick and buy. The new instances preserve regional deployment consistency by supporting the same APIs, AWS Management Console, automation, governance policies, and security controls on-premises and in the cloud. improving IT and developer productivity.
Know something
Second-generation Outpost racks may be parented to six AWS regions: Asia Pacific (Singapore), US West (Oregon), US East (N. Virginia, and Ohio), and EU West (London, France).Support for more nations, territories, and AWS regions is coming. At launch, second-generation Outpost racks support several AWS services from first-generation racks. Support for more AWS services and EC2 instance types is coming.
#AmazonElasticComputeCloud#machinelearning#C7iinstances#AmazonEC2#EC2instance#AWSRegions#News#Technews#Technology#Technologynews#govindhtech
0 notes
Text
Time-based Snapshot Copy For Amazon Elastic Block Store
An Amazon Elastic Block Store (Amazon EBS) snapshot can now be copied inside or between AWS Regions and/or accounts, with a specified completion time ranging from 15 minutes to 48 hours. Meeting time-based compliance and business requirements for important workloads will be made easier with this. As an illustration:
Testing: As part of your Test Data Management (TDM) strategy, test new data by promptly distributing it.
Development: Regularly and frequently send your developers updated snapshot data.
Disaster Recovery: In disaster recovery, make sure that important snapshots are duplicated to fulfill a Recovery Point Objective (RPO).
You can get reliable and consistent copies with this new capability, regardless of your use case. You can select the option and timing that best suits each scenario; this has no bearing on the functionality or dependability of regular copies.
Making a Copy of a Time-Based Snapshot
You can use the AWS Management Console, the copy-snapshot CLI, or the copy-snapshot API to make time-based snapshot copies.
Pick the source as normal and select Copy snapshot from the Action menu to produce a time-based snapshot. You selected the US-east-1 AWS Region as the destination, enter a description for the copy, click Enable time-based copy, and specify a 15-minute completion time because this is a time-sensitive snapshot:
The request will only be approved (and the copy will become pending) when you select Copy snapshot if your account’s throughput quotas haven’t surpassed the throughput used by other active copies you will be making to the destination region. If the account-level throughput quota has already been surpassed, an error message will appear in the console.
You may see the shortest possible copy duration for the photo by clicking the Launch copy duration calculator. You launch the calculator, input the throughput cap for my account, and select an assessment timeframe:
The calculator then determines the bare minimal amount of time you can finish by using past data gathered over the course of earlier snapshot copies. Using time-based copy and my current account throughput quota of 2000 MiB/second, you were able to copy 1,800,000 MiB in the last 24 hours. This would have taken roughly 15 minutes.
You can use the console to keep an eye on the copy’s progress while it’s happening, or you can call DescribeSnapshots and look at the result’s progress field. The Amazon EventBridge events listed below can also be used to perform actions (the event is broadcast in the destination area if the copy operation spans regions):
copySnapshot: Sent following the completion of the copy process.
copyMissedCompletionDuration: Sent if the copy is still pending when the deadline has passed.
Things to Keep in Mind
And it’s pretty much that simple! You should be aware of the following regarding time-based snapshot copies:
CloudWatch Metrics: The SnapshotCopyBytesTransferred metric, which is released in the destination area, indicates the volume of data measured in bytes that is transmitted between the source and destination regions.
Duration: This depends on the number of copies and can vary from 15 minutes to 48 hours in 15-minute increments.
Concurrency: If you are copying a snapshot and you start a second copy of it in the same location, the second copy’s time begins when the first one is finished.
Throughput: Each source-destination pair has a default throughput limit of 2000 MiB/second. Through the AWS Support Center, you can request an increase if you want more throughput to reach your RPO. The throughput is limited to 500 MiB/second per snapshot and cannot be raised.
Amazon EBS Snapshot pricing
Time-Based Snapshot Copy of Amazon EBS
By guaranteeing that your EBS Snapshots are replicated both inside and between AWS Regions within a predetermined duration, Time-based Snapshot Copy assists you in meeting compliance and business requirements. The cost of time-based snapshot copy operations is determined by the requested completion time per gigabyte of copied snapshot data. Keep in mind that you may only set completion times in increments of 15 minutes. The following are the fixed rates:Completion durationPrice15 minutes$0.020/GB30 minutes and 45 minutes$0.018/GB1 hour to 1 hour 45 minutes$0.016/GB2 hours to 3 hours 45 minutes$0.014/GB4 hours to 7 hours 45 minutes$0.012/GB8 hours to 15 hours 45 minutes$0.010/GB16 hours to 48 hours$0.005/GB
Complete pricing details can be found on the Amazon EBS Pricing page.
Time-based snapshot copies are accessible in every AWS region.
Read more on Govindhtech.com
#AmazonEBS#ElasticBlockStore#CopySnapshot#AWSregion#Snapshot#News#Technews#Technology#Technologynews#Technologytrends#Govindhtech
0 notes
Text
Amazon Route 53 Advanced Features for Global Traffic
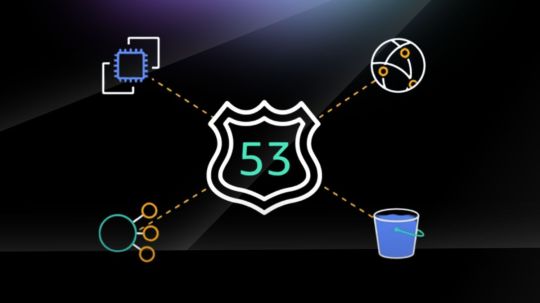
What is Amazon Route 53
A dependable and economical method of connecting end users to Internet applications
Sharing and then assigning numerous��DNS resources to each Amazon Virtual Private Cloud (Amazon VPC) can be quite time-consuming if you are managing numerous accounts and Amazon VPC resources. You may have even gone so far as to create your own orchestration layers in order to distribute DNS configuration throughout your accounts and VPCs, but you frequently run into limitations with sharing and association.
Amazon Route 53 Resolver DNS firewall
With great pleasure, AWS now provide Amazon Route 53 Profiles, which enable you to centrally manage DNS for all accounts and VPCs in your company. Using Route 53 Profiles, you may apply a standard DNS configuration to several VPCs in the same AWS Region. This configuration includes Amazon Route 53 private hosted zone (PHZ) associations, Resolver forwarding rules, and Route 53 Resolver DNS Firewall rule groups. You can quickly and simply verify that all of your VPCs have the same DNS setup by using Profiles, saving you the trouble of managing different Route 53 resources. It is now as easy to manage DNS for several VPCs as it was for a single VPC.
Because Profiles and AWS Resource Access Manager (RAM) are naturally connected, you can exchange Profiles between accounts or with your AWS Organizations account. By enabling you to create and add pre-existing private hosted zones to your Profile, Profiles effortlessly interacts with Route 53 private hosted zones. This means that when the Profile is shared across accounts, your organizations will have access to the same settings. When accounts are initially provisioned, AWS CloudFormation enables you to utilize Profiles to define DNS settings for VPCs regularly. You may now more effectively manage DNS settings for your multi-account environments with today’s release.
Amazon Route 53 benefits
Automatic scaling and internationally distributed Domain Name System (DNS) servers ensure dependable user routing to your website
Amazon Route 53 uses globally dispersed Domain Name System (DNS) servers to provide dependable and effective end-user routing to your website. By dynamically adapting to changing workloads, automated scaling maximises efficiency and preserves a flawless user experience.
With simple visual traffic flow tools and domain name registration, set up your DNS routing in a matter of minutes
With simple visual traffic flow tools and a fast and easy domain name registration process, Amazon Route 53 simplifies DNS routing configuration. This makes it easier for consumers to manage and direct web traffic effectively by allowing them to modify their DNS settings in a matter of minutes.
To cut down on latency, increase application availability, and uphold compliance, modify your DNS routing policies
Users can customize DNS routing settings with Amazon Route 53 to meet unique requirements including assuring compliance, improving application availability, and lowering latency. With this customization, customers can optimize DNS configurations for resilience, performance, and legal compliance.
How it functions
A DNS (Domain Name System) online service that is both scalable and highly available is Amazon Route 53. Route 53 links user queries to on-premises or AWS internet applications.Image credit to AWS
Use cases
Control network traffic worldwide
Easy-to-use global DNS features let you create, visualize, and scale complicated routing interactions between records and policies.
Construct programmes that are extremely available
In the event of a failure, configure routing policies to predetermine and automate responses, such as rerouting traffic to different Availability Zones or Regions.
Configure a private DNS
In your Amazon Virtual Private Cloud, you can assign and access custom domain names (VPC). Utilise internal AWS servers and resources to prevent DNS data from being visible to the general public.
Which actions can you perform in Amazon Route 53
The operation of Route 53 Profiles
You go to the AWS Management Console for Route 53 to begin using the Route 53 Profiles. There, you can establish Profiles, furnish them with resources, and link them to their respective VPCs. Then use AWS RAM to share the profile you made with another account.
To set up my profile, you select Profiles from the Route 53 console’s navigation pane, and then you select Create profile.
You will optionally add tags to my Profile configuration and give it a pleasant name like MyFirstRoute53Profile.
The Profile console page allows me to add new Resolver rules, private hosted zones, and DNS Firewall rule groups to my account or modify the ones that are already there.
You select which VPCs to link to the Profile. In addition to configuring recursive DNSSEC validation the DNS Firewalls linked to my VPCs’ failure mode, you are also able to add tags. Additionally, you have the ability to decide which comes first when evaluating DNS: Profile DNS first, VPC DNS second, or VPC DNS first.
Up to 5,000 VPCs can be linked to a single Profile, and you can correlate one Profile with each VPC.
You can control VPC settings for different accounts in your organization by using profiles. Instead of setting them up per-VPC, you may disable reverse DNS rules for every VPC that the Profile is connected to. To make it simple for other services to resolve hostnames from IP addresses, the Route 53 Resolver automatically generates rules for reverse DNS lookups on my behalf. You can choose between failing open and failing closed when using DNS Firewall by going into the firewall’s settings. Additionally, you may indicate if you want to employ DNSSEC signing in Amazon Route 53 (or any other provider) in order to enable recursive DNSSEC validation for the VPCs linked to the Profile.
Assume you can link a Profile to a VPC. What occurs when a query precisely matches a PHZ or resolver rule that is linked to the VPC’s Profile as well as one that is related with the VPC directly? Which DNS settings, those from the local VPCs or the profiles, take priority? In the event that the Profile includes a PHZ for example.com and the VPC is linked to a PHZ for example.com, the VPC’s local DNS settings will be applied first. The most specific name prevails when a name query for a conflicting domain name is made (for instance, the VPC is linked to a PHZ with the name account1.infra.example.com, while the Profile has a PHZ for infra.example.com).
Using AWS RAM to share Route 53 Profiles between accounts
You can share the Profile you made in the previous part with my second account using AWS Resource Access Manager (RAM).
On the Profiles detail page, you select the Share profile option. Alternatively, you may access the AWS RAM console page and select Create resource share.
You give your resource share a name, and then you go to the Resources area and look for the “Route 53 Profiles.” You choose the Profile under the list of resources. You have the option to add tags. Next is what you select.
RAM controlled permissions are used by profiles, enabling me to assign distinct permissions to various resource types. The resources inside the Profile can only be changed by the Profile’s owner, the network administrator, by default. Only the contents of the Profile (in read-only mode) will be accessible to the recipients of the Profile, which are the VPC owners. The resource must have the required permissions attached to it in order for the Profile’s recipient to add PHZs or other resources to it. Any resources that the Profile owner adds to the shared resource cannot be edited or removed by recipients.
You choose to allow access to my second account by selecting Next, leaving the default settings.
You select Allow sharing with anyone on the following screen, type in the ID of my second account, and click Add. Next, You select that account ID under Selected Principals and click Next.
You select Create resource share on the Review and create page. The creation of the resource sharing is successful.
You, now navigate to the RAM console using your other account, which you share your profile with. You select the resource name you generated in the first account under the Resource sharing section of the navigation menu. You accept the offer by selecting Accept resource share.
And that’s it! now select the Profile that was shared with you on your Amazon Route 53Profiles page.
The private hosted zones, Resolver rules, and DNS Firewall rule groups of the shared profile are all accessible to you. You are able to link this Profile to the VPCs for this account. There are no resources that you can change or remove. As regional resources, profiles are not transferable between regions.
Amazon Route 53 availability
Using the AWS Management Console, Route 53 API, AWS CloudFormation, AWS Command Line Interface (AWS CLI), and AWS SDKs, you can quickly get started with Route 53 Profiles.
With the exception of Canada West (Calgary), the AWS GovCloud (US) Regions, and the Amazon Web Services China Regions, Route 53 Profiles will be accessible in every AWS Region.
Amazon Route 53 pricing
Please check the Route 53 price page for further information on the costs.
Read more on govindhtech.com
#amazonroute53#globaltraffic#awsregion#usecases#dnsdata#route53#vpc#awsram#ram#aws#awscli#technology#technews#news#govindhtech
0 notes
Text
AWS Configuring Instance Behaviour and Instance Lifecycle

In this blog you will learn Configuring an Environment Instance, AWS Regions, Tenancy , Configuring Instance Behaviour and Instance Lifecycle.
Read More : https://www.info-savvy.com/aws-configuring-instance-behaviour-and-instance-lifecycle/
#awsconfiguringinstancebehaviour#awsconfiguringinstancebehaviourandit’sinstancelifecycle#AWSRegions#ConfiguringanEnvironmentforYourInstance
0 notes
Text
Introduction to Cloud Computing and AWS
You will learn into this regarding cloud computing and their six advantages as well as types of cloud computing in detail.
Read More : https://www.info-savvy.com/introduction-to-cloud-computing-and-aws/
#AvailabilityZones#AWSRegions#AWSSecurity#BenefitsofAWSSecurity#CloudComputing#CloudComputingDeploymentModels#CloudComputingModels#GlobalInfrastructure#InfrastructureasaService
0 notes