#awscli
Explore tagged Tumblr posts
Visit Tumblr Blog
Explore Tumblr blogs with no restrictions, modern design and the best experience.
Last Seen Tumblr Blogs


Fun Fact
70% of Tumblr users say the Dashboard is their favorite place to spend time online.
Text
Creating a Scalable Amazon EMR Cluster on AWS in Minutes

Minutes to Scalable EMR Cluster on AWS
AWS EMR cluster
Spark helps you easily build up an Amazon EMR cluster to process and analyse data. This page covers Plan and Configure, Manage, and Clean Up.
This detailed guide to cluster setup:
Amazon EMR Cluster Configuration
Spark is used to launch an example cluster and run a PySpark script in the course. You must complete the “Before you set up Amazon EMR” exercises before starting.
While functioning live, the sample cluster will incur small per-second charges under Amazon EMR pricing, which varies per location. To avoid further expenses, complete the tutorial’s final cleaning steps.
The setup procedure has numerous steps:
Amazon EMR Cluster and Data Resources Configuration
This initial stage prepares your application and input data, creates your data storage location, and starts the cluster.
Setting Up Amazon EMR Storage:
Amazon EMR supports several file systems, but this article uses EMRFS to store data in an S3 bucket. EMRFS reads and writes to Amazon S3 in Hadoop.
This lesson requires a specific S3 bucket. Follow the Amazon Simple Storage Service Console User Guide to create a bucket.
You must create the bucket in the same AWS region as your Amazon EMR cluster launch. Consider US West (Oregon) us-west-2.
Amazon EMR bucket and folder names are limited. Lowercase letters, numerals, periods (.), and hyphens (-) can be used, but bucket names cannot end in numbers and must be unique across AWS accounts.
The bucket output folder must be empty.
Small Amazon S3 files may incur modest costs, but if you’re within the AWS Free Tier consumption limitations, they may be free.
Create an Amazon EMR app using input data:
Standard preparation involves uploading an application and its input data to Amazon S3. Submit work with S3 locations.
The PySpark script examines 2006–2020 King County, Washington food business inspection data to identify the top ten restaurants with the most “Red” infractions. Sample rows of the dataset are presented.
Create a new file called health_violations.py and copy the source code to prepare the PySpark script. Next, add this file to your new S3 bucket. Uploading instructions are in Amazon Simple Storage Service’s Getting Started Guide.
Download and unzip the food_establishment_data.zip file, save the CSV file to your computer as food_establishment_data.csv, then upload it to the same S3 bucket to create the example input data. Again, see the Amazon Simple Storage Service Getting Started Guide for uploading instructions.
“Prepare input data for processing with Amazon EMR” explains EMR data configuration.
Create an Amazon EMR Cluster:
Apache Spark and the latest Amazon EMR release allow you to launch the example cluster after setting up storage and your application. This may be done with the AWS Management Console or CLI.
Console Launch:
Launch Amazon EMR after login into AWS Management Console.
Start with “EMR on EC2” > “Clusters” > “Create cluster”. Note the default options for “Release,” “Instance type,” “Number of instances,” and “Permissions”.
Enter a unique “Cluster name” without <, >, $, |, or `. Install Spark from “Applications” by selecting “Spark”. Note: Applications must be chosen before launching the cluster. Check “Cluster logs” to publish cluster-specific logs to Amazon S3. The default destination is s3://amzn-s3-demo-bucket/logs. Replace with S3 bucket. A new ‘logs’ subfolder is created for log files.
Select your two EC2 keys under “Security configuration and permissions”. For the instance profile, choose “EMR_DefaultRole” for Service and “EMR_EC2_DefaultRole” for IAM.
Choose “Create cluster”.
The cluster information page appears. As the EMR fills the cluster, its “Status” changes from “Starting” to “Running” to “Waiting”. Console view may require refreshing. Status switches to “Waiting” when cluster is ready to work.
AWS CLI’s aws emr create-default-roles command generates IAM default roles.
Create a Spark cluster with aws emr create-cluster. Name your EC2 key pair –name, set –instance-type, –instance-count, and –use-default-roles. The sample command’s Linux line continuation characters () may need Windows modifications.
Output will include ClusterId and ClusterArn. Remember your ClusterId for later.
Check your cluster status using aws emr describe-cluster –cluster-id myClusterId>.
The result shows the Status object with State. As EMR deployed the cluster, the State changed from STARTING to RUNNING to WAITING. When ready, operational, and up, the cluster becomes WAITING.
Open SSH Connections
Before connecting to your operating cluster via SSH, update your cluster security groups to enable incoming connections. Amazon EC2 security groups are virtual firewalls. At cluster startup, EMR created default security groups: ElasticMapReduce-slave for core and task nodes and ElasticMapReduce-master for main.
Console-based SSH authorisation:
Authorisation is needed to manage cluster VPC security groups.
Launch Amazon EMR after login into AWS Management Console.
Select the updateable cluster under “Clusters”. The “Properties” tab must be selected.
Choose “Networking” and “EC2 security groups (firewall)” from the “Properties” tab. Select the security group link under “Primary node”.
EC2 console is open. Select “Edit inbound rules” after choosing “Inbound rules”.
Find and delete any public access inbound rule (Type: SSH, Port: 22, Source: Custom 0.0.0.0/0). Warning: The ElasticMapReduce-master group’s pre-configured rule that allowed public access and limited traffic to reputable sources should be removed.
Scroll down and click “Add Rule”.
Choose “SSH” for “Type” to set Port Range to 22 and Protocol to TCP.
Enter “My IP” for “Source” or a range of “Custom” trustworthy client IP addresses. Remember that dynamic IPs may need updating. Select “Save.”
When you return to the EMR console, choose “Core and task nodes” and repeat these steps to provide SSH access to those nodes.
Connecting with AWS CLI:
SSH connections may be made using the AWS CLI on any operating system.
Use the command: AWS emr ssh –cluster-id –key-pair-file <~/mykeypair.key>. Replace with your ClusterId and the full path to your key pair file.
After connecting, visit /mnt/var/log/spark to examine master node Spark logs.
The next critical stage following cluster setup and access configuration is phased work submission.
#AmazonEMRcluster#EMRcluster#DataResources#SSHConnections#AmazonEC2#AWSCLI#technology#technews#technologynews#news#govindhtech
0 notes
Text
"6 Ways to Trigger AWS Step Functions Workflows: A Comprehensive Guide"
To trigger an AWS Step Functions workflow, you have several options depending on your use case and requirements:
AWS Management Console: You can trigger a Step Functions workflow manually from the AWS Management Console by navigating to the Step Functions service, selecting your state machine, and then clicking on the "Start execution" button.
AWS SDKs: You can use AWS SDKs (Software Development Kits) available for various programming languages such as Python, JavaScript, Java, etc., to trigger Step Functions programmatically. These SDKs provide APIs to start executions of your state machine.
AWS CLI (Command Line Interface): AWS CLI provides a command-line interface to AWS services. You can use the start-execution command to trigger a Step Functions workflow from the command line.
AWS CloudWatch Events: You can use CloudWatch Events to schedule and trigger Step Functions workflows based on a schedule or specific events within your AWS environment. For example, you can trigger a workflow based on a time-based schedule or in response to changes in other AWS services.
AWS Lambda: You can integrate Step Functions with AWS Lambda functions. You can trigger a Step Functions workflow from a Lambda function, allowing you to orchestrate complex workflows in response to events or triggers handled by Lambda functions.
Amazon API Gateway: If you want to trigger a Step Functions workflow via HTTP requests, you can use Amazon API Gateway to create RESTful APIs. You can then configure API Gateway to trigger your Step Functions workflow when it receives an HTTP request.
These are some of the common methods for triggering AWS Step Functions workflows. The choice of method depends on your specific requirements, such as whether you need manual triggering, event-based triggering, or integration with other AWS services.
#AWS#StepFunctions#WorkflowAutomation#CloudComputing#AWSManagement#Serverless#DevOps#AWSLambda#AWSCLI#AWSConsole#magistersign#onlinetraining#cannada#support#usa
0 notes
Text
0 notes
Text
How to Use AWS CLI: Automate Cloud Management with Command Line
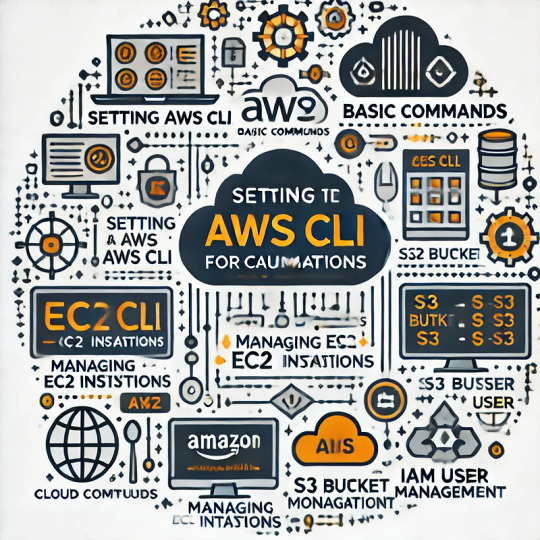
The AWS Command Line Interface (AWS CLI) is a powerful tool that allows developers and system administrators to interact with AWS services directly from the terminal. It provides automation capabilities, improves workflow efficiency, and enables seamless cloud resource management.
Why Use AWS CLI?
Automation: Automate repetitive tasks using scripts.
Efficiency: Manage AWS services without navigating the AWS Management Console.
Speed: Perform bulk operations faster than using the web interface.
Scripting & Integration: Combine AWS CLI commands with scripts for complex workflows.
1. Installing AWS CLI
Windows
Download the AWS CLI installer from AWS official site.
Run the installer and follow the prompts.
Verify installation:
aws --version
macOS
Install using Homebrew:
brew install awscli
Verify installation:
aws --version
Linux
Install using package manager:
curl "https://awscli.amazonaws.com/AWSCLIV2.pkg" -o "awscliv2.pkg" sudo installer -pkg awscliv2.pkg -target /
Verify installation:
aws --version
2. Configuring AWS CLI
After installation, configure AWS CLI with your credentials:aws configure
You’ll be prompted to enter:
AWS Access Key ID
AWS Secret Access Key
Default Region (e.g., us-east-1)
Default Output Format (json, text, or table)
Example:AWS Access Key ID [****************ABCD]: AWS Secret Access Key [****************XYZ]: Default region name [us-east-1]: Default output format [json]:
To verify credentials:aws sts get-caller-identity
3. Common AWS CLI Commands
Managing EC2 Instances
List EC2 instances:
aws ec2 describe-instances
Start an instance:
aws ec2 start-instances --instance-ids i-1234567890abcdef0
Stop an instance:
aws ec2 stop-instances --instance-ids i-1234567890abcdef0
S3 Bucket Operations
List all S3 buckets:
aws s3 ls
Create a new S3 bucket:
aws s3 mb s3://my-new-bucket
Upload a file to a bucket:
aws s3 cp myfile.txt s3://my-new-bucket/
Download a file from a bucket:
aws s3 cp s3://my-new-bucket/myfile.txt .
IAM User Management
List IAM users:
aws iam list-users
Create a new IAM user:
aws iam create-user --user-name newuser
Attach a policy to a user:
aws iam attach-user-policy --user-name newuser --policy-arn arn:aws:iam::aws:policy/AmazonS3ReadOnlyAccess
Lambda Function Management
List Lambda functions:
aws lambda list-functions
Invoke a Lambda function:
aws lambda invoke --function-name my-function output.json
CloudFormation Deployment
Deploy a stack:
aws cloudformation deploy --stack-name my-stack --template-file template.yaml
Delete a stack:
aws cloudformation delete-stack --stack-name my-stack
4. Automating Tasks with AWS CLI and Bash Scripts
AWS CLI allows users to automate workflows using scripts. Below is an example script to start and stop EC2 instances at scheduled intervals:#!/bin/bash INSTANCE_ID="i-1234567890abcdef0"# Start instance aws ec2 start-instances --instance-ids $INSTANCE_IDecho "EC2 Instance $INSTANCE_ID started."# Wait 60 seconds before stopping sleep 60# Stop instance aws ec2 stop-instances --instance-ids $INSTANCE_IDecho "EC2 Instance $INSTANCE_ID stopped."
Make the script executable:chmod +x manage_ec2.sh
Run the script:./manage_ec2.sh
5. Best Practices for AWS CLI Usage
Use IAM Roles: Avoid storing AWS credentials locally. Use IAM roles for security.
Enable MFA: Add Multi-Factor Authentication for additional security.
Rotate Access Keys Regularly: If using access keys, rotate them periodically.
Use Named Profiles: Manage multiple AWS accounts efficiently using profiles.
aws configure --profile my-profile
Log Command Outputs: Store logs for debugging and monitoring purposes.
aws s3 ls > s3_log.txt
Final Thoughts
AWS CLI is a powerful tool that enhances productivity by automating cloud operations. Whether you’re managing EC2 instances, deploying Lambda functions, or securing IAM users, AWS CLI simplifies interactions with AWS services.
By following best practices and leveraging automation, you can optimize your cloud management and improve efficiency. Start experimenting with AWS CLI today and take full control of your AWS environment!
WEBSITE: https://www.ficusoft.in/aws-training-in-chennai/
0 notes
Text
youtube
Mastering AWS on Windows: Configure Multiple Accounts with Ease | AWS Tutorial for Beginners by TutorialsFor #ManagingMultipleAWSAccounts #DevOpsOnAWS #ManagingMultipleAWSAccounts Mastering AWS on Windows: Configure Multiple Accounts with Ease | AWS Tutorial for Beginners https://ift.tt/JpyRaw3 As a developer or DevOps engineer, managing multiple AWS accounts is a common scenario. You may have separate accounts for development, testing, and production environments or for different projects. When working with Terraform, a popular infrastructure-as-code tool, configuring AWS credentials on your Windows machine is essential. In this article, we will explore how to configure AWS on Windows for two accounts. Understanding AWS Credentials Before diving into the configuration process, it's crucial to understand AWS credentials. AWS uses access keys to authenticate and authorize API requests. Each account has a unique access key ID and secret access key. You can create multiple access keys for an account, but it's recommended to use a single key per account. Configuring AWS CLI on Windows To configure AWS on Windows, you'll use the AWS Command Line Interface (CLI). The AWS CLI is a unified tool that allows you to manage your AWS resources from the command line. Open the Command Prompt or PowerShell as an administrator. Run aws configure --profile account1 to set up your first AWS account. Enter your access key ID, secret access key, region, and output format. Configuring Additional AWS Accounts To configure additional AWS accounts, you'll use the --profile option with aws configure. This option allows you to create separate profiles for each account. Run aws configure --profile account2 to set up your second AWS account. Enter your access key ID, secret access key, region, and output format. Verifying Profiles To verify your profiles, run aws configure list. This command displays a list of all configured profiles. Name Value Type Location ---- ----- ---- -------- profile account1 manual ~/.aws/credentials profile account2 manual ~/.aws/credentials Switching Between Accounts To switch between accounts, set the AWS_PROFILE environment variable. This variable tells the AWS CLI which profile to use. Use set AWS_PROFILE=account1 to switch to your first account. Use set AWS_PROFILE=account2 to switch to your second account. Note: Make sure to replace ACCESS_KEY_ID_1, SECRET_ACCESS_KEY_1, ACCESS_KEY_ID_2, and SECRET_ACCESS_KEY_2 with your actual AWS access keys. By following these steps, you can configure AWS on your Windows machine for two accounts. #AWS #AWSTutorial #Windows #CloudComputing #DevOps #AWSCredentials #AWSCLI #MultipleAccounts #AWSConfiguration #CloudSecurity #AWSBestPractices #DevOpsTools #CloudEngineering #AWSSolutions #CloudComputingTutorial #ConfiguringAWSonWindows #ManagingMultipleAWSAccounts #AWSCredentialsManagement #CloudComputingForBeginners #DevOpsOnAWS https://www.youtube.com/watch?v=z-UwWhwiB3o
#Mastering AWS on Windows: Configure Multiple Accounts with Ease | AWS Tutorial for Beginners#Youtube
0 notes
Link
How to install AWS-CLI on Linux? https://www.devopscheetah.com/how-to-install-aws-cli-on-linux/?feed_id=949&_unique_id=60e6ca20273ca
1 note
·
View note
Text
How to Copy Multiple Files From Local to AWS S3 Bucket Using AWS CLI?
Introduction
Amazon Simple Storage Service(S3) is one of the most used object storage services, and it is because of scalability, security, performance, and data availability. That means customers of any size or industries such as websites, mobile apps, IoT devices, enterprise applications, and IoT devices can use it to store any volume of data.
Amazon S3 provides easy-to-use management features so you can appropriately organize your data to fulfill your business requirements.
Many of us are using AWS s3 bucket on a daily basis; one of the most common challenges that are faced while working with cloud storage is syncing or uploading multiple objects at once. Yes, we can drag and drop or upload on a direct bucket page. Like the below image.

But the problem with this approach is if you’re uploading large objects over an unstable network if network errors occur you must have to restart uploading from the beginning.

Suppose you are uploading 2000+ files and you come to know that upload fails and your uploading these files from the last 1 hour, re-uploading has become a time-consuming process. So, to overcome this problem we have two solutions that we will discuss in the next sections.
Prerequisites
AWS Account
Installed AWS CLI
Upload Objects Using Multipart Upload API
Multipart upload opens the gate to upload a single object as a set of parts. Considering that it is possible to upload object parts independently and in any order.
In case the transmission fails in any section, it is possible to retransmit that section without affecting any other sections. So, it’s a good practice to use multipart uploads instead of uploading the object in a single operation.
Advantages of Using multipart upload:
Improved throughput – improve uploading speed
Fast recovery from any network issues: no need to re-upload from beginning
Resume and pause object uploads
It is possible to upload any object as you are creating it.
We can use multipart file uploading API with different technologies SDK or REST API for more details visit
Read more to Copy Files to AWS S3 Bucket using AWS S3 CLI
0 notes
Link
How To Provisioning RDS Instances using Terraform
#awscli#awssolutions#microsoftazureservices#teraformcertified#azurecertified#aws#amazonewebservicesolutions
0 notes
Link
0 notes
Text
Use AWS Console-to-Code To Turn Console Actions Into Code

AWS Console to Code
AWS Console-to-Code, which makes it simple to turn AWS console actions into reusable code, is now generally available (GA). When you launch an Amazon Elastic Compute Cloud (Amazon EC2) instance, for example, you can record your actions and workflows in the console using AWS Console-to-Code. You can then evaluate the AWS Command Line Interface (AWS CLI) commands for your console actions.
Using the infrastructure-as-code (IaC) format of your choosing, such as the AWS CloudFormation template (YAML or JSON) or the AWS Cloud Development Kit (AWS CDK) (TypeScript, Python, or Java), Amazon Q can generate code for you with a few clicks. This may be included into pipelines, further tailored for your production workloads, and utilized as a foundation for infrastructure automation.
Customers have responded well to AWS Console-to-Code since it revealed the preview last year. Since it has been working backwards from customer feedback, it has been significantly enhanced in this GA version.
GA’s new features
Encouragement of additional services Amazon EC2 was the sole service that was supported during the preview. Amazon Relational Database Service (RDS) and Amazon Virtual Private Cloud (Amazon VPC) are now supported by AWS Console-to-Code at GA.
Simplified experience: Customers can now more easily handle the workflows for prototyping, recording, and code creation with the updated user interface.
Preview code: Customers can now create code for EC2 instances and Auto Scaling groups without actually establishing them with updates to the launch wizards.
Advanced code generation: Amazon Q machine learning models power the creation of code for AWS CDK and CloudFormation.
How to begin using AWS Console-to-Code
Let’s start with a straightforward example of starting an Amazon EC2 instance. Open the Amazon EC2 console first. To begin recording, find the AWS Console-to-Code widget on the right and select Start recording.
Next, use the Amazon EC2 console’s launch instance wizard to start an Amazon EC2 instance. To finish the recording, select Stop once the instance has been launched.
Examine the recorded actions in the Recorded actions table. To filter by write actions (Write), utilize the Type dropdown list. Select the action RunInstances. To copy the relevant AWS CLI command, select Copy CLI.
It is simple to change this command. For this example, You can modify it to start two instances (–count 2) of type t3.micro (–instance-type). Although this is a simplified example, other workflows can use the same method.
You can use AWS CloudShell to run the command, and it launched two t3.micro EC2 instances as planned:
The API commands used when actions were conducted (during the EC2 instance launch) form the basis of the single-click CLI code creation experience. It’s intriguing to see that when you finish operations in the console, the companion screen displays the recorded actions. Additionally, it is simple to clearly scope activities for prototyping because of the interactive user interface’s start and stop capabilities.
Creating IaC with AWS CDK
An open-source framework called AWS CDK is used to specify cloud architecture in code and provision it using AWS CloudFormation. You may create AWS CDK code for your infrastructure workflows with AWS Console-to-Code. Currently available in Java, Python, and TypeScript.
Let’s move on to the use case for the EC2 launch instance. Locate the AWS Console-to-Code widget on the right side of the Amazon EC2 console, select Start recording, and then start an EC2 instance if you haven’t already. Once the instance has started, select the RunInstances action from the Recorded actions table and select Stop to finish the recording.
Select the Generate CDK Python button from the dropdown menu to begin generating AWS CDK Python code.
You can modify the code to make it production-ready for your particular use case, or you can use it as a starting point.
You made a new Python CDK project since you already had the AWS CDK installed:
Then entered the code that was generated into the Python CDK project. To make sure the code was correct for this example, modified the EC2 instance type, refactored the code into an AWS CDK Stack, and made a few other little adjustments. Using CDK deploy, was able to deploy it successfully.
You can replicate the same outcome by launching an EC2 instance from the console action and then going all the way to the AWS CDK.
Additionally, you can create CloudFormation templates in JSON or YAML format:
Preview code
Additionally, you may use the Preview code capability in Amazon EC2 and the Amazon EC2 Auto Scaling group launch experience to directly access AWS Console-to-Code. This implies that you can obtain the infrastructure code without actually creating the resource.
Try this out by following the instructions to use a launch template to build an Auto Scaling group. But click Preview code rather than Create Auto Scaling group. The options to replicate the AWS CLI command or produce infrastructure code should now be visible to you.
Things to be aware of
When using AWS Console-to-Code, keep the following points in mind:
To create AWS CLI commands for their infrastructure operations, anyone can use AWS Console-to-Code. There is a free monthly limit of 25 generations for the code generation feature for AWS CDK and CloudFormation formats; after that, an Amazon Q Developer subscription is required.
Prior to deployment, it is advised that you test and validate the generated IaC code.
Only actions in the Amazon EC2, Amazon VPC, and Amazon RDS consoles are recorded by AWS Console-to-Code at GA.
Actions from past sessions or other tabs are not retained by the Recorded actions table in AWS Console-to-Code; it only shows actions made within the current browser tab. Keep in mind that all recorded actions will be lost once the browser tab is refreshed.
Currently accessible
All commercial regions offer AWS Console-to-Code. The Amazon Q Developer user manual contains additional information about it. Try it out in the Amazon EC2 console and email the AWS re:Post for Amazon EC2 or your regular AWS Support contacts with your thoughts.
Read more on Govindhtech.com
#AWSConsoletoCode#AWSCDK#AmazonQ#AmazonEC2#EC2instances#AWSCLI#Coludcomputing#News#Technews#Technology#Technologynews#Technologytrends#govindhtech
0 notes
Text
youtube
0 notes
Text
Amazon EBS 的 gp3 可以用在開機磁碟了
Amazon EBS 的 gp3 可以用在開機磁碟了
可以先參考「Amazon EBS 推出了 gp3」這篇,但剛出來的時候大家都有發現無論是透過 web console 還是透過 awscli,boot disk 都沒辦法改成 gp3,可是在官方的文件上又說可以用 gp3,所以就有人在 AWS 的 forum 上發問了:「EBS GP3 Boot Volume Issues」。
直到剛剛發現已經可以改成 gp3 了… 一個一個手動改當然也是 OK,但對於有一卡車 EBS 要換的人來說鐵定得弄指令來換,這邊搭配了 jq 一起改:
aws ec2 describe-volumes | jq '.Volumes[] | select(.VolumeType == "gp2") | .VolumeId' | xargs -n1 -P4 env aws ec2 modify-volume --volume-type gp3 --volume-id
View On WordPress
0 notes
Text
How to install AWS CLI in Linux + Auto command completion
How to install AWS CLI in Linux + Auto command completion
This is a guide on how to install aws cli utlity in Linux along with screenshots.
Requirements:
– Linux. – Python 2.6.5 or higher.
[Tested on Linux Mint with bash shell. should work on Ubuntu as well.]
Update your system and its packages:
sudo apt update && sudo apt upgrade -y
Install Pip:
sudo apt install python-pip -y sudo pip install --upgrade pip
Install the following modules:
sudo pip…
View On WordPress
0 notes
Link
How to install AWS-CLI on Linux? https://www.devopscheetah.com/how-to-install-aws-cli-on-linux/?feed_id=1554&_unique_id=61261a0682561
0 notes
Text
Installing AWS CLI on Mac OS Sierra 10.12.6 for using AWS Docker Container Service
You will be needing AWS CLI when you try to use AWS Container service,and for this you need to do an authentication through command line to push your docker images into AWS repositories. So you can easily achieve that by following the below simple steps.
$ curl "https://s3.amazonaws.com/aws-cli/awscli-bundle.zip" -o "awscli-bundle.zip" $ unzip awscli-bundle.zip $ sudo ./awscli-bundle/install -i /usr/local/aws -b /usr/local/bin/aws $ aws configure WS Access Key ID [None]: AKIAIOSFODNN7EXAMPLE AWS Secret Access Key [None]: wJalrXUtnFEMI/K7MDENG/bPxRfiCYEXAMPLEKEY Default region name [None]: us-west-2 Default output format [None]: json
0 notes