#AudioTips
Explore tagged Tumblr posts
Visit Tumblr Blog
Explore Tumblr blogs with no restrictions, modern design and the best experience.
Last Seen Tumblr Blogs


Fun Fact
1,644 Tumblr posts in 1 second.
Text
Unveiling Audio Engineering Secrets: Julio Martinez Exclusive Podcast Interview | Iris of my I
youtube
*Volume warning*
Discover the secrets of audio engineering with Julio Martinez in this exclusive podcast interview. Get valuable insights into his journey from musician to sound engineer and learn expert tips for mastering audio production. Don't miss out on Julio's advice and techniques for improving your sound engineering skills. Subscribe, like, and comment to stay updated with more expert interviews and audio tips!
Unveiling Audio Engineering Secrets: Julio Martinez Exclusive Podcast Interview | Iris of my I
✅ Subscribe To My Channel For More Videos: https://www.youtube.com/@ebenflown/?s...
✅ Important Links:
👉 Feel Free To Linq With Me: https://linqapp.com/xyz?r=linkx
👉 EB&FLO: https://www.ebenflowbreath.co/
✅ Stay Connected With Me:
👉 Instagram: https://www.instagram.com/ebenflown
👉 TikTok: https://www.tiktok.com/@ebenflown
👉 Facebook: https://www.facebook.com/profile.php?...
👉 (X)Twitter: https://x.com/EbenflowN
==============================
#julioengineering #audiosecrets #audiotips #podcastinterview #soundengineering #musicproduction #engineeringadvice #expertinsights
© Iris of my I
CODE: I%o#I
#julioengineering#audiosecrets#audiotips#podcastinterview#soundengineering#musicproduction#engineeringadvice#expertinsights#Youtube
2 notes
·
View notes
Text
Unlock the Full Potential of LALAL.AI for Seamless Audio Editing

LALAL.AI offers powerful audio extraction and enhancement tools. Here are some tips to maximize its capabilities for professional-quality results.
Main Content:
Tip 1: Choose the Right Stem for Extraction Select the specific element you need—vocals, drums, bass, or full instrumentals—for more precise separation.
Tip 2: Use High-Quality Input Files Uploading lossless formats like WAV or FLAC ensures better separation results compared to compressed MP3s.
Tip 3: Leverage Batch Processing Save time by processing multiple audio files simultaneously, especially for larger projects.
Tip 4: Adjust AI Processing Intensity Experiment with LALAL.AI’s strength settings to achieve the perfect balance between separation quality and processing speed.
Tip 5: Enhance Extracted Stems with Post-Processing Apply EQ, reverb, or noise reduction after separation to further refine audio quality.
Visit AIWIKIWEB to know more.
0 notes
Text
Best Microphone Placement Tips for Optimal Sound
Proper microphone placement is crucial to capturing high-quality audio, whether you’re recording in a studio, performing live, or giving a speech. The placement of your microphone can significantly impact the clarity, warmth, and overall sound of your voice or instrument. Below are some essential tips for best microphone placement tips to achieve the best possible results.
1. **Understand the Microphone Type**
- **Dynamic Microphones**: These are great for live performances because they’re durable and less sensitive to background noise. Place them close to the sound source.
- **Condenser Microphones**: These are more sensitive and better for studio recordings. They can capture more detail but require careful placement to avoid picking up unwanted noise.
- **Ribbon Microphones**: Known for their warm, natural sound, these are typically used in studio settings. They are delicate, so handle and place them with care.
2. **Distance from the Sound Source**
- **Vocals**: Place the microphone 6-12 inches from the vocalist’s mouth. Closer placement increases bass response (the proximity effect), which can add warmth but might need balancing with EQ.
- **Instruments**: For string instruments, place the microphone about 6 inches away, aiming it at where the sound resonates most (e.g., the sound hole of a guitar). For brass and woodwinds, place the microphone about 1-2 feet away from the bell or sound source.
3. **Angle and Position**
- **Vocals**: Angle the microphone slightly off-axis (not directly in front of the mouth) to reduce plosive sounds (like “p” and “b” sounds). This also helps in reducing sibilance (harsh “s” sounds).
- **Acoustic Guitar**: Position the microphone near the 12th fret, about 6 inches away, and angle it slightly toward the sound hole for a balanced tone.
- **Drums**: For the snare drum, place the microphone just above the rim, angled towards the center. For the kick drum, position the microphone inside the drum, near the beater, or outside, just in front of the resonant head, depending on the desired sound.
4. **Avoiding Reflections and Feedback**
- **Live Performances**: Keep microphones away from speakers and monitor wedges to prevent feedback. Angle the microphone away from reflective surfaces like walls or hard floors to reduce unwanted echoes.
- **Studio Settings**: Use acoustic treatments like foam panels or bass traps around the microphone to reduce reflections and improve the clarity of the recording.
5. **Use Pop Filters and Windscreens**
- **Pop Filters**: Place a pop filter 2-4 inches in front of the microphone when recording vocals. This reduces plosive sounds and helps maintain a consistent distance between the singer and the microphone.
- **Windscreens**: For outdoor recordings, use a windscreen to reduce wind noise. Position it securely over the microphone, ensuring it doesn’t touch the microphone diaphragm.
6. **Experiment with Placement**
- **Sweet Spot**: Every room and every sound source is different. Don’t be afraid to experiment with microphone placement to find the “sweet spot” where the sound is most balanced and clear.
- **Room Sound**: Consider how much of the room’s natural reverb you want in the recording. Moving the microphone closer to the sound source reduces room noise, while placing it further away can capture more of the room’s ambiance.
7. **Monitor Your Sound**
- **Headphones**: Always monitor your sound with high-quality headphones during setup. This allows you to hear any issues in real-time and adjust the microphone placement accordingly.
- **Sound Check**: Perform a thorough sound check before recording or going live. Walk around the space with your microphone to identify any problem areas, and adjust the placement as needed.
Conclusion
The way you place your microphone can make a significant difference in the quality of your sound. By understanding the type of microphone you’re using, considering distance and angle, and taking the environment into account, you can optimize your microphone placement for any situation. Whether you’re aiming for crisp, clear vocals or a rich, full instrument sound, these tips will help you capture the best possible audio.
#MicrophonePlacement#SoundQuality#AudioTips#RecordingStudio#SoundEngineering#OptimalSound#MusicProduction#PodcastingTips#HomeStudio#AudioRecording
0 notes
Text
Tips for Capturing High-Quality Audio in Video Production
Capturing high-quality audio in video production is essential for professional results. Use a quality microphone, reduce background noise, and monitor audio levels during recording. Position the mic close to the subject and consider using a windscreen or pop filter. Record in a quiet environment and use external audio recorders for better clarity. Follow these tips for capturing high-quality audio in video production to elevate the overall impact of your projects.
0 notes
Text
The Ultimate Guide to Professional Mixing Techniques
🎚️ Level up your #mixingtech game. Discover advanced #audiotips like A/B referencing, dynamics, automation & #parallelprocessing to achieve pro sound. Plus #resources to master #musicmixing! #musicproduction #recording#audiomixing
Professional Mixing Techniques Greetings, fellow audiophiles and music creators! In today’s digital landscape, where music is more accessible than ever, the art of mixing has become a crucial factor in setting your tracks apart from the crowd. Whether you’re a seasoned producer or a bedroom beatsmith, mastering the intricacies of mixing can elevate your sonic masterpieces to unprecedented…

View On WordPress
#A/B referencing#audio engineering#automation#dynamics#loudness#mixing techniques#multi-system monitoring#music mixing#parallel processing
0 notes
Text
#audiotip: Meguiar’s Ultimate Quik Detailer for Speakers

With everyone stuck at home (but hopefully healthy!), I imagine many have some extra time on their hands to play with their systems. I'll be starting a series of #audiotips posts to share tweaks that I've found useful.
My first #audiotip has nothing to do with sound, but caring for glossy finishes on speakers. My @audiovector SR 1 in piano black has a paint job very similar to luxury automobiles, and I've found that Meguiar's Ultimate Quik Detailer spray does an excellent job cleaning and polishing them. On both my car and the speakers, it creates a flawless shine that has just the right amount of depth without appearing too wet or slick. The very gentle cleaning action helps polish out any marks and hairline scratches, and the smell is mild and unobjectionable. The key is to use a high quality, CLEAN microfiber cloth - I like Chemical Guys - and follow the fold-and-flip method that auto detailers espouse.
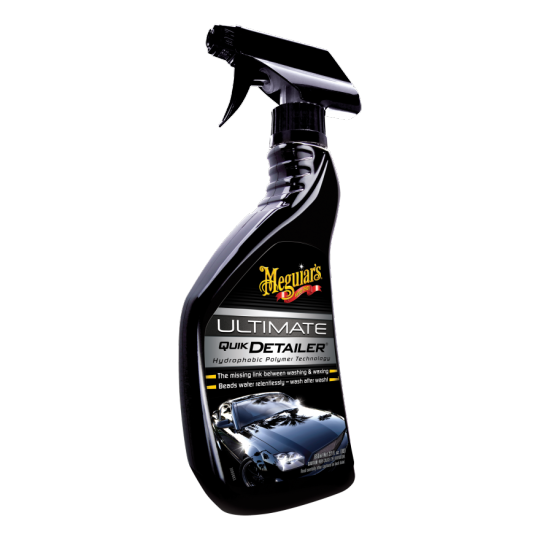
Usual warnings - test carefully on a small inconspicuous area first, use sparingly and infrequently (the treatment should last a year or more, use a every-so-slightly damp microfiber the rest of the time) and make sure to apply it only to the finish areas and not any sensitive components. The spray is available at many auto shops as well as Target, Walmart, Amazon etc., and I got a pack of the microfibers from Amazon to use all around the house. Highly recommended!
1 note
·
View note
Video
youtube
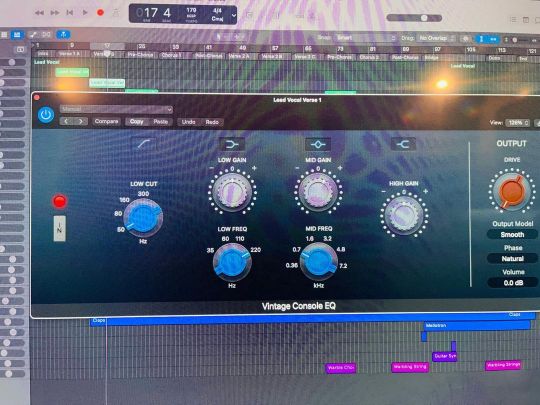
#shorts Visualizza le note sul piano roll di Logic
0 notes
Photo
Our new blog is out ‘What is the effect of #Gain in #Audio’ Read more on our web site blog page https://bonafidestudio.co.uk/what-is-the-effect-of-gain-in-audio/ 02088839641 #audioblog #audiogain #audiotips #audioengineer #studiolife https://www.instagram.com/p/CnrItpSInnU/?igshid=NGJjMDIxMWI=
0 notes
Text
Maximizing Your Audio Projects with Koolio AI

Koolio AI offers a range of features designed to enhance your audio content creation experience. Here are some tips to help you make the most of the platform's capabilities.
Tip 1:
Leverage AI Transcription for Efficient Editing Use the AI-driven transcription feature to convert your audio into text, making it easier to identify and edit specific sections of your content.
Tip 2:
Collaborate in Real-Time Invite team members to join your project within Koolio AI. The platform's virtual playground allows for seamless sharing and collaborative editing, enhancing creativity and efficiency.
Tip 3:
Enhance Audio Quality with Built-In Tools Utilize the audio enhancement features such as equalization and noise reduction to improve the clarity and professionalism of your recordings.
Tip 4:
Add Contextual Sound Effects and Music Incorporate AI-suggested sound effects and background music that align with your content's theme to create a more immersive listening experience.
Tip 5:
Explore Use Cases for Inspiration Visit the 'Use Cases' section on Koolio AI's website to see how others are utilizing the platform for podcasts, audiobooks, and more, sparking ideas for your projects.
Visit AIWIKIWEB to know more.
0 notes
Text
https://www.interestingmusic.us/post/tackling-writer-s-block-creative-songwriting-techniques
Achieving perfect sound quality is the goal of every music producer, sound engineer, and performer. Whether you’re recording in a studio or performing live, audio quality can make or break your work. But even with the best equipment, issues can arise. Here’s a guide to troubleshooting audio quality issues and improving sound quality during recording sessions and live performances.
1. **Identify the Source of the Problem**
Before you can fix an audio issue, you need to identify the source. Audio problems can stem from various places—your equipment, environment, or even your settings.
- **Check Your Signal Chain:** Start by inspecting every part of your signal chain, from the microphone or instrument to the final output. Ensure that all cables are securely connected and that there are no loose connections. A faulty cable or connection is often the culprit behind unwanted noise or dropouts.
- **Test Your Gear Individually:** If you’re not sure where the problem lies, test each piece of equipment individually. This helps isolate the issue, whether it’s a specific microphone, cable, or interface.
- **Environmental Factors:** Sometimes, the environment can introduce noise into your recordings. Background noise, electrical interference, and even the acoustics of your room can affect sound quality. Identifying and mitigating these factors can significantly improve your recordings.
2. **Reduce Background Noise**
Unwanted background noise can be a significant issue during both recording and live performances. Reducing noise at the source is always the best approach.
- **Use Noise Gates:** A noise gate can help eliminate low-level background noise by cutting off the sound when it falls below a certain threshold. This is especially useful in live performances where ambient noise can be unpredictable.
- **Choose the Right Microphone:** Different microphones pick up sound differently. For example, cardioid microphones are great for reducing background noise because they primarily pick up sound from the front. Condenser microphones, while sensitive, can pick up more background noise, so be mindful of your environment when using them.
- **Soundproofing and Acoustic Treatment:** In a recording environment, soundproofing your room and adding acoustic treatment can drastically reduce external noise and improve sound quality. Foam panels, bass traps, and diffusers can help control reflections and echoes.
3. **Avoid Distortion**
Distortion can ruin an otherwise perfect recording or live performance. It usually occurs when your input levels are too high, causing the sound to clip.
- **Monitor Input Levels:** Always keep an eye on your input levels to ensure they stay within a safe range. Most DAWs and mixing consoles have meters that indicate when your signal is peaking. Aim to keep your levels in the green, avoiding the red zone where clipping occurs.
- **Use a Limiter:** A limiter can prevent distortion by capping your signal’s peak level. This is particularly useful during live performances, where unexpected volume spikes can lead to distortion.
- **Adjust Gain Staging:** Proper gain staging—setting the right levels at each point in your signal chain—ensures that your signal is strong enough without being too hot. Start by setting the gain on your microphone or instrument, then adjust the levels on your preamp, interface, and DAW accordingly.
4. **Manage Frequency Balance**
A well-balanced mix is crucial for clarity and impact. Issues with frequency balance can lead to muddy or harsh sound, making your audio less pleasing to the ear.
- **EQ Your Tracks:** Use an equalizer (EQ) to carve out space for each instrument in the mix. For example, cutting unnecessary low frequencies from vocals can prevent them from clashing with the bass or kick drum. Similarly, reducing harsh high frequencies can make your mix sound smoother.
- **Use Reference Tracks:** Comparing your mix to a professionally produced track in a similar genre can help you identify frequency imbalances. Adjust your EQ until your mix sounds balanced and comparable to the reference.
- **Watch Out for Overlapping Frequencies:** Instruments that occupy the same frequency range can cause a cluttered mix. Use EQ to reduce overlapping frequencies and give each element its own space.
5. **Optimize Your Recording Environment**
Your recording environment plays a significant role in sound quality. Poor acoustics can lead to unwanted reflections, reverb, and phase issues.
- **Position Your Microphone Carefully:** The placement of your microphone in the room can affect the sound. Experiment with different positions to find the spot with the least amount of unwanted reflections or reverb. Close miking can also reduce the impact of room acoustics.
- **Use Acoustic Treatment:** As mentioned earlier, acoustic treatment helps control the sound in your recording space. In addition to foam panels and bass traps, consider using diffusers to scatter sound waves and prevent harsh reflections.
- **Record in a Quiet Space:** The quieter your recording space, the better. Turn off fans, air conditioners, and other noise sources, and choose a room away from busy streets or noisy neighbors.
6. **Enhance Clarity with Compression**
Compression is a powerful tool for controlling dynamics and enhancing the clarity of your recordings.
- **Set Your Threshold and Ratio Correctly:** The threshold determines when the compressor kicks in, while the ratio controls how much compression is applied. Start with a gentle ratio (e.g., 2:1) and adjust the threshold until the dynamics are controlled without sounding squashed.
- **Use Parallel Compression:** Parallel compression, also known as New York compression, involves blending a heavily compressed version of a track with the original signal. This technique can add punch and clarity without sacrificing dynamics.
- **Avoid Over-Compression:** While compression is useful, over-compressing can make your mix sound lifeless and flat. Use it sparingly, focusing on enhancing clarity and consistency rather than eliminating all dynamic range.
7. **Test and Adjust in Real-Time**
In live performances, sound quality can be affected by the acoustics of the venue, the PA system, and even the audience. Testing and adjusting in real-time is essential.
- **Perform Sound Checks:** Always conduct a thorough sound check before your performance. Test each microphone, instrument, and monitor to ensure everything sounds clear and balanced. Use this time to identify any potential issues and address them before the show starts.
- **Use In-Ear Monitors:** In-ear monitors (IEMs) allow you to hear yourself clearly during a performance, helping you identify any sound issues as they arise. IEMs also reduce the risk of feedback, which can be a common problem with traditional stage monitors.
- **Have a Backup Plan:** Always have backup equipment on hand in case something goes wrong during a performance. Extra cables, microphones, and even a secondary audio interface can save the day if issues arise.
Conclusion
Achieving perfect sound quality is a combination of preparation, attention to detail, and quick thinking. By identifying and addressing audio issues at their source, managing your recording environment, and using the right tools, you can ensure that your recordings and live performances sound their best. Remember, great sound quality isn’t just about having the best gear—it’s about knowing how to use it effectively to create the best possible audio experience.
#MusicProduction#SoundDesign#SoundEngineering#MusicMixing#RecordingStudio#AudioTips#LiveSound#AudioQuality#SoundTroubleshooting#PerfectSound
0 notes
Photo

Expectativa/Realidad - - #tipsdemezcla #tipsdeproduccion #audiotutorial #sprezmusic #efedep #producerlife #hiphopmusic #hiphopculture #producers💥 #productor #audiotips #hiphop #musicproducers #musicproducer #productormusical - - Https://Sprezmusic.com https://www.instagram.com/p/CFfbTeenpJX/?igshid=zstvanezlnz2
#tipsdemezcla#tipsdeproduccion#audiotutorial#sprezmusic#efedep#producerlife#hiphopmusic#hiphopculture#producers💥#productor#audiotips#hiphop#musicproducers#musicproducer#productormusical
0 notes
Photo

ProAudio Tips, to remove the Evil frequency,do a narrow cut at 666Hz with you favorite equalizer 🤫 . . . . . . . . . . . #Cubase #666 #Proaudio #Audiotips https://www.instagram.com/p/CCtYivviqwo/?igshid=1j5ts9db3gsxb
0 notes
Photo

The @uaudio LA2A has been a game changer for my vocal chain. #audiotips #producerlife #musicengineer
0 notes
Photo

Hey beautiful people! Here is a quick tutorial on how to use the noise reduction feature in Adobe Audition. Yes, I am aware that Premiere Pro has a noise reduction tool. However, I think it is not that great. Let me know it the comment below if this was helpful! #adobecreativecloud #youtuber #youtube #youtubechannel #subscribe #audiotips #videoediting
0 notes
Video
youtube
Mi Curso De Mezcla y Masterizacion (GRATIS) | Como Uso EQs y Efectos En ...#mezcladeaudio #productormusical #produccionmusical #abletonlive #masterizacion #musicproduction #mastering #productoresmusicales #flstudio #homestudio #musica #estudiodegrabacion #beatmaker #producerlife #n #producci #mezcla #nmusical #musictips #ingenierodemezcla #audiomixing #music #djproducer #grabacion #mixing #producer #djproductor #musicproducer #audiotips #audio
0 notes
Text
Maximize Your Audio Projects with Soca AI: Tips and Tricks

Soca AI is a powerful tool for creating voice and audio content, but knowing how to use its features effectively can greatly enhance your results. Here are some tips to optimize your experience with Soca AI.
Tip 1: Clearly Define Your Voice Needs
Explanation: Before starting your project, determine what type of voice solution you need (e.g., dubbing, voice cloning) to guide your use of Soca AI’s features effectively.
Tip 2: Experiment with Voice Cloning
Explanation: Use the voice cloning feature to create unique voice profiles for your projects. This can add a personal touch and enhance engagement.
Tip 3: Utilize the Dubbing Studio
Explanation: Take advantage of the dubbing studio to localize your content easily. Test different languages and accents to find the best fit for your audience.
Tip 4: Regularly Review Audio Quality
Explanation: After generating audio content, listen to it carefully. Adjust settings and regenerate if necessary to ensure the best quality.
Tip 5: Stay Updated with New Features
Explanation: Keep an eye on Soca AI’s updates and new features. Regularly incorporating these can enhance your projects and streamline your workflow.
Implement these tips to optimize your audio projects with Soca AI and enhance your creative process.
Visit aiwikiweb.com/product/soca-ai/
#AudioTips#SocaAI#AI#VoiceTechnology#ContentCreation#Dubbing#DigitalMarketing#CreativeTools#UserExperience#VoiceSolutions
0 notes