#Chroma Key Tutorial
Explore tagged Tumblr posts
Visit Tumblr Blog
Explore Tumblr blogs with no restrictions, modern design and the best experience.
Last Seen Tumblr Blogs


Fun Fact
28.6 is the average number of monthly visits per US mobile user.
Text
Chroma Key Magic: Adding Colorful Flair to Your Holiday Projects with Green Screen by DoInk
Bring your projects to life with a splash of color! In this blog post, we're excited to explore one of the unique features of Green Screen by DoInk that sets it apart from the rest: the ability to chroma key any color (except black or white). Welcome to our video tutorial on leveraging the chroma key feature of Green Screen by DoInk to add colorful flair to your projects. In this tutorial, we'll demonstrate how you can easily chroma key any color to enhance your videos with vibrant elements, such as colorful flowers, bringing your visions to life.
With Green Screen by DoInk, chroma keying any color opens up a world of creative opportunities. So why wait? Dive into the colorful world of chroma keying with Green Screen by DoInk and let your projects shine like never before!
#Green Screen by DoInk#Chroma Key Feature#Colorful Holiday Projects#Adding Colorful Elements to Videos#Chroma Key Tutorial#Creative Video Editing#Vibrant Holiday Celebrations#Festive Video Ideas#Holiday Video Tips#Green Screen Magic#DoInk#Do Ink#How to use DoInk
0 notes
Video
youtube
Hybrid masking tutorial | ADOBE AFTER EFFECTS
#youtube#tutorial#adobe after effects#masking#rotobrushing#watch me edit#beauty and the beast#chroma key#chroma keying
6 notes
·
View notes
Text
youtube
Tribute AMV for Dr. Underfang and Mrs. Natalie Nice/Nautilus.
From TyrannoMax and the Warriors of the Core, everyone's favorite Buzby-Spurlock animated series.
After all, who doesn't love a good bad guy, especially when they come in pairs?
Process/Tutorial Under the Fold.
This is, of course, a part of my TyrannoMax unreality project, with most of these video clips coming from vidu, taking advantage of their multi-entity consistency feature (more on that later). This is going to be part of a larger villain showcase video, but this section is going to be its own youtube short, so its an video on its own.
The animation here is intentionally less smooth than the original, as I'm going for a 1980s animated series look, and even in the well-animated episodes you were typically getting 12 FPS (animating 'on twos'), with 8 (on threes) being way more common. As I get access to better animation software to rework these (currently just fuddling along with PS) I'm going to start using this to my advantage by selectively dropping blurry intermediate frames.
I went with 12 since most of these clips are, in the meta-lore, from the opening couple of episodes and the opening credits, where most of the money for a series went back in the day.
Underfang's transformation sequence was my testing for several of my techniques for making larger TyrannoMax videos. Among those was selectively dropping some of the warped frames as I mentioned above, though for a few shots I had to wind up re-painting sections.
Multi-entity consistency can keep difficult dinosaur characters stable on their own, but it wasn't up to the task of keeping the time-temple accurate enough for my use, as you can see here with the all-t-rex- and-some-moving-statues, verses the multi-species effort I had planned:


The answer was simple, chroma-key.


Most of the Underfang transformation shots were done this way. The foot-stomp was too good to leave just because he sprouted some extra toes, so that was worth repainting a few frames of in post.


Vidu kind of over-did the texturing on a few shots (and magenta was a poor choice of key-color) so I had to go in and manually purple-ize the background frame by frame for the spin-shot.
This is on top of the normal cropping, scaling, color-correcting, etc that goes into any editing job of this type.

It's like I say: nearly all AI you see is edited, most of it curated, even the stuff that's awful and obvious (never forget: enragement is engagement)
Multi-Entity Consistency:

Vidu's big advantage is reference-to-video. For those who have been following the blog for awhile, R2V is sort of like Midjourney's --cref character reference feature. A lot of video AIs have start-end frame functionality, but being able to give the robot a model sheet and effectively have it run with it is a darn nice feature for narrative.
Unlike the current version of Midjourney's --cref feature, however, you can reference multiple concepts with multiple images.
It is super-helpful when you need to get multiple characters to interact, because without it, they tend to blend into each other conceptually.
I also use it to add locations, mainly to keep them looking appropriately background-painting rather than a 3d background or something that looks like a modded photo like a lot of modern animation does.
The potential here for using this tech as a force multiplier for small animation projects really shines through, and I really hope I'm just one of several attempting to use it for that purpose.
Music:
The song is "The Boys Have a Second Lead Pipe", one of my Suno creations. I was thinking of using Dinowave (Let's Dance To) but I'm saving that for a music video of live-action dinosovians.
Prompting:
You can tell by the screenshot above that my prompts have gotten... robust. Vidu's prompting system seems to understand things better when given tighter reigns (some AIs have the opposite effect), and takes information with time-codes semi-regularly, so my prompts are now more like:
low-angle shot, closeup, of a green tyrannosaurus-mad-scientist wearing a blue shirt and purple tie with white lab coat and a lavender octopus-woman with tentacles growing from her head, wearing a teal blouse, purple skirt, purple-gray pantyhose. they stand close to each other, arms crossed, laughing evilly. POV shot of them looming over the viewer menacingly. The background is a city, in the style of animation background images. 1986 vintage cel-shaded cartoon clip, a dinosaur-anthro wearing a lab coat, shirt and tie reaches into his coat with his right hand and pulls out a laser gun, he takes aim, points the laser gun at the camera and fires. The laser effect is short streaks of white energy with a purple glow. The whole clip has the look and feel of vintage 1986 action adventure cel-animated cartoons. The animation quality is high, with flawless motion and anatomy. animated by Tokyo Movie Shinsha, studio Ghibli, don bluth. BluRay remaster.
While others approach the scripted with time-code callouts for individual actions.
#Youtube#tyrannomax and the warriors of the core#unreality#tyrannomax#fauxstalgia#Dr. Underfang#Mrs. Nautilus#Mrs. Nice#80s cartoons#animation#ai assisted art#my OC#vidu#vidu ai#viduchallenge#MultiEntityConsistency#ai video#ai tutorial
23 notes
·
View notes
Note
Your art style is sooo pretty i recently saw your dst oc art and is super curious how you do the little animation and how you emulate the dst art style so well if you don't mind answering :D!!!
Tutorial for Animation/Art
Hi thanks for asking!! Here I will provide you a small tutorial for both, although it WILL be messy because I can't do tutorials to save my life and I tried to keep it as brief as possible! Although if it remains unclear or other users still have questions (about either the whole thing or certain aspects) I won't mind making full videos where I tackle everything step by step. :P
I will begin with how I make the gifs and then I will repost with a small guide to the artstyle because this is my FIFTH attempt at posting the entire thing and tumblr says no... ALSO ORIGINALLY THE VIDEO WAS SPLIT IN GIFS FOR EACH STEP BUT TUMBLR DOESN’T WANT THAT EITHER, I FEEL ANGER
(LONG THREAD BELOW, PROCEED WITH CAUTION /j)
Animation
Oh boy here we go again
——————————————————————————
1. As an example, here I have the animation I did for Sky's introduction. So basically what I do is draw whatever I desire to animate in different layers, in this case I drew the arms holding the headphones on a different layer above the body, fairly simple. I use IbisPaint X by the way!
2. Then I save the parts separately and move onto the animation bit, I previously used CapCut for animation too but now I use Alight Motion and I crop out the watermark.
!! On the first example I used a green screen so I can add the animation onto the background, but this may not work if your animation itself contains green or a similar color, so be mindful of the palette used on your art. !!
3. Once the animation is exported, I place it on the background along with added assets, effects, etc. To remove the background from the animation, you'll have to use the chroma key feature.
4. AND LASTLY, I use my precious website EzGif to turn it into a gif, and don't worry if the gif is too large in size, for this website has an optimisation feature that allows you to fix that issue (and if it doesn't work I just go on other optimisation websites lol).
——————————————————————————
Here’s the video, just a showcase of each step! No explanation in them.
10 notes
·
View notes
Text
Udaipur Motion Graphics and Green Screen Compositing: Changing Graphic Narrative
Introduction
In today’s digital age, visuals are everything. Whether it’s a business ad, a creative short film, or an engaging social media post, high-quality visuals grab attention and make content more compelling. And in a city as rich in culture and creativity as Udaipur, motion graphics and green screen compositing are redefining the way stories are told.
If you’re a business owner, content creator, or someone looking to explore the world of motion graphics and green screen compositing in Udaipur, this guide will walk you through everything you need to know.
What is Motion Graphics?
Motion graphics is simply graphic design in motion. It blends text, images, and animations to create dynamic visuals that communicate messages effectively. You see motion graphics in everything—from logo animations and explainer videos to infographics and digital advertisements.

Why Motion Graphics Matter?
✔ Engages Your Audience: People are more likely to watch a video with animations than read long paragraphs. ✔ Simplifies Complex Ideas: Motion graphics break down complicated information into digestible visuals. ✔ Enhances Brand Identity: A unique motion graphic style can make your brand stand out.
Understanding Green Screen Compositing
Ever watched a movie where a character is standing in a futuristic city or floating in space? That’s green screen compositing at work! This technique, also known as chroma keying, allows you to replace a green background with any image or video.
Green screen compositing isn’t just for Hollywood—it’s widely used in corporate videos, news broadcasts, product photography, and even social media content. In Udaipur, businesses and creators are leveraging green screen technology to create visually stunning content without the need for expensive locations or setups.
How Green Screen Compositing Works?

Where Can You Use Green Screen?
✅ Corporate & Marketing Videos – Create professional backgrounds for interviews or product showcases. ✅ YouTube & Social Media – Make engaging videos with dynamic settings. ✅ Advertising & Promotions – Add motion graphics to enhance visual appeal.
The Magic of Combining Motion Graphics and Green Screen Compositing
When motion graphics and green screen compositing come together, the results are next-level visuals. Imagine a speaker presenting data while animations pop up around them or a local brand placing their spokesperson in multiple locations without ever leaving the studio.
This combination allows creators in Udaipur to produce world-class content without a Hollywood budget. Whether it's a promotional video, an educational tutorial, or an immersive product demo, these tools make content more professional, engaging, and visually captivating.
Learning Motion Graphics and Green Screen in Udaipur
If you’re excited about getting into motion graphics and green screen compositing, there are several learning opportunities in Udaipur. Many local training institutes and online platforms offer courses on video editing, animation, and compositing.
Where to Learn: 🎨 Arena Animation Udaipur – Offers specialized courses on motion graphics and VFX. 📹 Online Platforms – Websites like Udemy, Skillshare, and LinkedIn Learning have great tutorials. 🏫 Workshops & Studios – Some digital media agencies provide hands-on training.
Finding Professional Motion Graphics & Green Screen Services in Udaipur
Not everyone has the time or expertise to create high-quality motion graphics or green screen effects. Luckily, Udaipur is home to several talented digital media agencies that specialize in these services.

Why Choose Rydon Digital?
✔ Expertise in Motion Graphics & VFX – Professional team with industry experience. ✔ Customized Solutions – Tailor-made videos for businesses, influencers, and brands. ✔ Advanced Editing Tools – Uses the latest software for seamless green screen effects.
How Motion Graphics and Green Screen Are Helping Udaipur Businesses?
With digital content being the backbone of modern marketing, businesses in Udaipur are using motion graphics and green screen compositing to step up their branding.
💼 Local Startups & Businesses – Create eye-catching ads that attract customers. 📢 Event & Wedding Planners – Add creative visual effects to promotional videos. 🎥 Filmmakers & Content Creators – Make high-quality videos without expensive setups. 🎭 Artists & Musicians – Create animated music videos and artistic projects.
For any business looking to enhance its digital presence, motion graphics and green screen compositing in Udaipur are the way forward.
The Future of Visual Content in Udaipur
As technology evolves, the demand for high-quality video content is only increasing. Virtual Reality (VR) and Augmented Reality (AR) are the next big things, and they rely heavily on motion graphics and compositing techniques.
For anyone in Udaipur—whether you’re a business, a content creator, or a digital enthusiast—now is the best time to dive into these exciting visual storytelling techniques.
Final Thoughts
Motion graphics and green screen compositing aren’t just fancy effects; they’re powerful storytelling tools. Whether you want to create professional marketing videos, stunning advertisements, or engaging social media content, these techniques help bring your vision to life.
With companies like Rydon Digital offering expert services, and various learning opportunities available in Udaipur, getting started has never been easier.
So, are you ready to take your visual content to the next level? 🚀
4o
Unlock more with Plus
ChatGPT Plus gives you higher limits, smarter models, and Sora for video.
Get Plus
#branding#infographic#graphic design#ecommerce#logo design#editorial design#GREEN SCREEN VIDEO EDITIING
0 notes
Text
X-Ray Video Hacks, Mic Secrets & Stunning Star Pics Await!
I’ve been having a blast testing gadgets, crafting cool video effects, and even chasing stars with my phone—and I’m excited to share it all with you! This week, you’ll find my latest product reviews, a fun X-ray effect tutorial, and a guide to capturing the night sky. Let’s get started!
How to Create an X-Ray Effect with Your Phone (CapCut Tutorial)
Want your phone to “see” through objects like a sci-fi gadget? Here’s a quick CapCut trick:
Fill your phone screen with a solid green color.
Record yourself “scanning” a box with the green screen displayed.
Remove the box, place an object in the same spot, and record a few seconds without moving the camera.
Open CapCut, start a new project, and import your recording.
Move the timeline to where the scan ends, then split the clip.
Select the scanning clip, tap “Overlay,” and go to “Remove BG > Chroma Key.”
Use the color picker to select green, confirm, and trim the clips to sync perfectly.
Result: A seamless “see-through” effect! Want the green screen file? Reply with “green,” and I’ll send you the link! Watch the full tutorial: https://youtube.com/shorts/Fy3AkKQgmTA?si=49Fm6YLddUG8C3HB
How to Use a Wireless Microphone with Your Android Phone
I’ve been testing the Hollyland Lark M2S wireless mic—designed for creators who want clear audio and a mic that is easy to hide. Here’s how it works:
Plug the Type-C receiver into your phone’s USB-C port.
Take out a wireless mic—it connects automatically (no Bluetooth, no app!).
Clip it to your shirt, small circle facing out, and keep it within 6 inches of your mouth for crisp sound.
Bonus Features: - Charge your phone while recording. - Press the orange button to cut background noise.
Want more details? Reply “yes”! Or get yours here... https://vt.tiktok.com/ZSMQhHK9y/ See it in action: https://www.tiktok.com/@adrianvideoimage/video/7476021471286955272
How I Captured Stars and Planets with My Samsung Phone
I finally nailed astrophotography with my Samsung Galaxy S22 Ultra! Here’s how:
Open the camera app, go to “More > Expert Raw” (update if needed).
Tap the Astrophotography icon (constellation symbol).
Enable “Show in Sky Guide” and set Capture Time to “Short.”
Mount your phone on a tripod, aim at a star or planet, and hit the shutter.
Wait a few seconds—bam, a stellar shot!
Editing Tweaks:
Exposure: -50
Highlights: +100
Sharpness: +50 This darkens the sky and makes stars pop!

Level up your videos with eye-catching visual effects and smooth transitions. Check out my latest Smartphone Videography and Video Editing Course here... https://www.inspizone.com/wsq-smartphone-videography-video-editing-course/
Got questions or ideas? Hit reply—I’d love to chat. Until next time, keep creating and exploring!
~ Adrian Lee @adrianvideoimage Helping creators turn content into cash—strategically.
Enjoying these tips? Support me with a coffee! 🍵 Buy me a coffee (tip) here... https://adrianlee.gumroad.com/coffee
0 notes
Text
Unlocking the Power of Adobe After Effects: A Creative's Dream Tool
Adobe After Effects is a game-changer for designers, animators, and video editors. This software opens up a world of possibilities for visual effects (VFX) and motion graphics, empowering creatives to bring their ideas to life in stunning, cinematic ways. Whether you're working on a Hollywood blockbuster, a YouTube tutorial, or an artistic project, After Effects is the perfect tool to enhance your content. Let’s dive into its many features and see how it can elevate your creativity.
What Makes Adobe After Effects Stand Out?
Adobe After Effects stands as the industry standard when it comes to creating motion graphics, VFX, and compositing. Its versatility and wide range of tools make it a go-to software for anyone looking to push the boundaries of visual storytelling. After Effects is designed for professionals and newcomers alike, offering intuitive interfaces and advanced capabilities to cater to all skill levels.
Powerful Motion Graphics
After Effects is known for its ability to create stunning motion graphics. Whether you’re animating text, graphics, or illustrations, the possibilities are endless. With powerful features like keyframing, easing, and path animation, you can easily control the movement and style of elements. It’s the perfect platform to design dynamic and eye-catching animations.
Advanced Visual Effects (VFX)
For those working with video, After Effects excels in adding breathtaking visual effects. Whether you're creating explosions, integrating CGI elements, or enhancing color grading, After Effects provides the necessary tools to make your footage look professional. It supports 3D compositing, chroma keying (green screen), and advanced tracking, all crucial for seamless VFX work.
Seamless Integration with Other Adobe Products
One of the strongest features of Adobe After Effects is its smooth integration with other Adobe Creative Cloud tools like Adobe Premiere Pro, Photoshop, and Illustrator. This interconnectivity ensures that your workflow remains efficient. You can easily import assets from Photoshop or Illustrator, and the round-trip workflow with Premiere Pro allows for seamless video editing, giving you a cohesive creative process.
Why Adobe After Effects is Essential for Creators
Enhance Your Videos with Stunning Animations
For video creators, After Effects is essential for creating engaging animations. Whether you're designing intros, lower thirds, transitions, or visual storytelling elements, After Effects makes it easy to take your videos to the next level. Its powerful tools allow you to manipulate and animate objects with precision, creating content that stands out.
Create Professional-Grade VFX
With After Effects, you can turn your footage into something extraordinary. Advanced features like 3D camera tracking and particle simulations allow you to add realistic effects that blend perfectly with your video. Whether you’re working on sci-fi, fantasy, or dramatic sequences, After Effects makes it possible to achieve stunning results.
Edit and Composite Like a Pro
After Effects is not just for animators; it’s also a powerful compositing tool. You can layer multiple video clips, apply masks, and create complex composites that blend perfectly with each other. For professional video editors, After Effects provides the tools needed to fine-tune every detail, making your video look polished and seamless.
Getting Started with Adobe After Effects
Easy-to-Learn for Beginners
While After Effects offers a range of complex features, it is also beginner-friendly. Adobe offers a wealth of tutorials, templates, and resources to help you get started. The software’s interface is intuitive, allowing you to quickly learn the basics and gradually explore more advanced techniques as you gain experience.
Expansive Community and Resources
After Effects has a vast community of users, which means a wealth of tutorials, forums, and plug-ins are available to help you learn and grow as a creative. Whether you need advice on a specific effect or want to learn how to speed up your workflow, you’ll find resources and support within the After Effects community.
0 notes
Text
How to Delete Background from Videos and Add a New Background via CLI

This is my IT tutorials blog. I plan to target the USA and need your help generating traffic/backlinks. Based on the results of this, I might engage more services
In the era of digital media, creating professional-looking videos has become more accessible than ever. One of the most sought-after features for video editing is the ability to delete video background. Whether you're a content creator, social media influencer, or marketer, the ability to seamlessly remove or replace backgrounds can elevate the quality of your videos. This process is commonly known as background removal or video compositing, and it involves isolating the subject from the background, allowing you to place them in a different setting or environment.
Removing the background from a video was once an expensive and time-consuming task that required advanced skills and high-end software. However, thanks to advancements in technology and AI-powered tools, this process has become more streamlined and accessible to everyone. In this comprehensive guide, we'll walk you through various methods to delete video background, the benefits of doing so, and the tools that make it possible.
Why Remove a Video Background?
There are several reasons why you might want to remove the background from your video:
Creative Freedom: Removing the background gives you the ability to place your subject in any environment, whether it's a professional backdrop, an animated setting, or an entirely different scene.
Cleaner Aesthetics: A cluttered or distracting background can take away from the message you're trying to convey. Removing the background helps ensure that the viewer's focus is solely on the subject.
Professional Quality: Background removal is commonly used in film, marketing, and advertising to create polished and professional-looking videos. It gives your content a more refined, high-quality appearance.
Virtual Environments: Many businesses and influencers use background removal to create virtual meetings or live streams where the background can be customized or removed entirely, giving a sleek, professional appearance.
Methods to delete video background
Chroma Keying (Green Screen): One of the most traditional and popular methods for deleting video backgrounds is chroma keying. This technique involves filming the subject in front of a green or blue screen, which can easily be replaced with any other background using video editing software. Chroma keying works best when there's a clear contrast between the background and the subject, and it requires lighting control to avoid shadows on the screen.
AI-Powered Tools: In recent years, AI technology has revolutionized video editing by allowing for automatic background removal without the need for a green screen. AI-powered tools can detect the subject in a video, separate it from the background, and remove or replace the background with incredible precision. These tools are often user-friendly, making it easier for beginners to edit their videos with minimal effort.
Manual Video Editing: Some advanced video editors prefer a more hands-on approach using tools like the pen tool or rotoscoping to manually cut out the subject frame by frame. This method can be time-consuming, but it offers precise control, especially for complex scenes or where the background is not uniform in color.
Online Video Background Removers: Several online platforms offer easy-to-use video background removal services. With these platforms, you simply upload your video, and the tool automatically identifies and removes the background. These tools are ideal for users who need quick results without the steep learning curve of professional software.
Popular Tools for Video Background Removal
Adobe Premiere Pro: Premiere Pro is one of the leading video editing software solutions used by professionals worldwide. It features advanced chroma keying capabilities, as well as other tools like masking and rotoscoping, for high-quality background removal.
Final Cut Pro: For Mac users, Final Cut Pro offers similar functionality as Premiere Pro, with powerful chroma keying tools and AI-based background removal features.
Camtasia: Camtasia is known for its simplicity and ease of use, making it a great option for beginners. While it doesn't offer the advanced features of Premiere Pro, it includes basic tools for background removal, particularly with green-screen footage.
Remove.bg: This AI-powered online tool is famous for automatically removing backgrounds from images, and now it also supports video background removal. It's incredibly user-friendly, with a fast processing time, making it ideal for quick projects.
Descript: Descript is an online platform offering AI-powered video editing, including automatic background removal. It allows for seamless editing, perfect for creators looking to streamline their workflow.
Benefits of Removing Video Backgrounds
Improved Focus on Content: By removing distracting elements in the background, you ensure that your audience's attention is directed to the subject and message of the video.
Enhanced Creativity: With a clean background, you can place your subject in virtually any environment, whether real or virtual, providing endless creative possibilities.
Increased Professionalism: Clean, background-free videos appear more polished and professional, improving the overall quality of your content.
Increased Engagement: Videos with dynamic or visually appealing backgrounds can enhance viewer engagement, making your content more attractive and memorable.
Final Thoughts
Whether you're creating content for YouTube, social media, a corporate video, or any other project, the ability to delete or replace the background in your videos is a game-changer. With a wide variety of tools and techniques available, you can easily achieve professional results without needing expensive equipment or years of experience.
By choosing the right delete video background removal method and tool for your project, you can unlock new creative potential and elevate your video content to the next level. So, explore the possibilities, and take advantage of the amazing advancements in video editing technology to bring your vision to life.
0 notes
Video
vimeo
Traditional Photo Album Motion Design from Antony Parker on Vimeo.
✔️ Get it here: templatesbravo.com/vh/item/traditional-photo-album/53692428
22 Raw Footages Easy to use UHD 3840×2160 No plugin needed 180+ sec Footage (raw) 30 fps Classic / Traditional Photo Album Old photo album pages Well organized After Effects 2023 and above Chroma Keyed and tracked Video Tutorial included
Rate us if you liked the project.
0 notes
Text
youtube
How to Create a Green Screen Photo in DoInk
Creating a green screen photo using the DoInk app is a such a quick and easy process. DoInk is often used by educators and content creators to make the most professional and realistic looking images with green screen effects. Here's a step-by-step video on how to create a green screen photo with the DoInk app!
#DoInk App Tutorial#Green Screen Photography#Chroma Key Tutorial#Green Screen Effects#iOS Green Screen#Green Screen Editing#Green Screen Techniques#Green Screen Tips#DoInk Green Screen Tutorial#DIY Green Screen#Green Screen How-To#Green Screen Setup#iOS Photo Editing#Green Screen Video#Special Effects Tutorial#Mobile Green Screen#Video Editing Apps#Green Screen Overlay#Keying in DoInk#Creating Transparent Backgrounds#Easy Green Screen Tutorial#Green Screen for Beginners#iOS Content Creation#Youtube
0 notes
Text
Green Screen Studio Hire: A Gateway to Unlimited Creativity
Green screen studio have revolutionized the way we create and capture visuals, offering incredible flexibility and creative possibilities for filmmakers, photographers, content creators, and marketers. Whether you're working on a film, a music video, a product advertisement, or any other creative project, a green screen studio can be the key to transforming your ideas into reality. In this article, we'll explore the numerous benefits of hiring a green screen studio and how it can take your creative projects to the next level.
What is a Green Screen Studio?
A green screen studio is a controlled environment where a green-colored backdrop is used to replace or "key out" the background in post-production. This technique, known as chroma keying, allows you to insert any digital image or video behind the subject, providing endless possibilities for visual storytelling. From realistic environments like beaches or cityscapes to fantastical worlds or animations, green screens enable you to create almost any setting you can imagine.
Advantages of Hiring a Green Screen Studio
1. Limitless Background Options
One of the most exciting features of a green screen studio is the ability to place your subjects in virtually any environment. Whether you're shooting a scene for a science fiction film, a corporate promotional video, or a music video, you can replace the green background with a digital scene that complements your narrative. The flexibility of background replacement opens up infinite creative possibilities, making green screen technology a game-changer for any project.
2. High-Quality Equipment for Seamless Integration
Green screen studios come equipped with professional-grade lighting setups, cameras, and green screen backdrops that ensure optimal conditions for the chroma key process. Proper lighting is essential to eliminate shadows and create a uniform green color, allowing for a clean keying process in post-production. Studios specializing in green screen rentals use high-end equipment, ensuring that the process is as seamless as possible, resulting in crisp and realistic images.
3. Cost and Time Efficiency
Building complex sets or shooting on location can be time-consuming and expensive. By hiring a green screen studio, you can avoid the hassle of creating physical sets or traveling to multiple locations. Everything you need, including lighting and backdrop, is provided within the studio, allowing you to shoot multiple scenes in a controlled and efficient manner. The ability to replace backgrounds digitally means you can shoot all your footage in one place, reducing production time and costs.
4. Ideal for a Wide Range of Projects
Green screen studios are versatile and can be used for various types of content, from films and TV shows to corporate videos, online tutorials, YouTube content, and advertisements. If you need to add special effects or insert realistic backgrounds that would be hard or expensive to achieve in real life, a green screen is the perfect solution. It’s also ideal for creating virtual events, webinars, and interactive content, where the subject can appear to be in multiple locations or environments without leaving the studio.
5. A Professional Environment for Collaboration
Green screen studios often provide a professional and collaborative setting, where you can work alongside a team of experts, including directors, cinematographers, makeup artists, and post-production specialists. Many studios also offer on-site editing facilities and visual effects (VFX) support, making it easier to complete your project from start to finish in one location. The studio environment fosters collaboration, allowing you to get the most out of your team and bring your vision to life.
Why Choose a Green Screen Studio?
Hiring a green screen studio gives you access to an environment designed specifically for high-quality video production. Whether you're creating an animated background, shooting a product demo, or producing a special effects-heavy music video, a green screen studio allows you to achieve professional results without the limitations of traditional locations. The combination of top-notch equipment, controlled lighting, and a customizable backdrop makes a green screen studio an invaluable asset for any production.
Moreover, the flexibility and time-saving nature of using a green screen means you can focus on the creative aspects of your project, knowing that the technical aspects are being taken care of. You’ll have the freedom to experiment with different environments and scenes, ultimately making your content more engaging and visually striking.
0 notes
Text
KineMaster Premium: Features Breakdown and Why It’s Worth the Subscription
In the digital age, creating visually stunning videos has become an essential skill, whether you’re a content creator, a social media enthusiast, or a business professional. Among the myriad of video editing tools available, KineMaster stands out as one of the most versatile and user-friendly apps for both beginners and experienced editors. While its free version offers impressive features, KineMaster Premium takes the experience to a whole new level.
In this blog, we’ll dive deep into the features of KineMaster Premium, how it enhances video editing, real-world examples of projects it empowers, and a price comparison with other professional tools.
1. Features Overview: What Does KineMaster Premium Offer?
The free version of KineMaster provides a solid foundation for video editing, but it comes with limitations such as watermarked exports and restricted access to advanced features. Upgrading to KineMaster Premium unlocks a suite of tools designed for professional-grade video editing.
a) No Watermark
One of the most significant perks of KineMaster Premium is the removal of the watermark. For content creators and businesses, having a clean, unbranded video is crucial for maintaining professionalism and brand integrity.
b) Access to Premium Assets
Subscribers gain full access to the KineMaster Asset Store, which includes:
Royalty-free music: A library of background tracks for various moods and themes.
Transitions and effects: Dynamic transitions, filters, and effects to elevate your videos.
Stickers and fonts: Creative elements for titles, captions, and animations.
c) Advanced Editing Tools
Chroma Key: Create green screen effects for blending multiple video layers.
Blending Modes: Adjust opacity and layer blending for cinematic effects.
4K Export at 60FPS: Export high-resolution videos with smooth frame rates for professional-quality output.
Reverse and Speed Control: Add creative twists with reverse playback and custom speed adjustments.
d) Unlimited Export and Sharing
Unlike the free version, which restricts export options, KineMaster Premium offers unlimited exports and direct sharing to social media platforms like YouTube, Instagram, and TikTok.
2. How These Features Enhance Video Editing
KineMaster Premium is designed to make video editing intuitive yet powerful. Here’s how its features provide an edge over the free version:
a) Improved Professionalism
The absence of a watermark ensures that your videos look polished and professional. Whether you’re creating promotional content, tutorials, or personal projects, a clean video reflects credibility.
b) Creative Freedom
With access to a vast library of effects, transitions, and audio tracks, KineMaster Premium allows you to bring your creative vision to life. These assets save time and eliminate the need for external downloads.
c) Enhanced Efficiency
Features like Chroma Key and Blending Modes eliminate the need for multiple software applications. You can achieve advanced effects directly within the app, streamlining your workflow.
d) High-Quality Outputs
Support for 4K resolution ensures your videos remain crisp and visually stunning, even on larger screens. This is especially beneficial for professional projects, such as product demos or cinematic trailers.
3. Real-Life Applications: How KineMaster Premium Elevates Projects
To illustrate its impact, here are some real-world scenarios where KineMaster Premium excels:
a) Content Creators on YouTube and TikTok
For YouTubers, the ability to create unique transitions and add music directly from the Asset Store simplifies video production. TikTokers can experiment with fast-paced edits, reverse effects, and speed controls to create engaging, viral-worthy content.
Example: A YouTuber in the beauty niche can use KineMaster Premium to add elegant transitions between makeup tutorials, overlay captions with custom fonts, and blend background music seamlessly.
b) Small Businesses and Marketing Campaigns
Small businesses often require high-quality videos for product promotions, but hiring professionals can be expensive. KineMaster Premium empowers business owners to create professional-grade ads and social media posts at a fraction of the cost.
Example: A café owner could film a short ad showcasing their new menu, adding text overlays, music, and slow-motion effects to captivate the audience.
c) Educational Content
Teachers and educators can use KineMaster Premium to create visually appealing video lessons. Features like text animations, transitions, and multi-layer editing help make complex topics engaging and understandable.
Example: An online instructor can use Chroma Key to create interactive science lessons, blending videos with graphics and diagrams for a dynamic learning experience.
4. Price Comparison: Is KineMaster Premium Worth It?
KineMaster Premium is competitively priced, making it accessible to a wide audience. Here’s a comparison with other popular tools:
ToolPrice (Monthly)Key FeaturesKineMaster Premium$4.99 — $5.99Full asset library, watermark removal, 4K exportAdobe Premiere Rush$9.99Cloud syncing, cross-platform editingFilmoraGo$5.99Templates, transitions, basic effectsLumaFusion (iOS)One-time $29.99Advanced editing tools, LUTs, multi-track editing
Why KineMaster Premium Stands Out
Affordability: At $4.99 per month, KineMaster Premium offers excellent value for money compared to higher-priced competitors.
Ease of Use: Unlike more complex software like Adobe Premiere Rush, KineMaster is beginner-friendly while still offering advanced features.
Mobile-first Design: Tailored for smartphones, it’s perfect for on-the-go editing.
5. Conclusion: The Case for KineMaster Premium
For anyone serious about video editing, KineMaster Premium is a worthy investment. Its features cater to diverse needs, from creating professional marketing content to producing stunning personal projects.
While the free version of KineMaster is great for basic editing, the premium subscription unlocks the full potential of the app, enabling users to elevate their videos to new heights. Compared to its competitors, KineMaster Premium strikes the perfect balance between affordability, functionality, and ease of use.
If you’re ready to take your video editing skills to the next level, consider trying KineMaster Premium. With its powerful tools and user-friendly interface, it’s an investment that pays off in every frame.
0 notes
Text
Multimedia Course in Delhi.
https://picklesanimation.in/
Creating a "Best Animation Campus" course involves designing a curriculum that covers a wide range of topics and skills necessary for students to excel in the field of animation. This course outline includes fundamental principles, advanced techniques, and professional practices to ensure a comprehensive education.
Best Animation Campus Course Outline
Module 1: Introduction to Animation
Overview of Animation
History of animation
Types of animation (2D, 3D, stop-motion, etc.)
Applications in various industries (film, television, video games, advertising)
Fundamentals of Animation
The 12 principles of animation
Basic animation techniques and workflows
Animation Software Introduction
Overview of popular animation software (Toon Boom, Adobe Animate, Autodesk Maya, Blender)
Installing and setting up software
Module 2: Drawing and Design for Animation
Basic Drawing Skills
Understanding shapes, forms, and perspective
Gesture drawing and anatomy
Character Design
Creating original characters
Designing characters with personality and appeal
Environment and Background Design
Creating dynamic backgrounds and settings
Understanding perspective and composition
Module 3: 2D Animation
Traditional 2D Animation Techniques
Frame-by-frame animation
Timing and spacing
Digital 2D Animation
Using digital tools for 2D animation
Rigging and animating 2D characters
Advanced 2D Animation Techniques
Lip-syncing and facial expressions
Special effects in 2D animation
Module 4: 3D Animation
3D Modeling Basics
Creating and manipulating 3D models
Understanding topology and mesh flow
Rigging and Skinning
Creating a rig for 3D characters
Binding models to skeletons and weight painting
3D Animation Principles
Keyframe animation
Using the graph editor for smooth animations
Advanced 3D Animation
Character animation and walk cycles
Animating complex scenes and interactions
Module 5: Storytelling and Storyboarding
Storytelling in Animation
Elements of a good story
Writing scripts for animation
Storyboarding Techniques
Creating effective storyboards
Visual storytelling and pacing
Animatics
Creating animatics from storyboards
Timing and refining the story
Module 6: Visual Effects (VFX) and Compositing
Introduction to VFX
Types of visual effects
VFX software overview (After Effects, Nuke)
Creating Visual Effects
Particle systems, dynamics, and simulations
Green screen and chroma key techniques
Compositing Techniques
Layering and blending elements
Color correction and grading
Module 7: Sound Design and Music for Animation
Sound Design Basics
Importance of sound in animation
Recording and editing sound effects
Music for Animation
Composing music for different scenes
Synchronizing music with animation
Voice Acting and Dialogue
Recording and editing voiceovers
Lip-syncing techniques
Module 8: Professional Practices and Portfolio Development
Project Management in Animation
Planning and organizing animation projects
Working in teams and collaboration
Industry Insights and Trends
Understanding the animation industry
Keeping up with current trends and technologies
Creating a Professional Portfolio
Selecting and presenting work
Building a demo reel
Career Development
Job search strategies
Networking and professional development
Additional Resources
Recommended Reading
"The Animator's Survival Kit" by Richard Williams
"Animation: The Mechanics of Motion" by Chris Webster
Online Tutorials and Courses
LinkedIn Learning
Coursera
Udemy
Course Delivery
Lectures and Demonstrations
Hands-On Projects
Peer Reviews and Critiques
Guest Lectures from Industry Professionals
Assessment and Evaluation
Quizzes and Tests
Project Submissions
Final Portfolio Review
This course structure aims to provide students with a comprehensive education in animation, covering essential technical skills, creative techniques, and professional practices to ensure they are well-prepared for a successful career in the animation industry.
Multimedia Course content picklesanimation ChatGPT
Creating a comprehensive multimedia course involves designing a curriculum that covers various aspects of multimedia, including graphic design, web design, video production, animation, and interactive media. Below is a detailed course outline that provides students with the skills and knowledge needed to excel in the field of multimedia.
Multimedia Course Outline
Module 1: Introduction to Multimedia
Overview of Multimedia
Definition and scope of multimedia
History and evolution of multimedia
Applications in various industries (advertising, entertainment, education, etc.)
Elements of Multimedia
Text, images, audio, video, and animation
Integrating multimedia elements
Multimedia Tools and Software
Overview of popular multimedia software (Adobe Creative Suite, Final Cut Pro, Blender)
Installing and setting up software
Module 2: Graphic Design
Principles of Graphic Design
Design elements (line, shape, color, texture, space, form)
Design principles (balance, contrast, emphasis, rhythm, scale, harmony)
Typography
Basics of typography
Choosing and pairing fonts
Creating readable and aesthetically pleasing text
Image Editing
Using Adobe Photoshop and Illustrator
Photo editing and manipulation
Creating digital illustrations
Layout Design
Creating layouts for print and digital media
Using grids and guides
Module 3: Web Design and Development
Introduction to Web Design
Principles of effective web design
User experience (UX) and user interface (UI) design
HTML and CSS
Basics of HTML5
Styling with CSS3
Responsive design techniques
Web Development
Introduction to JavaScript
Using web development frameworks (Bootstrap, React)
Content Management Systems
Overview of CMS (WordPress, Joomla, Drupal)
Creating and managing websites with CMS
Module 4: Video Production and Editing
Basics of Video Production
Understanding the video production process
Pre-production planning (scripting, storyboarding)
Shooting Video
Camera types and functions
Lighting and sound techniques
Video Editing
Using Adobe Premiere Pro and Final Cut Pro
Editing techniques (cutting, transitions, color correction)
Adding effects and titles
Module 5: Animation
Introduction to Animation
History and types of animation (2D, 3D, stop-motion)
Principles of animation
2D Animation
Using Adobe Animate and Toon Boom Harmony
Frame-by-frame animation and tweening
3D Animation
Using Autodesk Maya and Blender
3D modeling, rigging, and animation
Module 6: Audio Production
Introduction to Audio Production
Basics of sound and audio production
Recording techniques
Audio Editing
Using Adobe Audition and Audacity
Editing and mixing audio
Adding sound effects and music
Podcasting and Voiceover
Recording and editing podcasts
Techniques for voiceover work
Module 7: Interactive Media
Introduction to Interactive Media
Overview of interactive media
Applications in web, mobile, and gaming
Creating Interactive Content
Using Adobe Animate and Unity
Developing interactive animations and games
Virtual Reality (VR) and Augmented Reality (AR)
Basics of VR and AR
Creating VR and AR experiences
Module 8: Professional Practices and Portfolio Development
Project Management
Planning and organizing multimedia projects
Working in teams and collaboration
Industry Insights and Trends
Understanding the multimedia industry
Keeping up with current trends and technologies
Creating a Professional Portfolio
Selecting and presenting work
Building a digital portfolio
Career Development
Job search strategies
Networking and professional development
Additional Resources
Recommended Reading
"The Principles of Beautiful Web Design" by Jason Beaird
"Adobe Photoshop Classroom in a Book" by Andrew Faulkner
Online Tutorials and Courses
LinkedIn Learning
Coursera
Udemy
Course Delivery
Lectures and Demonstrations
Hands-On Projects
Peer Reviews and Critiques
Guest Lectures from Industry Professionals
Assessment and Evaluation
Quizzes and Tests
Project Submissions
Final Portfolio Review

This course structure aims to provide students with a comprehensive education in multimedia, covering essential technical skills, creative techniques, and professional practices to ensure they are well-prepared for a successful career in the multimedia industry.
0 notes
Text
youtube
Monria Titans
Let's Read Some $#!7 by Howard Zinn, The Brothers Grimm, & 3dtotalPublishing
Welcome to another installment of Let’s Read Some $#!7 (LRSS)! In sum, the purpose of these videos is to introduce educational resources regarding the creation of video games, to promote literacy, to provide world-building tools for creatives, to provide books for escapism, and/or to get banned books into people’s view and whatever I feel like reading aloud at the time.
They go as follows: 1. Read the summary on the back of the book (if applicable). 2. Read the “Forward”, “Preface”, and “Acknowledgments” (if applicable). 3. If there is no “Introduction”, read [part of] the first chapter.
If this is something you’re interested in, don’t forget to hit the “Subscribe” and/or “Follow” button!
Even though the purpose is education/book introduction, I only read PORTIONS because of DMCA and Copyright.
Today, I read PORTIONS of 3 books from my TBR Stack:
A People’s History of the United States by Howard Zinn With a new introduction by Anthony Arnove, this edition of the classic national bestseller chronicles American history from the bottom up, throwing out the official narrative taught in schools—with its emphasis on great men in high places—to focus on the street, the home, and the workplace. Known for its lively, clear prose as well as its scholarly research, A People’s History of the United States is the only volume to tell America’s story from the point of—and in the words of—America’s women, factory workers, African-Americans, Native Americans, the working poor, and immigrant laborers. As historian Howard Zinn shows, many of our country’s greatest battles—fights for fair wages, eight-hour workdays, child-labor laws, health and safety standards, universal suffrage, women’s rights, racial equality—were carried out at the grassroots level, against bloody resistance. Covering Christopher Columbus’s arrival through President Clinton’s first term, A People’s History of the United States, which was nominated for the American Book Award of 1981, features insightful analysis of the most important events in our history.
The Complete Grimm’s Fairy Tales by The Brothers Grimm THE BROTHERS GRIMM, JACOB (1785-1863) AND WILHELM (1786-1859), were German academics, linguists, and cultural researchers, though they were legendary, of course, for their storytelling. They collected and recorded stories from the wide wealth of European folk tales, and their aim was to retell the tales exactly as they heard them. The work of the Brothers Grimm popularized such classics as Cinderella, The Frog Prince, Hansel and Gretel, Rapunzel, Rumpelstiltskin, and Snow White. Originally titled Children’s and Household Tales, The Complete Grimm’s Fairy Tales contains the essential bedtime stories for children worldwide for the better part of two centuries. Accompanied by 40 color plates and 60 black and white illustrations from award-winning English illustrator Arthur Rackham, The Complete Grimm’s Fairy Tales is the perfect classic edition for your family’s bookshelf.
Artists’ Master Series: Color and Light by 3dtotalPublishing The Artists’ Master Series features experts from both the traditional and digital worlds. Drawing from a wealth of experience, in this book they fully dissect the theory and practice of using color and light to advance your art. Expert Charlie Pickard goes beyond the basics to explore color theory. Advanced topics include color hierarchy, value keying, color constancy, and exposure. Discover how hue, value, and chroma enable you to create, mix, and control color. Next, he moves on to the vast subject of light. Using highly illustrated examples, complex concepts of shading, form, depth, and texture are decoded. Three essential material types – matte, specular, and transparent – are analyzed, instilling confidence to paint any object you encounter. Respected artists Djamila Knopf, Guweiz, and Nathan Fowkes then guide you through extensive tutorials, specially commissioned to explore their use of color and light. Each artist breaks down their process, discussing the decisions made at every stage to achieve striking colors, believable lighting, immersive atmospheres, and realistic surfaces. All three artists work in contrasting ways, resulting in a wide range of approaches to putting theory into practice. Further insight is provided by the gallery artists, also experts in their fields, representing a range of styles, skills, and mediums. This unique opportunity to study color and light so extensively offers a deeper mastery of the subject, and a single, comprehensive reference at your fingertips. WARNING: CONTAINS NUDITY
All book links above are affiliate links.
—
The Monday, April 29th, and 574th, Artist Shout-Out goes to Yerim Lee! Check it out here!
—
TIMESTAMPS 0:00 – Welcome Gamers and Readers! 1:38 – Artist Shout-Out 4:48 – Read Aloud Prelude 5:58 – A People’s History of the United States 47:28 – The Complete Grimm’s Fairy Tales 1:23:02 – Artists’ Master Series: Color and Light 1:39:05 – Artist Shout-Out 1:39:55 – Closing 1:40:56 – MonriaTitans’ Bookshop 1:42:36 – Farewell
—
TO SUPPORT – Buy Me a Coffee: 15% of the proceeds go to Kids Need to Read! – “Let’s Read Some $#!7” About Page – MonriaTitans’ Summary & Links – MonriaTitans’ Bookshop – YouTube Channel – Throne Wishlist
View On WordPress
#3dtotalPublishing#AffiliateLink#APeoplesHistoryOfTheUnitedStates#ArtistsMasterSeriesColorAndLight#BecomEmpowered#Bibliophile#BookAddict#Books#Bookshoporg#HowardZinn#LearnSomethingNewEveryday#LetsReadSomeShit#LRSS#MonriaTitans#MonriaTitansWGS#MT#OaT#PromoteLiteracy#ReadAlouds#Reading#ReadingList#TBR#TBRStack#TheBrothersGrimm#TheCompleteGrimmsFairytales#Video#Videos#WGS#YouTube#YouTubeVideo
0 notes
Text
Movavi Video Editor: A Comprehensive Review for Budding Video Creators
Movavi Video Editor is equipped with a range of features that are integral to modern video editing. These include picture-in-picture, chroma key for those perfect green-screen effects, titling to add that professional touch, and keyframing for precise control over animations. The addition of motion tracking and AI-enhanced capabilities further elevates its utility, making complex tasks more accessible to the everyday user.
The hallmark of Movavi Video Editor is its clean and intuitive interface. It’s designed for ease of navigation and quick learning, ensuring that users don’t have to spend excessive time figuring out basic operations. This aspect is particularly beneficial for those interested in producing content like vlogs, social media videos, or any storytelling format, as it allows them to focus more on creativity rather than grappling with the software.
One of the most appreciated aspects of Movavi Video Editor is its seamless setup process. New users are not left to their own devices; they are supported by a wealth of online tutorials and resources, aiding them in quickly getting up to speed with the software’s capabilities. This guidance is crucial for anyone who wants to polish their videos to a professional standard.
The software supports a wide range of video formats, and users can easily edit their videos by cutting, trimming, and joining clips. This flexibility is a major advantage for creators who work with different types of content and formats.
Overall, Movavi Video Editor is more than just an editing tool; it’s a creative companion that empowers users to experiment with their ideas. Its approachable design, coupled with a robust set of features, ensures that users can enhance their videos without feeling overwhelmed. For anyone stepping into the realm of video creation, Movavi Video Editor stands out as a smart choice, balancing simplicity with powerful editing capabilities.
Click for Details
#movavi video editor#Movavi#photography#Photo Edit#Video Edit#Editing#artificial intelligence#Photoshop
0 notes
Text
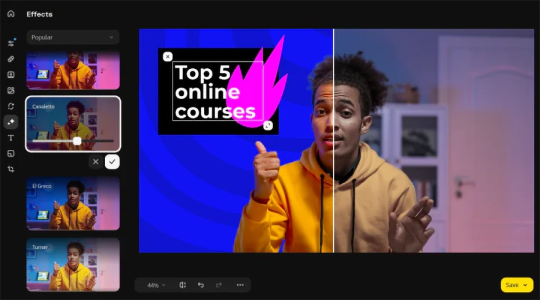
Como Fazer Chroma Key no CapCut pelo Celular: Tutorial Passo a Passo
Hoje, eu vou te mostrar como fazer chroma key no CapCut diretamente pelo celular. O chroma key é um recurso poderoso que permite que você remova o fundo de um vídeo, geralmente gravado em um fundo verde ou azul, e adicione efeitos interessantes aos seus vídeos. Mesmo que já tenha um tutorial sobre isso no meu canal, precisei fazer outro porque ninguém conseguia encontrá-lo após algumas…

View On WordPress
0 notes