#Cloaks for all sewalong
Text
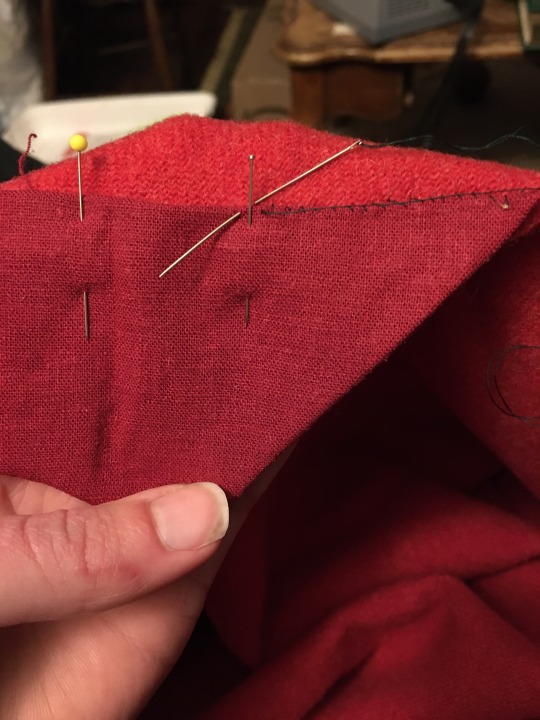

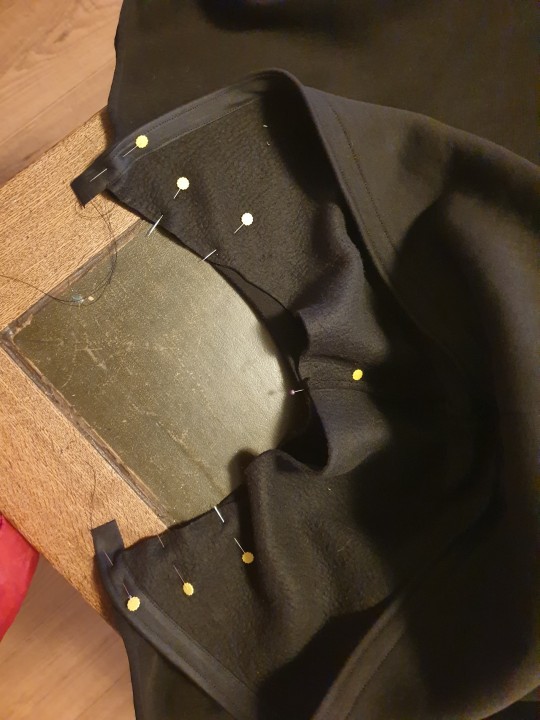
Since I am skipping the hood and this wool blend is definitely scratchy, I made a facing with some scrap linen. Tonight I’m working on whipping it in.
3 notes
·
View notes
Text
Cloaks for all! A cloak sewalong for beginners
Step 0: gathering supplies

We're starting this cloak in January, but let's give ourselves the time to gather supplies.
What you are definitely going to need:
Fabric
Thread
Needles
Fabric scissors
Sewing pins
A measuring tape
Some type of closure to close the cape
Tailor's chalk or some other way to mark the fabric
A sewing machine (optional if you have more time and handsewing experience)
Bias type in a colour matching your fabric for binding (not necessary if you intend to finish your cloak in a different way)
What will make this project a lot easier:
An iron and ironing board - everything will look much neater
If you’re used to inches, keep a converter handy because my brain is used to centimeters
How much fabric do I need?
A lot. 3 meters (of 1.50m width fabric) for a half circle cloak, double that for a full circle cloak. If you're shorter or you want a shorter cape, it'll be less.
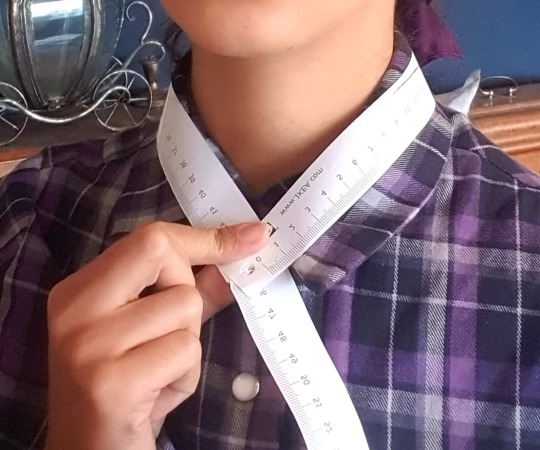
Necessary measurements:
Lenght of cloack = from neck across shoulder and arm down to where you want the cloak to end
Neck circumference = measuring tape goes around the neck
What kind of fabric?
Something that feels nice on your skin and isn't very light or terribly heavy. Wools are great for historical looks, velveteen is great for fantasy, silk is great if you have money to burn, etc. For your own sanity, pick something that doesn't fray too much.
#cloaksforall sewalong#cloaksforall step 0#a talia original#talia's adventures in dressmaking#part of the sewalong is that you het to ask questions#and show off your fabric in reblogs#that's three weeks to get your fabric
259 notes
·
View notes
Text
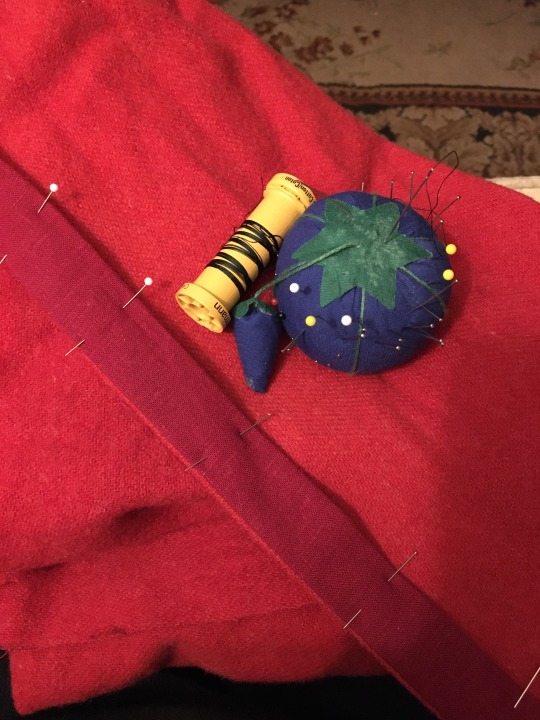

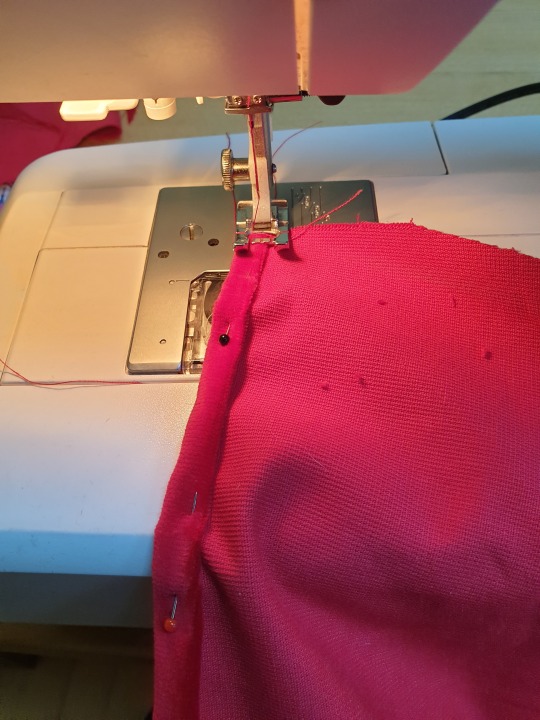
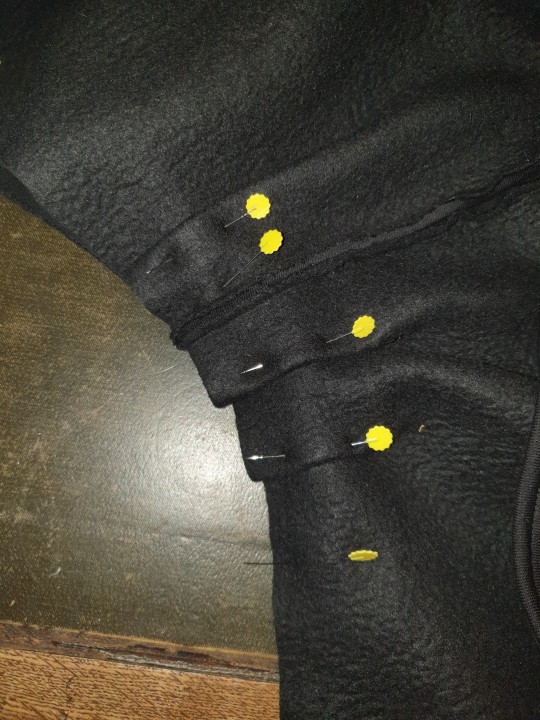
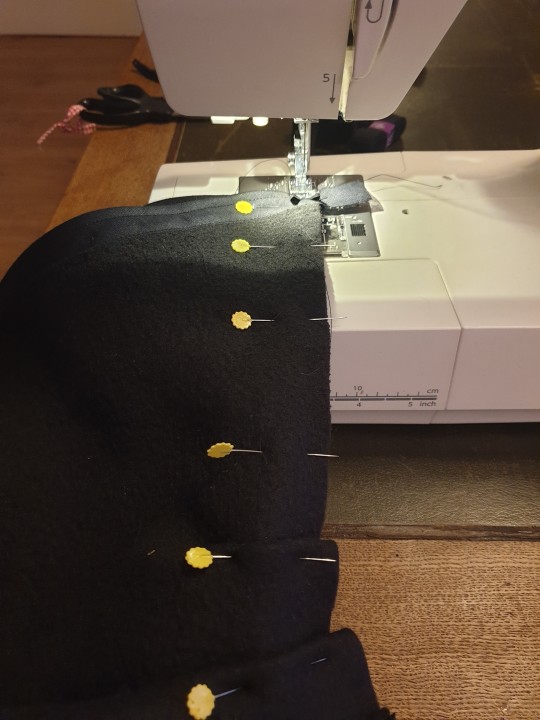
Working on the binding. Machine stitching the first seam, pressing, and hand-stitching down the second.
#Using the machine is so much faster#I’ve been doing mostly hand sewing the last couple years and I’m slightly surprised each time I go back to the machine#Cloaks for all sewalong
1 note
·
View note
Text
Cloaks for all! A cloak sewalong for beginners
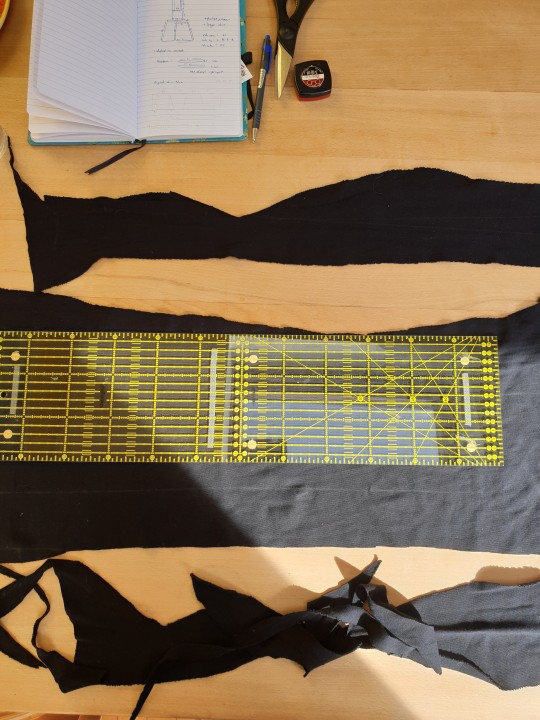
Step 1: Cutting/the pattern


The pattern of this cloak consists of three pieces. A (half) circle for the body and then two pieces for the hood.
We'll start with cutting the cloak itself:
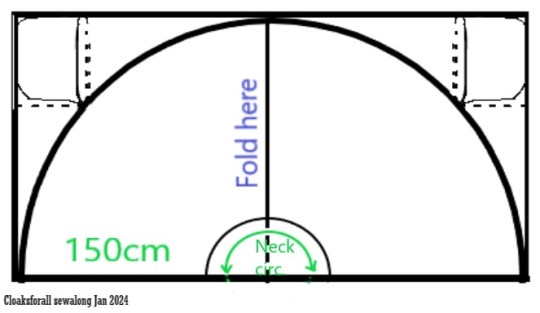
The longest cloak you can make will (with this pattern) be the length of the shortest side of your fabric. If you want it shorter, measure from your neck over your shoulder down over your arm to find the length you want, that will be the radius of your cloak circle. My fabric is 150cm wide, so my circle radius and cloak length are both 150cm.
You're gonna want to clear a large piece of floor for this one.
Cut the cloak
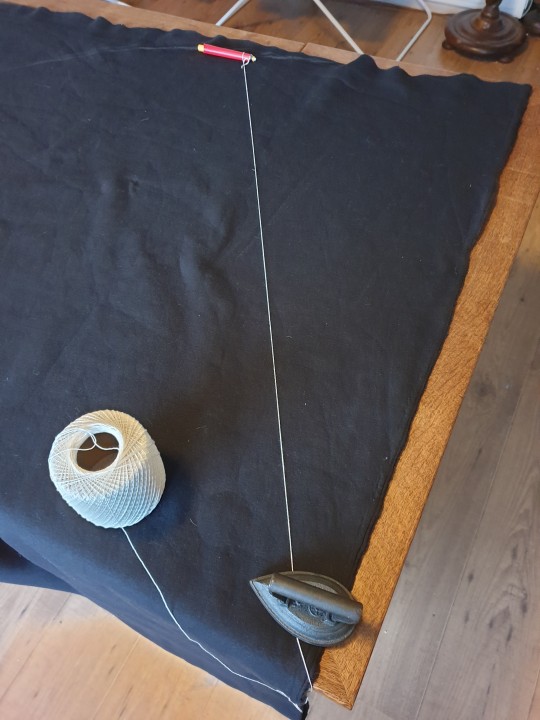
Fold your fabric in half (short side to short side). Now you mark a quarter circle. Get a 150cm piece of string, tape the end to your surface at the folded corner. Circling the piece around will give you an easy way to draw a circle with your chalk.
Cut the half circle you just drew while the fabric is still folded.
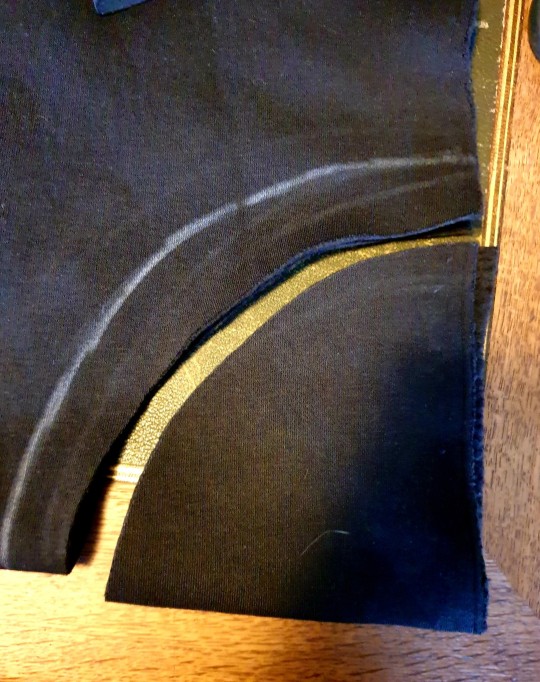
2. Cut the neckhole
You'll need your neck measurement. (make sure to leave breathing room).
You can either do math about it, or lay your tape measurement on your fabric in a circle and cut slightly smaller than half your neck measurement.
3. Cut the hood
For the hood, you have to make sure it is bigger than your head. Start with the largest rectangle that is left from your fabric. Curve the top right corner with some chalk.

The height of the hood controls how oversized it is. Measure from your collarbone over your head to your other collarbone and you'll have the minimum size. My hood is 45 cm high.
(Optional: hollow out the left line and curve the right bottom corner)
Putting a hoodie on this rectangle to get a nice shape makes it a lot easier.
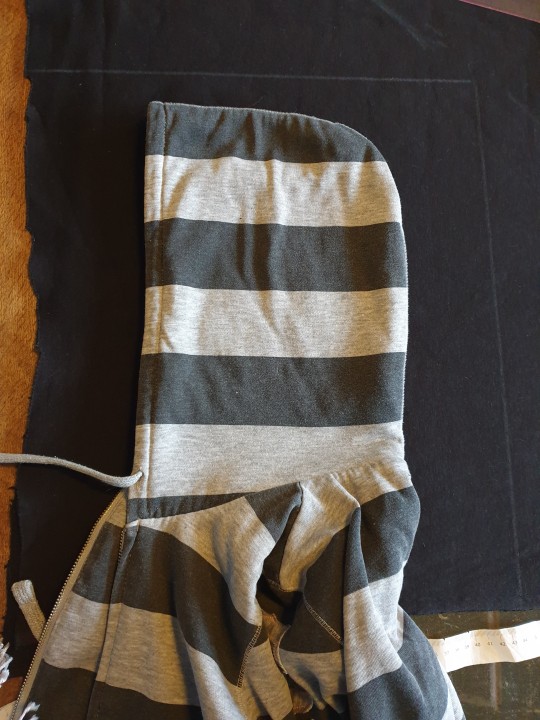
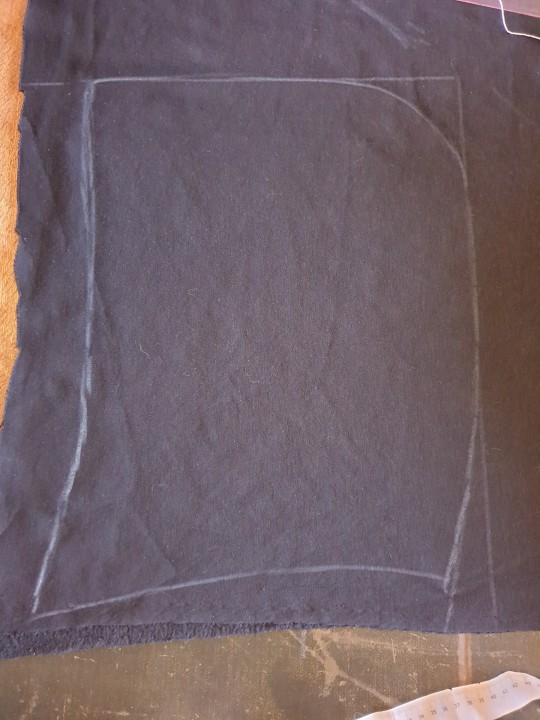
Draw the hood shape and cut two (this can be done while the fabric is folded double).
That's it for step 1. Tomorrow we start sewing!
#cloaksforall sewalong#cloaksforall#cloaksforall step 1#image id in alt#wow i may have underestimated how long is takes to write really thorough instructions...#sewing#this is meant for beginners#so i hope this is clear#feel free to ask questions
172 notes
·
View notes
Text
Cloaksforall Sewalong Step 2 - sewing down the opening seams

I just spent two hours making an in depth explanation on how to thread a sewing machine, so today's step is going to be quite small. The opening of our cloak is either selvage (the fuzzy ends of the fabric) or raw edge, so must be finished.
Looking at the ugly side of your fabric (this is called the wrong side) fold the straight edges (once if your selvage is neat, twice if it's not), pin down and sew.
How do I sew though?
Go here for help on how to thread your machine.
Then locate the buttons on your machine. On a modern machine (post 1960s or so) you'll have:

A dial for stitch type (on machines with more than two stitches)
A dial or lever for stitch length (how fast the feed dogs move)
A dial or lever for stitch width (how much the needle moves left to right)
A dial for tension (don't worry about it)
A button or handle for going backwards
What to do with all these levers?
Stitch type dial should be set to straight stitch (generally the first option)
Stitch lenght should be between 2 and 3
Tension is ordinarily on 3 or 4
Stitch width on 3, the neutral zone that sets your needle in the middle
You start sewing a cm or two away from the edge. Then you go backwards to catch the start of the seam as well. This prevents unravelling (and makes it harder for your machine to eat your fabric). Some machines have ruler guides you can align your seam allowance with to make sure you sew even straight lines.
At the end of the seam, go back and forth again to finish the seam.
#if you have a digital machine i'm lost as well#used one for a few lessons but i was not a fan#cloaksforall sewalong#cloaksforall step 2#i hope i'm making this clear for beginners#and not just overwhelming#cloaksforall#a talia original#image id in alt
22 notes
·
View notes
Note
Hello! I'm a huge admirer of your work, you're amazingly skilled and I would love to follow one of your sew-alongs one day.
The only problem is, I'm terrible at sewing - I can't cut a straight line to save myself; I measure a million times and always end up short; all the different terms even in "beginner" patterns are confusing and overwhelming. But I really want to learn, and the few things I've managed to make, even though they look like trash, have made me feel accomplished. Any beginner projects you'd recommend and/or novice sewing advice for someone without a crafty bone in their body?
Thank you and can't wait to see what you make next!
What a lovely message to wake up to, thank you!!
Anon, I'm going to go and find the first apron I made just for you. it is terrible in both design and execution but it accomplished its goal of existing in a fit enough state to encourage me to continue sewing.
It sounds like your projects do that too, so you're already doing awesome!
One isn't born with crafty bones, one creates them in hellish experiments bathed in blood and lost scissors.
That said, there's lots of ways to make the experiments less hellish. As with most things, money or help from someone with experience can make things much easier.
Can't cut straight? If you've got the disposable income, get yourself a quilter's cutting mat and a rotary cutter, or at least a clear ruler like this:
Picking your battles also helps. Using fabric with a clear grain that doesn't fray too much as you start out will prevent a lot of headaches, as will sharp scissors and a good chalk marker.
Depending on what your interests are, these are things I would call good ultimate beginners projects: pillow covers, aprons, gathered skirts, straight capes.
But ultimately, the best beginners project is whatever you would be happy pouring the hours and effort in, even if the project won't turn out perfect. It's really about gathering experience and if you get that by stitching random squares together or attempting a ballgown for your dog, that's the way to go!
Anyway, your message came at a good time. I've been musing on doing a sewalong for true beginners, since my previous ones were more for people new to historical sewing than new to sewing in general.
Not quite sure what, though...
Maybe a cloak?
#a talia original#asked and answered#this got a little long sorry#talking about sewing#thank you though this was such a lovely message to get#and patterns are confusing#this is an unfortunate fact#readers if you've got ideas for sewalongs do send me an ask#I've got some holiday coming up in January where it might be nice to sew together
29 notes
·
View notes
Text
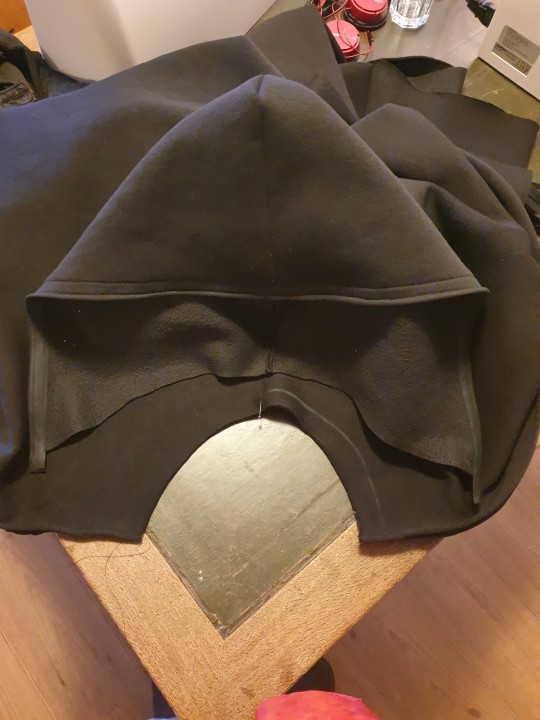
Cloaksforall Sewalong Step 4 - Attaching the hood
Today's task is sewing the hood to the cloak!
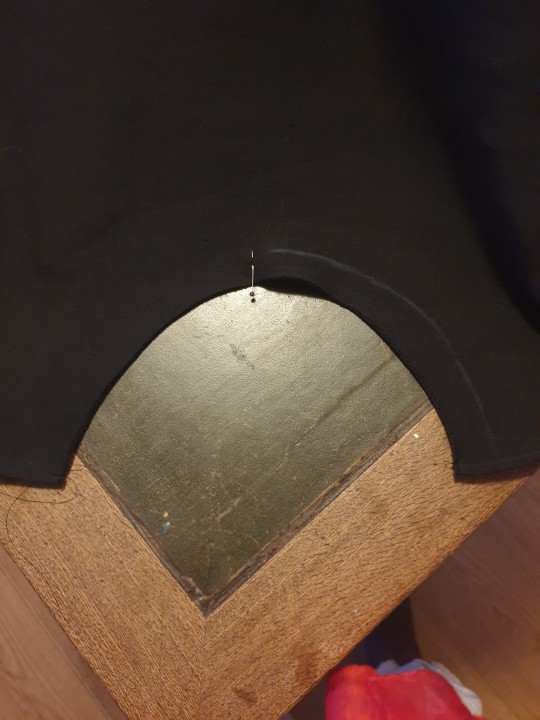
Lay the cloak flat, right side towards you. Mark the middle of the neck opening.
Lay the hood on top of the cloak, wrong side towards you. Pin the center seam of the hood to the midpoint of the cloak.
Pin the left edge of the cloak to the left edge of the hood. Do the same for the right edge.
Continue pinning from the inside towards the middle seam, laying the fabric flat. You'll have a bubble of hood left over. Fold that bubble in two or three small folds and pin them down.
When it is all pinned, it's time to sew. Your sewing machine might have trouble going over the folds if you have thick fabric (you'll hear it make a complaining noise) in which case you can use the wheel at the right to move the needle and pull the fabric through yourself.
Sew back and forth a few stitches at the end.
Technically you have a cloak now!
Here's a photo of the Protector of Scraps to reward you for making it this far. Tomorrow we bind the cloak edges! (might take more than a day)

13 notes
·
View notes
Text
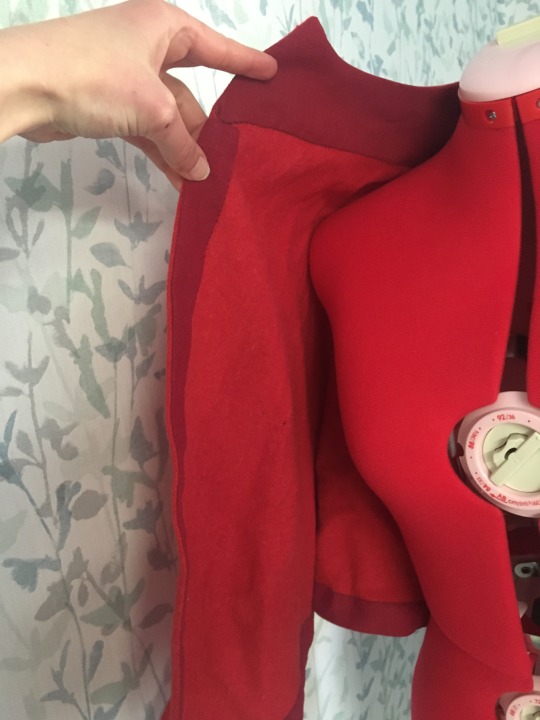
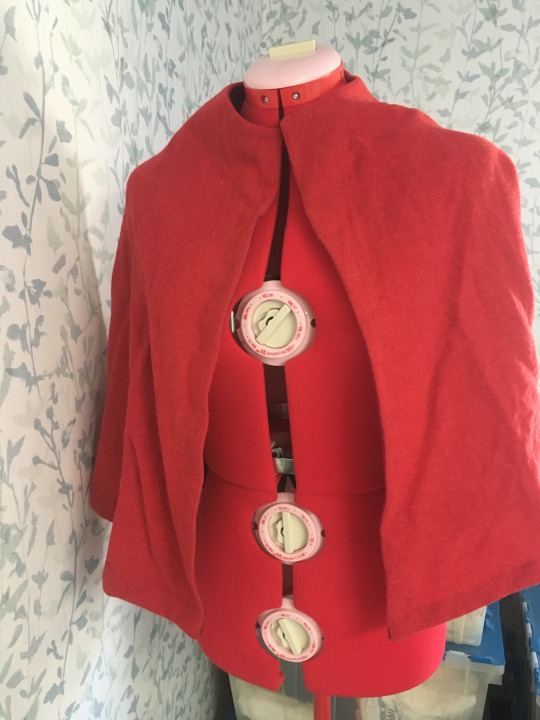
My project for @badassindistress’s Cloaks For All sewalong has been stalled for nearly a week by needing to choose a closure. Somewhere, I have a large decorative pewter button that my brother gave me a couple years ago, but I am not sure what box it ended up in during moving. (It’s not in the button box, of course.) If I use that, I want to do a longer, pointed pair of button tabs in the same red wool on the outside. If I decide I can’t find it, I will probably go for a shorter tab set underneath the main body.
But the hems are all bound, and I used the same scrap red linen to do a wide facing for the collar.
#Partly posting this to publicly pressure myself to search a couple more boxes for that button#cloaksforall#sewing#ramble
2 notes
·
View notes
Last Seen Blogs

cleopatra-ivxx
And you don't seem to understand

i-will-touch-the-sky
Sunshine & Laughter

kanpeki-bekki
Kanpeki-Bekki

kenddl
제목 없음

bluntedqueenb
Mermaid💙