#Export Directory
Photo

Get connected with 𝐭𝐡𝐞 𝐭𝐨𝐩 𝐦𝐚𝐣𝐨𝐫 𝐞𝐱𝐩𝐨𝐫𝐭𝐞𝐫𝐬 𝐰𝐨𝐫𝐥𝐝𝐰𝐢𝐝𝐞.🎯100,000+ 𝒎𝒂𝒏𝒖𝒇𝒂𝒄𝒕𝒖𝒓𝒆𝒓𝒔 𝒂𝒏𝒅 𝒃𝒖𝒚𝒆𝒓𝒔 are already trading through us.Join today and start export-import your products.✔️10,000+ Categories✔️100% Free Sign Up
𝐅𝐨𝐫 𝐦𝐨𝐫𝐞 𝐝𝐞𝐭𝐚𝐢𝐥𝐬:
www.go2bng.com
180-057-205-58
[email protected]
........
5 notes
·
View notes
Text

The turkey importers directory serves as a comprehensive database containing detailed information about companies based in Turkey that engage in importing goods from around the world. It provides valuable insights for international traders, manufacturers, and exporters looking to establish or expand their presence in the Turkish market. By accessing this directory, businesses can identify potential partners, understand market trends, and tailor their strategies to meet the specific demands of the Turkish market. Whether seeking new business opportunities or aiming to enhance existing partnerships, the Turkey Importers Directory is an indispensable tool for navigating the complexities of global trade within Turkey.
#global trade data#export#import#international trade#trade data#trade market#global market#import data#import export data#custom data#turkey importers directory#turkey#import export data provider#export data
0 notes
Link
Navigating Turkey's dynamic commerce landscape demands adeptness. Situated at the crossroads of continents, Turkey is a vital trade hub. To thrive, leverage key resources like the turkey importers list and master trade regulations. Here are ten crucial insights.
#import#export#import data#export data#trade#trade data#turkey importers list#turkey exim data#turkey import export data bank#turkey importers directory#turkey port data#turkey#global trade data#import export data#import export data provider#import export business
0 notes
Text
Best electronic weighing scale in savarkundla, gujarat, india. top electronic weighing scale, electronic weighing scale exports in gujarat, india. best electronic weighing scale exports in savarkundla, gujarat, india.
Best electronic weighing scale machine in savarkundla, gujarat, india. top electronic weighing scale machine, best electronic weighing scale in savarkundla, gujarat, india.
There are many top electronic weighing scales available in the market, and the best one for you will depend on your specific needs and requirements.
Etekcity Digital Body Weight Bathroom Scale
Greater Goods Digital Body Weight Bathroom Scale
Renpho Digital Body Weight Scale
FitTrack Dara Smart BMI Digital Scale
Withings Body+ Smart Body Digital Scale
All of these scales have modern designs, high accuracy, and are user-friendly with various features like Bluetooth connectivity, body composition analysis,
Best electronic weighing scale in savarkundla, gujarat, india. top electronic weighing scale, electronic weighing scale exports in gujarat, india. best electronic weighing scale exports in savarkundla, gujarat, india.
Best electronic weighing scale machine in savarkundla, gujarat, india. top electronic weighing scale machine, best electronic weighing scale in savarkundla, gujarat, india.
#galaxyscalecompany#galaxyscaleindustries#exporter#galaxyscale#weighing machine manufacturers#savarkundlagujaratindia#best weighing scale for home#gujaratindia#savarkundlaindia#supplier#free manufacturers weighing scale directory india#manufacturers
0 notes
Text
Explore the significance of International Buyers Directories in global trade with Seair Exim Solutions. Discover how these directories can boost your international business and connect you with potential buyers worldwide.
#International Buyers#Find International Importers#Best International Buyers Directory#Export Import data#Imports data
0 notes
Text
Explore unparalleled B2B opportunities with Grow Business for Sure, the leading B2B portal for Indian manufacturers and suppliers. Our platform revolutionizes business interactions, facilitating connections and transactions that drive growth and success. Seamlessly connecting businesses, we offer a user-friendly interface, enabling you to access a vast network of potential partners and streamline trade operations effortlessly. Join us to unlock a world of possibilities, expand your market reach, and engage in mutually beneficial collaborations. Elevate your business to new heights with our trusted and efficient B2B portal tailored for Indian businesses.
#b2b directory#indian exporters#indian suppliers#indian manufacturers#b2b directory for manufacturers#b2b directory for suppliers
0 notes
Text
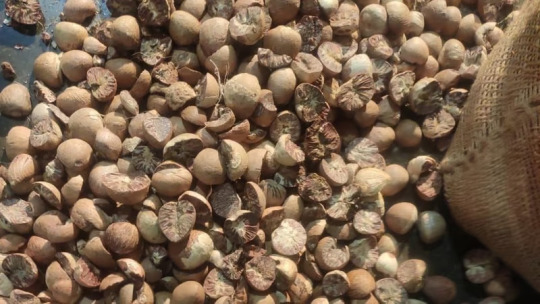
The Secret to Importing High-Quality Betel Nuts for Cheap: A Directory of the Top Exporters
Betel nuts are a popular chewable stimulant in many parts of Asia. They are typically wrapped in a betel leaf with lime paste and other ingredients, and chewed for their stimulating and euphoric effects. Betel nuts are also used in some traditional medicines and religious ceremonies.
Indonesia is the world's largest producer and exporter of betel nuts. Other major betel nut exporting countries include India, Sri Lanka, Thailand, China, Vietnam, and the Philippines.
If you are looking for a reliable betel nut exporter, there are a few things to keep in mind:
Quality: Make sure to choose an exporter that sells high-quality betel nuts. Betel nuts can vary in quality depending on the variety, growing conditions, and processing methods.
Price: Betel nut prices can vary depending on the quality of the nuts and the country of origin. It is important to compare prices from different exporters before you buy.
Reliability: Make sure to choose an exporter that is reliable and has a good track record. You can read reviews from other buyers to get an idea of the exporter's reputation.
Here is a directory of some of the leading betel nut exporters in the world:
Indonesia:
PT. Rezeki Mandiri Global
PT. Agro Future Indonesia
CV. Rezeki Mandiri
CV.GHI
PT. JKL
India:
M/s. ABCD
M/s. EFGH
M/s. IJKL
M/s. MNOP
M/s. PQRS
Sri Lanka:
AKEN LANKA PVT LTD.
ASHOK LANKA EXPORTS
BALAJI VENTURES LANKA PVT LTD.
BESPICE PVT LTD.
BEST DEAL EXPORTERS PVT LTD.
Thailand:
Thai Betel Nut Exporters Association
Thai Chamber of Commerce
Federation of Thai Industries
Thai Food Processors Association
Thailand Rice Exporters Association
China:
China Chamber of Commerce for Import and Export of Foodstuffs, Native Produce and Animal By-Products (CCCFNA)
China National Association of Grain Trade (CNAIT)
China Association for the Promotion of International Trade (CCPIT)
China Chamber of Commerce of Machinery and Electronics Importers and Exporters (CCCME)
China Food and Beverage Industry Association (CFBIA)
Vietnam:
Vietnam Chamber of Commerce and Industry (VCCI)
Vietnam Food Association (VFA)
Vietnam Association of Seafood Exporters and Producers (VASEP)
Vietnam National Coffee and Cocoa Association (VINACA)
Vietnam Cashew Association (VINACA)
Philippines:
Philippine Coconut Authority (PCA)
Philippine Chamber of Agriculture and Food Inc. (PCAFI)
Philippine Exporters Confederation Inc. (Philexport)
Philippine Chamber of Commerce and Industry (PCCI)
Federation of Philippine Industries (FPI)
Malaysia:
Malaysian Palm Oil Council (MPOC)
Malaysian Rubber Board (MRB)
Malaysian Cocoa Board (MCB)
Malaysian Timber Council (MTC)
Malaysian Pineapple Industry Board (MPIB)
Bangladesh:
Bangladesh Export Promotion Bureau (BEPB)
Federation of Bangladesh Chambers of Commerce and Industry (FBCCI)
Bangladesh Chamber of Industries (BCI)
Bangladesh Garment Manufacturers and Exporters Association (BGMEA)
Bangladesh Knitwear Manufacturers and Exporters Association (BKMEA)
Myanmar:
Myanmar Trade Promotion Organization (MTPO)
Myanmar Chamber of Commerce and Industry (UCCI)
Federation of Myanmar Chambers of Commerce and Industry (FMCCI)
Myanmar Rice Exporters Association (MREA)
Myanmar Timber Merchants Association (MTMA)
Papua New Guinea:
Papua New Guinea Investment Promotion Authority (IPPNG)
Papua New Guinea Chamber of Commerce and Industry (PNGCCI)
Manufacturers Council of PNG (MCPNG)
PNG Business Council (PNGCBC)
PNG Exporters Association (PNGEX)
Taiwan:
Taiwan Bureau of Foreign Trade (BOFT)
Chinese National Association of Industry and Commerce (CNAIC)
Taiwan Confederation of Industries (TCI)
Taiwan Electrical and Electronic Manufacturers Association (TEEMA)
Taiwan Textile Federation (TTF)
Conclusion
This is just a small sample of the many betel nut exporters around the world. When choosing an exporter, it is important to consider the quality of the nuts, the price, and the exporter's reputation. You can also contact the
#betel nut exporters directory#import betel nuts#buy betel nuts in bulk#wholesale betel nuts#betel nut suppliers#betel nut exporters near me#best betel nut exporters#cheap betel nut exporters#organic betel nut exporters#fair trade betel nut exporters#sustainable betel nut exporters
1 note
·
View note
Text
A guide to extracting a CC Shepard’s headmorph as a model (for beginners)
Are you a humble CC (Character Creator) Shepard user (like me)? Do you want your Shepard’s head as a 3D model (like me)?
Luckily for all of us, there is a Blender script for that, thanks to mustbetuesday (which I assume is their username; it’s the name of their website anyway). While there is a tutorial on their website on how to use it, it doesn’t go into detail on certain steps of the process (and also it mentions having to manually install UModel and use it to find and export the model, which isn't really necessary these days as Legendary Explorer makes all of that easier).
So here is a different tutorial, written in a way that beginners to ME modding and/or the tools required are able to follow. If you already know how to use these tools, you can pretty much just skim this guide. The guide mentions both OT and LE, but the files mentioned/used will be from the LE version. Note that for the sake of simplicity, I will only cover extracting the model itself and extracting textures.
(btw this is technically part 1 of an overarching guide on mesh swapping an NPC with your Shepard, but I figured that it would help to have it as a standalone guide in case people are interested in this kind of thing. Feedback is welcome!!)
Disclaimer: this guide only pertains to ME3. The script should also work with ME2 facemorphs and ME2 head models, but I haven’t really tried it yet. Maybe you can let me know how it goes if you try it with ME2 assets :)
What you need:
A PC copy of Mass Effect 3, or Mass Effect Legendary Edition
Blender version 2.8 (You can grab it here)
A PSK import/export script for Blender (I use this one personally for 2.8)
Legendary Explorer (You can grab it here. Alternatively you can download it via ME3Tweaks Mod Manager under the Tools options)
A ME3/LE3 save of the Shepard you’d like
(ME3 saves are located in Documents/BioWare/Mass Effect 3/Save)
(LE3 saves are located in Documents/BioWare/Mass Effect Legendary Edition/Save/ME3)
ME3 Gibbed save editor (You can grab it here. The recommended version is from Nov. 14, 2015)
Trilogy Save Editor (You can grab it here. Alternatively you can download it via ME3Tweaks Mod Manager under the Tools options)
The Blender head importer script (You can grab it here. Make sure to get the 2.8 version)
The base head model for male/female Shepard (I’ll go into detail on how to get this one later)
PART A: Getting the .me3headmorph
This part requires:
ME3 Gibbed Save Editor
A ME3/LE3 save
Open the ME3 Gibbed Save Editor. It should look like this when you first open the editor:

The save editor will automatically locate the directory for the OT ME3 career files, meaning that when you click Open, it will list all of your careers. This is useful for those using OT ME3; not as useful for those using LE3. Instead, what you want to do is click on the arrow beside the Open button, which will give you two options. The one you want is the “Open from File…” option:

From there you’ll be able to navigate to your saves and open the save you want. By default it’ll open the directory for OT ME3 saves. You may have to navigate manually to the LE3 save directory. While Gibbed save editor was originally made for OT, LE saves have the same filetype and will load normally.
Once your save is loaded, it will show the basic info for that save, like this:

The tab currently open is the Player > Basic tab. Navigate towards the Appearance tab. It should look like this:

What we’re getting here is the .me3headmorph, so you can ignore the other stuff for now.
Click on Head Morph, then “Export to File…”:

Save it wherever you like. It will save as a .me3headmorph file. Great! You now have the headmorph of your Shepard.
PART B: Getting the base head model
This part requires:
Legendary Explorer
You have the .me3headmorph of your Shepard, but you also need the base head model before you can actually apply that data. For this, we’re going to need the CC base head model.
Legendary Explorer (LEX) is the modding toolset for Mass Effect and Mass Effect: Legendary Edition. You can use it to view, browse, edit, or export any file from both the OT and LE versions of the trilogy. LEX has a tutorial wiki covering a variety of modding topics for those who want to try modding the game, but for now all we’re going to do is export a 3D model.
When you first open Legendary Explorer, it’ll look like this:

Click on the “Meshes & Textures” tab. You will get these programs:

Open Mesh Explorer (abbreviated as MSH). You’ll get this:

(If it’s your first time using Mesh Explorer, you won’t have anything under “Recently opened items”. Also, read the Welcome page, as it has some useful info.)
To get the head mesh you need, you’ll have to open the Package file it’s contained in. Normally you can search where the assets are located using the Asset Database (a different LEX program), but for the sake of the tutorial I’m just gonna go ahead and tell you the package file you need.
Go to File > Open, and if it doesn’t automatically open to the appropriate directory, navigate to your game’s directory. It should look something like this:
Origin Games\Mass Effect Legendary Edition\Game\ME3\BioGame\CookedPCConsole
(Steam users, refer to your game’s file directory path by right-clicking your game in your library, then go to Manage > Browse Local Files.)
Locate and open the file BIOG_MORPH_FACE.pcc. This is what you’ll see:

There are multiple base head models here, but the one you want ends in _CC (so HMF_HED_PROCustom_MDL_CC and HMM_HED_PROCustom_MDL_CC). The models that start with HMF are the female models, while HMM is the male models. When you click on the models on the left, they will render on the right:

To export these models, right-click on the entry you want on the left, then click on “Export Mesh to PSK with UModel”:

Save it in any directory you want. After that it will ask for the output format. Just select “psk” and click OK.
(btw, if this is your first time exporting with UModel, LEX will automatically install UModel for you.)

Once that’s done, File Explorer will automatically open to the directory you saved your model in. A folder named after the package file you exported the model from will be created, and inside there will be three subfolders. The model will be in the SkeletalMesh3 folder.

Congratulations! You now have the base head model. Now it’s time to put it all together.
PART C: Putting it all together in Blender
This part requires:
The .me3headmorph file you exported in Part A
The head model you exported in Part B
Blender
(Make sure your scripts are installed!! If you don’t know how, follow these instructions (just ignore the “Open Blender 4.0.0” part, it should still apply to 2.8))
When Blender is open, delete all the default items in the scene (the cube, the camera, and the light source). Once that’s done, go to File > Import > your PSK import script, then import your head model. (If you’re using a different script than the one I’m using, there may be an option to scale down your model. Make sure this is unchecked.)
Now your scene should look something like this:

To hide the bones for the head model, click the eye on your imported model on the top right.
IMPORTANT: Once you import the head model, DO NOT MOVE IT!!! This will mess up the face import. You can move the model after you do the import.
If you look on the right of the scene, you should see a section called “Mass Effect Face Importer”, which is located under the Object tab (this tab should be displayed by default). Expand the face importer and you’ll get this:

Click on the file button and navigate to where your .me3headmorph is located. Click “Accept,” and your .me3headmorph’s path will be loaded. When you’re ready, make sure your head model is selected, then click “Import HeadMorph”.
And boom!!! You should now see your Shepard’s headmorph applied to the model. For comparison, here’s the male base head before and after I imported John’s headmorph:

And for further comparison, here’s John’s face in-game:

So there you have it! You now have your Shepard’s head as a 3D model. From here you can save it, export it, edit it, do whatever you want with it. It’s your city now.
….But also I said I’d cover extracting textures so-
PART D: Extracting your Shepard’s textures
This part requires:
Trilogy Save Editor
Legendary Explorer
So you may notice that this guide requires two different save editors. The reason for this is that Trilogy Save Editor (TSE) does not export your headmorph in the filetype required for the script. That being said, It’s much easier to view Shepard’s headmorph data in TSE, hence why we’re using TSE for this part.
(Also, TSE is referred to in a lot of customization mods, so if you use hair or headmorph-related mods you’ve already used TSE in one way or another.)
When you first open TSE, it will look like this:

Click “Open,” and File Explorer will automatically open to Documents\BioWare. Follow the usual steps to getting your save.
When you load your save, it will look like this:

Currently, it’s on the General tab. Click the Head Morph tab to display your selected Shepard’s headmorph.

(Oh yeah, you can also get the file path for your Shepard’s hair mesh if you wanted.)
What’s nice about TSE is that it displays an asset’s file path. The first part of the file path will always be the Package file the asset is placed in.
For textures, click on Texture Parameters to expand the list. To display the parameters for each entry, simply click on each entry to expand it.

In this particular example, HED_Diff is the diffuse texture for Shepard’s face. The package file for this particular diff is found in BIOG_HMM_HED_PROMorph, and the filename for the texture is HMM_HED_PROBase_Face_Diff_Stack. Typically, this means you now have the info needed to open the file in Package Editor and locate the file yourself.
But there’s an easier way, and I mentioned it already: The Asset Database.
On the LEX menu, click the Utilities tab, and click on Asset Database (abbreviated as ADB)

If this is your first time using the Asset Database, you’ll need to actually build the database before you can use it. Each game needs its own database. You should be able to build these by going to Database and selecting “LE3 Database,” then click “Generate New Database”.
Once your databases are generated, the window should look like this:

To look for textures specifically, click on the Textures tab.

Take the name of the texture you need and paste it onto the search bar on the top right. It will automatically filter the file list to the files that contain the name. To view the texture in the middle, click on “Toggle Texture Rendering”.

Whoa, now you can see it! On the left is each individual file containing the name you searched. On the right are the usages – a list of the Package files containing that specific file. (NOTE: Package files from mods are highlighted in red. Vanilla Package files are in black.)
To export the file, click “Export to File,” where you can save it to any directory. You can save the texture as either a PNG, a DDS, or a TGA.
And there you have it! You now have your Shepard’s face textures. You can repeat this for all the textures you need. Note that some of the textures have alpha channels, which will come into play if you decide to edit them. Some textures, such as the eyebrows, may not actually be diffuse but rather normal textures. This is due to the way they’re applied in-game. But that’s a topic for a different guide :)
If you do decide to edit your textures by baking in the colours, you can go back to TSE to view your Shepard’s headmorph again, but this time expanding Vector Parameters. Here’s what it’ll look like:

(All the vector parameters have the option for inputting RGBA values as well as selecting a colour via colour wheel.)
If you’ve gotten this far and successfully followed the steps, then congratulations! You’re well on your way to making self-indulgent content using your beloved Shepard characters and/or learning how to mod Mass Effect in general. If I get around to making more guides (read: if people want them), I’ll get into more detail on other things, particularly on how to mesh swap your Shepard into the game. For now, extra notes:
If you need extra advice on mesh or texture modding, I recommend joining the ME modding Discord. Here’s the invite. There are people there who actually know how to texture/mesh mod better than I can lol
Alternatively, here's the Github wiki for LEX modding tutorials :)
This is mostly a comment, but I am so glad the 2.8 version of the script exists. Back when I first did this I had to use 2.7 and it took a lot longer, especially with the way it affected UV maps. Luckily the 2.8 version doesn’t affect the UV maps, and in fact made this entire process much easier and less archaic.
Incidentally, the reason why I learned how to extract CC Shepards from the game wasn’t even for ME modding. It was for XNALara. Anyway here’s a meme:

32 notes
·
View notes
Text
How to Back up a Tumblr Blog
This will be a long post.
Big thank you to @afairmaiden for doing so much of the legwork on this topic. Some of these instructions are copied from her verbatim.
Now, we all know that tumblr has an export function that theoretially allows you to export the contents of your blog. However, this function has several problems including no progress bar (such that it appears to hang for 30+ hours) and when you do finally download the gargantuan file, the blog posts cannot be browsed in any way resembling the original blog structure, searched by tag, etc.
What we found is a tool built for website archiving/mirroring called httrack. Obviously this is a big project when considering a large tumblr blog, but there are some ways to help keep it manageable. Details under the cut.
How to download your blog with HTTrack:
Website here
You will need:
A reliable computer and a good internet connection.
Time and space. For around 40,000 posts, expect 48 hours and 40GB. 6000 posts ≈ 10 hours, 12GB. If possible, test this on a small blog before jumping into a major project. There is an option to stop and continue an interrupted download later, but this may or may not actually resume where it left off. Keep in mind that Tumblr is a highly dynamic website with things changing all the time (notes, icons, pages being updated with every post, etc).
A custom theme. It doesn't have to be pretty, but it does need to be functional. That said, there are a few things you may want to make sure are in your theme before starting to archive:
the drop down meatball menu on posts with the date they were posted
tags visible on your theme, visible from your blog's main page
no icon images on posts/notes (They may be small, but keep in mind there are thousands of them, so if nothing else, they'll take up time. Instructions on how to exclude them below.)
Limitations: This will not save your liked or private posts, or messages. Poll results also may not show up.
What to expect from HTTrack:
HTTrack will mirror your blog locally by creating a series of linked HTML files that you can browse with your browser even if tumblr were to entirely go down. The link structure mimics the site structure, so you should be able to browse your own blog as if you had typed in the url of your custom theme into the browser. Some elements may not appear or load, and much of the following instructions are dedicated to making sure that you download the right images without downloading too many unnecessary images.
There will be a fair bit of redundancy as it will save:
individual posts pages for all your tags, such as tagged/me etc (If you tend to write a lot in your tags, you may want to save time and space by skipping this option. Instructions below.)
the day folder (if you have the meatball menu)
regular blog pages (page/1 etc)
How it works: HTTrack will be going through your url and saving the contents of every sub directory. In your file explorer this will look like a series of nested folders.
How to Start
Download and run HTTrack.
In your file directory, create an overarching folder for the project in some drive with a lot of space.
Start a new project. Select this folder in HTTrack as the save location for your project. Name your project.
For the url, enter https://[blogname].tumblr.com. Without the https:// you'll get a robots.txt error and it won't save anything.
Settings:
Open settings. Under "scan rules":
Check the box for filetypes .gif etc.
Make sure the box for .zip etc. is unchecked.
Check the box for .mov etc.
Under "limits":
Change the max speed to between 100,000 - 250,000. The reason this needs to be limited is because you could accidentally DDOS the website you are downloading. Do not DDOS tumblr.
Change the link limit to maybe 200,000-300,000 for a cutoff on a large blog, according to @afairmaiden. This limit is to prevent you from accidentally having a project that goes on infinitely due to redundancy or due to getting misdirected and suddenly trying to download the entirety of wikipedia.
Go through the other tabs. Check the box that says "Get HTML first". Uncheck "find every link".
Uncheck "get linked non-html files". If you don't want to download literally the entire internet.
Check "save all items in cache as well as HTML".
Check "disconnect when finished".
Go back to Scan Rules.
There will be a large text box. In this box we place a sort of blacklist and whitelist for filetypes.
Paste the following text into that box.
+*.mp4 +*.gifv -*x-callback-url* -*/sharer/* -*/amp -*tumblr.com/image* -*/photoset_iframe/*
Optional:
-*/tagged/* (if you don't want to save pages for all your tags.)
-*/post/* (if you don't want to save each post individually. not recommended if you have readmores that redirect to individual posts.)
-*/day/* (if you don't feel it's necessary to search by date)
Optional but recommended:
-*/s64x64u*.jpg -*tumblr_*_64.jpg -*avatar_*_64.jpg -*/s16x16u*.jpg -*tumblr_*_16*.jpg -*avatar_*_16.jpg -*/s64x64u*.gif -*tumblr_*_64.gif -*avatar_*_64.gif -*/s16x16u*.gif -*tumblr_*_16.gif -*avatar_*_16.gif
This will prevent the downloading of icons/avatars, which tend to be extremely redundant as each image downloads a separate time for each appearance.
Many icons are in .pnj format and therefore won't download unless you add the extension (+*.pnj), so you may be able to whitelist the URLs for your and your friends' icons. (Honestly, editing your theme to remove icons from your notes may be the simpler solution here.)
You should now be ready to start.
Make sure your computer doesn't overheat during the extremely long download process.
Pages tend to be among the last things to save. If you have infinite scroll on, your first page (index.html) may not have a link to page 2, but your pages will be in the folder.
Shortly after your pages are done, you may see the link progress start over. This may be to check that everything is complete. At this point, it should be safe to click cancel if you want to stop, but you run the risk of more stuff being missing. You will need to wait a few minutes for pending transfers to be competed.
Once you're done, you'll want to check for: Files without an extension.
Start with your pages folder, sort items by file type, and look for ones that are simply listed as "file" rather than HTML. Add the appropriate extension (in this case, .html) and check to see if it works. (This may cause links to this page to appear broken.)
Next, sort by file size and check for 0B files. HTMLs will appear as a blank page. Delete these. Empty folders. View files as large icons to find these quickly.
If possible, make a backup copy of your project file and folder, especially if you have a fairly complete download and you want to update it.
Finally, turn off your computer and let it rest.
103 notes
·
View notes
Photo

We are the best option for reaching globally. Expand your business with us, and connect with verified global 𝐁𝐮𝐲𝐞𝐫𝐬 and 𝐒𝐮𝐩𝐩𝐥𝐢𝐞𝐫𝐬.
𝑹𝒆𝒈𝒊𝒔𝒕𝒆𝒓 𝒘𝒊𝒕𝒉 𝒖𝒔
:📩E-mail us - [email protected]
📲Call us - 1800 57205 58
🌐Visit- www.go2bng.com
#Go2bng#business network gateway#strategyforbusiness#business growth#strategy for growth#B2B Marketplace#B2b Business#b2b#export#export from india#export import business#export directory#india business directory#international trade#market growth#growth
1 note
·
View note
Text
In the complex realm of global trade, accessing accurate data is key to success. The Turkey Importers List and Import Export Data Bank offer vital insights for businesses seeking a competitive edge. Learn how savvy enterprises utilize these resources to drive profits and stay ahead in international trade. Explore the blog "How Savvy Businesses Profit from the Turkey Importers List" Now!
#export#global trade data#import#international trade#trade data#trade market#global market#import data#import export data#turkey importers list#turkey import export data bank#turkey importers directory#turkey import export data provider#turkey exim data#turkey#trade#market research
0 notes
Note
Not a question, but I’m so sorry this is happening to you! Seeing years of comments as I was reading for the first time was magical, and knowing that no new readers will be able to experience that is tragic. We’re here for you during this! Barruni forever!! 💚💜
It's fucking me up pretty bad. I know there's a way to export the comments so I won't necessarily lose them forever, but they just won't be on the site anymore.
Thank you for the kind words. I'm trying my best to not let this be an end-of-the-world situation if I'm able to help it at all. There are a few benefits of not needing to retain comments like putting the volumes into more proper directories and maybe even separate them by series. I feel like that would be much cleaner going forward.
31 notes
·
View notes
Text
in case anyone else is taking the opportunity to back up their own or other people's fic hosted on ao3, the ao3 downloader bookmarklet makes it much quicker to quickly download all of the works on a given page in any of the formats ao3 offers for export. like so:
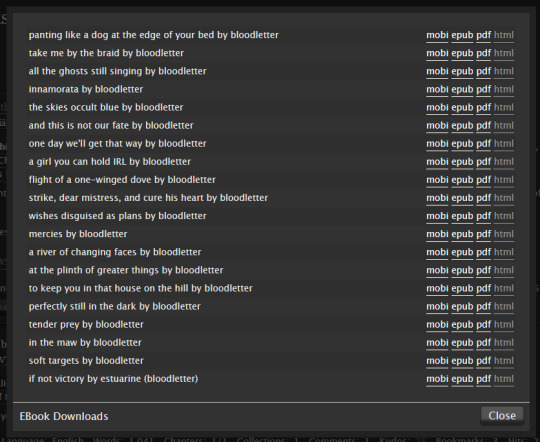
it works on a given author's works directory or a bookmarks listing page.
if you're comfortable using python, this ao3 downloader script might give you more advanced functionality, but that is way more effort than i'm willing to put in to setting something up that exists so i have to put less effort into something... but if you have a large catalogue of works or bookmarks it might be worth the effort.
edit: there's also a quick and dirty tutorial to making a simple neocities site as a personal fic archive using html files -- you can find that here. even if you plan to keep hosting work on ao3, backups are always good!
122 notes
·
View notes
Text
Today so far:
Git clean up/adding the GPLv3 license to old commits
Most of the hopper backend demo code is complete, next I need to make a demo json endpoint to test with and then I'll pick an online web page to demo with
Cracked distributed database functionality and so distributed Catch querying, all I really needed to do was export ths overall directory listing and next I'll need to make a packet to sync that data and allow querying for those resources
13 notes
·
View notes
Note
okay Wait. this is probably a bad question 2 be asking you but since when can u export ur cats.. like into transparent images.. and how... cuz that would make my life so much easier
no problem at all!!! happy to help
so first off you go ahead and select the cat that you want to export an image of, then click on the little magnifying glass up on the top right
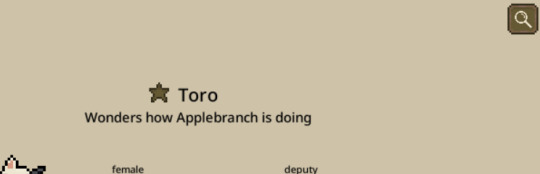
then you get to this screen. you can choose which stuff you want to see on the image, and you can click on the arrows to either side to change the cat's age! when you've got the image you want to export, click on Save as Image
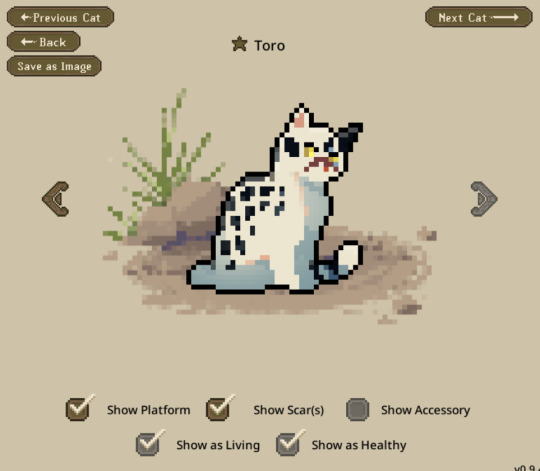
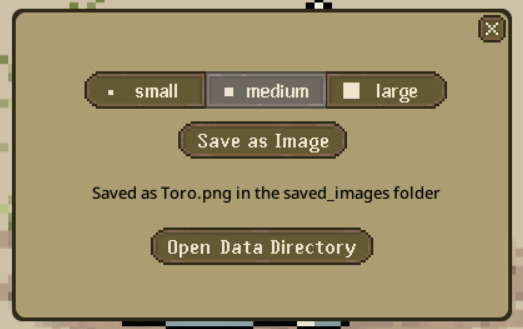
that gets you to here. i usually make the images medium just because, but you do whatever size you want. then click save as image, and you should be able to find the exported cat in the saved_images folder in the data directory!
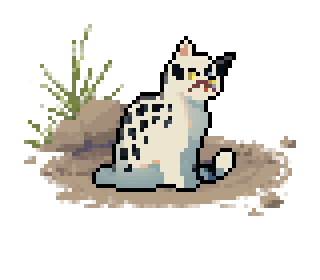
super easy, hopefully :) enjoy ur images
58 notes
·
View notes
Text
GUESS WHAT!!! a tutorial for rayman origins texture mods like how i made uglette

this is for origins only for now, ill make a separate post for legends later (but itd follow most of the same steps)
first of all. use rayman control panel, if you dont have it somehow then what are you waiting for?? make sure its updated to the latest update too (14.0.0.9 as of writing this) for improved modding support
updated on january 10 2024 for the dds portion
-
step 1: getting the textures
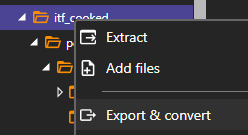
in control panel, click origins and then open the archive explorer

youll get a whole directory of a bunch of folders, what you need for the textures is just the itf_cooked folder. if you want all the textures just right click the folder, click export & convert, and convert them to png or something for convenience
if you converted all the images and dont need any things that arent images, just use windows search on the extracted folder to prune all the remaining .ckd files to save on space, but this isnt as necessary
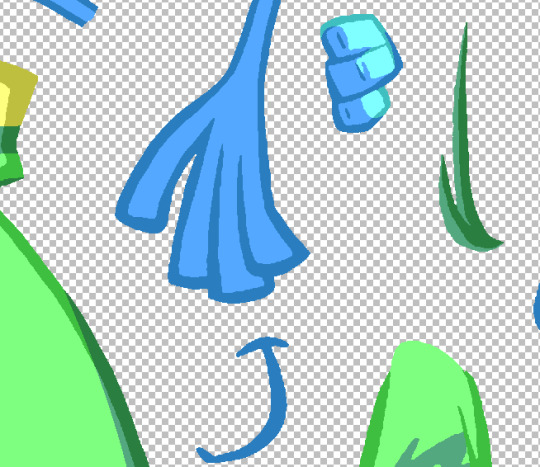
you can also extract just the sprites you want to work with, or heck get them from spriters resource if you want, but still keep control panel in mind as you need the original directory of the files
if you want to replace the playable characters, their textures are are in the following folders
rayman sprites:
itf_cooked/pc/actor/playablecharacter/rayman/animation
globox sprites (you will also need mosquito sprites for him):
itf_cooked/pc/actor/playablecharacter/globox/animation
itf_cooked/pc/world/common/shooter/playablecharacter/shootermoskitoglob/animation
teensy sprites:
itf_cooked/pc/world/1_jungleworld/friendly/teensy/animation
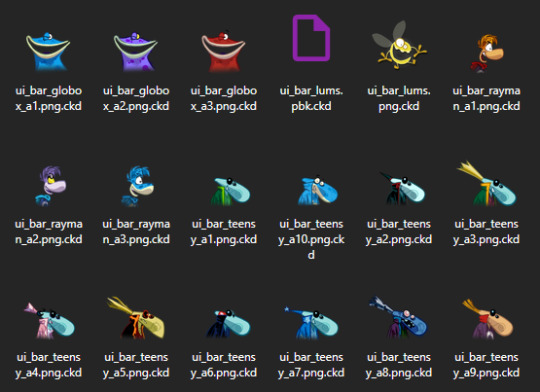
ui icons for everyone:
itf_cooked/pc/world/common/ui/ui_bar
-
step 2: the art itself
once you have the original textures all you need to do is to edit them, or redraw them. this may be a tedious process though! what i did is painstakingly edit each original spritesheet to be 2x size, then aliased to put it into a format that i can easily work with and edit, i mostly did so with a whole bunch of magic wand usage and tweaks
i did finish all the templates for all playable characters, i will see if i can release them somehow eventually? but yeah for now figure out your own way to edit them for now
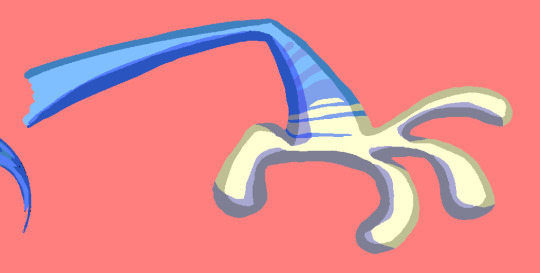
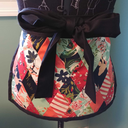
either way you can figure out some way to draw new art for them. save it in a folder separate from all the other assets obviously. here for example i made a more rayman 3-like grand mimimus. i also frankensteined an icon together

-
step 3: dds things
now that youve done the textures for the mod, duplicate them and save them as .dds files
this isnt necessary, as larger resolutions will also work (probably as long as the dimensions are still a power of 2), but you can resize the textures to the original resolution as well. i will be doing that personally
if you dont have a program that supports dds files, i just use paint.net. i provide a save configuration for it specifically, you can get it here if you need
this is updated!!! after much experimenting this one looks the best to me. the most important settings are outlined in orange, but try to match the rest too
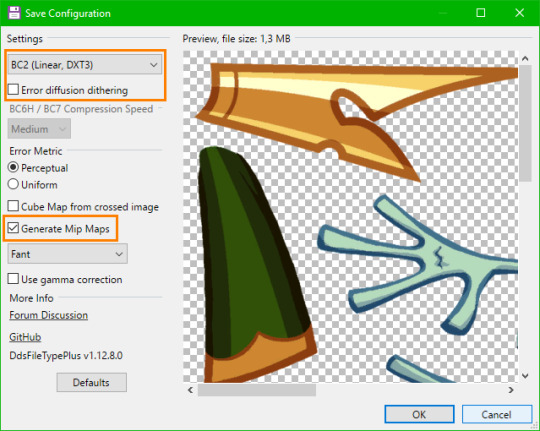
make sure you have generate mipmaps on specifically or else the sprite will end up pixelly

however some additional, more jpeg-y crust will be applied onto the sprite from the mipmaps themselves. so heres the technical part thats probably complicated... if you dont wanna bother with this try to copy the rest of my save configuration, i think it works the best here
i experimented a bit with what looked best and picked fant with no gamma correction, but you can try saving multiple dds files with different settings, viewing them with whatever lets you view the mipmaps themselves (windows image viewer does) and just picking which looks better at a smaller scale
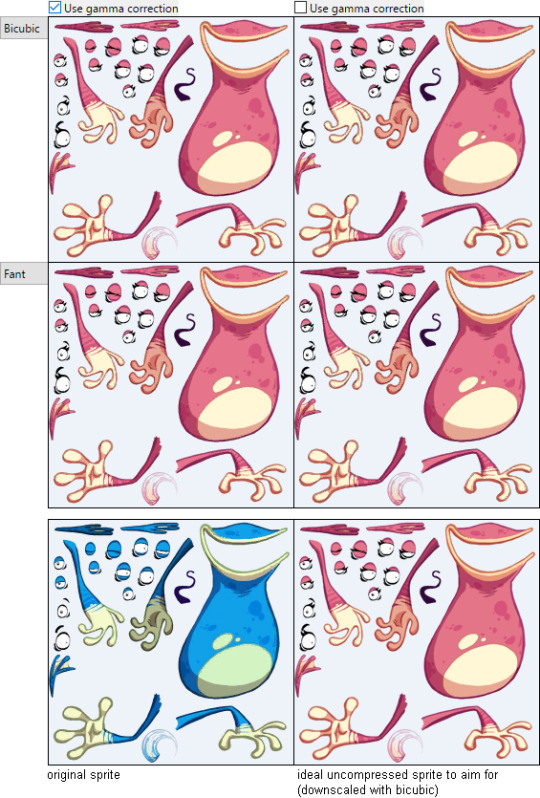
(to see the differences look closely at the eyes specifically, its probably hard without overlaying these one over another and directly comparing though)
one thing i can say is bicubic and fant are definitely the best for matching the original sprites' mipmaps, as theyre not too blurry (like bicubic smooth or bilinear) while remaining fairly good looking
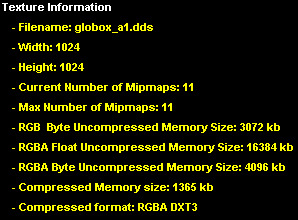
these are the original dds files' settings as viewed in dxt viewer. most of this doesnt seem to be applicable for the save settings but the compressed format is specifically dxt3 (which is also present in its header if you view it in hxd), so for the first save setting you probably have to pick BC2 (Linear, DXT3) as i have
TLDR: i know this is complicated, try to just copy the dds save configuration from the start of this step i guess???
-
step 4: renaming things
once you have done that, the weird thing you need to do is to rename the .dds into files that the game can actually read (even though theyre still dds files, and can be renamed back to .dds for them to function). for convenience you can just duplicate the files again
pay attention to the original file formats which you can see in control panel! as you can see, you should rename the majority of the extensions from .dds to .tga.ckd
windows will stop recognizing them, likely the same for the programs you use, but that shouldnt be a big deal. if you want, you can rename them back to .dds to make them usable
the important part here, dont miss it!!! is that all the ui icons are not tga.ckd, but png.ckd!!! even though theyre actually still dds files under the surface. just rename them correctly and pay attention to the right extension, or else the icon wont work
obviously make sure they have the same filename in general ALONGSIDE the extension
-
step 5: actually making the mod
now that you have the relevant files, click create mod in control panel

select the files module, and then make and select a folder to use as the mod folder, which should give you this result
the files folder should have these two

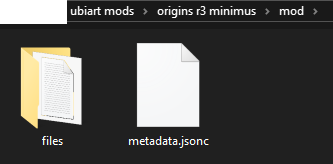
you should create a GameData folder in added_files, after which the entire regular filepath follows, starting from bundle_PC.ipk, then itf_cooked, then so on. for example, these are (nearly) the full directories of my files
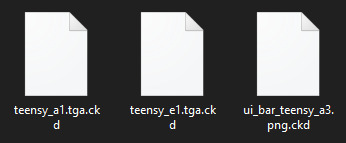
\mod\files\added_files\GameData\bundle_PC.ipk\itf_cooked\pc\world\1_jungleworld\friendly\teensy\animation\teensy_a1.tga.ckd
\mod\files\added_files\GameData\bundle_PC.ipk\itf_cooked\pc\world\1_jungleworld\friendly\teensy\animation\teensy_e1.tga.ckd
\mod\files\added_files\GameData\bundle_PC.ipk\itf_cooked\pc\world\common\ui\ui_bar\ui_bar_teensy_a3.png.ckd
obviously all the textures should have the same filename and the same file path as the textures theyre replacing
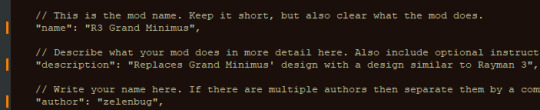
then go back to the base mod folder and edit the metadata.jsonc file in something like notepad++. the file itself has commented-in extensive instructions so just follow them
as the mod creator thingy says you can also optionally create a thumbnail
anyway once youve done all of that, select all the files in your mod folder and zip them. you cant just select the folder WITH the mod things and then zip that, as then control panel wont read it because the base of the zip directory doesnt have the metadata file

-
step 6: finally implementing the mod!!!
now that you have the zip ready, click the mod loader and select this in the lower left corner

navigate to your zip and select it. it should appear here under installed mods

make sure you press the checkmark to the left of it and then press the apply button in the lower right

after a short wait for the mods to apply you can go turn on the game and test it

and it should hopefully work !
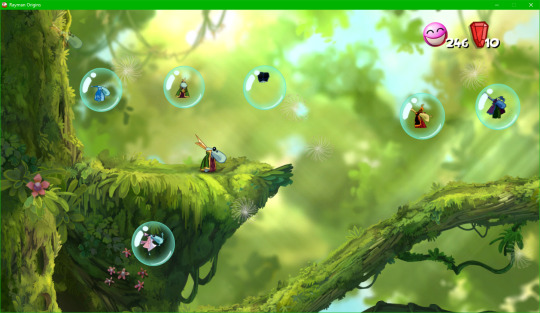
also yeah ill release the minimus soon enough on gamebanana

if you want to make any further edits to the textures, youd have to resave them as .dds files again, and rename them to tga.ckd/png.ckd and such, then just replace them in the mod's directory (or add new files to it) and just zip it again. its fairly easy to work with i hope
this is overall kind of a complicated tutorial but its not too bad once you get the hang of it
20 notes
·
View notes
Last Seen Blogs

offkaya
👑💄🎀💌🖤

betafaggitz
submit bitch

hufflety-pufflety15-blog
F*ck a silver lining
hereastitch-blog
Here a Stitch

emilyzhang9007
kangertech