#High torque servo motor arduino
Explore tagged Tumblr posts
Visit Tumblr Blog
Explore Tumblr blogs with no restrictions, modern design and the best experience.
Last Seen Tumblr Blogs


Fun Fact
70% of Tumblr users say the Dashboard is their favorite place to spend time online.
Text

MG995 TowerPro Metal Gear Servo Motor 180 degree Rotation
Getting an original TowerPro mg995 Servo Motor is not an economical option at all! And is also a very difficult task to recognize and buy an original TowerPro mg995 servo motor, Because there are many suppliers spread over different online shops who are selling fake servo motors under this Brand name. The TowerPro MG995 Servo Motor rotates 90° in each direction making it 180° servo motor. It is a Digital Servo Motor that receives and processes PWM signal faster and better. It equips sophisticated internal circuitry that provides good torque, holding power, and faster updates in response to external forces. These TowerPro MG995 Servo Motors are the high-speed servo motors with the mighty torque of 10 kg/cm. Wire Description
RED – Positive
Brown – Negative
Orange – Signal
NOTE: This servo draws high current while operation (up to 2 amp stall), to make this servo work with Arduino or any other microcontroller, please do the following connections. PLEASE MAKE SURE THAT YOUR SYSTEM HAS COMMON GROUND. POWER SOURCE ANYTHING BATTERY/SMPS/ADAPTER.
Features:
The connection cable is thicker.
Equips high-quality motor.
High resolution
Accurate positioning
Fast control response
Constant torque throughout the servo travel range
Excellent holding power
#sensor#arduino#sales in chennai#electronic components#lcd#robotic kits#raspberrypi#adxl335 module price#5mp camera#motor
0 notes
Text
Elevate Your Projects with Hitec Servo Motors
When precision, reliability, and innovation are your top priorities, Hitec Servo Motors are your go-to solution. Whether you're an engineer, a robotics enthusiast, or a B2B customer, our range of advanced servomechanisms, including brushless DC electric motors, is designed to meet your most demanding requirements.
Unmatched Performance and Versatility
Hitec Servo Motors offer unparalleled performance across a wide array of applications:
Unmanned Systems: From aerial drones to underwater submersibles, our servos provide the robust torque and precise control needed for critical operations.
Robotics: Ideal for creating sophisticated robots, our servos deliver high efficiency, diverse communication capabilities, and precise feedback to bring your innovative designs to life.
Industrial Automation: Optimize your motion control systems with our responsive and durable servos, perfect for enhancing productivity and efficiency in manufacturing environments.
Animatronics and Entertainment: Create lifelike movements and immersive experiences with our reliable and powerful servos, trusted by industry professionals for their exceptional performance.
Cutting-Edge Integration and Customization
Our servos support a range of industry-standard command protocols, including PWM, TTL, RS485, CAN, and DroneCAN, ensuring seamless integration into your existing systems. With Arduino compatibility, you can easily bring your automation and robotics projects to life.
At Hitec, we understand that every project has unique requirements. That's why we offer custom modification services to tailor our servo motors to your exact specifications. Whether you need a specific torque, speed, or size, our engineering expertise and extensive product line have you covered.
Global Support and Commitment to Excellence
With over five decades of experience, Hitec is committed to delivering top-notch precision and reliability. Our manufacturing capabilities, located outside of China, allow us to meet the highest standards and ensure that our products are RoHS COMPLIANT and ISO 9001:2015 / 14001:2015 CERTIFIED.
Our global sales and support network means we're always there to assist you, no matter where your project takes you. Join the ranks of satisfied engineers and professionals who trust Hitec for their servo motor needs.
Stay Updated and Connected
For the latest product updates and industry news, sign up for the Hitec Commercial Solutions Newsletter today. Whether you're working on the next big innovation in robotics or enhancing your industrial automation setup, Hitec is here to support your journey.
1 note
·
View note
Text
High torque servo motor arduino

#High torque servo motor arduino manual#
#High torque servo motor arduino full#
Similar to the Sweep sketch, the servo motor signal pin is attached to pin 9 of the Arduino UNO. On the Arduino IDE, go to File > Examples > Servo > Sweep. This library comes with the IDE so no additional downloads necessary. The Arduino Servo library has two easy-to-use examples. By the way, there are other ways to generate PWM besides the hardware PWM on the Arduino. Side note: But it doesn’t mean that the control pin is limited to only a PWM pin. This means this lead must be connected to any of the pins with the ~ in them. The yellow pin is where you would send PWM signals to the Arduino. Remember that the Arduino +5v pin is limited to 500 mA! Thus, the number (and sometimes, type) of servos you can use is limited. My MG996R draws 10 mA at idle, 170 mA when operating but without any load connected and stalls at 1400 mA (!). However, larger servos might draw more current which can reset the Arduino. Most servo motors run on 5V so you can attach the red lead to the Arduino’s +5V pin. Servo motors that don’t produce high torque typically contain plastic gears.Ī better look at the circuit board, dc motor and potentiometer: This servo motor is capable of producing high torque (rotational force), and thus has metal gears inside: Other servo motor brands have different colors for their wires but almost all uses red for +5V and black for ground. Servo Motor InternalsĪs you can see, there are three wires: red for +5V, black for ground and yellow for pulse. There is a way to make a continuous rotation servo and is shown in this tutorial. A continuous rotation servo is stronger than a an ordinary dc motor. The limited possible values for PWM signals needs to be mapped to a smaller range (of angles).
#High torque servo motor arduino full#
Originally designed for converting rotational motion to linear motion, servo motors do not need full 360 degree rotation (see crank mechanism).
There are two reasons why servo motors don’t rotate for a full circle: There is mechanical stop at the gear assembly to limit the rotation of servo motors to 180 degrees. If you want to get the exact pulse width for a specific angle, you must test your servo motor. The exact pulse width could vary per servo motor. The position of the servo motor arm corresponds with the width of the pulse: From SM2608 Hardware Hacking Workshop Also, the gears boost the torque output of the servo motor. The gear assembly slows down the rotation of the motor to a speed that the potentiometer can catch up.
The potentiometer (via voltage divider) generates a voltage equivalent to that of the input pulse that stops the DC motor, indicating equilibrium.
As the motor turns, the gear assembly turns and thus also turns the potentiometer.
When a pulse is applied, the two inputs on the error amplifier is no longer equal and thus the amplifier drives the motor.
The inputs to the error amplifier are equal and the motor is undriven.
When the DC motor is at stop, it means the motor shaft and potentiometer knob are in its equilibrium position.
A servo motor accepts pulses and outputs rotation.
The operation of the servo motor can be described by the diagram below: It follows the concept of servomechanism.
5 Use Potentiometer to Control a Servo MotorĪ servo motor is a special device containing a dc motor, feedback electronics and a set of gears.
4.2 Using Microseconds instead of Angles.
4 Programming an Arduino for Servomotors.
3 Arduino to Servo Motor Wiring Diagram.
#High torque servo motor arduino manual#
We recommend using manual pulse lengths if possible: check if you can set your servo controller to custom pulse lengths and try 0.75ms to 2.25ms. Note that the default servo pulse widths (usually 1ms to 2ms) will not give a full range of motion on this servo. Position "0" (1.5ms pulse) is middle, "90" (~2ms pulse) is all the way to the right, "-90" (~1ms pulse) is all the way to the left. To control with an Arduino, we suggest connecting the orange control wire to pin 9 or 10 and using the Servo library included with the Arduino IDE ( see here for an example sketch). Please note, this servo will 'hold' the position even when no signal is sent! Works great with the Motor Shield for Arduino, our 16-channel Servo Driver, or by just wiring up with the Servo library. Of course, it's not nearly as strong as a standard servo. Good for beginners who want to make stuff move without building a motor controller with feedback & gearbox, especially since it will fit in small places. You can use any servo code, hardware, or library to control these servos. The tiny little servo can rotate approximately 90 degrees (45 in each direction) and works just like the standard kinds you're used to but smaller. Add more power to your robot with this metal-geared MG90D servo.
0 notes
Text
Buy 10 x MG995 Servos Motor High Speed Digital Metal Gear Ball Bearing Torque 12kg For RC Car Boat Helicopter For Robot Arduino Kit
Buy 10 x MG995 Servos Motor High Speed Digital Metal Gear Ball Bearing Torque 12kg For RC Car Boat Helicopter For Robot Arduino Kit
10 x MG995 Servos Motor High Speed Digital Metal Gear Ball Bearing Torque 12kg For RC Car Boat Helicopter For Robot Arduino Kit
Check Price

More Description
More photo
View On WordPress
0 notes
Text
Unleash Your Inner Maker with These Incredible Arduino Kits!
Arduino is an open-source electronics platform that has gained immense popularity in the last few years. The platform offers a wide range of microcontrollers and compatible electronic components that can be used for various DIY projects. Arduino kits are readily available in the market, and they are perfect for beginners and experts alike. In this blog, we will discuss four different types of Arduino kits: CNC Shield + UNO R3 Board compatible with Arduino + 4xDRV8825 Driver Kit, UNO DIY Line Follower Kit, UNO Basic Starter Kit, and UNO Robotics Kit.
CNC Shield + UNO R3 Board compatible with Arduino + 4xDRV8825 Driver Kit:
The CNC Shield + UNO R3 Board compatible with Arduino + 4xDRV8825 Driver Kit is perfect for those who want to build a CNC machine. This kit includes a CNC shield, a UNO R3 Board, and four DRV8825 driver modules. The CNC shield provides a convenient way to control stepper motors and has four slots for the DRV8825 drivers. The UNO R3 Board acts as the brain of the CNC machine and is compatible with the Arduino software. The DRV8825 driver modules control the stepper motors and provide high torque at low speeds. With this kit, you can build a CNC machine that can be used for cutting, engraving, and milling.
UNO DIY Line Follower Kit:
The UNO DIY Line Follower Kit is an excellent choice for those who want to build a line-following robot. This kit includes an UNO R3 Board, a line sensor module, a motor driver module, and two DC motors. The line sensor module detects the black line on a white surface and provides feedback to the UNO R3 Board. The motor driver module controls the speed and direction of the DC motors. With this kit, you can build a line-following robot that can navigate its way through a maze.
UNO Basic Starter Kit:
The UNO Basic Starter Kit is perfect for those who are new to Arduino and want to learn the basics of electronics and programming. This kit includes an UNO R3 Board, a breadboard, various electronic components such as resistors, LEDs, and sensors, and a USB cable. With this kit, you can learn how to build circuits and write simple programs using the Arduino software. This kit is an excellent choice for beginners who want to learn the fundamentals of electronics and programming.
UNO Robotics Kit:
The UNO Robotics Kit is ideal for those who want to build a more advanced robot. This kit includes an UNO R3 Board, a motor driver module, a servo motor, a distance sensor module, and various other electronic components. With this kit, you can build a robot that can move around, detect obstacles, and interact with its environment. The motor driver module controls the speed and direction of the DC motors, while the servo motor provides precise movement control. The distance sensor module can detect objects in front of the robot and provide feedback to the UNO R3 Board. With this kit, you can build a robot that can perform various tasks and interact with its surroundings.
Conclusion
Arduino kits offer a convenient way to build electronics projects for beginners and experts alike. The CNC Shield + UNO R3 Board compatible with Arduino + 4xDRV8825 Driver Kit, UNO DIY Line Follower Kit, UNO Basic Starter Kit, and UNO Robotics Kit are just a few examples of the different types of Arduino kits that are available in the market. With these kits, you can build a wide range of projects, from CNC machines and line-following robots to more advanced robots that can interact with their environment.
0 notes
Text
Handy machine cuts heat shrink tubing to length
Solder joints on PCBs don’t usually require extra protection, but loose wires are a different story. Because they can move around and touch each other or the enclosure, you need to protect the bare wire from shorts. Most people use either electrical tape or heat shrink tubing for the job. But cutting heat shrink tubing to length can be a time-consuming process if you have many wires to protect. That’s why Mr Innovative used an Arduino to build this handy machine that cuts heat shrink tubing automatically.
Mr Innovative built similar machines in the past, including one that feeds four different wire spools and cuts them to desired lengths. This machine is similar, but works with a single spool of heat shrink tubing. The user inserts one end of the tubing into the machine, sets the length via a touchscreen interface, and the machine takes care of the rest. It will continue to snip off sections of tubing, all of the same length, until it runs out of heat shrink to work with.
An Arduino Nano board controls the machine through a custom PCB that contains two A4988 stepper motor drivers. A NEMA 17 stepper motors drives a wheel that feeds the heat shrink tubing. A high-torque stepper motor in a servo motor package actuates a linkage that pushes the cutting blade. The display is a Nextion NX3224K028 2.8″ resistive touchscreen with a resolution of 320×240, which has a custom interface programmed by Mr Innovative. The machine’s frame is a combination of wood, aluminum extrusion, and 3D-printed parts.
youtube
The post Handy machine cuts heat shrink tubing to length appeared first on Arduino Blog.
Handy machine cuts heat shrink tubing to length was originally published on PlanetArduino
0 notes
Text
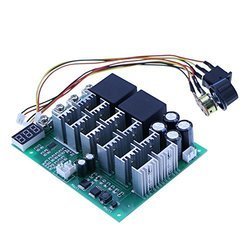
72v 700w Brushless Motor Controller Driver Board

Brushless Motor Speed Controller
Items in search results
DC 36V 48V 72V 60V 700W Brushless Motor Drive Board Balanced Car BLDC Controller
EUR 13.49
+ EUR 1.13 postage
From Hong Kong
DC72V 4000W Electric Bicycle Brushless Motor Speed Controller for E-bike Scooter
EUR 236.18
Free Postage
From China
DC 36V-72V 700W Brushless Motor Controller Hall Motor Balanced Car Driver Board
EUR 13.49
+ EUR 1.13 postage
From Hong Kong
12V 24V 36V 48v 72V 30A DC MOTOR SPEED governor CONTROL PWM HHO RC CONTROLLER
EUR 9.33
+ EUR 1.13 postage
From Hong Kong
700W BLDC driver board DC brushless no Hall sensor motor control dc 36-72v 60v
EUR 14.94
+ EUR 1.13 postage
From Hong Kong
140A 200V 48V 72V current limited DC motor speed controller PWM RS232 arduino
EUR 97.58
+ EUR 10.65 postage
From Hungary
72V 1200W Electric Bicycle E-bike Scooter Brushless DC Motor Speed Controller SP
EUR 45.00
Free Postage
From Hong Kong
200A 100V 48V 72V current limited DC motor speed controller PWM RS232 arduino
EUR 88.71
+ EUR 10.65 postage
From Hungary
70A 100V 48 72v DC motor PWM Speed Controller Reversible H bridge RS232 Arduino
EUR 79.84
+ EUR 10.65 postage
From Hungary
NEW Malin Crown CR20334-000 72 Volt DC Truck Lift Turret Drive Motor 72V
EUR 584.67
+ EUR 675.44 postage
From United States
6-72V 450W DC Brushless Motor Controller BLDC PWM Hall Driver Board 12v 24v 48V
EUR 11.13
+ EUR 1.13 postage
From Hong Kong
DC 5-72V 15A Digital Display PWM DC Motor Speed Controller Module Button Versio
EUR 5.84
+ EUR 1.13 postage
From Hong Kong
Waterproof Digital Meter DC 3.5~150V Led Voltmeter 12V 24V 36v 48v 72v car Motor
EUR 4.49 toEUR 4.94
+ EUR 1.13 postage
From Hong Kong
48-72V 1000W Electric bike Scooter Hub Motor BLDC Brushless DC Speed Controller
EUR 52.83
(EUR 52.83/Unit)
Free Postage
From Hong Kong
Malin Crown CR20334-000 DC 72 Volt Truck Lift Turret Drive Motor 72V
EUR 275.77
+ EUR 531.08 postage
From United States
1000W 60/64/72V Brushless Motor Controller For E-bike & Scooter Electric Bicycle
EUR 30.37
Free Postage
From United Kingdom
60/64/72V 1000W Electric Bicycle E-bike Scooter Brushless Motor Speed Controller
EUR 29.92
Free Postage
From United Kingdom
DC Motor 12V 120rpm
EUR 1.13
1 bid
+ EUR 3.26 postage
From United Kingdom
KP-DHV821 Motor DC servo 6÷7.4VDC standard digital 72g 40x20x39mm K-POWER
EUR 100.21
+ EUR 1.11 postage
From United Kingdom
60W 12V 24V DC Reversible Speed Reducing Brush Gear Motor (+ Bracket)
EUR 138.08
Free Postage
From China
RS Pro, 3 V, 1.5 â?? 3 V dc, 1000 gcm, Brushed DC Geared Motor, Output Speed 72
EUR 32.03
Free Postage
From United Kingdom
18V DC Motor JD 550
EUR 5.61
0 bids
+ EUR 3.25 postage
From United Kingdom
Motor Large Torque Gear Motor 775/795/895 Motor Bracket DC 12V-24V 3000-12000RPM
EUR 5.55
Free Postage
Free returns
From Hong Kong
Faulhaber Brushed DC Motor, 1.72 W, 6 V dc, 2.9 mNm, 3860 rpm, 1.5mm Shaft Diame
EUR 162.27
Free Postage
From United Kingdom
Sanyo Denki Step-Syn Motor Model 103-7500-5110. 1.82V DC, 1.3A, 0.72° step >
EUR 50.69
+ EUR 53.01 postage
From United States
DC 6V 12V 18V 24V RS-775/795/895 Motor High Speed Large Torque Dual Ball Bearing
EUR 20.88
Free Postage
Free returns
From China
60/64/72V 1000W Electric Bicycle E-bike Scooter Brushless Motor Speed Controller
EUR 29.92
Free Postage
From Belgium
Nidec, 12 V dc, 0.98 Nm, Brushed DC Geared Motor, Output Speed 52.3 rpm
EUR 119.54
Free Postage
From United Kingdom
Large Torque Gear Motor DC12V-24V Motor Bracket 3000-12000RPM BeltSander
EUR 43.42
Free Postage
Free returns
From Hong Kong
Nidec, 24 V dc, 0.98 Nm, Brushed DC Geared Motor, Output Speed 52.3 rpm
EUR 119.54
Free Postage
From United Kingdom
DC Electric E Scooter Motor 24v 120w 16T Belt Sprocket ZY6812 Reversible 24 Volt
EUR 18.93
Free Postage
From United Kingdom
Electric bicycle E-bike DC Voltage Converter Regulator 36-72V to 12V 10A
EUR 5.61
+ EUR 1.11 postage
From China
DC6V~24V 12V 18V High Speed Large Torque RS-775/795/895 Electric Motor 5mm Shaft
EUR 20.88
Free Postage
Free returns
From China
1000W 60/64/72V Brushless Motor Controller For E-bike & Scooter Electric Bicycle
EUR 30.37
Free Postage
From Belgium
Parvalux 90BB-5501 Meditek 24V DC permanent magnet motor gearbox high torque
EUR 66.39
+ EUR 11.02 postage
From United Kingdom
DC geared motor 5 U / min 6 V P8F3
EUR 5.97
Was: Previous priceEUR 6.29
Free Postage
From Hong Kong
DC24V 200RPM Electric Micro High Torque Geared Motor for Spotlight
EUR 15.74
+ EUR 0.56 postage
From China
Synchronous Electric Oriental Motor 100v 60/72 RPM 0.17A Vexta B020-1500-V420A
EUR 22.49
0 bids
Free Postage
From United Kingdom
High speed R280 Carbon brush Motor DC 3-7.4V 7250rpm-17800rpm Miniature DC motor
EUR 3.36
Free Postage
From China
Miniature Round Small Electronic DC Motor 1.5-12V For DIY electric toy Small fan
EUR 3.59
Free Postage
From United Kingdom
DC Gear Motor High Torque 25GA 12V 10rpm 370 for DIY Robotics Arduino
EUR 16.83
+ EUR 21.99 postage
From United States
DC Gear Motor High Torque 37GB 12V 20rpm Long for DIY Robotics Arduino
EUR 25.72
+ EUR 21.99 postage
From United States
ALBRIGHT SW182B-316 72-80V 150A 1 pole DC dual switch relay MOTOR REVERSING
EUR 78.71
Free Postage
From United Kingdom
775 DC 24V Large Torque Low Noise High Speed Motor Gear Bearing 20000RPM
EUR 15.29
Free Postage
From China
DC Electric Brush Motor 200r/min 12V Reversible Speed Reduccer Motor
EUR 16.23
+ EUR 0.56 postage
From China
Miniature Small Electric Motor Brushed 1.5V - 12V DC for Models Crafts Robots
EUR 3.81
Free Postage
From United Kingdom
DC Speed Reducer Brush Motor 12V Reversible Electric Micro Geared Motor 47rpm
EUR 15.16
+ EUR 1.13 postage
From China
Reversible Brush Electric Motor 260r/min Motor DC12V for Cutting Bench
EUR 15.72
+ EUR 0.56 postage
From China
12V DC 3.5 RPM - Reversable Motor & GBox - High Torque - ARDUINO - RASPBERRY Pi
EUR 15.74
Free Postage
From United Kingdom
DC Speed Reducer Brush Motor 12V Reversible Electric Micro Geared Motor 65 rpm
EUR 15.16
+ EUR 1.13 postage
From China

(NEW) 12V 24V 20A Max PWM DC Motor Stepless Adjustable Speed Controller 25kHz
C $16.58
Free shipping
May 19, 2011 - Now You Can Stop Your Break Up, Divorce or Lovers Rejection, Even If Your Situation Seems Hopeless! I'll take you by the hand and show. Magic of making up system free download.
DC Motor Speed Control HHO / PWM 12V/24V 30A Max Digital Version (Free Shipping)
C $53.16
C $55.96
Free shipping
(NEW) DC 10~50V 60A 3000W Driver Module PWM Motor Speed Controller 12V 24V 48V
C $33.15
Free shipping
Circuit Board and DC Brushless Motor of Kathrein Integrated Remote Control Unit
C $17.97
C $19.97
Free shipping
12V 8010 DC Fan 80x80x10mm 2 Pin Brushless for PC Computer Hydroponics Cooling
C $11.96
Free shipping
Almost gone
HX-PWM AC90V-260V Input DC0-110V Output 8A 300W DC Motor Speed Controller Driver
C $58.06
C $61.11
Shipping: + C $6.50 Shipping
Almost gone
Excellway ZS-X4B 90W DC 3-35V Motor PWM Speed Controller Switch LED Fan Dimmer
C $9.99
Free shipping
HHO 64kHz PWM DC Motor Speed Controller 30A max plus soft start 12VDC ( CH003 )
C $58.22
ThePiratebay.org - Download movies, music, software, games and much more. The Pirate Bay Org is the biggest BitTorrent site. Looking for Piratebay.org. The pirate bay com download movies. The Pirate Bay is ranked #1 in alternatives to Kickass Torrents, #1 in torrent sites for music. In torrent sites for downloading Tollywood movies and TV shows. Download music, movies, games, software and much more. The Pirate Bay is the galaxy's most resilient BitTorrent site.
C $61.29
Free shipping
Last one
(NEW) DC 12V Four Wire Thermostat PWM Fan Speed Controller Module
C $14.18
Free shipping
Last one
12V-24V DC PWM Stepless Speed Controller Digital Display Speed Regulator Governo
C $15.99
Free shipping
PWM Voltage Converter Digital to Analog PLC Industrial Interface Conversion New
C $11.50
Colt python serial number dates. Used from 1953 to about 1961 SECOND TYPE TARGET 'Half moon' checkering border under the medallions. SERIAL NUMBERS Trooper serial numbers are very confusing. Silver medallions Used from about 1961 to end of production in 1969 SERVICE TYPE Silver Medallions Used throughout production. Loading clearance only on the left side.
Free shipping
HHO 132kHz PWM 0-100% Duty Cycle Control 30A max with automotive fuse 12 - 30VDC
C $59.49
C $62.62
Free shipping
FidgetFidget Dc 36V-72V 700W Brushless Motor Controller withou Hall Balanced Car Driver Board. By FidgetFidget. $22.32 $ 22 32. FREE Shipping on eligible orders. RAYOVAC AA 24-Pack FUSION Premium Alkaline Batteries, 815-24LTFUSK. $63.99 new (1 offer) 4.2 out of 5 stars 296.
Brushless Motor Speed Controller
3: As the BLDC motor factory may use different Hall sequence,if the motor start abnormal, can't start or the current getting to high, please adjust the sequence of the Hall, or the driver will be damaged. 6.5E 36v-72v 700W DC Brushless Motor Control Sensorless Board US $16.99 / piece Free Shipping| Orders (21). 5V-36V DC Brushless Motor Controller 350W BLDC PWM Driver Board with Cable Overcurrent Protection Motor Speed Controller US $19.82 / piece. Hot Promotions in 36v brushless motor controller: the best online deals and discounts with. 500W Brushless Motor Controller Hall Motor Balanced Car Driver Board 12v -36v dc. Free shipping. Dc 36V-72V 700W Brushless Motor Controller withou Hall Balanced Car Driver Board. 1 x 36V 48V 60V 72V 700W Brushless Motor Controller Hall Balanced Car Driver Board; Payment. 1.We accept PayPal only. 186 results for 72v dc motor. DC 36V-72V 700W Brushless Motor Controller Hall Motor Balanced Car Driver Board. 700W BLDC driver board DC brushless no Hall. 12-36V Brushless Motor Controller board test magnetic power. 12V-36V 500W Brushless Motor Controller - Part 1 - Duration. Run a Hard Drive Brushless Motor Without Driver - Duration.
0 notes
Text
Compromises
Building the device out of a music box definitely has a more romanticised feel to it, especially being fully mechanical, however I thought up some issues with this.
- the music box mechanism can only be wound a finite amount of times, meaning the device might stop in the same place, pointing at the same symbols, or could be predictable.
- the music box mechanism can only take very little weight, hence why if you get a music or jewellery box with a dancing figure these figures are often very light.
- I could use a music box movement suited for a carousel, since the figures for these are a lot heavier. I could but one of them and rip them apart for components however this still leaves the first problem - the predictability - unsolved. Plus I would have to create a gear mechanism to enable the music box movement to handle three rotating disks as opposed to one, something I don’t really have the time for.
With time constraints, the best way for me to build the machine I want is to go digital, this means working with the arduino. This makes the task a little more simple in a sense that I can program the arduino to stop at random, removing the predictability of the music box.
This means the disks have to be rotated with a servo motor. Luckily my arduino kit came with a servo motor.

This motor allows you to build moving parts - such as to make simple animatronics such as making a dolls head move and some of them can even be used to mace RC cars.
there are three moving disks - not including the figurine on top, which I might choose to keep static, this means I need three gears that would help me rotate them at different speeds.
my first thought was to use three servo motors, they’re small enough and would be easier to offset, however the simplest way was to find something that that has a similar mechanism and take it apart for the gears.
the simplest object would be a clock, which has three hands that move in different speeds. A high torque clock - one that can carry larger hands should work for this.

I can pair the clock movement with the servo or modify the clock device itself so it can take commands from the arduino.
0 notes
Text
The New DJI Robot is Insane: Introducing the Robomaster EP Core
Our verdict of the DJI Robomaster EP Core: The most powerful STEAM learning robot ever. A comprehensive education toolkit and curriculum for both Scratch and Python programming is provided, and further expansion is possible with various microcontrollers and sensors.1010
You probably think of DJI as that drone company, but they’ve actually turned their engineering geniuses to a lot more than just drones. The DJI Robomaster EP Core is the next generation of intelligently programmable, remote-controlled, or entirely autonomous robots. It’s insanely good fun, a great learning experience, and I’m completely smitten with it.
Read on to find out more.
Robomaster EP Core: At a Glance
Omnidirectional movement via Mecanum wheels and custom servo motors with 250Nmm torque.
Four hit detectors (impact or laser) with RGB ring lights.
2-axis grabber.
2400mAh battery (around 1-hour battery life).
HD camera, microphone, and onboard speaker.
Micro-SD card slot.
Local Wi-Fi or router connectivity.
Proximity sensor.
Dimensions: H13 x W10 x L15.5 inches (H33 x W25 x L39 cm) with grabber fully retracted.
Weight: 7lbs 8oz (3.4kg).
Expandable with Raspberry Pi, Arduino, micro:bit, or NVIDIA Jetson; sensor adaptors provided.
FPV remote control via desktop or smartphone app.
Scratch or Python programming.
Curriculum and structured competitive modes.
Note: we received an engineering sample for testing. Contents and build guide may differ, and we didn’t have access to the full educational curriculum, only the existing Robomaster app (which is primarily designed for the Robomaster S1 Series).
Building the Robomaster EP Core
Before you can really get started, the Robomaster EP Core package arrives in an enormous box consisting of five trays of parts. That’s right: it’s flat-packed and you’ll need to build it yourself. That would the Engineering part of the STEAM learning experience.
It took me a good half-day of solid build time to get this put together (which you can see in the video review compressed down to about a minute!).
Thankfully the instructions are detailed, and despite two full trays of screws and bolts, each part is labeled well and at no point was I confused about where something ought to be placed.
If you can build some Ikea furniture, you can do this. Just be sure to pick the right screw from the right part of the tray.
Getting Started
You can connect to the Robomaster either via a local Wi-Fi, or by allowing the Robomaster to connect to your router. The latter is preferable, as it allows you to access the Robomaster from any networked client for truly remote control and programming.
A desktop version of the software is available for Mac or PC, though it appears to be a direct port of the mobile app, and runs full-screen.
A switch on the side of the grey controller box selects which mode to operate in. Simply type in your Wi-Fi password to the app so it can generate a QR code. The camera mounted on the Robomaster will then read this, and connect to the network.
Note that the Robomaster is unable to roam between enterprise Wi-Fi access points, so you should use a single high powered router or ensure adequate coverage in the location you’ll be operating the Robomaster. Driving down my hallway resulted in the Robomaster disconnecting from one Unifi access point and pausing for a few seconds as it reconnected through another.
Robomaster Chassis
There are two main parts to the build. The first is the wheels and chassis. We’ll talk more about the “Mecanum” wheels in a moment, but the chassis itself is built around a large solid metal frame, which includes extra mounting points for your own 3D printed parts, accessories, or additional sensors.
The front half has a slight suspension on it, allowing it to traverse small bumps with ease.
This chassis houses the battery as well as the power distribution board and communication bus. It’s this that you’ll plug everything in to. The battery is removable, and spares can be purchased. Each charge lasted me about an hour of constant use.
The 2400mAh battery can be swapped easily and spares purchased separately.
One outstanding feature of the Robomaster EP Core is the four Mecanum wheels. Each wheel is driven by its own powerful custom DJI servo.
Rather than a traditional rubber tire, these wheels has a set of twelve freely-rotating rollers, mounted at a 45-degree offset. Confused? I don’t blame you.
This curious arrangement of rollers on the wheel means that simply rotating the wheel actually forces it to move sideways instead. In order to create the normal forward or backward motion, you need another Mecanum wheel with its rollers mounted in the opposite direction. When both wheels are then rotated in the same direction, the sideways forces cancel each other out, and the chassis actually moves forward or backward as intended.
However, the magic comes when each wheel is driven in opposite directions, both creating the same sideways motion instead. With four such wheels mounted in this configuration, the Robomaster can both strafe left and right, and rotate 360-degrees on the spot. This is called omnidirectional movement. And it’s nothing short of amazing.
If you haven’t already watched the review video to see this in action, you really need to go do that now. Go on, I’ll wait.
This isn’t just incredible to watch though, it also opens up so many more programming possibilities for maneuvering because of the precision involved.
It also adds more interest to the remote control aspect. Maneuvering now requires two analog joysticks, rather than an accelerate and brake pedal, and steering wheel. Anyone familiar with first-person shooter games will feel at home immediately. You can strafe around a target in a circle, for instance, or easily drift around corners. The Robomaster EP Core is highly agile in tight spaces, and racing this thing is immensely fun.
Stop having fun though: this is a learning experience!
Grabber
Mounted on top of the chassis are the grabber attachment and grey controller box. The controller handles Wi-Fi communication, as well as the micro-SD card for recordings.
Powered by three strong servos, the grabber can lift up and down, push or pull, as well as pinch in or expand its rubber claws. Obviously the first thing I did was to grab a courgette and lug it around the kitchen for a while.
This is a screenshot from a video taken using the on-board camera.
When fully extended, the lifting power of the servo is limited, so you may need to pull an object in closer before it can be lifted up again. It’s reasonably powerful and was able to lift up some small blocks of wood or toy cones, but struggled with an iPhone 6 Plus (which is about 6 ounces).
Robomaster doing a spot of weeding with the grabber.
The Robomaster App
While a separate SDK is available and will likely be used for parts of the curriculum, your initial point of contact with the robot will be via the Robomaster app (for iOs, Android, Mac, or Windows). Launch this and you’ll be greeted with three choices:
Solo
Battle
Lab
Solo mode is for simple remote control. Use the joystick on the left to move forward, backward, and strafe. Drag left or right on the screen to rotate. Click the grabber button to bring up that control interface. The main screen area is taken up by the wide-angle first-person-view from Robomaster’s camera. You can also record a number of audio clips to playback on the robot. These are saved to the hardware and can be recalled or set on a loop with hilarious consequences.
The button for follow mode sadly does nothing without the gimbal attached. To move the camera view up or down, you’ll need to manipulate the grabber arm that it’s attached to. The health bar also doesn’t do much unless you’re being pursued by a Robomaster S1 equipped with a laser gun (not even kidding–that’s a thing).
Battle mode is a more structured FPV combat or race event. Without the gimbal and gel bead or laser gun, the battle type aren’t relevant, but the race mode can still be used. By placing the included visual markers around your track, Robomasters must visit each marker in order, which behave as checkpoints. A bonus marker can also be hidden for extra points. The AI recognition system will immediately identify any it sees (though I found this only worked with good lighting), and after visiting each one in turn for the required number of laps, you’re given a resulting time.
Camera and FPV
Unsurprisingly for a company known to produce superb quality video drones, the FPV camera mounted on top of the grabber is also superb.
With an f2.4 aperture and wide 120-degree field of view, I found video transmission to be rock solid and perfectly clear, though this will depend largely on your router and Wi-Fi performance. You can record HD video to a micro-SD card too (not included), which includes audio.
A screengrab from the on-robot camera.
Finally, the Lab is where you can learn all the Robomaster functions, as well as jump right into Python or Scratch coding. Road to Mastery consists of 11 guided Scratch tutorials. DIY Programming presents you with some ready-made Python or Scratch code examples or allows to start afresh. Robo Academy is really just three web links, taking you directly the developer documentation, video tutorials, and programming guide.
Again though, many of these resources rely on the gimbal attachment, so I wasn’t able to fully complete all of these with the EP Core. They’re still beneficial to run through however, and you may find you can convert many of the instructions for use with the grabber alone. The curriculum included with EP Core purchases will be tailored to the grabber.
Scratch Programming the Robomaster EP Core
Now taught to all school children from primary ages and up, Scratch is a visual block programming language that’s surprisingly powerful. The custom Robomaster GUI includes buttons to either bring up a first-person view (to drive the robot back tot he start position before running code again, for instance), and a debug overview of currently defined variables. As the robot runs through programs, blocks of code are highlighted, so it’s easy to follow along and see exactly what’s going on. You can even convert your Scratch program to Python code at any point if you’d rather.
I haven’t actually used Scratch before–the best I had in school was some a BBC Micro Turtle, with BASIC programming. I was pleasantly surprised at how easy it is to pick up, and how much of the Robomaster’s systems are exposed to graphical programming. The “Smart” block section includes things like action for when a visual marker is recognized in view, or when a number of claps are identified.
Robomaster S1 vs EP Core
Robomaster S1 was released last year and is available to purchase for all consumers. It features the same Mecanum wheeled chassis as the EP Core, but doesn’t have as any extensibility when it comes to additional power ports, sensor adaptors, or communications facilities for Arduino, micro:bit, or Raspberry Pi. It’s a more simple remote control and programmable robot, than an entire engineering platform.
The most noticeable difference is that the S1 featured a gel-bead and laser shooter mounted on a gimbal (“Warrior mode”), which could be used for Robomaster battles, or to shoot the included vision marker targets.
Instead, the EP Core instead uses a more education-focused (or school-friendly) grabber attachment, which DJI calls “Engineering mode”.
The EP Core also has a full curriculum for all suitable year groups to follow (though we haven’t had access to that so can’t comment further on it).
While many of the Robomaster app tutorials are currently reliant on having the gimbal attachment, the remote control element and programming components are all there for use with the grabber.
The other difference is pricing: Robomaster S1 can be purchased for around $500 from numerous stockists. The EP Core is only available through educational partners, or via direct inquiry to DJI. I couldn’t draw them on exact pricing (presumably there are bulk discounts for schools), but given the similarity to the S1, I wouldn’t have thought it was too far off the $500 mark.
Robomaster S1 Robomaster S1 Buy Now On Amazon $549.00
Is This the Ultimate STEAM Learning Tool?
In a word, yes.
The only slight frustration is that you can’t currently follow all of the Robomaster app tutorials. It’s not clear if these will be expanded to cover more of the grabber functionality, but the full curriculum will be tailored toward it and included with all purchases.
I’m quite envious of any lucky students who have the opportunity to learn to program using the EP Core. It’s simply an incredible learning tool. Sure you could learn Scratch without a cool robot to drive around, but it’s a whole lot more motivating to have that real hardware react to your programming. The EP Core model includes expansion ports and mounting holes for additional sensors and development boards, such as the Raspberry Pi, Arduino, or even NVIDIA’s Jetson Nano.
For pricing, you’ll need to enquire directly with DJI or via their local educational providers. Alternatively, if the expansion capabilities aren’t a concern and you’d rather the gimbal-mounted gel-bead and laser shooter instead of a grabber, check out the Robomaster S1, which is widely available.
Read the full article: The New DJI Robot is Insane: Introducing the Robomaster EP Core
The New DJI Robot is Insane: Introducing the Robomaster EP Core posted first on grassroutespage.blogspot.com
0 notes
Text
The New DJI Robot is Insane: Introducing the Robomaster EP Core
Our verdict of the DJI Robomaster EP Core: The most powerful STEAM learning robot ever. A comprehensive education toolkit and curriculum for both Scratch and Python programming is provided, and further expansion is possible with various microcontrollers and sensors.1010
You probably think of DJI as that drone company, but they’ve actually turned their engineering geniuses to a lot more than just drones. The DJI Robomaster EP Core is the next generation of intelligently programmable, remote-controlled, or entirely autonomous robots. It’s insanely good fun, a great learning experience, and I’m completely smitten with it.
Read on to find out more.
Robomaster EP Core: At a Glance
Omnidirectional movement via Mecanum wheels and custom servo motors with 250Nmm torque.
Four hit detectors (impact or laser) with RGB ring lights.
2-axis grabber.
2400mAh battery (around 1-hour battery life).
HD camera, microphone, and onboard speaker.
Micro-SD card slot.
Local Wi-Fi or router connectivity.
Proximity sensor.
Dimensions: H13 x W10 x L15.5 inches (H33 x W25 x L39 cm) with grabber fully retracted.
Weight: 7lbs 8oz (3.4kg).
Expandable with Raspberry Pi, Arduino, micro:bit, or NVIDIA Jetson; sensor adaptors provided.
FPV remote control via desktop or smartphone app.
Scratch or Python programming.
Curriculum and structured competitive modes.
Note: we received an engineering sample for testing. Contents and build guide may differ, and we didn’t have access to the full educational curriculum, only the existing Robomaster app (which is primarily designed for the Robomaster S1 Series).
Building the Robomaster EP Core
Before you can really get started, the Robomaster EP Core package arrives in an enormous box consisting of five trays of parts. That’s right: it’s flat-packed and you’ll need to build it yourself. That would the Engineering part of the STEAM learning experience.
It took me a good half-day of solid build time to get this put together (which you can see in the video review compressed down to about a minute!).
Thankfully the instructions are detailed, and despite two full trays of screws and bolts, each part is labeled well and at no point was I confused about where something ought to be placed.
If you can build some Ikea furniture, you can do this. Just be sure to pick the right screw from the right part of the tray.
Getting Started
You can connect to the Robomaster either via a local Wi-Fi, or by allowing the Robomaster to connect to your router. The latter is preferable, as it allows you to access the Robomaster from any networked client for truly remote control and programming.
A desktop version of the software is available for Mac or PC, though it appears to be a direct port of the mobile app, and runs full-screen.
A switch on the side of the grey controller box selects which mode to operate in. Simply type in your Wi-Fi password to the app so it can generate a QR code. The camera mounted on the Robomaster will then read this, and connect to the network.
Note that the Robomaster is unable to roam between enterprise Wi-Fi access points, so you should use a single high powered router or ensure adequate coverage in the location you’ll be operating the Robomaster. Driving down my hallway resulted in the Robomaster disconnecting from one Unifi access point and pausing for a few seconds as it reconnected through another.
Robomaster Chassis
There are two main parts to the build. The first is the wheels and chassis. We’ll talk more about the “Mecanum” wheels in a moment, but the chassis itself is built around a large solid metal frame, which includes extra mounting points for your own 3D printed parts, accessories, or additional sensors.
The front half has a slight suspension on it, allowing it to traverse small bumps with ease.
This chassis houses the battery as well as the power distribution board and communication bus. It’s this that you’ll plug everything in to. The battery is removable, and spares can be purchased. Each charge lasted me about an hour of constant use.
The 2400mAh battery can be swapped easily and spares purchased separately.
One outstanding feature of the Robomaster EP Core is the four Mecanum wheels. Each wheel is driven by its own powerful custom DJI servo.
Rather than a traditional rubber tire, these wheels has a set of twelve freely-rotating rollers, mounted at a 45-degree offset. Confused? I don’t blame you.
This curious arrangement of rollers on the wheel means that simply rotating the wheel actually forces it to move sideways instead. In order to create the normal forward or backward motion, you need another Mecanum wheel with its rollers mounted in the opposite direction. When both wheels are then rotated in the same direction, the sideways forces cancel each other out, and the chassis actually moves forward or backward as intended.
However, the magic comes when each wheel is driven in opposite directions, both creating the same sideways motion instead. With four such wheels mounted in this configuration, the Robomaster can both strafe left and right, and rotate 360-degrees on the spot. This is called omnidirectional movement. And it’s nothing short of amazing.
If you haven’t already watched the review video to see this in action, you really need to go do that now. Go on, I’ll wait.
This isn’t just incredible to watch though, it also opens up so many more programming possibilities for maneuvering because of the precision involved.
It also adds more interest to the remote control aspect. Maneuvering now requires two analog joysticks, rather than an accelerate and brake pedal, and steering wheel. Anyone familiar with first-person shooter games will feel at home immediately. You can strafe around a target in a circle, for instance, or easily drift around corners. The Robomaster EP Core is highly agile in tight spaces, and racing this thing is immensely fun.
Stop having fun though: this is a learning experience!
Grabber
Mounted on top of the chassis are the grabber attachment and grey controller box. The controller handles Wi-Fi communication, as well as the micro-SD card for recordings.
Powered by three strong servos, the grabber can lift up and down, push or pull, as well as pinch in or expand its rubber claws. Obviously the first thing I did was to grab a courgette and lug it around the kitchen for a while.
This is a screenshot from a video taken using the on-board camera.
When fully extended, the lifting power of the servo is limited, so you may need to pull an object in closer before it can be lifted up again. It’s reasonably powerful and was able to lift up some small blocks of wood or toy cones, but struggled with an iPhone 6 Plus (which is about 6 ounces).
Robomaster doing a spot of weeding with the grabber.
The Robomaster App
While a separate SDK is available and will likely be used for parts of the curriculum, your initial point of contact with the robot will be via the Robomaster app (for iOs, Android, Mac, or Windows). Launch this and you’ll be greeted with three choices:
Solo
Battle
Lab
Solo mode is for simple remote control. Use the joystick on the left to move forward, backward, and strafe. Drag left or right on the screen to rotate. Click the grabber button to bring up that control interface. The main screen area is taken up by the wide-angle first-person-view from Robomaster’s camera. You can also record a number of audio clips to playback on the robot. These are saved to the hardware and can be recalled or set on a loop with hilarious consequences.
The button for follow mode sadly does nothing without the gimbal attached. To move the camera view up or down, you’ll need to manipulate the grabber arm that it’s attached to. The health bar also doesn’t do much unless you’re being pursued by a Robomaster S1 equipped with a laser gun (not even kidding–that’s a thing).
Battle mode is a more structured FPV combat or race event. Without the gimbal and gel bead or laser gun, the battle type aren’t relevant, but the race mode can still be used. By placing the included visual markers around your track, Robomasters must visit each marker in order, which behave as checkpoints. A bonus marker can also be hidden for extra points. The AI recognition system will immediately identify any it sees (though I found this only worked with good lighting), and after visiting each one in turn for the required number of laps, you’re given a resulting time.
Camera and FPV
Unsurprisingly for a company known to produce superb quality video drones, the FPV camera mounted on top of the grabber is also superb.
With an f2.4 aperture and wide 120-degree field of view, I found video transmission to be rock solid and perfectly clear, though this will depend largely on your router and Wi-Fi performance. You can record HD video to a micro-SD card too (not included), which includes audio.
A screengrab from the on-robot camera.
Finally, the Lab is where you can learn all the Robomaster functions, as well as jump right into Python or Scratch coding. Road to Mastery consists of 11 guided Scratch tutorials. DIY Programming presents you with some ready-made Python or Scratch code examples or allows to start afresh. Robo Academy is really just three web links, taking you directly the developer documentation, video tutorials, and programming guide.
Again though, many of these resources rely on the gimbal attachment, so I wasn’t able to fully complete all of these with the EP Core. They’re still beneficial to run through however, and you may find you can convert many of the instructions for use with the grabber alone. The curriculum included with EP Core purchases will be tailored to the grabber.
Scratch Programming the Robomaster EP Core
Now taught to all school children from primary ages and up, Scratch is a visual block programming language that’s surprisingly powerful. The custom Robomaster GUI includes buttons to either bring up a first-person view (to drive the robot back tot he start position before running code again, for instance), and a debug overview of currently defined variables. As the robot runs through programs, blocks of code are highlighted, so it’s easy to follow along and see exactly what’s going on. You can even convert your Scratch program to Python code at any point if you’d rather.
I haven’t actually used Scratch before–the best I had in school was some a BBC Micro Turtle, with BASIC programming. I was pleasantly surprised at how easy it is to pick up, and how much of the Robomaster’s systems are exposed to graphical programming. The “Smart” block section includes things like action for when a visual marker is recognized in view, or when a number of claps are identified.
Robomaster S1 vs EP Core
Robomaster S1 was released last year and is available to purchase for all consumers. It features the same Mecanum wheeled chassis as the EP Core, but doesn’t have as any extensibility when it comes to additional power ports, sensor adaptors, or communications facilities for Arduino, micro:bit, or Raspberry Pi. It’s a more simple remote control and programmable robot, than an entire engineering platform.
The most noticeable difference is that the S1 featured a gel-bead and laser shooter mounted on a gimbal (“Warrior mode”), which could be used for Robomaster battles, or to shoot the included vision marker targets.
Instead, the EP Core instead uses a more education-focused (or school-friendly) grabber attachment, which DJI calls “Engineering mode”.
The EP Core also has a full curriculum for all suitable year groups to follow (though we haven’t had access to that so can’t comment further on it).
While many of the Robomaster app tutorials are currently reliant on having the gimbal attachment, the remote control element and programming components are all there for use with the grabber.
The other difference is pricing: Robomaster S1 can be purchased for around $500 from numerous stockists. The EP Core is only available through educational partners, or via direct inquiry to DJI. I couldn’t draw them on exact pricing (presumably there are bulk discounts for schools), but given the similarity to the S1, I wouldn’t have thought it was too far off the $500 mark.
Robomaster S1 Robomaster S1 Buy Now On Amazon $549.00
Is This the Ultimate STEAM Learning Tool?
In a word, yes.
The only slight frustration is that you can’t currently follow all of the Robomaster app tutorials. It’s not clear if these will be expanded to cover more of the grabber functionality, but the full curriculum will be tailored toward it and included with all purchases.
I’m quite envious of any lucky students who have the opportunity to learn to program using the EP Core. It’s simply an incredible learning tool. Sure you could learn Scratch without a cool robot to drive around, but it’s a whole lot more motivating to have that real hardware react to your programming. The EP Core model includes expansion ports and mounting holes for additional sensors and development boards, such as the Raspberry Pi, Arduino, or even NVIDIA’s Jetson Nano.
For pricing, you’ll need to enquire directly with DJI or via their local educational providers. Alternatively, if the expansion capabilities aren’t a concern and you’d rather the gimbal-mounted gel-bead and laser shooter instead of a grabber, check out the Robomaster S1, which is widely available.
Read the full article: The New DJI Robot is Insane: Introducing the Robomaster EP Core
The New DJI Robot is Insane: Introducing the Robomaster EP Core published first on http://droneseco.tumblr.com/
0 notes
Text
Abstract
An Intelligent Exoskeleton – Myoelectric, Pressure, and Health-Sensing Powered Arm Orthosis via Neural Network for Muscle Rehabilitation
Arm Orthosis Braces, used to support the arm after it is paralyzed or atrophied, are expensive and inconvenient. Machine-assisted braces remain non-commercial, and prototypes are costly, bulky, and require sensing both limbs, an infeasible method for independently-moving arms. After a friend of mine got injured, I knew there must be a better solution.
Ortho is an arm orthosis that uses inputs from electromyographic muscle sensors, pressure sensors, and an accelerometer to mechanically assist arm movement. Ortho learns speed and movement thresholds from the user’s movement patterns via a Neural Network designed in MATLAB then controls flexion through an Arduino and high-torque servo motor. Unlike current braces, Ortho processes movement as the wearer recovers and reduces aid over time to promote natural muscle rehabilitation. Ortho also has health processing which can deactivate the motor. The entire system operates on one arm and costs under $200.
Ortho was tested by comparing gait patterns in wearers with current braces and wearers with Ortho. Results were statistically analyzed and cross-correlated to compare efficiency across common scenarios. Results indicated accurate movement over 98% of the time with 0 false positives and few omissions. Moreover, Ortho reduced human energy expenditure by over 95% but significantly increased torque. Finally, Ortho was 500% closer to fully-functioning arm movement in comparison to current braces. The results support efficient and natural movement and can begin.
Ortho is an intelligent orthosis that non-invasively gathers movement data and actively controls flexion via embedded sensors.
0 notes
Text
My Notes of Kirk, David S., Chatting, D. J., Yurman P. & Bichard, J. 2016. “Ritual Machines I & II: Making Technology at Home”. In Proceedings of CHI ‘16.
My Notes:
What are the new terms in this text? How are they defined?
community there is a large body of research that has sought to understand how we can design technologies for domestic spaces. Phatic technologies are devices that serve to express the
non-verbal emphatic, emotive and paralinguistic elements of communication.
This research aimed to understand how regular separation from home affects the lives of five participating families, capturing the daily rituals that form family life when together and separated and critically considering the role of technology in their mobile living.
Ritual Machine I – ‘Drinking Together Whilst Apart’
The wine dispenser contains a WiFi connected Arduino Yun, controlling a high torque servo-motor that mechanically operates an unmodified wine optic. Sensors detect the glass and LEDs cause it to be illuminated when inserted.
Ritual Machine II – ‘Anticipation of Time Together’
The iPhone app shows what is currently displayed on the flip-dots from wherever they are, be they home or away. Touches on the iPhone screen is relayed to the flip-dot display in real-time allowing simple gestures to be communicated home, a simple phatic exchange.
Who are the authors? Where do they work? Who do they refer to?
David S. Kirk, David Chatting - Open Lab Newcastle University
Paulina Yurman*, Jo-Anne Bichard - Helen Hamlyn Centre for Design Royal College of Art London, UK.
Family Rituals 2.0 was a two-year research project supporting collaboration between four partner universities in the UK.
Vocabulary
Phatic – phatisch
Inquiry - Anfrage
0 notes
Text
SunFounder Metal Gear Digital RC Servo Motor High Torque for Helicopter Car Boat Robot Arduino AVR Toys Drone Fix-Wing Airplane
Introduction This metal gear servo has a torque of as large as 13.5KG. It rotates from 0-180 degrees. You can control its gear to rotate to a certain degree by program. The metal gear used is not prone to breaking due to crashes so it is perfect for various smart remote models. The connection cable is 30cm long; the orange wire is the signal wire, brown, the ground, and red, the power. The servo…
View On WordPress
0 notes
Text
DS04-NFC Servo 360° Continuous Rotation For Arduino/Raspberry-Pi/Robotics
DS04-NFC Servo 360° Continuous Rotation Servo DC Gear Motor for Arduino/Raspberry-Pi/Robotics This Servo DC gear motor is a 360° continuous rotation motor which can rotate continuously both forward & backward. The motor is high torque and easy to interface with any type of microcontroller. Specifications: Model: DS04-NFC. Weight: 38g. Dimensions: 40.8 x 20 x 39.5 mm. Torque: 5.5kg/cm (at 4.8V).…
View On WordPress
0 notes
Text
SunFounder Metal Gear Digital RC Servo Motor High Torque for Helicopter Car Boat Robot Arduino AVR Toys Drone Fix-Wing Airplane
SunFounder Metal Gear Digital RC Servo Motor High Torque for Helicopter Car Boat Robot Arduino AVR Toys Drone Fix-Wing Airplane
Introduction This metal gear servo has a torque of as large as 13.5KG. It rotates from 0-180 degrees. You can control its gear to rotate to a certain degree by program. The metal gear used is not prone to breaking due to crashes so it is perfect for various smart remote models. The connection cable is 30cm long; the orange wire is the signal wire, brown, the ground, and red, the power. The servo…
View On WordPress
0 notes
Text
Creating an online robot fighting game using Arduino MKR1000 WiFi
This is a guest post from Surrogate, a team of developers building games that people play in real-life over the internet.
We introduced this concept last year, and have launched three games so far. Our final game of 2019 was SumoBots Battle Royale — where players from anywhere in the world can fight real robots in a battle royale-style arena. The aim of the project was to have the game run semi-autonomously, meaning that the bots could self-reset in between the games, and the arena could run by itself with no human interaction. This was our most complex project to date, and we wanted to share some parts of the build process in more detail, specifically, how we’ve built these robots and hooked them online for people to control remotely.
Robot selection
We’ve started our process by choosing which robots we’d want to use for the game. There were a couple of requirements for the robots when making the evaluation:
Are able to withstand 24/7 collision
Easily modifiable and fixable
Can rotate on the same spot
Must have enough space to fit the electronics
After looking at a lot of different consumer robots, maker projects, and competitive fighting bots, we’ve decided to use the JSUMO BB1 robots for this game. We liked the fact that these bots have a metal casing which makes them very durable, all parts are easily replaceable and can be bought separately, and it has 4 independent motors (motor shields included), one for each wheel, which allows it to rotate on the same spot.
We were pretty skeptical of being able to fit all the electronics into the original casing, but we decided to go with this robot anyways, as it had the best overall characteristics. As this robot is easily modifiable, we can always 3D print an extra casing to fit all the parts.
What is the board?
Now that we’ve decided on the robot, it was the time to define what electronics should we use in this build. As usual, it all starts with the requirements. Here’s what we need for the game to run smoothly:
The robot should be able to recover from any position
Can stay online while charging
Supports WiFi network connection and offers reliable connectivity
Easily programmable and supports OTA updates
Can control four motors simultaneously
Based on these requirements we had the following electronics layout in mind:
We had to find a board that is energy efficient, can send commands to motors, supports parallel charging and has a small footprint on the robot size. With so many requirements, finding the perfect board can be a challenge.
Arduino to the rescue
Fortunately, Arduino was there to help us out. They offer a rich selection of boards to fit every possible robotics project out there and have very detailed documentation for each of the boards. More importantly, Arduino is known for its high quality, something that is crucial for semi-autonomous types of applications. Coming from an embedded software background and having to work with all sorts of hardware, we often see that some features or board functionalities are not fully finished which can lead to all sorts of unpleasant situations.
After looking at the Arduino’s collection of boards we quickly found a perfect candidate for our project, the Arduino MKR1000 WiFi. This board fits all of our main requirements for the motor controls, is easily programmable via Arduino IDE, and due to its low power design is extremely power efficient, allowing us to have a lower capacity battery. Additionally, it has a separate WiFi chip onboard, which solely focuses on providing a reliable WiFi connection, something that is very important in our use case.
Now that we’ve decided on the “brain” of our robot, it was time to choose the rest of the components.
Robust hardware means working software
Something to keep in mind is that when working with hardware, you should always try to avoid any possible risks. This means that you should always over-do your minimal hardware requirements where possible. The reason is — if your hardware doesn’t work as intended, your whole software stack becomes unusable too. Always chose reliable hardware components for mission-critical applications.
Some of our electric components might look a bit overkill, but due to the nature of our projects, they are a critical requirement.
Avoiding the battery explosions
As there is a lot of robot collision involved in the game, we decided to go with a high safety standard battery solution. After evaluating multiple options on the market, we decided to go with the RRC2040 from RRC (Germany). It has a capacity of 2950 mAh that allows us to run the robots for up to five hours on a single charge. It has an internal circuitry for power management, protection features and it supports SMBUS communications (almost like I2C), and is certified for all of the consumer electronics battery standards. For charging, we used RRC’s charging solution designed specifically for this battery and that offers the possibility to feed power to the application while the battery is being charged.
Note: the Arduino MKR1000 has a pretty neat charging solution on the board itself. You can connect the battery to the board directly as the main power source, and you charge it directly through the MKR1000’s micro USB port. We really wanted to use it to save space and have a more robust design, but due to the large capacity of our battery, we couldn’t use it at full potential. In our future projects with smaller scale robots, we definitely plan to use the board’s internal charging system, as it works perfectly for 700-1800 mAh power packs.
Bot recovery
For the bot to be able to recover from falling on its head, we’ve implemented a flipping servo. We didn’t want to have any risk of not enough torque, so we went with DS3218, which is capable of lifting up to 20KG of weight. Here’s how it works:
Hooking everything together
Now that we’ve decided on all of the crucial elements of this setup, it was time to connect all the elements together. As the first step, we figured what would be the best step way to locate all the pieces within the bot. We then 3D-printed a casing to protect the electronics. With all of the preliminary steps completed, we’ve wired all of the components together and mounted them inside of the casing. Here’s how it looks:
It was really convenient for us that all the pins on the board could be connected just by plugging them in, this avoids a lot of time spent on soldering the cables for 12 robots and more importantly, allowed us to cut out the risk of bad soldering that usually can’t be easily identified.
Arduino = Quick code
Arduino MKR1000 offered us the connectivity we needed for the project. Each sumo robot hosts their own UDP server using MKR1000 WiFi libraries to receive their control commands for a central control PC and broadcasting their battery charge status. The user commands are translated to three different PWM signals using Arduino Servo library for the flipping, left and right side motor controllers. The board used has support for hardware PWM output which was useful for us. Overall we managed to keep the whole Arduino code in a few hundred lines of code due to the availability of Servo and Wifi libraries.
The out of the box ArduinoOTA support for updating the code over the WiFi came in handy during the development phase, but also anytime we update the firmware for multiple robots at the same time. No need to open the covers and attach a USB cable! We created a simple Bash script using the OTA update tool bundled in Arduino IDE to send firmware updates to every robot at the same time.
To summarize
It’s pretty amazing that we live in the age where you can use a mass market, small form factor board like the Arduino MKR1000 and have so much functionality. We’ve had a great experience developing our SumoBots Battle Royale game using the board. It made the whole process very smooth and streamlined, the documentation was right on point, and we never had to hit a bottleneck where the hardware wouldn’t work as expected.
More importantly, the boards have proven to be very robust throughout the time. These SumoBots have been used for more than 3,000 games already, and we haven’t seen a single failure from the MKR1000. For a game where you literally slam the robots in to each other at a high speed, that’s pretty impressive to say the least.
We look forward to working with Arduino on our future games, and we can’t wait to see what they will be announcing in 2020!
Creating an online robot fighting game using Arduino MKR1000 WiFi was originally published on PlanetArduino
0 notes