#How to install Linux in Oracle VirtualBox
Explore tagged Tumblr posts
Visit Tumblr Blog
Explore Tumblr blogs with no restrictions, modern design and the best experience.
Last Seen Tumblr Blogs


Fun Fact
Forty percent of Tumblr users are between the ages of 18 to 25.
Text
Install Linux in Oracle VirtualBox
In this article, we will learn how to install Linux in Oracle VirtualBox step by step. We are demonstrating Oracle Linux 8.4 installation here, the steps are almost the same for Redhat Linux/Centos, etc. Required Softwares Download Oracle VirtualBox Oracle Linux iso Step 1: Create a Virtual Machine Open VirtualBox software and create a new virtual machine first. Name: Enter your virtual…

View On WordPress
0 notes
Note
Where do I learn how to code and use linux? I want to try it but I don't know anything about coding.
I will do my best to help! The answer to that question is very long if I write it all out here, but a lot of it has been answered by other people, so I'll give you an overview and link you to some resources along the way.
The good thing is that you don't need any programming knowledge to use Linux. If you just want to try out the Linux operating system and see what it's like, I would start by downloading a program like Oracle's VirtualBox: https://www.virtualbox.org/
This will allow you to basically run a second, simulated, computer on your actual computer. From there, you can download a Linux image and install it, run it inside VirtualBox, and get familiar with the operating system. This has the additional benefit that if you do something wonky to your Linux virtual machine (VM for short) by mistake, you can just delete it and recreate it and no harm will be done to your actual computer. For a step-by-step explanation, see: https://ubuntu.com/tutorials/how-to-run-ubuntu-desktop-on-a-virtual-machine-using-virtualbox#1-overview
Short aside: Linux is not a monolithic operating system like Windows or MacOS. Linux, written by a man named Linus Torvalds, is a "kernel" made up of certain very basic computer functions, and the rest of the operating system, things like the graphical user interface (GUI, to nerds like me) doesn't come with it. To be usable by normal people, Linux has to have that functionality filled in by other programmers, which creates something called a distribution, or distro for short. Ubuntu, Debian, RedHat, Linux Mint, and OpenSUSE are all Linux distros. Different distros are designed for different purposes. Ubuntu and Mint are both pretty friendly to normal folks who want to write documents, check their email, etc. RedHat is for large companies. There's a distro called Kali that's for cybersecurity and penetration testing. Etc. etc. etc. There are tons of distros. If you don't know which one to pick, I recommend Ubuntu or Mint, as I have experience with both, and they're fairly easy to use.
From this point out, a search engine will be your best friend. There are lots of helpful tutorials online, and also answers to almost any question you can imagine. If you're unsure where to start, documentation from the website of an official Linux distribution, like Ubuntu, is usually reliable, though it can be kind of opaque if you're not used to reading tech-ese. The tutorials on Ubuntu's site, however, seem to be structured with beginners in mind, and I would run through this one to start with: https://ubuntu.com/tutorials/command-line-for-beginners#1-overview
Once you get to the point of having specific questions about how a command works or how to make the operating system do something, I would take a good look at any answers from StackOverflow, which is basically a website for computer people of all skill levels to ask each other questions ranging from the basic to the ridiculously obscure. If you're wondering it, chances are good someone on StackOverflow has asked it.
Other than that, click around your new VM, create files, find programs, etc. If you really get stuck, I'll try and help, but keep in mind I may very well be searching StackOverflow myself. XD
The other cool thing about VMs is that you can try multiple operating systems, i.e. Linux Mint (https://linuxmint-installation-guide.readthedocs.io/en/latest/) which is pretty user-friendly, as I recall.
Once you get to the point where you actually want to install Linux, you'll want to back up your computer to an external hard drive so you can restore from the backup if something goes wrong, and then follow the instructions for your chosen Linux distro. LibreOffice runs on Linux and can open most Microsoft file types, so you shouldn't need to move your files to a different type, you'll just need to copy them somewhere (like another external hard drive or a thumb drive) and then copy them back when you're done with the installation. Obligatory word of warning: installing Linux on your actual machine, as opposed to a VM, WILL OVERWRITE YOUR ENTIRE HARD DRIVE. Do this with caution. Restoring from a backup is possible, so as long as you backed everything up you will not lose any data, but it can be a pain in the neck and if you're not particularly tech-savvy, you may have to go to a computer repair store to get them to do it.
Now, as to your question about learning to code: this requires no VM and no new installation; you can start doing that today. There are almost infinite tutorials online about how to start coding. CodeCademy.com is a pretty decent one, as I recall, though it's been a long time since I used it. There's also a channel on YouTube called BroCode that puts up free 'how to get started in this programming language' tutorials, which are pretty beginner-friendly. I would recommend that you start with either Python or Java (NOT JavaScript; it's not the same thing as Java, and it's a really annoying programming language, so don't do that to yourself). Python has syntax that is more similar to English than most programming languages and it is pretty powerful, but it may confuse you when you start moving to other programming languages. Java is less immediately comprehensible but probably more representative of programming languages as a whole.
Hope this helps! Feel free to send me follow-up questions or ask for clarification if I lapsed into tech-speak and this doesn't make sense.
2 notes
·
View notes
Text
yes it is that easy for usa ppl but not for people in india.
mb for other countries too where the government restricts internet usage, so lemme tell you how to do it
books-epub-wall.vk
movies-piratebay
how do you do this? well see
1. go install oracle virtualbox (so that you can have an environment completely different from your own computer, you can skip steps 1 and 2 if you already have linux, or dont wanna install vms on your computer or wtv, but i do it for safety reasons so that my computer doesn't get affected from malware and linux has more open source applications that you can download for free as compared to windows)
2. get a linux iso from the internet for free because linux is open source (i use kali linux because well it has so many tools pre installed ᵃⁿᵈ ʸᵒᵘ ᶜᵃⁿ ᵃˡˢᵒ ᵘˢᵉ ᵗᵒ ᶦᵗ ᵗᵒ ᶜʳᵃᶜᵏ ʷᶦᶠᶦ ᵖᵃˢˢʷᵒʳᵈˢ ᵒʳ ᵍᵉᵗ ᶦⁿᵗᵒ ʰᵃᶜᵏᶦⁿᵍ) oh also if you wanna learn white hat hacking practice on hackthebox, also mb get into bug bounty hunting because companies pay you so much to find bugs on their websites, and there are so many videos on youtube teaching you how to find bugs and shi, all in all good way to earn money if you have a laptop and internet access, anyways
3. install windscribe vpn (free easy to use, we dont need fancy ass vpns) (if you have windows search up some good vpns for free but honestly like i said windows doesn't have many free options, also you don't need too much internet from the vpn anyways for what we're going to do so don't waste too much money on big ass vpn data plans)
4. switch on vpn and go to sites you want and get magnet links for torrents
5. what i have done is i have bit torrent installed on my actual os (the base os not the virtual one), bit torrent is smthg that you can use from the web and works in india, utorrent doesn't work anymore mostly mb, (imsorry i don't know about other countries, it'll take some trial and error but you can do it!) so copy magnet link from virtual os and paste it to bittorrent (oracle virtualbox allows this, if you have set clipboard sharing to be bidirectional) and voila it will start to download, congratulations you did some pirating and you also have kali linux to do some hacking, now go and earn some money using bug bounty hunting.
tldr: get virtualbox, get a virtual linux, install vpn, get torrent magnet link, install torrent installer on actual os, paste magnet link to torrent installer, start downloading
Other Ways:-
1. if your government controls the information you see and you have brave or tor browser you can go to .onion sites (basically what you call dark web) and read news articles on famous sites which have a .onion counterpart url? but for the love of god dont dive too much into the dark web (deep web) because its a bit dangerous (a lot, especially to younger people who're doing this, don't trust the internet too much and stay cautious), just stick to famous sites, which you can google or duckduckgo the .onion url of.
2. andddddd you can also use google dorks to find movies, search up some good dorks and use them, https://gist.github.com/markstachowski/1202382150e3fb25ece69a1ff9cf5b6e
^^examples
3. also kayoanime gives you drive links to anime, aniwatch.to still works idk for how long
dm me if you have any questions
i don’t understand people who say they don’t pirate movies bc they don’t know how like you literally just google “best movie sites reddit [insert current year]” install an add blocker and that’s it. it’s literally easier to pirate movies than it is to watch them legally bc it takes more effort to sign up for streaming services than it does to look for hosting sites
#sorry i rambled too much#but hope this helps#I've been pirating since i was in like 8th or smng#and this works best since the recent law in india where they control our internet access and websites we can reach#truly dark times
7K notes
·
View notes
Text
How to run mac on windows 10 virtualbox

#How to run mac on windows 10 virtualbox full version
#How to run mac on windows 10 virtualbox windows 10
#How to run mac on windows 10 virtualbox pro
#How to run mac on windows 10 virtualbox software
#How to run mac on windows 10 virtualbox Pc
This means, for example, you can't check your Apple Mail at the same time as you're using Windows. The biggest disadvantage of using Boot Camp over virtualization is that you can't access your primary operating system at the same time. Instead, it lets you boot your Mac into another operating system at startup, either a separate version of macOS or copy of Windows 8, Windows 8.1, or Windows 10.
#How to run mac on windows 10 virtualbox software
Built into macOS, the software isn't run on virtualization technology. If you rather not use a third-party solution, consider Apple's Boot Camp. Who's this for: Open-source software is preferred by many computer users and for those folks, VirtualBox is a great choice. It's available for Mac, Windows, Linux, and Solaris too. VirtualBox is available to download online. Otherwise, pay for a copy of Parallels 15 or VMware Fusion 11.5. If you're an IT professional or someone with the time to play around with open-source software, by all means, consider VirtualBox. Unfortunately, because it's open-source, VirtualBox doesn't provide technical support, although there's an active user forum.īut again, it's important to circle back around to VirtualBox's interface, which isn't nearly as slick or easy to use as the others. Another advantage: Oracle has released VirtualBox as open-source, which offers more flexibility to end-users than the other solutions. Perhaps the most important reason to consider VirtualBox is that it's free, at least for personal or educational use. Despite this, there are some important differences between it and Parallels 15 and VMware Fusion 11.5 that might make it a better solution, depending on your situation. Unfortunately, Oracle's VirtualBox is the least polished virtualization title on this list. When using software, I expect a polished experienced. If you're familiar with VMWare products, Fusion is probably the one for you. Who's this for: VMWare's Fusion 11.5 is nearly as good as Parallels 15.
#How to run mac on windows 10 virtualbox pro
If you're familiar with other VMWare products, including Workstation Pro for Windows, Fusion is probably the path for you, although check out both products if you can.įusion 11.5 is available for download from the VMWare website. The VMWare Fusion interface doesn't look nearly as nice as the one offered by Parallels, but it's close. All versions come with a 14-day free trial. A professional version is also available for IT environments.
#How to run mac on windows 10 virtualbox full version
It also supports Touch Bar on a MacPro Pro.įusion 11.5 is available at the same price points as Parallels, $80 for a full version and $50 for an update. Beginning with Fusion 11, support was added for Apple's Metal graphics system. With Fusion's unity mode, you can run Windows-based applications on your computer as if they were Mac apps.
#How to run mac on windows 10 virtualbox windows 10
In this case, you can use Fusion with Windows 10 (or another operating system) through a window on your Mac desktop or in full-screen mode. Like Parallels, Fusion lets you create a virtual machine through software that can run separately from your macOS installation. Created by Dell Computer's VMWare, the latest version of Fusion (11.5), has been designed to take advantage of macOS Catalina tools, including Sidecar and Dark Mode. Parallel's closest virtualization competitor, Fusion, is another great choice for consumers. Grab a copy if you're looking for a solution that just works. Who's this for: Parallel offers a no-nonsense approach to virtualizaiton. New versions of Parallels typically arrive around the time Apple releases a new version of macOS, usually in the fall. Once a new version gets released, you can download it from the Parallels website. The professional version does include free upgrades. The former doesn't include free updates to future versions of Parallels Desktop, but also has no expiration date. The home version is $80 or $50 for an upgrade, while the professional version is $100 per year. Parallels Desktop 15 is the company's flagship consumer product and is available through a free trial, regardless of the version you choose. It also works with macOS Mojave 10.14, macOS High Sierra 10.13, and macOS Sierra 10.12. Noted Windows apps you can run on your Mac include Autodesk 3ds Max 2020, Lumion, ArcGIS Pro, and more.īeyond this, Parallels Desktop 15 is also fully compatible and optimized for macOS Catalina, which means it supports Apple's Sidecar.
#How to run mac on windows 10 virtualbox Pc
To date, nearly 1,600 PC games require DirectX 11, which means you can now experience all of them on your Mac through Parallels virtualization.
2 notes
·
View notes
Text
Virtualbox 5.2 For Windows 7 32 Bit

Virtualbox 5.2 For Windows 7 32 Bit Download
Download Virtualbox For Windows 10
Virtualbox 5.2 For Windows 7 32 Bit Free
Oracle VM VirtualBox Base Packages - 6.1.26. Freely available for Windows, Mac OS X, Linux and Solaris x86 platforms under GPLv2: Platform. Windows Installer. Solaris 10 5/08 and later or Solaris 11. First, create a new virtual computer on VirtualBox. Select Windows Server 2016 (64-bit) in the operating system selection window in the steps for creating a VM. After preparing the MS Server 2019 virtual machine, run the virtual machine by clicking the Start button. Configure the language, time settings, and keyboard layout for MS Server 2019. Virtualbox 32 Bit - downyup. VirtualBox for Windows 7 - original software that allows you to experiment with operating systems. Creates a virtual machine, allows you to set iron parameters within certain limits. The advantage is the modular architecture and the presence of internal logic. Suitable for users with an average level of skills.
Run Android on your PC
VirtualBox How To
The following are instructions on how to run Android-x86 inside VirtualBox. Note: For optimal performance, make sure you have enabled either VT-x or AMD-V in your host operating system's BIOS. Android-x86 versions tested against Virtualbox versions.
Date TestedVirtualboxHost OSAndroid-x86Result??2.2.4Windows XP??Good??3.0.2Fedora 11??GoodNov. 2 20175.2.0Windows 106.0-r3 32/64 bitGood
Downloading
Download an ISO of Android-x86 from here.
Caution
If you are using Android-x86 for debugging purposes, some binaries (gdb for example) are built for 32-bit architectures and will not support debugging 64-bit binaries such as the Android app host. Download a 32-bit distribution instead.
Create a new VM
If you have not already created a VirtualBox virtual machine for Android-x86 yet, do so as follows:
Click the 'New' button, and name your new virtual machine however you like. Set Type to Linux, and Version to Linux 2.6 / 3.x / 4.x. Note that you should choose the appropriate bit type for the version of Android-x86 that you downloaded.
Specify how much RAM will be allocated to your virtual machine when you run it. Android doesn't specify a bare-minimum requirement for memory, just keep in mind what apps you plan on running. 2GB (2048MB) is a good place to start, and you can change this later if you need to.
Create a new Hard disk image which will act as your machine's storage. The recommended starting size of 8GB is enough. Click through the rest of the options for creating your Hard disk.
Your virtual machine has now been created. It still needs to be initially installed at this point.
Settings
Tested on VirtualBox 64-bit for Windows, version 5.2.0. Android-x86 version 6.0-r3, both 32-bit and 64-bit. Select your machine, then click the Settings button and refer to the below recommended configuration to make sure your settings match.
(System)Recommended: Processor(s) should be set above 1 if you have more than one virtual processor in your host system. Failure to do so means every single app (like Google Chrome) might crush if you try to use it.
(Display):
Optional: Video Memory may be increased beyond the minimum selected automatically. The affects of this are unknown.
Mandatory: Unless guest additions are installed(1), change the default VMSVGA to VBoxVGA.
Optional: Enable 3D Acceleration may be checked. The Linux Guest Additions must (VirtualBox v6.1+) / may (VirtualBox v6.0 and below) need to be installed(2)(1) to get any benefit from this.
Failure to do so means you won't even be able to launch Android-X86 in the first place.(3)
(Storage) Find the first 'Empty' item (this should have an icon of a CD). In the Attributes, click on the CD icon with a small down arrow, and pick 'Choose Optical Virtual Disk File...'. Specify the Android-x86 ISO that you downloaded.
(Audio) Intel HD Audio seems to be natively supported in Android-x86.
(Network) By default, your installation of Android-x86 will be able to automatically connect to the internet. If not, you can try to enable WiFi in Settings/Network & Internet, and connect to showing VirtWifi. If you do not want to connect to the internet in VirtualBox, uncheck Enable Network Adapter under the Adapter 1 tab.
Install
Click the green Start arrow to power-on your virtual machine. You'll be presented with a list of options. Use the arrow keys to pick which one you want, then press Enter once the one you want is selected.
If you don't want to install Android-x86 yet and just want to test it, pick one of the Live CD options (except for Debug mode).
Pick the Installation option if you want your system to be installed to the virtual hard drive.
If you want to use higher resolution, you can edit the boot option by pressing TAB, change vga=788 (800x600) to vga=791 (1024x768) or vga=794 (1280x1024), and press Enter. You can also use vga=ask to see all available modes. But please note Android will only work under 16-bit mode.
Partition
When you are prompted to Choose a partition:
If you upgrade Android-x86 from a previous version, just select the existing partition. Agree to overwrite it when prompted.
If this is a new VM, choose to Create/Modify partitions. Use Bootable but not GPT! This will cause the GRUB installation to fail later.
You may partition your disk however you see fit. If you just want a simple installation, create one partition taking up the entire disk and format it as ext4.
Continue through the installation. You should install GRUB when it prompts you to. You may also leave /system as read and write when prompted. Once the installation is complete, force close/shut down the virtual machine and remove the ISO from the virtual CD drive. Finaly, start Android-x86. If it's a new machine, once loaded you can perform the Android setup to begin using your machine.
Advanced
Custom partitions, SDCard
When booting Android-x86, you may specify which partitions represent the data and sdcard. On the boot menu, select an entry you would like to boot from, press TAB, then add the following as it suits your needs: DATA=sda1 SDCARD=sda2 Press Enter to boot. These options specify user data (your setting, your uploaded applications, ...) go into /dev/sda1, and data saved in sdcard go into /dev/sda2. If you build the ISO from source, you can add these options to bootable/newinstaller/boot/isolinux/isolinux.cfg. Here is a note from David when using fdisk:
Create a new virtual machine with a hard disk.
Launch the Live ISO in Debug mode (I used android-x86-2.2-generic.iso) to get the commend prompt.
'fdisk /dev/sda', then type:
'n' (new partition)
'p' (primary partition)
'1' (1st partition)
'1' (first cylinder)
'xx' (choose the last cylinder, leaving room for a 2nd partition)
'w' (write the partition)
Repeat #3, but call it partition 2, and use the remaining cylinders.
'mdev -s'
'mke2fs -j -L DATA /dev/sda1'
'mke2fs -j -L SDCARD /dev/sda2'
Reboot ('reboot -f')
At the boot menu, choose VESA, then hit TAB and type so that the end of the line reads: 'DATA=sda1 SDCARD=sda2'. (Only need for the generic target images, for VM target images, this is not needed)
After booting (and of course disabling mouse integration via the machine menu), the SD card is read as unformatted, but you can format it by going to Settings > SD card & phone settings > Format SD Card, then Mount SD card.
The SD card should now work!
Note: for the step 7, if you want to format to vfat only, then you can do : Also remember the partition type has to be fat32 (b or c). By using vfat, the step 10 is not needed. DevTools application has a MediaScanner which (re)indexes your SD card for cases where you manually copied media over. This ensures that you see new images and/or music in the apps without having to reboot. If you downloaded it from within android, the application asks the relevant service to index new files.
Playing music
This section describes two ways to upload music files into Android running on a vbox so you can play them by the Music app. Of course, you can save the files to the virtual disk mounted at /sdcard, as described above.
Upload files by adb
Adb is Android Debug Bridge, a tool to debug Android system. If you compile from source, it is located in out/host/linux-x86/bin/adb. Otherwise you can get it from Android SDK. Suppose the network of your vbox is OK, you can upload a file from your host by
ADBHOST=<ip of vbox> out/host/linux-x86/bin/adb push <a music file> /sdcard

You need to know the ip of your vbox. You can get it by Alt-F1 and netcfg. You may also need to reboot Android to see the uploaded files. Of course in this way you have to mount /sdcard to a virtual disk partion. For complex network settings of the VirtualBox VM, you should refer to Debug How To on how to connect adb to the VM.

Upload files by wget
You can also upload files by wget in the debug mode. In the debug mode shell, before entering Android,
# cd /android/sdcard # netcfg eth0 dhcp # wget <url of a music file>
Then type exit to enter Android.
Debug with adb
This section describes the way to debug Android with adb via network.
Virtualbox 5.2 For Windows 7 32 Bit Download
If we want to debug with adb via network, we should ensure the ip of vbox can be accessed by host machine. So we should change the Network Adapter type of vbox to Bridged Adapter. After starting the android-x86, we should follow the above Settings/(Network) section to ensure the network of android-x86 is enabled, and enable USB debugging in Settings/System/Developer Options. Then we can get the device ip from Settings/System/About tablet/IP address. For example, if we see the ip address is 192.168.0.116, then we can use following command to connect android-x86 in vbox from host machine.
Then you can use adb command to debug android-x86 such as get log, and dump system information.
References
Download Virtualbox For Windows 10
Virtualbox 5.2 For Windows 7 32 Bit Free
^ ab VirtualBox currently has no Guest Additions for Android.
^ VirtualBox v6.1.0 states: 'old style 3D support (with VBoxVGA) has been completely removed'
^ VirtualBox states: 'Note that you must install the Guest Additions on the guest VM to specify the VBoxSVGA or VMSVGA graphics controller.'
1 note
·
View note
Text
Install Oracle Virtualbox On Mac

How to run Mac OS X on VirtualBox0

Download the latest version of Oracle VirtualBox for OS X hosts. Go to your Downloads folder and double click on the VirtualBox disk image file (dmg) you just downloaded.
Oracle VM VirtualBox Extension Pack. Free for personal, educational or evaluation use under the terms of the VirtualBox Personal Use and Evaluation License on Windows, Mac.
Install Linux(Ubuntu) on Oracle VirtualBox. Mayank Kumar Chaudhari. Which usually works much better on linux than on Windows or Mac, but you don’t want to leave your preferred os — may be windows or Mac OS or you want to experiment with a new software without risking the host OS.
Currently MacOS X is available to download for everyone, and with it you will obtain a mass of advantages and bonuses, like incredible Aqua interface and unforgettable style and traditions of classical MacOS X design. However, at the moment all the enthusiasts are capable to install and run MacOS X on VirtualBox VM instance, but you’ve got to know, that you will encounter some obstacles and thorns on your way. The main reason is different hardware architecture, PC has a lot of special options and peculiarities comparing to MacOS X platform, and during installation of MacOS in VirtualBox you will tackle with them all. Also no one guarantees that everything would work fine on your VirtualBox instance, without any problems and barriers, so be ready for unexpected surprises and moments.
The first thing what you should do prior to setting up, is to download the virtual hard disk image with the stored copy of Mac OS X (in this build 10.11 ElCaptain version is installed), so everything that you need is to get the installed copy of HDD, import it into VirtualBox and start using it as if you installed it yourself.
In this article I’m going to tell you how to run Mac OS X on VirtualBox, how to customize it and how to transform the virtual instance into functional representation easily.

The first thing what you should do prior to setting up, is to download the virtual hard disk image with the stored copy of Mac OS X (in this build 10.11 ElCaptain version is installed), so everything that you need is to get the installed copy of HDD, import it into VirtualBox and start using it as if you installed it yourself.
The copy:

https://drive.google.com/drive/folders/0B7cXiM2mdMukRW85U0xxM2FCRFU
So, download the file from the source link and extract the archive to the reliable destination.

Now I will describe the hardware requirements for the MacOS X installation on VirtualBox.
Requirements for the personal computer:
Install Oracle Vm On Mac
OS: Windows 10/8/7 (64-bit)
CPU: Intel
RAM: 3072 MB (minimal)

BIOS: Virtualization Enable (VT-x)
The next step, which you should perform, is to install VirtualBox.
Further create new VM instance. Here come the parameters:
Name: OSX ElCapitan Final
Type: MacOSX
Version: MacOSX 10.11 ElCapitan (64-bit)
Image: OSX ElCapitan Retail.vmdk
When the form with RAM memory definition appears during VirtualBox setting up, set the RAM size to 4 GB (minimum 2.56 GB).
Next step is related to virtual machine configuration. Set up the following settings for exact reproduction of hardware platform and correct VM operation:
CPU: 2 CPU and Enable PAE/NX
Install Macos Catalina On Oracle Virtualbox
System: Disable Floppy, Enable EFI, Chipset is IHC9 or PIIX3.
Can't Install Virtualbox On Mac
On this iteration the algorithm “How to install Mac OS X on VirtualBox?” is approaching to its conclusion. Using the predefined instruction, you will easily be able to install and run MacOSX 10.11 ElCapitan on your Windows PC platform and VirtualBox appropriately and use it with full comfort and coziness. As far as this instruction is quite detailed and circumstantial, you will not feel any discomfort or confusion while addressing to it. Also we checked the links given in the beginning of the article, and may guarantee that they are all correct and working. Thus, they will serve you well and successfully.
1 note
·
View note
Text
Mysql Download For Mac Mojave

Mysql Workbench Download For Mac
Mysql Install Mac Mojave
I am more of a command line user when accessing MySQL, but MySQLWorkBench is by far a great tool. However, I am not a fan of installing a database on my local machine and prefer to use an old computer on my network to handle that. If you have an old Mac or PC, wipe it and install Linux Server command line only software on it. Machines as old as 10/15 years and older can support Linux easily. You don't even need that much RAM either but I'd got with minimum of 4GB for MySQL.
The Mojave installer app will be in your Applications folder, so you can go there and launch it later to upgrade your Mac to the new operating system. Make a bootable installer drive: The quick way. Sep 27, 2018 So before you download and install macOS 10.14 Mojave, make sure your Mac is backed up. For information on how to do this, head over to our ultimate guide to backing up your Mac. How to download.
Apr 24, 2020 Download macOS Mojave For the strongest security and latest features, find out whether you can upgrade to macOS Catalina, the latest version of the Mac operating system. If you still need macOS Mojave, use this App Store link: Get macOS Mojave.
Oct 08, 2018 Steps to Install MySQL Workbench 8.0 on Mac OS X Mojave Step 1. Download the Installer. Follow this link to download the latest version of MySQL Workbench 8.0 for Mac. When I write this article, the Workbench version 8.0.12 is available. Save the file to your download directory.
Or...
Use Virtualbox by Oracle to create a virtual server on your local machine. I recommend Centos 7 or Ubuntu 18.04. The latter I used to use exclusively but it has too many updates every other week, whereas Centos 7 updates less often and is as secure regardless. But you will need to learn about firewalls, and securing SSH because SSH is how you will access the virtual machine for maintenance. You will have to learn how to add/delete users, how to use sudo so you can perform root based commands etc. There is a lot more to the picture than meets the eye when you want to use a database.
I strongly recommend not installing MySQL on your local machine but use a Virtual Machine or an old machine that you can connect to on your local area network. It will give you a better understanding of security when you have to deal with a firewall and it is always a good practice to never have a database on the same server/computer as your project. Databases are for the backend where access is secure and severely limited to just one machine via ssh-keys or machine id. If you don't have the key or ID you ain't getting access to the DB.
There are plenty of tutorials online that will show you how to do this. If you have the passion to learn it will come easy.
Posted on
Apple released every update for macOS, whether major or minor, via Mac App Store. Digital delivery to users makes it easy to download and update, however, it is not convenient in certain scenarios. Some users might need to keep a physical copy of macOS due to slow Internet connectivity. Others might need to create a physical copy to format their Mac and perform a clean install. Specially with the upcoming releasee of macOS Mojave, it is important to know how the full installer can be downloaded.
We have already covered different methods before which let you create a bootable USB installer for macOS. The first method was via a terminal, while the second method involved the usage of some third-party apps, that make the whole process simple. However, in that guide, we mentioned that the installer has to be downloaded from the Mac App Store. The installer files can be used after download, by cancelling the installation wizard for macOS. However, for some users, this might not be the complete download. Many users report that they receive installation files which are just a few MB in size.
Luckily, there is a tool called macOS Mojave Patcher. While this tool has been developed to help users run macOS Mojave/macOS 10.14 on unsupported Macs, it has a brilliant little feature that lets you download the full macOS Mojave dmg installer too. Because Mojave will only download on supported Macs, this tool lets users download it using a supported Mac, created a bootable USB installer and install it on an unsupported Mac. Here is how you can use this app.
Download macOS Mojave installer using macOS Mojave Patcher

Download the app from here. (Always use the latest version from this link.)
Opening it might show a warning dialogue. You’ll have to go to System Preferences > Security & Privacy to allow the app to run.Click Open Anyway in Security & Privacy.
Once you are able to open the app, you’ll get a message that your machine is natively supported. Click ok.
Go to Tools> Download macOS Mojave, to start the download. The app will ask you where you want to save the installer file. Note that the files are downloaded directly from Apple, so you wouldn’t have to worry about them being corrupted.The download will be around 6GB+ so make sure that you have enough space on your Mac.Once the download starts, the app will show you a progress bar. This might take a while, depending on your Internet connection speed.
Mysql Workbench Download For Mac
Once the download is complete, you can use this installer file to create a bootable USB.
Mysql Install Mac Mojave
P.S. if you just want to download a combo update for Mojave, they are available as small installers from Apple and can be downloaded here.
1 note
·
View note
Photo


06.06.20
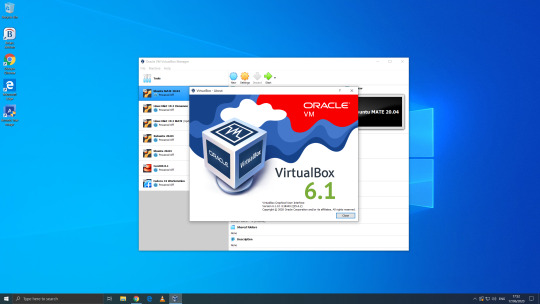
We went to the Oracle VirtualBox site and downloaded and installed VirtualBox 6.0. Oracle VM VirtualBox is free, open source virtual machine software maintained by Oracle Corp.
It was originally an Innotek product before Innotek was acquired by Sun Microsystems in 2008. Sun Microsystems was in turn acquired by Oracle in 2010. The alternative software to Oracle VM VirtualBox is VMware workstation.
I have been using Oracle VM VirtualBox since 2016 and have learnt a lot of information about how it works and how to install various operating systems.
Virtualbox can run Linux guest operating systems and Microsoft Windows guest operating systems. It can emulate both 64-bit operating systems and 32-bit operating systems.
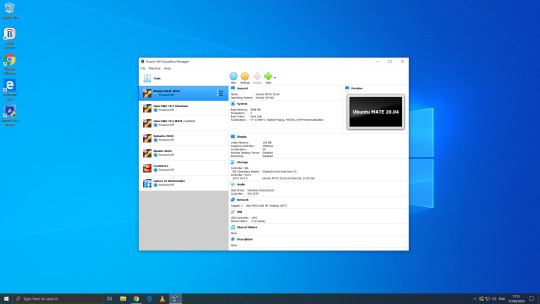
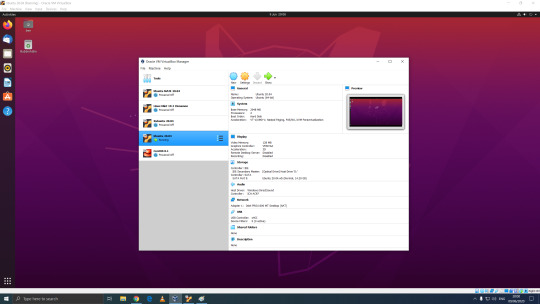
Each operating system you add to VirtualBox is treated as a Guest. The guest operating system is running in its own virtual environment, which emulates a real machine on your PC. This means that anything you do in it does not affect your PC. The guest runs in a console:
About the VBox console: The VirtualBox console displays the active virtual machine. It shows the virtual guest operating system activity icons in the status bar. The console can be re-sized, minimised and forced closed from the title bar. It is not recommended to force close an active guest operating system as this acts like switching off mains power. Your guest operating system should be shut down cleanly. You can select different viewing modes in the view list or use the shortcut keys assigned with them. These mode include full screen mode, seamless mode and scaled mode. VirtualBox website link: https://www.virtualbox.org/ VirtualBox wiki link: https://en.wikipedia.org/wiki/VirtualBox
After setting it up, I went to find some Linux-based operating systems to download. Each download is a disc image file with the file extension .iso.
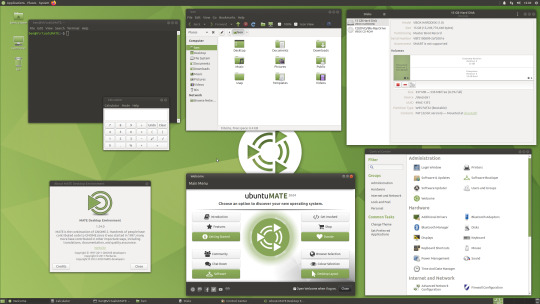
I chose:
Ubuntu MATE 20.04 LTS (Long Term Support)
This operating system uses the MATE Desktop Environment, which is the continuation of the former GNOME 2 Desktop. I like this desktop environment because it has a very configurable interface.
Ubuntu MATE: https://ubuntu-mate.org/
Wiki link: https://en.wikipedia.org/wiki/Ubuntu_MATE
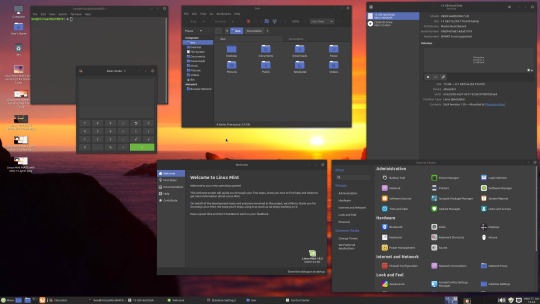
Linux Mint Cinnamon 19.3 Tricia (based on Ubuntu 18.04 LTS)
This operating system uses the Cinnamon Desktop Environment which is based on GNOME 3. Cinnamon uses MGSE (Mint Gnome Shell Extensions), which re-creates a more traditional desktop linux experience whilst also looking modern.
I like this desktop environment because it looks modern and feels familiar to those who come from Windows.
Linux Mint: https://www.linuxmint.com/
Wiki link: https://en.wikipedia.org/wiki/Linux_Mint
Linux Mint MATE 19.3 Tricia (based on Ubuntu 18.04 LTS)
Linux Mint edition featuring the MATE Desktop Environment. I like this desktop environment because like Ubuntu MATE, it is very configurable. It also features Linux Mints system updating utility.
Ubuntu 20.04 LTS
This version of Ubuntu is the main version by Canonical Ltd. This operating system uses the GNOME 3 Desktop Environment.
Ubuntu came out in 2004 and used GNOME 2 as it’s desktop environment until 2011, when it changed to the now discontinued Unity Desktop. In 2017, Canonical announced it would return to GNOME. I like this desktop environment as unlike the GNOME 3 default interface, Ubuntu uses its own orange style theme and adds a Unity like dock on the left of the screen.
Ubuntu: https://ubuntu.com/
Wiki link: https://en.wikipedia.org/wiki/Ubuntu
Xubuntu 20.04 LTS
This operating system uses the XFCE Desktop Environment which aims to be lightweight on system resources and has a really configurable user interface. Xfce once stood for XForms Common Environment. The menu system is called the Whisker Menu. I like this desktop environment because like MATE it is very configurable.
The Ubuntu 20.04 Long Term Release is code named: Focal Fossa. All Ubuntu based distros use .deb (Debian Package Manager) for software installation.
Xubuntu: https://xubuntu.org/
Wiki link: https://en.wikipedia.org/wiki/Xfce
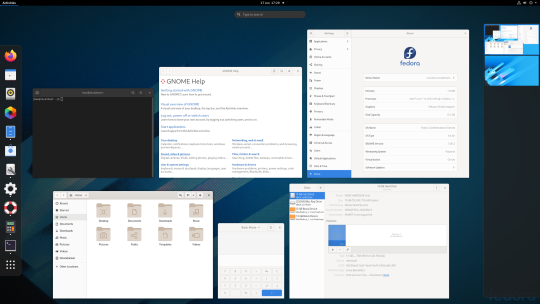
Fedora Workstation 32
Fedora is a Linux distribution developed by the community-supported Fedora Project which is sponsored primarily by Red Hat, a subsidiary of IBM, with additional support from other companies. Fedora is used by Linus Torvalds who is the creator of the Linux kernel.
Fedora is the upstream source of the commercial Red Hat Enterprise Linux distribution.
Since the release of Fedora 30, five different editions are currently available: Workstation, focused on the personal computer, Server for servers, CoreOS, focused on cloud computing, Silverblue, focused on an immutable desktop specialized to container-based workflows and IoT, focused on IoT devices.
I like this desktop environment because it looks fresh and modern. This operating system features the latest version of the GNOME Desktop Environment.
The screenshot of Fedora shows the ‘Activities’ dial screen which gives you a Visual overview of your GNOME Desktop.
With the Activities screen, you can see and control currently opened app windows, all installed applications, search system and switch desktop work spaces.
Fedora: https://getfedora.org/
Wiki link: https://en.wikipedia.org/wiki/Fedora_(operating_system)
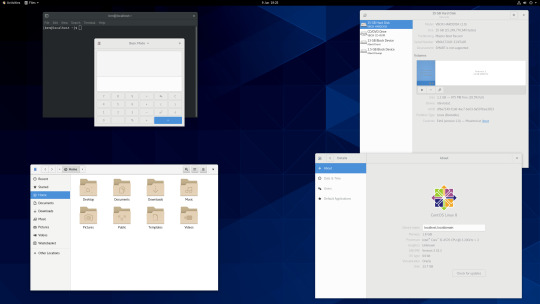
CentOS 8.1
CentOS (Community Enterprise Operating System) is a Linux distribution that provides a free, community-supported computing platform functionally compatible with its upstream source operating system, Red Hat Enterprise Linux (RHEL). It is maintained by The CentOS Project (affiliated with Red Hat). Both operating systems use GNOME 3 as their default desktop environment.
It is basically a free version of Red Hat Enterprise Linux, with the Red Hat branding removed and update servers pointing away from Red Hat servers.
Red Hat Enterprise Linux is a commercial focused Linux distro.
All Red Hat Linux based distros such as RHEL, CentOS and Fedora use .rpm (Red Hat Package Manager) for software installation.
CentOS and Red Hat Enterprise Linux can be installed on servers, workstations and desktops. Both are very popular on mission critical commercial server systems as it is designed to be flexible and very stable.
I thought this Linux distro is interesting because unlike the Ubuntu based distros above, installation of CentOS is more involved, you set up software sources, installed software, desktop and operating system components.
CentOS runs on a lot of web servers.
CentOS: https://www.centos.org/
RHEL:
https://www.redhat.com/en/technologies/linux-platforms/enterprise-linux
CentOS Wiki link: https://en.wikipedia.org/wiki/CentOS
RHEL Wiki link: https://en.wikipedia.org/wiki/Red_Hat_Enterprise_Linux
VirtualBox requires the installation of Guest Additions, which adds extra features to the virtual machine, such as the ability to scale the resolution of the guest operating system, better 3D acceleration and the ability to move files between the Guest and Host machine.
To install Guest Additions on a Linux guest, you will need to use the terminal. installation of this is different on .deb and .rpm builds of Linux.
4 notes
·
View notes
Video
Sailpoint IdentityIQ tutorial 1 - Hardware and Software requirements In this SailPoint tutorial we discussed the various hardware and software requirements for SailPoint Installation. 🔥 Lab - Linux 7 installation 📌 Live training on Sailpoint IdentityIQ To know more kindly visit- https://www.identityclasses.com/courses/sailpoint-identityiq/ For any queries drop us an ✉️ email at [email protected] or WhatsApp us on +919046881874.
In this SailPoint IIQ tutorial we are going to discuss the various software and hardware requirements for installing SailPoint. As part of Software requirements we need - 1. Database (Oracle DB, MySQL, or IBM's DB2) 2. Java Virtual Machine (Oracle Java or OpenJDK) 3. Application Server (Apache Tomcat or WebLogic) 4. SailPoint software binaries.
Hardware requirements for Sailpoint depend on the footprint. A Footprint is a hardware deployment topology that supports the Sailpoint installation of a certain scale. As per Sailpoint, five different types of footprint exist depending upon the number of identities, applications, etc. 1. Sailpoint Micro Footprint - It is a small, non-production installations of up to 5K Identity objects. In this footprint, IdentityIQ server and the database server resides on the same machine/host. The server configuration should be 1 or 2 core processor with 4 GB RAM and 40 GB of block storage space. 2. Sailpoint Small footprint - It supports installation up to 10K Identity objects. This footprint requires 2 servers. One server is combined with the IdentityIQ application and database, while the other will only have the IdentityIQ application. The server configuration should be a 4-core processor with 8 GB of RAM and 250 GB of RAID protected DB block storage space. 3. Sailpoint Medium footprint - It supports installations of 10K to 50K Identity objects. This footprint requires 4 servers. One dedicated server for the database. One dedicated server for the UI. Two dedicated servers for Tasks/Batch. The Task server configuration should be a 4-core processor with 64-bit OS, 8 GB of RAM and 50GB of local block storage space for binaries and logs. The UI server configuration should be a 4-core processor with 64-bit OS, 8 GB of RAM, and 40GB of local block storage space for binaries and logs. The database server configuration should be a 4-core processor with 64-bit OS, 64GB RAM and 500GB of RAID protected DB storage plus 20 GB of RAID protected storage for OS files. 4. Sailpoint Large footprint - It supports installations of 50K to 500K Identity objects. This footprint requires 5 servers. One dedicated server for the database. Two dedicated servers for the UI and two dedicated servers for Tasks/Batch. The Task and UI server configuration should be a 4-core processor with 64-bit OS, 8 GB of RAM and 50GB of local block storage space for binaries and logs. The database server configuration should be an 8-core processor with 64-bit OS, 128GB RAM, and 1 TB of RAID protected DB storage plus 20 GB of RAID protected storage for OS files. 5. Sailpoint CALL Footprint - It supports installations over 500K Identity objects.
In the last part of the video we also discussed how to download all software that is required for SailPoint installation. At the end we installed Oracle Linux 7 in the VirtualBox.
👍 Subscribe us - https://www.youtube.com/channel/UCFtuzrsxfKmU03X-IUomz7A?sub_confirmation=1 ✔️ Website - https://www.identityclasses.com ✔️ Blog - https://blog.identityclasses.com ✔️ LinkedIn - https://www.linkedin.com/company/identityclasses ✔️ Twitter - https://twitter.com/classesidentity 🔥 Sailpoint IdentityIQ tutorial
1 note
·
View note
Link
How To Download And Install Red Hat Linux ISO On Oracle Virtualbox To download and install Red Hat Linux on Oracle VirtualBox, you will need to follow these steps: Download the Red Hat Linux ISO image from the Red Hat website or any other source that provides it.Install Oracle VirtualBox on your computer. You can download the latest version of VirtualBox from the Oracle website.Launch VirtualBox and click on the "New" button to create a new virtual machine.Enter a name for your virtual machine and select "Linux" as the type and "Red Hat (64-bit)" as the version. Click on the "Next" button.Allocate at least 2048 MB of RAM to your virtual machine and click on the "Next" button.Select "Create a virtual hard disk now" and click on the "Create" button.Select "VDI (VirtualBox Disk Image)" as the hard disk file type and click on the "Next" button.Select "Dynamically allocated" as the storage on physical hard disk and click on the "Next" button.Allocate at least 20 GB of space for the virtual hard disk and click on the "Create" button.Right-click on the virtual machine that you just created and select "Settings".In the "Settings" window, go to the "Storage" section and click on the "Add hard disk" icon.Select "Choose existing disk" and browse to the location of the Red Hat Linux ISO image that you downloaded earlier. Click on the "Open" button.Close the "Settings" window and start the virtual machine.Follow the on-screen instructions to install Red Hat Linux on your virtual machine.
0 notes
Text
Virtualization is a very old technology but still finds high use, especially in cloud computing. It involves creating software-based or virtual versions of computer resources such as storage, networks, applications, and servers. This makes it possible to partition a single server into multiple virtual instances that run and interact independently. There are mainly two types of virtualization. These are: Type 1/Bare Metal virtualization where the hypervisor is installed directly on top of the physical machine. For example Microsoft Hyper-V, open-source Kernel-based VMs (KVMs), VMware ESXi Type 2/Hosted virtualization where the hypervisor is installed on an existing operating system. For example VMware Workstation and Oracle VirtualBox In this guide, we will discuss how to install and use Vagrant With VirtualBox / KVM on Rocky Linux 9. Vagrant is an open-source tool that can be used to build and manage virtual machine environments in a single workflow. It provides the simplest and easiest command line way to manage virtual environments. This reduces the development environment setup time while increasing the production parity. Vagrant is preferred due to the following features: It is built on top of industry-standard technology and is controlled by a single consistent workflow. It offers simplicity when setting up an environment. It standardizes environments across platforms Virtual machines can easily be provisioned on top of VirtualBox, VMware, AWS, or any other provider. It is a cross-platform tool There are terminologies involved when dealing with Vagrant. These are: Vagrant Box: This is the Vagrant setup unit. just like docker, Vagrant is a self-contained image. This is a packaged Vagrant environment. Vagrant File: This is the configuration file for Vagrant. It contains the configurations used to create a VM. Provider: is the location in which the virtual environment runs, the default option is Virtualbox but can be set to any other tool such as KVM, docker e.t.c Now let’s plunge in and enjoy the awesomeness of this tool! Before you Begin Before we begin, you need a hypervisor installed on your Rocky Linux 9 machine. For this case, we will use KVM or Virtualbox, which can be installed with the aid below; Install and Use KVM Virtualization on Rocky Linux 9 Install and Use VirtualBox on Rocky Linux 9 1. Install Vagrant on Rocky Linux 9 Once a preferred hypervisor has been installed, proceed and install Vagrant on Rocky Linux 9. To achieve this, begin by adding the Vagrant repository to the system. sudo yum install yum-utils sudo yum-config-manager --add-repo https://rpm.releases.hashicorp.com/RHEL/hashicorp.repo Install Vagrant on Rocky Linux 9 with the command: sudo yum install vagrant Dependency Tree: Dependencies resolved. ======================================= Package Arch Version Repo Size ======================================= Installing: vagrant x86_64 2.3.0-1 hashicorp 108 M Transaction Summary ======================================= Install 1 Package Total download size: 108 M Installed size: 257 M Is this ok [y/N]: y 2. Using Vagrant with VirtualBox / KVM on Rocky Linux 9 Once installed, Vagrant can be used to create/provision Virtual Machine on your hypervisor. First, create a working directory for Vagrant and navigate into it: mkdir Vagrant && cd Vagrant Install the Vagrant Libvirt Provider(KVM Only) For KVM, you need to download the Vagrant plugin. First, enable the PowerTools CRB repo: sudo dnf install epel-release sudo dnf config-manager --set-enabled crb Install the required build tools: sudo dnf install gcc make perl kernel-devel kernel-headers bzip2 dkms elfutils-libelf-devel sudo yum groupinstall "Development Tools sudo dnf install libvirt-devel Install the Vagrant Libvirt Provider vagrant plugin install vagrant-libvirt ##OR CONFIGURE_ARGS="with-libvirt-include=/usr/include/libvirt with-libvirt-lib=/usr/lib64" vagrant plugin install vagrant-libvirt
Verify the installation with the command: $ vagrant plugin list vagrant-libvirt (0.10.1, global) Configure and Initialize the VM Now download a Vagrant box file for the desired VM and set the provider. For example Ubuntu 20.04 ##For VirtualBox vagrant box add generic/ubuntu2004 --provider=virtualbox ##For KVM vagrant box add generic/ubuntu2004 --provider=libvirt Sample Output: ==> box: Loading metadata for box 'generic/ubuntu2004' box: URL: https://vagrantcloud.com/generic/ubuntu2004 ==> box: Adding box 'generic/ubuntu2004' (v4.1.6) for provider: libvirt box: Downloading: https://vagrantcloud.com/generic/boxes/ubuntu2004/versions/4.1.6/providers/libvirt.box box: Calculating and comparing box checksum... ==> box: Successfully added box 'generic/ubuntu2004' (v4.1.6) for 'libvirt'! Create a Vagrant file for the VM using the init command: $ vagrant init generic/ubuntu2004 A `Vagrantfile` has been placed in this directory. You are now ready to `vagrant up` your first virtual environment! Please read the comments in the Vagrantfile as well as documentation on `vagrantup.com` for more information on using Vagrant. You can view the Vagrantfile: cat Vagrantfile Start the VM with the command: vagrant up Sample Output: Bringing machine 'default' up with 'virtualbox' provider... ==> default: Importing base box 'generic/ubuntu2004'... ==> default: Matching MAC address for NAT networking... ==> default: Checking if box 'generic/ubuntu2004' version '4.1.6' is up to date... ==> default: Setting the name of the VM: Vagrant_default_1660834980416_30148 ..... default: Vagrant insecure key detected. Vagrant will automatically replace default: this with a newly generated keypair for better security. default: default: Inserting generated public key within guest... default: Removing insecure key from the guest if it's present... default: Key inserted! Disconnecting and reconnecting using new SSH key... ==> default: Machine booted and ready! ==> default: Checking for guest additions in VM... After this, you will have the VM created and running on your hypervisor. For VirtualBox For KVM Creating a Custom Vagrantfile It is also possible to create your own Vagrantfiles to run the VMs. This can be done as shown: vim Vagrantfile Add the lines below replacing them appropriately: # -*- mode: ruby -*- # vi: set ft=ruby : ENV['VAGRANT_DEFAULT_PROVIDER'] = 'virtualbox' Vagrant.configure("2") do |config| ##### DEFINE VM ##### config.vm.define "centos01" do |config| config.vm.hostname = "centos7.example.com" config.vm.box = "centos/7" config.vm.box_check_update = true end end Now start the VM with the command: vagrant up SSH into the machine You can ssh to the VM with the Vagrant command below: $ vagrant ssh vagrant@ubuntu2004:~$ You are now set to interact with your VM as preferred. To terminate the session. use CTRL+D or the logout command: $ logout Connection to 192.168.121.125 closed. File shares Synced/shared folders are configured within your Vagrantfile using the config.vm.synced_folderparameter. For example, we can choose to share the local vagrant folder by adding the lines below to the Vagrantfile. Vagrant.configure("2") do |config| # other config here config.vm.synced_folder "/home/rocky9/Vagrant/", "/vagrant" ...... end The first parameter represents the path on the local machine /home/rocky9/Vagrant/ for this case and the second is the path to be created on the guest machine Reload the VM to apply the changes vagrant reload Vagrant will automatically mount /vagrant directory which is synced with the directory containing the Vagrantfile on your host system. This can be verified once you SSH into the VM as shown: $ vagrant ssh $ ls /vagrant/ Vagrantfile To test if you can sync files between the host and guest systems, add a new file in the VM’s vagrant directory: vagrant@vagrant:~$ touch /vagrant/share_test
End the session: $ exit Verify if the file exists in the local vagrant directory: $ ls share_test Vagrantfile Ansible Scripts It is also possible to provision VMS using Ansible playbooks. The Vagrant Ansible provisioner is the tool that allows you to perform all this. You need to have: Ansible installed on your Vagrant host. a recent version of OpenSSH that supports ControlPersist on your Vagrant host. Now you can have the simplest Vagrantfile configuration as shown: Vagrant.configure("2") do |config| # # Run Ansible from the Vagrant Host # config.vm.provision "ansible" do |ansible| ansible.playbook = "playbook.yml" end end More on how to use the Vagrant Ansible provisioner has been covered in the guide below: How To Use Ansible Playbook With Vagrant up 3. Teardown an Environment We have explored how to quickly set up a development environment. It is time we know how to stop, shut down and delete the environment. List the available vagrant boxes with the command: $ vagrant box list centos/7 (libvirt, 2004.01) centos/8 (libvirt, 1905.1) generic/ubuntu2004 (libvirt, 3.0.20) Suspend a VM Suspending a VM stop and save the current running state. The command below can be used to suspend a VM: $ vagrant suspend ==> default: Saving VM state and suspending execution... To resume, you need to issue the command: $ vagrant up Bringing machine 'default' up with 'virtualbox' provider... ==> default: Checking if box 'generic/ubuntu2004' version '4.1.6' is up to date... ==> default: Resuming suspended VM... ==> default: Booting VM... ==> default: Waiting for machine to boot. This may take a few minutes... default: SSH address: 127.0.0.1:2222 default: SSH username: vagrant default: SSH auth method: private key ==> default: Machine booted and ready! ==> default: Machine already provisioned. Run `vagrant provision` or use the `--provision` ==> default: flag to force provisioning. Provisioners marked to run always will still run. The VM resumes with the state where you left off. Halt a VM Halting gracefully shuts down the guest operating system and powers off the VM. The command for this is: $ vagrant halt ==> default: Attempting graceful shutdown of VM... When you power on the VM with the vagrant up command, it takes time to start from a cold boot. Destroy a VM To remove all traces of the VM from your system you use the destroy command. This command will stop/power off the VM, and reclaim the disk space and RAM used. The command used is as shown below: $ vagrant destroy default: Are you sure you want to destroy the 'default' VM? [y/N] y You will be prompted to confirm for the VM to be destroyed. Conclusion That marks the end of this amazing guide on how to use Vagrant With VirtualBox / KVM on Rocky Linux 9. At this point, you should be able to provision and manage a VM on VirtualBox / KVM using Vagrant. I hope this was important to you.
0 notes
Text
How to install Oracle VirtualBox on a Mac device
How to install Oracle VirtualBox on a Mac device
VirtualBox is a powerful x86 and AMD64/Intel64 virtualization product for enterprise as well as home use. VirtualBox isn’t only rich in functionalities, but also the only professional solution that is freely available as Open Source Software under the terms of the GNU General Public License (GPL) version 3. VirtualBox runs on Windows, Linux, Macintosh, and Solaris hosts and supports a large…

View On WordPress
#MAC#Macbook#MacOS#macOS Big Sur#macOS Monterey#Oracle VirtualBox#Type 2 Virtualization#VirtualBox#virtualization#VMs
0 notes
Text
Turn off cmd c virtual box

TURN OFF CMD C VIRTUAL BOX HOW TO
TURN OFF CMD C VIRTUAL BOX INSTALL
TURN OFF CMD C VIRTUAL BOX UPGRADE
Then tick the checkboxes near shortcut options and file associations.Ĭonfirm installation of VirtualBox network interfaces (click Yes). Select the manner in which you want features to be installed, clicking on the installation directory and installed components-you can leave the default values. The installation wizard that has a GUI (graphical user interface) should appear. Run the installer and define the installation options
TURN OFF CMD C VIRTUAL BOX UPGRADE
In the next blog post, the VirtualBox upgrade process will be explained.
TURN OFF CMD C VIRTUAL BOX HOW TO
In the current example, you can see how to set up VirtualBox on an example of VirtualBox 5.2. VirtualBox 5.2 supports 32-bit hosts while VirtualBox 6.0 doesn’t. You can also download older versions, for example, version 5.2. At the moment of writing this blog post, the latest VirtualBox version is 6.0.8. If you are looking for how to set up VirtualBox on mac, download the OS X installer. Go to the official web site to download the VirtualBox installer for your operating system (Windows in this case). The majority of modern processors support hardware virtualization. If Hyper-V is installed on your Windows machine, uninstall Hyper-V before installing VirtualBox (otherwise Hyper-V will block hardware virtualization extensions needed by VirtualBox to run VMs). Otherwise, if you run 64-bit guest operating systems, you can get the error: VT-x is not available. Enable CPU virtualization featuresįirst, you need to enable hardware virtualization features on your CPU (Central Processor Unit) such as Intel VT-X or AMD-V in UEFI/BIOS of your physical computer. The process of VirtualBox installation is not difficult and is similar for all supported operating systems. Let’s explore how to set up VirtualBox on Windows. On VirtualBox you can run VMs with Windows, Linux, macOS, Solaris, FreeBSD, Novell Netware, and other operating systems. VirtualBox can be installed on Windows, Linux, macOS, Solaris, and FreeBSD. A guest OS is an operating system installed on a virtual machine running inside VirtualBox. A host OS is the operating system installed on a physical machine, on which VirtualBox is installed. VirtualBox supports a long list of host and guest operating systems. Operating Systems Supported by VirtualBox
How to use VirtualBox for recording video inside the VM.
Running the installer and defining the installation options.
Today’s blog post explores how to use VirtualBox and contains the following sections: Thus, you can perform your tests in isolated virtual machines without any concerns of damaging your host operating system or other virtual machines. Virtual machines are isolated from each other and from the host operating system. An OS and applications installed inside a VM “think” that they are running on a regular physical machine since emulated hardware is used for running VMs on VirtualBox. One more VirtualBox advantage is that this product can be installed for free.Ī virtual machine (VM) works much like a physical one. VirtualBox is designed to run virtual machines on your physical machine without reinstalling your OS that is running on a physical machine. Oracle VirtualBox is what you need in this case, instead of reinstalling software on your physical machine.
TURN OFF CMD C VIRTUAL BOX INSTALL
When using a traditional you need to install the operating system on a physical machine for evaluating software that cannot be installed on your current operating system. By Michael Bose How to Use VirtualBox: Quick Overview
0 notes
Text
Iso image virtualbox mac os x

#Iso image virtualbox mac os x for free
#Iso image virtualbox mac os x how to
#Iso image virtualbox mac os x mac os x
#Iso image virtualbox mac os x mac os
In our next posts, we will post articles about the macOS Mojave installation. In this article, we have prepared and shared the macOS 10.14 image file for you to use macOS on virtual machines. To install macOS 11 on a virtual machine using the VMware virtualization program, click on the image below to browse our article.Īfter downloading the image file, click on the image below to download Mojave on VMware ESXi. If you have already installed macOS Mojave, open the Mac App Store and download and install this version from Updates. Update (July 26, 2018): macOS High Sierra 10.13.6 Released!Īpple introduced macOS 10.14.6 for developers. The macOS ISO file will not open on Windows! Just create a new virtual machine for macOS and add the ISO file to the virtual machine and then start the installation!Ĭlick the button below to get macOS Mojave 10.14 ISO file to your computer. You will also get ISO Corrupted Error if you try to open it on the Windows operating system after downloading the installation image to your computer. We have tested this ISO file, and it works fine. You can use this ISO file with virtualization programs such as VirtualBox, VMware Workstation. If you want to install macOS 10.13.5, check out our macOS High Sierra Installation article.ĭownload macOS Mojave Image File for VirtualBox, ESXi, and VMware In our previous articles, we have shared with you the macOS High Sierra operating system ISO files. After creating an Apple Developer account, you can download and install this update on your computer by downloading the macOS Developer Beta Access Utility. If you want to download and install macOS Beta on your iMac or MacBook computer, you must have an Apple Developer account. Once you have installed the macOS 10.14 installation image file on a virtual machine, you can start the installation immediately. In this article, we have prepared the ISO file for installing the Mojave operating system using VMware Workstation, Oracle VM VirtualBox, VMware Fusion, or ESXi virtualization programs. If you want to update your system to macOS 10.14, we recommend that you first back up your macOS computer for errors that may occur.
#Iso image virtualbox mac os x mac os
You can follow our blog for new images we release for VirtualBox.Although Mac OS Mojave beta is released, many users have updated their systems. It is a free and powerful x86 and AMD64/Intel64 virtualization product available for most of the operating systems such as Linux, Microsoft Windows, Mac OS X, Solaris and ported version for FreeBSD. VirtualBox is the most easiest way to run secondary OS on your primary operating system, If your hardware doesn’t allow you to install any other operating system then VirtualBox comes in hand.
#Iso image virtualbox mac os x how to
We do not install ‘Guest Additions’ in the OS or add any kind of stuff, read our privacy policy. This video guide you how to install Mac OS on VirtualBox with Mac OS ISO Download for Virtualbox.Mac OS ISO. the further detail you can read under review.
#Iso image virtualbox mac os x mac os x
Here you can follow the guide how to attach/configure VDI image with VirtualBox. Download Mac OS X 10.6.3 DMG Snow leopard full V setup is full offline installer setup and bootable ISO Image of MAC OS and compatible with 32 and 64 bit. You can check FAQs for Credentials( Username & Password) for VDI images. At the moment we have plans to offer you 30+ Linux/Unix distributions, we may add more to our list in near future, you can also send us suggestions if we are missing any popular distribution from our list.
#Iso image virtualbox mac os x for free
We offer images for both architectures 32bit and 64bit, you can download for free for both architectures. From here you can download and attach the VDI image to your VirtualBox and use it. We offer open-source (Linux/Unix) virtual machines (VDIs) for VirtualBox, we install and make them ready-to-use VirtualBox images for you.
1 note
·
View note
Text
Sas university edition virtualbox

#Sas university edition virtualbox for mac os#
#Sas university edition virtualbox code#
#Sas university edition virtualbox download#
#Sas university edition virtualbox download#
To download SAS University Edition, click on the URL Get free Software. SAS University edition is for academic and for non commercial use. SAS runs on a Virtual Machine, in general we can use Oracle VirtualBox or VMware Workstation. Download SAS University editionīefore Installing SAS University editions, we must download two softwares for successful SAS installation.
#Sas university edition virtualbox for mac os#
Lot many useful algorithms, intuitive GUI and different statistical methods available in SAS University edition software helps in proper analysis of data. Now that you have the SAS University Edition file and VirtualBox, follow the instructions to install it to your computer Installation for Windows (see chapter 3) Installation for Mac OS (see chapter 3) Installation for Linux (see chapter 3) Contact Information. SAS is one of the best tool available for Data analytics. Do NOT send me Personal Messages (PMs) for troubleshooting, they are simply deleted. Do NOT start VirtualBox automatically after the installation finishes, rather exit the installer after the installation is done and start it as you would normally. Statistical Analysis system (SAS) was created in 1970s by Jim Goodnight, John Sall and other NC State University Colleagues to analyze agricultural research data. Right-click on the installer and 'Run as Administrator'. If the same thing happens, either post a Bugtracker ticket with a link to this topic as well as both SAS and Linux vbox.logs, or wait until our hex whisperer fth0 happens along. Three different versions are available using Oracle Virtual Box. This is explained in the installation and use guides. SAS University Edition runs as a virtual machine on your native operating system and access is via a web browser to run statistics. Ubuntu, Debian, a general main-stream Linux distro. On the Mac and Windows, unless you have VMWare Fusion installed, download Oracle VirtualBox.
#Sas university edition virtualbox code#
Work through the initial setup and configuration and run SAS code from the training modules. To use SAS University edition, we don’t need to pay any licensing fee and it helped to increase the students engagement in Class. As a test to see if this is something related to the 'SAS University Edition' guest OS, try a basic Linux guest. Get Started with SAS University Edition on your local machine using Virtual Box to host a pre-installed instance. SAS University Edition is a free SAS software provided to faculty, staff and students to use day to day in Universities and at home. How to download & Install SAS University Edition?
0 notes
Text
Virtualbox network settings

Virtualbox network settings how to#
Virtualbox network settings install#
Virtualbox network settings update#
Virtualbox network settings windows#
This command would reserve the network addresses from 192.168.100.0 to 192.168.100.254 for the first NAT network instance of " VM name".
Virtualbox network settings windows#
You can change the default NAT network for individual virtual machine using below command on your Windows Machine under the home directory of VirtualBox C:Program FilesOracleVirtualBox>VBoxManage modifyvm "VM name" -natnet1 "192.168.100.0/24" In that case the guest is assigned to the address 10.0.2.15, the gateway is set to 10.0.2.2 and the name server can be found at 10.0.2.3.ĪLSO READ: Complete Shodan Tutorial | The Search Engine for Hackers So x is 2 when there is only one NAT instance active. In NAT mode, the guest network interface is assigned to the IPv4 range 10.0.x.0/24 by default where x corresponds to the instance of the NAT interface +2. Valid_lft 86385sec preferred_lft 86385sec List the available interface and identify the interface for which you have configured NAT as Network Mode in the Settings # ip aġ: lo: mtu 65536 qdisc noqueue state UNKNOWN group default qlen 1000 But in VMware Workstation Player you can directly connect to your virtual machine using NAT IP Address. You cannot run a server this way unless you set up port forwarding. In Oracle VirtualBox NAT is much like a private network behind a router, the virtual machine is invisible and unreachable from the outside internet. There is a difference how NAT works in VirtualBox and VMware. So in this article I will be very brief and touching only those areas to cover our primary agenda to enable and connect virtual machine to internet connection. I have written another article with detailed explanation of different network mode available with Oracle VirtualBox and VMware Workstation Player.
Virtualbox network settings how to#
These two are the most used Virtualization Software by end users for performing R&D and testing.īefore we jump into out main topic on how to connect virtual machine to internet connection, you must have Oracle VirtualBox installed on your environment Server and also you must be familiar with the different types of Network Modes and which one would help us connect to internet using our Linux or Windows OS from the Virtual Machine. There are various types of Network Mode available with Oracle VirtualBox and VMware Workstation Player.
Connect Virtual Machine to Internet Connection using Bridged network.
How to change Adapter Type in VirtualBox?.
Connect Virtual Machine to Internet Connection using NAT.
How to select/change Network Mode in VMware Workstation Player?.
How to select/change Network Mode in Oracle Virtual Box?.
I can now ssh / ftp into the guest server from the host on its static IP address and the guest can connect to the internet. Netplan cfg with static IPĪnd that is it. In the image below I have added the other network interface as seen from ip a and have given it the static IP of 192.168.56.108. Now edit the config file with your preferred text editor (vi, nano etc). Make a backup of that file in case something goes wrong and you need to roll back. cd /etc/netplanĭepending on your Ubuntu version you will see a filename like 01-netcfg.yaml for my Ubuntu 20.04 server or 50-cloud-init.yaml for Ubuntu 18.04. Netplan is the network management tool on Ubuntu these days, so forget the old /etc/network/interfaces. To see the network interfaces available type: ip aĪnd you will get output like: Ubuntu 20.04 ip a before static IP You will now be back in the console window. OK to save the new setting and start the VM. Now go to Adapter 2, check Enable Network Adapter and choose Attached to ‘Host-only Adapter’. For this VM, choose settings and the Network.
Virtualbox network settings update#
Do a sudo apt update & sudo apt upgrade to have the OS up to date and then sudo shutdown now.īack in VirtualBox.
Virtualbox network settings install#
To begin it is assumed you have downloaded the relevant Ubuntu iso file, created a new virtual machine through VirtualBox and gone through that install process. NAT network adapter (for access to the outside world).a host-only network adapter and configure the VM with a static IP address (for host to guest access).VirtualBoxįor this to happen the VM needs 2 network adapters: The aim is being able to access the guest on a static IP from the host to upload/download files and for the guest to be able to access the internet for API access to external services, apt update etc. Guest OS is Ubuntu 20.04 (Focal Fossa) Server Beta.
0 notes