#How to learn Docker step by step examples
Explore tagged Tumblr posts
Visit Tumblr Blog
Explore Tumblr blogs with no restrictions, modern design and the best experience.
Last Seen Tumblr Blogs


Fun Fact
Tumblr has 4 main sources of revenue.
Text
Ready to future-proof your applications and boost performance? Discover how PHP microservices can transform your development workflow! 💡
In this powerful guide, you'll learn: ✅ What PHP Microservices Architecture really means ✅ How to break a monolithic app into modular services ✅ Best tools for containerization like Docker & Kubernetes ✅ API Gateway strategies and service discovery techniques ✅ Tips on error handling, security, and performance optimization
With real-world examples and practical steps, this guide is perfect for developers and teams aiming for faster deployment, independent scaling, and simplified maintenance.
🎯 Whether you’re a solo developer or scaling a product, understanding microservices is the key to next-level architecture.
🌐 Brought to you by Orbitwebtech, Best Web Development Company in the USA, helping businesses build powerful and scalable web solutions.
📖 Start reading now and give your PHP projects a cutting-edge upgrade!
2 notes
·
View notes
Text
How to Choose the Right Tech Stack for Your Web App in 2025

In this article, you’ll learn how to confidently choose the right tech stack for your web app, avoid common mistakes, and stay future-proof. Whether you're building an MVP or scaling a SaaS platform, we’ll walk through every critical decision.
What Is a Tech Stack? (And Why It Matters More Than Ever)
Let’s not overcomplicate it. A tech stack is the combination of technologies you use to build and run a web app. It includes:
Front-end: What users see (e.g., React, Vue, Angular)
Back-end: What makes things work behind the scenes (e.g., Node.js, Django, Laravel)
Databases: Where your data lives (e.g., PostgreSQL, MongoDB, MySQL)
DevOps & Hosting: How your app is deployed and scaled (e.g., Docker, AWS, Vercel)
Why it matters: The wrong stack leads to poor performance, higher development costs, and scaling issues. The right stack supports speed, security, scalability, and a better developer experience.
Step 1: Define Your Web App’s Core Purpose
Before choosing tools, define the problem your app solves.
Is it data-heavy like an analytics dashboard?
Real-time focused, like a messaging or collaboration app?
Mobile-first, for customers on the go?
AI-driven, using machine learning in workflows?
Example: If you're building a streaming app, you need a tech stack optimized for media delivery, latency, and concurrent user handling.
Need help defining your app’s vision? Bluell AB’s Web Development service can guide you from idea to architecture.
Step 2: Consider Scalability from Day One
Most startups make the mistake of only thinking about MVP speed. But scaling problems can cost you down the line.
Here’s what to keep in mind:
Stateless architecture supports horizontal scaling
Choose microservices or modular monoliths based on team size and scope
Go for asynchronous processing (e.g., Node.js, Python Celery)
Use CDNs and caching for frontend optimization
A poorly optimized stack can increase infrastructure costs by 30–50% during scale. So, choose a stack that lets you scale without rewriting everything.
Step 3: Think Developer Availability & Community
Great tech means nothing if you can’t find people who can use it well.
Ask yourself:
Are there enough developers skilled in this tech?
Is the community strong and active?
Are there plenty of open-source tools and integrations?
Example: Choosing Go or Elixir might give you performance gains, but hiring developers can be tough compared to React or Node.js ecosystems.
Step 4: Match the Stack with the Right Architecture Pattern
Do you need:
A Monolithic app? Best for MVPs and small teams.
A Microservices architecture? Ideal for large-scale SaaS platforms.
A Serverless model? Great for event-driven apps or unpredictable traffic.
Pro Tip: Don’t over-engineer. Start with a modular monolith, then migrate as you grow.
Step 5: Prioritize Speed and Performance
In 2025, user patience is non-existent. Google says 53% of mobile users leave a page that takes more than 3 seconds to load.
To ensure speed:
Use Next.js or Nuxt.js for server-side rendering
Optimize images and use lazy loading
Use Redis or Memcached for caching
Integrate CDNs like Cloudflare
Benchmark early and often. Use tools like Lighthouse, WebPageTest, and New Relic to monitor.
Step 6: Plan for Integration and APIs
Your app doesn’t live in a vacuum. Think about:
Payment gateways (Stripe, PayPal)
CRM/ERP tools (Salesforce, HubSpot)
3rd-party APIs (OpenAI, Google Maps)
Make sure your stack supports REST or GraphQL seamlessly and has robust middleware for secure integration.

Step 7: Security and Compliance First
Security can’t be an afterthought.
Use stacks that support JWT, OAuth2, and secure sessions
Make sure your database handles encryption-at-rest
Use HTTPS, rate limiting, and sanitize inputs
Data breaches cost startups an average of $3.86 million. Prevention is cheaper than reaction.
Step 8: Don’t Ignore Cost and Licensing
Open source doesn’t always mean free. Some tools have enterprise licenses, usage limits, or require premium add-ons.
Cost checklist:
Licensing (e.g., Firebase becomes costly at scale)
DevOps costs (e.g., AWS vs. DigitalOcean)
Developer productivity (fewer bugs = lower costs)
Budgeting for technology should include time to hire, cost to scale, and infrastructure support.
Step 9: Understand the Role of DevOps and CI/CD
Continuous integration and continuous deployment (CI/CD) aren’t optional anymore.
Choose a tech stack that:
Works well with GitHub Actions, GitLab CI, or Jenkins
Supports containerization with Docker and Kubernetes
Enables fast rollback and testing
This reduces downtime and lets your team iterate faster.
Step 10: Evaluate Real-World Use Cases
Here’s how popular stacks perform:

Look at what companies are using, then adapt, don’t copy blindly.
How Bluell Can Help You Make the Right Tech Choice
Choosing a tech stack isn’t just technical, it’s strategic. Bluell specializes in full-stack development and helps startups and growing companies build modern, scalable web apps. Whether you’re validating an MVP or building a SaaS product from scratch, we can help you pick the right tools from day one.
Conclusion
Think of your tech stack like choosing a foundation for a building. You don’t want to rebuild it when you’re five stories up.
Here’s a quick recap to guide your decision:
Know your app’s purpose
Plan for future growth
Prioritize developer availability and ecosystem
Don’t ignore performance, security, or cost
Lean into CI/CD and DevOps early
Make data-backed decisions, not just trendy ones
Make your tech stack work for your users, your team, and your business, not the other way around.
1 note
·
View note
Text
DevOps Training in Marathahalli Bangalore – Build a Future-Proof Tech Career

Are you looking to transition into a high-growth IT role or strengthen your skills in modern software development practices? If you're in Bangalore, particularly near Marathahalli, you're in one of the best places to do that. eMexo Technologies offers a detailed and industry-ready DevOps Training in Marathahalli Bangalore designed for beginners, professionals, and career changers alike.
Explore DevOps Course in Marathahalli Bangalore – Key Skills You’ll Gain
This DevOps Course in Marathahalli Bangalore is structured to give you both theoretical knowledge and hands-on experience. Here’s what the curriculum typically covers:
Core Modules:
Step into the world of DevOps Training Center in Marathahalli Bangalore, where you'll discover how this powerful approach bridges the gap between development and operations to streamline processes and boost efficiency in today’s tech-driven environment.
✅ Linux Basics: Learn command-line fundamentals essential for DevOps engineers.
✅ Version Control with Git & GitHub: Master source code management.
✅ Automate your software build and deployment: workflows seamlessly using Jenkins as a powerful Continuous Integration tool.
✅ Configuration Management with Ansible: Manage infrastructure more efficiently.
✅ Containerization using Docker: Package apps with all their dependencies.
✅ Orchestration with Kubernetes: Manage containers at scale.
✅ Cloud Computing with AWS: Get started with DevOps in cloud environments.
✅ Monitoring & Logging with Prometheus, Grafana: Gain insights into application performance.
✅ CI/CD Pipeline Implementation: Build end-to-end automation flows.
✅ Everything is taught with real-time: examples, project work, and lab exercises.
Get Recognized with a DevOps Certification Course in Marathahalli Bangalore – Boost Your Industry Credibility
Upon completing the course, you'll be awarded a DevOps Certification Course in Marathahalli Bangalore issued by eMexo Technologies, validating your expertise in the field. This certification is designed to validate your expertise and improve your credibility with hiring managers. It’s especially useful for roles like:
✅ DevOps Engineer
✅ Site Reliability Engineer (SRE)
✅ Build & Release Engineer
✅ Automation Engineer
✅ System Administrator with DevOps skills
Top-Rated Best DevOps Training in Marathahalli Bangalore – Why eMexo Technologies Stands Out from the Rest
When it comes to finding the Best DevOps Training in Marathahalli Bangalore, eMexo Technologies ticks all the boxes:
✅ Up-to-Date Curriculum: Constantly refreshed to include the latest industry tools and practices.
✅ Experienced Trainers: Learn from industry professionals with 8–15 years of real-world experience.
✅ Real Projects: Work on case studies and scenarios inspired by actual DevOps environments.
✅ Flexible Timings: Choose from weekday, weekend, and online batches.
✅ Affordable Pricing: With the current 40% discount, this course is great value for money.
✅ Lifetime Access to Materials: Revise and revisit anytime.
DevOps Training Institute in Marathahalli Bangalore – Why Location Matters
Located in one of Bangalore’s biggest IT hubs, eMexo Technologies is a top-rated DevOps Training Institute in Marathahalli Bangalore. Proximity to major tech parks and MNCs means better networking opportunities and access to local job openings right after your course.
DevOps Training Center in Marathahalli Bangalore – Hands-On, Tech-Ready Lab Environment
At the DevOps Training Center in Marathahalli Bangalore, students don’t just watch tutorials—they do the work. You’ll have access to a fully equipped lab environment where you’ll implement DevOps pipelines, configure cloud environments, and monitor system performance.
DevOps Training and Placement in Marathahalli Bangalore – Start Working Faster
Job support is one of the biggest advantages here. The DevOps Training and Placement in Marathahalli Bangalore equips you with everything you need to launch a successful career in DevOps, including:
✅ 1:1 career counseling
✅ Resume building support
✅ Mock interviews with real-time feedback
✅ Interview scheduling and referrals through their hiring partners
✅ Post-course job alerts and updates
Many past students have successfully secured roles at top companies like Infosys, Wipro, TCS, Mindtree, and Accenture.
youtube
Don’t Miss This Opportunity!
If you're serious about breaking into tech or advancing in your current role, now is the perfect time to act. With expert-led training, hands-on labs, and full placement support, eMexo Technologies' DevOps Training in Marathahalli Bangalore has everything you need to succeed.
👉 Enroll now and grab an exclusive 30% discount on our DevOps training – limited seats available!
🔗 Click here to view course details and enroll
#DevOps#DevOpsTraining#DevOpsCourse#LearnDevOps#DevOpsEngineer#DevOpsSkills#DevOpsCulture#Git#Jenkins#Docker#Kubernetes#Ansible#Terraform#Prometheus#Grafana#CI/CD#Automation#ITTraining#CloudComputing#SoftwareDevelopment#CareerGrowth#DevOpsTrainingcenterinBangalore#DevOpsTrainingInMarathahalliBangalore#DevOpsCourseInMarathahalliBangalore#DevOpsTrainingInstitutesInMarathahalliBangalore#DevOpsClassesInMarathahalliBangalore#BestDevOpsTrainingInMarathahalliBangalore#DevOpsTrainingandPlacementinMarathahalliBangalore#Youtube
1 note
·
View note
Text
DevOps for Beginners: Navigating the Learning Landscape
DevOps, a revolutionary approach in the software industry, bridges the gap between development and operations by emphasizing collaboration and automation. For beginners, entering the world of DevOps might seem like a daunting task, but it doesn't have to be. In this blog, we'll provide you with a step-by-step guide to learn DevOps, from understanding its core philosophy to gaining hands-on experience with essential tools and cloud platforms. By the end of this journey, you'll be well on your way to mastering the art of DevOps.

The Beginner's Path to DevOps Mastery:
1. Grasp the DevOps Philosophy:
Start with the Basics: DevOps is more than just a set of tools; it's a cultural shift in how software development and IT operations work together. Begin your journey by understanding the fundamental principles of DevOps, which include collaboration, automation, and delivering value to customers.
2. Get to Know Key DevOps Tools:
Version Control: One of the first steps in DevOps is learning about version control systems like Git. These tools help you track changes in code, collaborate with team members, and manage code repositories effectively.
Continuous Integration/Continuous Deployment (CI/CD): Dive into CI/CD tools like Jenkins and GitLab CI. These tools automate the building and deployment of software, ensuring a smooth and efficient development pipeline.
Configuration Management: Gain proficiency in configuration management tools such as Ansible, Puppet, or Chef. These tools automate server provisioning and configuration, allowing for consistent and reliable infrastructure management.
Containerization and Orchestration: Explore containerization using Docker and container orchestration with Kubernetes. These technologies are integral to managing and scaling applications in a DevOps environment.
3. Learn Scripting and Coding:
Scripting Languages: DevOps engineers often use scripting languages such as Python, Ruby, or Bash to automate tasks and configure systems. Learning the basics of one or more of these languages is crucial.
Infrastructure as Code (IaC): Delve into Infrastructure as Code (IaC) tools like Terraform or AWS CloudFormation. IaC allows you to define and provision infrastructure using code, streamlining resource management.
4. Build Skills in Cloud Services:
Cloud Platforms: Learn about the main cloud providers, such as AWS, Azure, or Google Cloud. Discover the creation, configuration, and management of cloud resources. These skills are essential as DevOps often involves deploying and managing applications in the cloud.
DevOps in the Cloud: Explore how DevOps practices can be applied within a cloud environment. Utilize services like AWS Elastic Beanstalk or Azure DevOps for automated application deployments, scaling, and management.
5. Gain Hands-On Experience:
Personal Projects: Put your knowledge to the test by working on personal projects. Create a small web application, set up a CI/CD pipeline for it, or automate server configurations. Hands-on practice is invaluable for gaining real-world experience.
Open Source Contributions: Participate in open source DevOps initiatives. Collaborating with experienced professionals and contributing to real-world projects can accelerate your learning and provide insights into industry best practices.
6. Enroll in DevOps Courses:
Structured Learning: Consider enrolling in DevOps courses or training programs to ensure a structured learning experience. Institutions like ACTE Technologies offer comprehensive DevOps training programs designed to provide hands-on experience and real-world examples. These courses cater to beginners and advanced learners, ensuring you acquire practical skills in DevOps.

In your quest to master the art of DevOps, structured training can be a game-changer. ACTE Technologies, a renowned training institution, offers comprehensive DevOps training programs that cater to learners at all levels. Whether you're starting from scratch or enhancing your existing skills, ACTE Technologies can guide you efficiently and effectively in your DevOps journey. DevOps is a transformative approach in the world of software development, and it's accessible to beginners with the right roadmap. By understanding its core philosophy, exploring key tools, gaining hands-on experience, and considering structured training, you can embark on a rewarding journey to master DevOps and become an invaluable asset in the tech industry.
7 notes
·
View notes
Text
Staging on a VPS: Safely Preview Changes Before Going Live
🧪 How to Build a Staging Environment Using Your VPS
Safely test changes before going live — the smart way.
If you're running a website, web app, or SaaS project, you know the pain of broken layouts, buggy features, or downtime after updates. That’s where a staging environment comes in — a replica of your live website where you can test everything before going public.
In this guide, you’ll learn how to set up a reliable staging environment using your VPS hosting (ideal if you're hosted with VCCLHOSTING).
🧠 What Is a Staging Environment?
A staging environment is a testing ground — separate from your production (live) server — that simulates the real-world environment of your website or app. You can use it to:
Test design updates, new features, or plugin installs
Preview major code or content changes
Troubleshoot performance and security
Collaborate with your dev or QA team
Avoid downtime or user experience issues
🛠️ Why Use a VPS for Staging?
Using a VPS (Virtual Private Server) gives you:
Root access for full control
Dedicated resources (RAM, CPU)
Ability to isolate staging from live environment
Freedom to run multiple domains/subdomains or even container-based staging setups
💡 Tip: If you're using VCCLHOSTING, you can easily configure multiple environments on a single VPS or request an additional one at discounted rates for dev/testing purposes.
🧰 Tools You’ll Need
A VPS with Linux (Ubuntu/Debian/CentOS)
Web server: Apache or NGINX
PHP, MySQL/MariaDB stack (or your app’s language/runtime)
Optional: Git, Docker, cPanel, or phpMyAdmin
Domain/subdomain for staging (e.g., staging.yoursite.com)
🔧 Steps to Build a Staging Environment
1. Create a Subdomain or Separate Directory
Subdomain method: Set up staging.yourdomain.com in your DNS settings Point it to a new virtual host directory on your VPS
Folder method: Use a separate folder like /var/www/html/staging
✅ If you use cPanel or DirectAdmin (available on VCCLHOSTING), this can be done with a few clicks.
2. Clone Your Production Site
Manually copy your website files (via SFTP, rsync, or Git)
Export your live database and import it to a new one (e.g., staging_db)
Update configuration files:
Database credentials
Site URL paths (e.g., in WordPress: update wp-config.php and wp_options table)
3. Add Security
You don’t want Google indexing your staging site or hackers testing exploits.
Use .htpasswd to password-protect the staging directory
Block indexing via robots.txt
Restrict IP addresses if needed
Use HTTPS (let's Encrypt SSL or clone your live certificate)
4. Use Version Control (Recommended)
Set up Git to manage your staging deployments:
bashCopy
Edit
git clone https://github.com/yourrepo/project.git
This allows your devs to push to staging for testing before merging to live.
5. Test Your Changes in Staging First
Always use staging to:
Apply plugin/theme updates
Run database migrations
Test performance under simulated load
QA user flows, logins, carts, or contact forms
Once everything works in staging, deploy to live using:
Git-based CI/CD
Manual sync
Hosting control panel tools (e.g., Softaculous staging)
🤖 Bonus: Automate Staging with Docker or Containers
If you manage multiple apps, use Docker Compose or Kubernetes to quickly spin up isolated environments on your VPS.
Example with Docker Compose:
yamlCopy
Edit
version: '3' services: app: image: php:8.1-apache volumes: - ./code:/var/www/html ports: - "8081:80"
🛡️ Staging Environments with VCCLHOSTING
With VCCLHOSTING VPS, you get:
Full root access to configure staging as needed
Support for Linux or Windows environments
Optional cPanel/DirectAdmin for GUI-based staging
Local data center in Kolhapur for low-latency testing
Backup & restore tools to sync between live and staging
🧠 Final Thoughts
A staging environment isn’t just for big companies — it’s for anyone who cares about uptime, stability, and professionalism. Whether you're running a SaaS project or an eCommerce store, setting up staging on your VPS saves time, avoids downtime, and helps you launch with confidence.
🚀 Need Help Setting It Up?
Talk to the team at VCCLHOSTING — we’ll help you set up a staging-ready VPS with backup, SSH, and everything pre-configured.
🔗 www.vcclhosting.com 📞 Call us: 9096664246
0 notes
Text
Master YAML, JSON & JSONPath Like a Pro with This Ultimate Course

If you’ve ever peeked into the world of software development, DevOps, or data handling, you’ve probably come across YAML, JSON, and JSONPath. These aren't just tech buzzwords—they're foundational tools used by developers, sysadmins, testers, and analysts across industries. But let’s face it, they can be confusing at first. That’s exactly why the Ultimate YAML Course: YAML JSON JSONPath Zero - Master is a game-changer for anyone looking to master these powerful data formats and querying languages with ease.
Let’s break down what makes this course a must-have in your learning arsenal.
🚀 Why You Need YAML, JSON, and JSONPath Today
YAML and JSON are the backbones of modern configuration files, APIs, and data communication formats. Whether you're configuring Kubernetes clusters, writing GitHub Actions, managing AWS CloudFormation, or interacting with REST APIs, you're bound to run into one (or all) of these technologies.
JSON (JavaScript Object Notation) is everywhere—mobile apps, web servers, and databases use it daily. YAML, with its clean indentation and human-friendly structure, is quickly becoming the default for configuration files in DevOps and CI/CD workflows. And then there’s JSONPath—an incredibly handy tool to extract and manipulate JSON data easily.
Yet despite their popularity, many professionals still fumble when working with these tools. Why? Because their documentation is dry, scattered, or too technical. That’s where the Ultimate YAML Course comes in to save the day.
🧠 What This Course Teaches (In Plain English)
You don’t need to be a coder to start this course. That’s the beauty of it. Whether you’re a beginner just stepping into the world of data or a working professional who wants to polish your skills, the course starts from zero and walks you through to mastery.
Here’s a sneak peek at what’s inside:
YAML Fundamentals: Understand indentation, lists, dictionaries, anchors, and references.
JSON Deep Dive: Learn how to read, write, format, and validate JSON data effortlessly.
JSON vs YAML: Get a clear picture of when to use each and why.
JSONPath Simplified: Learn to filter and extract data from JSON with powerful expressions.
Real-World Use Cases: You won’t just learn theory. You’ll see these formats in action—configuring files, interacting with APIs, and handling practical data workflows.
And it’s all delivered in bite-sized lessons, so you’re never overwhelmed.
🎯 Who Should Take This Course?
This course isn’t just for developers. If your work involves configuration files, data management, system integration, or cloud services—this course will make your job easier and smarter.
DevOps Engineers: Automate infrastructure using YAML (Kubernetes, Docker Compose).
QA Testers: Parse and assert data from JSON APIs using JSONPath.
Backend Developers: Understand data interchange formats like JSON.
Tech Writers: Document API calls and data structures more accurately.
Students & Beginners: Build foundational knowledge with practical examples.
Whether you’re preparing for a job, tackling a project, or just curious—this course meets you right where you are.
🌟 What Makes This Course Different?
There are hundreds of tutorials online. Why choose this one?
Crystal-Clear Explanations: No fluff. No jargon. Just simplified concepts that click.
Practical Examples: Work with real files and use cases you’ll see on the job.
Zero to Mastery Structure: Start with nothing and leave as a confident YAML/JSON/JSONPath user.
Lifetime Access: Come back and review any time you hit a tricky file or need a refresher.
Plus, you’ll gain confidence as you build real-world hands-on skills—not just theory. It’s like having a mentor who actually gets how people learn best.
🛠️ Skills You’ll Walk Away With
By the time you finish the course, you’ll:
✅ Understand and write clean YAML files for any tool or platform ✅ Debug and format JSON like a pro ✅ Navigate nested JSON data with JSONPath ✅ Know when to use YAML vs JSON in projects ✅ Feel confident handling any configuration or API data file thrown your way
You’ll unlock a skillset that’s in demand across industries—whether you're managing cloud deployments, writing CI/CD pipelines, or consuming third-party APIs.
💼 Why It Matters for Your Career
Being fluent in YAML and JSON isn’t a bonus anymore—it’s a necessity. Every modern stack depends on data formats that are clean, structured, and easy to manage. If you’re looking to:
Land a job in DevOps, software testing, or backend development
Work with modern frameworks like Kubernetes, Ansible, or Terraform
Handle API responses with ease
Pass technical interviews with confidence
Or simply become more productive and efficient…
…then this course is your shortcut to success.
Many employers value practical knowledge over fancy degrees. When you can prove that you can confidently read and write these formats, you stand out. And with this course, you’ll be ready to show off your skills on day one.
🎉 Ready to Learn YAML, JSON, and JSONPath Once and For All?
If you’re tired of Googling basic syntax every time you see a YAML or JSON file, or if you’re confused about how JSONPath works, it’s time to take control.
The Ultimate YAML Course: YAML JSON JSONPath Zero - Master will teach you everything you need to know in a fun, clear, and practical way.
Don’t just be someone who uses these formats—be someone who masters them.
Your journey to mastering modern data formats starts now. 🚀
0 notes
Text
Is Coding Knowledge Necessary to Become a DevOps Engineer?
As the demand for DevOps professionals grows, a common question arises among aspiring engineers: Do I need to know how to code to become a DevOps engineer? The short answer is yes—but not in the traditional software developer sense. While DevOps doesn’t always require deep software engineering skills, a solid understanding of scripting and basic programming is critical to succeed in the role.

DevOps is all about automating workflows, managing infrastructure, and streamlining software delivery. Engineers are expected to work across development and operations teams, which means writing scripts, building CI/CD pipelines, managing cloud resources, and occasionally debugging code. That doesn’t mean you need to develop complex applications from scratch—but you do need to know how to write and read code to automate and troubleshoot effectively.
Many modern organizations rely on DevOps services and solutions to manage cloud environments, infrastructure as code (IaC), and continuous deployment. These solutions are deeply rooted in automation—and automation, in turn, is rooted in code.
Why Coding Matters in DevOps
At the core of DevOps lies a principle: "Automate everything." Whether you’re provisioning servers with Terraform, writing Ansible playbooks, or integrating a Jenkins pipeline, you're dealing with code-like instructions that need accuracy, logic, and reusability.
Here are some real-world areas where coding plays a role in DevOps:
Scripting: Automating repetitive tasks using Bash, Python, or PowerShell
CI/CD Pipelines: Creating automated build and deploy workflows using YAML or Groovy
Configuration Management: Writing scripts for tools like Ansible, Puppet, or Chef
Infrastructure as Code: Using languages like HCL (for Terraform) to define cloud resources
Monitoring & Alerting: Writing custom scripts to track system health or trigger alerts
In most cases, DevOps engineers are not expected to build full-scale applications, but they must be comfortable with scripting logic and integrating systems using APIs and automation tools.
A quote by Kelsey Hightower, a Google Cloud developer advocate, says it best: “If you don’t automate, you’re just operating manually at scale.” This highlights the importance of coding as a means to bring efficiency and reliability to infrastructure management.
Example: Automating Deployment with a Script
Let’s say your team manually deploys updates to a web application hosted on AWS. Each deployment takes 30–40 minutes, involves multiple steps, and is prone to human error. A DevOps engineer steps in and writes a shell script that pulls the latest code, runs unit tests, builds the Docker image, and deploys it to ECS.
This 30-minute process is now reduced to a few seconds and can run automatically after every code push. That’s the power of coding in DevOps—it transforms tedious manual work into fast, reliable automation.
For fast-paced environments like startups, this is especially valuable. If you’re wondering what's the best DevOps platform for startups, the answer often includes those that support automation, scalability, and low-code integrations—areas where coding knowledge plays a major role.
Can You Start DevOps Without Coding Skills?
Yes, you can start learning DevOps without a coding background, but you’ll need to pick it up along the way. Begin with scripting languages like Bash and Python. These are essential for automating tasks and managing systems. Over time, you’ll encounter environments where understanding YAML, JSON, or even basic programming logic becomes necessary.
Many DevOps as a service companies emphasize practical problem-solving and automation, which means you'll constantly deal with code-based tools—even if you’re not building products yourself. The more comfortable you are with code, the more valuable you become in a DevOps team.
The Bottom Line and CTA
Coding is not optional in DevOps—it’s foundational. While you don’t need to be a software engineer, the ability to write scripts, debug automation pipelines, and understand basic programming logic is crucial. Coding empowers you to build efficient systems, reduce manual intervention, and deliver software faster and more reliably.
If you’re serious about becoming a high-impact DevOps engineer, start learning to code and practice by building automation scripts and pipelines. It’s a skill that will pay dividends throughout your tech career.
Ready to put your coding skills into real-world DevOps practice? Visit Cloudastra Technology: Cloudastra DevOps as a Services and explore how our automation-first approach can elevate your infrastructure and software delivery. Whether you're a beginner or scaling up your team, Cloudastra delivers end-to-end DevOps services designed for growth, agility, and innovation.
0 notes
Text
How Artificial Intelligence Courses in London Are Preparing Students for AI-Powered Careers?
Artificial Intelligence (AI) has become a cornerstone of technological innovation, revolutionizing industries from healthcare and finance to transportation and marketing. With AI-driven automation, analytics, and decision-making reshaping the global job market, there is a growing need for professionals who are not only tech-savvy but also trained in cutting-edge AI technologies. London, as a global tech and education hub, is rising to meet this demand by offering world-class education in AI. If you're considering an Artificial Intelligence course in London, you’ll be stepping into a well-rounded program that blends theoretical foundations with real-world applications, preparing you for AI-powered careers.
Why Choose London for an Artificial Intelligence Course?
London is home to some of the top universities, research institutions, and tech startups in the world. The city offers access to:
Globally renowned faculty and researchers
A diverse pool of tech companies and AI startups
Regular AI meetups, hackathons, and industry events
Proximity to innovation hubs like Cambridge and Oxford
Strong networking and career opportunities across the UK and Europe
An Artificial Intelligence course in London not only provides robust academic training but also places you in the center of the AI job ecosystem.
Core Components of an AI Course in London
Artificial Intelligence programs in London are designed to produce industry-ready professionals. Whether you're enrolling in a university-led master's program or a short-term professional certificate, here are some core components covered in most AI courses:
1. Foundational Knowledge
Courses start with fundamental concepts such as:
Algorithms and Data Structures
Linear Algebra, Probability, and Statistics
Introduction to Machine Learning
Basics of Python Programming
These are essential for understanding how AI models are built, optimized, and deployed.
2. Machine Learning and Deep Learning
Students dive deep into supervised and unsupervised learning techniques, along with:
Neural Networks
Convolutional Neural Networks (CNNs)
Recurrent Neural Networks (RNNs)
Transfer Learning
Generative Adversarial Networks (GANs)
These modules are crucial for domains like image recognition, natural language processing, and robotics.
3. Natural Language Processing (NLP)
With the rise of chatbots, language models, and voice assistants, NLP has become a vital skill. London-based AI courses teach:
Tokenization and Word Embeddings
Named Entity Recognition (NER)
Text Classification
Sentiment Analysis
Transformer Models (BERT, GPT)
4. Data Handling and Big Data Tools
Students learn to preprocess, clean, and manage large datasets using:
Pandas and NumPy
SQL and NoSQL databases
Apache Spark and Hadoop
Data visualization libraries like Matplotlib and Seaborn
These tools are indispensable in any AI role.
5. Real-World Projects
Perhaps the most defining element of an Artificial Intelligence course in London is hands-on project work. Examples include:
AI-powered financial fraud detection
Predictive analytics in healthcare
Facial recognition for surveillance systems
Customer behavior prediction using recommendation systems
These projects simulate real-world scenarios, providing students with a portfolio to showcase to employers.
Tools & Technologies Students Master
London AI programs focus on practical skills using tools such as:
Programming Languages: Python, R
Libraries & Frameworks: TensorFlow, Keras, PyTorch, Scikit-learn
Cloud Platforms: AWS AI/ML, Google Cloud AI, Microsoft Azure
Deployment Tools: Docker, Flask, FastAPI, Kubernetes
Version Control: Git and GitHub
Familiarity with these tools enables students to contribute immediately in professional AI environments.
Industry Integration and Career Readiness
What sets an Artificial Intelligence course in London apart is its strong integration with the industry. Many institutes have partnerships with companies for:
1. Internships and Work Placements
Students gain hands-on experience through internships with companies in finance, healthcare, logistics, and more. This direct exposure bridges the gap between education and employment.
2. Industry Mentorship
Many programs invite AI experts from companies like Google, DeepMind, Meta, and fintech startups to mentor students, evaluate projects, or deliver guest lectures.
3. Career Services and Networking
Institutes offer:
Resume workshops
Mock interviews
Career fairs and employer meetups
Job placement assistance
These services help students transition smoothly into the workforce after graduation.
Solving Real-World AI Challenges
Students in AI courses in London aren’t just learning — they’re solving actual challenges. Some examples include:
1. AI in Climate Change
Projects focus on analyzing weather patterns and environmental data to support sustainability efforts.
2. AI in Healthcare
Students build models to assist with medical image analysis, drug discovery, or early disease diagnosis.
3. Ethics and Fairness in AI
With growing concern about algorithmic bias, students are trained to design fair, explainable, and responsible AI systems.
4. Autonomous Systems
Courses often include modules on reinforcement learning and robotics, exploring how AI can control autonomous drones or vehicles.
Popular Specializations Offered
Many AI courses in London offer the flexibility to specialize in areas such as:
Computer Vision
Speech and Language Technologies
AI in Business and Finance
AI for Cybersecurity
AI in Healthcare and Biotech
These concentrations help students align their training with career goals and industry demand.
AI Career Paths After Completing a Course in London
Graduates from AI programs in London are in high demand across sectors. Typical roles include:
AI Engineer
Machine Learning Developer
Data Scientist
NLP Engineer
Computer Vision Specialist
MLOps Engineer
AI Product Manager
With London being a European startup capital and home to major tech firms, job opportunities are plentiful across industries like fintech, healthcare, logistics, retail, and media.
Final Thoughts
In a world increasingly shaped by intelligent systems, pursuing an Artificial Intelligence course in London is a smart investment in your future. With a mix of academic rigor, hands-on practice, and industry integration, these courses are designed to equip you with the knowledge and skills needed to thrive in AI-powered careers.
Whether your ambition is to become a machine learning expert, data scientist, or AI entrepreneur, London offers the ecosystem, exposure, and education to turn your vision into reality. From mastering neural networks to tackling ethical dilemmas in AI, you’ll graduate ready to lead innovation and make a meaningful impact.
#Best Data Science Courses in London#Artificial Intelligence Course in London#Data Scientist Course in London#Machine Learning Course in London
0 notes
Text
Docker Guide: Introduction, Benefits, and Basic Example
This comprehensive guide offers an accessible introduction to
Docker, a powerful platform for developing, shipping, and running applications in isolated environments. We'll demystify what Docker is, explore its key benefits such as portability, scalability, and efficiency, and walk you through a practical, basic example to get you started with containerization.
#Docker #Containerization #DevOps #Introduction #Benefits #Example #Tutorial #Beginner #SoftwareDevelopment #ApplicationDeployment #Virtualization #Microservices
0 notes
Text
Docker Tutorial for Beginners: Learn Docker Step by Step
What is Docker?
Docker is an open-source platform that enables developers to automate the deployment of applications inside lightweight, portable containers. These containers include everything the application needs to run—code, runtime, system tools, libraries, and settings—so that it can work reliably in any environment.
Before Docker, developers faced the age-old problem: “It works on my machine!” Docker solves this by providing a consistent runtime environment across development, testing, and production.
Why Learn Docker?
Docker is used by organizations of all sizes to simplify software delivery and improve scalability. As more companies shift to microservices, cloud computing, and DevOps practices, Docker has become a must-have skill. Learning Docker helps you:
Package applications quickly and consistently
Deploy apps across different environments with confidence
Reduce system conflicts and configuration issues
Improve collaboration between development and operations teams
Work more effectively with modern cloud platforms like AWS, Azure, and GCP
Who Is This Docker Tutorial For?
This Docker tutorial is designed for absolute beginners. Whether you're a developer, system administrator, QA engineer, or DevOps enthusiast, you’ll find step-by-step instructions to help you:
Understand the basics of Docker
Install Docker on your machine
Create and manage Docker containers
Build custom Docker images
Use Docker commands and best practices
No prior knowledge of containers is required, but basic familiarity with the command line and a programming language (like Python, Java, or Node.js) will be helpful.
What You Will Learn: Step-by-Step Breakdown
1. Introduction to Docker
We start with the fundamentals. You’ll learn:
What Docker is and why it’s useful
The difference between containers and virtual machines
Key Docker components: Docker Engine, Docker Hub, Dockerfile, Docker Compose
2. Installing Docker
Next, we guide you through installing Docker on:
Windows
macOS
Linux
You’ll set up Docker Desktop or Docker CLI and run your first container using the hello-world image.
3. Working with Docker Images and Containers
You’ll explore:
How to pull images from Docker Hub
How to run containers using docker run
Inspecting containers with docker ps, docker inspect, and docker logs
Stopping and removing containers
4. Building Custom Docker Images
You’ll learn how to:
Write a Dockerfile
Use docker build to create a custom image
Add dependencies and environment variables
Optimize Docker images for performance
5. Docker Volumes and Networking
Understand how to:
Use volumes to persist data outside containers
Create custom networks for container communication
Link multiple containers (e.g., a Node.js app with a MongoDB container)
6. Docker Compose (Bonus Section)
Docker Compose lets you define multi-container applications. You’ll learn how to:
Write a docker-compose.yml file
Start multiple services with a single command
Manage application stacks easily
Real-World Examples Included
Throughout the tutorial, we use real-world examples to reinforce each concept. You’ll deploy a simple web application using Docker, connect it to a database, and scale services with Docker Compose.
Example Projects:
Dockerizing a static HTML website
Creating a REST API with Node.js and Express inside a container
Running a MySQL or MongoDB database container
Building a full-stack web app with Docker Compose
Best Practices and Tips
As you progress, you’ll also learn:
Naming conventions for containers and images
How to clean up unused images and containers
Tagging and pushing images to Docker Hub
Security basics when using Docker in production
What’s Next After This Tutorial?
After completing this Docker tutorial, you’ll be well-equipped to:
Use Docker in personal or professional projects
Learn Kubernetes and container orchestration
Apply Docker in CI/CD pipelines
Deploy containers to cloud platforms
Conclusion
Docker is an essential tool in the modern developer's toolbox. By learning Docker step by step in this beginner-friendly tutorial, you’ll gain the skills and confidence to build, deploy, and manage applications efficiently and consistently across different environments.
Whether you’re building simple web apps or complex microservices, Docker provides the flexibility, speed, and scalability needed for success. So dive in, follow along with the hands-on examples, and start your journey to mastering containerization with Docker tpoint-tech!
0 notes
Text
Cloud Computing for Programmers

Cloud computing has revolutionized how software is built, deployed, and scaled. As a programmer, understanding cloud services and infrastructure is essential to creating efficient, modern applications. In this guide, we’ll explore the basics and benefits of cloud computing for developers.
What is Cloud Computing?
Cloud computing allows you to access computing resources (servers, databases, storage, etc.) over the internet instead of owning physical hardware. Major cloud providers include Amazon Web Services (AWS), Microsoft Azure, and Google Cloud Platform (GCP).
Key Cloud Computing Models
IaaS (Infrastructure as a Service): Provides virtual servers, storage, and networking (e.g., AWS EC2, Azure VMs)
PaaS (Platform as a Service): Offers tools and frameworks to build applications without managing servers (e.g., Heroku, Google App Engine)
SaaS (Software as a Service): Cloud-hosted apps accessible via browser (e.g., Gmail, Dropbox)
Why Programmers Should Learn Cloud
Deploy apps quickly and globally
Scale applications with demand
Use managed databases and storage
Integrate with AI, ML, and big data tools
Automate infrastructure with DevOps tools
Popular Cloud Services for Developers
AWS: EC2, Lambda, S3, RDS, DynamoDB
Azure: App Services, Functions, Cosmos DB, Blob Storage
Google Cloud: Compute Engine, Cloud Run, Firebase, BigQuery
Common Use Cases
Hosting web and mobile applications
Serverless computing for microservices
Real-time data analytics and dashboards
Cloud-based CI/CD pipelines
Machine learning model deployment
Getting Started with the Cloud
Create an account with a cloud provider (AWS, Azure, GCP)
Start with a free tier or sandbox environment
Launch your first VM or web app
Use the provider’s CLI or SDK to deploy code
Monitor usage and set up billing alerts
Example: Deploying a Node.js App on Heroku (PaaS)
# Step 1: Install Heroku CLI heroku login # Step 2: Create a new Heroku app heroku create my-node-app # Step 3: Deploy your code git push heroku main # Step 4: Open your app heroku open
Tools and Frameworks
Docker: Containerize your apps for portability
Kubernetes: Orchestrate containers at scale
Terraform: Automate cloud infrastructure with code
CI/CD tools: GitHub Actions, Jenkins, GitLab CI
Security Best Practices
Use IAM roles and permissions
Encrypt data at rest and in transit
Enable firewalls and VPCs
Regularly update dependencies and monitor threats
Conclusion
Cloud computing enables developers to build powerful, scalable, and reliable software with ease. Whether you’re developing web apps, APIs, or machine learning services, cloud platforms provide the tools you need to succeed in today’s tech-driven world.
0 notes
Text
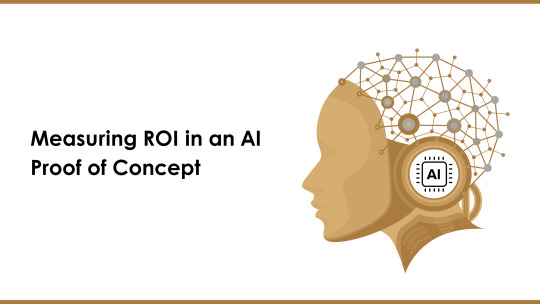
Measuring ROI in an AI Proof of Concept
Return on investment (ROI) guides organizations in deciding whether new initiatives justify resources. With an ai proof of concept, the stakes often feel higher—machine learning models, specialized data sets, and new infrastructure can rack up costs. Yet success can yield major wins, from operational gains to deeper user engagement. This blog explores how to systematically measure ROI in AI pilot projects and ensure those insights translate into more confident, data-driven expansions.
1. Defining Success Indicators
Cost-Reduction Metrics: E.g., “15% decrease in manual review time per day.”
Performance Upgrades: E.g., “Automated suggestions improved accuracy by 30%.”
User Engagement: E.g., “Chatbot usage soared by 40% after launch.”
Clear definitions let you quantify how the pilot aligns with strategic goals. If none of the metrics show improvement, the pilot might need rethinking.
2. Cost Components
Data Preparation: Labeling, cleaning, or merging data from scattered sources.
Model Development: ML engineering overhead—like CPU/GPU usage, specialized data scientists, or dev tools.
Pilot Deployment: Docker, Kubernetes, or cloud hosting charges.
Maintenance: Fixes, updates, and model re-training if performance drifts.
Tracking these helps you isolate each expense, forming a robust cost baseline for your ROI calculations.
3. Quantifying Benefits
Efficiency Gains: Did the pilot reduce manual steps? For instance, a helpdesk AI might cut average resolution time from 12 minutes to 6 minutes, saving labor hours.
Revenue Uplift: In some cases, a well-targeted AI pilot—like product recommendations—may boost cross-sales or conversions.
Quality Improvements: If AI-led inspection or analytics yields fewer defects or better forecasts, the resulting cost avoidance translates to real business value.
While intangible benefits like brand innovation or team morale matter, tangible metrics usually take precedence in ROI justification.
4. Data-Driven Approaches to ROI Tracking
4.1 A/B Testing Compare user interactions or processes in an AI pilot group vs. a control group. For example, half your site visitors see the AI-driven feature, half do not. Differences in behavior or outcomes highlight pilot benefits.
4.2 Real-Time Dashboards Visualizing cost usage, time saved, or user uptake as the pilot runs ensures immediate feedback. If metrics stall, you can adapt quickly—like adjusting model hyperparameters or focusing on new data sets.
4.3 Post-Pilot Analysis After the pilot, compile key stats into a final report: cost savings, success rates, or user opinions. This summary shapes the argument for further expansions or more advanced AI features.
5. Bridging the Gap Between Pilot and Full-Scale Implementation
Refine the Model: If the pilot’s accuracy was borderline acceptable, further data or re-training might close the gap for enterprise usage.
Enhance Architecture: For large-scale usage, add better DevOps integration or advanced orchestration with microservices.
Stakeholder Buy-In: Present the pilot’s ROI. If a chatbot saved 200 staff-hours monthly, scaling across more teams multiplies that advantage.
6. Potential Challenges in ROI Analysis
Attribution Issues: Distinguishing which gains come directly from the AI pilot vs. outside factors like seasonal demand spikes.
Overlapping Initiatives: If multiple transformations happen at once, it may be tough to isolate the pilot’s contribution.
Long-Term vs. Short-Term Gains: A short pilot might show minimal immediate gains, but set the foundation for bigger future returns.
7. Finalizing ROI-Focused Recommendations
Document Everything: Each cost item, from labeling hours to pipeline integration, ensures transparent budgeting.
Emphasize Quick Wins: Even small improvements can encourage broader stakeholder acceptance.
Propose Next Steps: If ROI is positive, highlight immediate expansions or features that could amplify results.
Conclusion
Calculating ROI for an ai proof of concept involves analyzing cost inputs meticulously against measurable improvements. By zeroing in on efficiency, accuracy, or revenue metrics, you can gauge the pilot’s tangible value. A well-structured ROI evaluation not only justifies the pilot’s budget but provides a roadmap for scaling AI across the enterprise—where real transformation, market competitiveness, and sustainable growth are realized. With data-driven ROI insights, your organization can confidently move from pilot success to broad-scale AI adoption.
0 notes
Text
"Deploying a Rust Web Application with Actix and Docker"
Introduction Deploying a Rust web application with Actix and Docker is a crucial step in bringing your application to production. In this tutorial, we will guide you through the process of deploying a Rust web application using Actix and Docker. We will cover the technical background, implementation guide, code examples, best practices, testing, and debugging. What Readers Will Learn How to…
0 notes
Text
Step-by-Step Guide to Building a Generative AI Model from Scratch
Generative AI is a cutting-edge technology that creates content such as text, images, or even music. Building a generative AI model may seem challenging, but with the right steps, anyone can understand the process. Let’s explore steps to build a generative AI model from scratch.
1. Understand Generative AI Basics
Before starting, understand what generative AI does. Unlike traditional AI models that predict or classify, generative AI creates new data based on patterns it has learned. Popular examples include ChatGPT and DALL·E.
2. Define Your Goal
Identify what you want your model to generate. Is it text, images, or something else? Clearly defining the goal helps in choosing the right algorithms and tools.
Example goals:
Writing stories or articles
Generating realistic images
Creating music
3. Choose the Right Framework and Tools
To build your AI model, you need tools and frameworks. Some popular ones are:
TensorFlow: Great for complex AI models.
PyTorch: Preferred for research and flexibility.
Hugging Face: Ideal for natural language processing (NLP).
Additionally, you'll need programming knowledge, preferably in Python.
4. Collect and Prepare Data
Data is the backbone of generative AI. Your model learns patterns from this data.
Collect Data: Gather datasets relevant to your goal. For instance, use text datasets for NLP models or image datasets for generating pictures.
Clean the Data: Remove errors, duplicates, and irrelevant information.
Label Data (if needed): Ensure the data has proper labels for supervised learning tasks.
You can find free datasets on platforms like Kaggle or Google Dataset Search.
5. Select a Model Architecture
The type of generative AI model you use depends on your goal:
GANs (Generative Adversarial Networks): Good for generating realistic images.
VAEs (Variational Autoencoders): Great for creating slightly compressed data representations.
Transformers: Used for NLP tasks like text generation (e.g., GPT models).
6. Train the Model
Training involves feeding your data into the model and letting it learn patterns.
Split your data into training, validation, and testing sets.
Use GPUs or cloud services for faster training. Popular options include Google Colab, AWS, or Azure.
Monitor the training process to avoid overfitting (when the model learns too much from training data and fails with new data).
7. Evaluate the Model
Once the model is trained, test it on new data. Check for:
Accuracy: How close the outputs are to the desired results.
Creativity: For generative tasks, ensure outputs are unique and relevant.
Error Analysis: Identify areas where the model struggles.
8. Fine-Tune the Model
Improvement comes through iteration. Adjust parameters, add more data, or refine the model's architecture to enhance performance. Fine-tuning is essential for better outputs.
9. Deploy the Model
Once satisfied with the model’s performance, deploy it to real-world applications. Tools like Docker or cloud platforms such as AWS and Azure make deployment easier.
10. Maintain and Update the Model
After deployment, monitor the model’s performance. Over time, update it with new data to keep it relevant and efficient.
Conclusion
Building a generative AI model from scratch is an exciting journey that combines creativity and technology. By following this step-by-step guide, you can create a powerful model tailored to your needs, whether it's for generating text, images, or other types of content.
If you're looking to bring your generative AI idea to life, partnering with a custom AI software development company can make the process seamless and efficient. Our team of experts specializes in crafting tailored AI solutions to help you achieve your business goals. Contact us today to get started!
0 notes
Text
What Is AWS Lambda? & Advantages Of Lambda, Its Use Cases

What is AWS Lambda
Execute code without the need to manage runtimes, create workload-aware cluster scaling logic, provision or manage servers, or maintain event integrations.
Execute code for almost any kind of backend service or application. Simply upload your code as a container image or ZIP file, and Lambda will automatically distribute compute execution power and execute your code for any volume of traffic based on incoming requests or events.
Create Lambda functions in your preferred language (Node.js, Python, Go, Java, and more) then create, test, and deploy them using serverless and container tools like AWS SAM or Docker CLI.
Why Lambda on AWS?
The quickest method to transform an idea into a contemporary, production serverless application is with AWS Lambda, a compute service that automatically maintains the computing resources and executes your code in response to events.
Use Cases
Web Applications
Developers can create robust web applications that automatically scale up and down and operate in a highly available configuration across multiple data centers by integrating AWS Lambda with other AWS services. This eliminates the need for administrative work related to scalability, backups, or multi-data center redundancy.
Learning Machines
Before supplying data to your machine learning model, you can preprocess it using AWS Lambda. You may also serve your model for prediction at scale with Lambda access to EFS, eliminating the need to provision or maintain any infrastructure.
Processing Data
Run code in reaction to triggers, such as user activities, system status changes, or data changes. Lambda may connect to pre-existing EFS file systems or integrate with workflows using AWS Step Functions. It can be activated by AWS services like S3, DynamoDB, Kinesis, or SNS. This enables you to construct a range of serverless real-time data processing systems.
Advantages of Lambda
Server management is not necessary
Execute code without managing or allocating resources. Just create the code and upload it as a container image or.zip file.
Scaling automatically
Regardless of the scale from a dozen events per day to hundreds of thousands per secondautomatically react to requests for code execution.
Pay-per-use pricing
Instead of allocating infrastructure in advance for peak capacity, save money by just paying for the milliseconds of compute time that you really utilize.
Optimization of performance
Use the appropriate function memory size to maximize code execution time and performance. With Provisioned Concurrency, you can react to strong demand in double-digit milliseconds.
Features of AWS Lambda
AWS Lambda executes code in response to events to manage compute resources. Discover how AWS’s comprehensive infrastructure offerings and capabilities enable fast, affordable application development.
Other features of AWS Lambda include the following:
Multiple language support
Back-end code can be executed in Node.js, Python, Java, Kotlin, and C#.
Pictures of containers
To deploy heavier workloads or utilize pre-existing container tooling, you can make a container image for a Lambda function.
You can use instrumentation tools such as AWS X-Ray and Gatling to track the performance of your Lambda function. Additionally, you can leverage third-party log management solutions like CloudWatch to measure concurrency, performance, and invocation.
Serverless compute service on AWS Lambda
Serverless compute service AWS Lambda lets developers run code without server management:
Event-driven: When a user adds an item to their shopping cart, for example, Lambda executes code in reaction to that event.
Pay as you go: When your code is not executing, there is no fee; you just pay for the compute time you utilize.
Automatic administration: Lambda takes care of the computer resources your code needs on its own.
High availability: Your code is scaled with high availability via Lambda.
Integration: You can call your code directly from a web or mobile application, or you can configure it to run automatically from other AWS services.
Security: Lambda guards against unwanted access to client data.
FAQs
Q: What kind of code can run on AWS Lambda?
AWS Lambda provides a simple method for completing a variety of cloud-based tasks. For instance, AWS Lambda can be used to create mobile back-ends that retrieve and modify data from Amazon DynamoDB, handlers that compress or modify objects as they are uploaded to Amazon S3, auditing and reporting of API calls to any Amazon Web Service, and Amazon Kinesis for server-less streaming data processing.
Read more on Govindhtech.com
#machinelearning#AWSLambda#Lambda#API#AWSservices#Serverlesscompute#News#Technews#Technology#Technologynews#Technologytrends#Govindhtech
0 notes
Text
Docker and Kubernetes Training in Hyderabad | India
Docker and Kubernetes Course: How to Set Up and Install Docker
Introduction:
To start your journey with containerized applications, understanding Docker and Kubernetes is crucial. For those diving into Kubernetes, there are plenty of resources, including Kubernetes Online Training, that help you grasp its complexities. Before Kubernetes can be explored in depth, a solid foundation in Docker is essential, as Docker forms the core of containerization technology. Docker simplifies application deployment by packaging applications into containers, making them portable across different environments. This step-by-step guide will walk you through setting up and installing Docker, while also providing an overview of Docker and Kubernetes, highlighting their roles in modern DevOps workflows.

Docker Overview: The Foundation of Containerization
Docker is an open-source platform designed to automate the deployment of applications inside lightweight, portable containers. These containers include everything needed for the application to run—code, runtime, libraries, and settings. Docker revolutionized how developers build, ship, and run applications, eliminating the traditional "it works on my machine" problem. Docker allows for consistency across multiple environments, such as development, testing, and production, ensuring that applications behave identically regardless of where they're deployed.
Kubernetes Online Training, you can master how Kubernetes ensures high availability and scalability by distributing containerized applications across multiple nodes in a cluster. When Docker and Kubernetes are combined, they form a dynamic duo that helps streamline DevOps practices, improving both development speed and operational efficiency.
Step-by-Step Guide to Setting Up and Installing Docker
Install Docker on Your Machine to begin using Docker, the first step is installation. Docker Desktop is available for mac OS, Windows, and Linux. Head to the official Docker website and download Docker Desktop based on your operating system. For Linux users, Docker can be installed using package managers like APT (for Ubuntu) or YUM (for CentOS).
Run Docker Desktop Once Docker Desktop is installed, launch the application. Docker Desktop includes Docker Engine, Docker CLI, and Docker Compose, providing a user-friendly interface to manage your containers. Ensure that virtualization is enabled on your machine, as Docker relies on this feature to run containers efficiently.
Verify the Installation to check if Docker is properly installed, open a terminal (or command prompt) and run the following command:
css
Copy code
docker --version
This command displays the Docker version installed on your system, confirming a successful installation.
Pull a Docker Image Docker images are templates for creating containers. To pull an image, use the docker pull command followed by the image name. For example, to pull the latest Ubuntu image, run:
Copy code
docker pull ubuntu
This downloads the image from Docker Hub to your local machine.
Run a Docker Container After pulling an image, you can run a container using the docker run command. For example, to start an Ubuntu container, run:
Arduino
Copy code
docker run -it ubuntu
This launches a new container running Ubuntu, providing an interactive shell for executing commands.
Docker and Kubernetes: Working Together
Once Docker is up and running, the next step is to explore Kubernetes. Kubernetes excels in orchestrating Docker containers across multiple environments. With Docker and Kubernetes Courses, you’ll learn how Kubernetes automates the scaling, networking, and management of containers. Kubernetes uses a declarative approach to manage containerized applications, ensuring they run smoothly across clusters, whether on premise or in the cloud.
While Docker simplifies the creation of containers, Kubernetes handles the complexity of managing them at scale. For instance, if an application experiences high traffic, Kubernetes can automatically scale up by creating new containers to handle the load. Conversely, during low demand, Kubernetes scales down the application to optimize resource usage.
A Docker and Kubernetes Course will delve into advanced concepts, such as Kubernetes pods (the smallest deployable units in Kubernetes), services, and deployments. Kubernetes also provides features like load balancing, service discovery, and self-healing by automatically replacing failed containers, ensuring the system remains resilient.
Tips for Mastering Docker and Kubernetes
Start Small with Docker: Focus on mastering Docker before diving into Kubernetes. Understanding how to build, run, and manage containers will make learning Kubernetes easier.
Utilize Kubernetes Training Resources: Many platforms offer Kubernetes Online Training that covers the basics, as well as advanced topics like networking, storage, and security in Kubernetes.
Experiment in a Local Environment: Set up Docker and Kubernetes on your local machine before deploying to production environments. This allows you to experiment with different configurations and build your confidence.
Leverage Docker Compose: When managing multi-container applications, Docker Compose can help define and run them with a single command, simplifying orchestration before moving to Kubernetes.
Conclusion
Docker and Kubernetes have transformed the way modern applications are developed, deployed, and scaled. Docker enables developers to create lightweight, portable containers, while Kubernetes automates their orchestration across clusters, ensuring scalability and availability. For those new to this ecosystem, taking a Kubernetes Online Training course and a Docker and Kubernetes Course will provide the foundational knowledge and practical skills needed to thrive in the world of containerized applications. Mastering these tools equips you to build efficient, scalable, and reliable applications in any environment.
Visualpath is the Best Software Online Training Institute in Hyderabad. Avail complete Docker and Kubernetes worldwide. You will get the best course at an affordable cost.
Attend Free Demo
Call on - +91-9989971070.
WhatsApp: https://www.whatsapp.com/catalog/917032290546/
Visit: https://www.visualpath.in/online-docker-and-kubernetes-training.html
#Docker and Kubernetes Training#Docker Kubernetes Online Course#Docker and Kubernetes Training in Hyderabad#Docker and Kubernetes Course#Docker Online Training#Kubernetes Online Training#Docker and Kubernetes Online Training#Kubernetes Certification Training Course
0 notes