#How to: Get Rid of First Chapter Endnotes To My Latest Chapter
Explore tagged Tumblr posts
Visit Tumblr Blog
Explore Tumblr blogs with no restrictions, modern design and the best experience.
Last Seen Tumblr Blogs


Fun Fact
The average Tumblr user visits about 67 pages every month.
Text
How to Customize Your AO3 Writing HTML Format & More!
Okay! So you want to know how to customize your AO3 HTML writing format/how to navigate AO3 in general—well you’ve come to the right place!
Here I’ll be addressing common errors that happen when navigating AO3 as both a reader and primarily as a writer. I’ll also be giving out some great tips and tricks on navigating AO3—especially when it comes to customizing your AO3 writing. I’m mainly making this because when I was trying to simply publish my stories on AO3 with indentation on my writing format; it was such a HASSLE. Especially going through countless blogs that were really freakin’ old and youtube videos that weren’t at all helpful and/or very confusing. Hopefully today I’ll be able to help you try and alleviate that confusion.
I’m also going to make a youtube video on this in the near future as well as my tumblr guide( if you want to learn how to customize your Tumblr blog(theme, linking things on your bio, navigating certain functions) go ahead click here.
Alright! So let’s say you already have your chapter ready and prepped to be pasted onto the HTML writing format. Here are a few things you need to know before pasting that long written chapter onto the HTML format.
If you have a bunch of indentation on your chapter and go ahead and paste that onto AO3 HTML format—it’d immediately remove all that indentation.
Indentation:
No Indentation:
This is going to happen no matter how much spacing you put in that text on HTML. It’s primarily because HTML is meant to be a bunch of code in between text. There is no code suggesting to create indentations on your text. So you might be asking yourself, well how do I create indentions Seph? Here is how:
^ here is my secret weapon hehe~
Now, before I came across this holy grail of a website(after going through long hours of searching through youtube videos and articles etc) I was manually typing out all of my code onto my stories. It was literal hell(especially because I write very LONG chapters(20k-60k) so I had to physically scroll through my own writing to put code in between text that sometimes didn’t even work when I finally published my story/chapter. The website I’m going to link to you—it’s a website where you paste your work onto the google doc and it’d put the code in FOR YOU. So you don’t have to sit there for hours implementing your own code for indentations, bold text, etc. Here’s how to use the website:
Website link: https://docs.google.com/document/d/19eZnBQ4989Dr17v2ODFgE8QWAo9Oahi4USDNS3hOSvM/copy (as far as I know this website doesn’t have a name but imma just call it the HTML holy grail lolll)
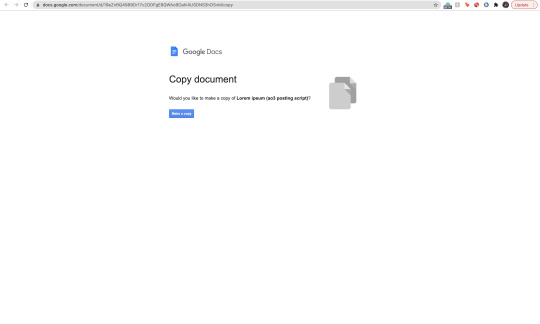
* You’re going to click, “make copy.”
Make sure before you’re clicking, “make copy,” that the gmail you’re signed into is the same one your browser is signed into. So when you go through the process of selecting a google account to sign into—you don’t select a different gmail. If you don’t write your stuff on google docs and for example—use Word—just copy your writing from your Word document and paste it into the website’s google doc. You’d just have to sign into an email anyway lol.
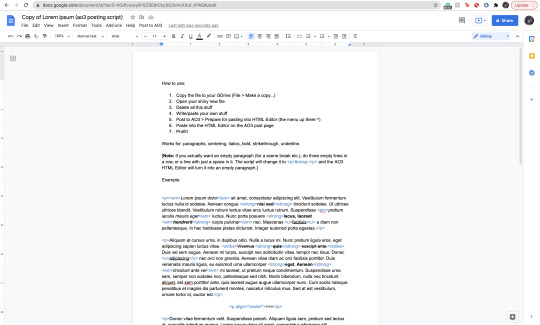
Now when you click, “Make copy,” it’d open to this page. This page has a bunch of instruction you don’t need to read. What you’re going to do is delete all of this text and paste your writing on it. To select all the text:
SHIFT+CMD+A (MAC)
SHIFT+ALT+A (Windows)
Then hit:
Delete (Mac)
Backspace (Windows)
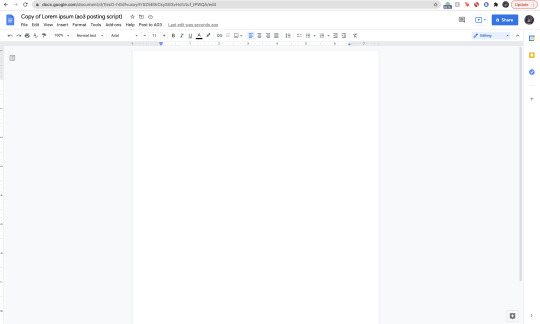
Now that it’s empty, you’re going to go ahead and copy your story:
SHIFT+CMD+A & then CMD + C (MAC)
SHIFT+ALT+A & then ALT + C (Windows)
and paste it to this document.

Now it’s going to look very similar to your own google docs page where you copied your writing from. What you’re going to do next, is click/look for the text that says, “Post to AO3″ which can be found on taskbar above the writing functions next to, “Help.”

When you click this, it’d ask you two things:
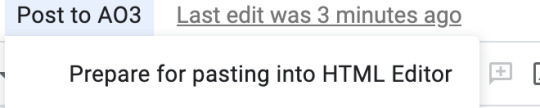
and:

Obviously, we want to select, “Prepare for pasting into HTML Editor.” Click that and it’d immediately start running. It will ask you to sign into a google account as well:
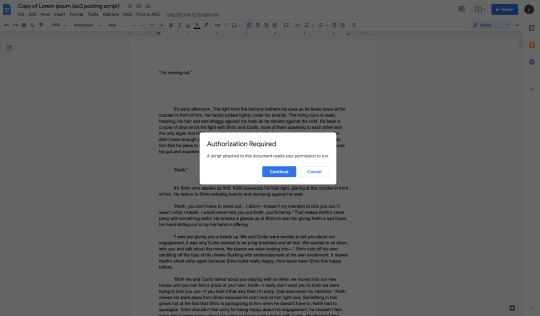
Click continue (this is where it’d ask you to sign into a google account):

Here choose your gmail account (for obvious reasons I won’t be showing my email lol):

It’d ask for permission, select— “Allow” below.
It’d immediately run the script and it should look like this:

Everything highlighted in blue is your code. This coding will make your indentations for you as well as make the coding for bold text, italic text, so on and so forth.
Now, you’re going to copy all of this text:
SHIFT+CMD+A :then: CMD + C (MAC)
SHIFT+ALT+A :then: ALT + C (Windows)
and paste it into your HTML editor on AO3 (ofc, delete all the text already on your ao3 editor):

Now all of your writing should look like this—all code and text.
Keep in mind, when you click, “Preview” your indentations/italics/bold text won’t appear. Idk why it doesn’t (ao3 is just wack like that) but when you publish your indentations/bold text/italics, text WILL appear. I guarantee it.
Alright so adding tags/editing your work is very simple:
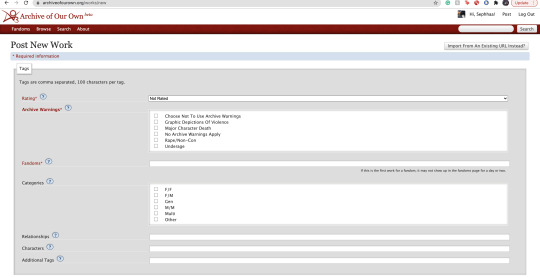
Here is where you’re going to tag all of your work. As you can see, you have a lot of options:

Here is where you start rating your fic. It runs from Not Rated to Explicit. This is primarily to let readers know what type of fic they’re reading before actually clicking on it. It lets younger audiences know not to click it if it’s too mature or too explicit. This also makes it easier for readers to search up stories under whichever rating you choose.

Now the Archive warnings are just extra EXTRA warnings that are more specific. So if your story falls under any of these specific warning tags go ahead and put them—you can also choose not to use the warnings.

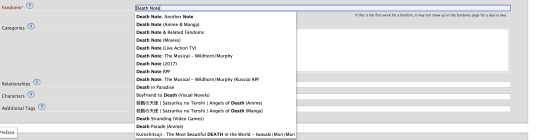
The fandom tag is pretty self-explanatory. If you’re confused then you clearly don’t know what AO3 is LOLL. Ao3 is commonly known as a fanfiction site where people will upload fanfics in relation to the fandom they’re writing for. So let’s say I made a fanfic for the anime Death Note, I would type, “Death Note” onto the fandom tag:
Now the categories tag is very self-explanatory as well, choose the tag pertaining to the relationship of your main characters. For example:
I’m going to use Death Note as my example: both of my main characters and/or ship is L/Light Yagami depending on how both characters identify their genders, in this case both characters identify as male in my fanfic. I would choose the “M/M,” tag. Another example:
If I wrote a BTS fanfic and it’s a x-reader X Park Jimin fic, the x-reader for my fic identifies as female, while Park Jimin identifies as a male in my fanfic so I would choose the “F/M” tag.
If the fanfic you wrote has characters that are nonbinary for example, you can choose the “other” tag.
The trend here is knowing what your characters identify as in your fanfic and applying that tag here.

The relationships tag is where you’d put the main ship tag. So again:
If I wrote a Death Note fanfic, and my main romantic pairing or sexual pairing was L/Light Yagami I’ll type that pairing onto the bar and depending on how popular that ship is, it’d pop up for you.
The characters tag is where you’d put all of your characters by name onto the bar. So going back to the Death Note example, I would put L, Light Yagami, and Misa Aname as my characters. You also have the option to add OC characters as a tag (OC—Original characters.)
Additional tags is just that—additional tags. Here is where you’d list specific tags/concepts pertaining to your fanfic. So my tag list will look something like this:
*Gore
*Violence
*Explicit Sexual Content
*Fluff
etc.
Here is where authors commonly put a bunch of random thoughts/writing. You have to keep in mind—if you want to write your thoughts, for example, “L totally rims Light cuz we all know Light is king of the bottoms” you can’t make your thoughts EXTREMELY long. If your thoughts end up being very long—ao3 won’t let you publish your fanfic unless you fix the tags.
Onwards!
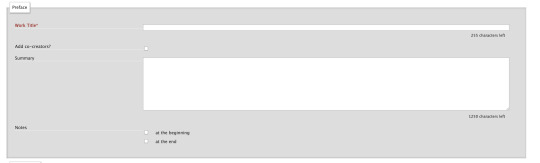
Now, here is where you’re going to put your story title, summary, add any co-creators, beginning notes and end notes. All very self-explanatory. Though, I will come back to beginning notes/endnotes later.
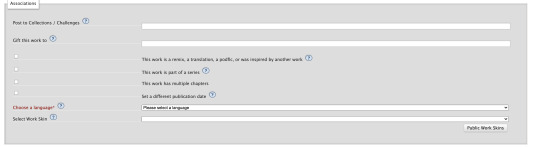
Here is all the extra stuff that I don’t really find a lot of authors using. The only one that has a lot of relevance is the “Language” tag which is very important for obvious reasons. Though the small list of tags/buttons to click on—hold some value. If you have a fanfic that is a series, as an example, you can select this box. If you have a fanfic that has multiple chapters, you’d check off the mark that says “this work has multiple chapters.” When you click this, it’d ask you how many chapters. If you don’t know how long your fic will be, you can simply put a question mark. If you selected the option where your fanfic is part of a series, it’d ask you from what series in your works and/or let you make a new series (if your first work is the first book to said series.) The last option, “Set a different publication date,” is an interesting feature on ao3. This feature lets you prep your works in advance and if you know what exact date you plan on publishing your fanfic, you can put an exact date on that fic for when you want to publish it.
Now work skins, or, “Skins,” is a feature I don’t find a whole lot of people using. I had ended up using it because again—I wanted to create indentations to my work on a HTML format and upon some research I found that someone recommended to use skins and apply them to your work to create those indentations.
You may be asking yourself, “What is a skin/work skin?”
A work skin/skin is a body of code you can customize in a separate window. I don’t know the exact details on how to successfully make this code since I forgot how to properly do it (also I mainly don’t want to go into extreme detail how to make a work skin lol) this work skin can be applied to your writing and modify it in a way where you don’t have to manually add certain features. For example:
I wanted to make indentations for my fanfic on the HTML format. At first I used a work skin with code to do the indentation for me:
Here’s a link where you could learn how to do that: work skin indentation
The issue I found when creating this work skin and applying it to my writing, it made it look really wonky. Now I’m sure you can go ahead and change the settings to the work skin in terms of sizing/spacing etc. But to be honest, that sounds like a lot of work I don’t wanna be doing. If you find yourself successfully using work skins (and you know your way around advance coding) by all means, use work skins to your advantage. As far as I know, work skins also have different functions but I do not know those exact functions. I have the holy grail google docs to make indentations/coding for me lol. Moving on!

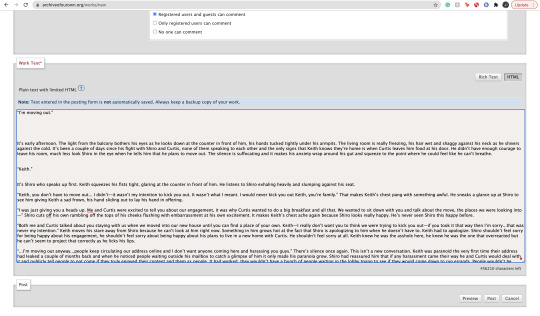
Last but not least, we have the privacy section where you’d obviously make your selections based on your preferences. Registered users are users who have actual ao3 accounts. Guests are users who don’t have ao3 accounts. Pretty self-explanatory. You can choose where you want a specific audience to read your fics, register users or guests. Or choose both. Or none at all.
START NOTES/ENDNOTES:
Remember how I mentioned that I would be coming back to beginning notes/endnotes? Here’s why:
Let’s say you successfully publish your fanfic and it’s a multi chapter fic. A common problem I found myself having and A LOT of other people, when you have multiple chapters and you add endnotes to a specific chapter, your first chapter endnotes appear on that latest chapter you’ve created different endnotes for.
Let me make this clearer:
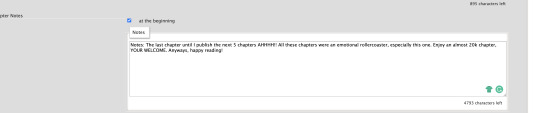
Let’s say my fic is 10 chapters. In the very first chapter, I added specific endnotes that look like this:

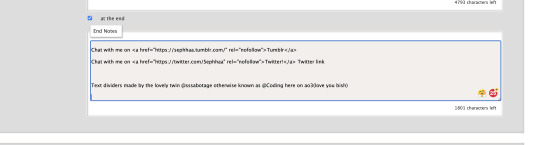
The text: “Leave a comment if you enjoyed the first chapter! Chat with me on my <a href="https://sephhaa.tumblr.com/" rel="nofollow">tumblr</a> Chat with me on my <a href="https://twitter.com/Sephhaa" rel="nofollow">Twitter!</a>” <— this is my endnotes I put for my first chapter.
Now if I go ahead to check my chapters outside of the editor page and then check my latest chapter (in this case is chapter 10):
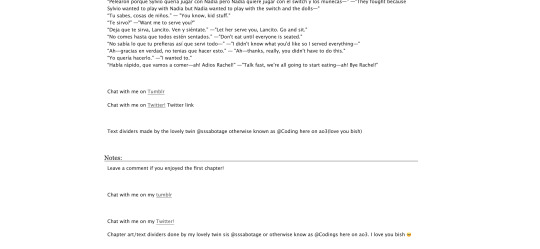
Both my endnotes for that chapter (chapter 10) and my endnotes for the very first chapter appear on my 10th chapter when only my endnotes for, specifically, chapter 10—should be the only one that readers SHOULD see. My readers should only be seeing chapter 10 endnotes. NOT chapter 10 endnotes AND chapter 1′s notes.
Now you may be asking yourself, “Well, how do I get rid of my first chapter notes on my chapter 10 endnotes? When I go to the editor page, to chapter 10, my endnotes look fine and I don’t see my first chapter endnotes there?” Here is how you get rid of them:

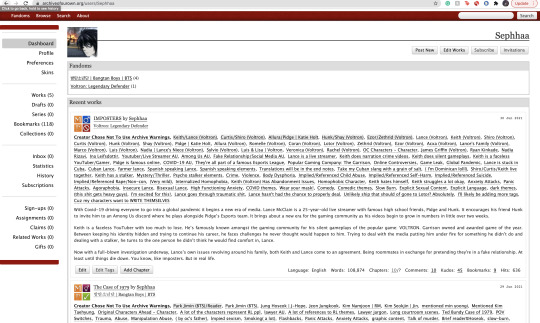
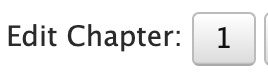
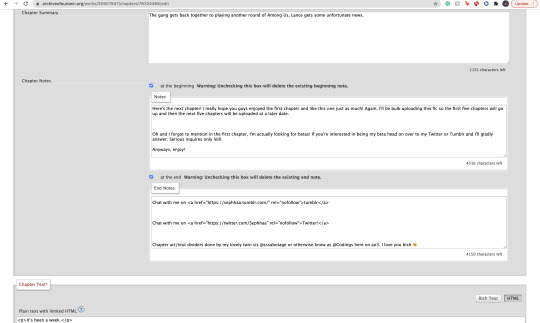
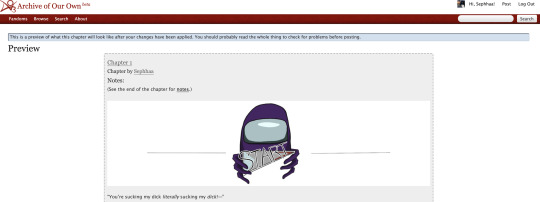
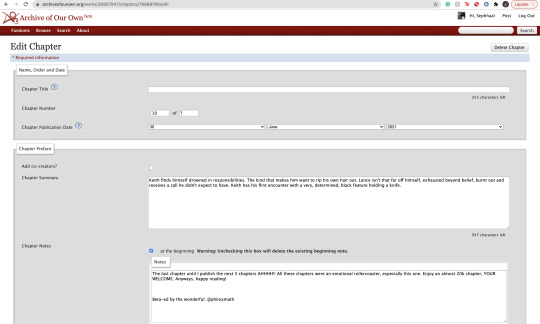
Now, I want you to pay attention to this screenshot. This is a screenshot of my ao3 editor page for my latest fic, “IMPOSTERS.” The reason why I want you to pay attention to this screenshot because I want you to notice a very alarming detail we all gloss over.
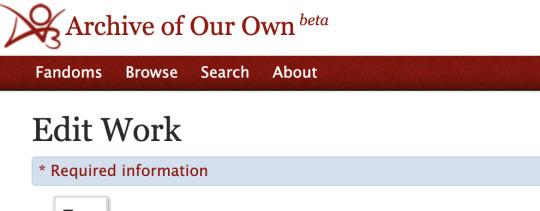
We are in the, “Edit Work” page. We are NOT on chapter 1.
Let me break this down:
You know how your first chapter’s endnotes keep appearing on your latest chapters? Yeah, that’s because they’re appearing on every other chapter because you’ve pasted your first chapter’s endnotes on the, “Edit Work” editor page instead of putting your endnotes to chapter 1 and ONLY chapter one.
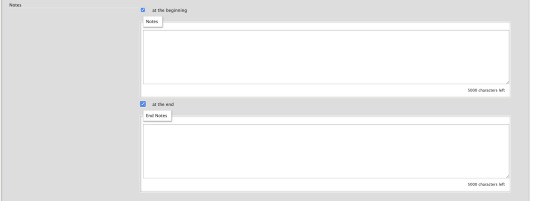
What you’re going to do is scroll down to your endnotes
*Copy them if you want
*DELETE! the endnotes on the, “Edit Work” page by selecting this little window:
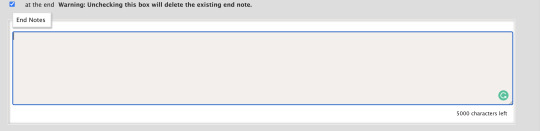

*Make sure to un-click the little blue check mark so it deletes the endnotes.
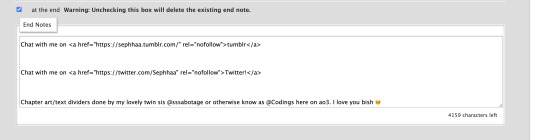
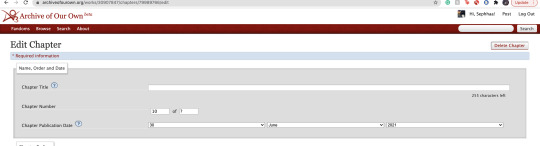
Go over to your first chapter by selecting the chapter number on the above taskbar:

*Scroll down to your endnotes
*Paste those endnotes you copied in the endnotes box (now these notes will only appear on chapter 1)
And BOOM! No more first chapter endnotes to your latest chapter endnotes:

Keep in mind: what commonly happens is if you see your first chapter endnotes and then you go and publish chapter 6, just know that if you had written notes in the editor page instead of the chapter, will now naturally move on to the next chapter until another update —it’s because your first chapter endnotes will move onto the latest chapter you post. Those first chapter endnotes won’t be applied to every single chapter of yours.
HITS/KUDOS/COMMENTS:
Now, Hits, Kudos and especially comments are very self-explanatory but here are some things I really do love about each feature:

HITS:
Hits are something I really do enjoy about ao3. Main reason being it’s so different compared to every other writing platform for example—Wattpad.
Now I’ve been, up until recently, on Wattpad for 8 years, I started as an original novel writer and then transferred into fic writing (which is hilarious cuz a lot of writers start as the very opposite.)
In saying that, Wattpad is famously known for clicking and rising the amount of views/reads on a story based on the amount of clicks you give that story. What I didn’t like, even as the writer to my own work, if I click my own stories—Wattpad would count those clicks and mark them as reads. So whenever I edit or check my own work, my reads would go up simply by me—as the author— clicking my own story/chapters. It would be extremely hard to know who was actually reading my story and how many of those reads were actually me just clicking my story.
AO3 doesn’t do this. Since you are the author of that fanfic, it doesn’t count you as a reader when clicking your own story.
This is super great and it just gives me an idea of how many people actually went to give my fic a hit.

KUDOS:
Kudos is a great function and I like it a lot because ao3 doesn’t have the option where people can dislike a fic. Ao3 and many writing sites don’t have a “liking” system like Instagram and Facebook. And that’s mainly because ao3 is NOT a social platform. You cannot make social posts on ao3 and while it’d be nice to notify my readers about x, y and z you can just link your social platforms in your end notes. Which is something I’ll get into in a second.
COMMENTS:
Comments are just that, comments. A good feature on ao3 tho is, you as the author can filter comments. I see authors, unfortunately get a lot of hate for x and y ship and/or concept. It happens a lot and it’s complete BS—especially when authors end up orphaning said story so they can get a little peace of mind.
Ao3 has a pretty good filtering system where you can choose to allow certain comments underneath the story/chapters. The only downside to this, you as the author have to manually read through all these comments (which are commonly hate comments) and it can put a mental toll on you. Ao3 has yet to figure out a way where we can block certain users so they won’t be able to comment/read your fic. So if you are someone who has recently came out with a fic and you are receiving some kind of hate—maybe get a friend or close family member to log into your account and filter your comments for you. Otherwise, you’d have to grow a backbone and can take the hate and filter through your own comments.
In saying that, please please be aware to not take every comment personally and surround yourself with good people. What people say doesn’t matter as long as you were happy writing that chapter/pairing/concept. If it means you’d need a minute away from the internet or not check your inbox at all—both options are available to you and you as the writer don’t have an obligation to respond to hate if you don’t want to.
LINKING YOUR SOCIAL MEDIA IN NOTES:
If you had came from my tumblr guide (which I highly recommend if you’re trying to navigate your tumblr) the coding used for adding links to your tumblr bio in that guide is extremely similar to the coding we will be using today in the AO3 beginning notes/endnotes:
Now here is my social media links in my endnotes. You can add social media links to both beginning notes and endnotes (I find they’re placed more commonly in the endnotes) the coding we will be focusing on is:
<a href=“
that is:
<a SPACE href= QUOTATION MARK ( “ )
(really familiar yeah? lollll shoutout to y’all who came from my tumblr guide)
Now, you’re going to want to type this out in your notes window, and then go grab a social link (I’ll just go ahead and use my Twitter social link) simply copy whichever social platform link you want to copy and paste it right after the quotation mark. It’d look a little something like this:
<a href=“https://twitter.com/Sephhaa”
and end it with a quotation mark( “ ) again.
Right after that we need to write more coding and that coding is:
ref=“no follow”
that is:
SPACE ref=QUOTATION MARK( “ ) no SPACE follow QUOTATION( “ )
So your link will now look a little something like this:
<a href=“https://twitter.com/Sephhaa” ref=“no follow”
Now more coding, but this time, we need some type of text so it just doesn’t look like some long ass link in your notes. Here is the code we’re going to use:
> - beginning
</a> - end
that is:
(start) > TEXT </a> (end)
(my text in this case is going to be “>Twitter!</a>”)
(together ofc, for the sake of the example I’m spacing it) Your link should look something like this:
<a href=“https://twitter.com/Sephhaa” ref=“no follow”>Twitter!</a>
Now you can do this with every social media you have to convert it into a link inside your notes/endnotes.

You can tell whether it worked or not if it’s underlined and highlighted.
ADDING IMAGES TO YOUR HTML FORMAT:
Alright! Adding images to your fic is great! Especially if you want to feature some fanart and you want everyone to see it etc. I personally use this feature to add text dividers. Text dividers is what separates my text, for example, if I’m going from one POV to another—I can add a text divider. I’m going to teach you how to add images to your HTML format since it’s a bit complex and takes a little trial and error—especially when it comes to sizing.

Alright so the coding you’re going to use here is this:
<img src="
that is:
<img SPACE src= QUOTATION MARK ( “ )
After that we’re going to use a website that can convert our images into a link:

Postimages.org!: Website Link.
Here is where you can choose an image, the website will convert it and then you can copy the link of your image and paste it to your code:

After converting your image of choice—you’re going to copy the direct link.

Now, once you have copied the direct link you will go back to your coding and paste it after the quotation mark. It should look like this:
<img src=“https://i.postimg.cc/kGfmV3hQ/C6-CF33-E3-8-D9-E-4-E92-B63-F-1-EE2-B5-FA00-AF.jpg" alt="
and make sure you end it with another quotation mark.
Here is the next set of coding:
alt=“
that is:
alt= QUOTATION MARK ( “ )
Then:
width=“100%” (or whatever number you want to put, here I will just put 100)
that is:
width= QUOTATION ( “ ) 100% QUOTATION MARK ( “ )
height=“50%” (or whatever number you want to put, here I will just put 50%)
that is:
height= QUOTATION MARK ( “ ) 50% QUOTATION MARK ( “ )
Your code should now look like this:
<img src=“https://i.postimg.cc/kGfmV3hQ/C6-CF33-E3-8-D9-E-4-E92-B63-F-1-EE2-B5-FA00-AF.jpg"alt=“”width=“100%”height=“50%”
Now you’re going to end the code like this:
/> </p>
that is:
/> SPACE </p>
Now your official image link should look like this:
<img src=“https://i.postimg.cc/kGfmV3hQ/C6-CF33-E3-8-D9-E-4-E92-B63-F-1-EE2-B5-FA00-AF.jpg"alt=“width=“100%”height=“50%”/> </p>
If you select “Preview,” in your HTML editor you can see your image in that window and you can adjust the sizing of the image as much as you like. My image looks something like this when I go to preview:

This sizing is pretty great for fanart sizes. You can use this to also make text dividers but in smaller sizes. Like this:
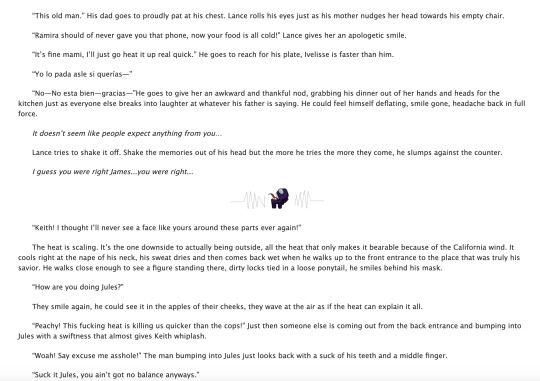
(I have to fix the spacing but you know what I’m trying to get at lollll)
my text dividers look like that and I use a sizing of 30% for both my width and height. You’d simply use the same steps as the first image. Just change the sizings on width and height and adjust it to a much smaller image so it can appear as a text divider. These images are also set to “center” immediately. I don’t know the the coding to make images not centered(if you want your image on the right/left sides) but if I find them all add them to this guide.
Now I don’t really have a whole lot of tips and tricks but some tips I can give you if you are someone trying to gain some attention to your story.
1). Within your fandom pay attention to which fanfic gets the most hits and look at their concepts/tags. Now I pride myself on originality and you should too but sometimes just seeing what tags/concepts ppl use can give you an idea of what readers are trying to read.
I find that in the VLD fandom, the top grossing ship is Klance therefore if I make a fic with them as my main ship, I know I can except some hits. Ships alone can make readers click on your stories. If you write an uncommon ship, it’s likely you won’t really get a lot of hits but honestly you should write for your own enjoyment and not for the hits. This is coming from a person who makes fanfics that I MYSELF want to read and anyone else reading it is reading my own indulgence lmaoooo.
2). Look at concepts.
Think of yourself as a reader and not a writer when looking at concepts. What are concepts YOU seek out. This could be anything from smut to explicit content. To enemies to lovers, to murder and violence. Fantasy AUs and Touch of Life AUs. Me personally—I always seek out stories that have explicit content, primarily smut cuz I know if the story has smut sometimes the story is written to my unhealthy standards of mature content/explicit content. I also look for uncommon concepts, violence, and my favorite concept is anything with crime.
Those are my preferences as a reader and if you are a writer and writing content that you yourself would like to see in a fanfic, there’s a chance other people like those same concepts too. If you don’t know what concepts you’d like to write or what concepts are out there—look at your favorite fic writers and what concepts they write as a reference. You can also just sit yourself down, in front of a google doc, and think about a fanfic you would like to scroll by and think, “OOO That’s def something I wanna read/add to my bookmarks.”
3). Now, I don’t use this tip/trick that often (cuz again, I don’t really care THAT much about hits/kudos etc.) but it is daunting when you put so much time in a fic and it’s not getting as much hits/kudos as you thought it would. If you think it’s a fic worthy of some attention and you’d like to get your name out there more than use this tip/trick:
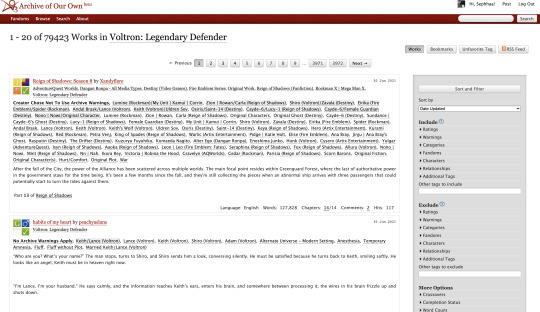
AO3 functions in a way where if you publish a fanfic to your designated fandom, it’d appear on the front page of that fandom tag. This is where readers will scroll through and find fanfics they want to read. Since there is so many people who publish their fics daily everywhere in the world—your fic won’t stay on the front page for a long time. Unless it’s a fic with A LOT of hits (I only really see this in the BTS fandom tag, all stories with thousands of hits are on that front page lol) So here is a little secret way to keep your fic on the front page for a much longer time:
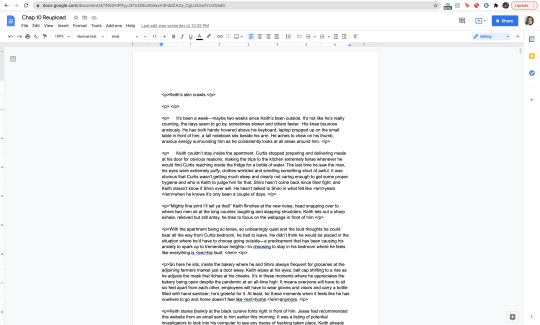
Go to your latest chapter on any of your stories or any story in general.
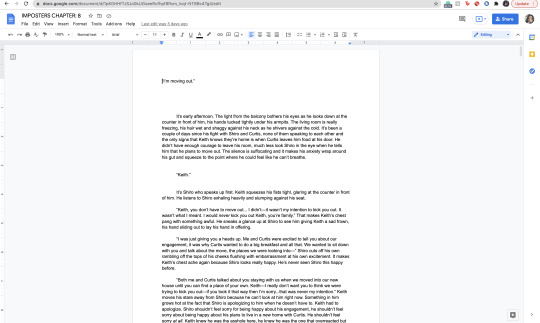
In order to get your story on the front page again, you’d need to copy everything in this chapter. I’m talking about summary, notes, and the entire written chapter. I suggest separating your chapter summary/notes in one google doc and the chapter text in the work section in a different google doc. Mainly cuz it’s easier to use the
SHIFT+CMD+A (MAC)
SHIFT+ALT+A (Windows)
keys. So go ahead and copy everything, paste them to their separate google docs and delete that entire chapter.
Yes. You heard me. Delete the chapter.
It physically hurts me to do this, especially if something goes wrong. Good thing I keep a copy of all my work—AND YOU SHOULD TOO WTH.
Anyway, go ahead and delete the chapter and then go ahead to your story Edit Work and add a new chapter where you’d be re-publishing that specific chapter.
Step 1: Saving Chap Summary/Notes

Step Two: Saving Chapter 10:
Step 3: Deleting Chapter/Latest Chapter on AO3:

(As you can see above, I only have 9 chapters when originally I had 10)
Step 4: Re-Publication:


Step 5: Publication/Post:

You can also take your time and preview it to see if everything looks good.

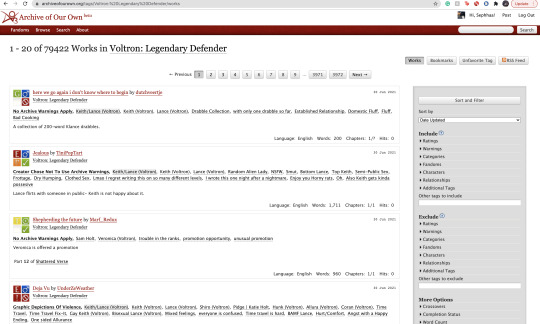
As you can see my chapter is posted and it looks good! Now if you click on your fandom tag underneath your fic title—it’d take you to the front page of the list of fics posted. You should be able to see your fic on the front page.
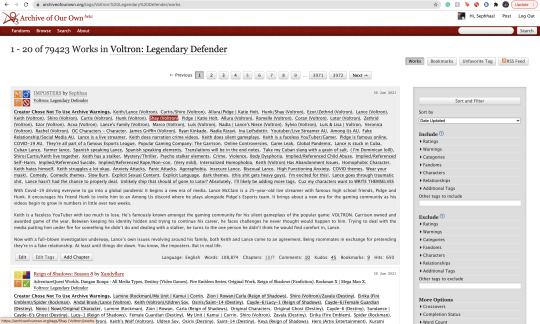
As you can see, my fic is the very first one on the list of fics and on the front page of my fandom fic tag.
Some things to keep in mind:
1). While this is extremely helpful in getting people to click on your fic since your fic is on the front page, the downside of using this tip/trick is the fact that the original date you published this chapter will change. So let’s say you published your fic in the summer of 2020 and have long since finished the story and decide to use this trick and republish your work again in order to get on the front page—the date will instead be 2021 on whatever season or month you decide to republish. It feels kind of weird to republish a chapter and/or story when you’ve finished it a long time ago and it will give an impression to readers that you have only JUST finished the book. Now, if the readers decide to follow your social media and know that you had actually finished the series a long ass time ago—then it’d be written off as you editing/revamping the chapter.
In a lot of cases, it’s just you editing/revamping a chapter in the case that the chapter didn’t upload right etc.
2). Depending on your fandom: this tip/trick might not entirely work. While I’m in the VLD fandom and it’s fairly easy to appear on the front page again—I’m also in the BTS fandom and I find that the process is extremely different. While re-publishing my story in the VLD fandom tag I can easily get my story back on the front page—I cannot say the same for my BTS fandom tag primarily because BTS fics are not sought after by how recent fics have been published but by the amount of hits your fic has. The larger amount of hits you have on your BTS fics—the greater your chances are staying on the front page of the BTS fandom tag list. Since my BTS fic has a good amount of hits (499-500) I appeared on the front page but for a very short period of time. Sometimes that’s enough to garner the attention of 1 or 2 readers. And that’s enough for me.
3). Again, I don’t use this tip/trick often (mostly a trick honestly lol it kinda feels like cheating the system a bit) and you should use this sparingly. Not so much to NOT give your fics the attention you want them to have but on your mental health. Numbers are numbers at the end of the day and it matters more to actually like the stories you write and reach out to a few people instead of thousands upon thousands who probably don’t even interact with you as an author. Start small and build your way up. It’s more genuine that way and you can learn how to maneuver things smoothly when you start off small. That and you have more room to make mistakes and get the chance to learn from them instead of receiving hate for them early on.
Welp! That is all for my AO3 guide. I’m sure I’ll come across another tip or trick or SOMETHING and add it here lolll. I’m still fairly new on ao3 (in terms of publishing my own work) and I’m bound to run into errors etc. But I hope this was helpful for you. I really wish there was a guide like this one (updated to at least 2019 or something cuz LORD all the articles/blogs I came across were old as shit and I didn’t even know if their tips/information were still relevant to the new ao3 format etc) So at least I did a service to younger Seph a year or two ago trying to navigate ao3.
If you found this helpful, I also have a tumblr guide on how to customize/navigate tumblr and all things tumblr (in terms of adding links to your bio, how to make a masterlist etc) so if you’d like to see/read that, head on over here. I’ll also be making youtube videos on both these guides in the near future, just for the peeps that need that extra visual and who don’t want to read through this VERY long guide.
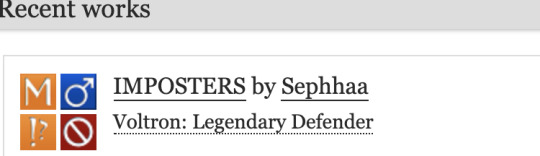
If you like this or me, check out some of my work! I am a fanfic writer—I write both anime and BTS content ( primarily VLD(Voltron) fics but I do plan on writing something for Death Note & Inuyasha (cuz there isn’t enough SangoXMiroku content and that’s a crime in of itself) I also plan to write for the MHA fandom soon too! If that’s something you’re interested in head on over to my Masterlist.
Until my next guide!
#How to Customize Your AO3 HTML Writing Format/Navigate AO3#AO3 guide#How to: AO3#AO3 tutorial#How to: Add A Link To My AO3 Notes#How to: Get Rid of First Chapter Endnotes To My Latest Chapter#How To: Make Indents in AO3 HTML Editor#AO3 Tips#AO3 Tricks#Newbie AO3 Friendly#Fic Writer Friendly#How to: Add Images to Your HTML AO3 Format
32 notes
·
View notes
Text
Walthrough: Reposting your old FFNet fics to Ao3
In light of recent rumors that FanFiction.Net might be receiving little/no ongoing support, and could suddenly disappear one day with very little warning, I wanted to offer a resource that might help preserve another fic or two. Just in case.
I'm already keeping a private collection of favorite fics from FFN that I can't bear to lose, but this tutorial isn't for saving other folks' fic. Instead, this tutorial is for people who might want to republish their own fic to Ao3 in a streamlined, relatively painless way.
Using these steps, I was able to upload an entire 16-chapter fic, with all the correct original formatting and without doing any fussy HTML editing, in about an hour. (And that was while making up the steps as I went along!)
What you'll need:
A link to your old FFNet account URL OR the those of the fics you want to save (no login necessary)
Access to a working Ao3 account
A web browser, permission to download zipped HTML files, and an unzipper (most computers have these by default)
How to save your fic for posterity:
Copy the link to the first chapter of the fic on FFN that you want to save. (Right-clicking the title of the fic on your profile and choosing "Copy Link" will do this.)
Go to https://fichub.net/ and paste in the URL. Press Export, then click "Download as zipped HTML." This saves your entire fic at once, no matter how many chapters, with formatting intact. Everyone thank the team who made this tool, because it's amazing.
Navigate to your downloads (or click on the pop-up that'll probably appear) and open the zipped HTML file. It will probably open in your default browser on its own, but you might need to tell it to open by right-clicking the unzipped file and choosing the desired browser. The resulting file should have all the chapters of the fic laid out one after another, with clear breaks between each chapter and the original HTML formatting (including section breaks).
Post a "New Work" in Ao3. (Can't import with FFNet, sadly, which is why this tutorial exists.) Add the title, relevant tags, and summary. (I used my FFNet summary with a note that the fic is crossposted.) Backdate the fic if desired by choosing a publishing date from around the time the fic was written.
Here's the magic part: Switch to Rich Text Mode in the "Work Text" field, then copy-paste the text from your first chapter into the Rich Text Mode window. (Note: You may see the stray space appear around italicized/bolded text, and an extra line break tends to appear between section breaks. Otherwise, though, the formatting is generally very well preserved.)
Optional detail: Hit "Preview," then "Save Draft," then "Add Chapter" to avoid posting any of your chapters till you have them all set up and ready to go.
Side note 1: Don't put an endnote on the end of your Chapter 1. Or if you do, go add a chapter 2 first, and then go back to add a chapter 1 endnote. Otherwise it'll end up at the end of your fic instead. It's a fixable outcome, but an annoying one.
Side note 2: If you use a pseud to post, you'll need to be careful to select the correct pseud for each chapter you upload, or you'll end up being listed as the author twice, once under each pseud you selected. If you notice this happening, it's because you've missed switching one in one or more chapters. This is fixable by checking the author listed under each chapter heading using the "Entire Work" button and keyword searching the username you're trying to get rid of.
While I didn't find a way to post all chapters at once, you can do it pretty quickly in the right order, without skipping, by doing the following steps in a loop:
Press "Entire work" at the top of the page.
Use your browser's "Find in page" function for the text "post chapter".
Hitting the "Post Chapter" button that appears.
Just continue the loop until there's no more "Post Chapter" buttons.
Once your chapters are all uploaded, you're done! Congratulations.
A final note
I know that this latest rumor might be blowing certain hints of FFNet's siterunners' inactivity out of proportion. I know that Ao3 isn't everyone's favorite (though I don't agree with most of those people). And I know, most of all, that some folks would rather some of their older fics not see the light of day anymore, for whatever reason.
But look. I'm a trans guy who used to be a teenage girl who (enthusiastically) wrote Twilight/Doctor Who crossover fanfic. I get it, and yet I'm still managing to stun the part of me that cringes long enough to preserve my stuff, because I think that fic should survive whenever possible.
There are options to help make the cringe factor more manageable. Use a pseud for your older stuff (like me), or to minimize any connection to your current account, you can use the Anonymous collection or the Orphan Work function as soon as you're done posting. Do whatever you need to feel comfortable.
But remember that every creative work is a victory just for existing. Please, if you can, find it in your heart (and your schedule) to preserve your work. Past!you worked hard on it, after all. And besides, you never know who might stumble across it someday exactly when they need it.
(PS: Please let me know about any other FFN preservation efforts, by the way! Hopefully this is all blown out of proportion, but you really can never be too careful.)
384 notes
·
View notes