#I CANT TAKE THIS NO MORE I NEED AN AXE AND SOME NEW FRUITS
Text
I’ve been trying to take it easy towards the end of the year and that has turned into me playing Animal Crossing on my 3DS a little bit every day (it’s also been nice! I’ve been trying to sleep earlier too! :D) IF ANYONE HAS THE GAME AND HAS SOME FRUITS IN THEIR TOWN I CAN GET PLEASE….HELPPPPP I do not mind exchanging friend codes and trying to visit a town!!
#potato speaks#potato speaks :D#I CANT TAKE THIS NO MORE I NEED AN AXE AND SOME NEW FRUITS#😭😭😭#animal crossing#animal crossing new leaf#animal crossing 3DS#nintendo 3ds#3DS#ACNL#acnl community
28 notes
·
View notes
Text
How some necessities made
Disturb me again not, what u want i have told ya with everything even charcoal, liquor or soda made as bellow u can change grass with any veggies or fruit then hurl something down on something or chop something or brush paint brush on something and the environment as well u can change if results not out or to stop wasting ya time take all veggies and fruits around ya and drop at once on each if not interested which one that makes it and if so try the same on one many people with different veggies and fruits until u get who gets it dude
News paper made in the boom process when few or a samples placed grass then drop pumpkin on floor full of water or dust or chop pumpkin or break sticks or carrot or brush bare ground with little grass with paint brush dude
text books few sample or a sample in grass then drop cabbage on grass on the floor or use an axe to divide wood and with other books not out try dropping any veggie or fruit as well as berries on floor with any liquid or chemical, grass, hay or any leaf until u get it dude, not necessarily on bare floor dude
Biro pen a few in grass then fall carrot on paraffin or chop kale 4 transparent common 1 but with others try the many methods of dropping and cutting while pencil is a sample in grass then banana on the floor or chop waru and with exercise books, a sample in grass then chop avocado or fall hay on water and much more dude
Black and white liquor is paw paw in hay u drop tangerine and boom ya liquor on the floor dude and most i have placed three things the last to be added can not be added but dropped in any fluid on the floor or leaves or veggies or berries as much as fruits and still the results out or chopped dude.
sometime if u Rab shoulders 2 people is the end process of making jets and rubbing ya dick on a woman pussy not inserting makes air craft carrier vessels and lean on 1 back both standing makes big air planes and houses as well as rubbing ya hands rolling something round inside the palm or grinned and dried anything as u give it just a trial make other machines.
Mathematical sets made when a sample placed in grass then drop avocado on grass or charcoal or black beans on sewer water or chop paw paw or tamarind or chop tangerine dude
Banana made when few samples placed in grass then cut to chop corpse with machete or drop passion fruit on tea leaves dude while sweet made when sample placed in grass then u chop carrots or drop guava in hay dude
Leave kids all alone to co exist not with them always as u leave ya toothbrush after brushing though u need it the most or even soap, u don't always walk with it, in such situation where people love kids so much means they are frightened dude of the future of such kids so wants best and easy 4 them and even give birth to much to conquer next lands which now cant happen dude and u know that bro. Kikuyu blooded stop that with kids even disturbing others with, it means not u hate kids and also u, u think along bro and once u know the end where we go after death, then just obey the state laws not to land u in jail as ya tradition will not secure u a place in heaven or hell dude cause were made bro as other have not such and they do more than ya bro, like having an affair in ya fathers house, provided aint known wont land ya in hell and that's it according to some whites friends writing on my Instagram in Norway. Stop being 1st of ya traditions yet how gadgets made more absurd than that dude
When u lack tetanus then u hate machines even owning personal cars and u come to love commuting and that's it dude and many such nations making such wants people to have tetanus to long 4 their finished machine parts and dude get it period bro
passion fruit made when samples placed in grass then drop like medicine white bottles on the floor with much water or chop sweet potato while avocado fruit made when sample placed in grass then u drop shirt buttons on floor or drop lemon or brush paint brush on clothes dude or play drum sets dude. Pixie fruit few sample in grass then hammer paw paw seed with hammer or divide polythene bag as tortilla with knife or touch one on the back shoulder while charcoal made when few samples place in grass in the watery valley then u chop peas or banana or u fall paw paw in floor or watery ground dude
Pixie fruit in grass then pour out fanta or citrus acid on water and boom much such fruits formed while with sun flower seed u chop paw paw after placing in grass or drop eraser or rubber on the floor or tomato dude
Few samples placed in kale then chop mango seed or drop hay or placed in guava and then chop grass or drop pumpkin and that’s how much grapes made dude
Bible revised standard sample placed in hay then u hammer orange seed with hammer and boom ya book or hurl cold water down the floor when placed in grass or folded photo in kale and chop break carrots or hurl cold water with basin unto the heap
Golden bells a piece in grass heap then run with horse or chop fruits as avocado or eat banana or folded photo in hay drop kale or chop mango dude as 1 in the link below
https://www.google.com/imgres?imgurl=https%3A%2F%2Fwww.worldbooksandrecords.com%2Fimages%2Fproducts%2Flarge_52_GoldenBells4.jpg&imgrefurl=https%3A%2F%2Fwww.worldbooksandrecords.com%2Findex.php%3Fl%3Dproduct_detail%26p%3D52&tbnid=9AyDZLcX2PsZhM&vet=12ahUKEwjJ68Gw96nsAhUJlBoKHV0sApEQMygAegUIARCUAQ..i&docid=gBe7TVZGgHfsaM&w=516&h=387&q=golden%20bells%20songs%20book%20images&client=firefox-b-e&ved=2ahUKEwjJ68Gw96nsAhUJlBoKHV0sApEQMygAegUIARCUAQ
Christmas lights made when a piece placed in kale then chop onion or drop or place in kale drop or break sticks or carrot as in the link below dude on hillside or folded photo in guava chop kale or a piece in sweet potato drop many waru
https://www.jumia.co.ke/festive-christmas-5meters-led-snake-lights-for-decoration-generic-mpg146455.html
https://www.jumia.co.ke/generic-10m-3528-smd-rgb-flexible-led-light-strip-600leds-44-key-ir-remote-controller-multicolor-27019185.html
X-mas tree is folded photo in grass cut chop avocado or lemon or drop cabbage or a piece in grass play soccer like with kids or fight kinda or folded photo in grass then then cut hay like with machete or hurl with cold or hot water mixed with thinner chemical as in the link below
https://www.jumia.co.ke/6ft-christmas-tree-luxurious-encryption-christmas-tree-generic-mpg126359.html
https://www.jumia.co.ke/generic-needle-christmas-tree-26459859.html
Another way to make gadgets and machines even other necessities as clothes is place that photo on the computer and let the light of computer screen illuminate the heap which can be grass, leaves, veggies, fruit or berries or old clothes and even scrap metal then change the environment as can be a hillside, slopes, depression, hole, basement or alter then employ all the boom process described in following tumblrs of sirjustice390 and boom ya machine given out and with anything dude and even with fruits and veggies dude. This produces the most best machines in life and even with TV that can pause or laptops dude and even makes fab house and sky-scrapers, road and bridges.
Mineral water place piece of such bottles like in cabbage then chop chilies or drop guava or brush paint brush on the wall and boom ya bottled water and even with any liquor, toys, fruit juice and even soda. U can maintain the placed in as above is cabbage but change the end done thing or change it as the end thing with mineral water in cabbage can make soda in hay or some fruit heaps as mango for example dude
eggs few samples placed in guava the brush polish brush on grass and boom ya eggs or placed in avocado brush it on wood surface or on kale brush it on bare ground surface when the heap under water on the hillside or alter dude and with match box place in cabbage and brush it on melons bro or drop kale dude
Cassava in hay place guava chop paw paw makes hunters choice liquor or drop or guava in grass place cabbage and chop kale gives ya the same while with soaps place in grass and brush it on wall boards or ceiling dude or on bare ground or drop bottle tops or sewer water in juala or dark beans, Euphorbia or passion fruit.
Negro made some machines in the song link below and still more songs dude
https://www.youtube.com/watch?v=S-sJp1FfG7Q
https://www.youtube.com/watch?v=gpkRH4sAilg
we will drop nuclear bomb made in SA google using e-supersonic jet if u relent not dude, in Moscow or Paris, or London or Beijing, or Tokyo or Rio or Rome, stop your shit dude in the middle of the night even in Nairobi and Lagos. stop ya shit dude and even in Delhi and u will do nothing cause we remain anonymous dude. my tumblr a/c is sirjustice700 or 900 how machine parts are made read dude
https://www.youtube.com/watch?v=KEBEst2hRrs
If what they championed in buying in other lands could be made another way like sugar and cooking oil, game was played on them dude, u see, kinda, their corpse, those who have refused they ways are hurled into the ROADS and even Russians as Atomic bomb placed under hyper-sonic jets and hurled reasons some dignitaries get to Russia in pretense dude and unscrupulous Kenyans in the USA have learnt to make the same to hurl in the dark night in G20 nation cities. If 1 is mad then one is mad without realizing placing the enemy close than those ready to help them and relent not even after explanation dude. That’s why in a haste i hasten and say how such are made with folded photos in the boom process dude by either chopping a fruit, veggies or dropping the same even monies made that way bro. Kikuyu a bad man and their blooded, should be all eliminated using kinda, capsizing ground theorem dude and Italians knowing they are jew yet saying its another tribe to bring about all the above without further proof as they claim they will use alliances as stipulated in the bible dude
Any veggie in grass or any leave or berries or fruit or animals, rodents in grass and u drop any 1 of the above or chop or do 1 of the boom process changing the environment makes these machines u longed to make previously in the boom process dude
Gold sample placed in paw paw then chop cabbage or break carrot or sticks on top of a hill or folded photo in kale peel cabbage or drop orange dude
Cashless payment option to eliminate hard cash link below
https://www.youtube.com/watch?v=3vrTGKTU46I
https://www.newvision.co.ug/news/1314188/uganda-launch-space-observer
https://nilepost.co.ug/2018/05/16/kenya-steps-into-space-with-first-satellite-launch/
https://www.aa.com.tr/en/energy/energy-security/spacex-in-bid-to-launch-first-turkish-built-satellite/25403
https://www.presstv.com/Detail/2020/04/19/623396/Iran-radar-systems
folded photo in guava heap drop pumpkin or chop tomato or coconut on hillside plateau makes the house in the link below in daylight looking the other-side dude
https://redshift.autodesk.com/affordable-modular-homes/
Rwanda made fabricated houses in the link below at Safintra dude
https://safintrarwanda.com/prefab-structure/
https://www.google.com/search?q=safintra+made+in+rwanda+houses+images&tbm=isch&ved=2ahUKEwjYkuLk_6bsAhVO0IUKHQ2wDXsQ2-cCegQIABAA&oq=safintra+made+in+rwanda+houses+images&gs_lcp=CgNpbWcQA1DhhAZY-MAGYOLIBmgAcAB4AIABzgKIAfIikgEHMC45LjUuNZgBAKABAaoBC2d3cy13aXotaW1nwAEB&sclient=img&ei=phKAX9inLM6glwSN4LbYBw&bih=882&biw=1280&client=ms-google-coop
https://twitter.com/hashtag/Quikmovers?src=hash
https://constructionreviewonline.com/2017/05/rwanda-urged-to-engage-private-developers-to-fix-housing-challenge/
https://guardian.ng/property/2020-offers-new-opportunities-for-lagos-home-ownership/
https://www.mininfra.gov.rw/fileadmin/user_upload/1.Affordable_housing_initiatives_by_Leopord.pdf
E-stoves from Ethiopia link below
file:///C:/Users/Acxian/AppData/Local/Temp/PD_Locally%20Manufactured%20Electric%20Stoves_23Jan2017-2.pdf
Boom made sky-scrappers in the link below dude and fabricated housing in the link below
https://www.google.com/imgres?imgurl=http%3A%2F%2Fmeqasa.com%2Fblog%2Fwp-content%2Fuploads%2F2019%2F04%2FAccra-Buildings-2018.jpg&imgrefurl=https%3A%2F%2Fblog.meqasa.com%2Faccra-skyline-buildings%2F&tbnid=2Us-2he2vU1MaM&vet=12ahUKEwiyxK3H_ansAhXNwYUKHaFQCpUQMygDegUIARCoAQ..i&docid=gTx7SlnfKl-I9M&w=1200&h=630&q=sky%20scrappers%20made%20in%20ghana%20images&client=firefox-b-e&ved=2ahUKEwiyxK3H_ansAhXNwYUKHaFQCpUQMygDegUIARCoAQ
http://www.cbmprefabricatedhouse.com/prefab-house-in-kenya/#comment-2336
Kebi Minaj chali outside their house in Kisumu where creative minds are nurtured by just staying close when he is around or just being within that radius bro
https://www.google.com/imgres?imgurl=https%3A%2F%2Fmiro.medium.com%2Fmax%2F2400%2F1*pm_Sm8OXC0QAQVPc0i4-bQ.jpeg&imgrefurl=https%3A%2F%2Fmedium.com%2Fcofundie%2Fwant-to-build-a-house-in-west-africa-here-are-5-alternative-materials-you-can-use-c05c50f7f06f&tbnid=VUpAyNMPJ_vgdM&vet=10CNUBEDMoygFqFwoTCKDdx8v-qewCFQAAAAAdAAAAABAC..i&docid=-zn_Clasg3rQ5M&w=1200&h=664&q=fabricated%20houses%20in%20Ghana%20images&client=firefox-b-e&ved=0CNUBEDMoygFqFwoTCKDdx8v-qewCFQAAAAAdAAAAABAC
https://www.prefabricated-houses.com/prefab-schools.html
Copper wires place few in green grass then chop paw paw or drop kunde or folded photo in green grass drop avocado or perform any boom process 4 more while aluminum is few pieces in hay chop guava or drop pumpkin in hole or alter with shower on and grass around or folded photo in hay chop mango or drop coconut to break its shell dude
Titanium is made when folded photo in guava chop avocado or drop water from a bucket in the floor or few sample in cabbage chop corpse hand or drop to chop apple dude
Car tire few in garbage chop lemon or drop cassava or folded photo in garbage cut grass or play with kids and even with every car spare part employing another method of dropping or chopping another something altogether dude
With rims is folded photo in hay drop kale or chop euphorbia or a sample in hay chop to break coconut or eggs shell or fall melons dude.
Cassava when still raw grinned in blender then mixed with water or starchy foods as well as bougainvillea garden flower leaves when hurled into snakes kill such snakes as break their bones in one way or another and its utility dude.
When Kikuyu knows business let them still know as we got over 100 nations without such tribes and still doing good and most formed earlier than kikuyu tribe states, just like walking though u walk fast or slow the bottom line we have all arrived in time and all got the day. That’s their gimmicks they are good in business to stay afloat while most got money online to delude the public their business collapse not yet they aint bothered if their is a loss or profit cause they got online free sauces dude and that’s the gimmicks homey
cocoa berries made when few samples placed in kale drop cabbage or chop carrot or banana and with coffee is few sample in millet drop avocado seed or brush tree back with polish brash or chop onion and with tea leaves is few sample in cabbage chop kale or avocado seed or drop hay or brush shoe soul with polish brush
POP CORN maize few in cabbage chop green grams or grass or drop spinach or 4 white maize is few sample in cabbage drop guava or chop kale dude
Burundi Rwanda made light rail in the link below dude
https://www.youtube.com/watch?v=LiVAmzXyuO8
Daku nyalo waaaaaa, bas nyaluhuru un yawyoyi, donge, sophy Gi sam. Whitemen sermons are MLK things or writings and not any1 and still on the net and no debate 4 such and u know that, lest it will be war if u heap such on one 4 people to disturb, think u will bring us your minute minds, dude u r on the wrong side of history. Mago gik mlk betuhuru kung’eyo hamano, nonno to thao or goyo um rasingwa
1 note
·
View note
Note
hi do you have any tips/recs for someone who’s just starting new leaf? i had it a long time ago but i stopped playing, and now i want to start playing again but i don’t remember it well 🙈
Hi! This might be long but! When I restarted this last time I was worried it would get boring real fast like with my first save, so I planned out as much as I possibly could ahead of time.
Think of a theme that makes you happy! Do you love witchy/fairy things? A specific color? maybe a season? particular villager animal? Aliens??? If you can figure out a theme you can build around (and it can be ANYTHING) then you will have much more confidence when you first step foot in your new town!
Now I’m gonna use my town as reference, so, I really like the Witchy/Fairy aesthetic and I knew immediately thats what i was going to do. I’m bad at town names, but i like Pokemon and remembered they have a fairy town, so I looked it up and got my name and figured why stop there? That’s how Laverre City became one of my sole inspirations for my town. I was inspired to restart because of hackers so even though I cant hack, I think about things I might like to do, or really want to do when/if i ever can and i have some big ideas lol im so sad. So ultimately i settled on a fall themed town (not perpetual fall but looks best in fall and the dreamcode will be of the town in fall) with lots of pink cosmos and regular saplings to give off a resemblance to Laverre City :)I then looked at a lot of forest and dreamy type towns to get some inspiration like mushroom rings, layout ideas, and items or PWPs to use. I also checked sites like animal crossing wikia to make a list of PWPs I might like in my town and chose 30 possible options (you can only build 30) and check the space requirements.
Once I start for real with a vague idea of where I want to put things I look at all the maps available and if they don’t have specific traits i want (secret beach, desirable town tree location, diving cliff, ponds in places that wont get in the way of projects and landscaping ideas, good spot for the cafe, etc) I restart until a map comes up that I like. Once I arrive in town its time to check my native fruit and rock locations and make sure its up to my standards, and if a resident is important for you to have/not have make sure to check the map too!
Once you get a town you’re happy with and you’ve found the perfect place to call home its time to get serious >: |It’s time for your first shovel and axe.Now, I have always been anti-axe in previous games but this last save changed me. I got a hold of that first axe and chopped down every tree that wasn’t a southern cedar tree! (southern cedars are only possible at the start! If you plant them they’ll only grow in the North, thats the top half of your town.) Now your town will feel barren at first and this is the ugliest stage but also one of the funnest -imo- so lets open up your patterns and get started. Now that you have a blank canvas use your green & blue tiles to signify trees/bamboo and bushes, you can even redesign it and write “T” or “B” respectably and start laying them out. You can also use the Yellow to lay down where you want PWPs (make sure to surround two spaces further than the project requires. a 3x3 fountain should look more like a 5x5 area to ensure no one moves directly next to where you want to build). You should have lots of fruit piled up (remember to stack them) so you can layout bush tiles and plant fruit if you’d rather have a better idea of how its gonna look. I planted all my peaches and would later go back and replace certain ones with new fruit i acquired. Its good to have a “this is all a process” mindset because it will take a while to get your town done even if you time travel, but thats good! because the game is all about making your dream town!
So now you have a good amount of the town planned out and probably have some ideas of what to do next. The next few days will be spent checking out how things are growing and making sure you planted things in the right spots. if there’s anything you’re not liking - change it! Your town Your rules!
Now while you are waiting for things to grow and get pretty its time to gather aaaaaallllll the flowers you can find and organize them in a large free space so they are all diagonally touching (XXXX), this way you can get hybrids early on :)Make sure they are the same breed and check hybrid guides so you know which colors work best to make the hybrids you most want and make sure to water them everyday as they will wilt if you don’t have the beautiful ordinance. Hybrids are good to have for trades when you dont have much money.
After all this you should be off to a pretty good start. Try to keep in mind villagers you would like to have and try to make friends online or IRL that you can adopt from (I always post when i have some one leaving and who I am hoping to replace them with and I usually get an offer fairly quickly, even for villagers I was desperate to get out. No matter who they are someone likes them :)) But if your town is set up in a way that you’ll be devastated if your dreamie moves in that one perfectly made up spot, it might be a good idea to plot set &/ reset.Plot resetting is when you make a *NEW* character save to check and see if anyone moved in overnight, and more importantly, if they moved in an undesirable place. If this happens restart and select the new save option until the villager plots in a spot you like. Once they do that build your tent somewhere and save quit. This will make the new residents spot permanent and then you can select the new save once more and delete their home. This could take quite a while if you have lots of “open” space. “Open Space” is how I refer to non-tiled/pwp or house occupied areas and the way I go about this is covering my town in about 75% tiles and spacing out pwps to where there are as few places houses can plot in as possible. Houses wont build over tiles and will plot at least 2 spaces away from other buildings, rocks and projects and one away from clifs and ponds/rivers. They dont care however if there are trees, bamboo, items, bushes, or flowers so be sure to lay out tiles in any place at risk to being plotted on. I refer to this as “Plot Setting” as you can make 3x3 empty plots you surround with tiles which will help villagers know where to plot. If you do a good job and plot everything out just right, you’ll never have to worry about someone messing up your hard work.
Now here’s the kinda sucky part of ACNL and that is The Limitations.Annoying programmed rules that seem to only get in the way such as the 2-space rule between pwps/buildings. This can mess up your aesthetic a lot and sometimes you will have to completely replan things due to a small fact you may have overlooked or not noticed and suddenly your garden isnt looking right so im gonna name off the biggest hassles and how I have gotten around some of them.
Bush + tree + bush: You can line up 12 trees/bamboo and bushes in a line. This works both straight and diagonally. only 12. Now you can leave gaps in some places that will reset the count or do intricate designs like one cedar in the middle of 4 bushes, a line of bushes with trees spaced out directly behind, a pattern of bushes and chopped bamboo, etc get creative. Visiting others towns or looking at pics people post can help you get lots of ideas. Bushes can touch each other but trees & bamboo still have the one space between rule.
PWP 2-space rule: now I’ve already mentioned this a few times but this rule is always the one that I seem to forget when planning. YOU NEED TWO SPACES. I cant tell you how many times i have planned project locations weeks in advance only to not be able to lay them out as i wanted because I got the space requirement wrong or only left one space between other objects :/
Beach Rules: You may have seen cool towns with pwps, cedar trees and hibiscus bushes scattered around their beach and Ive got some bad news; Those are hacked towns. The only thing that can be planted on the beach naturally is coconut and banana trees, flowers, and clovers. Nothing grows on the beach, not even weeds. No pwps can be built there either, even though it was initially programmed to be possible. I currently use the space for hybrid breeding since i have no space to elsewhere ¯\_(ツ)_/¯
Tear Down and Build Up: I will say though that even though only maybe 15% of my original plans came to life, my town looks way better than i had ever imagined it would. Don’t be afraid to tear things down and try out different locations or setups you might figure something out that looks amazing compared to your original plans.
Finally, while you can participate in the Happy Home Ratings, you dont have too. Decorate how ever the flip you want. Find new things to do everyday as the game can get old fast and you might get temped to Timetravel (which isnt a bad thing if thats what you want to do, but be careful you dont lose your villagers/flowers! Even though I have the Beautiful ordinance, I water all my flowers incase they pop out a hybrid. I try to earn all the badges, I visit dreamtowns for inspiration, redesign areas of my town, farm PWPs, make patterns, try hunting down items to decorate my house with, etc, this is another area where having a theme can help as you will find inspiration easier, and make you feel more immersed like you’re playing an RPG.
I’ve gone on a lot here and I have more to add but I’ve spent over an hour typing this, but let me know if you have any other questions or need clarification on anything :) I’m not gonna add pics rn but if you need photo reference send another message and I will address it separately and add it here later.
Now heres a bunch of links to help you get invested:MoriBD - A catalog of every in-game item and an option to make a wishlistHybrid Guide - By @nooklingPWP GuideVillager Adoption Further Info on Plot ResettingPWP Farming Towns/interiors I found inspirationalSome QRsHacking info (if youre interested)How to upload your screenshots & Make your screenshot pretty!
Pick the right face when you startOnce you get the QR reader (talk to sable 7 days) you can use these
Please let me know if there’s anything else I can do to help :)Just putting it out there too, I am always happy to help people get whatever they want/need for no cost whether it be fruits, bamboo, mushrooms, items, hybrids, etc, I will always do what I can to help you out, whether you’re just starting or on your 5th year.
#ref#tutorial#animal crossing#acaddicts#animal crossing new leaf#i might have to go through and edit this later#but im too tired rn#blanca
40 notes
·
View notes
Text
Class of 1999 (1990)

Directed by Mark L. Lester
Written by C. Courtney Joyner
Story by Mark L. Lester
Music by Michael Hoenig
Country: United States
Language: English
Running Time: 99 minutes
CAST
Bradley Gregg as Cody Culp
Traci Lind as Christie Langford
John P. Ryan as Mr. Hardin
Pam Grier as Miss Connors
Patrick Kilpatrick as Mr. Bryles
Stacy Keach as Dr. Robert "Bob" Forest
Malcolm McDowell as Dr. Miles Langford
Darren E. Burrows as Sonny
Joshua John Miller as Angel
Sharon Wyatt as Janice Culp
James Medina as Hector
Jason Oliver as Curt
Brent David Fraser as Flavio
Jill Gatsby as Dawn
Sean Hagerty as Reedy
And Rose McGowan as girl briefly glimpsed sat in a chair

Class of 1999 is one of those movies which were once set in the future but are now set in the past, which is always funny. It must certainly have tickled director Mark L. Lester since this is his second such movie, the first being Class of 1984 (1982). The intellectuals out there will have noticed both movies are also set in schools. Judging by the content of them I think we can infer Mark L. Lester has strong emotions about his schooldays. Negative emotions. Back in 1982 in the UK Class of 1984 upset a lot of people who decided what we could watch, and so it was not passed as uncut until 2005. Unfortunately by then I was busy self-destructing and by the time I surfaced as a functional human being DVD was passé, alas. I’m waiting for the Blu-Ray now so I still haven’t seen it, basically; but I will, I will. That cinematic bad boy sure sounds a lot harder and nastier than Class of 1999, which is the kind of goofy pulp schlock that video store chains were built on. “The year is 1999 and school’s out – FOREVER!” the tag line doesn’t run (but totally should, in howling electric lime green if possible).

Teens! Little shits! Always a problem, but particularly so in the ‘80s when feral gangs ran wild and committed heinous crimes, in fact just like they had since the teenager was invented (the 1920s) but sometimes it’s politically expedient for reactionary assholes to pretend it’s a new problem, and the ‘80s was particularly rich in reactionary assholes. So we were constantly being told that the kids weren’t alright. Movies like Class of 1984 probably helped feed the fires of hysteria and Class of 1999 seems like a kind of belated atonement for this. This time Lester seems to be mocking the ridiculous reactionary horseshit which turns troubled youth into a patsy for political and financial gain, and all the ridiculous reactionary bullshit solutions proposed which never actually address the root causes (because that would require thought, money and time) and hence do nothing to ameliorate the problem, but always end up making someone rich (usually , spookily enough, the someone sponsoring the reactionary assholes involved). You know, the kind of Twinkie® head who thinks the solution to school shootings is arming teachers. Shit, just cut straight to arming the kids as well and whoever walks out at home time wins. Televise it, monetise it, get some revenue streams going. Don’t piss about, people!

Class of 1999 certainly doesn’t piss about. By 1999, every reactionary asshole’s wet dream has come true; all across America youth gangs with bandannas and guns have established free fire zones, where the police fear to tread and schools have begun shutting down. Obviously the problem must be the bandannas as it can’t be the guns, because what your latte drinking, book reading, cat grooming “Leftee” never gets is that no problem in America is ever down to guns; not even when it involve guns; especially not when removing guns would remove the problem. Because of the easy access to bandannas things are in such a state that the Department of Education is now the Department of Education and Defence (DED; geddit?). This rebranding allows for some real blue-skying and results in a joint project with MegaTech to take back the schools by piloting the introduction of android teachers. Mega-Tech, like any responsible corporation that probably doesn’t pay its taxes, decides to cut corners and use three military androids gathering dust due to the early end of a recent war. Things escalate quickly, and lessons are learned about simple solutions to complex problems and the evil fruits of a society which treats its kids as monsters and where bandannas are legal.
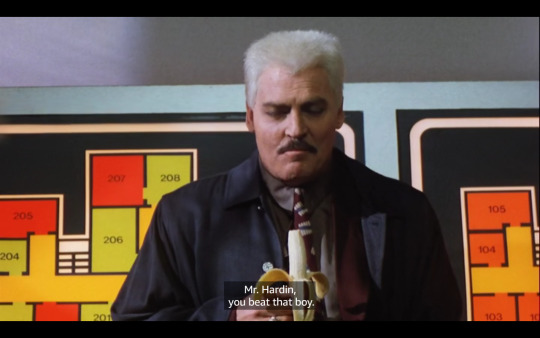
Miles Langford (Malcolm McDowell), the new principal at Seattle’s’ Kennedy High School, agrees to the use of his school for the initial introduction of the android educators. Langford is clearly a “progressive” (spit!) who wants the best for the kids (or “scum” to real, decent, working people) but is undone by his ambition; it’s a strangely nuanced performance in a remarkably (and deliberately) nuance free movie, but that’s the magic of Malcolm McDowell. Stacy Keach as MegaTech’s Dr Bob Forrest (Stacy Keach) doesn’t need nuance as he has decided to play his role in a white wig and white contacts, as an albino corporate asshole who remains perpetually unruffled no matter how bad things get. “The teachers are making hats out of the pupil’s internal organs.” a tech-head (probably a liberal who owns a book) might exclaim, only to have Dr Bob say “Wait, let’s see how things develop.” as he eats a banana. I’m not convinced Keach can actually see out of his white contact lenses but who gives a shit, it’s Stacy Keach! (The last time I saw Stacy Keach onscreen he was singing Elvis at a karaoke bar in Alexander Payne’s delightful Nebraska (2013). Stacy Keach, people!)

Dr Bob’s three androids are Mr. Hardin (John P. Ryan) for History, Ms Connors (Pam Grier) for Science and Mr. Bryles (Patrick Kilpatrick) for P.E. (and probably Geography; P.E. teachers always have to do Geography as well, in my experience; P.E. not actually being a real subject). Anyone who has wasted their eyes on the quirkier side of movies will already be excited by that list. John P. Ryan, whose jaw-popping performance in Runaway Train (1985) earned him a place in Movie Valhalla, is full-on here as a history teacher who prefers strategy to strangling but will strangle if pushed. Pam Grier should need no introduction and, despite returning to the screen here after illness, she is as lively a screen presence as ever, memorably taking an axe to the chest like it’s a gnat bouncing off her. And Patrick Kilpatrick’s name might not be known to you but he has probably died at the hands of your favourite ‘80s/’90s action star, probably as revenge for being a better actor than any of them. Basically, these three ‘droids rock. As does Bradley Gregg as Cody Culp, the youthful ex-gangbanger recently released from pokey who is caught between the gangs and the teachers like a pretzel in a car crusher. Gregg acts like he’s in a serious movie and his earnest solidity helps stop the comic book ridiculousness swamping everything. Which is no mean feat in a movie where an albino Stacy Keach eats a banana.

Obviously I was taken by the banana bit, but a lot more stuff happens in Class of 1999 than albino potassium ingestion. Unfortunately quite a lot of it involves the rival gangs who are not the most interesting part of the movie. But they do fight a lot so there is that. In fact they fight more than usual as the robo-teachers niftily set them against each other, before the kids “wise up” and take on the real enemy in a night time school siege, which swiftly descends into a slaughtertastic game of cat and mouse, or android and pupil, if you will. Despite its limitations, in 2018 Class of 1999 remains a fun film for teens, fans of films that mock reactionary assholes, people who wish The Terminator (1984) was set in a school, and, crucially, P.E. teachers who wish they could use a flamethrower on that kid who took the piss out of them for teaching Geography.
#Class of 1999#Movies#Science Fiction#Mark L. Lester#Stacy Keach#Pam Grier#Bradley Gregg#John P. Ryan#Patrick Kilpatrick#United States#1990#1990s
4 notes
·
View notes
Text
Desolate Caladium: Chp 2
Desolate Caladium : chapter 2
Falls on me
The dead of night came quickly for us, I was able to use some of my savings to get us out of port on a cargo ship going to neighboring islands. The kingdom is in an uproar and caladium is terrified. While on the hold we were finally able to rest and I watched as he tossed and turned the entire night. Of course I wanted to tell him everything was fine but in truth how could it, losing your father, cast from your kingdom like a leper, and your only company is a guy you saved 5 years ago, and is wanted for the murder of the king. When he woke up I found him eating a basket of fruit some of the sailors gave him, tossing me a banana, he told me to eat it plenty of it considering scurvy is a thing in the high seas. Eating the fruit I notice that caladium is taking out a long dagger and looking at it.
“an azoth dagger, meant for mages who completed their training as novices and attain the rank of casters, only given when one slays a beast, never thought I’d ever unwrap the cloth to use it.”
“it’s a beautiful blade prince, but why take it out now”
As I ask I notice hime cut it into his long locks of hair and sees it change color, from dark brown, to a light tan.
“as of now, my name is callum, and drop the prince, I don’t have use for it no more.”
When we got to port he asked me to get him clothes that were civilian instead of royal and as we walked I saw him eyeing the guards around us, looking for me.
“don’t worry if anyone notices you, ill keep them away alright.”
“being a mage must really be cool.”
“well it’s the hard work that pays off.”
His hair almost looks better shorter, but of course the hair that fell off just burned away, no doubt to just simply keep from being tracked later on. He grabbed my by the arm and brings me to the marketplace where he places some cents on a man’s table asking for a place for the night. The man tells him money is no good for him as the merchants guild has been struck down by the fallen kingdom and requires assistance more than anything. He gave us the room in exchange we bring his caravan to the next city 5 miles away. Gladly accepting, callum looks at me and smiles knowing that were safe another day. That night he slept more soundly and I kept watch outside once again. I began notice the sound of a horse galloping fast around the market and place it as nothing more than rounds being done by the police force. My real concern was watching callum just sleep as the night drags on. He woke around 4 am telling me he will take over and for me to rest before we must leave again. I can tell his very focused as he doesn’t even blink as he gazes outside, his auburn eyes under the moon glistened as I looked at him before drifting off. Although my time with him has been short we have been through more than enough to know the confines of needing one another to survive in this world. He promised me that we would be okay and in retrospect we are, together we stand against the illegal acts of the coup de ta while also running from our fate at the hands of the gallows. Forbidding himself from magic, he relies only on his brawn to keep us safe.
While the night persisting into the early morning we were able to rest enough to be ready to head out with the caravan. He took the reins and whisked us away from the market all the way to the next town in only a matter of hours, with one horse and supplies. As we arrived he received a large sum of cash that he stashed into his satchel to get us another room. Instead of a nice room in an inn, we chose to stay in the stables free of charge in order to recuperate and regroup our route away from the kingdom. His idea is to become a merchant only to provide protection as well as favors for cash in return for living quarters and start a new life. While I would like the idea of having a new life with him, it is not fair he is the one doing all the work. I requested to be sent to the local apothecary to work as a medical official and help townspeople with licensing from the city. The issue is that I need an alias as well, but callum assured me that desmond is so common it wouldn’t be an issue and effortlessly got me an emblem signifying my alliance to a med corp. as tears ran down my face I saw that he was smiling and wiped the tears from me.
“your eyes, I didn’t notice they were green, the color of life, a perfect fit for a medic.”
“I never really noticed callum, thank you.”
“we should celebrate, lets splurge a bit at the bar.”
we drank til the hour grew late and we laughed at the expense of our new life, although much of it was running thin on the confines of time as we needed callum to still earn a living with the merchants guild. As a mage he could easily be a noble or even king, but his life was gone and he looks like hes okay with it.
“why are you so happy callum?”
“huh, that’s no issue des, I just love being happy.”
“but you have lost everything you had in a matter of days and you see the brighter side so quickly.”
“of course I do, its because deep down the more I see the pain and anguish the easier it is for me to learn from it and become a better person throughout my life”
“why help everyone but yourself, you act like that’s your purpose.”
“as a mage that is how I am born to be, to use magic as a way of helping instead of destroying as my master would say, but now I cant without being outed by the guards.”
As I think back at all the things hes had to endure its more prevelant now that I merely only know one minute of his life aside from the entirety. He went on to tell me of his childhood, when his mother died when he was born due to the inheritance of her magic, his father showering him with affection even though he was king, spending time with other kids his age accidently hurting them only to have one friend who understood him.
“I fear that he may come soon, he is the most powerful knight of my fathers council and his bloodline is laced in carnage and bodies.”
“how come, isn’t he your friend.”
“because its his duty to protect the kingdom, as of now were seen as fugitives and at the same time as victims of conspiracy, but that doesn’t matter to them, they wish to seek control and end the kings familial bloodline one way or another.”
“you really are a brave man, I don’t get how you could ever…..”
he cut me off placing his hand on my mouth and gesturing me to leave with him. Sneaking out the back he pulled me into a back aisle in the road where he snuck behind the crates. A large hulking figure was looming around stopping in the aisle before moving on. I knew something was different, he was reeking of blood and seemed like the type to end a many for simply arguing with him.
“already found us, and not even three days passed, well done black knight, may we settle our debate tonight or shall I continue to elude you.”
As I blinked the man came between us narrowly slicing me with a odd weapon, a sword and staff combined. He looked at both of us and kicked me into the crates as he went to take on callum, whose leaped in the air to the rooftops grabbing his azoth dagger. The man followed suit and I could only watch as they continually fought clashing blades and running after one another.
“for a man who is the kings lapdog, it’s a surprise you didn’t decide to kill him.”
“true I didn’t, but given the price I can easily take his sons hide as my own trophy.”
“always the morbid talker, taking any price for the job, taken any price for a rescue.”
Callum had blasted him off right at my feet landing on his head. As soon as I thought he was dead, he rose back up cracking his neck into place and laughing.
“losing your touch caladium, you really surprise me without your true magic showing.”
“its callum, and what did I expect from the son of the impaler, or as I call you guys, the failed kinship.”
“ouch most damage you ever gave me”
Callum was getting more and more serious in this fight and all I could do was watch as the two moved more quickly than ever at each other. The metal of the blades going back and forth like a wavering dance of who would lead next, until chris began incantations.
“caelum hoc urere flammis bestia”
“oh goodie breaking out the dead language that gonna be fun.”
A burst of flames erupt from callums blade and strikes the man into the wall allowing him to grab me and run. The man gets up and gives chase merely cornering us and getting to grab my by the collar as I tried to run. Putting his blade to my neck he asked for me to drop mine and come with him. Doing so callum gives into the demands and leaves. I pick up his azoth dagger and glows in the direction he left with the man. Following the signal I come to see the man with piercing red eyes and golden hair curled with a massive beard. The two are drinking together near the shore and I sneak to see what is going on.
“its been years bro, how have you been?”
“tough, but you know what its like in the kingdom.”
“yeah true I don’t get it either but they pay well, and again im sorry to hear about your dad.”
“he was old and things happen, but thank you for the sentiment.”
“pleasure now that I know your good on your own, im gonna tell them your dead, and so is that nurse fellow.”
“thank you for this, Trev”
“least I could do after busting your ass to get me the knights gig, a vampiric knight of the council god everone flipped.”
“those were the good old days.”
I watched as callum got up and hands over a emerald pendant as the black knight rises and takes it from his grasp.
“payment for this favor, you know the drill.”
“ill find two loathsome vermin in town your size and axe them off, then you disguise them yourself, that will act as proof of your death.”
“not the first time we did this, go to the east district that where most of the mongrels live.”
“good to know, and by the way, why hang around that kid.”
“I see something in him innocent, that’s been masked for a long time, also his smile is adorable.”
1 note
·
View note
Text
The Future You That You Least Suspect
The other night my teenage boys asked me what was on my mind (likely looking for material to make fun of me. Just kidding, they’re thoughtful kids).
Instead of trying to “kid proof” my thoughts or rush the conversation, I wrote them this letter. First, to explain that I’m consumed by how we think about and where we look for answers to the biggest questions of our time (listed below), and second, to propose an alternative way of finding answers (hint: I found inspiration in an amoeba).
How are we going to address climate change before it creates global chaos?
What jobs will be available for my kids when they finish school? What should they study?
Over the next few decades, how will we re-train ourselves fast enough — again and again — to remain employed and useful as technology becomes more capable?
Can the human race cooperate well enough to solve our biggest problems or will the future simply overwhelm us?
Most importantly, where do we look to find answers to these questions?
Hopefully I didn’t ruin the possibility that my kids will ever again ask me what’s on my mind 🙂
##
Boys,
There is an old joke where a man is looking for his keys under a street light. Another person walks by and inquires, “Sir, are you certain you lost your keys here?”
“No” the man replies, “I lost them across the street.”
Confused, the stranger says, “Then why are you looking here?”
The man responded, “The light is much brighter here!”

Credit
This comic is as humorous as it is true. All too often, we each do this when we’re trying to solve something. It’s where our brains naturally take us first.
Our imaginations are constrained to the familiar (under the light), so we have a hard time finding answers to difficult questions and problems because the answers often lie in the unknown (or in the comic above, the darkness). Staying in the light is natural, easy, and intuitive, but this limits our discovery potential.
I. How to look in the dark?
History can give us some hints about how others found interesting things in the dark. For example, we discovered that:
the sun is the center of our planetary swarm
the earth is round
the physical world is a bunch of tiny, uncertain pieces governed by quantum physics
Before these became accepted truths, they were very difficult to imagine. This is part because they are non-obvious and also counter-intuitive to our everyday experience.
It’s also because we can’t know what is not known, which means we’re blind to what is yet to be discovered. Don’t believe me? Try to think of something you don’t already know. It’s impossible! That is, until you know it, and then it’s obvious.
Going back to the 5th question, how and where can we look today to find new unknowns (the dark) that help us solve our biggest problems? Where are today’s insights that are equivalent to the sun is the center of our planetary swarm?
I think the most exciting and consequential place to explore is not looking outside ourselves, but looking inside; in our own minds. This is where I see the most fruitful answers to the questions about your future and mine.
What if the next reality busting revolution happened to our very reality and consciousness? And if that happened, could the future of being human be entirely unrecognizable from our vantage point today? I hope so, because the answers to our challenges don’t appear under the lights we have turned on so far.
You’re probably thinking, c’mon Dad, this is crazy talk.
Well, it’s happened before.
II. Thanks Homo Erectus, We’ll Take it From Here
Our ancestor Homo erectus lived two million years ago and wasn’t equipped with our kinds of languages, abstractions, or technology. Homo erectus was possibly an inflexible learner as evidenced by the fact that they made the same axe for over 1 million years.
Imagine trying to explain to Homo erectus a complex phenomena of our modern day society, such as the stock market. You’d have to explain capitalism, economics, math, money, computers, and corporations — after extensive language training and the inevitable discussion of new axe design possibilities (of course, trying not to offend).
The supporting technological, cultural, and legal layers that enable the stock market to exist are the engines and evidence of our prosperity. It’s taken us thousands of years to develop this collective intellectual complexity. The point is, our brains are incredibly capable of evolving and adapting to new and more complicated things.
That our cognition evolved from Homo erectus demonstrates that we have radically evolved before.
III. Amoeba, You’re So Smart!

A few months ago, Japanese researchers demonstrated that an amoeba, a single-celled organism, was able to find near optimal solutions to the following question:
Given a list of cities and the distances between each pair of cities, what is the shortest possible route a salesperson could take that visits each city only once and returns to the origin city? (image credit)
This is known as the Traveling Salesman Problem (TSP), and classified as an NP-hard problem because the time needed to solve it grows exponentially as the number of cities increases.
Humans can come up with near optimal solutions using various heuristics and computers can execute algorithms to solve the problem using their processing power.
However, what’s unique is that Masashi Aono and his team demonstrated that the amoeba’s solution to the TSP is completely different than the way humans or computers have traditionally solved it.
That’s right, this amoeba is flexing on us.
(Note: it’s worth reading about the clever way they set up the experiment to allow the amoeba to solve the problem.)
This got me thinking: when we’re confronted with a problem, we use the tools at our disposal. For example, we can think, do math, or program a computer to solve it.

Professor Aono found a different tool for problem solving: a single-celled organism.
I know what you’re thinking, can the amoeba do my homework or take tests for me? It’s a good question!
Also, kudos to Aono and his team for searching in the dark — this experiment is non-obvious.
IV. Why Am I Telling You About Amoebas?
I strongly believe that we need a major cognitive revolution if we are to solve the global challenges we face. Our species evolved before and we can do it again, but we can’t wait a million years; we must accelerate this evolution.
What I’m saying is very hard to understand and imagine, because it’s in the dark. But bare with me.
The amoeba gives me hope because it didn’t evolve to solve the TSP. We augmented it with technology to accomplish something pretty amazing. Similarly, we haven’t evolved to deal with cooperating on a global scale, battle an invisible gas that warms our planet or retraining our brains every few years as AI takes over more of our work. How can we augment our own minds to allow us to take on these challenges?
Imagine a scenario where you are dressed head-to-toe in haptics (think Ready Player One) that allow you to experience and understand things by feeling changes in vibrations, temperature, and pressure.
Also imagine that you have a brain interface capable of both reading out neural activity and “writing” to your brain — meaning that certain communications can be sent directly into to your brain — the kind of stuff I’m building at Kernel.
Let’s call this a mind/body/machine interface (MBMI). It would basically wire you up to be like the amoeba in the experiment.
Now, what if you were given certain problems, such as the TSP, that your conscious and subconscious mind started working to solve? Imagine that instead of “thinking” about the problem, you just let your brain figure things out on it’s own — like riding a bike.
Would you come up with novel solutions not previously identified by any other person, computer or amoeba?
If we actually had the technology to reimagine how our brains work, over time, I bet that we’d get really good at it and be surprised with all the new things we can do and come up with. To be clear, this is not just “getting smarter” by today’s standards, this is about using our brains in entirely new ways.
Maybe that means that your school today would be in the museum of the future.
People would likely use these MBMIs to invent and discover, solve disagreements, create new art and music, learn new skills, improve themselves in surprising ways and dozens of other things we can’t imagine now.
When thinking about the possibilities, hundreds of questions come to my mind. For example, could we:
minimize many of our less desirable proclivities, individually and collectively?
become more wise as a species?
come up with original solutions to climate change and other pressing problems?
accelerate the speed someone learns (i.e. you get a new kind of PhD at age 12 versus the average of 31 today)
I wonder, is this what you will do at your job in 20 years? Would your mind change so much that it would be hard to recognize your 15 year old self?
Ultimately, for our own survival, we are in a race against time. We need to identify the problems that pose the greatest risks and respond fast enough so that we avoid a zombie apocalypse situation. The most important variable to avoid that: we need to be able to adapt fast enough.
I’m sure at this moment you’re thinking, woah, Dad, calm down!!
V. Your New Job — Being Really Weird (in a good way)
You’re right in wondering what jobs computers will take — if not all of them. They’ll do the boring things that adults do to make money, except far better and for far less money. But imagine a scenario where AI relieves you of 75% of your current day-to-day responsibilities, and is much better at doing those things than you. (I imagined what this world could look like)
A lot has been written, even movies made, about this scenario (e.g.Wall-E). If this happened, would you play fully immersive video games all day? Or live a life of pleasure and be work-free? Certainly possible, although those are linear extrapolations of what we are familiar with today — meaning that’s simply taking what we know today and mapping it into the future. The same thing as looking in the light.
What if millions or even billions of people could build careers by exploring new frontiers of reality and consciousness powered by MBMIs? These types of “weird” thought exercises may be breadcrumbs that extend the considerations we’re willing to make when thinking about our collective cognitive future.
These may be the starter tools that empower us to become Old Worldexplorers setting out for the New World, and journeying on the most exciting and consequential endeavor in human history — an expedition, inward, to discover ourselves.
Dad
orginally posted here:
https://medium.com/future-literacy/the-future-you-that-you-least-suspect-18cf63bd0061
The Future You That You Least Suspect was originally published on transhumanity.net
#climate change#kids#Parenting#Problem Solving#Thinking#crosspost#transhuman#transhumanitynet#transhumanism#transhumanist#thetranshumanity
0 notes
Text
How to Build a Fretless Bass
New Post has been published on https://netmaddy.com/how-to-build-a-fretless-bass/
How to Build a Fretless Bass
Frankly, I can’t think of an easier and more enjoyable project than building a fretless bass, and trust me when I tell you, it’s easier than you think! With a little patience and attention to detail, you can have a top of the line instrument for half the shelf price! If there is one thing I have learned over the years about building my fretless basses is that once you take the responsibility of making your ax, you become a master of your sound. If your bass sounds and plays well or looks and plays crappy, it will be because you took the time to put the parts together and experiment! The best preliminary, step to the building is to go to one or more local music stores and just play basses. Make a note of what you like and what you don’t like the sound, appearance, and configuration of the bases, that way when you are ready to drop some cash on your parts you will know what to get. Another thing to keep in mind is that if you use crappy parts, you will get a crappy sound. Always get the best grade woods and hardware you can afford, trust me it makes a HUGE difference!
We will start with the body. In this tutorial, we will be using a simple two-piece Alder body, but like I said earlier, your tastes and budget can be the judge on what tone woods or combination you would like. The first step is to sand your new body with a 60 to 150 grit sand paper. This ensures a smooth feel, even grain and a uniform look on the wood. Remember to always sand with the grain of the wood and not to push down too hard.
Pushing down too hard, especially with lower grit paper, will destroy the sultry curves of your bass. The idea is to make everything uniform especially for the feel and texture of the wood. Sanding allows the stain or finishes to penetrate the wood in the evenest way possible!
Once your body is sanded a good wipe down with either a tack cloth or a damp rag will remove all excess debris and prepare the body for the next step. I really enjoy this step of the process simply because you can make your instrument look anyway you like. There are many options available to you in the are of stains and paints. For this bass I used a simple MinWax Water Based Stain in Fruit Punch. Out of all the stains I’ve used water based allows for the easiest application and clean up, not to mention its environmentally friendly.
A simple coat or two of this stain can yield luster and beauty, depending on the kind of wood you use for your bass. A visit to your local hardware store can get you started and there is a wide range of colors and blends to choose from!
Another thing to keep in mind is that you might want to go with the Tru-Oil finish by itself, especially if you have a nice grain of wood. A simple image search of Tung Oil or Tru-Oil finished instruments will yield many beautiful results. Please explore and experiment.
Once I chose a color I coated the body with MinWax Pre-Stain. This water-based compound fills in the pours of uneven hard woods and allows for a more uniform and even stain across the whole body. Please make sure to always follow the directions on the can for best results! After drying I started to stain the body. Again, I can not stress how important it is to work in a safe and well ventilated area. While it maybe temping to do this in a more comfortable area, you don’t want to expose yourself to fumes and suffer the side effects! I hung and finished the body in my apartment patio closet which was perfect for shelter and ventilation. Remember, if you find a coat is unacceptable you can always sand it away with a low grit sandpaper. However, it will require the same low to high sanding process, and if your not careful it the sanding can erode angles and curves.
After getting the color right where I like it, it’s time to seal the body with a finish. Like stated earlier we will be using a very easy but effective gun stock finish called Tru-Oil. Just like the stain make sure you find a well ventilated and climate controlled area and clean it of any debris. To cut down on spots and fingerprints find an old wire hanger or shoelace and hang the body up at just about eye level. Take an old rag pour a small amount of finish and gently rub the finish in small circles, making sure to spread the amount of finish as far as possible (a little goes a long way). I find it easier to do one side at a time to help prevent smudges. After each coat, allow to dry for about an hour and buff lightly (as not to remove previous coats) between coats. I find about 10 to 15 coats is enough to build a nice luster and provide a nice hard surface, but going to about 20 to 25 will be more than enough. A final buffing with steel wool will give the finish a dull shine and a smooth touch. Give about 24 to 48 hours to completely cure the finish.
Once the body is finished, drill holes (if needed) and assemble the body with electronics and hardware. I find after years of soldering iron burns and melted wires, as well as a trip or two to the hospital from solder fumes, that the same well vented area is needed as well as pre-assembling of the pots to the control plate be done outside and separate from the bass body itself. You want everything to be finish and connected that way the only thing left to solder will be the ground cord and pickup wires. I would also recommend buying a Jazz Bass electronic kit. All the parts separately would cost a lot more, but for about 18 bucks you get them all plus instructions and trust me, wiring a jazz bass is very very easy! I will go into this in more detail in the electronics section of the website to help clear things up. Another thing I like to do helps) is to line every part of the inside of the bass with copper foil tape. This helps to ensure that even if wires do come loose they will be grounded and shielded. This also helps prevent hums picked up from lighting and other electronic devices ( lights and certain electronic devices emit a 60 cycle hum that interfere with pickups and bass electronics). Now that everything is sealed, grounded and assembled its time to move to the neck.
The neck, the soul of a bass! For this bass I’m going with a maple neck and a walnut lined maple fingerboard. I like the brightness of the maple and the crazy glue epoxy finish (more on that in another section). Normally, a maple neck tends to get all gunked up with finger oil and dirt because maple tends to soil easily, however with an epoxy finish I will not need to worry about that. Again like the body, you want to make the neck smooth and supple! A 400 grit rub down with the grain works great but make sure (and I can’t stress this enough) to not press hard. I order my necks unfinished so I can color and finish it anyway I want (which we will in this tutorial with Tru-Oil) plus it’s way cheaper (about $50 to $80 dollars more) which really makes a huge difference especially when you are on a budget and who’s not these days!
Just like the body it is important to let the neck hang between coats in a well ventilated area. You will finish the neck much like the body. Use a rag and rub in small circles with the finish covering the sections of the neck. Let the neck dry an hour at a time and buff lightly with with steel wool. Again you are aiming for about 10 to 15 coats. Like on the body,
it will gain a nice luster that will polish nicely with the wool. It is also important to remember that the neck needs to have a good amount of finish on it. This is because the neck is under constant pressure and any moisture can compromise the strength of the wood that leads to warpage. ( There are some woods that cant even take coats of like most of the African woods because they are too oily or waxy already.) I find that Tru-Oil needs a good day or two to cure which is why I always try to finish the body and the neck staggered one after the other. That way I’m always working on one of them and they are both done around the same time. Its also good to add a coat right before you are on the way out to school, the store or work, that way it gets a nice long undisturbed drying session. Once everything is sealed, buffed and drilled, assemble the neck. I will go into further finer drilling and adjustment in another section as I know some of you will have a neck with no holes drilled, but this is a very easy extra step! After the tuners, and string trees are mounted the final step is the string nut. I have found that it is best to take this to a professional because it takes practice and a skilled hand to file the nut blank. If you mess up you have to buy another nut and uncool it off the finger board and that’s a waste of time and money. It may cost a little bread but the tech can slap on a nice new custom nut and have the bass growling with new strings the same day, which is always a nice ending to a custom job well done! I would also encourage you to watch (if you can) the tech install everything and learn all you can. I know after a few questions and watching, I was able to nail this delicate step, but take your time!
Now that your fretless is put together it’s time to set up! Keeping your instrument setup properly will cut out unwanted variables in your intonation, sound and allow you to operate your bass as easily as possible. I like to think of the bass as an extension of oneself, which is almost impossible to do if your bridge is intonated incorrectly or the neck is out of whack! Please, do not be afraid of any adjustments, or changes that need to be done. Once you know how to adjust these factors you will be a confident bass master!
Now that your bass is physically together lets string her up! Whatever your bass string of choice is, installing them properly will ensure good tension, a snug fit and long lasting strings. incorrect instillation will result in buzzes, dead spots and dollars wasted from broken strings. When you unwrap the strings they will be pre-coiled and ready to go. You will need a pair of wire cutters and a tuner. First take the G string and run the very tip through the bridge’s G string slot, up past the saddle, under the string tree and past the tuning post.
Now, everybody is different, some say don’t clip the string, some say do, but I find that keeping about 3 to 5 windings on every post will ensure a secure hold. I do this by using my wire cutters as a measuring tool. I match the full length of the wire cutters with the bass strings, then I put the tip of the handle of the wire cutters on the tuning post and mark my fingers at the tip of the head of the pliers, then clip. This ensures that each string is cut at the same length and allows you to take them off and store them if needed.
Once you have your string cut to the right length, take the freshly cut string end and bend just a bit of it, say a centimeter or two, at a right angle. Take this straight end and insert it into the hole in the middle of the tuning peg. Use downward pressure on the string and turn it clockwise to wrap the string around the tuning peg. You want to make sure that the string is running straight front the bridge, under the string round and to the tuning peg.
Continue turning the tuner until the string holds tension and rests in the nut. Repeat the process, bringing each string up to tune. Remember that new strings need some time to stretch and will go out of tune for the next few hours. But worry not they will eventually settle.
The neck of your bass is the strongest of all the parts! It consists of a metal rod embedded under the fingerboard called a Truss Rod. The truss rod turns with an allen wrench either clockwise or counter-clockwise to counteract the tension applied to the neck by the strings. This tension (or lack there of) will either add or take away curve to the neck allowing the strings to clear all parts of the fingerboard vibrate freely and allow the plucked note to sound. An adjustment to either the heel of the neck or at the top in front of the nut will allow you to turn the trus rod and add or take away tension or curve to the neck.
Remember, on a top mounted adjustment turn your allen wrench clockwise to tighten the neck and straighten it, or counter clockwise to loosen it and curve the neck. On heel adjustments its the exact opposite! The more curved the neck the higher the strings will be from the fingerboard, the straighter the neck the closer. On a fretless neck you want the action to be as low as possible to allow for the pleasant buzzy “Mmmwah” sound. It is possible to set the action too low in which the “mmmahh” will be squelched. A good indication of where your neck is at is either a buzz at the first 5 frets which indicates a neck that is too straight or a buzz at the 7th fret and up which indicates a neck that is too curved. Holding the bass at eye level against a strong light and looking at the very edge of the fingerboard will indicate the status of the neck curvature. You want to set your neck as straight as possible until you get buzzes on or about the 5th fret or lower, then back the neck off with quarter turns until the buzzes go away.
Now that the neck has the right relief its time to adjust the bridge. The bridge holds the important setup factors such as intonation and string height. While the neck curvature determines string height, the bridge saddles will give you a finer adjustment and allow you to lower your action even lower and match the curvature of the fingerboard. This allows you to intonate or tune the bass with itself. Keep in mind that all the adjustment you do at the bridge will knock your strings out of tune so have a tuner handy to bring the string back to pitch whenever you adjust something. This way you know how the correct playing tension will feel when the setup is complete.
The next step is bridge intonation and this is very very vital. The thing you have to always remember is that unlike playing other fretted instruments, the player makes the intonation not the frets. This being said you can get some help either from fret lines (like on this bass) or position markers like the ones on a blank fingerboard. The choice of one or the other is all personal preference and yet another option for you to consider.
Intonation of a lined fingerboard is done in the same way as a fretted. Hook up your tuner to your bass and play the open G string in tune. Fret directly on the 12th and check to see if your fretted note is in tune. Carefully make sure that you are using the tip of your finger avoiding any kind of fingertip pivot that will change your pitch. While this is a great technique while playing, in tuning and setup its not going to do you any favors. Now if the fretted note is sharp, turn the adjustment screw on the bridge so the saddle is moving towards you. If it is flat move the saddle away from you. Do small quarter turns and bring the string back up to tune before you check it. Once the fretted note is intonated repeat the process with the other three. One thing to keep in mind is that while the fret lines are right where the frets should be, it doesn’t mean that all of the lines are in tune 100% all over the neck.
Just like with any fretless instrument, you have to use your ears to judge the pitch and adjust accordingly. Avoid using the lines as a crutch to good intonation. Now if you have a blank plank, then your options are fewer (and less complicated) for intonating the bridge. Just grab a measuring tape and measure from the nut exactly 17 inches. Mark the spot with a piece of tape and intonate to that spot, which 9 times out of 10 is just about in the center of the octave double dot marker. Remember like the lined board, your ear is judge of pitch, not the markers.
Depending on the type of strings you use, the wear and tear on the board can vary quite a bit. Roundwound strings will eat your fingerboard, causing dead spots and loss of proper intonation. Flatwounds are far gentler and have a smooth texture. This being said, the more you play on the board the more it will need to be dressed and sanded. Like a formula race car that get’s it’s tires changed every few laps, your board will need to be smoothed out and it’s crown or arc restored to get a consistent sound. You can do this in one of two ways. One way is to run some nice 400 grit sand paper on the fingerboard. Make sure to do this very gently because you do not want to remove the arc from your board. If you’re too worried about screwing up your board spend a little cash and get your bass into a luthier to dress it for you professionally. Either way it is important that you maintain a good working fingerboard, because it’s where all the sound happens. If you are lucky enough to have a bass with treated epoxy then most if not all of these maintenance steps will be unnecessary. Should problems arise make sure you do what is needed without voiding your warranty!
Setting correct pickup height is vital to a good round sound and volume. The standard jazz bass pickup will come with four screws (two on each side). The screws adjust the pickup up and down. On the shafts of each screw are springs. Those springs provide tension which keeps the pickup from falling down to the bottom of the body cavity. The springs also provide upward and downward pressure. When you loosen the screws the tension from the spring pushes up on the pickup allowing the pickup to rise, when you tighten the screws down the springs are compressed and the pickup goes down.
With the help of the installed pickup springs turn a phillips head screw driver to move the pickup up or down. Moving the pickup higher or up towards the strings will yield a louder over all tone. Moving it away or down from the strings will result in a quieter volume. You want to strike a balance between the two which I find can be done by making your pickups like a ramp. You want to give the lower E and A strings plenty of room to vibrate so keep that end of the pickup just a bit lower, while making the D and G string side just a tad higher. It shouldn’t be extreme but all the strings need to clear the pickup otherwise the case for the pickup itself will get scratched and the sound of your fingers hitting the top of the pickup will make an unwanted “thump” sound, that is unless you want that thump sound.
1 note
·
View note
Text
Sudan and One Tourist
New Post has been published on https://netmaddy.com/sudan-and-one-tourist/
Sudan and One Tourist
Frankly I can’t think of an easier and more enjoyable project than building a fretless bass, and trust me when I tell you, it’s easier than you think! With a little patience and attention to detail you can have a top of the line instrument for half the shelf price! If there is one thing I have learned over the years about building my own fretless basses is that once you take the responsibility of making your own axe, you become a master of your own sound. If your bass sounds and plays well or sounds and plays crappy it will be because you took the time to put the parts together and experiment! The best preliminary step to building is to go to one or more local music stores and just play basses. Make note of what you like and what you don’t like about the sound, appearance and configuration of the basses, that way when you are ready to drop some cash on your parts you will know what to get. Another thing to keep in mind is that if you use crappy parts you will get a crappy sound. Always get the best grade woods and hardware you can afford, trust me it makes a HUGE difference!
We will start with the body. In this tutorial we will be using a simple two piece Alder body, but like I said earlier, your tastes and budget can be the judge on what tone woods or combination you would like. The first step is to sand your new body with a 60 to 150 grit sand paper. This ensures a smooth feel, even grain and uniform look on the wood. Remember to always sand with the grain of the wood and not to push down too hard..
Pushing down too hard, especially with lower grit paper, will destroy the sultry curves of your bass. The idea is to make everything uniform especially for the feel and texture of the wood. Sanding allows the stain or finish to penetrate the wood in the most even way possible!
Once your body is sanded a good wipe down with either a tack cloth or a damp rag will remove all excess debris and prepare the body for the next step. I really enjoy this step of the process simply because you can make your instrument look anyway you like. There are many options available to you in the are of stains and paints. For this bass I used a simple MinWax Water Based Stain in Fruit Punch. Out of all the stains I’ve used water based allows for the easiest application and clean up, not to mention its environmentally friendly.
A simple coat or two of this stain can yield luster and beauty, depending on the kind of wood you use for your bass. A visit to your local hardware store can get you started and there is a wide range of colors and blends to choose from!
Another thing to keep in mind is that you might want to go with the Tru-Oil finish by itself, especially if you have a nice grain of wood. A simple image search of Tung Oil or Tru-Oil finished instruments will yield many beautiful results. Please explore and experiment.
Once I chose a color I coated the body with MinWax Pre-Stain. This water-based compound fills in the pours of uneven hard woods and allows for a more uniform and even stain across the whole body. Please make sure to always follow the directions on the can for best results! After drying I started to stain the body. Again, I can not stress how important it is to work in a safe and well ventilated area. While it maybe temping to do this in a more comfortable area, you don’t want to expose yourself to fumes and suffer the side effects! I hung and finished the body in my apartment patio closet which was perfect for shelter and ventilation. Remember, if you find a coat is unacceptable you can always sand it away with a low grit sandpaper. However, it will require the same low to high sanding process, and if your not careful it the sanding can erode angles and curves.
After getting the color right where I like it, it’s time to seal the body with a finish. Like stated earlier we will be using a very easy but effective gun stock finish called Tru-Oil. Just like the stain make sure you find a well ventilated and climate controlled area and clean it of any debris. To cut down on spots and fingerprints find an old wire hanger or shoelace and hang the body up at just about eye level. Take an old rag pour a small amount of finish and gently rub the finish in small circles, making sure to spread the amount of finish as far as possible (a little goes a long way). I find it easier to do one side at a time to help prevent smudges. After each coat, allow to dry for about an hour and buff lightly (as not to remove previous coats) between coats. I find about 10 to 15 coats is enough to build a nice luster and provide a nice hard surface, but going to about 20 to 25 will be more than enough. A final buffing with steel wool will give the finish a dull shine and a smooth touch. Give about 24 to 48 hours to completely cure the finish.
Once the body is finished, drill holes (if needed) and assemble the body with electronics and hardware. I find after years of soldering iron burns and melted wires, as well as a trip or two to the hospital from solder fumes, that the same well vented area is needed as well as pre-assembling of the pots to the control plate be done outside and separate from the bass body itself. You want everything to be finish and connected that way the only thing left to solder will be the ground cord and pickup wires. I would also recommend buying a Jazz Bass electronic kit. All the parts separately would cost a lot more, but for about 18 bucks you get them all plus instructions and trust me, wiring a jazz bass is very very easy! I will go into this in more detail in the electronics section of the website to help clear things up. Another thing I like to do helps) is to line every part of the inside of the bass with copper foil tape. This helps to ensure that even if wires do come loose they will be grounded and shielded. This also helps prevent hums picked up from lighting and other electronic devices ( lights and certain electronic devices emit a 60 cycle hum that interfere with pickups and bass electronics). Now that everything is sealed, grounded and assembled its time to move to the neck.
The neck, the soul of a bass! For this bass I’m going with a maple neck and a walnut lined maple fingerboard. I like the brightness of the maple and the crazy glue epoxy finish (more on that in another section). Normally, a maple neck tends to get all gunked up with finger oil and dirt because maple tends to soil easily, however with an epoxy finish I will not need to worry about that. Again like the body, you want to make the neck smooth and supple! A 400 grit rub down with the grain works great but make sure (and I can’t stress this enough) to not press hard. I order my necks unfinished so I can color and finish it anyway I want (which we will in this tutorial with Tru-Oil) plus it’s way cheaper (about $50 to $80 dollars more) which really makes a huge difference especially when you are on a budget and who’s not these days!
Just like the body it is important to let the neck hang between coats in a well ventilated area. You will finish the neck much like the body. Use a rag and rub in small circles with the finish covering the sections of the neck. Let the neck dry an hour at a time and buff lightly with with steel wool. Again you are aiming for about 10 to 15 coats. Like on the body,
it will gain a nice luster that will polish nicely with the wool. It is also important to remember that the neck needs to have a good amount of finish on it. This is because the neck is under constant pressure and any moisture can compromise the strength of the wood that leads to warpage. ( There are some woods that cant even take coats of like most of the African woods because they are too oily or waxy already.) I find that Tru-Oil needs a good day or two to cure which is why I always try to finish the body and the neck staggered one after the other. That way I’m always working on one of them and they are both done around the same time. Its also good to add a coat right before you are on the way out to school, the store or work, that way it gets a nice long undisturbed drying session. Once everything is sealed, buffed and drilled, assemble the neck. I will go into further finer drilling and adjustment in another section as I know some of you will have a neck with no holes drilled, but this is a very easy extra step! After the tuners, and string trees are mounted the final step is the string nut. I have found that it is best to take this to a professional because it takes practice and a skilled hand to file the nut blank. If you mess up you have to buy another nut and uncool it off the finger board and that’s a waste of time and money. It may cost a little bread but the tech can slap on a nice new custom nut and have the bass growling with new strings the same day, which is always a nice ending to a custom job well done! I would also encourage you to watch (if you can) the tech install everything and learn all you can. I know after a few questions and watching, I was able to nail this delicate step, but take your time!
Now that your fretless is put together it’s time to set up! Keeping your instrument setup properly will cut out unwanted variables in your intonation, sound and allow you to operate your bass as easily as possible. I like to think of the bass as an extension of oneself, which is almost impossible to do if your bridge is intonated incorrectly or the neck is out of whack! Please, do not be afraid of any adjustments, or changes that need to be done. Once you know how to adjust these factors you will be a confident bass master!
Now that your bass is physically together lets string her up! Whatever your bass string of choice is, installing them properly will ensure good tension, a snug fit and long lasting strings. incorrect instillation will result in buzzes, dead spots and dollars wasted from broken strings. When you unwrap the strings they will be pre-coiled and ready to go. You will need a pair of wire cutters and a tuner. First take the G string and run the very tip through the bridge’s G string slot, up past the saddle, under the string tree and past the tuning post.
Now, everybody is different, some say don’t clip the string, some say do, but I find that keeping about 3 to 5 windings on every post will ensure a secure hold. I do this by using my wire cutters as a measuring tool. I match the full length of the wire cutters with the bass strings, then I put the tip of the handle of the wire cutters on the tuning post and mark my fingers at the tip of the head of the pliers, then clip. This ensures that each string is cut at the same length and allows you to take them off and store them if needed.
Once you have your string cut to the right length, take the freshly cut string end and bend just a bit of it, say a centimeter or two, at a right angle. Take this straight end and insert it into the hole in the middle of the tuning peg. Use downward pressure on the string and turn it clockwise to wrap the string around the tuning peg. You want to make sure that the string is running straight front the bridge, under the string round and to the tuning peg.
Continue turning the tuner until the string holds tension and rests in the nut. Repeat the process, bringing each string up to tune. Remember that new strings need some time to stretch and will go out of tune for the next few hours. But worry not they will eventually settle.
The neck of your bass is the strongest of all the parts! It consists of a metal rod embedded under the fingerboard called a Truss Rod. The truss rod turns with an allen wrench either clockwise or counter-clockwise to counteract the tension applied to the neck by the strings. This tension (or lack there of) will either add or take away curve to the neck allowing the strings to clear all parts of the fingerboard vibrate freely and allow the plucked note to sound. An adjustment to either the heel of the neck or at the top in front of the nut will allow you to turn the trus rod and add or take away tension or curve to the neck.
Remember, on a top mounted adjustment turn your allen wrench clockwise to tighten the neck and straighten it, or counter clockwise to loosen it and curve the neck. On heel adjustments its the exact opposite! The more curved the neck the higher the strings will be from the fingerboard, the straighter the neck the closer. On a fretless neck you want the action to be as low as possible to allow for the pleasant buzzy “Mmmwah” sound. It is possible to set the action too low in which the “mmmahh” will be squelched. A good indication of where your neck is at is either a buzz at the first 5 frets which indicates a neck that is too straight or a buzz at the 7th fret and up which indicates a neck that is too curved. Holding the bass at eye level against a strong light and looking at the very edge of the fingerboard will indicate the status of the neck curvature. You want to set your neck as straight as possible until you get buzzes on or about the 5th fret or lower, then back the neck off with quarter turns until the buzzes go away.
Now that the neck has the right relief its time to adjust the bridge. The bridge holds the important setup factors such as intonation and string height. While the neck curvature determines string height, the bridge saddles will give you a finer adjustment and allow you to lower your action even lower and match the curvature of the fingerboard. This allows you to intonate or tune the bass with itself. Keep in mind that all the adjustment you do at the bridge will knock your strings out of tune so have a tuner handy to bring the string back to pitch whenever you adjust something. This way you know how the correct playing tension will feel when the setup is complete.
The next step is bridge intonation and this is very very vital. The thing you have to always remember is that unlike playing other fretted instruments, the player makes the intonation not the frets. This being said you can get some help either from fret lines (like on this bass) or position markers like the ones on a blank fingerboard. The choice of one or the other is all personal preference and yet another option for you to consider.
Intonation of a lined fingerboard is done in the same way as a fretted. Hook up your tuner to your bass and play the open G string in tune. Fret directly on the 12th and check to see if your fretted note is in tune. Carefully make sure that you are using the tip of your finger avoiding any kind of fingertip pivot that will change your pitch. While this is a great technique while playing, in tuning and setup its not going to do you any favors. Now if the fretted note is sharp, turn the adjustment screw on the bridge so the saddle is moving towards you. If it is flat move the saddle away from you. Do small quarter turns and bring the string back up to tune before you check it. Once the fretted note is intonated repeat the process with the other three. One thing to keep in mind is that while the fret lines are right where the frets should be, it doesn’t mean that all of the lines are in tune 100% all over the neck.
Just like with any fretless instrument, you have to use your ears to judge the pitch and adjust accordingly. Avoid using the lines as a crutch to good intonation. Now if you have a blank plank, then your options are fewer (and less complicated) for intonating the bridge. Just grab a measuring tape and measure from the nut exactly 17 inches. Mark the spot with a piece of tape and intonate to that spot, which 9 times out of 10 is just about in the center of the octave double dot marker. Remember like the lined board, your ear is judge of pitch, not the markers.
Depending on the type of strings you use, the wear and tear on the board can vary quite a bit. Roundwound strings will eat your fingerboard, causing dead spots and loss of proper intonation. Flatwounds are far gentler and have a smooth texture. This being said, the more you play on the board the more it will need to be dressed and sanded. Like a formula race car that get’s it’s tires changed every few laps, your board will need to be smoothed out and it’s crown or arc restored to get a consistent sound. You can do this in one of two ways. One way is to run some nice 400 grit sand paper on the fingerboard. Make sure to do this very gently because you do not want to remove the arc from your board. If you’re too worried about screwing up your board spend a little cash and get your bass into a luthier to dress it for you professionally. Either way it is important that you maintain a good working fingerboard, because it’s where all the sound happens. If you are lucky enough to have a bass with treated epoxy then most if not all of these maintenance steps will be unnecessary. Should problems arise make sure you do what is needed without voiding your warranty!
Setting correct pickup height is vital to a good round sound and volume. The standard jazz bass pickup will come with four screws (two on each side). The screws adjust the pickup up and down. On the shafts of each screw are springs. Those springs provide tension which keeps the pickup from falling down to the bottom of the body cavity. The springs also provide upward and downward pressure. When you loosen the screws the tension from the spring pushes up on the pickup allowing the pickup to rise, when you tighten the screws down the springs are compressed and the pickup goes down.
With the help of the installed pickup springs turn a phillips head screw driver to move the pickup up or down. Moving the pickup higher or up towards the strings will yield a louder over all tone. Moving it away or down from the strings will result in a quieter volume. You want to strike a balance between the two which I find can be done by making your pickups like a ramp. You want to give the lower E and A strings plenty of room to vibrate so keep that end of the pickup just a bit lower, while making the D and G string side just a tad higher. It shouldn’t be extreme but all the strings need to clear the pickup otherwise the case for the pickup itself will get scratched and the sound of your fingers hitting the top of the pickup will make an unwanted “thump” sound, that is unless you want that thump sound.
0 notes
Last Seen Blogs

sweetly-yours-and-mine
wider than a mile

ben12345ok
Untitled

kkrinak-blog
Untitled

captin-metal-head
Music Is Life

foxxylolita
Queen Of Teasing