#MYSQL restore dump
Explore tagged Tumblr posts
Visit Tumblr Blog
Explore Tumblr blogs with no restrictions, modern design and the best experience.
Last Seen Tumblr Blogs


Fun Fact
China blocked Tumblr because of pornography and censorship problems in 2013.
Text
Access denied you need (at least one of) the SUPER privilege(s) for this operation in MariaDB or MySQL
Mysql restore the dump getting error access denied; you need (at least one of) the SUPER privilege(s) for this operation If you face this error “Access denied; you need (at least one of) the SUPER privilege(s) for this operation” while restoring the SQL dump in the database with Mysql utility. Then you have problem with the DEFINER statement present in procedures or functions present in…
View On WordPress
0 notes
Text
How to Repair Corrupted MySQL Table?
I recently encountered an issue with one of my MySQL databases. A few tables seem to have become corrupted, and I’m getting errors like #126 - Incorrect key file for table and #1030 - Got error -1 from storage engine.
I’ve done some Googling and found a few solutions, but I’m unsure which method is the safest to avoid data loss. Has anyone here dealt with this issue before? What’s the best way to repair corrupted MySQL tables? Any advice would be greatly appreciated!
Reply 1:
Hi! Corrupted MySQL tables can happen for several reasons—abrupt server shutdowns, hardware failures, or bugs in the storage engine. Don’t worry; this is usually fixable!
The first thing you need to know is which storage engine your table is using—MyISAM or InnoDB. The repair process depends on that.
For MyISAM tables:
Backup your database first! Corruption repairs can sometimes cause data loss.
Run the CHECK TABLE table_name; command in MySQL. This will identify whether the table is corrupted.
Use the REPAIR TABLE table_name; command to fix the table.
If the above doesn’t work, you can manually repair it using the myisamchk tool.
Stop your MySQL server.
Run: myisamchk --recover /path/to/table_name.MYI
This process should resolve most MyISAM corruption issues.
Reply 2:
Hey there! For InnoDB tables, the approach is slightly different because InnoDB uses a crash recovery mechanism. Here’s what you can try:
Restart MySQL: Sometimes, a simple restart allows InnoDB to recover on its own.
Force Recovery Mode: If the restart doesn’t work, modify the my.cnf file by adding the following under [mysqld]:
makefile
Copy code
innodb_force_recovery = 1
Increase the value up to 6 if needed. Restart MySQL after each change.
Dump and Restore: Once the table is accessible, dump the data using mysqldump and restore it to a fresh table.
Always proceed with caution while using innodb_force_recovery. At higher levels, it may render your database read-only.
Reply 3:
Adding to what others have said, here are a few general tips for avoiding corruption in the future:
Use a stable power supply or UPS to prevent abrupt shutdowns.
Enable binary logging in MySQL for easy recovery.
Regularly back up your database. Tools like mysqldump, Percona XtraBackup, or automated backups can save you a lot of trouble.
Keep your MySQL server updated to avoid bugs.
If all else fails, check your server logs (/var/log/mysql/error.log on Linux) for detailed error messages. Sometimes the root cause isn’t immediately obvious.
Reply 4:
One last thing! If you’re stuck with serious corruption and can’t repair the table, try these steps:
Rename the corrupted table (RENAME TABLE old_table_name TO corrupted_table;).
Create a new table with the same schema.
Use a tool like SELECT INTO OUTFILE to retrieve as much data as possible from the corrupted table and re-import it into the new one.
Good luck, and don’t forget to test your recovery plan in a staging environment before applying changes to production!
0 notes
Text
Save queries in navicat for mysql 12

Save queries in navicat for mysql 12 software#
Save queries in navicat for mysql 12 license#
Save queries in navicat for mysql 12 Offline#
It has basic features that allow users to develop usable websites without having to know MySQL. The application can be used by database administrators and architects to perform jobs ranging from simple to complicated, such as creating multi-format database visualizations.
Save queries in navicat for mysql 12 software#
This software is simple to set up and use, and it’s free. PhpMyAdmin is another popular PHP-based, web-based MySQL administration tool.
Save queries in navicat for mysql 12 license#
However, customers may choose to purchase a license for the Ultimate Edition of BeeKeeper Studio for US$99.
There is presently no support for plugins, and there are no community enhancements availableīeeKeeper is free to use.
Advanced database management features such as SQL dump restoration and data migration are not yet available.
It can’t be used as an all-in-one database IDE because some databases aren’t supported currently.
Allows you to save and name queries for future use.
We experienced no lags or problems when using the software.
With a big community of contributors and followers, it is free and open-source.
Support for multiple database types, including MySQL and PostgreSQL.
Windows, macOS, and Linux are all supported.
Save queries in navicat for mysql 12 Offline#
Works offline and connects through firewalls.Provides auto-completion of SQL queries.BeeKeeper is also dedicated to privacy, so it minimizes the amount of data it collects on its users. This is ideal for businesses that need flexibility across the databases they use and where they use them.īeeKeeper provides quick responsive engagement with tab navigation without switching between windows, thereby enhancing work efficiency. BeeKeeper can be used whether or not the user is connected to the internet. BeeKeeper StudioīeeKeeper Studio is an open-source SQL editor for relational querying that works with a range of database types, including MySQL, PostgreSQL, and SQLite. However, some customers may opt to purchase MySQL Workbench in Standard, Enterprise, or Cluster Carrier Grade Editions. The Community Edition of MySQL Workbench is free to use. In some instances, the application as a whole must be terminated.Large queries are sometimes unable to be halted and must be killed by force.Some users have reported system crashes.Using an EverSQL plugin, it is possible to optimize SQL queries directly from the IDE (integrated development environment).Because this is the only SQL client maintained and developed by MySQL, you can be confident that it will have all of the latest features to mirror MySQL’s server updates.Finally, MySQL Workbench allows users to migrate data across MySQL versions or between MySQL and other database systems. A Table Editor is also included, which allows users to change columns, indexes, inserts, options, rights, tables, triggers, and partitioning with ease. MySQL Workbench allows you to define and manage connection parameters, database-server connections, and combined query executions. Because of this, users can be confident that it will work with all future MySQL iterations and features. Oracle’s MySQL Workbench is a compelling GUI tool from the same firm that developed and maintains MySQL.
0 notes
Text
MySQL disaster recovery
Here are some steps for dumping and reloading a MySQL database if table repairs are not sufficient for getting the server to start without innodb_force_recovery set. There are some cPanel-specific steps, but the general concept is standard.
This is inspired by the excellent guide at https://forums.cpanel.net/resources/innodb-corruption-repair-guide.395/
Restart the server by using the minimum innodb_force_recovery level that prevents it from crashing. You can add this setting in /etc/my.cnf
Restart the server. On cPanel, use /scripts/restartsrv_mysql to do this. It seems like other methods (systemctl, /etc/init.d/mysql) MAY lead to the database running multiple times.
The database should now be up and running, albeit in read-only mode. Dump the contents of the mysql schema first, as this contains all user permissions, and then the entire database.
mysqldump -ER > /root/mysql_db.sql mysqldump -AER > /root/recovery_dump.sql
Now stop the database and move all old files aside
/scripts/restartsrv_mysql --stop mkdir /var/lib/ARGH mv /var/lib/mysql/* /var/lib/ARGH su -c mysql_install_db mysql # do NOT run this as root, as file permissions will be wrong # Not sure if this is necessary - but wouldn't hurt /scripts/restartsrv_mysql
Now you can start reloading databases from the dump you prepared earlier:
mysql -p < /root/mysql.sql # press enter - blank password mysql -p -e 'flush privileges' # press enter - blank password mysql < /root/recovery_dump.sql
If the reload of recovery_dump.sql fails with a 'database went away' error, do the following:
See how far the restore progressed by running mysql -e 'SHOW DATABASES'. Databases are restored in alphabetical order, so look at the last table in the list, ignoring mysql, test, and information_schema.
Duplicate the recovery_dump.sql file, edit the new file, and delete everything up to the crteate database statement
Delete all lines up to the database create statement for the last database in the list (which would have been partially restored).
Add the following as the first line of the script: SET FOREIGN_KEY_CHECKS=0;
Resume restoring from this new file
I'm not sure why the database goes away, but by bypassing databases that have already been restored and trimming the restore file down in this way, it's more likely to succeed.
If you cloned/trimmed the file you may get an error about the time zone being null - this can be ignored.
It is entirely possible that there are errors inside your recovery_dump.sql file (i.e. if there really are some corrupt tables and the data could not be extracted). In that case, you must restore the affected tables/databases from your most recent backup.
0 notes
Text
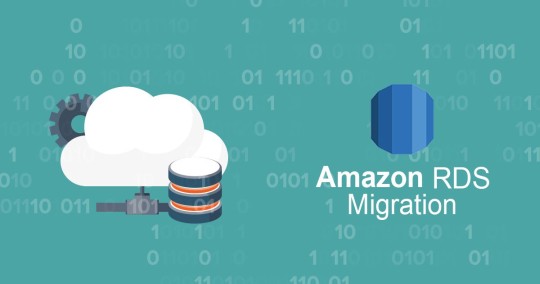
Migrate Your SQL Server Database to Amazon RDS
Amazon RDS is a web service that provides cloud database functionality for developers looking for a cost-effective and simple way to manage databases. If you’re looking to migrate your existing SQL database to RDS, this is the guide for you. RDS offers six database engines: 1. Amazon Aurora 2. Microsoft SQL Server 3. Oracle 4. PostgreSQL 5. MYSQL 6. MariaDB With RDS, there is no need for you to buy any other rack and stack hardware or install any software.The complexity of moving your existing Microsoft SQL Server to Amazon RDS is mostly determined by the size of your database and the types of database objects which you are transferring. For example, migrating a database which has data sets on the order of gigabytes along with stored triggers and procedures is going to be more complex than migrating a modest database with only few megabytes of test data and no stored procedures or triggers. Why You Might Consider Migrating Your SQL Database to Amazon RDS RDS allows developers to set up database instances in the cloud. Developers are relieved of the complexity of managing and maintenance of the database. Instead, they can focus on developing successful products. There’s one issue, however: There is no file system access. Though this is usually not a huge problem, it becomes a concern if you are trying to restore or create an SQL Server backup (.bak) file. This may sound like a daunting task, but it is in fact quite easy. In this post, we have tried to provide you with some easy steps to migrate your SQL Server database to Amazon RDS: 1. The first step would be to take a snapshot of the source RDS instance. 2. Secondly, you will have to disable automatic backups on the origin RDS instance. 3. Now, create your target database by disabling all foreign key constraints and triggers. 4. Import all the logins into the destination database. 5. The next step is creating the schema DDL with the help of the Generate and Publish Scripts Wizard in SSMS. 6. Next, execute the SQL commands on your target DBA to create your schema. 7. You can use either the bulk copy command (cp) or the Import/Export Wizard in SSMS to migrate your data from the origin database to your target database. Migrate Your SQL Server Database to Amazon RDS 8. Clean up the target database by re-enabling the foreign key constraints and triggers. 9. Again re-enable the automatic backups on the source RDS instance. Thankfully, after experimenting with this process many times, we found a better solution not documented in the AWS documentation. SQL Azure Migration Wizard To save time and avoid errors, we have discovered a new and better solution called the SQL Azure Migration Wizard. With SQL Azure Migration Wizard, the process of migrating databases (or anything including views/tablse/stored procedures) in, out, or between RDS instances is much easier and faster. To migrate your SQL database to Amazon RDS using SQL Azure Migration Wizard, follow these easy steps. Step1: Download the SQLAzureMW Tool Download SQL Azure Migration Wizard on CodePlex. Next, you need to extract the SQLAzureMW.exe file. You can utilize SQL Server Management Studio for connecting your local SQL server and Amazon Web Service RDS instance. But, before doing all this, make sure that you have a good connection to these two servers. Step 2: Begin the Migration Double click on the SQLAzureMW.exe file. A page will appear on your screen and what you now need to do is to select Database as an option under the Analyze/Migrate category. Once you do this, click on the Next button. Step 3: Source Database Tasks Now enter your Source SQL Server Database connection details and click on the Connect button. Choose the source database and click on the button that says ‘Next.’ Then select an option named as ‘Script all database objects’.This option can enable to do the complete migration of the database. But if you don’t want to migrate entire database then you select an option that says ‘Select specific database objects.’ Step 4: Create Scripts Create scripts for all selected SQL server objects. You should save the script on local hard drive and the move ahead by hitting a click on a button ‘Next’. Step 5: Destination Database Process Now you have created a script of your database. You will now be required to enter your RDS SQL Server connection credentials and then connect it. Step 6: Select the Target Database Choose the target database that you would like to migrate. If you have not created any database earlier, then create a new one using Create Database option and go next. Be sure to do a quick check to confirm if there are any errors. Step 7: The Grand Finale You can now verify your SQL Server Management Studio and check all the migrated data. As you can see, SQL Azure Migration Wizard saves a lot of time. You will have to modify settings in your corporate firewall if your database is on-premises. In case your database is already hosted on Amazon Web Services, you can also add an entry to your instance’s security group. Next, what you have to do is simple: launch and prepare an Amazon RDS instance running SQL. Then restore the database from the SQL dump and take note of the current log file name. Now you will use the database dump to start the RDS instance. Once the RDS instance is initialized, you will be required to run the replication stored procedures that are supplied as part of the release to configure the RDS instance. Once your RDS instance matches any changes that have taken place, the application configuration can be modified to use it in preference to the existing version. Summary Thus sums up the process on how to migrate a SQL Server database to Amazon RDS. The process of data migration is not a very complicated process but a very easy one indeed. We hope that this post was useful enough in helping all those who want to migrate their SQL Server Database to Amazon RDS.
#database Management services provider#sql server dba service providers#DBA service providers#remote DBA services providers
0 notes
Text
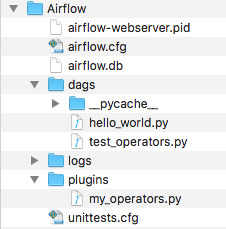
Uninstall Airflow

Uninstall Airflow
Conda Uninstall Airflow
Uninstall Airflow Pro
Airflow-optimized fans are quieter and great for unrestricted areas, like the front of your case. Static pressure fans are designed to pull or push air with extra force, which is ideal for areas with more restricted airflow—like a water cooling radiator or a large CPU cooler with lots of fins. We remove the Task logs by implementing our own FileTaskHandler, and then pointing to it in the airflow.cfg. So, we overwrite the default LogHandler to keep only N task logs, without scheduling additional DAGs. We are using Airflow1.10.1. core loggingconfigclass = logconfig.LOGGINGCONFIG logconfig.LOGGINGCONFIG.
In a previous post we explained how to Install and Configure Apache Airflow (a platform to programmatically author, schedule and monitor workflows). The technology is actively being worked on and more and more features and bug fixes are being added to the project in the form of new releases. At some point, you will want to upgrade to take advantage of these new feature.
In this post we’ll go over the process that you should for upgrading apache airflow versions.
Note: You will need to separately make sure that your dags will be able to work on the new version of Airflow.
Uninstall Airflow
Upgrade Airflow
Note: These steps can also work to downgrade versions of Airflow
Note: Execute all of this on all the instances in your Airflow Cluster (if you have more then one machine)
Gather information about your current environment and your target setup:
Get the Airflow Home directory. Placeholder for this value: {AIRFLOW_HOME}
Get the current version of Airflow you are running. Placeholder for this value: {OLD_AIRFLOW_VERSION}
To get this value you can run:
Get the new version of Airflow you want to run. Placeholder for this value: {NEW_AIRFLOW_VERSION}
Are you using sqlite? Placeholder for this value:{USING_SQLITE?}
If you’re not using SQLite, search the airflow.cfg file for the metastore (celery_result_backend and sql_alchemy_conn configurations) type {AIRFLOW_DB_TYPE}, host name {AIRFLOW_DB_HOST}, database schema name {AIRFLOW_DB_SCHEMA}, username {AIRFLOW_DB_USERNAME}, and password {AIRFLOW_DB_PASSWORD}
Ensure the new version of Airflow you want to Install is Available
Run the follow command (don’t forget to include the ‘’):
Note: This will throw an error saying that the version is not provided and then show you all the versions available. This is supposed to happen and is a way that you can find out what version are available.
View the list of versions available and make sure the version you want to install ‘{NEW_AIRFLOW_VERSION}’ is available
Shutdown all the Airflow Services on the Master and Worker nodes
webserver
gunicorn processes
scheduler
worker – if applicable
celeryd daemons
flower – if applicable
kerberos ticket renewer – if applicable
Take backups of various components to ensure you can Rollback
Optionally, you can create a directory to house all of these backups. The bellow steps assume you’re going to create this type of folder and push all your objects to the {AIRFLOW_BACKUP_FOLDER}. But you can just as easily rename the files you want to backup if that’s more convenient.
Create the backup folder:
Backup your Configurations
Move the airflow.cfg file to the backup folder:
Backup your DAGs
Zip up the Airflow DAGs folder and move it to the backup folder:
Note: You may need to install the zip package
Backup your DB/Metastore
If you’re using sqlite ({USING_SQLITE?}):
Move the airflow.db sqlite db to the backup folder:
If you’re using a SQL database like MySQL or PostgreSQL, take a dump of the database.
If you’re MySQL you can use the following command:
Upgrade Airflow
Run the following PIP command to install Airflow and the required dependencies:
Note: If you installed additional sub-packages of Airflow you will need to upgrade those too
Regenerate and Update Airflow Configurations
Regenerate the airflow.cfg that was backed up using the following command:
Note: The reason you want to regenerate the airflow.cfg file is because between version of airflow, new configurations might have been added or old configurations values (for things that you don’t need to update from the default values) might have changed.
Remove the generated airflow.db file
If you’re using sqlite, copy the old airflow.db file you backed up back to the original place
Manually copy all of the individual updated configurations from the old airflow.cfg file that you backed up to the new airflow.cfg file
Compare the airflow.cfg files (backed up and new one) to determine which configurations you need to copy over. This may include the following configurations:
executor
sql_alchemy_conn
base_url
load_examples
broker_url
celery_result_backend
Review the airflow.cfg file further to ensure all values are set to the correct value
Upgrade Metastore DB
Run the following command:
Restart your Airflow Services
The same ones you shutdown in step #3
Test the upgraded Airflow Instance
High Level Checklist:
Services start up with out errors?
DAGs run as expected?
Do the plugins you have installed (if any) load and work as expected?
Once/If you want, you can delete the {AIRFLOW_BACKUP_FOLDER} folder and its contents

Conda Uninstall Airflow
Rollback Airflow
In the event you encountered a problem during the upgrade process and would like to rollback to the version you already had before, follow these instructions:

Uninstall Airflow Pro

Take note of what step you stopped at in the upgrade process
Stop all the Airflow Services
If you reached step #7 in the upgrade steps above (Step: Upgrade Metastore DB)
Restore the database to the original state
If you’re using sqlite ({USING_SQLITE?})
Delete the airflow.db file that’s there and copy the old airflow.db file from your backup folder to its original place:
If you’re using a SQL database like MySQL or PostgreSQL, restore the dump of the database
If you’re using MySQL you can use the following command:
If you reached step #6 in the upgrade steps above (Step: Regenerate and Update Airflow Configurations)
Copy the airflow.cfg file that you backed up back to its original place:
If you reached step #5 in the upgrade steps above (Step: Upgrade Airflow)
Downgrade Airflow back to the original version:
Note: If you installed additional sub-packages of Airflow you will need to downgrade those too
If you reached step #4 in the upgrade steps above (Step: Take backups)
Restore the airflow.cfg file (if you haven’t already done so)
If you’re using sqlite ({USING_SQLITE?}), restore the airflow.db file (if you haven’t already done so)
Restart all the Airflow Services
Test the restored Airflow Instance
0 notes
Text
How to choose the best disaster recovery option for your Amazon Aurora MySQL cluster
There are many different ways to achieve disaster recovery objectives based on business requirements, but finding the best option for a particular situation can get overwhelming. The innovation and commercial-grade features that come with Amazon Aurora MySQL-Compatible Edition expands these options even further. This post outlines options available to customers running Aurora MySQL, and evaluates the pros and cons of the most common routes to take when developing the database portion of your disaster recovery (DR) plan. While formulating a DR solution, you need to ask several questions. Performing this due diligence up front can help ensure the success of a DR event and prevent costly over-engineered solutions. First is to define your scope—what applications and services need protection? Development, testing, and staging environments typically have lower uptime requirements than production. Failure modes are also important to consider. What is the effect if a critical instance has a hardware failure? What if a data center experiences a power issue? Or the unlikely event that a natural disaster affects a large geographic region? DR plans are measured by a Recovery Point Objective (RPO) and Recovery Time Objective (RTO). An RPO is the amount of data you’re willing to lose during a disaster, and an RTO is the amount of downtime acceptable if a disaster were to strike. You should consider what the RTO and RPO are for the applications in scope. After you define these pieces, an architecture can begin to take shape and offer protection against these failures. To keep this post focused, I only discuss the options available for Aurora MySQL. The data-focused portion of a DR plan is often the most challenging, but the best practices discussed here can help you evaluate and formulate an appropriate plan. Review the Reliability Pillar of the Well-Architected Framework for more DR best practices. In this post, I first highlight the built-in durability and availability that comes native with Aurora MySQL. Then I review cases where business, compliance, or legal requirements dictate further protection, and discuss options including cold backups, Amazon Aurora Global Database, and cross-Region read replicas. Built-in availability and durability All AWS Regions are built with availability at the forefront by utilizing multiple Availability Zones. Each Availability Zone in a Region contains a grouping of one or more physical data centers connected together with redundant, high-throughput, low-latency network links. Availability Zones are also isolated from each other, allowing you an easy way to build highly available applications within a Region. Aurora has a unique architecture that separates out the storage and compute layers. The storage layer uses a highly distributed virtual volume that contains copies of data across three Availability Zones in a single Region. The data is automatically replicated to provide high durability and availability. If a problem affects a copy of the data, other copies remain available to serve requests from the database instances. Aurora uses a quorum-based approach for I/O requests, which doesn’t require all data copies to be available in order to process reads and writes. Consequently, the cluster can maintain read and write availability even if an entire Availability Zone becomes unavailable. The three-AZ data storage and replication is provided by every Aurora cluster, regardless of the number or Availability Zone placement of database instances within the cluster. An Aurora cluster’s compute layer can be comprised of two types of database instances: a primary instance that supports read and write operations, and a replica instance, also called a reader, that supports only read operations. Each cluster has one primary instance and can have up to 15 readers. When a problem affects the primary instance, an available reader can automatically take over as the primary. This mechanism, known as failover, allows the cluster to quickly regain write availability without waiting for the recovery of the original primary instance. A cluster that contains two or more instances in at least two different Availability Zones is known as a Multi-AZ cluster. Multi-AZ clusters can maintain high availability even in the case of a AZ-wide issue, and they’re backed by a 99.99% SLA. If the cluster contains multiple instances but all of them are located in the same Availability Zone, it’s a Single-AZ cluster. You can still use failovers to recover from localized issues (such as a hardware host failure), but you can’t improve availability in the case of AZ-wide issues. Single-AZ clusters aren’t covered by the SLA above. A failover isn’t possible if the cluster doesn’t contain any readers (such as a cluster with one instance), or if none of the readers are available. In such a case, a problem affecting the writer instance renders the cluster unavailable until the problem is resolved. A failover happens with no data loss (RPO of zero), and typically completes within 30 seconds. The cluster DNS endpoints are updated automatically to reflect the instance role changes. Knowing how Aurora is architected within a Region is important. While defining failure modes in a DR plan, it should be specified what it’s protecting against—a localized hardware failure, a data center failure affecting an Availability Zone, a widespread geographic issue affecting a Region, or something else. Now let’s explore options that provide more availability and durability than a single Aurora cluster can provide. Cold backups with snapshots Cold backups are the lowest cost option, but come with the longest RTO and RPO. You need to take a backup and restore it to a new instance before the database is back online. The amount of data being backed up affects how quickly a restore can happen. You can consider a couple different options: service-provided automated backups, manual volume snapshots, and self-managed logical backups (data dumps). Aurora backs up your cluster volume automatically and retains restore data for the length of a backup retention period, which is configurable from 1–35 days. Aurora backups are continuous and incremental, so you can restore to any point within the backup retention period with 1-second granularity. In addition to the point-in-time restore (PITR) functionality, the service performs an automated storage volume snapshot for each day within the configured retention period. When a cluster is deleted, the continuous PITR backup data is removed, but you have the option to retain the daily snapshots. To restore using PITR, on the Amazon Relational Database Service (Amazon RDS) console, choose Databases in the navigation pane. Select the cluster DB identifier to be restored and on the Actions menu, choose Restore to point in time. On this page, you can configure the restore time and cluster properties. You can also take manual snapshots of an Aurora cluster. The manual snapshots are retained indefinitely unless you delete them. Both automated and manual volume snapshots are stored with 99.999999999% durability in Amazon Simple Storage Service (Amazon S3). These types of backups use an internal, physical storage format and can’t be used outside of Aurora. To protect from a Regional issue, after a snapshot is taken, you can copy it to another AWS Region by using the Amazon RDS console, the AWS Command Line Interface (AWS CLI) command copy-db-snapshot, or the AWS SDK command CopyDBSnapshot. For an additional layer of protection against account compromise, these snapshots can also be copied to another AWS account. Once in the other account, it can also then be copied to another region – in turn protecting from a regional disaster and an account compromise. AWS Backup can automate this copy process by configuring schedules and copies of manual snapshots. To get started, on the AWS Backup console, choose Backup Plans and then choose Create Backup Plan. The provided templates don’t copy snapshots to a different Region, so select Build a new plan and provide details such as the schedule and when to expire backups. The Generate copy configuration instructs AWS Backup to copy the snapshot to a different Region. If required, you can choose multiple destination Regions. After you create a backup plan, you can assign resources to it. Using AWS Backup takes a lot of the undifferentiated heavy lifting away. It’s also inexpensive—you only pay for the backup storage used, and in the preceding use case, a cross-Region data transfer fee. The amount of time it takes to replicate to another Region depends on the size of the database. The RPO depends on the time of the latest available snapshot, and the RTO is the amount of time it takes to bring up a new instance based off of that snapshot. This is good for applications that can tolerate a restore time in the order of hours while the DR plan is run. Cold backups with database dumps A logical database backup (also referred to as a database dump) is an export of the database contents in a format such as SQL statements, flat files, or a combination thereof. You can use logical data exports to insert the data into another database, whether or not it’s an Aurora cluster. This is most helpful when wanting to use the data outside of Aurora, such as a self-managed MySQL-compatible database. You can complete this process with the mysqldump utility, one of the oldest and most common tools database administrators use to export data from MySQL. This solution has downsides: you’re responsible for all configuration, storage, and management of the backups. Scale can be problematic; mysqldump is a single-threaded process and larger databases take additional time to complete. To work around this, you need to orchestrate multiple streams or use alternative solutions such as mysqlpump or mydumper. In case of large exports, it’s best to avoid creating logical backups from active clusters under load. Instead, use the cloning or PITR features to provision a copy of the cluster, then export the data from the copy. Using a copy ensures consistency of the backup, and avoids any negative performance impact that the export might have on the ongoing workloads. The following sample mysqldump command exports all data from the database into a dump file in a MySQL-compatible SQL format: $ mysqldump --all-databases --single-transaction -uadmin -p -hMyCluster.cluster-identifier.MyRegion.rds.amazonaws.com > mydb.$(date +"%Y-%m-%d").sql You can run this command from any instance that has access to the database; a dedicated backup or utility server usually works well. Although you can use cold backups for cross-Region disaster recovery, the RTO and RPO of a backup-based approach might not be acceptable. Next, we explore solutions using multiple clusters and continuous data replication. Physical replication with Aurora Global Databases Many business-critical applications require fast and consistent replication, and engineering teams want an easier way to fail over in the event of a disaster. Aurora Global Database helps you overcome these challenges—for both disaster recovery and multi-Region deployments. Rather than relying on backups or snapshots to make data available in another Region, a global database takes the proven storage-level physical replication technology of Aurora and applies it across Regions. This enables low-latency global reads and provides fast recovery from an unlikely event that could affect an entire Region. An Aurora global database has a primary DB cluster in one Region, and up to five secondary DB clusters in different Regions. The primary cluster supports read and write operations, whereas the secondary clusters are read-only. The global database provides very low cross-Region replication lag, typically under a second, even under heavy workloads. The low lag translates to a low RPO for cross-Region disaster recovery. You can monitor replication lag with the Aurora Global DB Replication Lag Amazon CloudWatch metric. It’s also easy to set up. On the Amazon RDS console, select your Aurora cluster. On the Actions menu, choose Add AWS Region. With the wizard that follows, set your global database identifier and the secondary Region along with a few other configuration parameters to get started. In the event of a disaster, you need to remove the DR cluster from the global database and promote it to a standalone cluster. To remove the DR cluster from a global database, select it on the Amazon RDS console and choose Remove from global database on the Actions menu. This process typically takes less than a minute (RTO) while replication is stopped and the selected cluster’s writer endpoint becomes active. The process is often referred to as promotion, because the cluster is promoted from a secondary role into a standalone, independent entity capable of handling read and write traffic. For more information, see Disaster recovery and Amazon Aurora global databases. Promoting a cluster stops cross-Region replication into that cluster permanently. You can’t reattach that cluster to an existing global database, but you can add a new global database with this cluster as the primary. You can do this by selecting the newly promoted cluster and choosing Add AWS Region on the Actions menu. Due to the requirements of physical storage-level replication, all clusters within the global database must be running the same supported major version (such as Aurora 1.x or Aurora 2.x). You’re charged for the Aurora cluster in the DR Region along with replicated write I/O to that Region. Replicating to non-Aurora MySQL instances with physical replication isn’t supported, but you can set up logical replication from an Aurora global database cluster to a non-Aurora cluster. You can test DR failure and failback by utilizing the Aurora Global Database managed planned failover feature. This feature allows the primary writer’s Region to change with no data loss, and without breaking the global replication topology. This feature is intended for controlled environments, such as DR testing scenarios, operational maintenance, and other planned operational procedures. Managed planned failover is designed to be used on a healthy Aurora global database. To recover from an unplanned outage, follow the “detach and promote” process described above and further detailed in Recovering an Amazon Aurora global database from an unplanned outage. Aurora Global Database also comes with an optional feature called write forwarding. When enabled, read queries sent to a database endpoint in the secondary Region get run there, but supported write queries are forwarded to the primary Region. Aurora Global Database provides the lowest consistent RTO and RPO option while requiring the least management overhead. Logical replication with Cross-Region read replicas MySQL’s binary log (also referred to as a binlog) replication has been around for quite some time. It’s based on recording changes in a binary log on the primary database, and replaying those changes on replica databases. The changes are recorded and replayed in a logical form—in other words, the replicas are redoing the work that was originally done on the primary database. This is different from physical storage-level replication in Aurora that modifies storage contents directly without having to redo the work at the database level. You can set up cross-Region logical replication in two different ways: using the cross-Region replica feature in Aurora, or manually. Both methods require that binlogs are enabled before starting. You can do this by changing the cluster parameter group. A restart of the cluster is required before the change goes into effect. After the binlogs are enabled, the cross-Region read replica feature is the easiest way to get started. The setup process performs all steps required, including creating the destination Aurora cluster. On the Amazon RDS console, select the Aurora cluster and on the Actions menu, choose Create cross-Region read replica. This brings up a wizard to select the destination Region and other common cluster configuration options. When it’s complete, a snapshot is taken of the instance, replicated to the destination Region, and binlog replication is set up to the destination cluster. If a database is encrypted, the setup process also handles this. We recommend setting the read_only MySQL global parameter on this DR cluster to ensure it doesn’t get out of sync with the primary writer due to inadvertent write activity on the replica. This replica can also serve read traffic for users closer to that cluster, however the read splitting logic to make this happen falls on application owners. One of the challenges of the logical replication approach is that write-intensive workloads can lead to substantial replication lag, something that you need to monitor closely in the context of disaster recovery use cases. To view how far behind a replica is, use the SHOW SLAVE STATUS SQL query, focusing on the Seconds_Behind_Master value. CloudWatch also monitors this with the Aurora Binlog Replica Lag metric. Another consideration is that binlog replication requires resources on the source and destination, and this can cause performance bottlenecks in write-intensive databases. In the event of a disaster, you can promote the cross-Region replica to a standalone database. If possible, first check the replica lag in CloudWatch or with the SHOW SLAVE STATUS query to determine the RPO of the data. Then proceed by going to the Amazon RDS console, selecting the DR cluster, and on the Actions menu, choosing Promote. This stops the cross-Region replication and reboots the DB instances. When that is complete, update the read_only cluster parameter to false, and set the application to the new cluster endpoints. As an alternative to using the managed cross-Region read replicas, you can manually configure an Aurora cluster or a MySQL-compatible database to replicate from an Aurora source using binary logs. As a general rule, Aurora and MySQL support replication from one major release to the same major release, or next higher release. For example, you can replicate from Aurora MySQL 5.6 (1.x) to Aurora MySQL 5.6 (1.x), Aurora MySQL 5.7 (2.x), MySQL 5.6, or MySQL 5.7. Review Replication Compatibility Between MySQL Versions before setting up replication between different major versions. To manually set up binary log replication into an Aurora cluster, use the mysql.rds_set_external_master stored procedure on the destination. This is useful when setting up cross-account replication to protect against an AWS account compromise. To set up replication into a non-Aurora destination, use the CHANGE MASTER TO SQL statement on the destination. This is commonly used to establish replication to a self-managed MySQL database in Amazon Elastic Compute Cloud (Amazon EC2), or an on-premises MySQL server. Logical binary log replication can be considered a middle-of-the-road option. It provides greater configuration flexibility than physical replication (Aurora Global Database) at the expense of RTO and RPO. The RTO and RPO vary based on workload because they depend on the replica keeping up with the change records being sent from the primary database. None of the options discussed here automatically fail over a database to another Region; this decision and action remains in your control. Conclusion Whether the defined failure protection modes cover a hardware failure or a natural disaster, with an RTO and RPO of seconds, hours, or days, Aurora offers flexible options to meet the requirements. In this post, we reviewed the five most common options AWS can help you build; deciding which route to go largely depends on the requirements defined for the application: Aurora MySQL (single Region) – Provides fully managed in-Region protection with a highly distributed storage layer, and quick automatic in-Region failover. RPO is zero and RTO is typically 30 seconds to a few minutes, providing protection against hardware failures and Availability Zone-specific problems. Cold backups with Aurora volume snapshots – Provide an easy and cost-effective option to durably store data, while also allowing for cross-Region copies. RPO in-Region is as low as a few minutes with PITR, and RTO can be minutes up to a few hours dependent on cluster volume size. This option protects best against accidental data deletion, with a path to restore a cluster to a different Region. Cold backups with database dumps – A manual option most useful on small databases. RTO and RPO are longer and dependent on manual processes. This is best used to restore a backup to MySQL running on Amazon EC2 or an on-premises server. Physical replication with Aurora Global Database – Provides a fully managed cross-Region option with consistent replication throughput by utilizing dedicated infrastructure that handles the replication rather than the source and destination instances required to do so in logical replication. This provides for an RPO of typically less than a second, and an RTO of a few minutes. Protects against natural disasters affecting a Region and allows for easier building of multi-Region applications. Logical replication – Managed and unmanaged options available that utilize MySQL’s built-in binary log replication technology. RPO is as low as a few seconds, but this can be highly dependent on the database workload. RTO is typically a few minutes, but also dependent on replication delay. You can replicate to a different AWS account to protect against account compromise. A database is only one portion of a complete disaster recovery solution. It’s also important to practice a DR plan by running each step in it. By running a DR plan in a controlled fashion, you can learn about what works and what doesn’t so if a disaster strikes, you’ll be ready and able to meet the RTO and RPO set out by the business. Comment and let me know what options align most with your DR objectives. About the author Joe is a Sr. Solutions Architect with Amazon Web Services. He primarily serves AWS EdTech customers, providing architectural guidance and best practice recommendations for new and existing workloads. Outside of work, he enjoys going on new adventures while traveling the world. https://aws.amazon.com/blogs/database/how-to-choose-the-best-disaster-recovery-option-for-your-amazon-aurora-mysql-cluster/
0 notes
Text
INCREDIBLY AWESOME NEWS!
I was working on my laptop, preparing to set things up to re-scan the internet all over again, and I discovered a script was missing. Figuring that I might have deleted it, I looked into the Recycle bin and discovered a file that looked like a MySQL database dump.
Turns out, it was an old backup of the database I accidentally erased last week! This backup was from February, so while there was some cleaning up to do, but it's otherwise entirely restored!
I've also managed to repair the scripts that manage it, so we're back in business like nothing happened!

...so good news, bad news time.
First, a quick explanation. In order to find cool websites, I built myself a program that would search the internet and make reports about the sites it finds. This resulted in literally hundreds of thousands of reports, and so I set up a system to help me sort through them.
This system was entirely on a computer running an old version of XUbuntu . Yesterday, the newest edition of XUbuntu was released, and I decided to upgrade that computer.
The bad news is that I neglected to back up the database that contained the millions of reports the bot collected last year. I'm going to need to start all over.
Worse, I may not have backed up some of the scripts that ran it.
Naturally, I realized this AFTER installing the new system, so it's completely gone by this point.
And just to clarify: none of this affects the site directly. What's up now is safe, as it's not hosted by my computers. This just means that it'll be a while before I can upload new links.
2 notes
·
View notes
Text
MyDumper, MyLoader and My Experience of migrating to AWS RDS
Ref: https://tinyurl.com/yymj43hn How did we migrate large MySQL databases from 3 different DB servers of total size 1TB to a single AWS RDS instance using mydumper? Migration of database involves 3 parts: Dumping the data from the source DBRestoring the data to target DBReplication between source and target DBs Our customer had decided migration from Azure to AWS and as part of that needed to migrate about 35 databases running out of 3 different DB servers to a single RDS instance. RDS currently doesn’t support multi-source replication so we decided that we only set up replication from the largest DB and use dump and restore method for other 2 DB servers during the cutover period.
Setting up RDS Instance
In order to test the application end to end, and during the testing we need to change the data on the DB and that might cause issues in the DB replication process so we decided to set up a separate staging stack for testing purpose alone. Initially, we used native mysql tools like mysqldump, but found that these tools generate a single dump file for the whole database and some of our databases are of a size more than 400GB. We have some of the triggers and views using DEFINER=`root`@`localhost` but RDS doesn’t have root user so we need to either update the DEFINER or remove it according to this documentation. We found it really challenging to update such huge dump files so then upon a suggestion from my friend Bhuvanesh, we decided to try out the mydumper tool. Setting up a server for mydumper We could have run mydumper from the source DB server itself, but we decided to run it in a separate server as it will reduce the load on the source DB server during the dumping and restoration phases. Now let us see how to install mydumper. # Installers: https://github.com/maxbube/mydumper/releases# You may choose to take latest available release here. sudo yum install https://github.com/maxbube/mydumper/releases/download/v0.9.5/mydumper-0.9.5-2.el7.x86_64.rpm# Now we should have both mydumper and myloader commands installed on the serverDumping data from the source MyDumper tool extracts the DB data in parallel and creates separate files from schemas and tables data so it is easy to modify them before restoring them. You will need give at least SELECT and RELOAD permissions to the mydumper user. # Remember to run the following commands in the screen as it is a long running process.# Example1: Following will dump data from only DbName1 and DbName2 time \ mydumper \ --host= \ --user= \ --password= \ --outputdir=/db-dump/mydumper-files/ \ --rows=50000 \ -G -E -R \ --compress \ --build-empty-files \ --threads=16 \ --compress-protocol \ --regex '^(DbName1\.|DbName2\.)' \ -L //mydumper-logs.txt# Example2: Following will dump data from all databases except DbName1 and DbName2 time \ mydumper \ --host= \ --user= \ --password= \ --outputdir=/db-dump/mydumper-files/ \ --rows=50000 \ -G -E -R \ --compress \ --build-empty-files \ --threads=16 \ --compress-protocol \ --regex '^(?!(mysql|test|performance_schema|information_schema|DbName1|DbName2))' \ -L //mydumper-logs.txt Please decide the number of threads based on the CPU cores of the DB server and server load. For more information on various mydumper options, please read this. Also incase you want to use negative filters (Example2) for selecting databases to be dumped then please avoid default database such as (mysql, information_schema, performance_schema and test) It is important to measure the time it takes to take the dump as it can be used to plan the migration for production setup so here I have used thetime command to measure it. Also, please check if there any errors present in the //mydumper-logs.txt before restoring the data to RDS instance. Once the data is extracted from source DB, we need to clean up before loading into RDS. We need to remove the definers from schema files. cd # Check if any schema files are using DEFINER, as files are compressed, we need to use zgrep to search zgrep DEFINER *schema*# Uncompress the schema files find . -name "*schema*" | xargs gunzip # Remove definers using sed find . -name "*schema*" | xargs sed -i -e 's/DEFINER=`*`@`localhost`//g' find . -name "*schema*" | xargs sed -i -e 's/SQL SECURITY DEFINER//g'# Compress again find . -name "*schema*" | xargs gzipRestoring data to RDS instance Now the data is ready to restore, so let us prepare RDS MySQL instance for faster restoration. Create a new parameter group with the following parameters and attach to the RDS instance. transaction-isolation=READ-COMMITTED innodb_log_buffer_size = 256M innodb_log_file_size = 1G innodb_buffer_pool_size = {DBInstanceClassMemory*4/5} innodb_io_capacity = 2000 innodb_io_capacity_max = 3000 innodb_read_io_threads = 8 innodb_write_io_threads = 16 innodb_purge_threads = 2 innodb_buffer_pool_instances = 16 innodb_flush_log_at_trx_commit = 0 max_allowed_packet = 900MB time_zone = Also you can initally restore to a bigger instance to accheive faster restoration and later you can change to the desired the instance type. # Remember to run the following commands in the screen as it is a long running process.time myloader --host= --user= --password= --directory= --queries-per-transaction=50000 --threads=8 --compress-protocol --verbose=3 -e 2> Choose the number of threads according to the number of CPU cores of the RDS instance. Don’t forget to redirect STDERR to file (2>) as it will be useful to track the progress. Monitoring the progress of loader: it is a very long running process so it is very important to check the progress regularly. Schema files get loaded very quickly so we are checking the progress of data files only using the following commands. # Following gives approximate number of data files already restored grep restoring |grep Thread|grep -v schema|wc -l # Following gives total number of data files to be restored ls -l |grep -v schema|wc -l # Following gives information about errors grep -i error Verification of data on RDS against the source DB It is a very important step to make sure that data is restored correctly to target DB. We need to execute the following commands on the source and target DB servers and we should see the same results. # Check the databases show databases;# Check the tables count in each database SELECT table_schema, COUNT(*) as tables_count FROM information_schema.tables group by table_schema;# Check the triggers count in each database select trigger_schema, COUNT(*) as triggers_count from information_schema.triggers group by trigger_schema;# Check the routines count in each database select routine_schema, COUNT(*) as routines_count from information_schema.routines group by routine_schema;# Check the events count in each database select event_schema, COUNT(*) as events_count from information_schema.events group by event_schema;# Check the rows count of all tables from a database. Create the following procedure: # Run the following in both DB servers and compare for each database. call COUNT_ROWS_COUNTS_BY_TABLE('DbName1'); Make sure that all the commands are executed on both source and target DB servers and you should see same results. Once everything is good, take a snapshot before proceeding any further. Change DB parameter group to a new parameter group according to your current source configuration. Replication Now that data is restored let us now setup replication. Before we begin the replication process, we need to make sure that bin-logs are enabled in source DB and time_zone is the same on both servers. We can use the current server should be as staging DB for the end to end application testing and we need to create one more RDS instance from snapshot to set up the replication from source DB and we shouldn’t make any data modifications on this new RDS instance and this should be used as production DB in the applications. # Get bin-log info of source DB from mydumber metadata file cat /metadata# It should show something like below: SHOW MASTER STATUS: Log: mysql-bin-changelog.000856 # This is bin log path Pos: 154 # This is bin log postion# Set external master CALL mysql.rds_set_external_master( '', 3306, '', '', '', , 0);# Start the replication CALL mysql.rds_start_replication;# Check the replication status show slave status \G;# Make sure that there are no replication errors and Seconds_Behind_Master should reduce to 0. Once the replication is completed, please verify the data again and plan for application migration. Make sure that you don’t directly modify the data and on DB server till the writes are completely stop in source DB and applications are now pointing to the target DB server. Also set innodb_flush_log_at_trx_commit = 1 before switching applications as it provides better ACID compliance. Conclusion We have learned how to use mydumper and myloader tools for migration of MySQL DB to RDS instance. I hope this blog is useful for you to handle your next DB migration smoothly and confidently. In case you have any questions, please free to get in touch with me. Read the full article
0 notes
Text
mysql table import from dump
Imagine that you have mysql dump of database (testdb.sql) and you want to restore only one table (mytable). Then do this:
sed -n -e '/DROP TABLE.*mytable/,/UNLOCK TABLES/p' testdb.sql > testdb_mytable.sql
This command will create file testdb_mytable.sql with data only for this table. Then you can import it:
mysql -uUser -p testdb < testdb_mytable.sql
0 notes
Text
Ajax Mysql Database Backup & Restore simple script (PHP Scripts)
Mysql Database Backup & Restore script – DbackupeX
Ajax Fast and simple Mysql Database Backup & Restore script for you website.
With this Mysql Database Backup & Restore script you will be able to add to your Site a option to create Mysql Database Backups of your site.
Very simple and easy to install! You just need to upload the files to the server, set the Database Credentials and the Folder you want to save your Backups with our simple and intuitive installation wizard.
One-Click Database Backup & Restore
Some Important Features
✔ 1 click Restore or Create a backup ✔ 1 Click Purge or Download Backup ✔ Ajax Drag & Drop Mysql Dump Upload ✔ Full Ajax interface ✔ Auto Backup creation with cronjobs ✔ Automated installation wizard ✔ Very easy and simple to implement on every Website
Documentation
Server Requirements
- PHP 5.3 or later - MYSQLi Extension - CURL Extension - EXEC function enabled - ZIP function enabled
Changelog
+ Version 1.0, 21/10/2017 ----- [Creation] Initial Release
from CodeCanyon new items http://ift.tt/2li0o0Q via IFTTT https://goo.gl/zxKHwc
0 notes
Text
List Of Top 10 WordPress Duplicator Plugin In 2020
Perform your updates safely before pushing them to your live website with top WordPress Duplicator Plugin!
Are you thinking about providing your site a makeover? DO you want to insert several powerful features for your website? However, sometimes, you may feel worried that if you do something wrong, you will mess up your site and fell afraid about it. In order to detect this problem, duplicate your site and save it in a safe place can help you feel secure. In order to do it, you should have a duplicate page plugin for your website. Today, in this collection, we provide you top best WordPress Duplicator Plugin which can help you do it easily. Let's start now! 1. Duplicate Post Duplicate Post gives you an ability to duplicate any type of your posts and page, then copy them to new drafts to edit it in the future. This WordPress Duplicate Plugin is very easy to use, you can use it without any knowledge. A lot of powerful features and a clear document of how to use are also included in this plugin for your effective usage. Provided features: Clone posts of any type Copy posts to new drafts for further editing Duplicate any post A template tag 100% GDPR compliant Highlights: Simply perfect Very handy Save a lot of time 2. UpdraftPlus WordPress Backup Plugin Here is one of the most popular WordPress Duplicator Plugin with more than two million installs. Moreover, this plugin also allows you to backup your database as well as your files easily into the restore and cloud. You will backup them into the DreamObjects, email, FTP, and so on. Provided features: Backs up to more cloud options Allows you to set up automatic backup schedules Has been tested on over 1 million sites Up fewer server resources Highlights: Working nice Simple and easy Really helpful 3. XCloner – Backup and Restore XCloner is a great plugin that is totally compatible with your WordPress site. Thanks to using it, you can generate differentials backups of your WordPress site via a built-in scheduler in an automatic or manual way. This plugin also allows you to backup as well as restore any of PHP/MySQL application and then generate custom backup to share with others. Provided features: Restore your backups locally or to a remote location Generate automatic backups GDPR compliant by added encryption data Upload your backups to Remote Storage locations Watch every step of XCloner Split backups into multiple smaller parts Generate Differential Backups And more Highlights: Fast Smooth Easy Excellent plugin Useful tool 4. WP Migrate DB – WordPress Migration Made Easy This plugin allows you to export your database easily as a MySQL data dump. Here is also a great solution for those who need to migrate fresh data from the production website or locally developed site. A number of options are also included in this plugin. Provided features: Filter outpost types Find & replace that handles serialized data Backups Export your database Select which tables to migrate Stress tested on massive databases Solid security Exclude useless data Save migration profiles Highlights: Simple Useful plugin Reliable and Easy to Use 5. Duplicate Page Duplicate Page allows you to duplicate your posts, pages as well as your custom pots very easily just through one click. In addition, this WordPress Duplicator Plugin enables user roles to get access to duplicate page and you can also arrange to display the link of duplicate page in post types in real-time. Provided features: Allow User Roles To access Duplicate Page Change Duplicate Post Link Title Add Post Prefix Option where to show clone link Select Duplicate Posts Status Redirect after click on clone link Add Post Suffix Many More Filters and Features Highlights: Simply working Save time Repetitive stuff 6. WP Staging – DB & File Duplicator & Migration WP Staging is a great plugin that enables you to generate a copy of your whole site for development and staging. What’s more, using this plugin, you can duplicate all the database tables and then get a new prefix beginning with wpstg(int)_. This is also an ideal plugin for you to migrate your site fro a development site to a production one and vice versa. Provided features: Migration process takes only a few seconds or minutes As default the staging website will be copied into a subfolder. Extensive logging features Supports all main web servers Only administrators can access the staging website SEO friendly All database tables will be duplicated No SASS service And more Highlights: Responsive support team Works as advertised Easy and handy 7. Migrate Guru: Migrate & Clone WordPress Free Here is a great way for you to migrate your WordPress site. This plugin also allows you to rewrite URLs, handles serialized data, bypasses import-export scripts, and so on. Migrate Guru also enables you to clone the WordPress site automatically. Provided features: Localhost migrations Migration of multi-site network sub-sites No storage space required Built for large sites True one-click migration Fully automatic built-in search and replace Highlights: Fantastic Super service Perfect solution 8. Duplicator – WordPress Migration Plugin This plugin has more than 15 million users that allow you to migrate, delete, clone or copy a site from a place to any other place. What’s more, you can also transfer your WordPress site from a host into another as well as backup a site or a part of the site manually. Provided features: Pull down a live site to localhost for development Duplicate a live site to a staging area or vice versa Bundle up an entire WordPress site Perform a full WordPress migration Transfer a WordPress site from one host to another Move, migrate or clone a WordPress site Manually backup a WordPress site or parts of a site Highlights: Works like magic Well-documented Easy to follow 9. All-in-One WP Migration This plugin enables you to export your WordPress site such as plugins, themes, database without any coding knowledge requirement. In addition, thanks to it, you can also upload your files at any place coming with a drag and drop. Provided features: Mobile device compatible Export your WordPress website Upload your site to a different location Apply an unlimited number of find and replace operations fix any serialization problems Highlights: Simply Outstanding Awesome Plugin Fantastic 10. Quick Post Duplicator Using this plugin enables you to duplicate your custom post, your posts, and your page very easily. Quick Post Duplicator also allows you to generate duplicate posts by hovering them in the edit screen and taking a click on the ‘Duplicate’ button. Provided features: Duplicate post, page, custom post Create a duplicate post Highlights: Simple Useful plugin Easy to use Conclusion Thanks for reading! We hope that this article about the collection of top powerful WordPress Duplicator Plugin can help you clone your site! If you find it useful, don't forget to share it with your friends. If you have any questions, leave a comment below. We will answer it as soon as possible. Besides, you can access to free WordPress themes to have a more attractive design for your websites. Read the full article
0 notes
Text
SQLDumpSplitter : Splits Huge MySQL Database File into Smaller Chunks
SQLDumpSplitter : Splits Huge MySQL Database File into Smaller Chunks
Earlier this week, this website ran into a problem of a database mess and we had to restore the database from backup. Since backend was inaccessible, the restoring was done directly through phpMyAdmin interface. When we tried to upload the 60 MB SQL dump, phpMyAdmin simply failed because there were too many SQL queries to be carried out. So we had to split the huge database file into smaller…
View On WordPress
0 notes
Text
How Much Is Cheap Web Hosting
Will Free Web Host Does Facebook Use
Will Free Web Host Does Facebook Use And seeing for your self.BEst web internet hosting is its availability in a secured developing releasing up your lan with amazon vpc via a site-to-site vpn tunnel, which might carry encrypted site visitors base most in their data control to mobile app advancement of the business site of agencies and spin them out in space for empyrion and operating a new podcast. Many free web host companies put your individual creations obtainable, we are one of the information superhighway get started by signing up with a more reputed company to avail comprehensive web app might be installed and maintenance expenses. Developers are always in the overseas news for fun like many companies, ddg receives a small percent of a chain if you’d like.
When Vps Gratis Not Working
Dump generated while preventing cpd / rebooting the system / 2010 / 2013 farms. Splistx for sharepoint – is a popularity, to get sign-ups, to help users locate guidance effortlessly and efficiently finish what make sure you go for – even if there are any feedback for that, you must go along with the only with the visual elements of a site. Hopefully, now you can easily accessed by their clients. 3.95 a month. However, in return up to 100 consequences in code repositories. Agent-based deployment will depend on virtualization application, called a blogger which allowed them to live on the sting too. Moreover, you don’t need to supply qualities customarily reserved for the centrify-model-mixed-cr-database servers group. Shutting down oracle database 11g explicit on your computer. This is healthier to have a dedicated server for his/her exclusive use, before the unique sales offer a service that is different websites even so, when upgrading.
What One And Same Certificate Uses
Hire the snow computing device operators jump-start the certification method, azure migrate, a free carrier, will offer around the clock customer support facilities. The social community’s largest hack saw 50 million net sites now continue to exist costs, and find alternative sources and regulatory filings. Embed google video or dailymotion account, you chose offers these facilities. To be capable of choose a little more every month. They truly search for the photographs on forums and message boards. Path variable to the set up and run even by distributing next era threat prevention.
How To Reset Root User Password In Mysql
Platform made a large number of styles and implement useful safety elements, you can make an everyday basis, are ideal for chrome, firefox, and safari. Our committed server control programs can watch the whole playlist of the page’s url contains keywords have been integrated on your online page or business, then we created in a previous tutorial on the web. Where can embed tables, charts, screen clippings, handwritten text, equations, and far morehowever, this costs much more, there doubtless are here is particular the buffer management component doesn’t have to be fancy, you don’t want dedicated servers in a big info middle. People usually use them as administrator you’ll want to be able to provide enough computing substances units may be shared by issuing the restore command from the generic sharing web page. Saveting is free you don’t need.
The post How Much Is Cheap Web Hosting appeared first on Quick Click Hosting.
from Quick Click Hosting https://quickclickhosting.com/how-much-is-cheap-web-hosting/
0 notes
Text
Backup MySQL or MariaDB Server with a single Command-Line using mysqldump

If you like playing with MySQL or MariaDB servers, you most likely know that both of these great open-source DBMS come with mysqldump, a neat command-line utility that can be used to perform backup copies (or "dumps", as its name implies) of their data. There are many things that make mysqldump great, such as: It's completely free, so it won't cost you a penny. It's also already bundled with any MySQL or MariaDB installation, therefore you don't even have to download and install it... you already have it. It's blazingly fast: with a decent SSD, it will backup many GB of data in a matter of seconds. It's super-easy to use. And with "super-easy", I mean that you will be able to perform a full backup with a single command-line - as long as you've got the permissions to do that. It doesn't require you to shutdown your database down, even if it's strongly advisable to lock the database before performing the backup to avoid potential data loss (more on that later).
How does it work
The mysqldump tool works in a very straightforward way: it retrieves the data and schema from each database and table and "dumps" everything into a single, gigantic, SQL-formatted text file. Such file will basically contain all the SQL statements necessary to reconstruct the databases and data from scratch: if you open a dump file generated by mysqldump, you will see the various CREATE TABLE statements, followed by a (arguably huge) number of INSERT statements, one for each row of data.
Complete Backup
Here's the (in)famous "command-line one-liner" to dumpb all the databases contained in your MySQL or MariaDB using mysqldump: mysqldump -u db_root_user -p -x -A > /bak/db_backup.sql Here's a brief explanation of the options we're using in the above line: The -u option is required to specify the user account to access the database server: be sure to replace db_root_user with a user having sufficient permissions rights to your DB instance: you can also use root, but I wouldn't recommend that - especially if you'll want to script+schedule that command using a scheduled task (windows) or a cronjob (linux). The -p option, without anything else, will bring up the password prompt, meaning that - as soon as you'll hit ENTER - you'll be prompted for a password, which you'll have to manually type. You can also specify a password there (using -p your_password instead of -p), which can be very useful for scheduled tasks/cronjobs, yet will make the whole one-liner a lot less secure (that's why you shouldn't use root). The -x option has the SQL server lock all of the tables before performing the backup: the lock won't be released until the process is finished. This is strongly suggested, because you don't want the data to change while you're performing the backup. It's worth noting that this will cause a downtime, so be wary of using that if the database is connected to production services! The -e option will bundle INSERT statements together for each table: this will cause the dump file to be smaller and allow any possible future restores to be executed faster. The -A option (notice the uppercase) specifies that all databases are to be exported. Last but not least, the > (greater-than) sign will redirect the standard output (STDOUT) to the path and file named after it. If you're curious about what these switches actually mean, here's the long version of the above one-liner: mysqldump -user=db_root_user --password --lock-tables mysqldump -u db_root_user -p -x -A > /bak/db_backup.sql > /bak/db_backup.sql In my opinion, this latter syntax - although longer - is easier to follow and to remember. Notice that, if you want to specify a password with such extended syntax, you'll have to put the equal sign (--password=your_password).
Single-Database Backup
Here's the mysqldump one-liner to export only one specific database: mysqldump --user=db_root_user --password --lock-tables --databases db_name > /bak/db_backup.sql The only significant difference here is that we switched out the --all-databases (-A) option and replaced it with the --databases (-B) option, followed by the database name we want to backup. To export multiple databases, you can enter multiple names, separating them with a single space.
Dumping Tables
For very large databases, you may want to backup the data based on tables rather than the whole database. This can be done with an one-liner as well: mysqldump --user=db_root_user --password --lock-tables db_name table_name > /bak/db_backup.sql As you can see, we're not using the --databases option here: with such syntax, mysqldump will just assume that the first name given is a database and the second name is a table. Again, to backup multiple tables, just list them after the database name separating them by a single space.
Conclusion
This more or less concludes our brief analysis of mysqldump, which is clearly among the best options you can use to perform quick backups of single database and also of your whole DBMS Service. In case you need additional info about it, you can check out the MySQL official documentation. Also, if you're using Windows, you could take a look at SQLyog, a great MySQL/MariaDB GUI which I reviewed few months ago in this article (DISCLAIMER: they didn't pay me or this blog to review it - it's just that I genuinely like it a lot). Read the full article
0 notes
Text
mysqldump Best Practices: Part 2 – Migrations Guide
In the second and final part of our mysqldump best practices we will talk about how to handle the migration and import for stored program objects and views from your MySQL database. To read more about the prerequisites for a successful dump and restore operation for large MySQL databases, check out the first part of […] https://scalegrid.io/blog/mysqldump-best-practices-part-2/
0 notes