#NSURL
Explore tagged Tumblr posts
Visit Tumblr Blog
Explore Tumblr blogs with no restrictions, modern design and the best experience.
Last Seen Tumblr Blogs


Fun Fact
There are dozens of funny blogs to kill time on Tumblr.
Text
Flutter for mac m1

#Flutter for mac m1 code
^^^^^^^^^^^^^^^^^^^^^^^^^^^^^^^^^^^^^^^^^^^^Ĭommand PhaseScriptExecution failed with a nonzero exit codeĪs for the Error log from Xcode: /Users/wissamboughannam/Developer/flutter/.pub-cache/hosted//provider-3.2.0/lib/src/provider.dart:259:19: Error: The method 'inheritFromWidgetOfExactType' isn't defined for the class 'BuildContext'. : context.ancestorInheritedElementForWidgetOfExactType(type)?.widget Try correcting the name to the name of an existing method, or defining a method named 'ancestorInheritedElementForWidgetOfExactType'. Users/wissamboughannam/Developer/flutter/.pub-cache/hosted//provider-3.2.0/lib/src/provider.dart:260:19: Error: The method 'ancestorInheritedElementForWidgetOfExactType' isn't defined for the class 'BuildContext'. ? context.inheritFromWidgetOfExactType(type) as InheritedProvider Try correcting the name to the name of an existing method, or defining a method named 'inheritFromWidgetOfExactType'. 'BuildContext' is from 'package:flutter/src/widgets/framework.dart' ('/Users/wissamboughannam/Developer/flutter/packages/flutter/lib/src/widgets/framework.dart'). Users/wissamboughannam/Developer/flutter/.pub-cache/hosted//provider-3.2.0/lib/src/provider.dart:259:19: Error: The method 'inheritFromWidgetOfExactType' isn't defined for the class 'BuildContext'. Volumes/Sub/Flutter-Projects/test-project/test_project_app_v2/test_app_2/ios/Pods/FirebaseCore/FirebaseCore/Sources/FIRLogger.m:101:20: warning: this old-style function definition is not preceded by a prototype Volumes/Sub/Flutter-Projects/test-project/test_project_app_v2/test_app_2/ios/Pods/FirebaseCore/FirebaseCore/Sources/FIRLogger.m:58:28: warning: this old-style function definition is not preceded by a prototype
#Flutter for mac m1 code
+ (PHFetchResult *)fetchAssetsWithALAssetURLs:(NSArray *)assetURLs options:(nullable PHFetchOptions *)options API_DEPRECATED("Will be removed in a future release", ios(8, 11), tvos(8, 11)) API_UNAVAILABLE(macos) Įrror: the following command failed with exit code 0 but produced no further outputĬompileC /Users/wissamboughannam/Library/Developer/Xcode/DerivedData/Runner-awkucyxpawezvvfjchbivjxuwsah/Build/Intermediates.noindex/Pods.build/Debug-iphonesimulator/file_picker.build/Objects-normal/x86_64/FilePickerPlugin.o /Users/wissamboughannam/Developer/flutter/.pub-cache/hosted//file_picker-1.4.2/ios/Classes/FilePickerPlugin.m normal x86_64 objective-c .clang.1_0.compiler Applications/Xcode-beta.app/Contents/Developer/Platforms/atform/Developer/SDKs/iPhoneSimulator14.5.sdk/System/Library/Frameworks/amework/Headers/PHAsset.h:74:1: note: 'fetchAssetsWithALAssetURLs:options:' has been explicitly marked deprecated here In module 'Photos' imported from /Users/wissamboughannam/Developer/flutter/.pub-cache/hosted//image_picker-0.6.7+1/ios/Classes/FLTImagePickerPhotoAssetUtil.h:6: Users/wissamboughannam/Developer/flutter/.pub-cache/hosted//image_picker-0.6.7+1/ios/Classes/FLTImagePickerPhotoAssetUtil.m:21:47: warning: 'fetchAssetsWithALAssetURLs:options:' is deprecated: first deprecated in iOS 11 - Will be removed in a future release UIKIT_EXTERN UIImagePickerControllerInfoKey const UIImagePickerControllerReferenceURL API_DEPRECATED("Will be removed in a future release, use PHPicker.", ios(4.1, 11.0)) API_UNAVAILABLE(tvos) // an NSURL that references an asset in the AssetsLibrary framework Applications/Xcode-beta.app/Contents/Developer/Platforms/atform/Developer/SDKs/iPhoneSimulator14.5.sdk/System/Library/Frameworks/amework/Headers/UIImagePickerController.h:62:51: note: 'UIImagePickerControllerReferenceURL' has been explicitly marked deprecated here In module 'UIKit' imported from /Volumes/Sub/Flutter-Projects/test-project/test_project_app_v2/test_app_2/ios/Pods/Target Support Files/image_picker/image_picker-prefix.pch:2: Users/wissamboughannam/Developer/flutter/.pub-cache/hosted//image_picker-0.6.7+1/ios/Classes/FLTImagePickerPhotoAssetUtil.m:17:44: warning: 'UIImagePickerControllerReferenceURL' is deprecated: first deprecated in iOS 11.0 - Will be removed in a future release, use PHPicker. Applications/Xcode-beta.app/Contents/Developer/Platforms/atform/Developer/SDKs/iPhoneSimulator14.5.sdk/System/Library/Frameworks/amework/Headers/UIAlertView.h:27:12: note: 'UIAlertView' has been explicitly marked deprecated UIAlertView : UIView module 'UIKit' imported from /Volumes/Sub/Flutter-Projects/test-project/test_project_app_v2/test_app_2/ios/Pods/Target Support Files/image_picker/image_picker-prefix.pch:2: Use UIAlertController with a preferredStyle of UIAlertControllerStyleAlert instead Users/wissamboughannam/Developer/flutter/.pub-cache/hosted//image_picker-0.6.7+1/ios/Classes/FLTImagePickerPlugin.m:141:20: warning: 'UIAlertView' is deprecated: first deprecated in iOS 9.0 - UIAlertView is deprecated.
0 notes
Text
Tonight theres going to be a jailbreak: detecting Jailbreaks with Swift on iOS part 2
A while ago I wrote a post about detecting Jailbreaks on iOS with Swift which I incorporated into the app that would eventually become PassVult. I thought there would be little need to continually keep updating Jailbreak’s due in part to the increasing the security of iOS and also due to Apple’s clever strategy of enticing away the Jailbreaker’s by getting them to work for them. But in this brave new / old world we live in there is always room to be surprised. So I���m sharing this code snippet to raise the bar across the board:
// Detect if device is Simulator, Jailbroken or not jailbroken func hasJailbreak() -> Bool { guard let cydiaUrlScheme = NSURL(string: "cydia://package/com.example.package") else { return false } if UIApplication.shared.canOpenURL(cydiaUrlScheme as URL) { return true } #if arch(i386) || arch(x86_64) // Device is a simulator return false #else /*let fileManager = FileManager.default if(fileManager.fileExists(atPath: "/private/var/lib/apt")) { // Device is jailbroken return true } else { // Device is not jailbroken return false } */ let fileManager = FileManager.default if fileManager.fileExists(atPath: "/Applications/Cydia.app") || fileManager.fileExists(atPath: "/Library/MobileSubstrate/MobileSubstrate.dylib") || fileManager.fileExists(atPath: "/bin/bash") || fileManager.fileExists(atPath: "/usr/sbin/sshd") || fileManager.fileExists(atPath: "/etc/apt") || fileManager.fileExists(atPath: "/usr/bin/ssh") || fileManager.fileExists(atPath: "/private/var/lib/apt") { return true } if ViewController.canOpen(path: "/Applications/Cydia.app") || ViewController.canOpen(path: "/Library/MobileSubstrate/MobileSubstrate.dylib") || ViewController.canOpen(path: "/bin/bash") || ViewController.canOpen(path: "/usr/sbin/sshd") || ViewController.canOpen(path: "/etc/apt") || ViewController.canOpen(path: "/usr/bin/ssh") { return true } let path = "/private/" + NSUUID().uuidString do { try "anyString".write(toFile: path, atomically: true, encoding: String.Encoding.utf8) try fileManager.removeItem(atPath: path) return true } catch { return false } #endif } static func canOpen(path: String) -> Bool { let file = fopen(path, "r") guard file != nil else { return false } fclose(file) return true } // Detect if iDevice is jailbroken func detectJailbreak() { if hasJailbreak() == true { UIControl().sendAction(#selector(URLSessionTask.suspend), to: UIApplication.shared, for: nil) } }
I based most of this code from browsing Stack Overflow a Github to update an earlier piece of code which I developed from browsing Stack Overflow and GitHub.
If you have better suggestions let me know.
Until Next Time!
The Security Sleuth
#Jailbreak#iOS#Code#Swift#pt2#Tonight theres going to be a jailbreak#Thin Lizzy#Apple#Stack overflow#GitHub
2 notes
·
View notes
Text
ios에서 UIView를 inherit하거나 expenstion해서 사용시 유의사항
기존의 UIView에 기능을 추가 해서 사용하는 방법으로는 subclass를 만들어 사용하는 것과 expension을 이용 확대하는 방법이 있다.
단 expension의 경우 stored property를 새로 추가 할수 는 없다. (참조 https://docs.swift.org/swift-book/LanguageGuide/Extensions.html Extensions can add new computed properties, but they cannot add stored properties, or add property observers to existing properties.)
하부 subclass에서 상부의 init()을 이용하는 경우 사용하기 전에 먼저 subclass에서 추가된 property의 값이 할당이 되어야 수행된다.
Swift has a very clear, specific sequence of operations that are done in initializers. Let's start with some basic examples and work our way up to a general case.
Let's take an object A. We'll define it as follows.
class A { var x: Int init(x: Int) { self.x = x } }
Notice that A does not have a superclass, so it cannot call a super.init() function as it does not exist.
OK, so now let's subclass A with a new class named B.
class B: A { var y: Int init(x: Int, y: Int) { self.y = y super.init(x: x) } }
This is a departure from Objective-C where [super init] would typically be called first before anything else. Not so in Swift. You are responsible for ensuring that your instance variables are in a consistent state before you do anything else, including calling methods (which includes your superclass' initializer).
subclass 를 이용 추가 property를 사용하는 예시들
class ViewController: UIViewController { var imageURL: NSURL? // this is a convenient way to create this view controller without a imageURL convenience init() { self.init(imageURL: nil) } init(imageURL: NSURL?) { self.imageURL = imageURL super.init(nibName: nil, bundle: nil) } // if this view controller is loaded from a storyboard, imageURL will be nil /* Xcode 6 required init(coder aDecoder: NSCoder) { super.init(coder: aDecoder) } */ // Xcode 7 & 8 required init?(coder aDecoder: NSCoder) { super.init(coder: aDecoder) } }
class UIGridCell:UIView {
var id:String=""
override init(frame: CGRect) {
super.init(frame: frame) // calls designated initializer
}
convenience init(id: String) {
self.init(frame: CGRect.zero)
self.id = id
}
required init?(coder aDecoder: NSCoder) {
super.init(coder: aDecoder)
}
}
2 notes
·
View notes
Text
Macos Sierra Patcher Tool For Unsupported Macs

The link itself gives the answer macOS Sierra Patcher Tool for Unsupported Macs Since it’s unsupported, it’s by definition, riskier than install Sierra on supported Macs.
. The “macOS High Sierra Patcher” application is intended for those with unsupported Macs. MacOS Serria 10.12 Vmware image by dmos25 torrent on isoHunt MacOS High Sierra Patcher is a small but powerful tool to help you set up a Mac OS High Sierra.
MacOS Catalina Patcher (formerly macOS Mojave Patcher, macOS High Sierra Patcher and macOS Sierra Patcher) is a small yet powerful tool that can help you create a bootable USB drive that can be used to install macOS Catalina on Mac computers older than mid 2012, basically acting as a macOS Mojave patch for unsupported Macs.
Macos Sierra Patcher Tool For Unsupported Macs Windows 10
Macos Sierra Patcher Tool For Unsupported Macs 7
Macos High Sierra Patcher
Sierra Patcher will now create a macOS installer on the drive you selected, making edits on the fly so that the resulting installer can be used on unsupported machines. Once the installer is created, Sierra Patcher will say Complete! And your USB drive should now show as OS X Base System instead of its previous name. MacOS Mojave Patcher (formerly macOS High Sierra Patcher and macOS Sierra Patcher) is a small yet powerful tool that can help you create a bootable USB drive that can be used to install macOS Mojave on Mac computers older than late 2009, basically acting as a macOS Mojave patch for unsupported Macs.
Questionsor comments? Feel free to contact me at (email protected) Pleasetake a look at the FAQ located at the bottom of this page as well. I also have a YouTube video going over the whole process. Requirements: - Early-2008 or newer Mac Pro, iMac, or MacBook Pro(MacPro 3,1 and 4,1, iMac 8,1 and 9,1, MacBook Pro 4,1, 5,1 5,2, 5,3,5,4, and 5,5) - Late-2008 or newer MacBook Air or Aluminum Unibody MacBook (MacBookAir 2,1, MacBook 5,1) - Early-2009 or newer Mac Mini or white MacBook (Macmini 3,1, MacBook 5,2) - Early-2008 or newer Xserve (Xserve 2,1, Xserve 3,1) Machines that ARE NOT supported: - 2006-2007 Mac Pros, iMacs, MacBookPros, and Mac Minis (MacPro 1,1 and 2,1, iMac 4,1, 5,1, 5,2, 6,1 and7,1, MacBook Pro 1,1, 2,1, and 3,1, Macmini 1,1 and 2,1) -- The 2007 iMac 7,1 is compatible if the CPU is upgraded to a Penryn-based Core 2 Duo, such as a T9300. - 2006-2008 MacBooks (MacBook 1,1, 2,1 3,1 and 4,1) - 2008 MacBook Air (MacBookAir 1,1) -- Note: Make sure SIP is disabled on the system you intend to installHigh Sierra on. If it's not or you're unsure, just boot into your Recoverypartition of your currently installed copy of OS X, open Terminal, andrun 'csrutil disable'. Things you'll need: - A copy of the macOS High Sierra InstallerApp. This can be obtained from the Mac App Store using a machinethat supports High Sierra, or by using the built-in downloading feature of the tool. In the Menu Bar, simply select 'Tools > Download macOS High Sierra...' - A USB drive that's at least 8 GB in size - A copy of the tool - Download here (Current version: 2.7.0, SHA1: 73f180d30200ef5f6d900440fe57b9c7d22bd6bf) -- View changelog and download older versions here Known issues: - Trackpad (MacBook5,2 affected only). The trackpad in the MacBook5,2isn't fully supported in High Sierra. While it works and is fully usable,High Sierra detects it as just a standard mouse, preventing you fromchanging some trackpad-oriented settings. How to use: 1. Insert your desired USB drive, open Disk Utility, and format it as OS X Extended (Journaled). 2. Open the 'macOS High Sierra Patcher' tool, and browse for your copy of the macOS High Sierra Installer App. *Ensure that the tool successfully verifies the app. 3. Next, select your USB drive in the Target Volume list, and click 'Start Operation.' 4. When the operation completes, boot your target unsupported Mac offthe USB drive you just created by holding down the Option key while turning on the machine, and selecting the drive. Note: Only perform steps 5 and 6 if you intend to do a clean install.Otherwise, you can simply skip these steps and install to your volumecontaing a previous version of OS X, and it'll do an in-place upgrade. 5. When the installer boots, open Disk Utility from the Utilities menu, or by double-clicking it in the Utilities window on the bottom left corner of the screen. 6. Select the disk or partition you want to install on, and erase it,ensuring to use either Mac OS Extended (Journaled), or APFS as the filesystem type.If formatting an entire drive, ensure GUID is selected. -- Please note that if you use APFS, you will not have a bootable Recovery partition. -- It is recommended that you only use APFS if the target drive is an SSD. -- If you decide to use APFS, a custom booting method will be installed by the post-install tool, as the firmware of these unsupported machines does not natively support booting from APFS volumes. It is not quite as clean as native booting, but will not cause any issues while running High Sierra. A demo of the modified booting process can be viewed here. 7. Install macOS normally onto the desired volume. 8. When the install completes, reboot back onto the installer drive.This time, open the 'macOS Post Install' application. 9. In the application, select the Mac model you are using. The optimalpatches will be selected for you based on the model you select. You canalso select other patches of your choosing. -- The 'i' button next to each patch will show more details about the respective patch. 10. Select the volume you have just installed macOS High Sierra on, andclick 'Patch.' When it finishes patching, click 'Reboot'. It may sitthere for a few moments rebuilding caches before rebooting. -- If for somereason the system fails to work correctly after rebooting, boot backinto your installer drive, run the post install patch again, and select'Force Cache Rebuild' before rebooting. This isn't necessary under mostcircumstances. 11. When it reboots, it should now boot into a fully working copy ofmacOS High Sierra. Additional Info: - If selected in the macOS Post Install tool, your High Sierra install will have a program named 'Patch Updater' located in your /Applications/Utilities folder. This program will alert you when new updates to patches are available for your machine, and will prompt you to install them. If you do not have Patch Updater installed, but would like it, you can download and run the script found here to do so. Updates System updates, such as 10.13.1, should install normally if 'Software Update Patch' was selected in the macOS Post Install tool, or installed using the Patch Updater program. If for some reason updates aren't showing up, or you did not apply the patch, you can install it manually using the script found here. -- If the machine does not start up properly after applying a system update, you will need to boot off your patched installer volume, and re-run the post-install patch on your High Sierra volume. Ensure you select 'Force Cache Rebuild' before rebooting. FAQ: Q: The tool created the USB drive successfully, but when booting, the progress bar hangs a bit more than half way. A: Check your copy of the Install macOS High Sierra App. If you're using thelatest version of the tool, you must be using the latest version of theInstall macOS High Sierra App. Version 1.1 ofthe patch tool and older support older versions of the installer app. Q: The patch tool gives me errors, such as 'Error copying files...'. A: Check to make sure your USB drive is writeable. Try re-formatting it, or just try a different USB drive. Q: The patch tool gives me a 'Mounting Failed' error A: Check to make sure your Install macOS High Sierra App is the correct one.It should be around 5GB in size. If you used the 'Skip App Verification' option, you have most likely selected an invalid app thatdoesn't contain the necessary files. Q: I cannot open my copy of Install macOS High Sierra with the patch tool. A: If you downloaded the copy linked above, it is distributed inside aDMG file. You must open this file (mount it) to access the InstallmacOS High Sierra App you need to select. Q: I don't see my hard drive partition in the installer screen or in the post-install tool. A: Make sure FileVault is disabled, or use the instructions found here to unlock it manually using Terminal. Q: I get a 'NO' symbol when starting up after successfully installing High Sierra. A: Make sure you have run the post-install patch on the correct volume, as detailed above in steps 8-10. Q: I get a 'NO' symbol when starting up from the patched USB drive A: Check the supported/not supported list at the top of this page. Ensure your machine is in the supported list. Q: My iSight camera doesn't work after installing High Sierra A: Make sure you properly remove (using the program's uninstaller, not by simply dragging the application to the Trash) all virtual machine software installed on your machine, such as VirtualBox, VMWare, etc. Q: I get 'NSURL' errors when trying to update my machine or use the App Store A: This is usually the result of having an invalid CatalogURL set. To revert to stock, simply run 'sudo softwareupdate --clear-catalog' in Terminal, and then run the software update patch script located above. Q: Safari, App Store, and/or Mail stopped working after installing a system update A: Download and run the Onyx application, select 'Maintenence' at the top, then click the Run button. Q: I get a 'No packages were eligible for install' error when attepting to install High Sierra A: This is due to your system's date and time being set incorrectly. To fix it, you can either boot into your current OS X install and set the date, or you can use Terminal after booting from your patched USB installer drive to set the date. Instructions to set the date using Terminal can be found here.
To get the latest features and maintain the security, stability, compatibility, and performance of your Mac, it's important to keep your software up to date. Apple recommends that you always use the latest macOS that is compatible with your Mac.
Learn how to upgrade to macOS Big Sur, the latest version of macOS.
Check compatibility
MacOS Patcher is a command line tool for running macOS Sierra, macOS High Sierra, macOS Mojave, and macOS Catalina on unsupported Macs Catalina Unus It's integrated into macOS Patcher so you if you have a Mac supported by it, you can create your patched installer using Catalina Unus, and then add macOS Patcher's patches to it by selecting the. MacOS Sierra Patcher is a free-to-use application for Mac OS that allows you to easily create a modified install drive. MacOS Sierra Patcher is a free. Install drive to use for installing macOS Sierra.
If a macOS installer can't be used on your Mac, the installer will let you know. For example, it might say that it's too old to be opened on this version of macOS, or that your Mac doesn't have enough free storage space for the installation.
To confirm compatibility before downloading, check the minimum requirements for macOS Catalina, Mojave, High Sierra, Sierra, El Capitan, or Yosemite. You can also find compatibility information on the product-ID page for MacBook Pro, MacBook Air, MacBook, iMac, Mac mini, or Mac Pro.
Make a backup
Before installing, it’s a good idea to back up your Mac. Time Machine makes it simple, and other backup methods are also available. Learn how to back up your Mac.
Download macOS
It takes time to download and install macOS, so make sure that you're plugged into AC power and have a reliable internet connection.
Safari uses these links to find the old installers in the App Store. After downloading from the App Store, the installer opens automatically.
macOS Catalina 10.15 can upgrade Mojave, High Sierra, Sierra, El Capitan, Yosemite, Mavericks
macOS Mojave 10.14 can upgrade High Sierra, Sierra, El Capitan, Yosemite, Mavericks, Mountain Lion
macOS High Sierra 10.13 can upgrade Sierra, El Capitan, Yosemite, Mavericks, Mountain Lion
Safari downloads the following older installers as a disk image named InstallOS.dmg or InstallMacOSX.dmg. Open the disk image, then open the .pkg installer inside the disk image. It installs an app named Install (Version Name). Open that app from your Applications folder to begin installing the operating system.
macOS Sierra 10.12 can upgrade El Capitan, Yosemite, Mavericks, Mountain Lion, or Lion
OS X El Capitan 10.11 can upgrade Yosemite, Mavericks, Mountain Lion, Lion, or Snow Leopard
OS X Yosemite 10.10can upgrade Mavericks, Mountain Lion, Lion, or Snow Leopard
Install macOS
Follow the onscreen instructions in the installer. It might be easiest to begin installation in the evening so that it can complete overnight, if needed.
If the installer asks for permission to install a helper tool, enter the administrator name and password that you use to log in to your Mac, then click Add Helper.
Please allow installation to complete without putting your Mac to sleep or closing its lid. Your Mac might restart, show a progress bar, or show a blank screen several times as it installs macOS and related firmware updates.
Learn more
You might also be able to use macOS Recovery to reinstall the macOS you're using now, upgrade to the latest compatible macOS, or install the macOS that came with your Mac.
Within this post, I will illustrate How To Install macOS Unlocker For Vmware Patch Tool. While we have provided macOS VMware Unlocker Patch Tool on Windows, we will install macOS VMware Unlocker Patch Tool. Installing macOS Catalina or alternative versions on Windows can be very complicated and hard without VMware Workstation Player, especially a macOS VMware Unlocker Patch Tool. That’s why we’ve supplied VMware Workstation Player first, which is a pretty useful virtual machine program. There are two types of VMware Workstation. The first one is the VMware Workstation Pro, and the next one is the VMware Workstation Player. We are going to explain more and also make you more aware.
VMWARE UNLOCKER
The VMware Workstation Pro is the top edition of this VMware Workstation and is somewhat expensive. Here’s the URL to buy it. The VMware Workstation Player is your free version of this VMware Workstation, free for students or other personal use. When you install VMware Workstation Guru or Player, it will have to install macOS VMware Unlocker Patch Tool to install macOS. That is because, as we have mentioned previously, VMware straightly supports macOS on VMware in Windows. That’s because Apple does not let its operating system to be set up someplace else except on its hardware. That includes the complete of its operating system such as iOS, macOS, WatchOS.
MACOS MOJAVE
Update following the update comes in Apple. Following macOS High Sierra, macOS Mojave, and then macOS Catalina. These upgrades come really late for Apple fans and even Windows macOS fans. The main reason is, Windows users may even install macOS High Sierra, set up macOS Mojave, and set up macOS Catalina on their Windows PC. All these are possible because of these essential tools, especially macOS Catalina VMware Unlocker Patch Tool, macOS Mojave VMware Unlocker Patch Tool, macOS High Sierra Unlocker Patch Tool. The only blackened tool which is important is VMware Workstation set up beforehand. Once the VMware is set up, it is pretty easy to install macOS VMware Unlocker Patch Tool on Windows.
While we have some idea about what’s VMware, it is kinds and also catch it in the previous post. Now it is time to Understand about VMware Unlocker Patch Tool for macOS (Unlocker for VMware). Here is everything you need to know about macOS High Sierra VMware Unlocker.
VMware Unlocker Patch Tool, which is also frequent as VMware Unlocker for macOS, macOS VMware Unlocker, macOS Mojave Unlocker, and Unlocker for VMware. These are the most common names of the Unlocker, which we know. That means if any of these is explained, you should likely they are calling off VMware Unlocker Tool. The VMware Unlocker Patch is actually a set of tools that’s a particular program like some other software such as VMware Workstation.
DOWNLOAD UNLOCKER FOR VMWARE PATCH TOOL
Although it isn’t required to patch VMware for installing macOS on Mac, even if it’s to a virtual machine, that’s because Apple supports installing macOS within Mac but not external. This specific tool or application includes a few and much more of the technical tools such as VMware-vmx, vmwarebase.dll, VMware base, which completely functions to spot and alter VMware Workstation’s configurations, options and also downloads the VMware Tools for your specific machine. In the end, it will help run and install macOS on VMware using all the options that macOS Unlocker does.
To install and operate macOS on VMware on Windows, we certainly need VMware Unlocker, in which case, we have provided macOS VMware Unlocker. Download VMware Unlocker Patch Tool for macOS (Unlocker for VMware). With this, there is no chance to install macOS Catalina on VMware. It is nearly impossible. So select a copy of this in the download link below.
This Unlocker for VMware works for any VMware version such as VMware Workstation 15, VMware Workstation 14, or other.
When you’ve downloaded it, extract it and proceed with steps to set up VMware Unlocker Patch Tool.
INSTALL MACOS UNLOCKER FOR VMWARE PATCH TOOL (UNLOCKER FOR VMWARE)
Macos Sierra Patcher Tool For Unsupported Macs Windows 10
When installing macOS is simple with those tools, there’s no reason not to take action. It doesn’t make sense. Fifa 2012 for mac. Irrespective of which Windows version and VMware Workstation, the VMware Unlocker is the best instrument to help us set up macOS Catalina on VMware. Regrettably, installing macOS on VMware on AMD does not operate for now. But it works on VirtualBox for many. We’ve established an exclusive tutorial on How to Install macOS Big Sur on VirtualBox on Windows.
To set up VMware Unlocker Tool, initially, installing VMware Workstation is demanded. Just VMware Fusion doesn’t work, and many others like VMware Workstation and Player works.
High Sierra Patcher Dosdude1
Whenever the VMware is set up, shut it if it’s open.
Now browse to the VMware Unlocker documents and click on win-install, and select Run As Administrator.
This can run the command prompt and will automatically close.
Great! The VMware has been patched, and it is now ready to do the job.
Fire up VMware and click on Create a New Virtual Machine.
Next up, click on the magician.
Macos High Sierra Patcher Tool For Unsupported Mac Pro Early 2008 3.1
Then select I’ll set up the operating system later.
Macos High Sierra Patcher Tool Download
So there it is! The Apple Mac OS X is currently there with its version in the drop-down menu. Select macOS 10.15 or 10.14 or anything version and click on Next.
Mac Os Sierra Patch Tool
Wallpaper for mac os x hd. Following this, then proceed with the setup from the tutorial we have provided below.
Macos High Sierra Patcher Download
Macos Sierra Patcher Tool For Unsupported Macs 7
That was about VMware Unlocker Patch Tool. With all these, we end up this post now. I am hoping it works, and it should help. When something we’ve left or might love to include or create some nice suggestions, we are delighted to hear.
Macos High Sierra Patcher
0 notes
Text
300+ TOP iOS Interview Questions and Answers
iOS Interview Questions for freshers experienced :-
1.What is latest iOS version? The latest version of iOS is 13. 2. What is the output of the following Program? let numbers = let numberSum = numbers.reduce(0, { $0 + $1}) 10 3. Conversion of Error to optional Value is used as a method to handle Errors in Swift (True/False) True 4. Structures can be inherited(True/False) Flase 5. What is the Output of Following Program var randomly Array: = print (randomArray) Compilation Error (1 is an Int not object) 6. What is the Output Of Following Program class FirstClass { func doFunction() { print(“I am superclass”) }} class SecondClass: Firstclass { override func doFunction() { print(“I am subclass”) }} let object = SecondClass() object.doFunction() I am subclass 7. What is ARC? Automatic Reference Counting 8. What is ARWorld Map? An ARWorldMap object contains a snapshot of all the spatial mapping information that ARKit uses to locate the user’s device in real-world space. 9. How shared AR Experience is Created? Once the AR world map created from once device is transferred to the other device using P2P connectivity or some other reliable source, the other devices can also have the same AR experience similar to the first device. To create an ongoing shared AR experience, like placing an AR object, When one user taps in the scene, the app creates an anchor and adds it to the local ARSession, instead of sending the whole map we can serializes that ARAnchor using Data and sends it to other devices in the multipeer session. 10. What are the main UITableViewDataSource methods that are needed to display data in table view? numberOfSection, numberOfRowsInSection, cellForRowAtIndexPath

iOS Interview Questions 11. What are the two basic things that are needed to create an NSFetchRequest in CoreData? EntityName, SortDescriptor/NSPredicate 12. What are Tuples in Swift? Tuples are Temporary container for Multiple Values. It is a comma-separated list of types, enclosed in parentheses. In other words, a tuple groups multiple values into a single compound value. 13. What are the Control Transfer Statements in swift? break, continue, fallthrough, return, throw 14. What are closures and write an example program for closure? Closures are self-contained blocks of functionality that can be passed around and used in code. var addClosure = { (a: Int, b: Int) in return a + b } let result = addClosure(1,2) print(result) 15. Briefly explain reference types and value types with examples? Classes are reference types and Structures are value types. When a class is assigned to variable and copied only the reference to the original value are passed and so any consecutive changes to the assigned values will also affect the original value. But in struct when it is assigned to another variable a copy is generated which will not have any effect on the original value when changed. 16. What are the features of Swift ? Variables are always initialized before use. Memory is managed automatically. Arrays and integers are checked for overflow. Switch function can be used instead of using “if” statement. It eliminates the classes that are in unsafe mode. 17. What is the significance of “?” in Swift? The question mark (?) is used during the declaration of a property can make a property optional. 18. What Is Initialization ? This process involves setting an initial value for each stored property on that instance and performing any other setup or it is required before the new instance is ready for use. e.g.: keyword: init() { // code initialization here. } 19. What is NSURL Session? NSURL Session is a replacement for NSURL Connection, and similarly it is both a distinct class and also a group of related APIs. 20. What are the Session Configuration? NSURL Session Configuration provides a few factory methods to create your session configuration. The methods are: Default Configuration – provides anccess to the global singleton storage and settings. Ephemeral Session Configuration – a private, in-memory only storage Background Session Configuration – out-of-process configuration that is keyed to the identifier string. 21. How to define kSomeConstant ? e.g.:let kSomeConstant: Int = 80 It is Implicitly defined as an integer. If you want to be more specific you can specify it like above e.g.. 22. Define hash value vs raw value ? HashValue:- If you had the enum as we had declared earlier without the type, there is no rawValue available but instead you get a member called hashValue. RawValue:- The rawValue on the other hand is a type value that you can assign to the enum members. 23. Define Static Binding and Dynamic Binding? Static Binding: It is resolved at “Compile time” Method overloading is an example of static binding. Dynamic Binding: It is virtual binding resolved at a “Run Time”. Method overriding is an example of Dynamic Binding. 24. What is Method Overloading? It defines a method with the same name many times with different arguments. These kind of feature is known as Method Overloading. 25. What is Method Overriding? If we define a method in a class, and we know that a subclass might need to provide a different version of the method. When a subclass provides a different implementation of the method defined in a superclass, with the same name, arguments and return type, that is called Overriding. The implementation in the subclass overwrites the code provided in the superclass. 26. What is QOS? QOS – Quality of Service QOS can applied all over iOS as well. One can Prioritize queues, thread objects, dispatch queues and POSIX threads.By assigning the correct priority for the work, iOS apps remain quick, snappy and responsive. 27. What is User Interactive? It works happened on the main thread, Immediately in order to provide a nice user experience. e.g run at while in Drawing and Ui animations. 28. What is User Initiated? It works when the user kicks off and should yield immediate results. It Performs asynchronously that are initiated from the UI This will get the mapped in to the high Priority Global Queue. This work must be complete for the user to continue. 29. What is DeadLock? A deadlock is a situation where two different programs or processed depend on one another for completion, either because both are using. It is the situation where a set of processes are blocked because each process is holding a resource and waiting for another resource acquired by some other process. 30. Define Run Loop? Run loop mode is a collection of input sources and times to be monitored and the collection of run loop observes to be notified. Become an iOS Expert with Certification in 25hours 31. What is iOS? iOS (intelligent Operating System) is a mobile operating system created and developed by Apple Inc. exclusively for its hardware with the help their own creating language called Objective C and Swift 32. What is the difference between the cocoa and cocoa Touch? Cocoa includes Foundation and AppKit frameworks for developing applications that run on Mac OS X. Cocoa Touch includes Foundation and UI framework for developing applications that run on iPhone ,iPod Touch and iPad. 33. What are the different property types? strong, weak, assign,copy,retain,atomic and non atomic. 34. Explain frame and bound of a View in ios? Bound is the rectangle that relative to its own coordinate system (0,0. Frame is the rectangle that relative to the superview . 35. What are the design patterns in ios? Singleton Delegate Model View Controller Observer Facade Command Template Method 36. Types of Dispatch Queues Serial :execute one task at a time in the sequential order Concurrent: execute one or more tasks concurrently. Main dispatch queue: executes tasks on the application’s main thread. 37. key value coding(KVC) and key value observing (KVO) Key-Value-Coding (KVC) : accessing a property or value using a string. Key-Value-Observing (KVO) : observe changes to a property or value. 38. Application life cycle application:willFinishLaunchingWithOptions application:didFinishLaunchingWithOptions applicationDidBecomeActive applicationWillResignActive applicationDidEnterBackground applicationWillEnterForeground applicationWillTerminate 39. Different states of application Not running Inactive Active Background Suspended 40. View life cycle loadView loadViewIfNeeded viewDidLoad viewWillAppear viewWillLayoutSubviews viewDidLayoutSubviews viewDidAppear viewWillDisappear viewDidDisappear 41. whats is delegate and notification Delegate: Creates the relationship between the objects. It is one to one communication. Notification: These are used if an object wants to notify other objects of an event. It is one to multiple communication. 42. What is the significance of “?” in Swift? The question mark (?) is used during the declaration of a property can make a property optional. If the property does not hold a value. 43.What are the Levels of Priority in QOS? User Interactive User Initiated Utility Background 44. How to write optional value in swift ? An optional that can hold either a value or no value. Optionals are written by appending a ‘?’ 45. How to unwrap the optional value in swift ? The simplest way to unwrap an optional value is to add a ‘!’ after the optional name. This is called “force unwrapping”. 46. Use of if -let statement in swift By using if- let ,we can unwrap an optional in safe way, otherwise nil it may crash the app sometimes. 47. What is id in Objective C? id is a type of any data type. It specifies a reference to any Objective-C object . 48. What is Categories in Objective C? Categories provide the ability to add functionality to an object without changing the actual object. 49. What is Extension in swift? Extension add new functionality to an existing class, structure, enumeration, or protocol type. Extensions are similar to categories in Objective-C. 50. Define Class methods and instance methods . An instance method accessed an instance of the class A class method accessed to the class itself. 51. How to add swift file to the existing Objective C project? If you add a new swift file to the existing project xcode will ask you to add Objective-C bridging header. 52. What is auto layout and why it uses? Auto Layout is a constraint-based layout system.By using this auto layout developers to create an adaptive interface that responds appropriately to changes in screen size and device orientation. 53.How many ways constraints can create programmatically? Three ways to creating constraints programmatically : layout anchors NSLayoutConstraint class Visual Format Language. 54. Is it possible to create multiple storyboards in single project. If yes how to switch from one storyboard to another? Yes, By using segue and Storyboard Reference we can switch from one storyboard to another storyboard. 55. What is let and var in swift? Let is immutable variable or a constant that means it cannot changed where as var is mutable variable meaning that it can be changed. 56. What is IBOutlet and IBAction in ios ? Interface Builder outlet(IBOutlet) is a variable which is a reference to a UI component. Interface Builder action(IBAction) is a function which is called when a specific user interaction occurs. 57. What is bundle in ios? A bundle is a directory in the file system that contains the all executable code and related resources such as images and sounds together in one place. 58. when will use deinit in swift? deinit can be used if you need to do some action or cleanup before deallocating the object. 59. what is the responsibility of URLSession? URLSession is responsible for sending and receiving HTTP requests. 60. what are the types of URLSessionTask? URLSessionDataTask URLSessionUploadTask URLSessionDownloadTask 61. Main difference between NSURLSession and NSURLConnection NSURLConnection: when our App goes to background mode or not running mode using NSURLConnection, everything we have received or sent were lost. NSURLSession: NSURLSession gives your app the ability to perform background downloads when your app is not running or app is suspended. 62. what is JSON? JSON ( JavaScript Object Notation) is a text-based, lightweight and easy way for storing and exchanging data. 63. what is JSONSerialization ? The built in way of parsing JSON is called JSONSerialization and it can convert a JSON string into a collection of dictionaries, arrays, strings and numbers . 64. Difference between core data and sqlite? Core Data is a framework that can be used for managing an object graph. Core Data is not a database.Core Data can use a SQLite database as its persistent store, but it also has support for other persistent store types, including a binary store and an in-memory store. SQLite is a lightweight relational database. 65. Difference between Keychain and NSUserDefaults? In Keychain: If user removed the app from device the saved UserName and Password still is there. In NSUserDefaults: If user removed the app from device the saved UserName and Password also removed. 66. what is app thinning. How to reduce app size? App thinning is concept of reducing the app size while downloading.Using the below methods we can reduce the app size App Slicing Bitcode On-Demand Resource 67. what is Bundle ID? The Bundle ID is the unique string that identifies your application to the system. 68. What are the types of certificates required for developing and distributing apps? Development and distributing certificates. Development certificate: used for development Distribution certificates: used for submitting apps to app store or in house 69. what are binaries required to install the app to device? .ipa, .app 70. what are the advantages of swift over Objective C? Readability Maintenance Safer Platform Less Code & Less Legacy Speed 71. What is latest xcode version and its features? Xcode latest version is 10.1 The Dark Mode instantly Swift Source Code Editor Debugging the Tools Playground for Machine Learning Source Control 72. What are new features in ios 12 for developers ? ARKit 2 Siri Shortcuts CarPlay for Navigation Apps Health Records Natural Language 73. How to pass data between view controllers Segue, in prepareForSegue method (Forward) Delegate (Backward) Setting variable directly (Forward) 74. What is the Output of the Following Program? class Cricket { var score = 100 } var player1 = Cricket() var player2 = player1 player2.score = 200 print((player1.score),(player2.score)) 200,200 iOS Questions and Answers Pdf Download Read the full article
0 notes
Link
original source : https://stackoverflow.com/questions/16176911/nsurl-path-vs-absolutestring
Question 1:
What is the actual difference between these methods?
Let's analyze this writing 6 lines of code - 3 for a local and 3 for http URL - and playing around with them a little bit.
Let's create an NSURL using the file:// scheme. If you ask yourself why there are 3 / after file: you should remember that a complete URL exists of a scheme (file:// and absolute or relative path (you can find more information on creating URLs in RFC 1808 on page 3). We use an absolute path which starts with a / so that we end up with ///.
NSURL *aLocalURL = [NSURL URLWithString:@"file:///Users/dennis/Desktop/"]; NSLog(@"absolute string: %@", aLocalURL.absoluteString); NSLog(@"path: %@", aLocalURL.path);
Output:
absolute string: file:///Users/dennis/Desktop/ path: /Users/dennis/Desktop
So we see that absoluteString still knows its scheme whereas path doesn't have this information anymore.
Note: path is a file (directory) URL and as the docs state, the trailing slash it is stripped.
Now let's take a look at remote URLs. With these type of URLs most people are more familiar. We create it using the same procedure as for local URLs. Our scheme is now http:// and our pathis www.apple.com/.
NSURL *anHTTPURL = [NSURL URLWithString:@"http://www.apple.com/"]; NSLog(@"absolute string: %@", anHTTPURL.absoluteString); NSLog(@"path: %@", anHTTPURL.path);
Output:
absolute string: http://www.apple.com/ path: /
Again, we see that the absolute string still knows its scheme but path is now /. So path seems to be not an appropriate way when working with remote URLs.
However, when we have an URL like http://www.apple.com/index.html we get
absolute string: http://www.apple.com/index.html path: /index.html
Reading the docs helps here, too:
Per RFC 3986, the leading slash after the authority (host name and port) portion is treated as part of the path.
So the path is everything beginning (and including) at the slash after the authority which is www.apple.com in our case.
Question 2
Is there a time when one should be used over the other?
From the docs: (method: path)
If this URL object contains a file URL (as determined with isFileURL), the return value of this method is suitable for input into methods of NSFileManager or NSPathUtilities.
In my opinion that sentence states clearly that you should use path when you work with NSFileManager or NSPathUtilities.
Conclusion:
When you work with remote URLs you (generally) use absoluteString, otherwise the result is not what you (generally) want. When you work with local URLs use path.
Sources: http://www.ietf.org/rfc/rfc1808.txt http://www.ietf.org/rfc/rfc3986.txt NSURL Class Reference
내가 추가로 기입하는 내용
let documentsUrl = FileManager.default.urls(for: .applicationSupportDirectory, in:.userDomainMask).first!
let url = documentsUrl.appendingPathComponent("QuestionModel.sqlite")
print ("?? \(url.path) ??\n")
print ("++ \(url.absoluteString) ++\n")
위와 같은 코드를 이용하여 application support 폴더내 화일에 접근하려는 경우
url.path
?? /Users/owner/Library/Developer/CoreSimulator/Devices/7C444728-467E-4085-8E94-6298D30B68D1/data/Containers/Data/Application/055751E5-8656-4B84-AE74-99AB01522080/Library/Application Support/QuestionModel.sqlite ??
url.absoluteString
++ file:///Users/owner/Library/Developer/CoreSimulator/Devices/7C444728-467E-4085-8E94-6298D30B68D1/data/Containers/Data/Application/055751E5-8656-4B84-AE74-99AB01522080/Library/Application%20Support/QuestionModel.sqlite ++
와 같이 결과가 된다. path의 경우 space가 정상적으로 표시된다. absoluteString의 경우는 %20으로 표현된다.
0 notes
Link
ブログトップ Salesforce MobileSDKのセッション管理について考えてみた はじめに みなさん、こんにちは。 走れるシステムエンジニア、溝口です。 Apple Watchが予約開始となりましたが、みなさん予約はされましたか!? 僕は即予約、アンド定時ダッシュで試着をして、Apple Watcherとしての想像と夢を膨らませておりました。 もちろん、冶金専門家が標準的な金よりも最大2倍硬くなるように開発した18Kで仕立てられた200万円超えのApple Watch Editionは華麗にスルーし、完全予定調和のSportsモデルを予約しました。 届くのが楽しみですね! Hybridアプリのセッション管理 それでは本題に参りましょう! 今回は先日執筆した「 WKWebViewとSalesforceでHybridアプリ開発」の補足的な内容となります。 前回の記事を見て気付いた方も居らっしゃると思いますが、WebViewでVisualforceのページを表示した際に、セッションの管理をどうするか、という点が考慮されていませんでした。 では、具体的に前回の記事の実装だとどうなるか見て行きましょう。 ここまでは前回と同じですね、普通にWebViewにVisualforceで実装した詳細画面が表示されています。 このままホームボタンを押して、セッション有効期間が切れるまで放置してみましょう。 ------------数時間後------------- さて、セッションが切れる時間となりました。 それでは、再度サンプルアプリを開いて見ましょう。 oh...、これはイケてないですね。 この様に、「セッションが切れた時にどうするか」という観点での実装が足りていなかった為、この様な現象が起きてしまいました。 Salesforceとの通信前にセッションのチェック 意図せずログイン画面が表示されてしまうのは、WebViewでVisualforceの画面を開いたままにした場合、「sid=」で付与しているセッションID(アクセストークン)の有効期間が切れてしまったまま、再度リクエストを投げてしまうことが原因でした。 「じゃあ、Salesforceとの通信の前に認証を行い、セッションのチェックをしよう!」ということで、前回のコードを以下の様に修正しました。 import UIKit import WebKit class DetailViewController: BaseViewController, WKNavigationDelegate, SFOAuthCoordinatorDelegate { var accountItem: AccountModel? var accountWebView: WKWebView? init(nibName: String, accountItem: AccountModel) { super.init(nibName: nibName, bundle: nil) self.accountItem = accountItem } required init(coder aDecoder: NSCoder) { fatalError("init(coder:) has not been implemented") } override func didReceiveMemoryWarning() { super.didReceiveMemoryWarning() } override func viewDidLoad() { super.viewDidLoad() SFRestAPI.sharedInstance().coordinator.delegate = self; setupDesign() setupWebView() } override func viewWillAppear(animated: Bool) { SVProgressHUD.showWithStatus("認証中") SFRestAPI.sharedInstance().coordinator.authenticate() } override func viewDidDisappear(animated: Bool) { SVProgressHUD.dismiss() } func setupDesign() { let refreshButton: UIBarButtonItem = UIBarButtonItem(barButtonSystemItem: .Refresh, target: self, action: "tapRefleshButton") self.navigationItem.rightBarButtonItem = refreshButton } func setupWebView() { accountWebView = WKWebView() self.view = accountWebView! accountWebView!.navigationDelegate = self } func createAccountRequest() NSURLRequest { let instanceUrl: String = SFRestAPI.sharedInstance().coordinator.credentials.instanceUrl.description let accessToken: String = SFRestAPI.sharedInstance().coordinator.credentials.accessToken let authUrl: String = instanceUrl + "/secur/frontdoor.jsp?sid=" + accessToken + "&retURL=" let accountUrl: String = instanceUrl + "/apex/AccountMobile?id=" + accountItem!.salesforceId! let request: NSURL = NSURL(string:authUrl + accountUrl)! let urlRequest: NSURLRequest = NSURLRequest(URL: request) return urlRequest } func webView(webView: WKWebView, didStartProvisionalNavigation navigation: WKNavigation!) { SVProgressHUD.showWithStatus("読み込み中") } func webView(webView: WKWebView, didFinishNavigation navigation: WKNavigation!) { SVProgressHUD.dismiss() self.title = accountWebView!.title } func webView(webView: WKWebView, didFailNavigation navigation: WKNavigation!, withError error: NSError) { SVProgressHUD.dismiss() } func webView(webView: WKWebView, decidePolicyForNavigationAction navigationAction: WKNavigationAction, decisionHandler: (WKNavigationActionPolicy) Void) { if (navigationAction.request.URL!.absoluteString!.hasPrefix("completed://")) { self.navigationController!.popViewControllerAnimated(true) } decisionHandler(WKNavigationActionPolicy.Allow) } func tapRefleshButton() { accountWebView!.reload() } func oauthCoordinatorDidAuthenticate(coordinator: SFOAuthCoordinator!, authInfo info: SFOAuthInfo!) { SVProgressHUD.dismiss() accountWebView!.loadRequest(createAccountRequest()) } func oauthCoordinator(coordinator: SFOAuthCoordinator!, didBeginAuthenticationWithView view: UIWebView!) {} } どこが変わったのか1つずつ見て行きましょう。 override func viewDidLoad() { super.viewDidLoad() SFRestAPI.sharedInstance().coordinator.delegate = self; setupDesign() setupWebView() } まず、ViewDidLoadでSFOAuthCoordinatorのDelegateを自身のクラスへ実装することを宣言します。 こうすることで、認証処理を行った後の処理を自身のクラス内で受け取れる様になります。 override func viewWillAppear(animated: Bool) { SVProgressHUD.showWithStatus("認証中") SFRestAPI.sharedInstance().coordinator.authenticate() } そしてViewWillAppearにて認証処理を実行するメソッドを呼び出します。 後は非同期で認証処理が走り、セッションID(アクセストークン)が切れていた場合、リフレッシュトークンにてセッションの書き換えが実行されます。 func oauthCoordinatorDidAuthenticate(coordinator: SFOAuthCoordinator!, authInfo info: SFOAuthInfo!) { SVProgressHUD.dismiss() accountWebView!.loadRequest(createAccountRequest()) } 最後に、認証が完了した際にこのメソッドが呼ばれます。 今回はこのDelegateメソッド内にSalesforceへリクエストを投げるメソッドを実装している為、必ず 認証(セッションの確認) → Salesforceへ通信 という経路を辿ることが出来ます。 最後に 如何だったでしょうか? 今回はちょっとしたTips的な内容となってしまいましたが、WebViewを使う上でセッションの管理をどう実装するのか、という部分は、モバイル開発を行う上でも重要なポイントと言えると思います。 今後はLightningなども出てきてモバイルの市場も更に活性化しそうですし、色々な点を考慮しながら楽しく開発していきたい���すね!
0 notes
Text
How to install Application via Test Flight in IOS ?
How to install Application via Test Flight in IOS ?
I found something on how to install Application via Test Flight in IOS .
Here, appStoreReceiptURL is an instance property, which we can find from main bundle.
Here, I am adding snippet for both Objective-C and Swift.
Objective-C
- (BOOL)isTestFlight { NSURL *appStoreReceiptURL = [[NSBundle mainBundle] appStoreReceiptURL]; if (appStoreReceiptURL != NULL) { return…
View On WordPress
0 notes
Text
0 notes
Text
Disable Apple Transport Security iOS Tutorial
Apple Transport Security(ATS) requires network requests to be sent over a secure connection. Apple Transport Security is enabled by default, so when it is still needed to make HTTP requests to an external source out of your control, ATS needs to be disabled. In this tutorial a request to a local server will be made and ATS will be disabled to make the connection. This tutorial is made with Xcode 10 and built for iOS 12.
Open Xcode and create a new Single View App.
For product name, use IOSDisableATSTutorial and then fill out the Organization Name and Organization Identifier with your customary values. Enter Swift as Language and choose Next.
In Mac OS X, the Python language including a web server module is installed by default. Open a terminal and enter the following commands to start the web server
mkdir web cd web echo "testing Web Server" > index.html python http.server
The http.server listens at port 8000 by default. Test this connection by opening a new terminal to enter the following command
wget -qO- localhost:8000
This will give the output "testing Web Server" to indicate the Web Server is serving requests. While leaving the terminal open go back to the Xcode Project and navigate to the ViewController.swift file and add the following method.
func webRequest() { let url = NSURL(string: "http://localhost:8000") let task = NSURLSession.sharedSession().dataTaskWithURL(url!) { (data, response, error) in if let dataReturned = data { print(NSString(data: dataReturned, encoding: NSUTF8StringEncoding)!) } } task.resume() }
This method creates an HTTP GET requests at the specified URL and prints the result in the console. Add the following line at the end of the viewDidLoad method
webRequest()
Build and Run the program. This will result in the following error in the console.
To avoid the error Apple Transport Security needs to be disabled. Go to the Info.plist. Right-click on the Information Property List at the top of the file and choose Add Row. Select the Key "App Transport Security Settings" and choose Type Dictionary. Add another row inside the new key and select "Allow Arbitrary Loads". The type will be Boolean with a value of YES. The info.plist should now look like this.
Build and Run the project again. Now the web request will succeed.
You can download the source code of the IOSDisableATSTutorial at the ioscreator repository on Github.
0 notes
Photo

Build a React Native Application & Authenticate with OAuth 2.0
This article was originally published on the Okta Developer Blog. Thank you for supporting the partners who make SitePoint possible.
With Okta and OpenID Connect (OIDC), you can easily integrate authentication into a React Native application and never have to build it yourself again. OIDC allows you to authenticate directly against the Okta API, and this article shows you how to do just that in a React Native application. Today you’ll see how to log a user into your React Native application using an OIDC redirect via the AppAuth library.
React Native is a pretty slick framework. Unlike Ionic and other hybrid mobile frameworks, it allows you to use web technologies (React and JavaScript) to build native mobile apps. There is no browser or WebView involved, so developing a mobile app with React Native is similar to using the native SDK in that you’ll do all your testing on an emulator or device. There is no way to test it in your browser like there is with Ionic. This can be a benefit in that you don’t have to write code that works in-browser and on-device separately.
If you look at Google Trends, you can see that React Native is even more popular than Android and iOS for native development!
//<![CDATA[ trends.embed.renderExploreWidget("TIMESERIES", {"comparisonItem":[{"keyword":"ios development","geo":"","time":"today 12-m"},{"keyword":"android development","geo":"","time":"today 12-m"},{"keyword":"react native","geo":"","time":"today 12-m"}],"category":0,"property":""}, {"exploreQuery":"q=ios%20development,android%20development,react%20native&date=today 12-m,today 12-m,today 12-m","guestPath":"https://trends.google.com:443/trends/embed/"}); //]]>
Today I’m going to show you how to develop a React Native app with the latest and greatest releases. At the time of this writing, that’s React 16.2.0 and React Native 0.54.0. You’ll create a new app, add AppAuth for authentication, authenticate with Okta, and see it running on both iOS and Android.
AppAuth is a client SDK for native apps to authenticate and authorize end-users using OAuth 2.0 and OpenID Connect. Available for iOS, macOS, Android and Native JS environments, it implements modern security and usability best practices for native app authentication and authorization.
Create Your React Native Application
React has a create-react-app command-line tool (CLI) that you can use to create new React apps. React Native has a similar tool called Create React Native App. Before you install it, make sure you have Node v6 or later installed.
Install create-react-native-app and create a new project called okta-rn:
npm install -g create-react-native-app create-react-native-app okta-rn cd okta-rn npm start
Running these commands will result in your terminal prompting you with some options:
To view your app with live reloading, point the Expo app to this QR code. You'll find the QR scanner on the Projects tab of the app. [QR Code] Or enter this address in the Expo app's search bar: exp://172.31.98.12:19000 Your phone will need to be on the same local network as this computer. For links to install the Expo app, please visit https://expo.io. Logs from serving your app will appear here. Press Ctrl+C at any time to stop. › Press a to open Android device or emulator, or i to open iOS emulator. › Press q to display QR code. › Press r to restart packager, or R to restart packager and clear cache. › Press d to toggle development mode. (current mode: development)
If you’re on a Mac, press i to open iOS emulator. You will be prompted to install/open with Expo, then presented with the rendered App.js.
If you’re on Windows or Linux, I’d suggest trying the Android emulator or your Android device (if you have one). If it doesn’t work, don’t worry, I’ll show you how to make that work later on.
TIP: You can use TypeScript instead of JavaScript in your React Native app using Microsoft’s TypeScript React Native Starter. If you decide to go this route, I’d recommend following the steps to convert your app after you’ve completed this tutorial.
React Native and OAuth 2.0
In this example, I’ll use React Native App Auth, a library created by Formidable. The reason I’m using this library is three-fold: 1) they provide an excellent example that I was able to make work in just a few minutes, 2) it uses AppAuth (a mature OAuth client implementation), and 3) I was unable to get anything else working.
I tried react-native-oauth but discovered it required using an existing provider before adding a new one. I only wanted to have Okta as a provider. Also, it’s high number of issues and pull requests served as a warning sign.
I tried react-native-simple-auth but had problems getting the deprecated Navigator component to work with the latest React Native release.
I tried doing this OAuth 2 with React Native tutorial, but also had problems redirecting back to my app.
Create Native Application in Okta
Before you add AppAuth to your React Native application, you’ll need an app to authorize against. If you don’t have a free-forever Okta Developer account, get one today!
Log in to your Okta Developer account and navigate to Applications > Add Application. Click Native and click Next. Give the app a name you’ll remember (e.g., React Native), select Refresh Token as a grant type, in addition to the default Authorization Code. Copy the Login redirect URI (e.g., com.oktapreview.dev-158606:/callback) and save it somewhere. You’ll need this value when configuring your app.
Click Done and you should see a client ID on the next screen. Copy and save this value as well.
Add React Native AppAuth for Authentication
You’ll need to “eject” the native configuration for your app, which is normally hidden by create-react-native-app.
npm run eject
When prompted to answer questions, use the following answers:
Question Answer How would you like to eject from create-react-native-app? React Native What should your app appear as on a user’s home screen? Okta RN What should your Android Studio and Xcode projects be called? OktaRN
To install App Auth for React Native, run the following commands:
npm i [email protected] npm i react-native link
After running these commands, you have to configure the native iOS projects. I’ve copied the steps below for your convenience.
iOS Setup
React Native App Auth depends on AppAuth-ios, so you have to configure it as a dependency. The easiest way to do that is to use CocoaPods. To install CocoaPods, run the following command:
sudo gem install cocoapods
Create a Podfile in the ios directory of your project that specifies AppAuth-ios as a dependency. Make sure that OktaRN matches the app name you specified when running npm run eject.
platform :ios, '11.0' target 'OktaRN' do pod 'AppAuth', '>= 0.91' end
Then run pod install from the ios directory. This can take a while the first time, even on a fast connection. Now is a good time to grab a coffee or a scotch! 🥃
Open your project in Xcode by running open OktaRN.xcworkspace from the ios directory.
If you intend to support iOS 10 and older, you need to define the supported redirect URL schemes in ios/OktaRN/Info.plist as follows:
<key>CFBundleURLTypes</key> <array> <dict> <key>CFBundleURLName</key> <string>$(PRODUCT_BUNDLE_IDENTIFIER)</string> <key>CFBundleURLSchemes</key> <array> <string>{yourReversedOktaDomain}</string> </array> </dict> </array>
Below is what mine looks like after I changed my app identifier and added this key.
<key>CFBundleIdentifier</key> <string>com.okta.developer.reactnative.$(PRODUCT_NAME:rfc1034identifier)</string> <key>CFBundleURLTypes</key> <array> <dict> <key>CFBundleURLName</key> <string>$(PRODUCT_BUNDLE_IDENTIFIER)</string> <key>CFBundleURLSchemes</key> <array> <string>com.oktapreview.dev-158606</string> </array> </dict> </array>
Open AppDelegate.h in your Xcode project (OktaRN > OktaRN > AppDelegate.h) and add the lines with the + next to them below.
+ @protocol OIDAuthorizationFlowSession; @interface AppDelegate : UIResponder <UIApplicationDelegate> + @property(nonatomic, strong, nullable) id<OIDAuthorizationFlowSession> currentAuthorizationFlow; @property (nonatomic, strong) UIWindow *window; @end
This property holds the authorization flow information that started before you redirect to Okta. After Okta authorizes you, it redirects to the redirect_uri that’s passed in.
The authorization flow starts from an openURL() app delegate method. To add it, open AppDelegate.m and import AppAuth.h.
#import "AppAuth.h"
Then at the bottom of the class (before @end), add the openURL() method.
- (BOOL)application:(UIApplication *)app openURL:(NSURL *)url options:(NSDictionary<NSString *, id> *)options { if ([_currentAuthorizationFlow resumeAuthorizationFlowWithURL:url]) { _currentAuthorizationFlow = nil; return YES; } return NO; }
Build Your React Native App
Replace the code in App.js with the following JavaScript. This code allows you to authorize, refresh your access token, and revoke it.
import React, { Component } from 'react'; import { UIManager, LayoutAnimation } from 'react-native'; import { authorize, refresh, revoke } from 'react-native-app-auth'; import { Page, Button, ButtonContainer, Form, Heading } from './components'; UIManager.setLayoutAnimationEnabledExperimental && UIManager.setLayoutAnimationEnabledExperimental(true); const scopes = ['openid', 'profile', 'email', 'offline_access']; type State = { hasLoggedInOnce: boolean, accessToken: ?string, accessTokenExpirationDate: ?string, refreshToken: ?string }; const config = { issuer: 'https://{yourOktaDomain}/oauth2/default', clientId: '{clientId}', redirectUrl: 'com.{yourReversedOktaDomain}:/callback', additionalParameters: {}, scopes: ['openid', 'profile', 'email', 'offline_access'] }; export default class App extends Component<{}, State> { state = { hasLoggedInOnce: false, accessToken: '', accessTokenExpirationDate: '', refreshToken: '' }; animateState(nextState: $Shape<State>, delay: number = 0) { setTimeout(() => { this.setState(() => { LayoutAnimation.easeInEaseOut(); return nextState; }); }, delay); } authorize = async () => { try { const authState = await authorize(config); this.animateState( { hasLoggedInOnce: true, accessToken: authState.accessToken, accessTokenExpirationDate: authState.accessTokenExpirationDate, refreshToken: authState.refreshToken }, 500 ); } catch (error) { Alert.alert('Failed to log in', error.message); } }; refresh = async () => { try { const authState = await refresh(config, { refreshToken: this.state.refreshToken }); this.animateState({ accessToken: authState.accessToken || this.state.accessToken, accessTokenExpirationDate: authState.accessTokenExpirationDate || this.state.accessTokenExpirationDate, refreshToken: authState.refreshToken || this.state.refreshToken }); } catch (error) { Alert.alert('Failed to refresh token', error.message); } }; revoke = async () => { try { await revoke(config, { tokenToRevoke: this.state.accessToken, sendClientId: true }); this.animateState({ accessToken: '', accessTokenExpirationDate: '', refreshToken: '' }); } catch (error) { Alert.alert('Failed to revoke token', error.message); } }; render() { const {state} = this; return ( <Page> {!!state.accessToken ? ( <Form> <Form.Label>accessToken</Form.Label> <Form.Value>{state.accessToken}</Form.Value> <Form.Label>accessTokenExpirationDate</Form.Label> <Form.Value>{state.accessTokenExpirationDate}</Form.Value> <Form.Label>refreshToken</Form.Label> <Form.Value>{state.refreshToken}</Form.Value> </Form> ) : ( <Heading>{state.hasLoggedInOnce ? 'Goodbye.' : 'Hello, stranger.'}</Heading> )} <ButtonContainer> {!state.accessToken && ( <Button onPress={this.authorize} text="Authorize" color="#017CC0"/> )} {!!state.refreshToken && <Button onPress={this.refresh} text="Refresh" color="#24C2CB"/>} {!!state.accessToken && <Button onPress={this.revoke} text="Revoke" color="#EF525B"/>} </ButtonContainer> </Page> ); } }
Make sure to adjust config with your settings.
const config = { issuer: 'https://{yourOktaDomain}/oauth2/default', clientId: '{clientId}', redirectUrl: 'com.{yourReversedOktaDomain}:/callback', ... };
Change index.js to use OktaRN as the name of your app.
AppRegistry.registerComponent('OktaRN', () => App);
This code uses styled-components, so you’ll need to install that as a dependency.
NOTE: Make sure to navigate into the root directory of your project before running the commands below.
npm i styled-components
Then copy the components directory into your project’s root directory from Formidable’s example.
svn export https://github.com/FormidableLabs/react-native-app-auth/trunk/Example/components
Grab the background image that’s referenced in the Page.js component too.
svn export https://github.com/FormidableLabs/react-native-app-auth/trunk/Example/assets
Run on iOS Simulator
Run your app with npm run ios.
You should see a screen that says “Hello, stranger.” Click on Authorize, and you’ll be prompted to continue or cancel.
Click Continue and you should see an Okta sign-in form. Enter your credentials, and you’ll be redirected back to the application.
You can click Refresh to watch the values for the access token and expire date change.
TIP: If animations happen slowly in iOS Simulator, toggle Debug > Slow Animations.
Android Setup
To configure the native Android project, start by upgrading the version of Gradle it uses.
cd android ./gradlew wrapper --gradle-version 4.6
React Native App Auth for Android depends on AppAuth-android, but you need to add the correct Android Support library version to your project.
Add the Google Maven repository to your android/build.gradle and upgrade the Android Tools dependency:
The post Build a React Native Application & Authenticate with OAuth 2.0 appeared first on SitePoint.
by Matt Raible via SitePoint https://ift.tt/2LmDPnq
0 notes
Text
Test
// URL from safari address bar.
NSURL *url = [NSURL URLWithString:@”https://youtu.be/DODLEX4zzLQ“];
NSURLRequest *request = [NSURLRequest requestWithURL:url];
[self.webView loadRequest:request];
View On WordPress
0 notes
Text
300+ TOP iOS Interview Questions and Answers
iOS Interview Questions for freshers experienced :-
1.What is latest iOS version? The latest version of iOS is 13. 2. What is the output of the following Program? let numbers = let numberSum = numbers.reduce(0, { $0 + $1}) 10 3. Conversion of Error to optional Value is used as a method to handle Errors in Swift (True/False) True 4. Structures can be inherited(True/False) Flase 5. What is the Output of Following Program var randomly Array: = print (randomArray) Compilation Error (1 is an Int not object) 6. What is the Output Of Following Program class FirstClass { func doFunction() { print(“I am superclass”) }} class SecondClass: Firstclass { override func doFunction() { print(“I am subclass”) }} let object = SecondClass() object.doFunction() I am subclass 7. What is ARC? Automatic Reference Counting 8. What is ARWorld Map? An ARWorldMap object contains a snapshot of all the spatial mapping information that ARKit uses to locate the user’s device in real-world space. 9. How shared AR Experience is Created? Once the AR world map created from once device is transferred to the other device using P2P connectivity or some other reliable source, the other devices can also have the same AR experience similar to the first device. To create an ongoing shared AR experience, like placing an AR object, When one user taps in the scene, the app creates an anchor and adds it to the local ARSession, instead of sending the whole map we can serializes that ARAnchor using Data and sends it to other devices in the multipeer session. 10. What are the main UITableViewDataSource methods that are needed to display data in table view? numberOfSection, numberOfRowsInSection, cellForRowAtIndexPath

iOS Interview Questions 11. What are the two basic things that are needed to create an NSFetchRequest in CoreData? EntityName, SortDescriptor/NSPredicate 12. What are Tuples in Swift? Tuples are Temporary container for Multiple Values. It is a comma-separated list of types, enclosed in parentheses. In other words, a tuple groups multiple values into a single compound value. 13. What are the Control Transfer Statements in swift? break, continue, fallthrough, return, throw 14. What are closures and write an example program for closure? Closures are self-contained blocks of functionality that can be passed around and used in code. var addClosure = { (a: Int, b: Int) in return a + b } let result = addClosure(1,2) print(result) 15. Briefly explain reference types and value types with examples? Classes are reference types and Structures are value types. When a class is assigned to variable and copied only the reference to the original value are passed and so any consecutive changes to the assigned values will also affect the original value. But in struct when it is assigned to another variable a copy is generated which will not have any effect on the original value when changed. 16. What are the features of Swift ? Variables are always initialized before use. Memory is managed automatically. Arrays and integers are checked for overflow. Switch function can be used instead of using “if” statement. It eliminates the classes that are in unsafe mode. 17. What is the significance of “?” in Swift? The question mark (?) is used during the declaration of a property can make a property optional. 18. What Is Initialization ? This process involves setting an initial value for each stored property on that instance and performing any other setup or it is required before the new instance is ready for use. e.g.: keyword: init() { // code initialization here. } 19. What is NSURL Session? NSURL Session is a replacement for NSURL Connection, and similarly it is both a distinct class and also a group of related APIs. 20. What are the Session Configuration? NSURL Session Configuration provides a few factory methods to create your session configuration. The methods are: Default Configuration – provides anccess to the global singleton storage and settings. Ephemeral Session Configuration – a private, in-memory only storage Background Session Configuration – out-of-process configuration that is keyed to the identifier string. 21. How to define kSomeConstant ? e.g.:let kSomeConstant: Int = 80 It is Implicitly defined as an integer. If you want to be more specific you can specify it like above e.g.. 22. Define hash value vs raw value ? HashValue:- If you had the enum as we had declared earlier without the type, there is no rawValue available but instead you get a member called hashValue. RawValue:- The rawValue on the other hand is a type value that you can assign to the enum members. 23. Define Static Binding and Dynamic Binding? Static Binding: It is resolved at “Compile time” Method overloading is an example of static binding. Dynamic Binding: It is virtual binding resolved at a “Run Time”. Method overriding is an example of Dynamic Binding. 24. What is Method Overloading? It defines a method with the same name many times with different arguments. These kind of feature is known as Method Overloading. 25. What is Method Overriding? If we define a method in a class, and we know that a subclass might need to provide a different version of the method. When a subclass provides a different implementation of the method defined in a superclass, with the same name, arguments and return type, that is called Overriding. The implementation in the subclass overwrites the code provided in the superclass. 26. What is QOS? QOS – Quality of Service QOS can applied all over iOS as well. One can Prioritize queues, thread objects, dispatch queues and POSIX threads.By assigning the correct priority for the work, iOS apps remain quick, snappy and responsive. 27. What is User Interactive? It works happened on the main thread, Immediately in order to provide a nice user experience. e.g run at while in Drawing and Ui animations. 28. What is User Initiated? It works when the user kicks off and should yield immediate results. It Performs asynchronously that are initiated from the UI This will get the mapped in to the high Priority Global Queue. This work must be complete for the user to continue. 29. What is DeadLock? A deadlock is a situation where two different programs or processed depend on one another for completion, either because both are using. It is the situation where a set of processes are blocked because each process is holding a resource and waiting for another resource acquired by some other process. 30. Define Run Loop? Run loop mode is a collection of input sources and times to be monitored and the collection of run loop observes to be notified. Become an iOS Expert with Certification in 25hours 31. What is iOS? iOS (intelligent Operating System) is a mobile operating system created and developed by Apple Inc. exclusively for its hardware with the help their own creating language called Objective C and Swift 32. What is the difference between the cocoa and cocoa Touch? Cocoa includes Foundation and AppKit frameworks for developing applications that run on Mac OS X. Cocoa Touch includes Foundation and UI framework for developing applications that run on iPhone ,iPod Touch and iPad. 33. What are the different property types? strong, weak, assign,copy,retain,atomic and non atomic. 34. Explain frame and bound of a View in ios? Bound is the rectangle that relative to its own coordinate system (0,0. Frame is the rectangle that relative to the superview . 35. What are the design patterns in ios? Singleton Delegate Model View Controller Observer Facade Command Template Method 36. Types of Dispatch Queues Serial :execute one task at a time in the sequential order Concurrent: execute one or more tasks concurrently. Main dispatch queue: executes tasks on the application’s main thread. 37. key value coding(KVC) and key value observing (KVO) Key-Value-Coding (KVC) : accessing a property or value using a string. Key-Value-Observing (KVO) : observe changes to a property or value. 38. Application life cycle application:willFinishLaunchingWithOptions application:didFinishLaunchingWithOptions applicationDidBecomeActive applicationWillResignActive applicationDidEnterBackground applicationWillEnterForeground applicationWillTerminate 39. Different states of application Not running Inactive Active Background Suspended 40. View life cycle loadView loadViewIfNeeded viewDidLoad viewWillAppear viewWillLayoutSubviews viewDidLayoutSubviews viewDidAppear viewWillDisappear viewDidDisappear 41. whats is delegate and notification Delegate: Creates the relationship between the objects. It is one to one communication. Notification: These are used if an object wants to notify other objects of an event. It is one to multiple communication. 42. What is the significance of “?” in Swift? The question mark (?) is used during the declaration of a property can make a property optional. If the property does not hold a value. 43.What are the Levels of Priority in QOS? User Interactive User Initiated Utility Background 44. How to write optional value in swift ? An optional that can hold either a value or no value. Optionals are written by appending a ‘?’ 45. How to unwrap the optional value in swift ? The simplest way to unwrap an optional value is to add a ‘!’ after the optional name. This is called “force unwrapping”. 46. Use of if -let statement in swift By using if- let ,we can unwrap an optional in safe way, otherwise nil it may crash the app sometimes. 47. What is id in Objective C? id is a type of any data type. It specifies a reference to any Objective-C object . 48. What is Categories in Objective C? Categories provide the ability to add functionality to an object without changing the actual object. 49. What is Extension in swift? Extension add new functionality to an existing class, structure, enumeration, or protocol type. Extensions are similar to categories in Objective-C. 50. Define Class methods and instance methods . An instance method accessed an instance of the class A class method accessed to the class itself. 51. How to add swift file to the existing Objective C project? If you add a new swift file to the existing project xcode will ask you to add Objective-C bridging header. 52. What is auto layout and why it uses? Auto Layout is a constraint-based layout system.By using this auto layout developers to create an adaptive interface that responds appropriately to changes in screen size and device orientation. 53.How many ways constraints can create programmatically? Three ways to creating constraints programmatically : layout anchors NSLayoutConstraint class Visual Format Language. 54. Is it possible to create multiple storyboards in single project. If yes how to switch from one storyboard to another? Yes, By using segue and Storyboard Reference we can switch from one storyboard to another storyboard. 55. What is let and var in swift? Let is immutable variable or a constant that means it cannot changed where as var is mutable variable meaning that it can be changed. 56. What is IBOutlet and IBAction in ios ? Interface Builder outlet(IBOutlet) is a variable which is a reference to a UI component. Interface Builder action(IBAction) is a function which is called when a specific user interaction occurs. 57. What is bundle in ios? A bundle is a directory in the file system that contains the all executable code and related resources such as images and sounds together in one place. 58. when will use deinit in swift? deinit can be used if you need to do some action or cleanup before deallocating the object. 59. what is the responsibility of URLSession? URLSession is responsible for sending and receiving HTTP requests. 60. what are the types of URLSessionTask? URLSessionDataTask URLSessionUploadTask URLSessionDownloadTask 61. Main difference between NSURLSession and NSURLConnection NSURLConnection: when our App goes to background mode or not running mode using NSURLConnection, everything we have received or sent were lost. NSURLSession: NSURLSession gives your app the ability to perform background downloads when your app is not running or app is suspended. 62. what is JSON? JSON ( JavaScript Object Notation) is a text-based, lightweight and easy way for storing and exchanging data. 63. what is JSONSerialization ? The built in way of parsing JSON is called JSONSerialization and it can convert a JSON string into a collection of dictionaries, arrays, strings and numbers . 64. Difference between core data and sqlite? Core Data is a framework that can be used for managing an object graph. Core Data is not a database.Core Data can use a SQLite database as its persistent store, but it also has support for other persistent store types, including a binary store and an in-memory store. SQLite is a lightweight relational database. 65. Difference between Keychain and NSUserDefaults? In Keychain: If user removed the app from device the saved UserName and Password still is there. In NSUserDefaults: If user removed the app from device the saved UserName and Password also removed. 66. what is app thinning. How to reduce app size? App thinning is concept of reducing the app size while downloading.Using the below methods we can reduce the app size App Slicing Bitcode On-Demand Resource 67. what is Bundle ID? The Bundle ID is the unique string that identifies your application to the system. 68. What are the types of certificates required for developing and distributing apps? Development and distributing certificates. Development certificate: used for development Distribution certificates: used for submitting apps to app store or in house 69. what are binaries required to install the app to device? .ipa, .app 70. what are the advantages of swift over Objective C? Readability Maintenance Safer Platform Less Code & Less Legacy Speed 71. What is latest xcode version and its features? Xcode latest version is 10.1 The Dark Mode instantly Swift Source Code Editor Debugging the Tools Playground for Machine Learning Source Control 72. What are new features in ios 12 for developers ? ARKit 2 Siri Shortcuts CarPlay for Navigation Apps Health Records Natural Language 73. How to pass data between view controllers Segue, in prepareForSegue method (Forward) Delegate (Backward) Setting variable directly (Forward) 74. What is the Output of the Following Program? class Cricket { var score = 100 } var player1 = Cricket() var player2 = player1 player2.score = 200 print((player1.score),(player2.score)) 200,200 iOS Questions and Answers Pdf Download Read the full article
0 notes
Text
Version 0.19b
In the last version, I tried to add a RevealViewController in order to display confirmation of what you stopped it at, and where it would have stopped. As you may have read. I couldn't get this to work. The code remains and it’s definitely something I’m planning on coming back to, however, right now I’ve decided that getting the game completed is more important than a feature which, although nice, isn’t required for the game to function.
Having said that. Neither is the ability to share your score on social media. But hey, this feature was always part of the plan. The RevealViewController wasn’t.
Sharing is going to happen after the game has finished. So it makes sense that everything happens on this ViewController.
I'm going to start by creating a ‘Share Score’ button and attached it to the FinalViewController.

In iOS 11, Apple has updated the way in which you are able to share to different places. Previously, you would have had to make a new function for each sharing option, then authenticate and check for details etc. Now it is much much easier. I created a new string called ‘socialMessage’ with no data. Then when I press the ‘share score’ button the first thing I do is set socialMessage to be my message that I want to send out. In this case:
socialMessage = "I played 'Hold Your Nerve' and got a score of " + StringToSegue + "! Can you beat me?"
Where StringToSegue is the final score that was passed over from the GameViewController.
Then I created a new UIActivityViewController called shareSheet. There are two options here: activityItems and applicationActiviities. activiityItems needs to be saved as an array, so within this array I’ve added socialMessage and an image containing the games logo. I then present the shareSheet.
That's it. Literally. If the user has Facebook, Twitter, Whatsapp installed the shareSheet will allow them to post to those various other applications. No other code required. It will also allow you to use this info with all of Apple built-in functions such as Message, Email, Print, AirDrop, Copy, Save to camera roll, Assign to contact etc. Whilst some of these are good and I want to include. Others aren’t appropriate. You can use the ‘excludeActivityTypes’ module to remove certain features from the UIActivityController. I removed the following from mine:
UIActivityType.print, UIActivityType.assignToContact, UIActivityType.copyToPasteboard,UIActivityType.saveToCameraRoll, UIActivityType.airDrop
You can see the outcome of the shareSheet below.
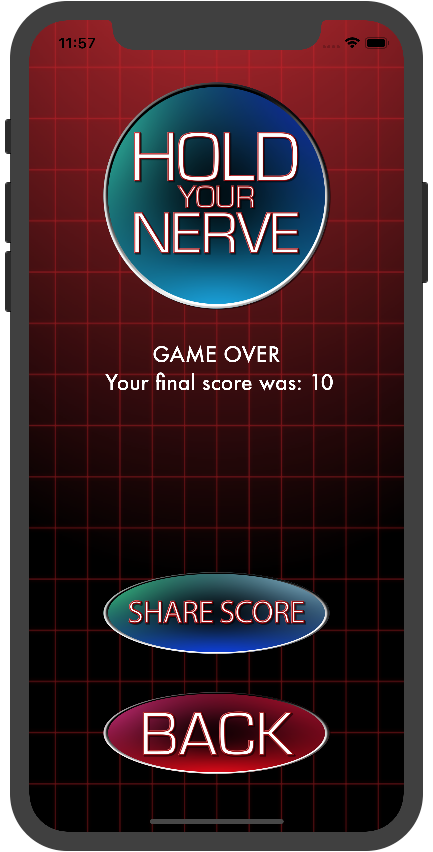
The only issue with this is Facebook. The Facebook API doesn’t allow you to populate the field with text that the user didn't write themselves. You can however still push an image or hashtags.
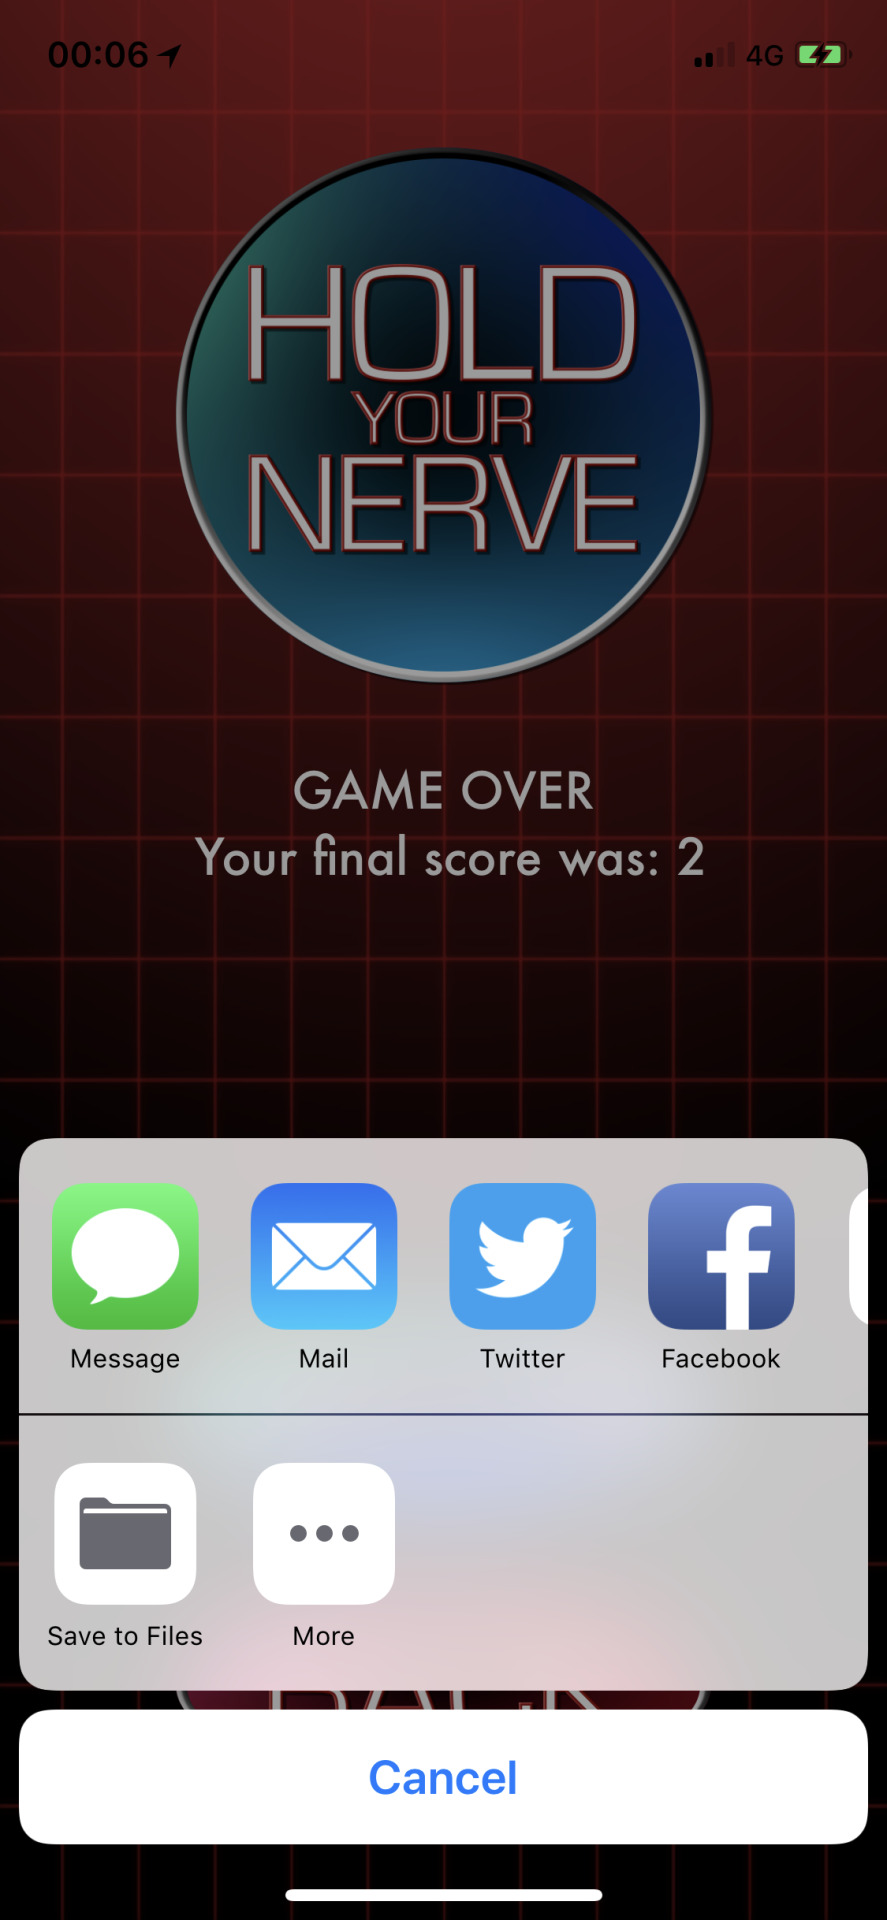
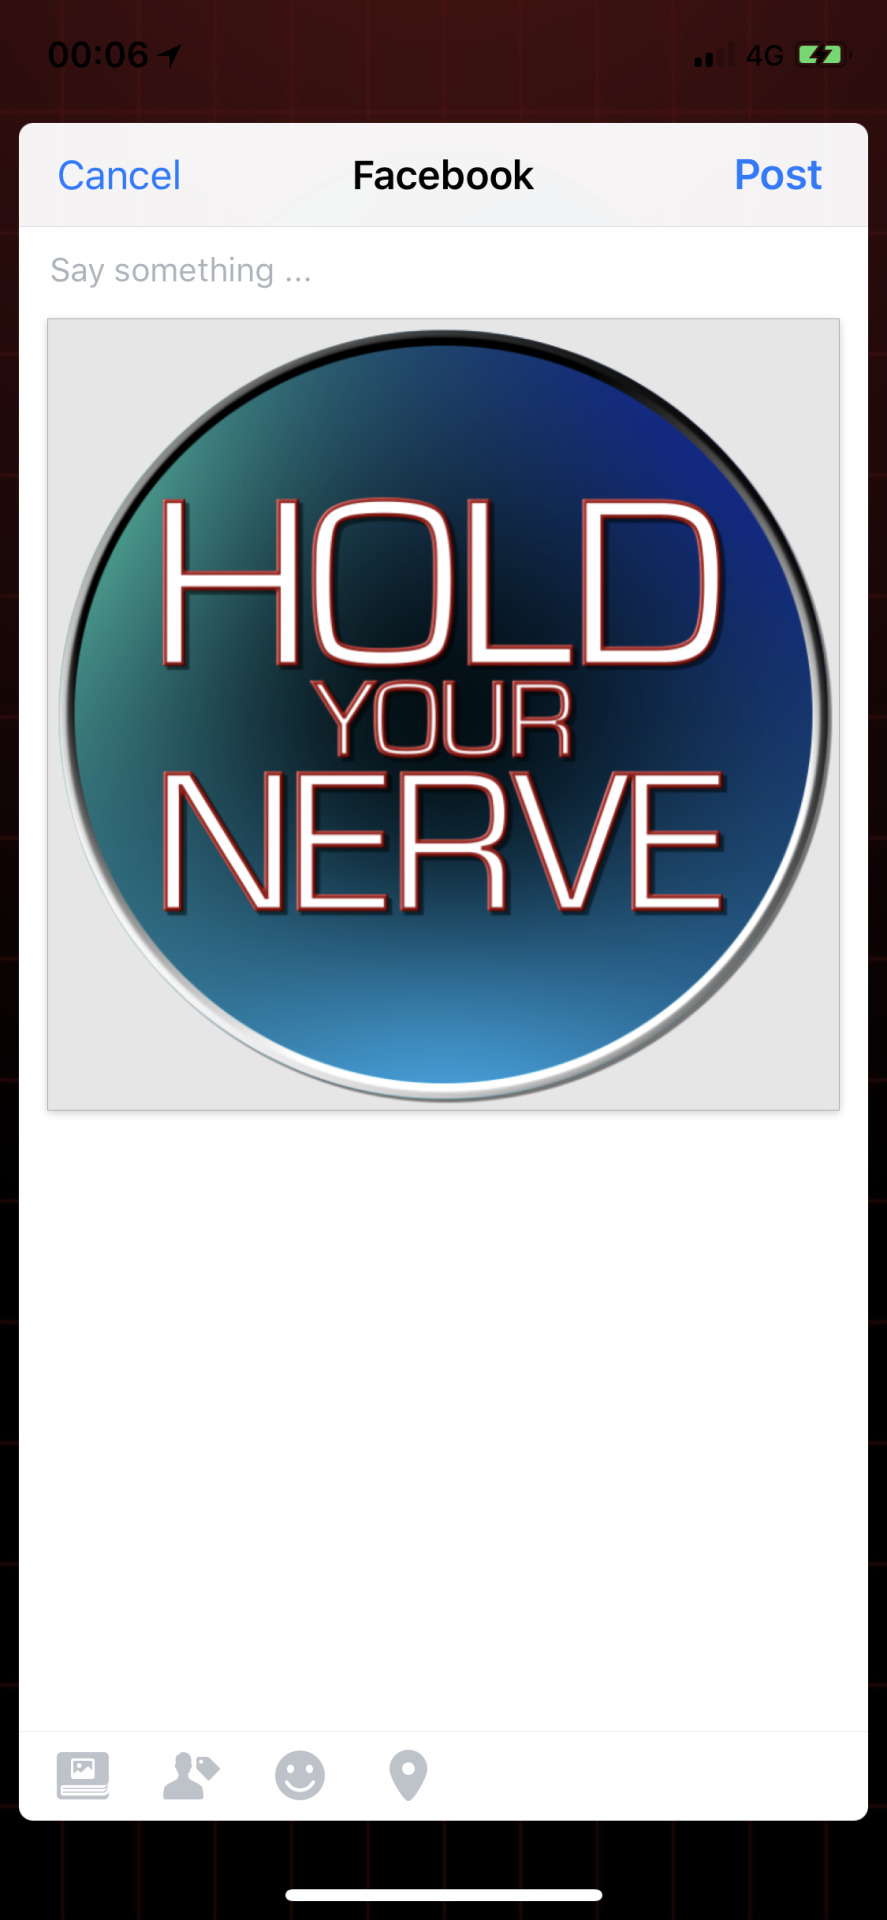

Really simple and straightforward. The message is a little basic, so I added the link to my website: https://jmpgames.online I did this by creating an NSURL called URL, then adding URL to the array of things to share. This ended up being quite a lot, so, I removed the image as the weblink is far more important.
let shareSheet = UIActivityViewController(activityItems: [socialMessage, URL as Any], applicationActivities: nil)
This then got me thinking. Looking at other apps, they have a way to share info about the app from the main menu. So, I decided my app should do the same. I decided to create a new ViewController called ContactViewController. Here I’m going to have buttons that take you directly to the Website, Facebook page and Twitter feed.
I created a new ViewController called ContactViewController and set up the relevant segues and buttons.
The next thing was to decide how to display these web pages. I could have done this simply by making the app close and opening facebook, twitter, safari in order to display the relevant pages. However, I decided to use an SFSafariViewController in order to display a safari page from within my app.
I create three variables, each one of type NSURL: webURL, facebokURL and twitterURL, each with the link to the correct page.
Within each of the buttons, I created a new SFSafariViewController called webVC. I passed the variables I just created to each one and used the present feature to display the new webVC. The code for displaying the website is shown below:
let webVC = SFSafariViewController(url: webURL! as URL) present(webVC, animated: true, completion: nil)
You can view the contact page here:
youtube
0 notes
Text
NSUserDefaults
One method we could use is NSUserDefaults. It is best when used for little bits of information like user preferences, but not for larger things like UIImages.
NSUserDefaults is read and written atomically. This means when you write something to it, the whole thing needs to be written again. And when you read one key from it, it reads the whole thing and presents just the key you requested. This is good for making sure the data is read and written correctly, but might effect performance if the amount of data in NSUserDefaults is large. It is cached after the initial app load, so subsequent reads should be quite fast, but the initial one could be slow.
NSUserDefaults is like a Property List or plist that saves stuff to the iOS defaults system. There are six data types it can store:
NSData NSString NSNumber UInt Int Float Double Bool NSDate NSArray NSDictionary
Initialising NSUserDefaults:
public let defaults = NSUserDefaults.standardUserDefaults()
Writing to NSUserDefaults:
defaults.setBool(value: Bool, forKey defaultName: String) defaults.setInteger(value: Int, forKey defaultName: String) defaults.setFloat(value: Float, forKey defaultName: String) defaults.setDouble(value: Double, forKey defaultName: String) defaults.setObject(value: AnyObject?, forKey defaultName: String) defaults.setURL(url: NSURL?, forKey defaultName: String) e.g. defaults.setBool(true, forKey: "myGroovyKey") defaults.setObject("myGroovyValue", forKey: "myGroovyKey")
The limit for how much data can be stored in NSUserDefaults is the maximum file size for iOS (logically), which is currently 4GB. But for large amounts of data storage, a good idea might be to use something else like core data.
Reading from NSUserDefaults:
defaults.boolForKey("myGroovyKey") defaults.integerForKey("myGroovyKey") defaults.floatForKey("myGroovyKey") defaults.doubleForKey("myGroovyKey") defaults.objectForKey("myGroovyKey") defaults.URLForKey("myGroovyKey") defaults.dataForKey("myGroovyKey") defaults.stringForKey("myGroovyKey") defaults.stringArrayForKey("myGroovyKey") defaults.arrayForKey("myGroovyKey") defaults.dictionaryForKey("myGroovyKey") e.g. if (defaults.boolForKey("myGroovyKey")) == true { do something awesome }
If you try to read a key and it does not exist it will return nil.
0 notes