#OHI Cosplay tutorials
Explore tagged Tumblr posts
Visit Tumblr Blog
Explore Tumblr blogs with no restrictions, modern design and the best experience.
Last Seen Tumblr Blogs


Fun Fact
Total funding amounts to $125.3M.
Text
3d Printing Resources
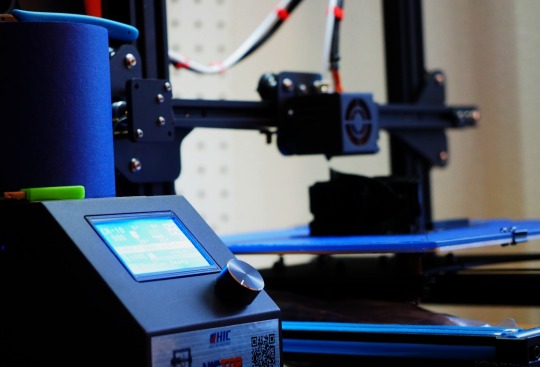
Queadlunn- The two of us at here at OHI got a 3d printer a couple months ago now, a Creality CR-10 (BangGood, Amazon) and it’s been great for us so far! As we’ve been learning about 3d printing in general I’ve been gathering a list of sites and tools that we’ve been using. This isn’t a comprehensive list in any way, just stuff we’ve found so far.
Slicing Programs:
Cura (https://ultimaker.com/en/products/ultimaker-cura-software) - This is the slicing software we currently use. It’s free and has loads of options.
Slic3r (http://slic3r.org/) - Another slicer program, don’t know much about it though.
Simplify3d (https://www.simplify3d.com/) One of the paid programs, very well regarded.
Modeling programs:
Autodesk 123d Design (https://www.amazon.com//dp/B01HE5O9IM/) - No longer offered by Autodesk directly any more. A great model creating and editing tool.
Autodesk 3dStudioMax (https://www.autodesk.com/products/3ds-max/overview) - One of the industry standards for 3d modeling. It’s got a 30-day free trial and 3-year licensing for students.
Autodesk MeshMixer (https://www.meshmixer.com/) - Another Autodesk tool, this one specifically made for working with tri-mesh objects.
Blender (https://www.blender.org/) - Another standard, this time free. Blender seems to mostly be geared to animation and characters.
NifScope (http://niftools.sourceforge.net/wiki/NifSkope) - This is a tool used with Bethesda games, if you want to work with those.
Ninja Ripper (https://gamebanana.com/tools/5638) - This is a DIY tool to extract models from running 3d applications. All of the models it can see in the running application are dumped to a directory. It kinda works but needs a lot of messing with. Also requires 3dSMax to convert the models.
Sculptris (http://pixologic.com/sculptris/) - I haven’t used this one but it seems fairly well regarded.
Model sources:
Thingiverse (https://www.thingiverse.com/) - Free to use, ready to print models
MyMiniFactory (https://www.myminifactory.com/) - Free to use, ready to print models
TinkerCAD (https://www.tinkercad.com/) - Free to use, ready to print models. Also has a web-based model creator program.
Pinshape (https://pinshape.com/) - Both free and paid models, ready for your printing software.
CGTrader (https://www.cgtrader.com/) - Paid models, ready for your printing software
SketchFab (https://sketchfab.com/) - 3d model portfolio site, some models for download but they need to be converted for use with printing software (I’ve been using 3dSMax).
Shapeways (https://www.shapeways.com/) - Printing service, has their own catalog uploaded by artists. Can't download models. You can upload your own models to them to print but it can be expensive.
Yeggi (http://www.yeggi.com) - A search engine that covers many of the larger 3d model sties. It even covers some game model sites.
Common Troubleshooting Guides:
Simplify3d’s Print Quality Troubleshooting Guide: https://www.simplify3d.com/support/print-quality-troubleshooting/
All3dp - 34 Common 3D Printing Problems: https://all3dp.com/1/common-3d-printing-problems-troubleshooting-3d-printer-issues/
MatterHackers 3D Printer Troubleshooting Guide: https://www.matterhackers.com/articles/3d-printer-troubleshooting-guide
#3d printing#cosplay guide#Cosplay DIY#3d printing cosplay#Cosplay Help#OHI Cosplay#OHI Cosplay Tutorials#Queadlunn
129 notes
·
View notes
Text
Cosplay 101: Adhesives
This is meant as a beginner primer for adhesives (that we use [enough to know a bit about {mostly}]). This is meant as an outline that covers the general details of each kind of adhesive. The links direct to the wikipedia page on the adhesive if you want to know more about the full details.

Cyanoacrylate: CA glue for shorthand, aka Superglue or krazyglue. However, if something is marketed as a super/krazyglue and doesn’t contain cyanoacrylate, it’s not a CA glue. This is our go-to glue. It’s strong, but a bit brittle and can melt the crap out of some materials.
Pros:
Strong
Widely available
Cleans up with acetone nicely
Can glue most things together (EVA foam, paper, styrene all work well)
Many consistencies available (thin, thick, gel)
Quick dry/cure time, can be quickened with CA accelerante
Can be mixed with baking soda for an effective gap filler (CA cement)
Safe to use on EVA foam
Readily available anywhere that sells adhesives
Cons:
Fumes/strong smell, ventilation and/or a respirator required if working with large amounts of CA glue
Brittle and non-flexible
Melts polystyrene (EPS/XPS foam aka Styrofoam)
Fumes can leave cloudy residue
Rapid exothermic reaction with leather, cotton, and wool that can cause burns and even fire
Shelf life of about a year unless kept somewhere dark and cool (like the fridge)

Polyvinyl Acetate: Also known as white glue or Elmer’s glue. Useful but a bit basic and requires open evaporation.
Pros:
Pretty safe, just don’t straight-up drink it or rub it into your eyes or nose
Great for paper and other open structure materials (fabric, some open-cell foams)
Widely available
Water-soluble
Inexpensive
Readily available anywhere that sells adhesives
Cons:
Relatively weak and brittle when cured
Needs open-air evaporation to dry
Water-soluble
Long dry/cure time

Gorilla Glue: We’ve used this one a few times and it seems to work fairly well
Pros:
Strong bond
Non-solvent, won’t melt things most of the time (stable with XPS foam)
Readily available anywhere that sells adhesives
Cons:
Needs clamping/pressure to cure properly
Long cure time
Expands during cure process, can squirt/drool out of joint (might be a good thing too, though)

E6000: A strong and flexible glue, great for fabrics or gluing things to fabrics.
Pros:
Very flexible, can hold up to a little stretching even
Strong bond with a bit of surface sanding
Can glue many kinds of things together (EVA foam, fabric, styrene, paper, leather all work well)
Dries clear (though air bubbles and edges can be visible)
Readily available anywhere that sells adhesives
Cons:
Toxic, should be used in a well-ventilated room with a respirator and gloves for safety
Solvent-based, will eat through polystyrene
Long cure time
Can smear easily during curing
May ooze out of the tube and glue the cap to itself (plies might be required to unscrew the cap if this happens)

JB Weld: An incredibly strong 2-part epoxy. I use this a lot to strengthen a mechanical joint.
Pros:
Incredibly strong, can be used to join engine parts together
Fairly shock resistant
Works great on most surfaces
You can drill, tap, sand and carve it once fully cured
Cons:
Very long cure time, about 24 hours
Not flexible at all
Requires a very good joint and a lot of surface prep
Can be brittle under torsion
Needs more cleanup than single-part adhesives

2-part Epoxy: This is a massive group of adhesives so I’m only going to mark the basics
Pros/Cons:
Strong
Cure time can vary from a few minutes to days
Needs more cleanup than single-part adhesives
Ranges from glass-hard to pretty flexible after it cures

Hot-melt adhesive (aka Hot glue): A craft standard and fairly material-safe way to adhere things together.
Pros:
Works on everything that doesn’t melt or [easily] catch fire
Fairly strong with a good joint surface
Pretty safe if you don’t touch the nozzle or glue while it’s hot
Safe to use on polystyrene
Great for EVA foam armor/props
Inexpensive
Glue itself can be versatile and used for filling molds.
Glue sticks can come in a variety of colors
Cons:
Can be a bit messy, nozzle keeps leaking sometimes and leaves threads of hot glue everywhere
May be visible under thinner materials if the glue isn’t smoothed out
Can straight-up melt or ignite some materials (spot test or look up the melting point of the material)
May be only semi-permanent in some cases, depending on the surfaces
Can melt when exposed to heat (don’t leave pieces glued together with hot glue in a hot car)

Contact cement: An adhesive that is applied to both surfaces, allowed to dry, then pressed together. Barge and Weldwood (US) are brands commonly used in cosplay. Rubber cement is not a contact cement.
Pros:
Very strong, practically permanent once bonded together
Great for EVA foam armor/props (the main go-to for a lot of foamsmiths)
Cons:
Fumes require ventilation and/or a respirator
Requires a ready supply of brushes for application
Shelf life up three months to a year depending on storing conditions. Throw away if the cement begins to set up in the container
Melts polystyrene
Cures in 5-10 minutes, but EVA foam may require a second coat due to its tendency to absorb materials
2K notes
·
View notes
Text
Building the Machine: Part 4, The Shoulders and Torso
Part 1, Collecting References
Part 2, Breaking Down the Parts, Picking Materials
Part 3, The Head

While it looks simple, the shoulders ended up being the hardest part because curved forms are a pain to make, it needed to be lightweight but strong enough to hold the head, and connect to the torso without breaking.
We decided to go with XPS foam, commonly found in home improvement stores as insulation foam board.
Important note: There are two types of foam used for insulation foam board: XPS and EPS. XPS is extruded polystyrene foam and has a higher density and a smoother appearance. EPS is expanded polystyrene and is little round polystyrene beads shoved together (EPS is also commonly what people think of as “styrofoam”). The small beads makes sanding EPS to smooth finish very difficult. Go with XPS for all prop needs.
XPS foam usually comes in 4′x8′ sheets in various thicknesses, but we found 2′x2′ squares with a thickness of 1 inch at Home Depot. It’s cheaper buying full sheets, but if you don’t have an easy way of transporting and storing the sheets, go with smaller squares. We bought 6 squares and used 5.
What you need:
XPS foam
A hot wire cutter or retractable utility knife
Extra wire or utility knife blades
Gorilla Glue and/or hot glue
Masking or painter’s tape
Bondo (optional)
Orbital power sander (Optional, but see the note below)
8-10mm EVA foam (for the torso)
You can cut XPS foam with a retractable utility knife, but a hot wire cutter made the process faster and easier. If you want to work with XPS foam, this is a valuable investment to make. This is the hot wire cutter we have. You’ll also need extra wire because the wire will break. As long as you get the right size, you can buy the wire in spools for a cheaper cost.
Gorilla glue is our adhesive of choice. While hot glue works, we went with gorilla glue for durability and ease of application. CA glue, E6000, and contact cement will melt XPS foam.
An orbital power sander is not required, but because we used bondo and gorilla glue for filling and sealing, it made it faster and easier. If you skip bondo and sealing with gorilla glue, sanding with sand paper and files/rasps is fine.
Note: Picture intensive tutorial


This is the starting frame for the shoulders. Keep in mind while the appearance is hunched, the person wearing the costume is standing straight. No exact measurements because it depends on the proportions of your build, but here are some notes.
The circumference of the outer ring is equal to the torso.
The ring needs to be large enough for your head to freely move around.
The top of the fame and the curved braces determine the slope of the shoulders.
Use tape to mount everything, only glue once you’re 100% certain of the placement of everything.

To fill out the sections of the shoulders, begin cutting out wedges and stacking them on each other like steps. Use scrap pieces as much as possible. Don’t worry about the inside of the shoulders, but keep the outside even as possible. This will make sanding and shaping down easier. You’ll eventually glue all the pieces together, but you can fill out entire sections before gluing anything. Gorilla works at this stage, but you can also use hot glue.

To hold the head in place, a second ring was added to the front. It’ll also get shaped down. A second ring was also added to the bottom to serve as an attachment point to the torso. The bottom ring is the same as the base, but with enough cut away so the torso sits (mostly) flush with the shoulders.

For the first smoothing pass, we used the hot wire cutter to slice through large sections. Go slow and let the hot wire melt through the foam instead of pulling: putting extra tension on the wire increases the chance of snapping it. At this point, you’re trying to set the shape, not get things perfectly smooth.

Subsequent smoothing passes will require hand sanding. You don’t need a perfectly smooth finish since it’s meant to be a beat-up, aged machine so sand to whatever stage you see fit.
For filling holes and smoothing out sections, you can use bondo. FYI, bondo will not eat through XPS foam, but the glazing putty will.
To seal the foam for painting, you can layer on PVA glue, but we found it only created a layer that could be peeled off. Saturating the surface with gorilla glue creates a hefty, solid layer, but because gorilla glue also expands slightly, it means there’s a lot of sanding ahead. This is where the power sander comes in handy. However, PVA glue will absolutely work, just make sure you do several layers and try to saturate the foam as much as possible.


The torso is 10 mm EVA foam. We cut two equal size panels to put seams on each side under the arm hole. One side is glued together, but the other is kept shut with velcro. Originally we kept one side openable as an emergency release, but we never needed it. The EVA foam is glued to the XPS foam with gorilla glue.
The arm holes are cut larger than the source image to give Queadlunn space to lower and rest his arms. Don’t cut the arm holes until the torso is attached, it’ll be easier to figure out size and placement.
With the body done, it’s time to move onto the limbs!
#cosplay tutorial#nier#nier automata#machine lifeform#cosplay help#long post#OHI cosplay#OHI cosplay tutorials
55 notes
·
View notes
Text
OHI Cosplay’s Tutorial Masterlist
For the latest version of this post, click the following [link]
Our top tutorials
A Beginner’s Guide to Pepakura
Cosplay 101: LEDs and Arduino
Cosplay 101: Plastic 101
Cosplay 101: Failure is always an option and that’s okay
Cosplay 101: Adhesives
Cosplay Library
Cosplay Pet Peeves AKA some brief notes on the different kinds of foam
Tools of the Trade
Part 1: The Tools
Part 2: Workspace and Materials
Part 3: Power Tools
Character Tutorials
Borderlands 2 - Gaige the Mechromancer
Steven Universe - Rose Quartz’s Sword
The World Ends With You - Harrier Reaper Sweatshirt
Star Trek - Tricorder (build logs)
Bastion - The Kid
Brusher’s Pike tutorial
War Machete tutorial
Character tutorial
Nier Automata - Machine
Part 1: Collecting References
Part 2, Breaking Down the Parts, Picking Materials
Part 3, The Head
Polycarbonate
Polycarbonate knife - Beveling, dyeing with Future and food coloring
Polycarbonate dagger
Polycarbonate gems
Test 1: Making the gems, dyeing with Dyelon
Test 2: Dyeing with iDye Poly
Video: Dyeing with iDye Poly
Test 3: More dye tests, acrylic test
EVA Foam
Reinforcing EVA foam
Cutting EVA Foam with the Silhouette Cameo 2
Miscellaneous tutorials
Stores in the Portland Metro Area
Alternate Sources for Cosplay Supplies
Leather Studio paint test
Transparent Color Mod Podge test
Duct tape sanding strips
Aluminum foil tape on EVA foam
Fiber Fix test part 1
Fiber Fix test part 2
Test your paint
1K notes
·
View notes
Photo


We’re currently running some adhesive tests on bonding XPS form to EVA foam and here’s what we’ve found.
Both pieces are scrap pieces of XPS foam, the top picture has contact cement (Weldwood) brushed onto it, the bottom has E6000. The surface was eaten away in seconds and worsened over time on both pieces.
The piece with contact cement was still able to bond with a piece of EVA foam coated with contact cement, but the EVA foam was easily peeled away, taking a a layer of XPS foam with it.
The piece with E6000 is slightly gummy to the touch, but lost all adhesive qualities after a few seconds.
On the plus side, this could be great for weathering or creating interesting textures.
Not shown, but CA glue and Bondo glazing putty also immediately dissolve the surface. Spray paint will also eat the surface of XPS foam.
PVA glue creates a suction seal against XPS foam and EVA foam, but can still be pulled apart because the PVA glue can’t dry. This applies to all air-drying glue.
Hot glue will bond XPS to EVA foam. Like hot glue and EVA to EVA foam, you can still pull it apart, but it’ll also tear the foam first. For best results, sand the XPS foam and apply a lot of pressure when gluing the pieces together.
A few different web sources say spray adhesive, two-part epoxy, and gorilla glue work on XPS foam, but because we don’t have either on hand, we can’t confirm or deny the statement.
Edit: We tried out gorilla glue (original formula) and it bonds XPS to XPS without melting anything. It requires a few hours to set (as per the directions) and since it expands, it might dribble over if you use too much.
87 notes
·
View notes
Text
Building the Machine: Part 2, Breaking Down the Parts, Picking Materials
Part 1, Collecting References
Now that you have all your references, how do you get started? The first thing to do with any costume is to break things down into its base parts. Let’s use another Automata character as an example.

Her outfit can be broken down into the following parts:
Cloak
Shirt
Pants
Belt
Weapon
Boots
Gloves
Kneepads
Hip holster
When you break a costume down into its base components, it’s easier to see the individual pieces and pick a starting place. When you begin working on a piece, you might have to break things down even further. For example, the cloak can be further broken into the cloak, hood, tassles, decorations, and cloak clasp. Alternately, you can group things together; the gloves, kneepads, and hip holster could easily be grouped together as “accessories.”
So how about the machine?

We broke it down as follows:
Head
Torso
Curved neck/shoulder/back portion
Arms
Legs
Electronics - Eyes
Electronics - Cooling
Undersuit
While “Electronics - Eyes” could belong with the head, we’re breaking it out as a specific thing we want to remember. “Electronics - Cooling” is also important so we want to make sure we build things with that in mind. If you need a wig or a specific makeup job, those need to be considered too.
The other thing we had to do was reassign the proportions. As you can see in the picture, the machine is shorter than a human with the shoulders lower and hands reaching the knees. The hands and legs are also very skinny. How do you translate that to a human?

Take a picture of yourself against a neutral background (front, 3/4, side, back). If you have an image editing program, you can reduce opacity to 50-75%. Now you have a template you can print out to draw on or use an image editing program to scale images to. This is useful for scaling costumes with unusual proportions, but can also be good for scaling large props, or serving as a template for an original design.
This method helped us figure out the proportions for the machine as well as how to do the arms and legs. We also decided what to build the limbs from; Sintra and styrene because we have plenty of both on hand. Using materials we already have means we can put the budget toward other things. Both are also lightweight and durable.
We had a few ideas on how to do the head (paper mache, slush-casting), but decided to see if we could find something pre-made. After visiting a few plastic stores and home improvement stores and not finding anything, we found an acrylic globe online (that can be picked up at Home Depot; go figure).
For the torso, we originally wanted to find a garbage can or some other kind of large tube. Unfortunately, we couldn’t find a large tube or a garbage can that wouldn’t require large amounts of surfacing. We decided to go with EVA foam for the outside with a plastic frame on the inside. For the curved shoulder/back part we’re thinking about carving XPS board, but we haven’t fully decided yet.
Have plans in mind, but stay flexible too. Remember money isn’t the only cost, but also time, both for making and finding materials.
That wraps up this write-up. The next update will be the start of the build. See you then!
#cosplay 101#cosplay tutorial#cosplay help#nier automata#machine lifeform#ohi cosplay#ohi machine#ohi cosplay tutorials
487 notes
·
View notes
Text
Cosplay 101: Failure is always an option and that’s okay
My niece asked for a rainbow sword for her birthday and how could I say no to that request? She’s still pretty young, so EVA foam is a good choice.

Got the two halves cut out, that didn’t take long. Normally I’d glue it together, but there’s a separate polycarbonate piece that needs to be cut out, so for now, I’ll tape it together so I can bevel it.

That’s a pretty good bevel job! Just needs a bit of heat to clean up the edges, maybe a bit of spot filling, but hey! Battle damage!

The other side isn’t bad either! Needs a bit more sanding and heat to smooth things out, but looks good!
Between the three pictures, it only looks like a few minutes of work. The reality? This was an hour of work. Why an hour?

Because I kept messing up the second side.
Messing up sucks. On the other three, I probably had the bevel perfect before I pushed a bit too hard, or caught the foam in the sander, or kept sanding when I should have stopped. But I didn’t, and I messed up, and I had to cut a new piece and start over.
And that’s frustrating, especially if you’re on a budget, or have limited time or resources.
But every screw up taught me what worked and what didn’t work. I learned how much pressure I needed to keep the bevel even. I learned the curved edge catches easier on the disc sander. I learned which direction is easier to bevel in. These are things I wouldn’t have learned if I didn’t make mistakes. And now I know what to do the next time I bevel EVA foam and now I know my next attempts will be better.
So fail, and fail repeatedly, accept you’re going to fail, especially if you’re trying a new skill. But learn from your mistakes and keep on going. That’s the only way you’ll become good.
838 notes
·
View notes
Text
Building the Machine: Part 3, The Head
Part 1, Collecting References
Part 2, Breaking Down the Parts, Picking Materials


Welcome to part three of the Machine build. Today we’re going to talk about the head, or specifically, how to make a round ball without breaking your budget.
We wanted to find something made out of plastic for durability. It turns out acrylic hemispheres and spheres over 10″ diameter get really expensive really fast. So we went to plan B:
Paper mache.
What you need:
A playground ball, beach ball, or balloon in the size you need.
Duct tape
A container or something you can tape to the object as a stand
Newspaper
PVA glue
Plastic wrap or petroleum jelly
Latex or nitrile gloves
Thin CA glue (optional)
Rotary tool, small handsaw, or really sharp Xacto or utility knife.

We found a 15″ playground ball at the store. A beach ball or large balloon will also work as long as the diameter is right. Take your container and tape it to the ball. If you want to save the ball, tape the container over the release valve. Cover the ball in plastic wrap or petroleum jelly. This works as a mold release. Try to keep it smooth and avoid bumps. Your first layer will show imperfections, but you can smooth things out in subsequent layers.
The glue mixture
I used Aleene’s Original Tacky Glue, but whatever PVA-based glue you have on hand will work. Pour it into a container and add enough water so its runny, but not completely watery. You don’t want to water it down too much, but you also want to water it down enough so it tries and isn’t tacky.
Tear your newspaper into strips. Take a strip and drag it through the glue mixture, squeezing out the excess. Then lay the paper on the ball, keeping it as smooth as possible. I alternated between vertical and horizontal layers so I could keep track of what I already covered, but you can do whatever. You might also drip glue-water, so put down some paper or plastic to catch it, or wipe it up later. Putting on some entertainment is also advised since it took 20-30 minutes per layer.

I did one layer at a time and let it dry, but you could do two layers at a time. Just make sure you let it dry between runs. Putting it in front of a fan and rotating the ball every few minutes can help.

The final ball has ten layers on it. Try to keep each layer as smooth as possible and avoid building up hard edges (unless that’s what you need).

(This is what ten layers of paper mache looks like. It’s about 4 mm.)
At this point, you have a perfectly serviceable hollow ball. However, we decided to harden the paper with CA glue for durability. If you decide to do this, you have to have a respirator that has a filter for organic vapors, eye protection, gloves, and be able to work outside. DO NOT DO THIS INSIDE.
Along with the above safety gear, you’ll need thin CA glue, 8 oz or more. This specifically needs to be thin CA glue as you want to build up layers and thin CA glue spreads nicely. Having CA glue accelerator helps with the dry time, but isn’t necessary.
If you decide not to, you can remove the ball inside. Once you’re done, free the container. Whether you’re popping the ball or using the release valve, do it slowly. Make sure you aren’t pulling or crumpling anything as the ball deflates.
If you’re going to harden the paper with CA glue, leave the ball inside and remove it after you apply a few layers of CA glue on the outside. If you have disposable brushes, you can use them. You can also take cardstock and tear it with a rough edge and use that as a brush.
Dribble some CA glue on the top and let it run down, using a brush to spread it out. If you can smell the glue or your eyes begin to water, stop working immediately and go inside. Wait 15-20 minutes before starting again. Repeat until the first layer is complete. Repeat this process until you have two or three layers.
For the inside, the process is similar except instead of brushing out the layers, pour CA glue into the ball, then roll the ball around to move the CA glue around (essentially slush casting). Keep the opening aimed away from you, go inside if you begin smelling CA glue or your eyes water. Build up as many layers as you want, we ended up using the entire 8 oz bottle of CA glue. You can also spray the inside with CA accelerator to speed up the dry time, but this is optional. At this point, the entire head should be a fairly solid, rigid piece.

See how reflective it is? That’s all CA glue.
Let the inside dry for a few days. If you can still smell CA glue, let it keep drying.
Cutting the head hole
For an easy way to figure out how big the head hole needs to be, take a big sheet of paper (or in our case, an EVA floor mater) and draw and cut out a circle about the circumference of your head. Now keep widening the circle until you can fit your head through it. Overlay the hole on the ball and trace it out.
A rotary tool is the best option for cutting out the head hole. You could do it with a handsaw or with a knife, but a rotary tool is the quickest option, especially if you hardened the paper with CA glue. After you cut out the head hole, seal the edge with CA glue or lots more PVA glue. Ditto for any other holes or exposed edges.
Sanding?
If you harden the surface with CA glue, you can do light sanding with 100 grit and up. To get a better idea of what the surface looks like, spray it with primer so it’s uniform. That’ll expose any edges or rough spots. You can also use Bondo to fill and smooth, but it depends on the surface you need.
How are you going to see?
Ummm we’re still working on that. With the way we’re building the Machine eyes, it’ll be impossible to see out of them. We’re looking at a few different options. For most costumes, cutting out holes and replacing them with screen or a fine mesh should work.
Next part: The shoulders and upper torso! See you then!
[BECOME AS GODS]
#nier automata#cosplay tutorial#machine lifeform#nier#paper mache#ohi cosplay#ohi cosplay tutorials#ohi machine
165 notes
·
View notes
Photo


Queadlunn- I’ve tried a couple new methods for my polycarbonate gem faceting. I cut another gem (the shape turned out a lot better this time too!) and this time I used iDye Poly to color it.
-WALL OF TEXT INCOMING-
The method of how I made the gem out of poly is pretty much the same as the last one (LINK), I had a cylindrical piece about 1x3” in size and I ground it into a (base) 3-sided pattern that worked pretty nicely. The disk sander we have currently has 80-grit on it, from there I moved to 220-grit, then 400-grit, then a felt polishing wheel (just sitting on my desk), then burnishing with cloth. This got me to image #4 which was looking really nice.
Since my last attempt to dye poly with standard fabric dye was a failure, I used some synthetic-compatible dye that Cata had bought me (iDye Poly, see image #5). I got the dye ready on the stove and dipped the gem in it for about 3 minutes total in 2 runs. I was really careful with the temperature this time (might have been around 85c or 90c or so) since the first test gem ended up with tiny thermal fractures on many facets. After the dye bath I was at image #1.
One drawback with the dyebath is that while it does seem to penetrate, it’s less than 0.2mm (with solid plastic this is understandable) and the dye process does take a bit of the luster from the earlier polishing off and it’s not something you can get back with polishing since you’ll just wear through the dyed plastic.
Since the gem wasn’t quite as shiny as I wanted now, I added a thin coat of Future to bring it back to a nice shine (image #1). Worked pretty well but I’ll need to airbrush the future on next time.
Overall, I think this is a great process, given that you have access to a bench disk sander and access to larger pieces of polycarbonate.
I’ve got one more of these planned, a larger one. I’m thinking of taking video of the faceting process but I’m still figuring that, and the material, out. Also thinking of trying a long-term soak dye (cold) to see if that gets the color farther in the plastic so I can re-polish without having to topcoat the gems.
#Polycarbonate#Prop Tutorial#Cosplay Help#Cosplay Tutorial#Gem#OHI Cosplay#Queadlunn#OHI Cosplay Tutorials
953 notes
·
View notes
Photo


Queadlunn- Here’s another practice build!
Since things had gone well with my polycarbonate carving in the recent past (Gem, Arc Sword, Glass Knife), I though I’d try a more complex shape.
I sketched the shape of a simple dagger out on some masking tape stuck to the PC plate (~30cm x 30cm x 1cm) to make sure it’d fit, then transferred that to paper to fully draw the design out.
To cut the initial work piece out I used a small drill bit and perforated along the outer edge of the dagger. I then used a saw blade on my Dremel (a bit dangerous, like this one) and cut the dagger free. Then it was a good couple hours with the bench sander getting it into shape. Check the Glass Knife build for more details on the shaping.
I used the same tinted future finish as I had before (~100ml Future, 4 drops blue food coloring, 1 drop green), and in about 4 good coats it was looking great. I used a sheet of ABS to make the two side plates, then red oak for the grip sides and brass plate for the decorative bits. The rivets are bronze rod that I had on hand. The carving on the guard was done with a ball engraving bit (like this) burnished clean with a bit of ABS rod and painted with some gold paint (link).
For the grips, after they were sanded into shape, I used the same tinted future again (~100ml, 3 drops red, 2 drops blue) and got to that shade after 5 coats.
The brass plates on the blade were dremeled into shape, cleaned up and then I used a dangerous [REDACTED]. Once that was done, I used some brass blackener to highlight the etching on the plates. I polished them up a bit and added them to the dagger.
Overall, this took about 3 weeks of work (less, really, not much hobby time right now). Polycarbonate is a great material. At some point I might use this same technique to make something like an ebony blade from Skyrim.
#Prop Tutorial#Cosplay Tutorial#weapon tutorial#Cosplay#cosplay help#OHI Cosplay#OHI Cosplay Tutorials#queadlunn#OHI dagger
699 notes
·
View notes
Photo


Queadlunn- More information about plastic dying.
So, after figuring out that polycarbonate possibly isn’t getting dyed I did a test. I soaked a bit of polycarbonate rod in blue iDye Poly for a few days. When I took the piece out, it looked like it had been dyed a really dark blue, which seemed great. After I had dried it off, I realized that the surface of the poly was a bit soft or gummy. I was able to cut into the surface with my fingernail. I took the piece back to my desk and found that the dye had built up a ~0.75mm layer on top of the poly, no penetration at all. It seems that polycarbonate does not really take dye made for artificial fabrics, though it does create a nice tinted coating.
I did a quick new crystal using a bit of acrylic rod instead of polycarbonate. This works well, just acts very differently from poly (much lower melting temp, softer material) and I’ll likely stick to poly for crystals that need really finely done facets.
I soaked the acrylic crystal in some iDye Poly as well and it at least creates the same surface coat that occurs on the poly, I’ll do a test with this as well to test the dye’s penetration.
Some other notes, pretty much all of the polycarbonate crystals have some amount of surface crazing, from a huge amount on the squat gems to just a few, tiny occurrences on the larger ones. I think this may be due to the heat generated during sanding and/or the plastic reacting to the dye in some way.
Also, we tested the iDye Poly on some transparency material. Didn’t work either due to the coating to allow inkjet printing or due to lack of penetration.
Previous posts: 1 2 3
#Polycarbonate#Acrylic#Prop Tutorial#Cosplay Tutorial#Prop Crystal#OHI Cosplay#Queadlunn#OHI Cosplay Tutorials
134 notes
·
View notes
Photo


Queadlunn- I’ve been messing with polycarbonate plastic the last few days. One thing is something I’m still working on. The other started out as a cut-off of a 1.5″ PC rod (about1.5″r2x1.5″). I used our bench sander’s 5″ disk (with 80 grit) to do a freehand kind of faceting that turned out pretty nicely.
I started out on the sander with 80-grit, then moved to 200-grit sandpaper taped to a piece of sheet-metal laminate. I then used 600-grit with a machine oil on the paper to lubricate (worked okay). This got me to the image labelled #3.
Since I know that some plastics can be dyed with fabric dye, I decided to try it out. Due to the plastic I was using, or the dye I had on hand, the gem didn’t really change after ~50 min. Because the heat of the dye bath the polished surface of the larger facets ended up crazing (maybe a thermal effect?).
The gem was still mostly the standard polycarbonate blue at this point, so I mixed a purple future wash (~120ml Future, 2 drops each red & blue food coloring) and did one coat. This added a bit of color to it as well as add even more gloss to the gem.
Not bad for a day of tinkering, I think I could do another gem like this (given I had all the materials on-hand) in about 3 hours. If I end up making more of these I’ll try to make some kind of faceting jig for our sander. Could be fun!
Edit: I used Dylon because it was what we had on hand. A dye for synthetic materials ( like RIT Dyemore or iDye Poly) would probably work better. A test for the future.
#polycarbonate#prop tutorial#cosplay help#cosplay tutorial#gem#OHI Cosplay#OHI Cosplay Tutorials#Queadlunn
733 notes
·
View notes
Text
Building the Machine: Part 1, Collecting References
Welcome to the first installment of Building the Machine, the build log and tutorial for our Nier:Automata Machine Build. While this will be a guide specifically for a machine from Automata, the tips and techniques can be applied to plenty of other costumes.
We’re not going to cover how to choose a cosplay because there are already countless tutorials out there on how to decide, and ultimately, the decision is a personal choice.
However, a useful thing is creating a project folder. For every cosplay you want to do, create a folder and fill it with reference pictures. Don’t think about skill level or complexity, just create folders for anything you want to do. And whenever you need an idea for your next cosplay, you already have a head start on ideas and references.

This is a sample of Cata’s project folder. You can also group things by series or even costume type (sewing, armor, props, etc.) if you want to be more organized.

When we start a costume, we break the folder down even more with a folder for progress pictures, the finished costume, and anything else that needs to be easy to access.
Now to tackle the first question: Where do you find reference pictures?
The first place we also go is Google images. Search for the character’s name and series and seeing what pops up is always our starting place.

Our first search through Google pulled up the above image, which helped us further decide which machine version to do. We also found an assortment of screenshots and artbook scans of varying quality. Depending on the character, you might be able to find most of what you need through Google. However, most characters will need to dig deeper.
Fan Art: Yes or no?
You may notice after a certain point, fan art begins popping up. Whether you use fan art as a reference is entirely up to you. For characters that might not have clear references, fan art can be useful for figuring out details or seeing interpretations. However, some people don’t use fan art as it’s not always accurate. This is also assuming you aren’t basing your costume off fan art in the first place.
Credit the artist if you incorporate their artwork in your costume. If you’re cosplaying a design an artist made or taking design elements from their art, please check with them first to see if it’s okay. if they say no, respect that. If they say yes, credit them in the finished piece. Do not take credit for someone’s ideas.
For official resources, you usually have a few options:
Promotional materials
Does the source have a website with promotional art? Press kits? More companies are also beginning to help cosplayers out by creating cosplay reference guides. This is usually geared toward main characters in a series.
Screenshots
Sometimes you can get high-resolution screenshots from the source’s website, but it’s more likely you’ll have to get your own, especially for details.
With video games, if the game has an in-game model viewer, take screenshots from there. If you have to take screenshots within the game, keep in mind the background and lighting. You want to try to find a neutral background and lighting that won’t wash out colors/details or cast shadows.

Nier:Automata has an in-game model viewer so we grabbed screencaps from all angles and some of the different animations.


There was also a music video that featured a machine and had some close up shots. The details are a little different from the in-game model, but gives us some ideas to work with. If you have a video program that lets you move frame by frame, that makes screencapping easier. Otherwise pausing and print screen works just as well.
Artbooks
More and more games/shows are getting artbooks released. These can be a great resource for reference and concept art. Sometimes you can find partial scans online, sometimes you have to buy the book. The quality of the artbook can also vary and cost can also be an issue. Overall, artbooks are great resources if you can find them.


We managed to find some artbook scans online and plan on buying a copy at some point.
Other Cosplayers
Similar to fan art, looking at other cosplayers can give you an idea of how to tackle the costume and see different interpretations. Reaching out to them for help can also be a good way to get information, but be polite and remember no one is required to help. Also give credit where credit is due.
The amount of reference material you collect is up to you. You can either collect everything at once or collect enough to get started and collect more along the way.
Real-world Equivalent
Making armor and not sure how to connect the pieces? Look at how real armor is strapped on. Making a kimono? Look up how real kimonos are constructed. Even for something like the machine, we’ll be using pictures of rusted metal for weathering references, and pictures of machine joints and fittings for the details.
Help! Nothing is consistent! What should I do?
Unfortunately, that’s a pretty common problem. Details can change from concept art to promotional art to the finished product. When that happens, you’ll have to pick-and-choose the details to follow.
That ends this guide. The next guide will be how to break down a costume. See you then!
#cosplay 101#cosplay tutorial#nier automata#machine lifeform#cosplay help#ohi cosplay#ohi machine#ohi cosplay tutorials
14 notes
·
View notes
Photo


Cata: Here’s a way to reinforce EVA foam without anything showing externally. The piece I’m working on are a pair of wings that need to stand upright without flopping around.
This is best on EVA foam that’s 8mm or thicker. You could do this with 6mm foam, but you’ll want to be careful.
1. Cut a channel into the foam. You want to keep it as straight as possible and cut as deep as possible without accidentally slicing out of the foam. The easiest way is to cut a light guide line, then go over the cut again and again with your knife until it’s deep enough. Again, the deeper the channel the better.
2. Cut a piece of aluminum wire (I used 2mm/12 gauge wire) that will fit into the channel. If you’re going around a curve, make sure to bend the wire to fit into the curve. Put the wire as deep into the channel as you can.
3. Use CA glue to glue the channel close. The further into the foam the wire is, the cleaner the seal will be as there’s more foam to glue shut. If any glue squeezes out, wipe it away. Work in sections and squeeze as tight as you can.
168 notes
·
View notes
Text
Cosplay 101: LEDs and Arduino

Queadlunn- Over the last year and a half I’ve learned a lot about electronics and Arduino and how I can apply it to props and cosplay. Just some simple LEDs in a sci-fi gun, a couple fans in a helmet or making a microcontroller light up some programmable LEDs when I close a switch on a DIY-ed lightsaber can really add to a project.
On basic circuits: If you have a battery (say 2 AA cells) you should be able to find out the cell voltage (for AA cells, it’s 1.5v per cell. This is easily google-able for most batteries) and if you know the voltage you have, you’ll know what kind of parts you can use with them.
For our 2 AA example, that’d mean you could use LEDs rated from 2.8v to 3.5v pretty safely, any more or less and it’ll take extra work and/or parts.
Here’s a good writeup on LEDs and basics: https://learn.adafruit.com/all-about-leds
On batteries: https://learn.adafruit.com/all-about-batteries/
Batteries and Wearables: https://learn.adafruit.com/battery-powering-wearable-electronics/
On Arduino/Microcontrollers: These are a lot more complicated than a battery, LED and a switch but can open up a whole world of options. From sequenced LED flashing, accelerometer-based triggers, even sounds. Sites like Arduino and Adafruit have amazing tutorials to get started. Arduino and like controllers are programmed via USB connection (sometimes through an adapter) and use a language that is a variant of C I believe.
You don’t have to be able to code from scratch to be able to use Arduino. I’ve gotten by with using the demo and tutorial code from various sites and modifying it a bit to suit my needs. I’m pretty bad at coding but good tutorials help wonders.
Adafruit’s Arduino tutorial series: https://learn.adafruit.com/lesson-0-getting-started
Arduino.cc’s ‘Getting Started’ page: https://www.arduino.cc/en/Guide/Introduction
Adafruit Learning System (great for everything): https://learn.adafruit.com/
A good Arduino starter kit can be a great way to begin.
Online sources (these are where I buy 95% of my parts):
Adafruit (https://www.adafruit.com/) - An amazing source, my favorite. They have loads of pre-built boards, everything from Arduinos to sensors to power supplies and an entire ‘wearables’ section. Adafruit has amazing tutorials for almost all of their products, this is where I learned the most while I was getting used to working with Arduinos and the like. Their Feather Arduino boards are awesome!
Sparkfun (https://www.sparkfun.com/) - Another great source. A bit more barebones than Adafruit (not as great with tutorials on products) but still a great place. I’ve mainly bought basic components and sensors here.
Amazon (https://www.amazon.com/) - If you know what you want, you can probably find a version of it here, though maybe of a different build than other sources. As always, Amazon Prime is amazing.
Ebay (http://www.ebay.com/) - Like Amazon, if you know specifically what you want you can probably find it here, though with little to no documentation or support. Ebay’s a pretty good place to get lots of basic components like LEDs, wire or pin headers.
#cosplay tutorial#cosplay 101#electronics#cosplay help#arduino#OHI Cosplay#OHI Cosplay tutorials#queadlunn
879 notes
·
View notes
Photo


Cata: Rose Quartz’s sword is a project we started in July of 2016 that ended up going on hold because life got in the way. in January 2017, Queadlunn picked up the project and finished it.
This sword is a combination of Sintra (blade) and styrene (hilt and detail pieces) with an oak dowel for the grip. We also used a belt sander, rotary tool, drill press, and power jig saw for this build. We understand not everyone has access to these tools so I’ll include alternate solutions, but having a rotary tool at the very least is recommended.
Onto the tutorial! (Note: image heavy)

This is the primary guide we used for the sword. The size of the sword depends on what you want to do. If you’re cosplaying Rose Quartz, the sword is sized to her so you’ll make it smaller than if you were cosplaying Connie or Steven. If you’re cosplaying Stevonnie, the sword is smaller than Connie or Steven, but still larger than Rose Quartz.
Or you can ignore all of that make the sword however big or small you want because it’s your sword.
The total length of our sword is 39 1/2 inches. The blade itself is 29 1/2 inches and 3 inches across. The grip is longer to accommodate two hands, but you could make it one-handed if you wanted.
For easy transportation, consider making the blade removable. The easiest way is to drill into the grip and blade a few inches, then glue a metal rod into the blade. Drop the rod into the grip and you’re done. This method will also give the blade more support, especially if you’re using EVA foam.
The Blade
(Previous post on the blade)
If you use Sintra and there’s a TAP Plastics nearby (or other place that will cut to order), a 3 feet by 3 inch piece 1/2 inch piece is only 5 dollars.
For the bevel, we used a belt sander and WM Armory’s beveling tutorial.
http://www.wmarmory.com/?p=2248
If you don’t have a belt sander but have a rotary tool:
http://www.wmarmory.com/?p=1210
The above tutorials will also work on EVA foam if that’s what you choose to make the blade out of. Make sure you practice before tackling the blade itself. It’s really easy to mess up and gouge the material. We had to get a second blade piece cut because of this.
It’s also up to how far the bevel goes. You can either bevel the entire light pink section or stop short. Our bevel only goes halfway up the light pink because we had trouble getting a full bevel to look good on both sides.
The decorative collar on the blade is 2mm EVA foam. I used cardstock to make a pattern, cut it out of foam, painted it, and glued it on. The lighter rose petal portion was a separate piece, but you can make it all one piece.
The Hilt
We ended up making two hilts. The first was completely out of EVA foam.

I ended up taking two pieces of 3 mm EVA foam, heating them up with a heat gun, then squishing them into a bowl to force the dome shape. The two pieces were glued together, the edges sanded flush, and filled with wood filler. The curved part was cut from 6 mm EVA foam and heat formed to get the curve in before I glued it to the hilt.
For structural reasons, we ended up moving to a styrene hilt. However, using EVA foam will absolutely work!

The second hilt used the exact same method as the first one, except Queadlunn used the stove to heat up the styrene. BE VERY CAREFUL WHEN HEATING PLASTIC.
The circles on the underside of the hilt are 2 mm EVA foam circles cut with the circle cutter on our drill press. You could cut the circles by hand or paint them on.
With the decorative flower piece on the hilt, we decided to go a different route and create a physical piece instead of painting it on. Queadlunn covered the hilt and the bottom of the blade with plastic wrap, put WaterWeld Expoy Putty on top of the hilt, and squished the blade down on it. That created a small lip and clear indentation of where the blade sat. Once the WaterWeid dried, Queadlunn used a rotary tool to carve the shape. The piece was later sealed to the hilt with JB Weld epoxy.
If you want to do something similar, you could probably do the same with clay.
The Grip and Pommel


You can see it assembled in the hilt picture above, but these are the separate pieces.
The grip is a an oak dowel cut to size and wrapped with leather. We got lucky and found some leather from a leather supply shop that was a close match to the color we needed. Queadlunn cut a strip of leather, glued it down as he wrapped it, then went back with leather cord painted dark purple and wrapped it around the seams.
The pommel consists of two Sintra pieces. The circle was cut using a circle cutter, then the edges cut in with a rotary tool. Instead of using white like the picture shows, we used light pink to tie the color in.
The larger pommel piece was several discs of Sintra glued together with contact cement and sanded to a taper with the belt sander. The gem housing and petals were cut with a rotary tool. The pink on the pommel is the same pink used on the hilt.
The gem itself was a plastic gem picked up from the craft foam, painted pink with Sharpie markers, and glued in with clear epoxy.
Painting the Sword
Here are the main colors we used
Dark pink (blade): Valspar Satin Thistle Field (85020)
Light pink (blade): Krylon Colormaster Ballet Slipper Satin
Hilt, pommel: Valspar Gloss Frosty Berry (85022)
Dark purple: Valspar Satin Sumptous Purple (85025)
The blade was wetsanded to make it smooth and shiny. If you don’t know what wetsanding is, I wrote a tutorial on it:
https://ohicosplay.tumblr.com/post/118296273887/the-ura-once-nearly-sacked-the-city-with-these
It’s entirely optional, but if you want some extra gloss, there you go.
The vine pattern was painted by Queadlunn. He masked the whole sword with tape* and drew out the pattern with a compass and freehand, then used a X-acto knife to cut the pattern out. He painted everything with white acrylic paint, then once it was dried, remasked it, and used pink acrylic paint to paint the center stripe.
The same was done for the vine pattern on the grip.
The inside of the hilt was painted with purple spray paint, then the two circles were glued in after.
The final seal coat is an acrylic sealer/finish in semi-gloss and we don’t be doing any weathering to keep the pristine/cartoony look. The finish you go with and if you do any weathering is entirely up to you.
Thanks for reading the tutorial! If you have any other questions, feel free to ask.
#cosplay tutorial#steven universe#rose quartz#cosplay help#prop tutorial#weapon tutorial#sword#OHI Cosplay#OHI Cosplay tutorials#OHI Lion
230 notes
·
View notes