#Cosplay DIY
Text
The Wolfkiller Cloak

So I have this thing where sometimes I see something on screen and my brain just short-circuits. It scratches my brain just right, I need to have this, I need to make this. And that’s what happened in nearly every episode of Interview with the Vampire, but especially in season 2 episode 3 “No Pain”.


This cloak has seared itself into my brain. The soft shine, the drape, the movement of the fabric (as Lestat is dragged across the floor and smashed against the wall) had bewitched me, body and mind. So I went out researching and decided to make one for myself, based on this pattern for a hooded cloak.
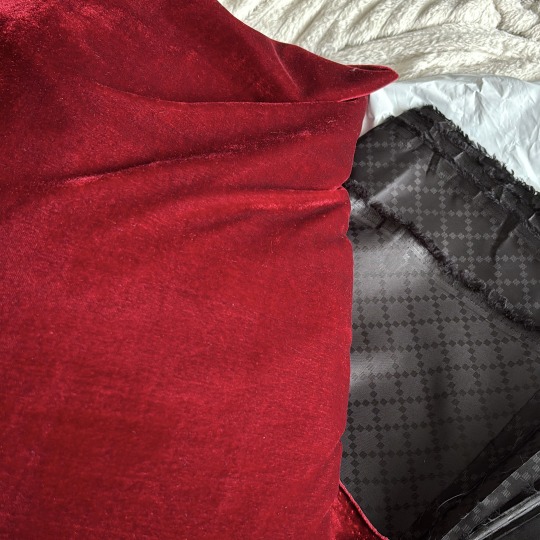
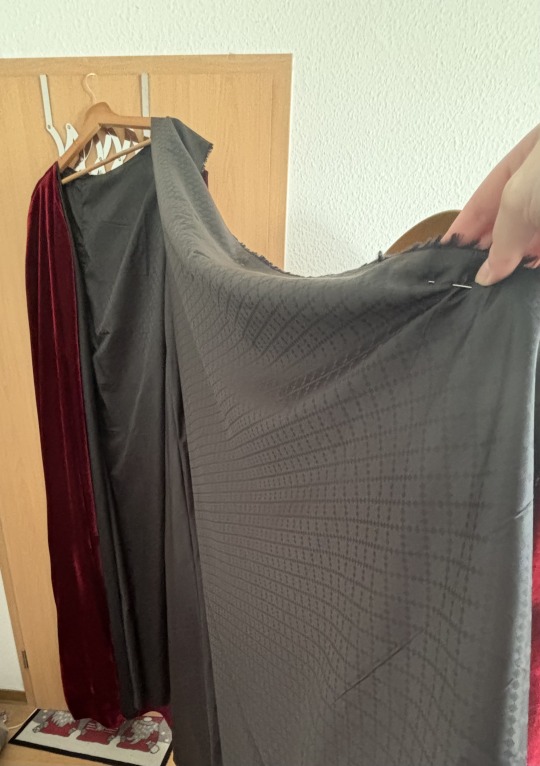
The fabric I used was stretchy velvet (for budget reasons, 6m) and a black lining fabric with a small diamond print (for fun, 4m). The pattern I used doesn't include a lining and I did think about leaving it out but in the behind the scenes footage (and when Armand smashes him against the wall, thank you for that) you could clearly see that there clearly is a dark lining on the inside of the cloak and my brain decided leaving it out just wasn't an option. So I just cut out the front and back piece twice, one velvet and one lining.
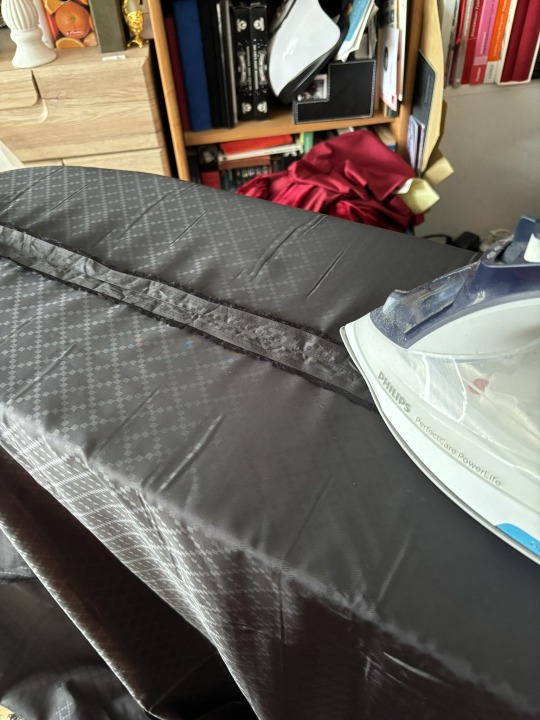
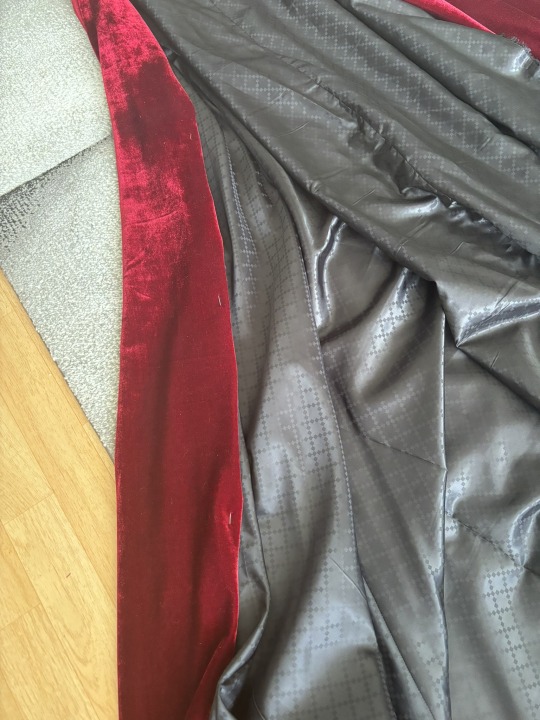
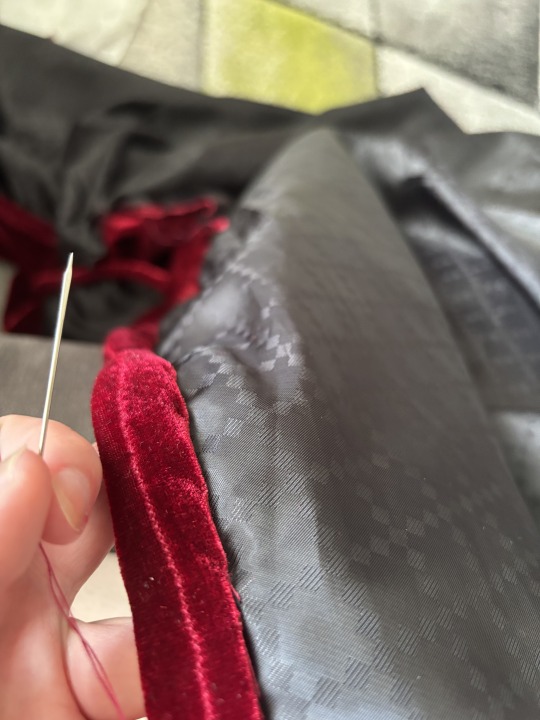
It might be 35°C and sunny outside, but you gotta press those seams. At least for the lining fabric. Then we can pin the lining to the the velvet, sew them together at the collar and start hemming the sides. Be warned. It's a lot of fabric, so you're gonna need a lot of space. I would also recommend (if you're using a stretchy fabric like me) to pin and, if you're able, even sew the hems while it's hanging on a hanger. Yes, I handstitched the sides and bottom hem. Ever since I started looking into historical reconstructions, I have kind of fallen in love with the lack of visible seams. Not to mention that hand stitching has also become something of a favorite pastime of mine while rewatching IWTV.
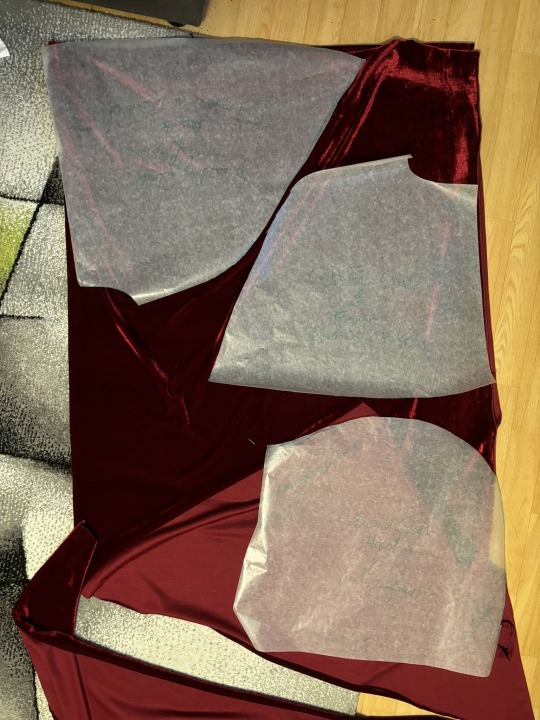
Now I shortened it, which was quite hard to do simply because it's so much fabric and I don't have a mannequin. So I hung it up, pinned where I wanted to cut it, tried it on, took a video, so I could see the where the cut would be and went from there. Took me a few tries, but I'm quite happy with how it turned out.
Now that that's done, we can attach the shorter layer and the hood. My biggest issue was finding some fur, but lucky for me, I was cat-sitting for my downstairs neighbor who has been working as a theater seamstress for 40 year and who was out of town for the weekend, visiting her son who, unbeknownst to me, also worked for a big theater company. And both of them had made it their personal mission to find me some faux fur. And they did. This incredible faux fur was everything I wanted it to be. A wolf-gray with a red shimmer and some darker spots. I was over the moon.

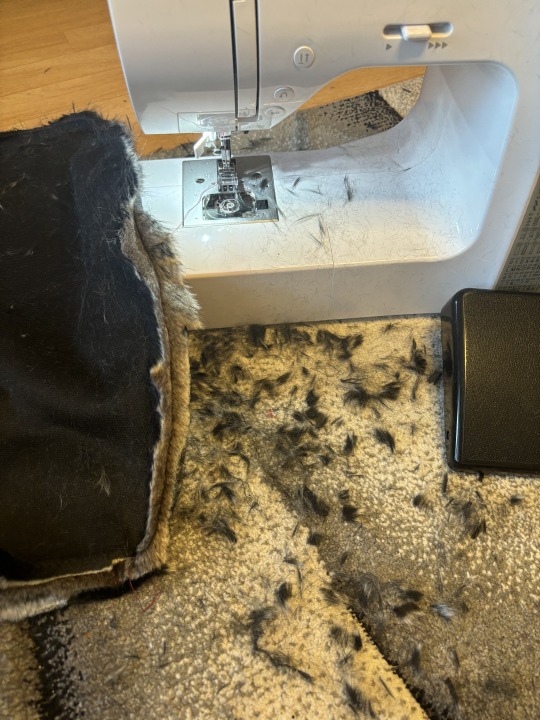
And it was totally worth coughing up hairballs for the rest of the evening. In the original pattern there actually is a hood lining, but I just replaced that with the fur. I would absolutely recommend stitching the fur and the hood together, as the pattern instructions say. Do as I say, not as I do.
The other issue I had was the fur on the hood. I had ordered a faux fur hood attachment for a winter jacket, but the look and the feel just wasn't the same. So I went on ebay, as I so often do late at night, and kind of hit the jackpot. A fox fur stole, not one person bidding on it, 3 days left to go. Yup, I got it. 30 bucks plus shipping.

I mean, come on. What a difference.
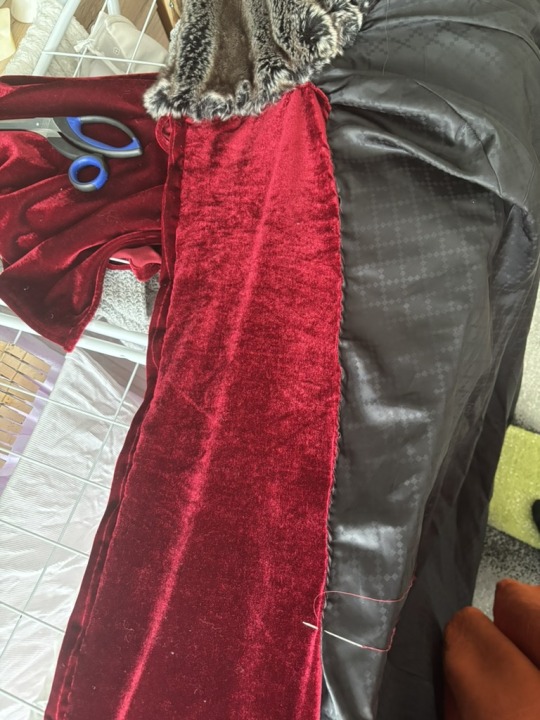

The last issue, the final problem so to speak, was the fact that there was a big border of velvet on the inside of the cloak. Now I tried attaching a long piece of velvet fabric, but it just wouldn't sit right and after the 3rd time attaching and reattaching and getting increasingly frustrated I simply took the easy way out. I cut out a triangular piece of velvet and attached it right where the cloak would open. Sue me.

And there you have it.


And because it's summer rn and I don't have the energy to head outside at night to take some actual pics, I decided to whip something up in photoshop.

#amc iwtv#iwtv#interview with the vampire#iwtv amc#interview with the vampire amc#amc lestat#lestat#iwtv cosplay#iwtv costume design#cosplay#cosplayer#cosplaying#cosplay costumes#my cosplay#sam reid lestat#lestat de lioncourt#the vampire lestat#iwtv lestat#iwtv s2#iwtv season 2#sewing project#sewing#fabric#cosplay diy#diy
40 notes
·
View notes
Text
Hey ghouls guess what.
I made this! Or am making it, rather. Still need to finish off tacking/gluing down edges, and I'm sure figuring out how to attach the hose is going to be an adventure, but this has been a really fun project.


I'm absolutely certain I've spent more on supplies and undoubtedly more in hours than it would cost to purchase a good replica, but building it to fit me and also learning/practicing a bunch of skills has a lot of value, too. Making this was a compromise with myself because I'm buying a lot of other pieces - boots, patches, shirt, etc.
This'll be for Halloween and I still plan on making the vest, chest harness, and cape, so I gotta keep plowing forward.
#the band ghost#ghost cosplay#ghost band cosplay#nameless ghouls#cosplay diy#impera#era 5 ghouls#if you have ghost#you have everything
24 notes
·
View notes
Text
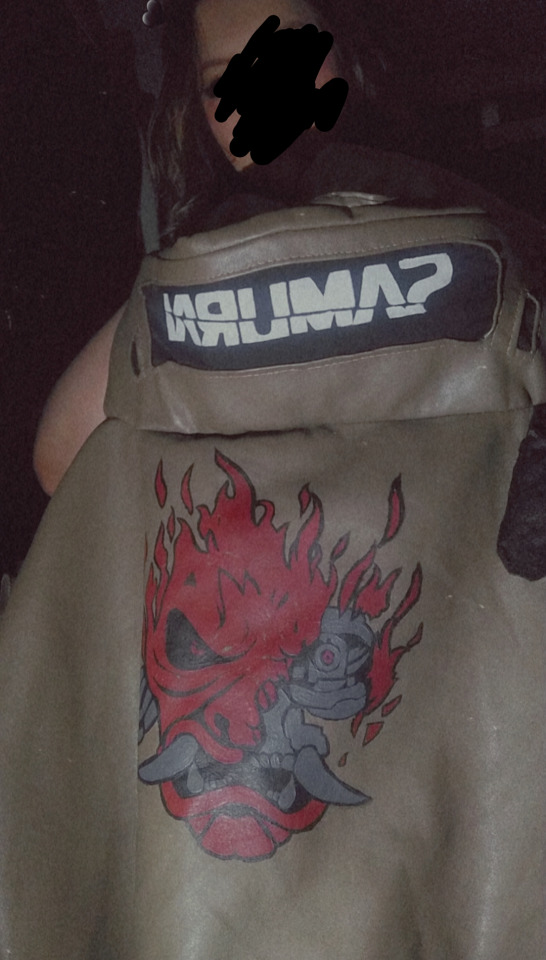
Making Johnny's jacket !!!! (◍•ᴗ•◍)❤ !! WIP !!


Still making the sleeves ༎ຶ‿༎ຶ
#cyberpunk 2077#cyberpunk#johnny silverhand#cyberpunk 2077 johnny#silverv#cyberpunk 2077 male v#cyberpunk johnny#male v#female v cyberpunk#v cyberpunk#male v cyberpunk#cyberpunk 2077 cosplay#handmade cosplay#hand made#handmade#hand sewn#wip#cosplay diy#cosplay
31 notes
·
View notes
Text


sooooo here’s some amazing photos of my mal cosplay from descendants 2 😭
between work and stuff it took about 2 months to complete and is far from perfect but it’s easily my FAVOURITE cosplay that i’ve ever done and i cannot wait to make more descendants fits in the future <33
(insta @ azzy.cxsplay)
#disney descendants#descendants#mal#cosplay#sewing#cosplay diy#disney#disney channel#mal cosplay#dove cameron#dcom#descendants 2
18 notes
·
View notes
Text


I'm here to steal your heart or something
costume and wig made by me. 3D file for mask by @/tavi_cosplay_props (insta). more photos to come probably
#my face#my cosplay#cosplay#league of legends#league#heartsteel#heartsteel yone#yone#cosplay diy#riot games#yes the mask lights up
18 notes
·
View notes
Note
i am so so SO curious as to how u made your mensis cage it looks absolutely fantastic (i wanna eventually make my own too :])
omg hi! I made a twitter thread about it actually :]
Crossposting here in case any of y'all can't access it:
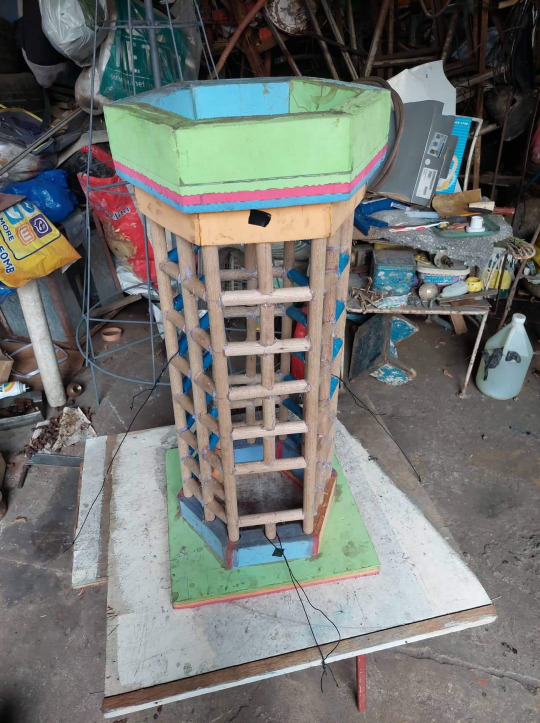
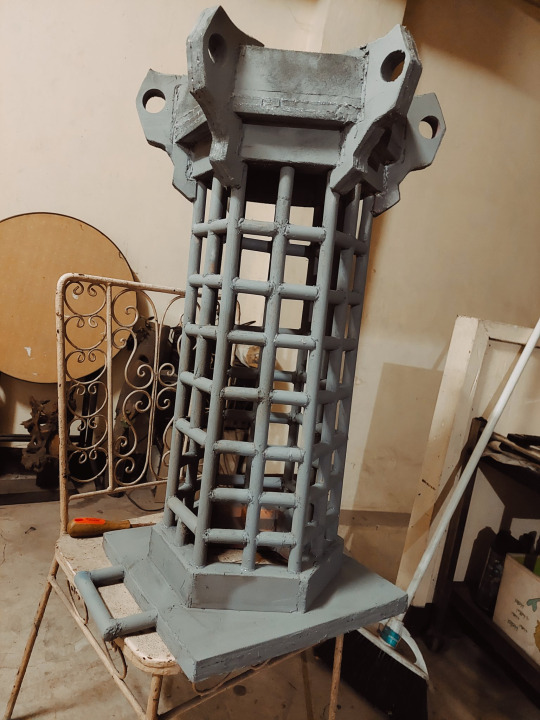
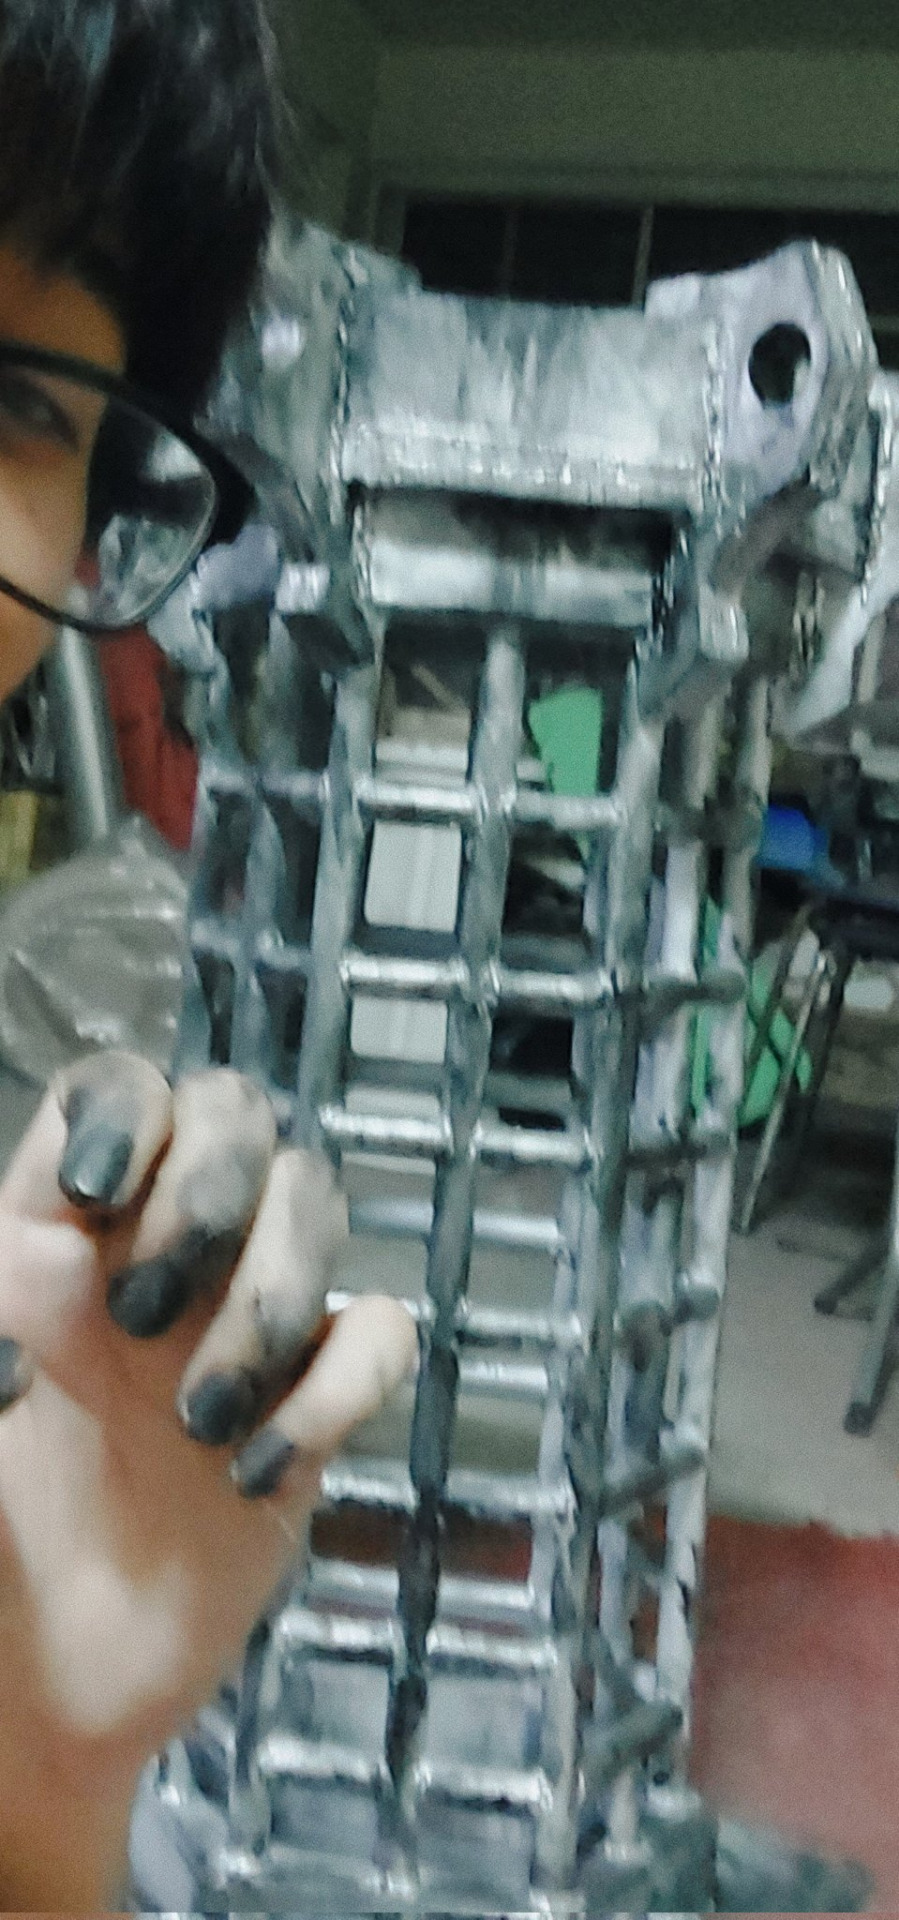
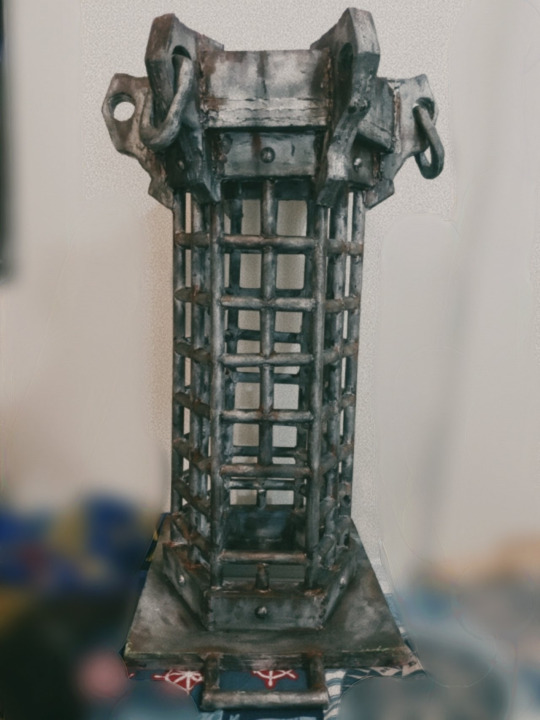
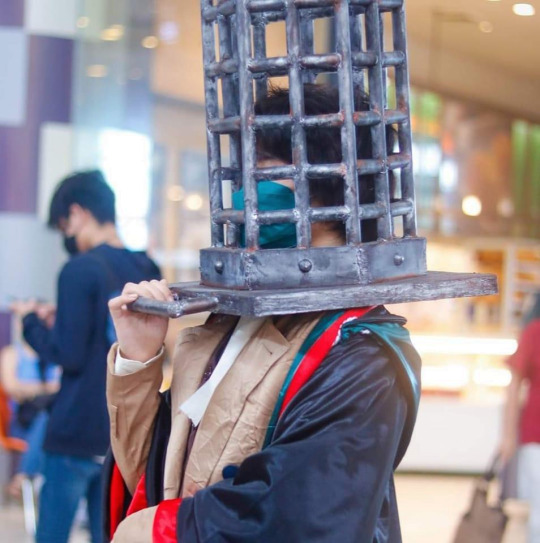
Woz's Mensis Cage DIY (Feat. Valtr's helmet)
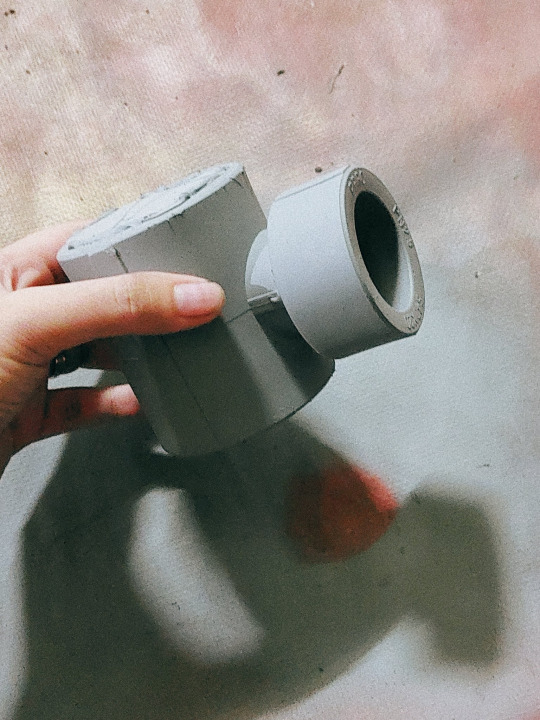
It was a lot of trial & error— we used a combo of wood dowels and pvc pipes for the bars, tho in retrospect having em all in pvc woulda been lighter 🥲

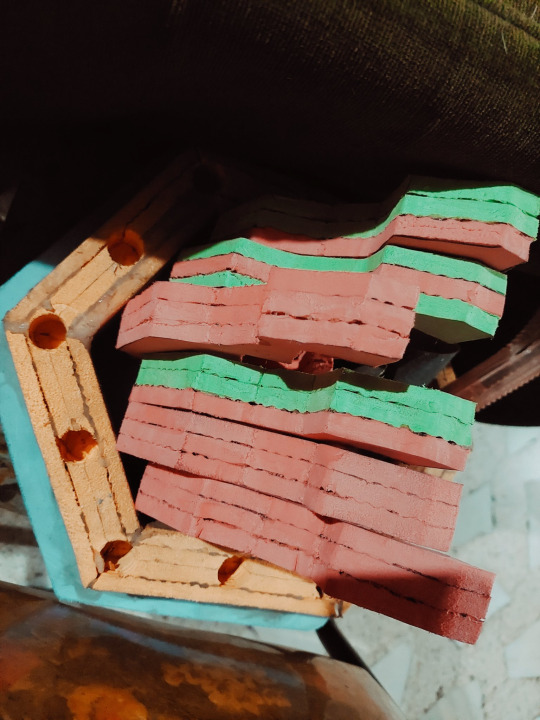
Base and top are made from foam! We don't have craft foam where I live so we used the foam from those puzzle playmats for toddlers, and layered them to the right thickness
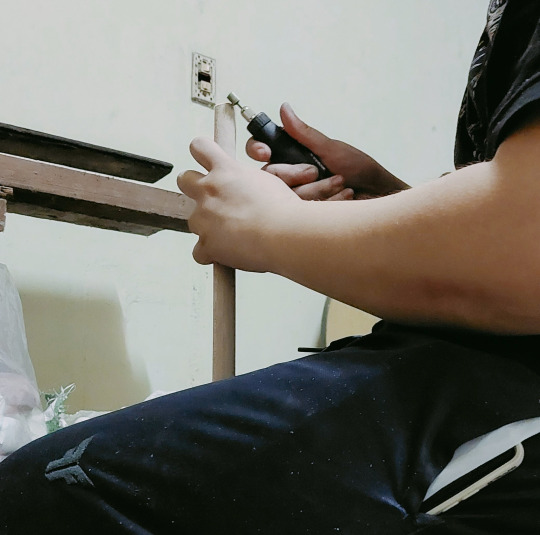
Lots of dremel work to sand out the edges—had to cut all of em w an exacto knife


We glued them together with contact cement and filled the gaps with caulk, then dremel again
Also drilling holes for the bars + the top
Behold. Gay mensis cage

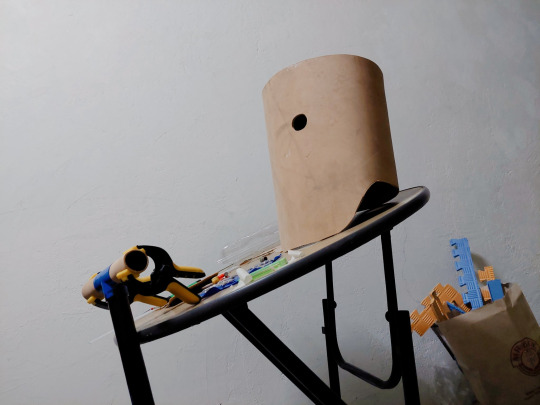
We also started on Valtr's helmet! It was really floppy foam so we sandwiched some chipboard between two pieces to make it stiff
top is leftover playmat foam that we cut just enough so it fits snugly
Tried not to use a lot of contact cement and more regular glue here bc fumes
Primed the cage!!! (also the helmet once it dried)

Used hot glue to seal remaining cracks + smooth "foamy" places
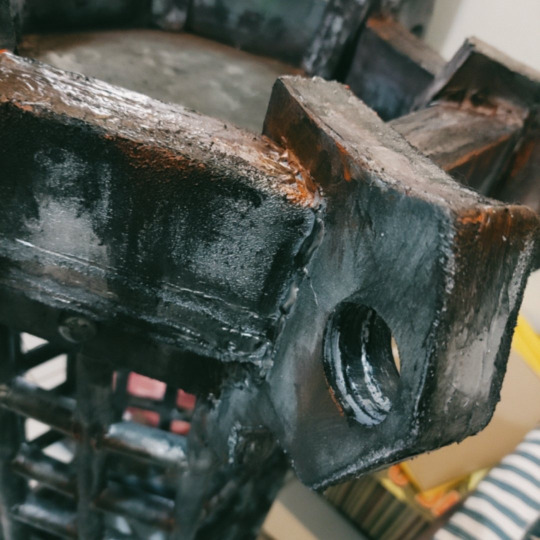
Sprayed silver paint as the base then weathering w acrylics
Used a sponge + brushed black paint to simulate soot/rust, esp corners + edges
Tried to also get the inside. used my hands to make it look spotty + dirty


Chain link is made out of foam! We made em seperately.
Valtr's belt buckle is an old button pin we repainted. Mensis bolts are just round buttons that we sanded the back off.
Didn't have time to make Valtr's belt lantern but a pipe did the trick. The lantern top was made of foam

To connect the chains to the cage we cut one side then fed it thru the hole. Since it's foam, it's pretty flexible. We reconnected it with hot glue and it's like good as new
The fun thing abt hot glue is that if you paint over it, it looks like welding :] perfect for the cage

Tadaaaa
All the rust details is acrylic. Black then brown then bright orange
Brushing them into the corners n crevices really helped sell the look! Especially the water stains on top/under the holes
Anyway ya that's it!! Thanks for reading :]
I learned a lot from this.
We started the cage Aug 6 and finished quite literally the morning of the con, Sept 17. Worked only weekends tho bc we had day jobs
It's not heavy for me personally, tho I would def recommend using pvc instead
Feel free to substitute the materials with whatever you have available in your area, and please take into account the total weight of it + the robes! I live in a tropical country so I had to make sure the fabrics were light + breathable enough, and that the cage wasn't too heavy to walk around in for long amounts of time.
good luck!! :] feel free to tag/message me if you ever base it off mine, I'd LOVE to see what y'all come up with! (But also it makes my heart feel v fuzzy)
#micolash host of the nightmare#micolash#bloodborne#soulsborne#mensis cage#cosplay#cosplay diy#ask#mothrodent
43 notes
·
View notes
Text
I manage to finish the Hux cosplay in time for the event. Unfortunately I couldn’t take a lot of photos but I had fun!!!
I didn’t expect many Star Wars cosplayer because it’s a comic con dedicated mostly to anime…anyway there was a cute guy who wanted a photo with me and I was so honoured 😂
Here are some photos.


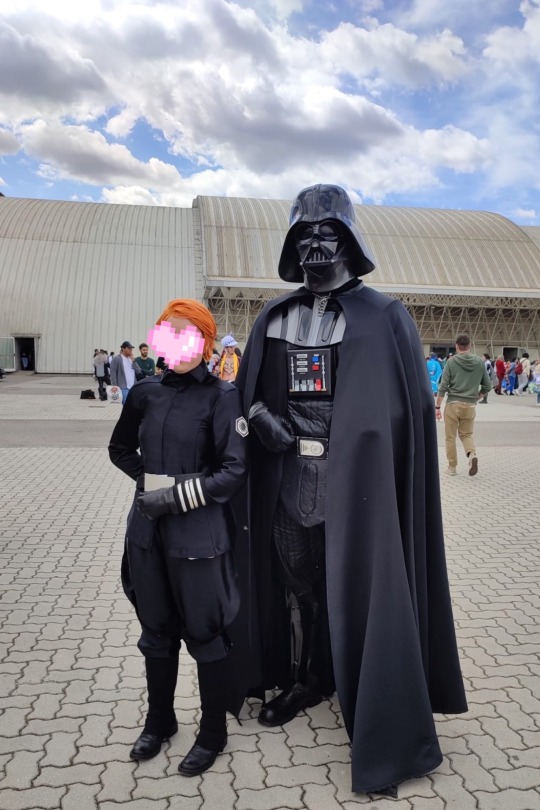
It was my first time wearing the costume and some details need to be fixed because they were literally falling apart 😂
#hux cosplay#general hux#armitage hux#star wars cosplay#cosplay diy#cosplay on a budget#general hux cosplay
56 notes
·
View notes
Text
youtube
Athena Cykes DIY Cosplay Boots - The Opal Empress
#athena cykes#ace attorney#ace attorney cosplay#the opal empress#cosplay video#Athena Cykes cosplay#phoenix wright ace attorney#phoenix wright#ace attorney dual destinies#apollo justice ace attorney#apollo justice#cosplay diy#cosplay shoes#cosplay boots#diy shoes#diy boots#cosplay#cosplay tutorial#ace attorney art#ace attorney fanart#逆転裁判#逆転裁判5#希月心音#逆転裁判コスプレ#コスプレ#Youtube
29 notes
·
View notes
Text
youtube
Make a pair of spike bracelets for yourself!
Pattern available here
36 notes
·
View notes
Text
Furiosa Belt
Furiosa belt: Materials; floor mat foam, 2 dog collars (nylon) with buckle, faux leather belt (cut to smaller length) & foam clay and craft foam. - Just using materials that I already have and that I want to use up.

I cut out two pieces of the floor mat foam and glued it together. I put a paper doily in between the foam- not necessary, I just wanted to use up what I had around. I cut an old leather belt to appropriate length and glued the two dog collars to the belt. I then glued the dog collars to the piece of foam. (hot glue)

Afterwords, I painted the circular piece of foam black- waited for that to dry.
I used up foam clay I've had for a while and it worked out perfectly.
I was able to copy the design furiosa had with foam clay and I spray painted that silver after the clay has dried.
I used craft foam scrapes for the "chain". I just cut stripes of craft foam and hot glued them together like so..
I was able to use materials that I've already have, use craft supplies that I wanted to use up.
#crafting#crafts#diy#cosplay#cosplay materials#furiosa#mad max#mad max furiosa#furiosa belt#cosplay crafting#cosplay diy#furiosa cosplay
2 notes
·
View notes
Text


❤️🗡️
#evie frye#assassins creed syndicate#the frye twins#cosplay#cosplay diy#evie frye cosplay#assassins creed cosplay
10 notes
·
View notes
Text
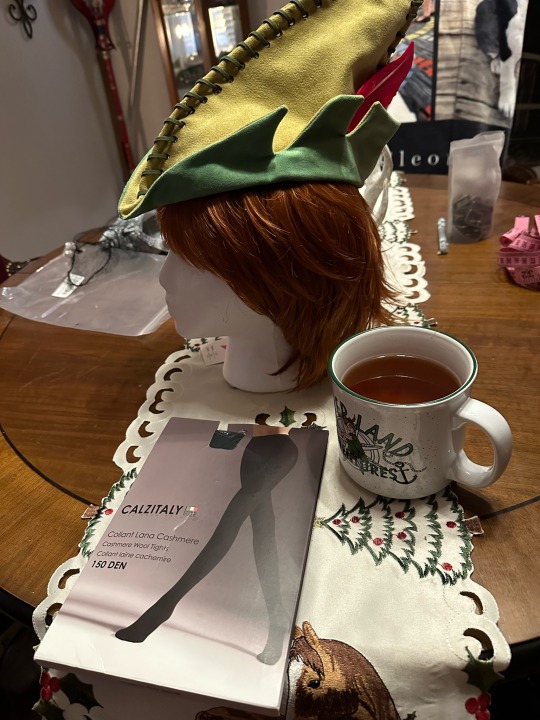
Tights and wig have arrived! Now for the sword and shoes!
6 notes
·
View notes
Text
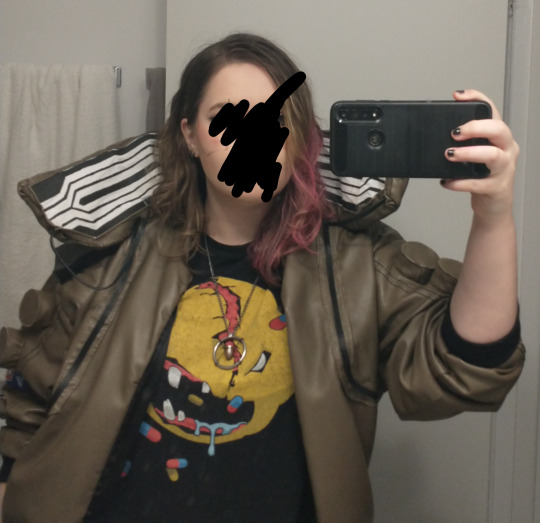
v cosplay!!!!!! in the summer i hand made Johnny's jacket for a convention 🔥🔥🔥 and yes it does light up. my shoes lit up too

#cyberpunk#cyberpunk 2077#art#cyberpunk 2077 cosplay#cyberpunk 2077 v#female v#male v#cyberpunk 2077 male v#male v cyberpunk#female v cyberpunk#cosplay#handmade#hand made#handmade cosplay#handmade costume#cosplay diy#diy#diy projects#im cryin#convention#cyberpunk art#hand made counts as art? i hope#me irl#so swag#i unironically love it#i still wear v's necklace every day its kinda badass ngl
13 notes
·
View notes
Text
hi cosplayer sewers or somehting i dunno!! so i wanna get into sewing my own cosplays n using EVA foam n i have VERY MINIMAL experience in sewing. r there any general tips or something i could get?
5 notes
·
View notes
Text


finally finally finally added the little ruffles to the end of the sleeves for Kasumi
13 notes
·
View notes
Text


My best friend and one of my aunties helped me with the more fiddly bits like the frame and attaching the foam and fur fabric.
My sister tried to help me with the gloves too. It proved a bit too difficult and I just brought gloves instead.
#my art#my cosplay#sonic cosplay#sonic the hedgehog cosplay#sonic the hedgehog#sonic fandom#sonic the hedgehog fandom#cosplay#cosplaying#cosplay progress#cosplay diy#sonic cosplay diy
4 notes
·
View notes
Last Seen Blogs

totally-not-depressed-teenager
It's Supposed To Be An Art Blog

noturlondonboy
London
In My WLIT Era

thewattomumma
thewattomumma

daldilvsbammie
daldi tired