#PSD to HTML Convert Templates
Explore tagged Tumblr posts
Visit Tumblr Blog
Explore Tumblr blogs with no restrictions, modern design and the best experience.
Last Seen Tumblr Blogs


Fun Fact
Tumblr was created by web developers David Karp and Marco Arment.
Text

I will make html email template
Fiverr Link https://www.fiverr.com/s/R7GykV2
Do you need to convert PSD to Html or sketch to Html or Xd to Html or Ai to Html or Zeplin to Html or Figma to Html or Invision to Html or Tailwind CSS#BooksWorthReading #PahalgamTerroristAttack #KuCoin #GalxeID #Pakistan #AMAs#wordpressdevelopment #socialmediamarketing #hosting #shopify #php #wordpresshosting #marketingdigital #websitedesigner #blogger #onlinemarketing #wordpressdesigner #wordpresswebsites #websites #ui #wordpressplugin #ux #developer #uidesign #coding #wordpresstips #elementor #contentmarketing #javascript #technology #google #development #programming #smallbusiness #instagram #cms
0 notes
Text
PSDtoHTMLNinja provide professional PSD to Email HTML conversion services. Get pixel-perfect, responsive, and SEO-friendly code for fast-loading websites today!
#PSD to Email HTML Conversion Services#PSD to Email HTML Conversion#PSD to Email HTML#PSD to Email HTML Service
0 notes
Text
Looking for best PSD to HTML converter tools? We have compiled a list of best websites that can help you convert PSD to HTML. In order to deliver a well balanced website, designers are required to focus over several vital attributes. It includes the over look and feel with navigation ease, semantic, web page loading time, compatibility over multiple browsers and a lot more. This could be a cumbersome task for a designer unless he/she possesses years of experience, good karma (valuable practice) and absolute expertise in the platform. Thus, it is advisable to consider a PSD to HTML services and achieve a remarkable web design that embraces the latest trends without getting deep into coding. Indubitably, there are several web development companies that offer invaluable PSD to HTML conversion services at affordable prices. However, with so many options around it often become hard to choose an appropriate service provider to efficiently achieve the ultimate goal. This article will offer you a list of the top-notched PSD to HTML service providers for your consideration. So that, you can further streamline your search as per your project requirements and seek the best suitable service provider. Let's have a look at the best PSD to HTML websites available out there. Markupcloud Backed with a team of over 150 professionals, Markupcloud offers incredible services. It not only allows one to convert their design into HTML, but one may even choose to convert into a desired CMS (including Drupal, WordPress, Magento and Joomla). They offer seamless communication and 24/7 technical support. Moreover, its money-back guarantee further scrutinize their services and ensure surefire results. Designs2HTML High end responsive designs are in trend and you can conveniently attain it by hiring the affordable services of Designs2HTML. It strives to deliver outstanding performance with utmost client's satisfaction. It is a reputed and reliable company that is well known in the web development realm. With over 5 years of experience, it is consistently paving the path towards success. You can completely rely on the company, as it's backed by a team of over 250 expert developers. Most interestingly, it offers absolutely free support for 30 days. Psd2html Available since 2005, this service provider has garnered an amazing popularity across the globe. They allow one to convert their Photoshop documents into the corresponding HTML/CSS or a Content Management System (CMS) at best prices. It also supports Drupal, WordPress and JS programming. You can even reap the benefits of its affordable services for transforming your design into an email template. WordPrax Create a conspicuous online presence and convert your dream design into reality by hiring the suitable services from WordPrax. Its remarkable services make it stand ahead of its competitors. It is highly recommended to the folks seeking for WordPress development. Whether you want to customize your WP theme, plugin or simply want your PSD document to be converted into a WP site, WordPrax offerings add to its viability. W3 Markup The absolute services of W3 Markup allow one to convert their Photoshop design into HTML or CMS themes. With the capability to handle Ajax, Cufon, jQuery and so forth, it possesses great expertise in the domain and thus, ensures high end results. CodeMyConcept Whether you have a design in PSD format or in any other format, CodeMyConcept offers services to convert an image file into SEO-friendly HTML and CSS. It also offers services to convert the design into CMSs including, WordPress, Magento, Drupal, etc. XhtmlWeaver While supporting the latest HTML5 and CSS3, XhtmlWeaver delivers amazing conversion results. It is well-known for offering agile web development, and embraces W3C standards, clean jQuery, and a lot more. The affordable and high end services of XhtmlWeaver make it a preferred choice. Crazyxhtml This PSD to XHTML conversion organization offer hand-written code, which is cross-browser compatible.
Moreover, it also ensures worthy conversions for email templates as well as WordPress. You may choose a suitable service and get your design converted into a proficient website. Markup4U Get your PSD design converted into a functional website within a day by hiring the suitable services of Markup4U. It delivers pixel-perfect website that is semantic, search engine optimized, and easily accessible. XHTMLized Serving its clients with incredible services since 2006, XHTMLized offers services to efficiently convert your design into HTML or WordPress. In fact, it also ensures a responsive design, thus, allows one to conveniently target colossal audiences using different mobile devices. Convert2xhtml Convert2xhtml offers excellent conversion services for PSD to basic HTML or to Joomla, WordPress, vBulletin and PSPBB. It offers hand-coded results at affordable prices within efficient turnaround time. Moreover, it also makes sure that the end result is cross-browser compatibility. Direct Basing Direct Basing delivers quality web development solution that is cross-browser compatible and search engine optimized. It possesses highly skilled programmers who help convert your design into an impressive and fully functional website. It even allows one to choose several resourceful options as per their requirement; for instance, you may opt desirable JavaScript features or custom fonts if required. Htmlburger Its results ensure an absolute conversion of PSD documents into equivalent hand coded, W3C compliant HTML and CSS markup. All the services of htmlburger will offer a lightweight and cross-browser compatible website. Most importantly, it facilitates its clients to first test the result without imposing any financial obligation. XhtmlChop The effective and proficient services of xhtmlChop ensure a consummate conversion of your designs into an equivalent pixel perfect HTML code. They support various image files like PSD, ANG and AI. It offers responsive designs and high end markup. They don't just offer conversion to HTML, but also provide services to convert a design into an email and CMSs (including, WordPress, Magento, Drupal, Joomla, and more). Moreover, they also provide a free support for 180 days. Psdgator This conversion service provider is well known in the industry for its quality services. It proficiently transforms an image file into HTML and CSS while ensuring the W3C standards. It offers pixel perfect and semantic conversions. WordSuccor Ltd. Established in 2010, WordSuccor Ltd. has become one of a popular PSD to HTML conversion service providers in the industry. They have experience of delivering over 1000 WordPress sites with good customer rating and offer you one-stop-solution for PSD/HTML to WordPress theme conversion. Final Thought Consider the aforementioned top PSD to HTML conversion service providers and choose the best suitable website. And, efficiently convert your design into an effective and impressive website. However, it is recommended to review their client testimonials and their portfolios before investing in the conversion services of any web development company. Also, don't forget to seek a Non Disclosure document before beginning the conversion process. This is more than imperative as it helps secure your design and info included in your design. This post is brought to you by Samuel Dawson, working as front-end developer for Designs2HTML Ltd. a leading PSD to HTML conversion company and he shares concrete information, latest trend & tips on front-end development technologies.
0 notes
Text
How to Handle Complex PSD Designs During WordPress Conversion
Converting complex PSD designs to WordPress can be a challenging task, but with the right approach, you can achieve a seamless transition. Here’s a step-by-step guide to help you navigate the PSD to WordPress conversion process efficiently.
1. Understand the Design Thoroughly
Before starting the PSD to WordPress conversion, ensure you fully understand the PSD design:
Analyze Layout: Break down the design into sections like header, footer, content, and sidebar.
Identify Features: Note any special features such as sliders, forms, or interactive elements.
Check Responsiveness: Ensure you understand how the design should adapt to different screen sizes.
2. Prepare Your Tools
Equip yourself with the necessary tools for a successful PSD to WordPress conversion:
Design Software: Use Adobe Photoshop or a similar tool to inspect and slice the PSD.
Development Environment: Set up a local WordPress environment for testing.
Plugins and Themes: Install necessary plugins and choose a base theme if needed.
3. Slice the PSD
Slice the PSD into manageable pieces for the PSD to WordPress conversion:
Header and Footer: Extract these elements as separate images.
Content Areas: Slice images used in the content area, such as backgrounds and icons.
Buttons and Icons: Save these as individual images for easy integration.
4. Convert to HTML/CSS
Create a static HTML/CSS version of the design as a precursor to the PSD to WordPress conversion:
HTML Structure: Write clean, semantic HTML to match the design structure.
CSS Styling: Apply CSS to achieve the visual appearance. Use responsive design techniques like media queries for mobile optimization.
5. Integrate with WordPress
Convert your static HTML/CSS into a WordPress theme in the PSD to WordPress process:
Create a Theme: Set up a new WordPress theme directory and create necessary files (style.css, index.php, etc.).
Template Files: Break down the HTML into WordPress template files (header.php, footer.php, sidebar.php).
Theme Functions: Add theme support features in functions.php and enqueue styles/scripts properly.
6. Implement Functionality
Add dynamic functionality during the PSD to WordPress conversion:
Custom Post Types: Create custom post types if the design requires special content types.
Widgets and Menus: Set up widgets and custom menus as needed.
Plugins: Integrate plugins to add features like sliders, contact forms, or SEO enhancements.
7. Test Thoroughly
Ensure everything works as intended:
Cross-Browser Testing: Check compatibility across different browsers.
Mobile Responsiveness: Verify that the site looks good on various devices.
Performance: Test site speed and optimize images and scripts for better performance.
8. Debug and Optimize
Fix any issues that arise:
Debugging: Use debugging tools to identify and resolve errors.
Optimization: Optimize CSS and JavaScript files, and implement caching to enhance site speed.
9. Deploy and Monitor
Deploy the site to the live server:
Migration: Use migration tools or plugins to move from the local environment to the live server.
Monitor: Keep an eye on the site’s performance and user feedback to make necessary adjustments.
10. Documentation and Maintenance
Document the conversion process and plan for ongoing maintenance:
Documentation: Write detailed documentation for future reference.
Updates: Regularly update WordPress, themes, and plugins to ensure security and functionality.
By following these steps, you can effectively handle complex PSD designs during the PSD to WordPress conversion, ensuring a smooth transition from design to a fully functional website.
0 notes
Text
What is PSD to HTML conversion? What is the use of PSD to HTML conversion?
PSD to HTML conversion is the process of transforming a design file created in Adobe Photoshop (PSD) into a functional HTML/CSS webpage. In simpler terms, a web designer typically creates the layout and design of a website in Photoshop, and then a developer converts that static image into a coded version using HTML, CSS, and sometimes JavaScript.
Steps in PSD to HTML Conversion:
Designing the Layout: First, the website design is created in Adobe Photoshop as a PSD file.
Slicing the PSD: The design is sliced into different sections or components, such as header, footer, images, and buttons.
Writing HTML/CSS: After slicing, developers start coding the layout with HTML for structure and CSS for styling, ensuring it looks like the original PSD design.
Adding Responsiveness: The HTML page is often made responsive using CSS media queries or frameworks like Bootstrap so that it looks good on different devices.
JavaScript Integration: Sometimes JavaScript or jQuery is added to implement interactive elements like sliders or drop-downs.
Use of PSD to HTML Conversion:
Visual Precision: It allows developers to faithfully recreate a design that matches the designer’s vision.
Custom Web Design: PSD to HTML conversion is useful for creating fully customized, unique website designs instead of using pre-made templates.
Cross-Browser Compatibility: Developers ensure that the resulting HTML webpage works smoothly across various browsers and devices.
SEO-Friendly: When done correctly, it can result in a clean, well-structured code that improves website SEO and load times.
In short, PSD to HTML conversion bridges the gap between design and development, transforming creative website layouts into fully functional, responsive websites.
0 notes
Text
The Ultimate Guide to PSD to WordPress Conversion: Tips, Tools, and Best Practices
Are you looking to transform your stunning PSD designs into a fully functional WordPress website? You’re not alone. Many designers and developers face the challenge of converting their Photoshop files into a dynamic online presence. With the right approach, tools, and knowledge, this process can be smooth and efficient. WordPress powers over 40% of websites on the internet today. This popularity stems from its flexibility, ease of use, and extensive range of themes and plugins. By converting your PSD files to WordPress, you're not just creating a website; you're crafting an engaging user experience that reflects your unique vision. In this ultimate guide to PSD to WordPress conversion, we’ll explore everything you need—insightful tips, essential tools, best practices for success—and even highlight common pitfalls to avoid along the way. Whether you’re a seasoned developer or just starting out in web design, you'll find valuable information here that will elevate your project from concept to reality. Let’s dive in!
What is PSD to WordPress Conversion?
PSD to WordPress conversion is the process of transforming a Photoshop design file (PSD) into a fully functional WordPress website. Designers often create stunning layouts and visuals in Photoshop, but those designs need to be translated into code for web use. This conversion involves several steps, including slicing the PSD file, coding it with HTML and CSS, and integrating it with WordPress themes and functionalities. The goal is to maintain the original design's aesthetics while ensuring that it performs well on various devices. By converting your PSD files into WordPress format, you harness the power of this popular content management system. This allows users to easily update content without diving back into complex coding or graphic design tools. It’s about making your creative vision accessible online while leveraging WordPress's robust features for optimal user engagement.
The Benefits of Converting from PSD to WordPress
Converting from PSD to WordPress opens up a world of possibilities for website design and functionality. One major benefit is the flexibility that WordPress offers. This platform allows you to easily customize your site without needing extensive coding knowledge. Speed is another significant advantage. Once your PSD file is transformed into a fully functional WordPress theme, your website can load faster. This not only enhances user experience but also positively impacts SEO rankings. Moreover, utilizing WordPress means access to countless plugins and tools. These can add features like contact forms, galleries, or e-commerce capabilities with just a few clicks. Security updates and support are readily available through the WordPress community. Regular updates help protect your site from vulnerabilities, giving you peace of mind as you focus on content creation and growth.
Step-by-Step Guide to Convert PSD to WordPress
Converting a PSD file to WordPress can seem daunting, but breaking it down makes it manageable. Start by slicing your PSD design into individual images. Tools like Adobe Photoshop allow you to export these assets easily. Next, set up a local development environment using software like XAMPP or MAMP. This helps create a sandbox for testing your site without affecting the live version. Install WordPress on this local server and choose an appropriate theme that aligns with your design structure. Now comes the coding part. Create custom templates using PHP files in your theme folder. File formats such as header.php, footer.php, and sidebar.php will be essential here. Use CSS to style each component according to your original design while ensuring responsiveness across different devices is crucial at this stage. Integrate necessary plugins for added functionality before launching everything on the web host of your choice!
Top Tools for PSD to WordPress Conversion
When tackling PSD to WordPress conversion, the right tools can make all the difference. One standout tool is Adobe XD. It streamlines design collaboration and allows for easy export of assets. Next up is Avada, a versatile theme that simplifies the conversion process while offering extensive customization options. Users appreciate its drag-and-drop interface, making it accessible even for beginners. Another powerful option is Elementor. This page builder integrates seamlessly with WordPress and provides real-time editing capabilities. Its library of templates helps speed up development time significantly. Don’t overlook plugins like WP All Import either. They enable smooth data migration from your PSD files into WordPress without losing any vital information. There’s Figma—a favorite among designers for its collaborative features and seamless integration with various coding tools. Each of these tools enhances efficiency in converting designs into functional websites.
Best Practices for Successful PSD to WordPress Conversion
To achieve a seamless PSD to WordPress conversion, start with well-structured designs. Keep your layers organized in Photoshop. Label them clearly for easier identification. Next, focus on responsive design. Ensure that the final website looks great on all devices, including tablets and smartphones. A mobile-friendly site is crucial for user experience and SEO. Optimize images before uploading them to WordPress. Compress files without sacrificing quality to improve loading speeds. Use a child theme during development if you're customizing an existing theme. This approach preserves original code while allowing you to make changes safely. Consistently test your site throughout the process. Check functionality, browser compatibility, and responsiveness regularly to catch issues early. Adhere closely to WordPress coding standards when converting HTML/CSS from your PSD files into PHP templates. Clean code enhances performance and maintainability over time.
Common Mistakes to Avoid in the Conversion Process
One common mistake during PSD to WordPress conversion is neglecting responsive design. Failing to ensure your site looks great on all devices can alienate users. Another pitfall is not optimizing images before uploading them. Large files slow down page loading, negatively affecting user experience and SEO rankings. Many forget about proper coding standards as well. Messy code can lead to maintenance headaches later on. Ignoring browser compatibility also poses issues. Always test the website across different browsers to maintain uniformity in appearance and functionality. Skipping testing phases is a critical error. Thoroughly check links, forms, and overall performance before launching the site to avoid frustrating your audience with broken elements or glitches.
Conclusion
When it comes to converting PSD files into functional WordPress websites, understanding the process is crucial. With the right tools and practices in place, you can create a stunning website that meets your needs and appeals to your audience. The benefits of transitioning from PSD to WordPress are numerous. You gain flexibility, ease of use, and access to countless plugins that enhance functionality. By following a step-by-step guide and utilizing top-notch tools specifically designed for this conversion, you can streamline the entire experience. It's essential not only to focus on technical aspects but also on best practices throughout the process. Avoiding common pitfalls will save time and ensure a smoother transition. With careful planning and execution, mastering PSD to WordPress conversion opens doors to endless possibilities for creating beautiful websites tailored perfectly for users' experiences. Embrace these guidelines as you embark on your journey into web development using WordPress!
0 notes
Text
Website Design Company in Tiruppur
At CV World, we are dedicated to bringing your digital vision to life. Our expert team offers a comprehensive range of services tailored to meet your unique needs and help your business thrive in the digital landscape.
Our Services:
1. Website Design
Crafting visually appealing and user-friendly websites that represent your brand identity.
2. Ecommerce Development
Building robust online stores with seamless shopping experiences to boost your sales.
3. Website Speed Optimization
Enhancing website performance to ensure fast loading times and improved user satisfaction.
4. WordPress Blog Creation
Setting up and customizing WordPress blogs to engage your audience with compelling content.
5. PSD to HTML Conversion
Converting your PSD designs into high-quality, responsive HTML websites.
6. Shopify Website Design
Designing and developing Shopify stores to help you succeed in the ecommerce space.
7. Google My Business Creation
Setting up and optimizing your Google My Business profile to enhance your local presence.
8. Graphic Design
Creating stunning visuals that capture attention and communicate your brand message effectively.
9. CRM Development
Developing custom CRM solutions to manage and streamline your customer relationships.
10. Website Migration
Smoothly transitioning your website to a new platform or hosting provider with minimal downtime.
11. SEO Services
Implementing effective SEO strategies to improve your website’s visibility and search engine rankings.
12. Clean a Hacked Website
Securing and restoring hacked websites to ensure your online presence is safe and sound.
13. Landing Page Creation
Designing high-converting landing pages that drive traffic and generate leads.
14. PSD To WordPress Conversion
Converting your PSD designs into fully functional WordPress websites.
15. Email Template Creation
Designing and coding responsive email templates that look great on any device.
16. Website Maintenance
Providing ongoing support and updates to keep your website running smoothly and securely.
17. Digital Visiting Card Creation
Designing and developing digital visiting cards to make a lasting impression.
18. Resume Website Creation
Building personalized resume websites to showcase your skills and achievements professionally.
Why Choose CV World?
Expertise: Our skilled team has extensive experience in web design and development.
Customization: We tailor our services to meet your specific requirements.
Quality: We are committed to delivering high-quality solutions that exceed your expectations.
Support: Our dedicated support team is always here to assist you with any queries or issues.
0 notes
Text
I will guide you on how to transform designs from PSD to HTML, WordPress, and Shopify.
Are you someone with a cool design that is saved in a Photoshop file? Or maybe you're a business owner with creative ideas for a website and you want to turn your design into a real website. So don't worry about that. I am here for your help in changing your Photoshop file into something websites can use, like HTML, WordPress, or Shopify themes. Let's break down this process and see how it works.
Understanding the PSD to HTML, WordPress, and Shopify Conversion:
PSD to HTML Conversion: This process turns your Photoshop design into HTML, which is the language used to make web pages. Every part of your Photoshop file, like pictures and text, gets carefully turned into HTML code. This makes sure your website looks perfect on different browsers and devices. After that, CSS is added to make your design look even better and work well on all screens.
2. PSD to WordPress Conversion: WordPress is a widely-used tool for managing website content. It's famous for being flexible and easy to use. Converting a PSD design into a WordPress theme means taking the design from Photoshop and fitting it into WordPress. This is how you can manage your website's content dynamically, making it easy for you to update and change things on your site.
3. PSD to Shopify Conversion: For e-commerce ventures, Shopify offers a robust platform to build online stores with seamless user experiences. Converting a PSD design into a Shopify theme requires slicing the PSD file and coding it into Liquid, Shopify's templating language. This transformation ensures that your online store not only reflects your design vision but also provides intuitive navigation and secure transaction capabilities.
Benefits of Converting PSD to HTML, WordPress, and Shopify
Customization: Turning PSD designs into HTML, WordPress, or Shopify themes lets you customize your website a lot. Whether you're a designer who wants every pixel to be perfect or a business owner who wants your website to match your brand perfectly, this process helps you make your online presence exactly how you want it to be.
Scalability: HTML, WordPress, and Shopify provide scalable solutions suitable for projects of all sizes. Whether you're launching a personal portfolio, a corporate website, or an e-commerce store, the versatility of these platforms ensures that your website can grow alongside your business.
SEO-Friendliness: By converting PSD designs into HTML, WordPress, or Shopify themes, you can optimize your website for search engines. From semantic HTML markup to SEO plugins and built-in features, these platforms offer robust tools to enhance your site's visibility and rankings in search engine results.
Converting PSD designs into HTML, WordPress, or Shopify themes is a valuable skill that bridges the gap between design and development. with this experience I am able to bring your creative visions to life and deliver engaging, user-friendly websites to your clients or audience.
#PSDtoHTML#PSDtoWordPress#PSDtoShopify#WebDesign#WebsiteDevelopment#HTML#WordPress#Shopify#DesignTransformation
0 notes
Text
From Pixel to Perfection: Mastering the Art of PSD to WordPress | Xchop
Introduction to PSD to WordPress Conversion
In today's digital age, having a strong online presence is essential for businesses and individuals alike. One of the most popular and powerful platforms for creating and managing websites is WordPress. With its user-friendly interface and extensive customization options, WordPress has become the go-to choice for website development. However, if you have a unique design for your website created in Photoshop (PSD) format, you need to convert it into a WordPress theme. This process is known as PSD to WordPress conversion, and it allows you to bring your design to life on the web. In this article, we will guide you through the steps involved in mastering the art of PSD to WordPress conversion.
Understanding the Benefits of Converting PSD to WordPress
Before diving into the technicalities of PSD to WordPress conversion, it's important to understand why it is a beneficial approach. Converting your PSD design to WordPress offers several advantages. Firstly, it provides you with a responsive and mobile-friendly website. With the increasing use of smartphones and tablets, having a website that adapts to different screen sizes is crucial. WordPress themes are designed to be responsive, ensuring that your website looks great on any device.
Secondly, converting PSD to WordPress allows for easy content management. With the intuitive WordPress dashboard, you can easily update and modify your website's content without any coding knowledge. This flexibility empowers you to keep your website up-to-date with fresh content, resulting in better user engagement and search engine rankings.
Step-by-Step Guide to Converting PSD to WordPress
Now that we understand the benefits, let's dive into the step-by-step process of converting PSD to WordPress. The first step is to slice your PSD design into individual image assets. This involves separating different elements like the header, footer, menus, and content sections. Once you have the images ready, you need to convert them into HTML and CSS code. This step involves coding the structure, layout, and styling of your website using web technologies like HTML, CSS, and JavaScript.
Next, you need to integrate the HTML and CSS code into a WordPress theme. This is done by converting the static HTML and CSS files into a dynamic WordPress theme structure. You will need to create PHP template files and add WordPress-specific tags and functions to make your theme compatible with WordPress.
Choosing the Right Tools and Resources for PSD to WordPress Conversion
To ensure a smooth and efficient PSD to WordPress conversion process, it is important to choose the right tools and resources. There are several tools available that can simplify the conversion process. For slicing the PSD design, you can use tools like Adobe Photoshop or Sketch. These tools allow you to export individual image assets from your design.
For coding the HTML and CSS, you can use popular text editors like Sublime Text or Visual Studio Code. These editors provide syntax highlighting, auto-completion, and other features to streamline your coding workflow. Additionally, there are online resources and tutorials available that can help you learn and understand the intricacies of PSD to WordPress conversion.
Customizing the WordPress Theme with Elementor
Once you have converted your PSD design into a WordPress theme, you can further enhance the customization options using popular page builders like Elementor. Elementor is a powerful drag-and-drop page builder that allows you to visually design your website without any coding knowledge. With its extensive library of pre-designed templates and elements, you can easily create stunning and unique layouts for your website. Elementor also offers advanced features like animation effects, responsive editing, and WooCommerce integration, making it a versatile tool for customizing your WordPress theme.
Enhancing Your WordPress Website with Divi Theme
Another popular option for customizing your WordPress theme is the Divi theme. Divi is a multipurpose WordPress theme that comes with a built-in visual page builder. With its intuitive interface and extensive customization options, Divi allows you to create stunning and professional websites. It offers a wide range of pre-designed templates, layout options, and modules that can be easily customized to match your design requirements. Divi also provides advanced features like split testing, global elements, and responsive editing, making it a powerful tool for enhancing your WordPress website.
Creating a Custom WordPress Theme from Scratch
While using pre-designed themes and page builders can be convenient, sometimes you may need a completely custom WordPress theme to meet your unique design requirements. In such cases, you can create a custom WordPress theme from scratch. This involves creating the necessary PHP files, adding the required WordPress tags and functions, and styling the theme using CSS. Although creating a custom WordPress theme requires advanced coding skills, it offers complete control over your website's design and functionality.
Utilizing WordPress with Advanced Custom Fields (ACF)
Another way to enhance your WordPress website is by using the Advanced Custom Fields (ACF) plugin. ACF allows you to add custom fields to your WordPress posts, pages, and custom post types. This gives you the flexibility to create custom content types and add additional data to your website. For example, you can add fields for testimonials, portfolios, or product specifications. ACF also provides an intuitive interface for managing and displaying the custom fields, making it a powerful tool for extending the functionality of your WordPress website.
Converting a Custom Design into a WordPress Website
In addition to converting PSD designs, you can also convert custom designs created in other design tools like Adobe XD or Sketch into a WordPress website. The process is similar to PSD to WordPress conversion, where you need to slice the design into individual assets and convert them into HTML and CSS code. Once you have the code ready, you can integrate it into a WordPress theme following the same steps mentioned earlier. This allows you to bring your custom design to life on the WordPress platform and take advantage of its powerful features and functionality.
Converting a Figma Design to WordPress
Figma is another popular design tool that allows you to create stunning web and mobile designs. If you have a design created in Figma and want to convert it into a WordPress website, the process is similar to converting PSD or custom designs. You need to export the design assets from Figma and convert them into HTML and CSS code. Once you have the code ready, you can integrate it into a WordPress theme and customize it further using WordPress plugins and page builders.
Best Practices for Successful PSD to WordPress Conversion
To ensure a successful PSD to WordPress conversion, it is important to follow best practices. Firstly, optimize your images for web by compressing them without compromising quality. This will ensure faster loading times for your website. Secondly, make your theme lightweight by removing unnecessary code and scripts. This will improve the performance and speed of your website. Thirdly, test your website on different devices and browsers to ensure compatibility and responsiveness. Finally, regularly update your WordPress theme, plugins, and core files to keep your website secure and up-to-date.
Conclusion
Mastering the art of PSD to WordPress conversion opens up a world of possibilities for creating stunning and functional websites. Whether you are a beginner or an experienced developer, the step-by-step guide provided in this article will help you navigate the complex process with ease. By understanding the benefits, choosing the right tools, and following best practices, you can convert your unique designs into fully functional WordPress websites. And if you need professional assistance, Xchop is a leading PSD to WordPress conversion service provider that can deliver high-quality custom WordPress themes tailored to your specifications. Don't miss out on the opportunities that PSD to WordPress conversion offers. Start converting your designs from pixel to perfection today!
More Info: https://www.xhtmlchop.com/
#wordpress#wordpressdesign#psd to wordpress#webdesign#figma to html#divitheme#ACF#wordpress elementor#webdevelopment#bootstrap#wordpress acf#web#website#xchop
0 notes
Text
0 notes
Text
Convert PSD into WordPress: A Comprehensive Guide
Introduction:
In today's digital era, having a stunning and functional website is crucial for businesses and individuals alike. If you have a Photoshop Design (PSD) file and want to transform it into a fully functional WordPress website, you've come to the right place. In this article, we'll explore the process of converting a PSD into a WordPress theme, step by step. So, let's dive in and uncover the secrets of turning your PSD design into a remarkable WordPress website.
Understanding PSD to WordPress Conversion
Why Convert PSD into WordPress?
WordPress has emerged as the most popular content management system (CMS) due to its flexibility, user-friendliness, and extensive theme options. Converting a PSD into a WordPress theme offers numerous benefits, such as:
Dynamic Website: WordPress allows you to create dynamic websites with interactive features, including blogs, image galleries, contact forms, and more.
SEO-Friendly: WordPress follows best practices for search engine optimization (SEO), helping your website rank higher in search engine results.
Easy Content Management: With WordPress, you can effortlessly manage and update website content, eliminating the need for technical expertise.
Wide Range of Themes and Plugins: WordPress offers a vast library of themes and plugins, allowing you to customize your website as per your requirements.

The Conversion Process
Step-by-Step Guide for PSD to WordPress Conversion
Step 1: Analyzing the PSD Design Before diving into the conversion process, carefully analyze the PSD design to understand its structure, elements, and functionality. Identify sections, such as headers, footers, sidebars, and content blocks, to effectively convert them into WordPress templates.
Step 2: Slicing the PSD In this step, use image editing software like Adobe Photoshop to slice the PSD design into individual image files. Ensure that the images are optimized for the web to enhance website performance.
Step 3: Create HTML/CSS Markup Transform the sliced PSD elements into HTML and CSS code. Focus on creating a well-structured markup with clean and semantic code. This ensures better website performance and easier integration with WordPress.
Step 4: Break the Markup into WordPress Theme Components Now, break the HTML/CSS markup into distinct components of a WordPress theme, such as header.php, footer.php, sidebar.php, and index.php. Utilize WordPress template tags and functions to make the theme dynamic and customizable.
Step 5: Adding WordPress Tags and Functions Integrate WordPress tags and functions into the theme components to enable dynamic content generation. These tags allow you to display posts, categories, tags, and other WordPress-specific elements on your website.
Step 6: Enqueue Stylesheets and Scripts Use WordPress' enqueue functions to add stylesheets and scripts to your theme. This ensures proper organization and loading of assets, improving website performance and maintainability.
Step 7: Implement Theme Options and Customization Add theme options and customization features to your WordPress theme. This allows users to modify colors, fonts, layouts, and other visual aspects of the website without touching the code.
Step 8: Test and Debug Thoroughly test your newly created WordPress theme across various browsers, devices, and screen sizes. Identify and fix any bugs, layout inconsistencies, or compatibility issues to ensure a seamless user experience.
Best Practices for PSD to WordPress Conversion
Ensure a Smooth Conversion Process
Optimize Images: Compress and optimize images to reduce page load times and improve website performance.
Maintain Responsiveness: Ensure your WordPress theme is fully responsive, adapting to different screen sizes and devices.
Use Child Themes: Create a child theme to preserve your modifications when the parent theme receives updates.
Follow WordPress Coding Standards: Adhere to WordPress coding standards to ensure compatibility, maintainability, and security.
Utilize Custom Post Types: Leverage custom post types to handle different types of content, such as portfolios, testimonials, or team members.
Conclusion
Unlock the Potential of Your PSD Designs
Converting a PSD into a WordPress website opens up a world of possibilities. It allows you to unleash the power of WordPress's robust features while showcasing your design skills. By following the step-by-step process mentioned above and implementing best practices, you can transform your static PSD design into a dynamic, user-friendly, and highly customizable WordPress website. So, go ahead and convert your PSD into WordPress to unlock the potential of your designs and create a remarkable online presence.
0 notes
Link
Just pay 99$ to Convert PSD To HTML5 Responsive Design. Get FIGMA, XD, Sketch, or PSD to HTML design Services with responsive and pixel-perfect design, clean and clear code from our 15 years experienced team within 48 hours.
#PSD To HTML5 Responsive Design#PSD to HTML Convert#Convert PSD to HTML5#PSD to HTML Convert Templates#PSD HTML5 convert price
0 notes
Link
#psd to html#html5#css#html template#web design#website design#front end development#convert psd to html
4 notes
·
View notes
Note
how to make borders around icons in photopea

The process has been covered by someone with PS so really it is about converting it over to photopea and knowing that somethings might be a little different. Full credit to THIS tutorial for everything that I’m about to show you. I will make blockquote psds and things if you tell me what you are wanting and things in my ask but here is the tutorial. This covers just a tad more in ways than the other tutorial but read that one for sure and look at this one as a secondary. It is the same thing just showing you what things look like in photopea!
Go to the gear shift and go down to HTML. Right before <figure you are going to want to add <blockquote> as many times as you want.
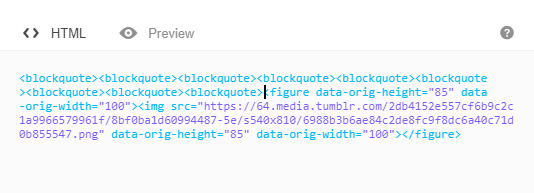
The cool thing is you don’t need the ending </blockquote> here so just skip that!
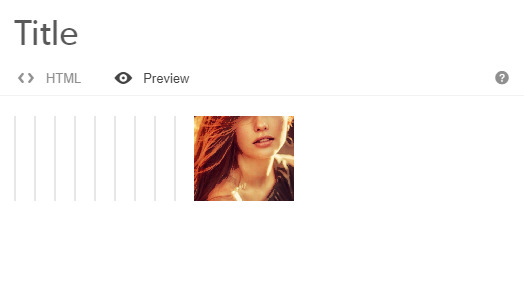
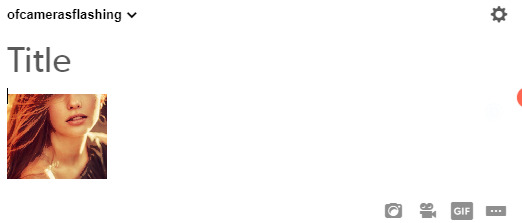
Go click preview! Here is the next part. Screenshot your post.

Save that so that way when you open it in Photopea it is there.

Open your image in Photopea. I then grab my magic wand and make a selection on the white. Delete that selection of white so cut it out of there. This will leave you with the blockquote and your icon shape.

Make another selection and this time add a new layer. Color on another just the lines
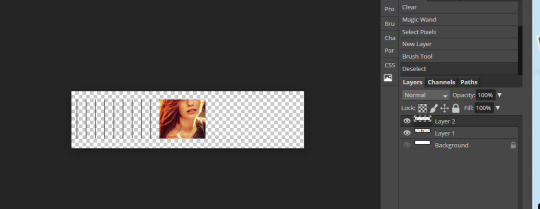
I tend to label everything so it is easy to find for next time. Remember this will be your baseline PSD from now on.

Select and color again only this time just where your icon is so the icon shape / etc. Go ahead and make folders and layer masks for your icon shape. Add a border to your icons / etc. This is your template so you can use it again next time and not go through all the steps with each icon!
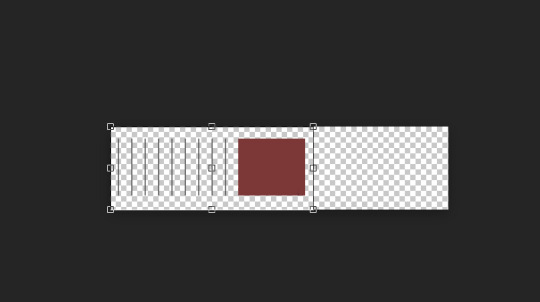
Either crop your icon close to the whole icon ! Don’t crop width if your width is going to be over 250? If you do that then it will stretch when you use them on tumblr and it isn’t flattering. There is a step you can use on tumblr to help with the stretch but we are trying to save you extra steps. If your width when you crop is over 250? Do this next step.

Go to image > canvas size and then go and add a width of 540. This will add more white space but that is a good thing. So once you have done that hit okay.
Save your image as png and save the PSD for use again.
28 notes
·
View notes
Note
I really wouldn't mind you aiding me with some tutorials love
giffing tutorial/resources
hi anon! sorry it took me so long to answer. i figured this might be helpful for others out there who have asked me similar questions, so i’ve compiled a pretty comprehensive list of tutorials/resources. idk about others but when i was new to giffing, it took me a lot of painful effort to go around and look for resources, so i’m putting it all here to make it a little easier!
i download videos using 4k video downloader. it will download very good quality 1080p videos in .mp4 format. if you’re downloading a 4k video, make sure to change the setting option to .mkv so that you get 4k and not 1080p—for obvious reasons since you want the highest quality.
i rely on kpopexciting to get .ts files — which are basically raw, very high quality video files for live performances. they are much less grainy than .mp4 versions of live performances—which are the ones you’ll see uploaded to youtube. i’ve found that 4k videos (in .mkv) are just as good quality as .ts, but obviously you will rarely see live performances in 4k, so get .ts when you can!! you can also try to find .ts files on twitter, but you may have to do a lot of digging. i wish i could recommend you twitter accounts, but the ones i used to go to have been very inactive/taken down all their drives :( but this website is really nice and updated frequently so i would recommend it!
vapoursynth links + download. the reason you would use vapoursynth is to resize your gif, while maintaining the optimal quality of the gif. if you gif without vapoursynth (.ie only using photoshop), it will still be fine, but the image quality may be grainier. also, you will definitely need vapoursynth to gif .ts files —more will be explained in the tutorial i’ve linked below. i would recommend that you have a high processing/lots of ram/newer desktop or laptop to use vapoursynth so that 1, your computer isn’t fried and 2, your vapoursynth process will go a lot faster. i am using a 2017 macbook pro for all my work, and it runs pretty well, but my laptop still gets pretty hot so just make sure you’re not running a million things in the background while using adobe products and vapoursynth lol. i used a pretty old and beat up 2011 model macbook air back then, and i will say that yes vapoursynth worked and ran on it, but it took much longer, and basically fried the laptop’s battery (aka i had to get the battery changed twice and the laptop would die randomly) but issok it was a school borrowed laptop so i didn’t feel too bad lol. im just saying this as a precaution, to preserve the health of your electronic devices!! but don’t be afraid to use vapoursynth! you should still try it at least once.
thank you to @realstraykids for this super detailed, really nice tutorial! it includes how and where to download videos, how to gif using vapoursynth, using photoshop, comparisons, coloring, and pretty much all you need to know. 10/10 would recommend
thank you to @dreamcolouring for this lifesaver!!! the best and easiest way to blur out unwanted captions/objects in your gifs. i recommend doing this step after converting your frames to video timeline and before you do sharpening and coloring. another tip i’ll add is to feather the selection you’ve made right before you click on “add vector mask” —this will make sense once you’ve read through the tutorial. feathering it will make the blurred spot less noticeable and more subtle.
i use this generator to create gradient colored captions! copy and paste your text, then select the colors you want. generate the code, and copy it. change the settings of the text editor on your post to HTML. paste the code, preview, and voila! add elements <blockquote>,<b>,<i>, etc as needed. see more on colored captions in this tutorial by @kylos --i believe op mentioned a different and better color generator but for some reason it won’t work for me :( hopefully it works for u! basically same idea as the previous generator i mentioned.
my own mini tutorial/workflow process of making gifs. this includes working with a .ts file, vapoursynth, photoshop, coloring, watermarking, etc. and a few of my own tips below:
if you are working with an .mp4, you do not have to make any changes to the preprocessor/denoise filters/sharpening in the resizing part of vapoursynth—it doesn’t make that big of a difference if you do. but if you are working with a .ts file, definitely do make those changes,, that’s the whole reason you have vapoursynth. with an .mp4, i like to use vapoursynth to just resize, but i don’t add any additional settings. i use smart sharpen in photoshop to sharpen it, which is pretty good on it’s own (at least in photoshop 2020!).
my rule of thumb is to do add .02 seconds when i am setting frame delay. so if when you first import the frames, they are at 0.04 seconds, i usually change them to 0.06. of course, this is my personal taste—you can make all your gifs faster or slower depending on how you want em to look.
if you are on a mac, you can screen record by pressing Command+Shift+5 (it’s a shortcut to quicktime screen recording). I only screen record for things like the beyond live concert or other live streamed events. the image quality of the screen recording, in my experience, is actually pretty good. when you gif the screen recording however, you may notice that it adds extra frames that you don’t need. by that i mean duplicate frames. you could keep the duplicate frames but that just means the size of your gif is going to be much bigger (keep in mind the limit is 8mb). in order to remove those duplicates, my only solution has been to remove them manually (by holding Command while selecting), or when you are importing the video to frames, select the option to “limit to every 2 frames”—but this method will be less precise and still not as good as manually removing frames. if you remove the duplicate frames, this means you will need to set the frame delay even slower, to make up for lost frames. in my experience, fps(frames per second) and frame delay work in conjunction. so for example, if i delete every other frame because they are duplicates, but the starting frame delay is 0.02, i am now going to change it to something like 0.05 (so i added 0.03 seconds rather than my usual 0.02). if the duration length and the image dimensions of the gif are short/small, feel free to keep the duplicate frames in—i only delete duplicate frames in order to keep my gif under the 8mb limit. then, if you keep the duplicate frames in, continue with your standard frame delay preferences. now that i’m writing this im realizing this might not make a lot of sense lol.. but don’t worry about it for now and if you run into trouble w screen recorded gifs then you can come back to this for reference. again, this is only my experience recording on a mac—it may be a lot different if you use a screen recording program or are on a pc.
i don’t really use .psd templates because i like to give every gif/gifset it’s own unique coloring—so i remake the coloring every time, but if you get into a rhythm it’s pretty easy. there are a lot of nice coloring tutorials out there, too! my personal coloring adjustments in order: levels, exposure, color balance, selective color (if needed), vibrance, photo filter (if needed), color lookup (i use 2strip most often and i put it on ‘color’ blending mode). don’t forget to adjust the opacities and fills of the ‘color lookup’ adjustment layer in case it’s too strong. go back to correct each adjustment layer as needed. then, when you’re done and satisfied, group all those layers, copy the group (you can do an easy command+c), and paste it onto the next gif you’re working on for easy workflow.
if for some reason you can’t see the frames when you import your layers/video, it’s likely because your ‘timeline’ window isn’t showing up. just go to the window menu on photoshop, go to the bottom and you’ll see ‘timeline.’ make sure it has a check next to it.
i recommend watermarking your gifs because a lot of people like to repost tings these days 😠 - so make sure u got your brand on it! i keep my watermark saved to my ‘libraries’ in photoshop so it’s ready when i need it. i use the blending mode ‘overlay’ and adjust the opacity, but if you don’t want to do that you can also add a stroke/shadow to your watermark/do all sorts.
tag #nctinc for your nct creations and #jenonet for your jeno creations!!
here’s my own mini tutorial (well not much of a tutorial ig more like a work process vid?): took about ten minutes including the time to search and download the video (but i didn��t record that part i trust yall know how to do that), vapoursynth, and exporting. i hope this helps somewhat! feel free to ask more questions whenever :)
youtube
keep in mind that giffing takes a lot of patience, energy, and experience—so don’t worry if it takes you a bit to figure things out or if your gifs don’t turn out the way you want them to the first time around. we all start at the same place and all run into problems. i know giffing can sound intimidating and seem like a lot of work, but i promise, once you get into a routine, giffing is going to happen in minutes—and you’ll get beautiful gifs. have fun! 😊
#anon#answered#tut#tuts#giffing tutorial#should i make a tut/resources post on gfx? not rly sure if gfx can be taught.. it's like a lottt about personal style imo lol#hope this helps!#not just for anon but for anyone
120 notes
·
View notes
Text
I will convert PSD to HTML modern responsive design with html css bootstrap5
Are you looking for someone to convert PSD to HTML, Xd to HTML, Sketch to HTML, pdf to HTML, and PSD to WordPress?
I am all ready to convert PSD to HTML, Xd to HTML, Sketch to HTML, pdf to HTML, and PSD to WordPress. I have completed 45+ projects for clients. I have been working on HTML, CSS, bootstrap framework, javascript, and jquery for the website design.
what will you get?
================
👉Quickly convert PSD to HTML-
👉Fully responsive website for mobile, tablet, and desktop-
👉Unic modern responsive website with Xd to HTML-
👉Custom HTML, CSS bootstrap for Sketch to HTML-
👉Email template with pdf to HTML-
👉Create Blog, E-commerce, news, portfolio, Agency website with PSD to WordPress -
👉fix HTML, CSS, bootstrap, jquery error-
👉W3C validation code check-
👉Css3 animation-
👉Jquery effect-
👉Upload to server
Why hire me?
============
➤100% refund guarantee-
➤Unlimited Revision-
➤On-Time Delivery-
➤pixel-perfect design-
➤live-time support-
Hire me link: https://www.fiverr.com/share/YywPap
#psd to html#psdtowordpress#xdtohtml#sketchtohtml#pdftohtml#webdesign#webdevelopment#html css#javascript
1 note
·
View note