#wordpress acf
Explore tagged Tumblr posts
Visit Tumblr Blog
Explore Tumblr blogs with no restrictions, modern design and the best experience.
Last Seen Tumblr Blogs


Fun Fact
If you dial 1-866-584-6757, you can leave an audio post for your followers.
Text
From Pixel to Perfection: Mastering the Art of PSD to WordPress | Xchop
Introduction to PSD to WordPress Conversion
In today's digital age, having a strong online presence is essential for businesses and individuals alike. One of the most popular and powerful platforms for creating and managing websites is WordPress. With its user-friendly interface and extensive customization options, WordPress has become the go-to choice for website development. However, if you have a unique design for your website created in Photoshop (PSD) format, you need to convert it into a WordPress theme. This process is known as PSD to WordPress conversion, and it allows you to bring your design to life on the web. In this article, we will guide you through the steps involved in mastering the art of PSD to WordPress conversion.
Understanding the Benefits of Converting PSD to WordPress
Before diving into the technicalities of PSD to WordPress conversion, it's important to understand why it is a beneficial approach. Converting your PSD design to WordPress offers several advantages. Firstly, it provides you with a responsive and mobile-friendly website. With the increasing use of smartphones and tablets, having a website that adapts to different screen sizes is crucial. WordPress themes are designed to be responsive, ensuring that your website looks great on any device.
Secondly, converting PSD to WordPress allows for easy content management. With the intuitive WordPress dashboard, you can easily update and modify your website's content without any coding knowledge. This flexibility empowers you to keep your website up-to-date with fresh content, resulting in better user engagement and search engine rankings.
Step-by-Step Guide to Converting PSD to WordPress
Now that we understand the benefits, let's dive into the step-by-step process of converting PSD to WordPress. The first step is to slice your PSD design into individual image assets. This involves separating different elements like the header, footer, menus, and content sections. Once you have the images ready, you need to convert them into HTML and CSS code. This step involves coding the structure, layout, and styling of your website using web technologies like HTML, CSS, and JavaScript.
Next, you need to integrate the HTML and CSS code into a WordPress theme. This is done by converting the static HTML and CSS files into a dynamic WordPress theme structure. You will need to create PHP template files and add WordPress-specific tags and functions to make your theme compatible with WordPress.
Choosing the Right Tools and Resources for PSD to WordPress Conversion
To ensure a smooth and efficient PSD to WordPress conversion process, it is important to choose the right tools and resources. There are several tools available that can simplify the conversion process. For slicing the PSD design, you can use tools like Adobe Photoshop or Sketch. These tools allow you to export individual image assets from your design.
For coding the HTML and CSS, you can use popular text editors like Sublime Text or Visual Studio Code. These editors provide syntax highlighting, auto-completion, and other features to streamline your coding workflow. Additionally, there are online resources and tutorials available that can help you learn and understand the intricacies of PSD to WordPress conversion.
Customizing the WordPress Theme with Elementor
Once you have converted your PSD design into a WordPress theme, you can further enhance the customization options using popular page builders like Elementor. Elementor is a powerful drag-and-drop page builder that allows you to visually design your website without any coding knowledge. With its extensive library of pre-designed templates and elements, you can easily create stunning and unique layouts for your website. Elementor also offers advanced features like animation effects, responsive editing, and WooCommerce integration, making it a versatile tool for customizing your WordPress theme.
Enhancing Your WordPress Website with Divi Theme
Another popular option for customizing your WordPress theme is the Divi theme. Divi is a multipurpose WordPress theme that comes with a built-in visual page builder. With its intuitive interface and extensive customization options, Divi allows you to create stunning and professional websites. It offers a wide range of pre-designed templates, layout options, and modules that can be easily customized to match your design requirements. Divi also provides advanced features like split testing, global elements, and responsive editing, making it a powerful tool for enhancing your WordPress website.
Creating a Custom WordPress Theme from Scratch
While using pre-designed themes and page builders can be convenient, sometimes you may need a completely custom WordPress theme to meet your unique design requirements. In such cases, you can create a custom WordPress theme from scratch. This involves creating the necessary PHP files, adding the required WordPress tags and functions, and styling the theme using CSS. Although creating a custom WordPress theme requires advanced coding skills, it offers complete control over your website's design and functionality.
Utilizing WordPress with Advanced Custom Fields (ACF)
Another way to enhance your WordPress website is by using the Advanced Custom Fields (ACF) plugin. ACF allows you to add custom fields to your WordPress posts, pages, and custom post types. This gives you the flexibility to create custom content types and add additional data to your website. For example, you can add fields for testimonials, portfolios, or product specifications. ACF also provides an intuitive interface for managing and displaying the custom fields, making it a powerful tool for extending the functionality of your WordPress website.
Converting a Custom Design into a WordPress Website
In addition to converting PSD designs, you can also convert custom designs created in other design tools like Adobe XD or Sketch into a WordPress website. The process is similar to PSD to WordPress conversion, where you need to slice the design into individual assets and convert them into HTML and CSS code. Once you have the code ready, you can integrate it into a WordPress theme following the same steps mentioned earlier. This allows you to bring your custom design to life on the WordPress platform and take advantage of its powerful features and functionality.
Converting a Figma Design to WordPress
Figma is another popular design tool that allows you to create stunning web and mobile designs. If you have a design created in Figma and want to convert it into a WordPress website, the process is similar to converting PSD or custom designs. You need to export the design assets from Figma and convert them into HTML and CSS code. Once you have the code ready, you can integrate it into a WordPress theme and customize it further using WordPress plugins and page builders.
Best Practices for Successful PSD to WordPress Conversion
To ensure a successful PSD to WordPress conversion, it is important to follow best practices. Firstly, optimize your images for web by compressing them without compromising quality. This will ensure faster loading times for your website. Secondly, make your theme lightweight by removing unnecessary code and scripts. This will improve the performance and speed of your website. Thirdly, test your website on different devices and browsers to ensure compatibility and responsiveness. Finally, regularly update your WordPress theme, plugins, and core files to keep your website secure and up-to-date.
Conclusion
Mastering the art of PSD to WordPress conversion opens up a world of possibilities for creating stunning and functional websites. Whether you are a beginner or an experienced developer, the step-by-step guide provided in this article will help you navigate the complex process with ease. By understanding the benefits, choosing the right tools, and following best practices, you can convert your unique designs into fully functional WordPress websites. And if you need professional assistance, Xchop is a leading PSD to WordPress conversion service provider that can deliver high-quality custom WordPress themes tailored to your specifications. Don't miss out on the opportunities that PSD to WordPress conversion offers. Start converting your designs from pixel to perfection today!
More Info: https://www.xhtmlchop.com/
#wordpress#wordpressdesign#psd to wordpress#webdesign#figma to html#divitheme#ACF#wordpress elementor#webdevelopment#bootstrap#wordpress acf#web#website#xchop
0 notes
Text
Meanwhile on WordPress...


On another note, Matt Mullenweg is a greedy ass motherfucker who is putting nearly 43% of the Internet at risk.
#when you give a corpo an open source project#meme#memes#tech news#news#wordpress#wordpress plugins#acf#advanced custom fields#this is bad#lawsuit#internet#save the internet#web development#web developers#wp engine
5 notes
·
View notes
Text
Actually no fuck that soggy wet cat rant, ceck out this sick website I made to keep track of fnaf lore and characters.
Me adding sans undertale bc I thought it was funny.
This is your sign to learn web development <3
(Aside from the very real and Canon fnaf character sans undertale, all the images are just placeholders)
Nice page under the cut

Rainbow Vanny is still real (to me) <3
15 notes
·
View notes
Text
Unlocking Power with Advanced Custom Fields (ACF) in WordPress
What exactly is Advanced Custom Fields (ACF)? Advanced Custom Fields is a WordPress plugin that allows you to extend the normal functionality of your content by adding custom fields. It’s an effective tool for creating organized data that’s tailored to your individual requirements. Advanced Custom Fields (ACF) transforms WordPress sites into full-fledged content management systems by giving you…

View On WordPress
0 notes
Text
[solved] Wordpress ACF Datepicker Field Update To Todays Date But Keep Time At Value In Post
[solved] Wordpress ACF Datepicker Field Update To Todays Date But Keep Time At Value In Post
WordPress is a content management system used for creating and managing websites. One of the key features of WordPress is its flexibility, allowing developers to customize themes and add functionality through plugins. One such plugin is Advanced Custom Fields (ACF), which allows users to create custom fields for specific types of content. One of the fields available in ACF is the Datepicker…
View On WordPress
0 notes
Text
Creating Custom Taxonomies Using the ACF Plugin: A Step-by-Step Guide

Taxonomies play a crucial role in organizing and categorizing content on your website. Luckily, with the ACF plugin, you have the ability to create and assign custom taxonomies to any post type. In this blog post, we will walk you through the process of creating a custom taxonomy in ACF, assigning a custom field group to it, and importing values for your taxonomy.
The Importance of Custom Taxonomies
Before we dive into the steps for creating custom taxonomies with the ACF plugin, let’s take a moment to understand why custom taxonomies are valuable for your website. While WordPress offers built-in taxonomies like categories and tags, these might not always align with your specific requirements.
In such cases, custom taxonomies allow you to classify your content in a way that better suits your needs. They provide a structured organization system and offer flexibility in categorizing your content based on your unique requirements.
How to Create Custom Taxonomies
To begin creating custom taxonomies with ACF, make sure you have the plugin installed on your website. Once installed, you will see the ACF menu listed in the sidebar. Follow the steps below to get started:
Navigate to ACF >> Taxonomies and click on “Add New.” This will take you to the “Add New Taxonomy” page.
Fill in the required fields to configure the basic settings. Provide the plural label, singular label, and taxonomy key. The taxonomy key field is automatically generated based on the singular label, but you can edit it if desired.
From the “Post Types” field, select the post types to which you want to assign this custom taxonomy. You can choose multiple post types.
By default, the taxonomy will be visible on the front end. If you want the taxonomy to have hierarchical descendants, enable the “Hierarchical” toggle button.
Additional Settings Configuration
ACF simplifies the configuration process with additional settings that you can access by toggling the bar. Here’s a brief overview of the available tabs:
General: Enable the “Sort Terms” option to sort the taxonomy terms. If you have the default term enabled, provide the term name (mandatory), term slug, and term description. You can also provide a general description for the taxonomy. The “Active” toggle is enabled by default, but you can deactivate the taxonomy without deleting it.
Labels: Define the labels for the taxonomy, which will be used throughout the admin dashboard. The labels are automatically generated based on the singular and plural labels you configured in the basic settings, but you can edit them if necessary.
Visibility: Control the visibility of the taxonomies on the front and admin dashboards.
URLs, Permissions, and REST API: These settings are preconfigured, but you can make changes based on your specific needs. For more detailed information, refer to the ACF official documentation on Custom Taxonomy.
Once you have configured the settings, click “Save Changes” to save the custom taxonomy in ACF.
Adding Values to Custom Taxonomies
There are multiple ways to add values to a custom taxonomy. One option is to visit the “Add New” or “Edit” page of any record in the post type to which you assigned the custom taxonomy. You will find the custom taxonomy listed as a submenu below the post type’s sub-menus. For instance, if you assigned “CTax1” to the “Posts” post type, you will find a “Ctax1” submenu listed below the “Posts” sub-menus. From there, you can create custom taxonomies.
Assigning Custom Fields to Custom Taxonomies
You can also assign a custom field group to your custom taxonomy. To do this, follow these steps
Go to ACF >> Field Groups and click on “Add New.”
Provide a title for your field group.
Add field types by selecting them from the dropdown menu. Enter the field label, field name, and default value.
In the “Settings” section, choose “Taxonomy” >> “is equal to” >> “your_taxonomy” from the dropdown menus.
Click “Save Changes.”
Now, the custom fields you created will be assigned to your custom taxonomy, enhancing the flexibility and functionality of your website.
Conclusion
Creating custom taxonomies with the ACF plugin allows you to organize and categorize your website’s content according to your specific needs. By following the steps outlined in this guide, you can create custom taxonomies, assign field groups, and import values, providing a structured and efficient content management system for your WordPress site. Additionally, if you want to import and export ACF Custom Taxonomy values, check out the CSV importer plugin here.
#wordpress#wordpress plugins#wordpress tutorial#cms#plugins#website development#custom post#acf#custom taxanomies#wordpresswebsite
0 notes
Text
this has a very good summary of everything that's been going on with wordpress if you haven't been keeping up with it, i'm going to copy/paste the list of Goings On from the table of contents to give you an idea:
I’m sorry, what happened?
Automattic approaches WP Engine to offer a “license”
Matt’s rejected, so he tries new strategies
Wait—what’s Matt’s actual deal? Why is he doing this?
Matt claims WP Engine is misrepresenting itself
Matt claims WP Engine is selling a “cheap knock-off” of WordPress
Matt says WP Engine doesn't give back enough
An aside on motivations and justifications
The WordCamp US fallout and Matt’s abuse of power
WP Engine’s reaction
Matt melts down
Matt goes nuclear
Updates: everything that’s happened since October 1st
Matt talks taking over WP Engine
Automattic releases the terms sheet, which kinda backfires
WP Engine files suit against Matt and Automattic
Matt offers buyouts to Automattic employees
159 Automattic employees take the buyout; Matt hires a famous lawyer who's a horrible human
Matt gleefully exposes a vulnerability in ACF, but prevents WPE from fixing it
Matt adds a vague anti-WP Engine checkbox to WordPress.org, but fails to clarify why, all while playing the victim
Matt commandeers ACF, using WordPress.org to steal a competitor's product
Previous lawsuits against Matt come to light
Matt responds to the 'other lawsuits'
Matt wars against dissenters with second buyout offer; threatens employees who speak out; intercepts employees' emails
WP Engine files an injunction to regain access to WordPress.org
#original#sorry about the italics but i didn't think i could blockquote and keep all the bullets#and wanted to make it clear this was all borrowed text#anyway. now i'm getting emails letting me know plugin updates won't come from wordpress servers anymore.#so that's the stage of community trust we're at lol
572 notes
·
View notes
Text
Well it looks like there’s another Matt Mullenweg update
PaidMembership, a major plugin for Wordpress, is withdrawing from Wordpress.org, and it seems Matt has threatened them over this decision
Are you worried that Matt might retaliate somehow?
The fact we have to even ask this question is why we have to make this move.
Two days after we closed the Paid Memberships Pro listing in the .org repository, Matt sent a direct message to me (Jason) on the WordPress.org Slack Workspace threatening to “take over your listing and make it a community plugin like we did to ACF”.
As usual I found out about this update from Josh Collins’ excellent ongoing coverage of Matt’s meltdown
26 notes
·
View notes
Text
WordPress Shifts in industry news I am not a part of but enjoy gossiping about
I used to do a a lot of work using WordPress as a system. It's easy, cheap to build and maintain with, etc.
I do not anymore. This has nothing to do with WordPress. It was exclusively a "a few years ago I received the opportunity to bow out of the industry as a graphic designer in order to pursue a cocktail of art, fantasy, economy, and business"
I used to be a customer of Advanced Custom Fields. I am no longer, for the same reason as above, I am no longer a web developer. Their service was good to me and I enjoyed it tremendously while I had it.
I have therefore no stake in this game and thus no public opinion.
And yet I enjoy the drama of it all so here we are.
WordPress is forking.
Or maybe it isn't a fork.
The core, mesmerizing, (and I do not say this lightly) potentially civilization changing beauty of open source software is the ability to meet different, often diametrically opposing, priorities.
"Civilization-changing is kinda heavy language?"

via
No :)
A significant portion of the internet as we know it today is powered by WordPress. It has and will continue to shape the entire scope and scale of internet development for longer than anyone reading this will be alive -- for good and for ill.
WordPress was primarily a blogging system that could build websites as well. With the introduction of externally-based Advanced Custom Fields, it became a powerhouse web builder as well.
The short version: You could easily say "put this image / text / whatever here in the template."
It was a game changer to many smaller scale developers (hi) with a tiny staff. It allowed us (me + team) to grow much more powerful very quickly and very affordably.
Digging into the news further, there is / was chatter about pulling in the core functionality of ACF into WP's main system.
It brings an interesting point to the open source space.
And goes to my original points above.
If you make something open, how much control do you have over it? If you profit from it, how long can this last before it gets pulled into the core?
That is a risk as a developer -- you could potentially lose your business because it gets folded into the larger entity, but on the other hand, until that point, your reward was immediate accessibility to a market / system a million times larger than you, that you had previously no hand in building.
It is a tragedy of the commons.
I had long forgotten this phrase.
I'm familiar with the concept -- a public finite resource is at risk of overuse from all because it is available to all -- it largely joins with the core issue of economics itself -- how do you find balance with finite resources and infinite desires.
It is the nature of art on the internet.
Artists want to make art and it to be seen, they put it online. Audiences do not by nature owe them anything, the art is available to view for free, but without audience support, the art will stop or degrade in posting frequency.
More directly, to the WordPress sphere, what is the responsibility to the core system (thus other users)? What is the responsibility of the users to the core system?
Objectively speaking, building and maintaining a system like WordPress requires a lot of resources.
The open source nature allows for competing priorities to be served provided enough resources, because you can always say "I don't want to follow your path of ABC, I want to do BCD" and then do that.
The open source nature also allows you to say "I made a widget, it costs $100/year"
But the core can say "Hm. That would make our system stronger. Yoink. Now it's ours and is free."
Then you have a market race to push to build the better whatever.
I...
...do not have answers.
To any of this.
I am left realizing.
It feels like macroeconomics and personal economics grinding against each other in a way that is traditionally seen across countries (if not the world) and decades (if not centuries) -- but in this instance, it's a much smaller scale (kinda? WP powers a lot of the internet and influences a significant portion of what it doesn't power).
And weeks and months.
Instead of decades and centuries.
This is a fun piece of bone to chew on.
I freely admit it is fun exclusively because I am not involved. If I were, it would be fucking nerve wracking.
14 notes
·
View notes
Text
2 notes
·
View notes
Text
A Detailed Comparison of Divi vs Elementor: Which One to Build With in 2025?
When it comes to building stunning WordPress websites without touching code, Divi and Elementor stand out as two of the most powerful and popular page builders available. As of 2025, both have evolved significantly, offering robust features, sleek interfaces, and seamless integrations — but which one should you choose?
Whether you’re a designer, developer, or business owner aiming to create a high-performing website, this in-depth comparison will help you make the best choice between Divi and Elementor for your project goals in 2025.
Overview: What Are Divi and Elementor?
Divi is a visual page builder created by Elegant Themes. It offers an all-in-one solution that combines a theme and builder into one package.
Elementor is a standalone page builder plugin that works with nearly any WordPress theme. It has a free version, but most professionals go with Elementor Pro for access to advanced tools.
1. Ease of Use
Divi has a true front-end visual editor that allows drag-and-drop editing, inline text updates, and responsive controls. However, some users report a learning curve, especially when adjusting fine-grained settings.
Elementor is praised for its clean, intuitive interface. Editing in real time is incredibly smooth, and it’s beginner-friendly without compromising on advanced controls.
If you value speed and ease of use, it’s no surprise many businesses choose to hire Elementor developer teams to streamline their project delivery.
2. Design Capabilities
Both Divi and Elementor are loaded with design modules and flexibility, but they differ in approach:
Divi offers a vast library of templates, animations, hover effects, and design presets. It’s very customizable — perfect for design-heavy websites.
Elementor provides pixel-perfect control, motion effects, global widgets, and flexible layout control. The Theme Builder allows full design control of headers, footers, and dynamic templates.
Whether you want a visually rich brand presence or want to design a mobile-friendly website with Elementor, both builders are equipped to handle the task — though Elementor may give you more precise layout control.
3. Performance & Speed
Speed is crucial in 2025 — not only for SEO but for user experience:
Divi has made notable improvements in performance, with caching enhancements and optimized code output. However, it can still be resource-heavy if not managed properly.
Elementor has consistently focused on speed, with a leaner core, modular scripts, and new performance-focused features in Pro versions.
Verdict: Elementor edges ahead with better speed optimization out of the box.
4. Theme Building Features
Both builders allow you to go beyond page editing and control your entire site layout:
Divi introduced its Theme Builder to allow custom headers, footers, and dynamic templates. It also supports WooCommerce and custom post types.
Elementor Pro’s Theme Builder is more mature, with tight control over every aspect of the site and powerful dynamic content integration with ACF, CPT UI, and more.
Verdict: Elementor has the edge for dynamic, large-scale site builds.
5. Templates & Blocks
Divi comes with 2,000+ pre-designed layouts and over 200 full website packs. Its layout packs are very polished and industry-specific.
Elementor also has a vast library of templates and blocks, and its Pro version includes full-site kits — great for fast deployments and consistency.
Verdict: Divi wins on volume and variety; Elementor offers better template flexibility.
6. Third-Party Ecosystem & Add-ons
Divi has a growing ecosystem of third-party plugins and child themes, but it’s smaller compared to Elementor.
Elementor benefits from a huge ecosystem with hundreds of free and premium add-ons. From advanced widgets to custom builders, the third-party support is unmatched.
Verdict: Elementor has a stronger plugin and add-on community.
7. Pricing in 2025
Divi is offered with one-time lifetime access or annual plans, covering unlimited sites. The value is excellent for agencies or freelancers handling multiple projects. If that’s your case, you might want to hire Divi theme developer experts to make the most of that investment.
Elementor Pro is priced yearly and has a tiered plan based on the number of sites. It’s more scalable and flexible for solo developers or small teams.
Verdict: Divi is cost-effective for unlimited projects; Elementor is more flexible for smaller use cases.
8. Customer Support and Documentation
Divi offers 24/7 support, a huge documentation library, and a vibrant user community.
Elementor provides email support for Pro users, a detailed knowledge base, forums, and a strong community on platforms like Facebook and Reddit.
Verdict: Both offer excellent support, but Divi’s live chat and lifetime access add extra value.
9. SEO & Mobile Responsiveness
Divi allows responsive editing, but its default output can be a bit bloated if not optimized carefully.
Elementor shines in mobile editing with detailed responsive controls. Its performance-centric updates also give it an SEO advantage.
Verdict: Elementor leads in SEO and mobile-first design features.
10. Learning Curve
Divi might feel overwhelming at first due to its packed UI and multiple customization layers.
Elementor is more beginner-friendly, with a faster learning curve and intuitive design flow.
Verdict: Elementor is easier to pick up for most users.
Final Verdict: Divi or Elementor in 2025?
Both Divi and Elementor are excellent tools — the right one for you depends on your priorities:
Choose Divi if you want all-in-one value, beautiful design templates, and a lifetime plan that saves money in the long run.
Choose Elementor if you want unmatched flexibility, blazing performance, and an ecosystem built for scalability and advanced functionality.
Want more tips, side-by-side demos, and WordPress design inspiration? 👉 Follow us on Instagram —we’re always sharing what’s new, what’s working, and what’s next in WordPress development.
0 notes
Text
How to Review Assignment Deadlines from Frontend in LearnDash

If you're using LearnDash to run your eLearning platform, keeping track of assignment deadlines is critical—for both learners and instructors. While LearnDash offers robust backend features, many users want to review assignment deadlines directly from the frontend for better visibility and user experience.
Here’s a simple guide to help students and instructors review assignment deadlines from the frontend in LearnDash.
Why Frontend Access to Assignment Deadlines Matters
By default, LearnDash manages assignments through the WordPress dashboard. But let’s be honest—not all students or even instructors are comfortable navigating the backend. Having deadline information available on the course frontend makes the process:
More user-friendly
Transparent
Better for tracking and planning
Less reliant on admin support
Method 1: Use the LearnDash Assignment Feature Wisely
LearnDash allows assignments to be attached to lessons or topics. When you create an assignment, use the lesson description or content area to communicate the deadline clearly.
Steps:
Go to the Lesson or Topic editor.
Add assignment instructions along with the submission deadline in the content editor.
Students will see this when viewing the lesson on the frontend.
While this method doesn’t automate deadline display, it's a quick and effective workaround.
Method 2: Use a Frontend Plugin or Page Builder
To enhance visibility, use a page builder (like Elementor) along with a dynamic content plugin such as:
Advanced Custom Fields (ACF)
WPFront User Role Editor
Uncanny LearnDash Toolkit
With these tools, you can create a custom frontend dashboard for students and instructors that includes:
Assignment titles
Submission status
Deadlines
Download/view links
Bonus: The Uncanny LearnDash Toolkit Pro offers a shortcode to list assignments with custom columns—perfect for displaying deadlines.
Method 3: Use Third-Party Add-Ons
There are LearnDash-compatible plugins like:
BuddyBoss for LearnDash
WISDM Reports for LearnDash
LearnDash Dashboard by Wbcom Designs
These tools offer custom frontend dashboards where students and instructors can view assignment statuses, deadlines, and feedback—all in one place.
With these plugins, you can:
Display assignment due dates on the course page
Show reminders or countdowns
Add filters for pending/completed assignments
Final Thoughts
LearnDash doesn’t show assignment deadlines on the frontend by default, but there are several practical ways to make it happen:
Manually add deadlines to lesson content
Use page builders and shortcodes for dynamic displays
Integrate third-party tools for a complete dashboard view
Making assignment deadlines visible from the frontend improves student accountability, reduces confusion, and streamlines communication.
Looking to customize LearnDash further? Consider hiring a LearnDash expert to set up automated reminders, custom dashboards, or deadline tracking features.
Source URL: http://saffiretech.com/blog/how-to-review-assignment-deadlines-from-front-end
#CourseCreators#TeachOnline#LearnDashTips#OnlineEducation#EdTechTools#DigitalLearning#InstructorTools
0 notes
Text
Unlocking Power with Advanced Custom Fields (ACF) in WordPress
What exactly is Advanced Custom Fields (ACF)? Advanced Custom Fields is a WordPress plugin that allows you to extend the normal functionality of your content by adding custom fields. It’s an effective tool for creating organized data that’s tailored to your individual requirements. Advanced Custom Fields (ACF) transforms WordPress sites into full-fledged content management systems by giving you…
View On WordPress
1 note
·
View note
Text
Top 10 Essential Plugins Every WordPress Developer Should Know
WordPress has evolved into one of the most powerful and flexible content management systems available today. With over 40% of the web powered by WordPress, developers have an incredible opportunity to build robust, high-performing websites tailored to any niche or industry.
One of the key reasons behind WordPress's popularity is its vast plugin ecosystem. Plugins enhance functionality, streamline development, improve security, and boost performance—saving developers time and effort. But with over 60,000 plugins in the WordPress repository, choosing the right ones can be overwhelming.
To help you cut through the noise, here are 10 essential WordPress plugins every developer should know. Whether you’re building custom themes, working on client projects, or managing your own website, these tools are must-haves in your toolkit.
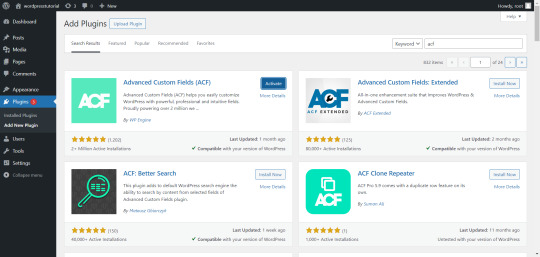
1. Advanced Custom Fields (ACF)
Purpose: Add and manage custom fields
Advanced Custom Fields is a staple for WordPress developers. It allows you to add custom fields to posts, pages, users, and more—giving you complete control over content structure.
Whether you're building a real estate site with custom listings or a portfolio with dynamic content types, ACF simplifies data entry and enhances your site's flexibility.
Why it’s essential:
User-friendly interface for clients
Supports complex field types (repeaters, galleries, flexible content)
Saves development time
2. Yoast SEO
Purpose: Optimize site for search engines
While it’s widely known among content creators, Yoast SEO is also an important tool for developers. It ensures that every page and post is properly optimized with SEO best practices in mind.
For developers, Yoast offers customizable breadcrumbs, schema integration, and control over robots.txt and sitemaps.
Why it’s essential:
Enhances search visibility
Adds structured data
Developer-friendly filters and actions
3. WP Rocket
Purpose: Performance optimization
Speed is a ranking factor and a user experience booster. WP Rocket is a powerful caching plugin that makes WordPress sites load faster with minimal configuration.
It handles page caching, browser caching, lazy loading, database cleanup, and CDN integration—all in one.
Why it’s essential:
Boosts Core Web Vitals
Developer hooks for customization
Compatible with eCommerce and multilingual sites
4. Query Monitor
Purpose: Debugging and performance analysis
Query Monitor is a must-have for diagnosing issues in WordPress development. It tracks database queries, PHP errors, hooks, REST API calls, and much more.
If your site is running slowly or you’re dealing with unexpected behavior, Query Monitor helps pinpoint the problem quickly.
Why it’s essential:
Real-time debugging
Works with themes and plugins
Identifies performance bottlenecks
5. Custom Post Type UI
Purpose: Create and manage custom post types and taxonomies
WordPress development often involves creating custom content structures beyond posts and pages. Custom Post Type UI provides an easy interface for registering custom post types and taxonomies without touching code.
It’s perfect for speeding up development and can be used alongside ACF for full control over content models.
Why it’s essential:
No-code setup for post types
Export functionality for use in themes/plugins
Saves hours of manual coding
6. Duplicator
Purpose: Site migration and backup
Duplicator makes it easy to clone, move, or back up a WordPress site. Whether you're moving from staging to production or delivering a completed project to a client, this plugin simplifies the process.
It packages your site files and database into a single archive for easy deployment.
Why it’s essential:
Hassle-free migrations
Great for creating boilerplate templates
No need for manual database edits
7. WP All Import
Purpose: Import data into WordPress
When working with client data, bulk content, or WooCommerce products, WP All Import is an invaluable tool. It allows you to import data from XML or CSV files into any post type.
It integrates seamlessly with ACF, WooCommerce, and custom taxonomies—giving developers control over how data is mapped and displayed.
Why it’s essential:
Handles large datasets
Flexible import options
Developer-friendly with PHP functions
8. User Role Editor
Purpose: Manage and customize user roles and capabilities
In complex WordPress sites, controlling access levels is crucial. User Role Editor lets you fine-tune permissions for different user roles, or even create entirely new roles tailored to your project.
This is particularly helpful for membership sites, eLearning platforms, and client dashboards.
Why it’s essential:
Easy UI for managing capabilities
Useful for multisite setups
Secure role management
9. Regenerate Thumbnails
Purpose: Recreate image sizes
When changing themes or modifying image dimensions in your functions file, WordPress doesn’t automatically apply those changes to existing media. Regenerate Thumbnails lets you update image sizes in bulk.
This ensures consistency in your layouts and prevents layout issues.
Why it’s essential:
Saves hours of manual editing
CLI support for automation
Works well in dev and production environments
10. Wordfence Security
Purpose: WordPress site security
Security should never be an afterthought. Wordfence offers real-time threat defense, malware scanning, login protection, and firewall features to keep your WordPress sites safe.
While developers might also work with server-level tools, Wordfence provides an easy layer of protection that’s client-friendly and highly effective.
Why it’s essential:
Real-time firewall and malware scanning
Brute force protection
Detailed traffic and threat reports
Final Thoughts
The WordPress plugin ecosystem is vast, and while there’s no one-size-fits-all solution, these ten plugins provide a solid foundation for any WordPress developer. They help speed up workflows, improve site performance, enhance SEO, secure data, and streamline debugging.
As a developer, knowing when and how to use these tools—and when to avoid unnecessary plugins—is part of mastering WordPress. Choose wisely, keep your stack lean, and always test for compatibility in your development environment.
Are there any plugins you can’t live without? Let us know in the comments!
0 notes
Text
[solved] Wordpress ACF - Custom filter by Select Field
[solved] Wordpress ACF - Custom filter by Select Field
Advanced Custom Fields (ACF) is a powerful and popular plugin for WordPress that makes it easy to create custom fields for posts, pages, and other content types. One of the most useful features of ACF is the ability to create a select field, which allows users to choose from a pre-defined set of options when creating or editing a piece of content. Sometimes you may need to create a custom filter…
View On WordPress
0 notes