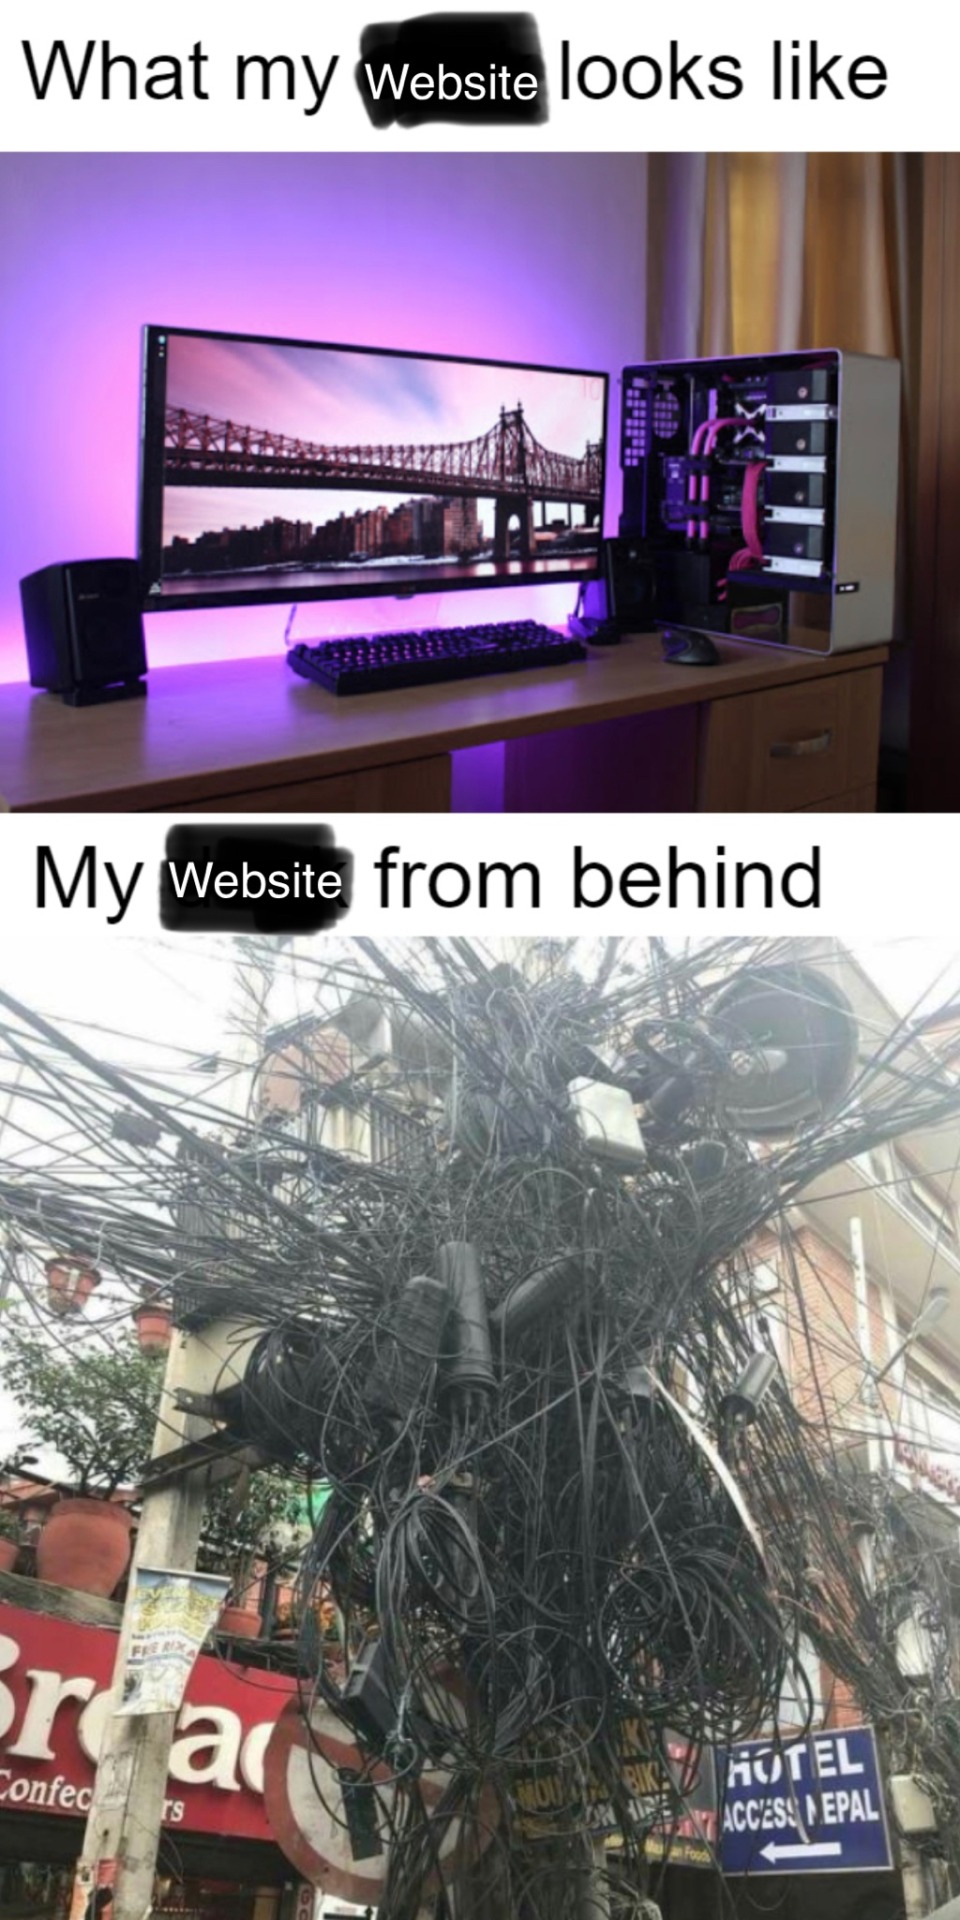
#website design
Explore tagged Tumblr posts
Visit Tumblr Blog
Explore Tumblr blogs with no restrictions, modern design and the best experience.
Last Seen Tumblr Blogs


Fun Fact
Post activity is at the highest at 4:00 pm EDT; notes peak at 10:00 pm EDT.
Text
some misc dividers :3


#dividers#graphics#web graphics#2000s#old internet#myspace#spacehey#blinkies#gifs#neocities#geocities#website design#web design#pixel graphics#carrd resources#web resources#useful stuff#carrd decor#carrd stuff#old web graphics#internetcore#webcore
3K notes
·
View notes
Text
Meme edits I made to explain my thoughts on coding languages I’ve used (from the perspective of a beginner making a website):
HTML
CSS

JavaScript
4K notes
·
View notes
Text
Essentials You Need to Become a Web Developer
HTML, CSS, and JavaScript Mastery
Text Editor/Integrated Development Environment (IDE): Popular choices include Visual Studio Code, Sublime Text.
Version Control/Git: Platforms like GitHub, GitLab, and Bitbucket allow you to track changes, collaborate with others, and contribute to open-source projects.
Responsive Web Design Skills: Learn CSS frameworks like Bootstrap or Flexbox and master media queries
Understanding of Web Browsers: Familiarize yourself with browser developer tools for debugging and testing your code.
Front-End Frameworks: for example : React, Angular, or Vue.js are powerful tools for building dynamic and interactive web applications.
Back-End Development Skills: Understanding server-side programming languages (e.g., Node.js, Python, Ruby , php) and databases (e.g., MySQL, MongoDB)
Web Hosting and Deployment Knowledge: Platforms like Heroku, Vercel , Netlify, or AWS can help simplify this process.
Basic DevOps and CI/CD Understanding
Soft Skills and Problem-Solving: Effective communication, teamwork, and problem-solving skills
Confidence in Yourself: Confidence is a powerful asset. Believe in your abilities, and don't be afraid to take on challenging projects. The more you trust yourself, the more you'll be able to tackle complex coding tasks and overcome obstacles with determination.
#code#codeblr#css#html#javascript#java development company#python#studyblr#progblr#programming#comp sci#web design#web developers#web development#website design#webdev#website#tech#html css#learn to code
2K notes
·
View notes
Text
Littlest Pet Shop.com circa 2008


287 notes
·
View notes
Text
Introduction To HTML
[Note: You need a text editor to do this. You can use Notepad or Text Edit. But it's so much better to download VS Code / Visual Studio Code. Save it with an extension of .html]
HTML stands for Hyper Text Markup Language
It is used to create webpages/websites.
It has a bunch of tags within angular brackets <....>
There are opening and closing tags for every element.
Opening tags look like this <......>
Closing tags look like this
The HTML code is within HTML tags. ( // code)
Here's the basic HTML code:
<!DOCTYPE html> <html> <head> <title> My First Webpage </title> </head> <body> <h1> Hello World </h1> <p> Sometimes even I have no idea <br> what in the world I am doing </p> </body> </html>
Line By Line Explanation :
<!DOCTYPE html> : Tells the browser it's an HTML document.
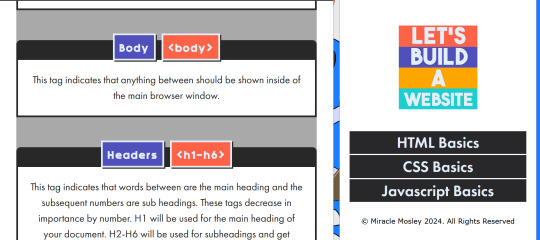
<html> </html> : All code resides inside these brackets.
<head> </head> : The tags within these don't appear on the webpage. It provides the information about the webpage.
<title> </title> : The title of webpage (It's not seen on the webpage. It will be seen on the address bar)
<body> </body> : Everything that appears on the webpage lies within these tags.
<h1> </h1> : It's basically a heading tag. It's the biggest heading.
Heading Tags are from <h1> to <h6>. H1 are the biggest. H6 are the smallest.
<p> </p> : This is the paragraph tag and everything that you want to write goes between this.
<br> : This is used for line breaks. There is no closing tag for this.
-------
Now, we'll cover some <Meta> tags.
Meta tags = Notes to the browser and search engines.
They don’t appear on the page.
They reside within the head tag
<head> <meta charset="UTF-8"> <meta name="viewport" content="width=device-width, initial-scale=1.0"> <meta name="description" content="Website Description"> <meta name="Author" content="Your Name"> <meta name="keywords" content="Websites Keywords"> </head>
Line By Line Explanation:
<meta charset="UTF-8"> : Makes sure all letters, symbols, and emojis show correctly.
<meta name="viewport" content="width=device-width, initial-scale=1.0"> : Makes your site look good on phones and tablets.
<meta name="description" content="Website Description"> : Describes your page to Google and helps people find it.
<meta name="author" content="Your Name"> : Says who created the page.
<meta name="keywords" content="Website's Keywords"> : Adds a few words to help search engines understand your topic.
_____
This is my first post in this topic. I'll be focusing on the practical side more than the actual theory, really. You will just have some short bullet points for most of these posts. The first 10 posts would be fully HTML. I'll continue with CSS later. And by 20th post, we'll build the first website. So, I hope it will be helpful :)
If I keep a coding post spree for like 2 weeks, would anyone be interested? o-o
#code#codeblr#css#html#javascript#python#studyblr#progblr#programming#comp sci#web design#web developers#web development#website design#webdev#website#tech#html css#learn to code#school#study motivation#study aesthetic#study blog#student#high school#studying#study tips#studyspo#website development#coding
91 notes
·
View notes
Text
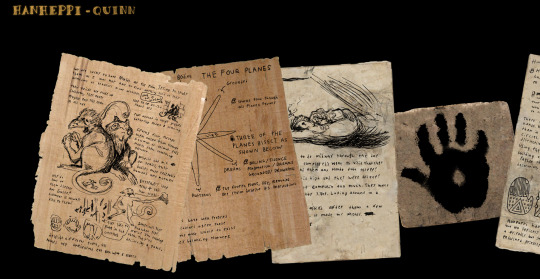

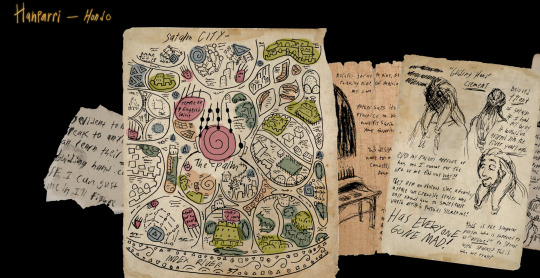
look at my webbed site you get to rifle through personal notes and doodles of a priest/naturalist and a highly opinionated butcher who wants to kill what is essentially the pope
#nnstuff#nnart#nnoc#hanheppi#hanparri#hondo#quinn#it doesn’t work on phonessss#original art#original character#oc art#website#website design
99 notes
·
View notes
Text


RARE PNG PAGE DECOR/WEBSITE ADDITIONS ETC - THE MOST ESOTERIC AND QUESTIONABLE TRANSPARENT GIF IMAGES FROM [REDACTED] PART 1
#page decor#rentry graphics#rentry resources#rentry decor#rentry stuff#carrd resources#carrd moodboard#carrd graphics#web graphics#pixel graphics#cute pixels#neocities#webcore#old web graphics#blinkies#stamps#decor#transparent png#png#pngfile#transparent#random pngs#gifset#multiple gifs#art#webmaster#web maintenance#website#website design#website optimization
190 notes
·
View notes
Text

꒰Carrd Template꒱🍪 Discord-Themed 🍪
— A simple, one page carrd based upon the social media application Discord! ✿
꒰🍓 • Details꒱
It features one-page website.
F2U: ko-fi.com/s/21e2c0ae33
Artist Support Version: VGen Shop
Preview here: carrd.co/templates/a1162572f1eda342
Commissions: vgen.co/WispyBun
If you ever want to upgrade your Carrd plan, please feel free to use my referral code: WISPYBUN (Thank you so much!)
TIPS ARE GREATLY APPRECIATED! THANK YOU!
꒰🍫 • T.O.S꒱
Do not redistribute.
Editing is allowed.
Do not remove the footer featuring my username
Non-Refundable.
Do not use my work for NFTs or A.I.
Do not use my work for any hate or discrimination.
This includes any language or behavior that is, though not limited to: racism, sexism, homophobia, transphobia, ableism, zionism, islamophobia, antisemitism, fatphobia, or any other form of discrimination.
Do not use my work for harmful depictions of minors, lolis/sho, or anything pedophilic or zoophilic.
61 notes
·
View notes
Text
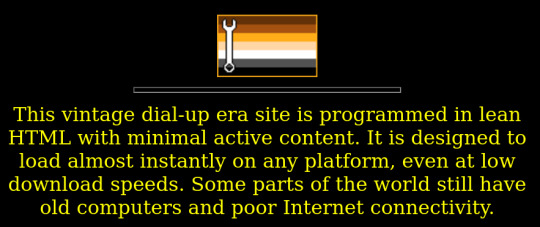
Every single website needs a basic HTML fallback version for people with poor internet connection (and/or days when the servers are bogged down), and I'm not kidding.
104 notes
·
View notes
Text


purple web tiles ^-^ sorry if the formatting looks weird on mobile
i have so many tiles to post! lmk which colour you want next!
#background tiles#bg tiles#web graphics#internet archive#webcore#web tiles#y2k#old web#web archive#internet graphics#web design#early web#early internet#graphics#website design#website graphics#purple#purple graphics#purple web graphics#web textures#textures
108 notes
·
View notes
Text
Friendly reminder that Wix.com is an Israeli-based company (& some website builders to look into instead)
I know the BDS movement is not targeting Wix.com specifically (see here for the companies they're currently boycotting) but since Wix originated in Israel as early as 2006, it would be best to drop them as soon as you can.
And while you're at it, you should leave DeviantArt too, since that company is owned by Wix. I deleted my DA account about a year ago not just because of their generative AI debacle but also because of their affiliation with their parent company. And just last month, DA has since shown their SUPPORT for Israel in the middle of Israel actively genociding the Palestinian people 😬
Anyway, I used to use Wix and I stopped using it around the same time that I left DA, but I never closed my Wix account until now. What WAS nice about Wix was how easy it was to build a site with nothing but a drag-and-drop system without any need to code.
So if you're using Wix for your portfolio, your school projects, or for anything else, then where can you go?
Here are some recommendations that you can look into for website builders that you can start for FREE and are NOT tied to a big, corporate entity (below the cut) 👇👇
Carrd.co

This is what I used to build my link hub and my portfolio, so I have the most experience with this platform.
It's highly customizable with a drag-and-drop arrangement system, but it's not as open-ended as Wix. Still though, it's easy to grasp & set up without requiring any coding knowledge. The most "coding" you may ever have to deal with is markdown formatting (carrd provides an on-screen cheatsheet whenever you're editing text!) and section breaks (which is used to define headers, footers, individual pages, sections of a page, etc.) which are EXTREMELY useful.
There's limits to using this site builder for free (max of 2 websites & a max of 100 elements per site), but even then you can get a lot of mileage out of carrd.
mmm.page

This is a VERY funny & charming website builder. The drag-and-drop system is just as open-ended as Wix, but it encourages you to get messy. Hell, you can make it just as messy as the early internet days, except the way you can arrange elements & images allows for more room for creativity.
Straw.page
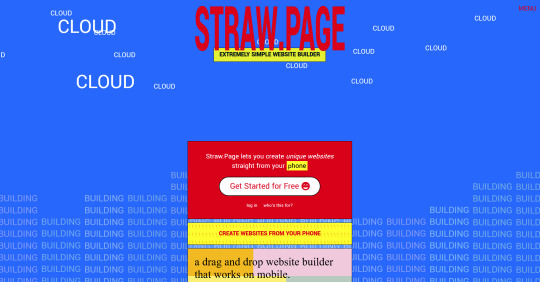
This is an extremely simple website builder that you can start from scratch, except it's made to be accessible from your phone. As such, the controls are limited and intentionally simple, but I can see this being a decent website builder to start with if all you have is your phone. The other options above are also accessible from your phone, but this one is by far one of the the simplest website builders available.
Hotglue.me

This is also a very simple & rudimentary website builder that allows you to make a webpage from scratch, except it's not as easy to use on a mobile phone.
At a glance, its features are not as robust or easy to pick up like the previous options, but you can still create objects with a simple double click and drag them around, add text, and insert images or embeds.
Mind you, this launched in the 2010s and has likely stayed that way ever since, which means that it may not have support for mobile phone displays, so whether or not you wanna try your hand at building something on there is completely up to you!
Sadgrl's Layout Editor

sadgrl.online is where I gathered most of these no-code site builders! I highly recommend looking through the webmaster links for more website-building info.
This simple site builder is for use on Neocities, which is a website hosting service that you can start using for free. This is the closest thing to building a site that resembles the early internet days, but the sites you can make are also responsive to mobile devices! This can be a good place to start if this kind of thing is your jam and you have little to no coding experience.
Although I will say, even if it sounds daunting at first, learning how to code in HTML and CSS is one of the most liberating experiences that anyone can have, even if you don't come from a website scripting background. It's like cooking a meal for yourself. So if you want to take that route, then I encourage to you at least try it!
Most of these website builders I reviewed were largely done at a glance, so I'm certainly missing out on how deep they can go.
Oh, and of course as always, Free Palestine 🇵🇸
#webdev#web dev#webdesign#website design#website development#website builder#web design#websites#sites#free palestine#long post#I changed the wording multiple times on the introduction but NOW I think im done editing it
501 notes
·
View notes
Text
I really hate modern website design. Massive picture with a meaningless slogan then scroll down to magically appearing fluff text, then some more magically appearing fluff text, then some more until you get to the bottom of the page and have found nothing of actual use, only to discover a virtually invisible menu button in the top right corner of the screen that hides all the actual website from you. Website designers, when did useability stop being something you were allowed to care about?
#website design#If your website is trying to sell me things#then surely the best way to sell me things#is to show me how to buy things?#Ugh#I am old and salty#And sometimes the pictures change in some sort of bizarre pointless slideshow of stock image nonsense#smiling people who are clearly only happy because they've never tried using this fucking website#style over substance at its most annoying
105 notes
·
View notes
Text

Welcome back, coding enthusiasts! Today we'll talk about Git & Github , the must-know duo for any modern developer. Whether you're just starting out or need a refresher, this guide will walk you through everything from setup to intermediate-level use. Let’s jump in!
What is Git?
Git is a version control system. It helps you as a developer:
Track changes in your codebase, so if anything breaks, you can go back to a previous version. (Trust me, this happens more often than you’d think!)
Collaborate with others : whether you're working on a team project or contributing to an open-source repo, Git helps manage multiple versions of a project.
In short, Git allows you to work smarter, not harder. Developers who aren't familiar with the basics of Git? Let’s just say they’re missing a key tool in their toolkit.
What is Github ?
GitHub is a web-based platform that uses Git for version control and collaboration. It provides an interface to manage your repositories, track bugs, request new features, and much more. Think of it as a place where your Git repositories live, and where real teamwork happens. You can collaborate, share your code, and contribute to other projects, all while keeping everything well-organized.
Git & Github : not the same thing !
Git is the tool you use to create repositories and manage code on your local machine while GitHub is the platform where you host those repositories and collaborate with others. You can also host Git repositories on other platforms like GitLab and BitBucket, but GitHub is the most popular.
Installing Git (Windows, Linux, and macOS Users)
You can go ahead and download Git for your platform from (git-scm.com)
Using Git
You can use Git either through the command line (Terminal) or through a GUI. However, as a developer, it’s highly recommended to learn the terminal approach. Why? Because it’s more efficient, and understanding the commands will give you a better grasp of how Git works under the hood.
GitWorkflow
Git operates in several key areas:
Working directory (on your local machine)
Staging area (where changes are prepared to be committed)
Local repository (stored in the hidden .git directory in your project)
Remote repository (the version of the project stored on GitHub or other hosting platforms)
Let’s look at the basic commands that move code between these areas:
git init: Initializes a Git repository in your project directory, creating the .git folder.
git add: Adds your files to the staging area, where they’re prepared for committing.
git commit: Commits your staged files to your local repository.
git log: Shows the history of commits.
git push: Pushes your changes to the remote repository (like GitHub).
git pull: Pulls changes from the remote repository into your working directory.
git clone: Clones a remote repository to your local machine, maintaining the connection to the remote repo.
Branching and merging
When working in a team, it’s important to never mess up the main branch (often called master or main). This is the core of your project, and it's essential to keep it stable.
To do this, we branch out for new features or bug fixes. This way, you can make changes without affecting the main project until you’re ready to merge. Only merge your work back into the main branch once you're confident that it’s ready to go.
Getting Started: From Installation to Intermediate
Now, let’s go step-by-step through the process of using Git and GitHub from installation to pushing your first project.
Configuring Git
After installing Git, you’ll need to tell Git your name and email. This helps Git keep track of who made each change. To do this, run:

Master vs. Main Branch
By default, Git used to name the default branch master, but GitHub switched it to main for inclusivity reasons. To avoid confusion, check your default branch:

Pushing Changes to GitHub
Let’s go through an example of pushing your changes to GitHub.
First, initialize Git in your project directory:

Then to get the ‘untracked files’ , the files that we haven’t added yet to our staging area , we run the command

Now that you’ve guessed it we’re gonna run the git add command , you can add your files individually by running git add name or all at once like I did here

And finally it's time to commit our file to the local repository

Now, create a new repository on GitHub (it’s easy , just follow these instructions along with me)
Assuming you already created your github account you’ll go to this link and change username by your actual username : https://github.com/username?tab=repositories , then follow these instructions :


You can add a name and choose wether you repo can be public or private for now and forget about everything else for now.

Once your repository created on github , you’ll get this :

As you might’ve noticed, we’ve already run all these commands , all what’s left for us to do is to push our files from our local repository to our remote repository , so let’s go ahead and do that

And just like this we have successfully pushed our files to the remote repository
Here, you can see the default branch main, the total number of branches, your latest commit message along with how long ago it was made, and the number of commits you've made on that branch.

Now what is a Readme file ?
A README file is a markdown file where you can add any relevant information about your code or the specific functionality in a particular branch—since each branch can have its own README.
It also serves as a guide for anyone who clones your repository, showing them exactly how to use it.
You can add a README from this button:

Or, you can create it using a command and push it manually:

But for the sake of demonstrating how to pull content from a remote repository, we’re going with the first option:

Once that’s done, it gets added to the repository just like any other file—with a commit message and timestamp.
However, the README file isn’t on my local machine yet, so I’ll run the git pull command:

Now everything is up to date. And this is just the tiniest example of how you can pull content from your remote repository.
What is .gitignore file ?
Sometimes, you don’t want to push everything to GitHub—especially sensitive files like environment variables or API keys. These shouldn’t be shared publicly. In fact, GitHub might even send you a warning email if you do:

To avoid this, you should create a .gitignore file, like this:

Any file listed in .gitignore will not be pushed to GitHub. So you’re all set!
Cloning
When you want to copy a GitHub repository to your local machine (aka "clone" it), you have two main options:
Clone using HTTPS: This is the most straightforward method. You just copy the HTTPS link from GitHub and run:

It's simple, doesn’t require extra setup, and works well for most users. But each time you push or pull, GitHub may ask for your username and password (or personal access token if you've enabled 2FA).
But if you wanna clone using ssh , you’ll need to know a bit more about ssh keys , so let’s talk about that.
Clone using SSH (Secure Shell): This method uses SSH keys for authentication. Once set up, it’s more secure and doesn't prompt you for credentials every time. Here's how it works:
So what is an SSH key, actually?
Think of SSH keys as a digital handshake between your computer and GitHub.
Your computer generates a key pair:
A private key (stored safely on your machine)
A public key (shared with GitHub)
When you try to access GitHub via SSH, GitHub checks if the public key you've registered matches the private key on your machine.
If they match, you're in — no password prompts needed.
Steps to set up SSH with GitHub:
Generate your SSH key:

2. Start the SSH agent and add your key:

3. Copy your public key:

Then copy the output to your clipboard.
Add it to your GitHub account:
Go to GitHub → Settings → SSH and GPG keys
Click New SSH key
Paste your public key and save.
5. Now you'll be able to clone using SSH like this:

From now on, any interaction with GitHub over SSH will just work — no password typing, just smooth encrypted magic.
And there you have it ! Until next time — happy coding, and may your merges always be conflict-free! ✨👩💻👨💻
#code#codeblr#css#html#javascript#java development company#python#studyblr#progblr#programming#comp sci#web design#web developers#web development#website design#webdev#website#tech#html css#learn to code#github
93 notes
·
View notes
Text

I've been tackling learning HTML/CSS and eventually JavaScript to remake my art portfolio! It has been fun studying by making mock-up webpages for Varsity RPG and transcribing my notes.
51 notes
·
View notes
Text
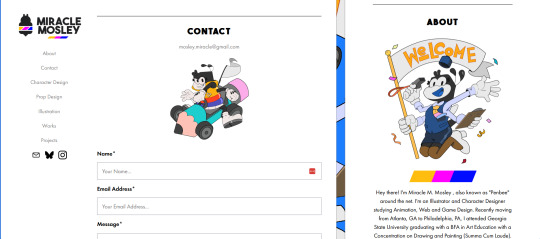
Day 6 [Forms In HTML]
Introduction To HTML
Day 2 [Multimedia Elements In HTML]
Day 3 [Table in HTML]
Day 4 [Link Tag In HTML]
Day 5 [Lists In HTML]
Forms are basically used for collecting user information. And they are really important to learn. Here's a simple form in HTML:
Code:


Line By Line Explanation:
<form>: Used for creating forms. All the form elements go in this tag. Action: When submitted, data is sent to this file or URL [index.html] Method="post": Sends data
<label> : This describes the input tag for="___": Connects the label to the input with id="name" id : gives a unique identification to the tag <input>: It's used to make the form elements
<input> Type Elements :
type="text" : A simple text box is created.
type="email" : A box to input email.
type="checkbox" : A small square that users can tick. Can select multiple options using this.
type="radio" : A small circle, you can only select one option.
type="submit" : A button that submits the data to the server.
<textarea>: Accepts multiple lines of text. rows="4": It creates 4 lines cols="30": It creates 30 characters
<select> : Creates a drop-down list <option>: Creates an item in the dropdown. value="colorname": This is the data sent to the server if chosen.
Output For The Code:

_______________________
Hope This Helps !!
#code#codeblr#css#html#javascript#python#studyblr#progblr#programming#comp sci#web design#web developers#web development#website design#webdev#website#tech#html css#learn to code#school#study motivation#study aesthetic#study blog#student#high school#studying#study tips#studyspo#website development#coding
31 notes
·
View notes