#Photoshop animation workflow tutorial design
Explore tagged Tumblr posts
Visit Tumblr Blog
Explore Tumblr blogs with no restrictions, modern design and the best experience.
Last Seen Tumblr Blogs


Fun Fact
Tumblr has 4 main sources of revenue.
Text
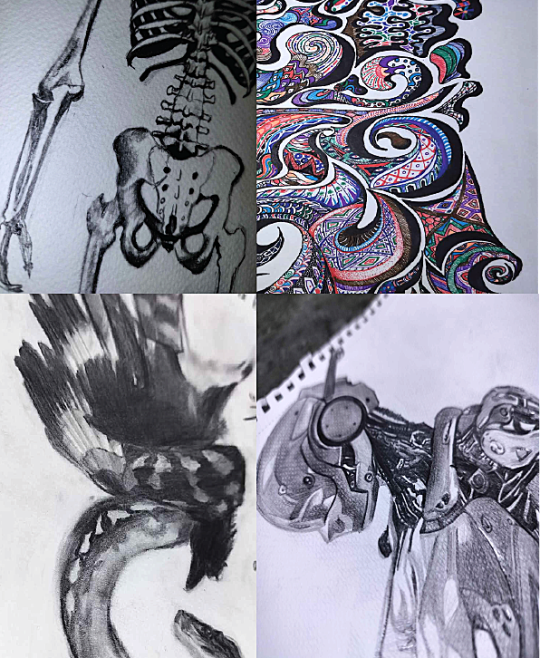
The Charm of Pencil Rendering: A Guide for Students Studying Multimedia
Pencil rendering is still an effective and expressive technique that links us to centuries of artistic history in an age where digital art and technology rule the art world. Learning pencil rendering as a multimedia student can help you become more creatively flexible and have a deeper understanding of artistic fundamentals. Precise control, depth, and texture are made possible by pencil rendering, which is timeless and essential to all artistic mediums. This tutorial will assist you in starting your adventure into the world of pencil art, regardless of your level of experience or desire to improve your abilities.

Understanding how to Render with Pencils
Pencil rendering is the process of producing artwork with depth, shading, and textures using colored pencils, graphite, or charcoal. Pencil rendering uses manual methods that call for patience and control, in contrast to digital art, which is created on a computer. The subtle tone changes, delicate lines, and the depth created by layering and shading are what make this art form captivating.
Key Tools to Begin
Sketchbook and Paper: Select high-quality paper with the appropriate texture (rough for improved graphite adherence, smooth for fine details). For a variety of shading effects, graphite pencils come in grades ranging from harsh (H) to soft (B). Charcoal Pencils: Perfect for expressive strokes and deep, rich blacks. Blending Tools: To even out shading, use cotton swabs, tissues, or stumps. Erasers: Precision erasers for fine details and kneaded erasers for delicate accents. For intricate work, use sharpeners and mechanical pencils ( optional for mechanical pencils ) to guarantee precise lines and constant sharpness.
Crucial Techniques to Learn
Sketching and Line Work: Learn to manipulate your lines by starting with basic forms. Shading and Blending: To add depth and texture, use master hatching, cross-hatching, stippling, and smooth shading. Light and Shadow: To produce realistic drawings, comprehend how light interacts with surfaces. Composition and Perspective: To create more dynamic artwork, learn about depth, symmetry, and balance. Texturing and Layering: To create representations that are richer and more realistic, gradually add layers.

Connecting Digital Art and Pencil Rendering
You can use your understanding of pencil rendering as a solid basis for digital design, animation, and other multimedia projects as a multimedia student. Hand-eye coordination is improved, contrast and form are better understood, and creativity that may be transferred to digital platforms is fostered by practicing conventional approaches. Consider taking a picture of your pencil work or scanning it, then utilizing programs like Photoshop or Illustrator to enhance it digitally.

Getting Inspired and Creating Your Own Style
Finding your own style is one of the most thrilling parts of pencil rendering. Begin by studying the pencil works of famous painters such as Albrecht Dürer, Leonardo da Vinci, and contemporary masters of graphite. Try a variety of shading methods and subjects to find what appeals to you. Still life drawings, architectural sketches, portraits, and nature can all be excellent sources of inspiration.
The secret to improvement is patience and practice.
Pencil rendering requires commitment and time to learn, just like any other ability. Make time for consistent practice sessions, push yourself with novel approaches, and don't be scared to make mistakes—they're a necessary part of learning. You can grow more quickly by participating in art communities, attending workshops, and asking for helpful criticism.

In conclusion A fun and engaging technique that lets you convey your ideas with accuracy and depth is pencil rendering. Incorporating pencil rendering to your workflow as a multimedia student can enhance your digital creations and expand your creative horizons. The process of using pencils to create art is just as rewarding as the finished product, whether you are sketching, shading, or experimenting with mixed media. Grab your pencils, enjoy the process, and unleash your inner artist!
2 notes
·
View notes
Text
Reliance Animation Academy Andheri – Transform Your Future with Graphic Design Courses in Andheri for the Motion Graphics Era

Reliance Animation Academy Andheri Is Creating Tomorrow’s Design Leaders with Graphic Design Courses in Andheri
Reliance Animation Academy Andheri is shaping the creative revolution in India, one designer at a time. With the world rapidly transitioning to visual-first communication, there’s a massive demand for skilled Motion Graphics Designers who can create, animate, and tell impactful stories through design. This rising industry need begins with a solid foundation—and that’s exactly what our graphic design courses in Andheri are built to offer.
From social media reels to app walkthroughs, animated brand intros to explainer videos—motion graphics is now the language of the digital world. If you want to master this language and stand out in the global creative market, your journey begins at Reliance Animation Academy Andheri.
What Does a Motion Graphics Designer Do in 2025?
A Motion Graphics Designer creates animated visuals that communicate messages clearly and creatively. Unlike traditional animators focused on character or cinematic storytelling, motion designers work with type, shapes, icons, and visual metaphors to create dynamic content for digital platforms.
At Reliance Animation Academy Andheri, our graphic design courses in Andheri cover all aspects of motion graphics—from design theory to professional animation workflows.
Graphic Designer vs. Motion Graphics Designer – What Sets Them Apart?
Graphic Designers craft visual compositions using images, colors, and typography for print or digital use.
Motion Graphics Designers take it a step further—using animation to bring static visuals to life.
Our graphic design courses in Andheri train students to excel in both disciplines, giving them an edge in today’s hybrid job market.
Industries That Can’t Function Without Motion Graphics in 2025
The demand for Motion Graphics Designers is exploding across multiple domains:
Digital Advertising Agencies
OTT Platforms and Media Houses
Mobile App and Game Developers
EdTech Companies and E-Learning Portals
AR/VR Startups and Metaverse Projects
UI/UX Design Studios
By enrolling in our graphic design courses in Andheri, you position yourself at the center of this booming creative economy.
Inside a Motion Designer’s Daily Workflow
At Reliance Animation Academy Andheri, students learn to:
Create storyboards and visualize animated sequences
Animate text, graphics, and characters
Sync visuals with voiceovers, music, or effects
Work across formats like ads, reels, tutorials, and app UIs
Collaborate with marketing, UI/UX, and video production teams
Every assignment in our graphic design courses in Andheri mimics real-world studio workflows.
Software and Tools You’ll Master at Reliance Animation Academy Andheri
Animation & Video Tools
Adobe After Effects
Adobe Premiere Pro
Blender, Cinema 4D, Maya
Design Software
Adobe Photoshop
Adobe Illustrator
Figma and Adobe XD (for UI animation projects)
Our graphic design courses in Andheri ensure you're job-ready with both foundational and cutting-edge tools.
Soft Skills That Matter Just as Much
Creative storytelling
Eye for motion timing and rhythm
Teamwork and communication
Curiosity and self-driven learning
We include collaborative assignments, feedback loops, and client-style project simulations within our graphic design courses in Andheri to build these skills.
Emerging Trends Covered in Our Courses
We don’t just teach what’s current—we teach what’s next:
AI-powered animation platforms (e.g., Runway ML, Adobe Firefly)
Interactive UI/UX motion design
AR and VR animation basics
Generative design for rapid prototyping
These topics are woven into our advanced graphic design courses in Andheri to prepare you for the creative future.
Why 2025 Is the Golden Year for Motion Designers
1. Reels & Shorts Dominate Attention
Brands need scroll-stopping animations for Instagram, TikTok, and YouTube Shorts.
2. Animated Branding Is the Norm
Static logos are old news. Animated identities are in.
3. Digital Products Demand Motion
Apps and websites use motion to onboard, guide, and retain users.
4. AR/VR Content Needs Dynamic Visuals
The metaverse needs artists who can animate immersive environments.
5. A Global Shortage of Skilled Designers
Motion design is still a specialized skill. Our graphic design courses in Andheri bridge this talent gap.
What Career Paths Open Up After Graphic Design Courses in Andheri?
With a portfolio in motion graphics, you can become:
Motion Graphics Designer
UI Motion Specialist
2D/3D Animator
Visual Effects Artist
Multimedia Video Producer
AR/VR Visual Designer
Our graphic design courses in Andheri include placement training, freelancing support, and mentorship from industry professionals.
Salary Outlook for Motion Graphics Designers
India: ₹25,000 to ₹50,000 per month (freshers); ₹1L+ per month with experience
Global Average: $70,000 to $95,000 per year
Freelance Projects: $25–$100/hour depending on niche
Specialists in 3D, AR/VR, or UI motion—trained through our graphic design courses in Andheri—can command top-tier compensation.
What You’ll Learn in Graphic Design Courses in Andheri
Foundational Modules
Principles of Design & Typography
Color Theory and Composition
Raster & Vector Graphics (Photoshop & Illustrator)
Motion Graphics Specialization
Animation Principles
Timeline-based Editing
Syncing with Audio/Voice
Real-World Ad & UI Projects
Professional Development
Portfolio Building
Freelance Training
Resume and Interview Prep
Every student in our graphic design courses in Andheri graduates with a personalized, industry-ready portfolio.
Portfolio Projects You’ll Create at Reliance Animation Academy Andheri
Animated Logos and Brand Openers
Social Media Reels and Ad Snippets
UI Animation for Web and Mobile
Explainer Videos for Startups
Motion Graphics for E-Learning and Gaming
These become your golden ticket to internships, freelance gigs, and full-time jobs after completing your graphic design courses in Andheri.
How Our Students Gain Real-World Experience
Agency-Style Assignments: Simulating client briefs
Live Freelance Projects: Platforms like Fiverr and Behance
Internships with Partner Studios: Right after course completion
Studio Visits and Expert Talks: Learning from industry mentors
Our graphic design courses in Andheri offer exposure, not just education.
What the Future Holds for Motion Designers
🚀 AI + Creativity = Next-Gen Workflows
Designers will use AI not just to speed up tasks, but to innovate.
🌍 The Metaverse Is Hiring
Avatars, digital products, and immersive spaces all need animation.
📲 Micro-Animations Everywhere
Even the smallest button needs motion to feel intuitive and modern.
That’s why our graphic design courses in Andheri evolve every year to keep you future-ready.
Conclusion: Build the Skills That Build the Future
Reliance Animation Academy Andheri is more than a design school—it’s a launchpad for passionate creatives. With the rising demand for motion graphics across the globe, there has never been a better time to upskill. Our graphic design courses in Andheri combine the theory of art with the pulse of technology, helping you create a career that’s flexible, high-paying, and creatively fulfilling.
If you’re ready to tell stories through motion, it’s time to begin your journey.
Enroll Today – Start Creating Tomorrow
Reliance Animation Academy Andheri Center Unit No. 14, 2nd Floor, Shri Alankar CHS Ltd, Nadco Shopping Centre, SV Road, Near Andheri Railway Station, Mumbai – 400058 📞 +91 9326591557 / +91 7400400795 / +91 9920678816 📧 [email protected] 🌐 relianceacademyandheri.com 📍 Google Maps – Navigate Here
👉 Book a Free Counseling Session 👉 Apply for the Next Batch of Graphic Design Courses in Andheri
0 notes
Text
Getting Started with 3D Game Development

3D game development is a captivating field that combines creativity and technical skills to create immersive gaming experiences. With advancements in technology, developing 3D games has become more accessible to developers of all skill levels. In this post, we’ll explore the basics of 3D game development, tools you can use, and tips for getting started.
What is 3D Game Development?
3D game development involves creating video games that utilize three-dimensional graphics. Unlike 2D games, 3D games allow for more realistic environments, characters, and interactions, enhancing the player's immersive experience.
Why Choose 3D Game Development?
Realism: Create visually stunning and realistic environments.
Immersion: Provide players with a more engaging experience through depth and perspective.
Flexibility: Design a wide range of game genres, from action and adventure to simulations.
Market Demand: 3D games are popular, with a vast audience across various platforms.
Essential Tools and Technologies
Game Engines: Unity, Unreal Engine, Godot
3D Modeling Software: Blender, Maya, 3ds Max
Version Control: Git for managing project files
Texturing Tools: Substance Painter, Photoshop
Audio Software: Audacity, FL Studio for sound design
Basic Workflow for 3D Game Development
Concept Development: Start with an idea, define the game's genre, target audience, and core mechanics.
Game Design Document (GDD): Outline the game's features, story, characters, and gameplay mechanics.
3D Modeling: Create 3D models for characters, environments, and objects using modeling software.
Implement Gameplay: Use a game engine to program game mechanics, controls, and interactions.
Testing: Regularly playtest the game to find and fix bugs, improve gameplay, and ensure stability.
Launch: Prepare for release by marketing the game and deploying it on relevant platforms.
Key Concepts to Learn
3D Graphics: Understand rendering, lighting, and shading techniques.
Physics: Learn how to implement realistic movements and collisions in 3D space.
Animation: Create character animations and transitions using rigging and skeletal animation.
Artificial Intelligence: Program non-player character (NPC) behaviors and pathfinding.
Networking: Understand multiplayer game architecture if developing online games.
Beginner-Friendly Game Ideas
A simple 3D platformer
An endless runner game
A 3D maze exploration game
A basic first-person shooter
A virtual reality experience
Resources for Learning
Udemy – Courses on Unity, Unreal Engine, and more
Coursera – Offers courses from top universities
YouTube – Many channels dedicated to game development tutorials
Unity Learn – Official tutorials and resources from Unity
Best Practices
Keep your code organized and modular for easier maintenance.
Document your design decisions and processes.
Stay updated with industry trends and new technologies.
Engage with the game development community for support and feedback.
Conclusion
3D game development is an exciting and rewarding field that combines art and technology. With the right tools, resources, and a passion for creativity, you can create immersive gaming experiences that captivate players. Start small, continue learning, and enjoy the journey of bringing your 3D games to life!
0 notes
Text
Unlocking the Power of Adobe After Effects: A Creative's Dream Tool
Adobe After Effects is a game-changer for designers, animators, and video editors. This software opens up a world of possibilities for visual effects (VFX) and motion graphics, empowering creatives to bring their ideas to life in stunning, cinematic ways. Whether you're working on a Hollywood blockbuster, a YouTube tutorial, or an artistic project, After Effects is the perfect tool to enhance your content. Let’s dive into its many features and see how it can elevate your creativity.
What Makes Adobe After Effects Stand Out?
Adobe After Effects stands as the industry standard when it comes to creating motion graphics, VFX, and compositing. Its versatility and wide range of tools make it a go-to software for anyone looking to push the boundaries of visual storytelling. After Effects is designed for professionals and newcomers alike, offering intuitive interfaces and advanced capabilities to cater to all skill levels.
Powerful Motion Graphics
After Effects is known for its ability to create stunning motion graphics. Whether you’re animating text, graphics, or illustrations, the possibilities are endless. With powerful features like keyframing, easing, and path animation, you can easily control the movement and style of elements. It’s the perfect platform to design dynamic and eye-catching animations.
Advanced Visual Effects (VFX)
For those working with video, After Effects excels in adding breathtaking visual effects. Whether you're creating explosions, integrating CGI elements, or enhancing color grading, After Effects provides the necessary tools to make your footage look professional. It supports 3D compositing, chroma keying (green screen), and advanced tracking, all crucial for seamless VFX work.
Seamless Integration with Other Adobe Products
One of the strongest features of Adobe After Effects is its smooth integration with other Adobe Creative Cloud tools like Adobe Premiere Pro, Photoshop, and Illustrator. This interconnectivity ensures that your workflow remains efficient. You can easily import assets from Photoshop or Illustrator, and the round-trip workflow with Premiere Pro allows for seamless video editing, giving you a cohesive creative process.
Why Adobe After Effects is Essential for Creators
Enhance Your Videos with Stunning Animations
For video creators, After Effects is essential for creating engaging animations. Whether you're designing intros, lower thirds, transitions, or visual storytelling elements, After Effects makes it easy to take your videos to the next level. Its powerful tools allow you to manipulate and animate objects with precision, creating content that stands out.
Create Professional-Grade VFX
With After Effects, you can turn your footage into something extraordinary. Advanced features like 3D camera tracking and particle simulations allow you to add realistic effects that blend perfectly with your video. Whether you’re working on sci-fi, fantasy, or dramatic sequences, After Effects makes it possible to achieve stunning results.
Edit and Composite Like a Pro
After Effects is not just for animators; it’s also a powerful compositing tool. You can layer multiple video clips, apply masks, and create complex composites that blend perfectly with each other. For professional video editors, After Effects provides the tools needed to fine-tune every detail, making your video look polished and seamless.
Getting Started with Adobe After Effects
Easy-to-Learn for Beginners
While After Effects offers a range of complex features, it is also beginner-friendly. Adobe offers a wealth of tutorials, templates, and resources to help you get started. The software’s interface is intuitive, allowing you to quickly learn the basics and gradually explore more advanced techniques as you gain experience.
Expansive Community and Resources
After Effects has a vast community of users, which means a wealth of tutorials, forums, and plug-ins are available to help you learn and grow as a creative. Whether you need advice on a specific effect or want to learn how to speed up your workflow, you’ll find resources and support within the After Effects community.
0 notes
Text
What software is best for creating professional logos?
Professional logo creation requires precision, creativity, and a blend of technical tools. Whether you’re brainstorming logo design ideas or implementing intricate motion graphics for animated logos, using the right software can make all the difference. Here’s a detailed guide to the best tools for creating professional logos, widely used by graphic design services to produce exceptional results.
1. Adobe Illustrator
Adobe Illustrator is the industry standard for professional logo design and widely favored by graphic designers. Its vector-based approach allows logos to be resized without losing quality, ensuring they look sharp on everything from business cards to billboards.
Features:
Advanced shape and typography tools for unique and scalable designs.
Wide range of color options, gradients, and effects.
Seamless integration with other Adobe products like Photoshop and After Effects.
Best For: Designers working on detailed or intricate creative logo design ideas that require precision.
2. CorelDRAW
CorelDRAW is another powerful vector-based design software known for its user-friendly interface and flexibility. It’s a popular choice among beginners and professionals alike.
Features:
Extensive customization options for colors, fonts, and effects.
Intuitive tools for creating clean and professional logos.
Easy-to-use interface for quick logo creation.
Best For: Small businesses or freelance designers looking to produce high-quality logos efficiently.
3. Canva
Canva is an excellent option for those seeking simplicity. While not as advanced as Illustrator or CorelDRAW, Canva’s drag-and-drop interface and pre-made templates make it accessible to beginners and non-designers.
Features:
A large library of templates and icons to inspire logo design ideas.
Simple tools for adding text, shapes, and colors.
Collaborative features for teams.
Best For: Quick mockups, brainstorming creative logo design ideas, or for users with minimal design experience.
4. Adobe After Effects
If your branding strategy requires animated logos with motion graphics, Adobe After Effects is unmatched. This software is widely used by professionals to create engaging logo animations for video intros, advertisements, and social media.
Features:
Tools for creating dynamic animations and 3D effects.
Integration with Adobe Illustrator for seamless logo imports.
Support for motion tracking and visual effects.
Best For: Brands or designers focusing on animated or video-based logo design.
5. Affinity Designer
Affinity Designer is a cost-effective alternative to Adobe Illustrator and offers both vector and raster graphic capabilities. It’s ideal for creating detailed logos with advanced visual elements.
Features:
Smooth user interface for beginners and pros.
Support for creating both pixel and vector graphics.
Compatibility with other Affinity products for a seamless workflow.
Best For: Designers looking for professional results on a budget.
6. Inkscape
Inkscape is a free, open-source alternative for vector graphic design. It’s packed with features for creating professional logos, making it a great choice for beginners or businesses on a tight budget.
Features:
Advanced path and node editing tools for precise logo creation.
Support for exporting designs in multiple formats.
Extensive community support and tutorials.
Best For: Beginners seeking a no-cost option for professional-looking logos.
7. Gravit Designer
Gravit Designer is a web-based design tool with a focus on simplicity and usability. It supports vector-based designs and offers features to create sharp and scalable logos.
Features:
Cloud-based storage for easy access and collaboration.
Flexible tools for shapes, paths, and layers.
Compatibility with multiple devices and platforms.
Best For: Remote teams or individuals who prefer web-based solutions.
How Professional Graphic Design Services Use These Tools
Professional graphic design services leverage a combination of these tools to deliver high-quality, versatile logos that meet clients’ needs. For instance, they may use Adobe Illustrator for intricate designs, Adobe After Effects for motion graphics, and Canva for brainstorming or mockups. This multi-software approach ensures flexibility and precision at every stage of the design process.
Choosing the Right Software for Your Needs
For Beginners: Canva and Inkscape are user-friendly and offer templates to kickstart your creativity.
For Professionals: Adobe Illustrator, CorelDRAW, and Affinity Designer provide advanced tools for detailed and scalable designs.
For Motion Graphics: Adobe After Effects is the top choice for creating animated logos.
For Budget-Conscious Users: Inkscape and Affinity Designer offer professional results without high costs.
Innovating Creative Logo Design Ideas
By combining powerful software with creative thinking, designers can craft logos that are visually stunning and aligned with a brand’s identity. Whether it’s brainstorming fresh logo design ideas or incorporating cutting-edge motion graphics, the right software ensures professional outcomes.
Conclusion
The best software for creating professional logos depends on your expertise, project requirements, and budget. Tools like Adobe Illustrator, CorelDRAW, and Canva each offer unique features that cater to diverse needs. Professional graphic design services seamlessly blend these tools to deliver logos that stand out, providing a lasting impact for businesses and brands.
#Graphic Design Services#Logo design Ideas#creative design#branding services#motion graphics#logo design#scribe&sigil
0 notes
Text

Reimagining Craft: A Journey into Digital Artistry
As a traditional artist, the decision to learn digital art is driven by my desire to expand my creative side by embracing a new opportunities. Digital art offers a unique set of tools and techniques that can enhance my traditional skills. For instance, the ability to easily manipulate colors, textures, and compositions allows for a lot of experimentation that can be more challenging with physical mediums. I can explore different styles and concepts without the constraints of materials, and I can quickly undo mistakes, which encourages a risk-taking in my creative process.
Moreover, digital art can significantly streamline my workflow. The ease of editing and revising work can lead to a more efficient creative process, that would allow me to produce high-quality pieces in less time. This efficiency is beneficial if I want to create a series or respond to commissions quickly.
In terms of other benefits, mastering digital art opens up a wide range of professional opportunities. It can lead to roles in illustration, graphic design, animation, and even concept art for games or movies. Additionally, the digital platform makes used on sharing my work online much easier, helping me connect with a global audience and build a personal brand.
To step on this learning journey, I would look for a variety of available resources. Online platforms like Skill share and Udemy offer structured courses that cover the basics and advanced techniques in digital art. YouTube is also a treasure trove of free tutorials that can provide insights into specific software or methods. Joining community forums or social media groups can be valuable for receiving feedback, sharing experiences, and gaining inspiration from fellow artists. Lastly, investing time in practicing with different software—such as Adobe Photoshop, Procreate, or Clip Studio Paint—will be essential for developing my technical skills and finding my unique digital style.
Overall, the combination of these resources and a commitment for a regular practice will help me bridge the gap between traditional and digital art.
Non-fiction Writing // Rose Joy Cordero
Image from Google
The Daily Digest
0 notes
Text
Exploring Industry-Standard Software: A Comprehensive Overview
In today’s digital world, various industries heavily rely on software to carry out operations, design projects, create content, and manage data. From graphic design and animation to engineering and architecture, professionals use specific tools that are considered "industry-standard." These programs are the benchmark for quality, efficiency, and capability, offering advanced features that meet the high demands of professionals across the globe. Aspiring animators and designers can enhance their skills and knowledge at the best animation institute in Pune, where they gain hands-on experience with industry-standard software, preparing them for competitive roles in their respective fields.
Understanding industry-standard software not only allows individuals to produce high-quality work but also gives them a competitive edge in their respective fields. This article explores the significance of industry-standard software across multiple sectors, the benefits of mastering these tools, and a closer look at key programs used in various industries.
### What is Industry-Standard Software?
Industry-standard software refers to the software tools that are widely accepted and used by professionals within a specific industry. These programs are typically endorsed because they offer advanced functionality, stability, and compatibility with other platforms, making them integral to the industry’s workflow. Companies and freelancers alike prefer these tools because they ensure consistency in results and help streamline the production process.
In creative fields, industry-standard software often becomes synonymous with the trade itself. For example, Adobe Photoshop is almost interchangeable with digital image editing, and AutoCAD with architectural drafting.
### Benefits of Using Industry-Standard Software
1. **Professional Recognition and Competence**: Proficiency in industry-standard software is often seen as a measure of competence within an industry. For creative professionals, engineers, or architects, the ability to use leading software can open doors to employment and freelance opportunities. Clients and employers expect professionals to be familiar with these tools as they ensure the highest quality results.
2. **Advanced Features**: Industry-standard software often comes with a host of advanced features that enable professionals to push the boundaries of what’s possible. These programs are developed with input from industry experts, ensuring that they cater to the complex needs of professionals.
3. **Seamless Collaboration**: Using the same software as your colleagues or collaborators ensures seamless interaction across a project’s lifecycle. Files, models, and designs can be shared easily, reducing the likelihood of compatibility issues. For example, creative teams working on animation or graphic design projects often use Adobe Creative Cloud, allowing multiple users to collaborate efficiently.
4. **Regular Updates and Support**: Industry-standard software typically comes with regular updates to keep up with technological advances and emerging industry needs. These updates help improve the program's efficiency and introduce new features that keep users at the forefront of their profession. Additionally, the support network surrounding industry-standard software is vast, providing users with tutorials, forums, and customer service when needed.
### Key Industry-Standard Software Across Various Sectors
#### 1. **Graphic Design and Digital Art: Adobe Creative Suite**
One of the most recognizable names in the graphic design industry is Adobe Creative Cloud, which includes tools like Photoshop, Illustrator, InDesign, and After Effects. These applications dominate the world of digital content creation.
- **Photoshop**: The go-to tool for photo editing and digital painting. Professionals use Photoshop to manipulate images, design websites, and create marketing materials.
- **Illustrator**: Specializes in vector graphics and is essential for logo creation, illustrations, and print media.
- **InDesign**: Commonly used for layout design, including magazines, books, and other publications.
- **After Effects**: A must-have tool for motion graphics and visual effects in video production.
These tools are integral to industries such as marketing, film, publishing, and advertising, and they offer immense creative potential when used together.
#### 2. **3D Animation and VFX: Autodesk Maya and Blender**
In the world of 3D animation and visual effects, **Autodesk Maya** and **Blender** are industry standards.
- **Maya**: Widely used in film production, TV shows, and video games, Maya is known for its powerful tools that allow for 3D modeling, animation, rigging, and simulation. It offers a robust platform for character animation and visual effects creation, making it a favorite among professionals in Hollywood and the gaming industry.
- **Blender**: An open-source platform, Blender is gaining popularity due to its accessibility and powerful suite of tools. It includes features for 3D modeling, texturing, rigging, sculpting, and animation, along with a built-in game engine.
While Maya is often the top choice in high-budget productions, Blender's free nature and extensive feature set make it a favorite among indie developers and smaller studios.
#### 3. **Architecture and Engineering: AutoCAD and Revit**
In architecture, engineering, and construction (AEC), **AutoCAD** and **Revit** by Autodesk are essential tools for professionals.
- **AutoCAD**: This software has been the cornerstone of architectural drafting and design for decades. It allows professionals to create detailed 2D and 3D drawings, offering precision and control over complex designs.
- **Revit**: A Building Information Modeling (BIM) software, Revit is used to create 3D models that include data about the design and lifecycle of buildings. Revit is essential for architects, structural engineers, and MEP (Mechanical, Electrical, and Plumbing) designers, as it provides a collaborative environment for designing, managing, and maintaining building projects.
These programs streamline workflows and ensure that the different professionals involved in a project can collaborate efficiently.
#### 4. **Video Editing: Adobe Premiere Pro and Final Cut Pro**
Video content is increasingly important across industries, from entertainment to marketing. Two of the most prominent video editing software platforms are **Adobe Premiere Pro** and **Final Cut Pro**.
- **Premiere Pro**: Adobe’s video editing tool is widely used by professionals in TV, film, and online media production. Its flexibility, integration with Adobe’s other tools, and ability to handle complex editing tasks make it a favorite for professional editors.
- **Final Cut Pro**: Developed by Apple, Final Cut Pro is a high-performance video editing software that excels in speed and efficiency. Its intuitive interface is popular among filmmakers and editors working on Mac platforms.
Both tools provide industry-leading editing capabilities, with Premiere Pro preferred for integration within the Adobe ecosystem and Final Cut Pro known for its seamless performance on Mac systems.
### Conclusion
Industry-standard software serves as the foundation upon which professionals across various fields build their projects, ensuring quality, consistency, and innovation. From **Adobe’s Creative Suite** dominating the graphic design and video editing world to **AutoCAD** and **Revit** shaping the future of architecture and engineering, these tools provide the advanced features and flexibility required to meet the demands of today’s fast-paced industries.
For anyone looking to enter or advance in a specific industry, mastering the relevant industry-standard software is essential for staying competitive and producing high-quality, professional results. Institutions like MAAC Institute Pune offer specialized training that helps students and professionals alike to grasp the complexities of animation and design software, positioning them for success. Whether you're an animator, graphic designer, architect, or video editor, knowing and understanding the tools of your trade is the key to unlocking creativity and success in the digital age.
0 notes
Text
Choosing the Best Software for Interior 3D Rendering
Interior 3D rendering has become a cornerstone of modern interior design, allowing designers, architects, and clients to visualize spaces before they’re built or renovated. The effectiveness of these visualizations largely depends on the software used for creating them. With numerous options available, choosing the right software for interior 3D rendering can be a daunting task. This guide will help you navigate through the essential features, usability, and benefits of the top software options to ensure you make the best choice for your needs.
1. Key Features to Look for in Interior 3D Rendering Software
When selecting software for interior 3D rendering, it’s important to focus on the features that will enhance your workflow and the quality of your renders. Here are some essential features to consider:
Realistic Rendering Capabilities: The software should offer high-quality rendering capabilities, producing photorealistic images that accurately represent materials, lighting, and textures. This is crucial for creating detailed and convincing visualizations that clients can trust.
User-Friendly Interface: An intuitive interface is essential, especially for beginners. Software with a steep learning curve can slow down your workflow, so look for options that are easy to navigate and come with helpful tutorials or user communities.
Library of Materials and Objects: A comprehensive library of pre-made materials, furniture, and objects can save you time and enhance the realism of your renders. The ability to import custom objects and materials is also a plus.
Lighting and Shadow Control: Advanced lighting and shadow controls allow you to create realistic scenes by simulating natural and artificial light sources. This feature is key for achieving accurate interior 3D rendering results.
Compatibility and Integration: Ensure the software is compatible with other design tools and file formats you frequently use. Integration with CAD software, Photoshop, or other 3D modeling tools can streamline your workflow.
2. Top Software Options for Interior 3D Rendering
Now that you know what features to look for, let’s explore some of the best software options available for interior 3D rendering:
SketchUp: SketchUp is a popular choice for both beginners and professionals due to its user-friendly interface and powerful rendering capabilities. Paired with V-Ray or Enscape, it can produce highly realistic interior renders. SketchUp also offers a vast library of pre-made objects and materials, making it easier to create detailed interior designs.
3ds Max: 3ds Max is a powerful tool widely used in the industry for interior 3D rendering. Its robust modeling capabilities, coupled with the V-Ray or Corona Renderer plugins, make it ideal for producing photorealistic interiors. Although it has a steeper learning curve, the results are worth the effort.
Lumion: Lumion is known for its speed and ease of use, making it a great choice for quick and impressive interior renders. It offers a real-time rendering engine, allowing designers to see changes instantly. Lumion is especially useful for creating immersive, walk-through animations and presentations.
Blender: Blender is a free, open-source 3D modeling and rendering software that offers a wide range of features for interior design. With its powerful Cycles and Eevee rendering engines, Blender can produce stunning interior 3D rendering images. Its steep learning curve is offset by a supportive online community and extensive tutorials.
Revit: Revit is particularly useful for interior designers who work closely with architects and need to integrate 3D models into larger building projects. It offers excellent parametric modeling and rendering capabilities, making it ideal for detailed and accurate interior visualizations.
3. How to Choose the Right Software for Your Needs
When choosing the best software for interior 3D rendering, consider the following factors:
Project Scale and Complexity: For complex projects with intricate details, opt for software like 3ds Max or Revit, which offer advanced features and robust performance. For smaller or less complex projects, SketchUp or Lumion might be more suitable.
Budget: Consider your budget when selecting software. While some options like Blender are free, others like 3ds Max and Revit can be costly. Weigh the software’s features against your needs to ensure you’re making a cost-effective choice.
Skill Level: If you’re new to interior 3D rendering, start with software that offers an easier learning curve, such as SketchUp or Lumion. As you gain experience, you can explore more advanced tools like 3ds Max or Blender.
4. Conclusion
Choosing the best software for interior 3D rendering is crucial for delivering high-quality, realistic visualizations that meet your clients’ expectations. By considering the key features, exploring top software options, and aligning your choice with your project needs, budget, and skill level, you can select the perfect tool to enhance your interior design workflow. Whether you’re a beginner or a seasoned professional, investing in the right interior 3D rendering software will set you up for success in creating stunning and effective interior designs.
0 notes
Text
Mastering the Art of Image Editing: A Comprehensive Guide to Learning Photoshop
As the gold standard for image editing and manipulation, Adobe Photoshop is a must-have skill for creatives looking to excel in graphic design, photography, and digital art. With its vast array of tools and features, Photoshop can seem daunting to beginners, but with the right approach, anyone can master this powerful software. In this blog, we'll take you on a journey to learning Photoshop, covering the basics, advanced techniques, and expert tips to help you unlock your creative potential.
Why Learning Photoshop is a Must for Graphic Designers
Photoshop is an indispensable tool for anyone working with images. Whether you're a professional photographer, graphic designer, or social media influencer, learning Photoshop can help you:
Enhance your pictures: Improve the quality and aesthetic of your photos with advanced editing techniques.
Increase productivity: Streamline your workflow with Photoshop's powerful automation tools and shortcuts.
Stand out from the competition: Create unique and captivating visuals that set you apart from others in your field.
Boost your career: Develop a valuable skill that's in high demand across various industries.
Getting Started with Learning Photoshop
Before diving into the world of Photoshop, it's essential to understand the basics. Here are some key concepts to get you started:
Understanding the interface: Familiarize yourself with Photoshop's layout, including the toolbar, menu bar, and workspace.
Basic selection tools: Learn how to use the marquee tool, lasso tool, and magic wand to select and manipulate objects.
Layers and layer masks: Understand how to work with layers, layer masks, and blending modes to create complex compositions.
Basic adjustments: Learn how to make basic adjustments to brightness, contrast, and color balance.

Advanced Techniques for Learning Photoshop
Once you've mastered the basics, it's time to take your skills to the next level. Here are some advanced techniques to help you become a Photoshop pro:
Layer blending modes: Experiment with different blending modes to create unique and captivating effects.
Masking and compositing: Learn how to use layer masks and compositing techniques to create realistic and seamless compositions.
Retouching and restoration: Develop your skills in retouching and restoring images, including removing blemishes, noise, and artifacts.
Advanced selection techniques: Master advanced selection techniques, including using the pen tool, select and mask, and focus area.
Learn Photoshop from Beyond Animation offers the best Photoshop course in Jaipur.
Expert Tips for Learning Photoshop
To take your Photoshop skills to the next level, here are some expert tips to keep in mind:
Practice, practice, practice: The key to mastering Photoshop is practice. Set aside time each week to practice and experiment with new techniques.
Watch tutorials and online courses: Take advantage of online resources, including tutorials, classes, and YouTube channels, to learn from industry experts.
Join a community: Connect with other Photoshop users through online forums, social media groups, and meetups to share knowledge and get feedback.
Experiment and take risks: Don't be afraid to try new things and take risks. Photoshop is all about experimentation and creativity.
Common Mistakes to Avoid When Learning Photoshop
When learning Photoshop, it's easy to fall into common mistakes that can hinder your progress. Here are some mistakes to avoid:
Over-reliance on presets: While presets can be useful, relying too heavily on them can limit your creativity and understanding of Photoshop's tools.
Not saving regularly: Make sure to save your work regularly to avoid losing progress and data.
Not using layers: Failing to use layers can lead to a cluttered and disorganized workspace, making it difficult to edit and manipulate images.
Not understanding color management: Failing to understand color management can
result in inconsistent and inaccurate color representation.
Lightroom or Photoshop: Which is Right for You?
When it comes to image editing, many photographers and creatives wonder whether to use Lightroom or Photoshop. The answer depends on your specific needs and goals. Learning Lightroom is ideal for batch processing, cataloging, and organizing your images, while Photoshop is better suited for advanced image manipulation and editing. By mastering both Lightroom and Photoshop, you'll be able to create a seamless workflow that takes your image editing skills to the next level. Make a career in web designing with the best web designing course in jaipur from Beyond Animation.
The pros and cons of Learning Photoshop
Particularly when you use Camera Raw, a RAW editor that is quite comparable to Lightroom, Photoshop has a lot of the same functionality as Lightroom. Photoshop is software used for the very end of the workflow and utilized for very particular tasks. But it would help if you never undervalued Photoshop's ability. These are some Photoshop pros and cons!
Pros:
blending of various files for head switching, compositing, sky addition, texture addition, and other layer-dependent components
Adjusting opacity, masking, and blend modes
limitless options for editing
sophisticated tools for adjusting picture quality or expanding the canvas
Improved cloning that quickly eliminates difficult components
Multiple tools for sharpening
Many approaches to making difficult decisions
Process stages can be recorded as actions for convenient recurrence.
Offers capabilities for sophisticated retouching and altering reality's form, such as bending and liquifying.
Photoshop is the application you should use if you want to learn graphic design!
Cons:
Workflow is clunky in comparison to Lightroom. To get a process that is comparable to Lightroom, you need to use Photoshop, Camera Raw, and Bridge.
simpler to alter a single image
Absence of synchronization
It is not as useful for wedding or portrait photographers who are preparing many shots at once.
Possibility of more damaging editing
less natural learning
Conclusion
Learning Photoshop is a journey that requires patience, dedication, and practice. By mastering the basics, intermediate techniques, and advanced strategies outlined in this guide, you'll be well on your way to becoming a Photoshop expert. Remember to stay curious, keep practicing, and always be open to learning new skills. With Lightroom or Photoshop at your fingertips, the possibilities are endless. Start your career with Beyond Animation with a graphic designing course in jaipur. So, what are you waiting for? Start your learning Photoshop journey today and unlock the full potential of this powerful image editing software!
Visit Website :-
0 notes
Text
How to Choose the Right Graphic Design Software for Your Needs

Choosing the right graphic design software is crucial for ensuring efficiency, creativity, and compatibility with your specific needs. Here’s a step-by-step guide to help you navigate the selection process:
1. Define Your Design Requirements
Before choosing software, clarify what type of design work you primarily do or intend to do. Consider:
Graphic Design Disciplines: Are you focusing on print design, digital design, web design, UI/UX design, or a combination?
Specific Features: Identify must-have features like vector drawing tools, photo editing capabilities, typography support, animation tools, etc.
Collaboration Needs: Determine if you work solo or with a team, and whether collaborative features are essential.
2. Assess Your Skill Level
Consider your proficiency level with design software:
Beginner: Look for user-friendly interfaces and tutorials.
Intermediate: Seek software with more advanced features and customization options.
Advanced: Prioritize software that supports complex workflows and offers extensive customization and automation features.
3. Research Available Options
Explore different software options based on your defined needs:
Industry Standards: Adobe Creative Cloud (Illustrator, Photoshop, InDesign) for comprehensive design capabilities.
Specialized Tools: Sketch, Figma for UI/UX design; Affinity Designer as an Illustrator alternative; Procreate for digital illustration.
Online vs. Desktop: Consider whether you prefer cloud-based tools (Figma, Canva) or desktop applications (Adobe, Affinity).
4. Evaluate Features and Functionality
Compare software features against your requirements:
Core Features: Vector drawing, photo editing, typography tools, layer management, color management.
Additional Tools: Prototyping, 3D design, animation, collaboration features.
Integration: Compatibility with other software or plugins you use (e.g., Adobe plugins, third-party integrations).
5. Consider Workflow and Efficiency
Choose software that enhances your workflow:
Ease of Use: Intuitive interfaces, customizable workspaces, and shortcut options.
Speed and Performance: Smooth rendering, real-time editing, and responsiveness.
Automation: Tools that automate repetitive tasks can save time and improve productivity.
6. Trial and Feedback
Whenever possible, try out software through free trials or demos:
User Experience: Evaluate how comfortable and efficient you feel using the software.
Feedback: Gather input from peers or online reviews to understand real-world usability and support options.
7. Budget Considerations
Factor in costs:
Subscription vs. One-Time Purchase: Adobe Creative Cloud requires a subscription, while Affinity offers one-time purchase options.
Free vs. Paid: Consider free options like Canva or Inkscape versus paid software with more advanced features.
8. Support and Updates
Ensure the software provider offers adequate support and updates:
Customer Support: Availability, responsiveness, and quality of customer service.
Updates: Regular updates for bug fixes, new features, and compatibility improvements.
9. Scalability and Future Needs
Anticipate future growth and scalability:
Long-Term Use: Choose software that can grow with your skills and career aspirations.
Flexibility: Scalable features and capabilities to adapt to evolving design trends and technologies.
10. Legal and Licensing Considerations
Understand licensing terms and legal aspects:
Ownership: Clarify rights to your work and intellectual property.
Usage Restrictions: Ensure compliance with licensing terms for commercial or personal use.
0 notes
Text
Photography Course in Sonipat.
https://picklesanimation.in/sonipat/
Here's a comprehensive course outline for a Photography course offered by Pickles Animation. This course is designed to cover the fundamental principles, technical skills, and creative techniques needed for photography, catering to both beginners and advanced learners.
Course Outline for Photography
Module 1: Introduction to Photography
Overview of Photography
History and evolution of photography
Understanding different genres of photography (portrait, landscape, street, etc.)
The role of a photographer in various industries
Basic Photography Concepts
Understanding exposure: aperture, shutter speed, and ISO
The exposure triangle and its impact on photos
Basic composition rules (rule of thirds, leading lines, etc.)
Module 2: Camera and Equipment
Camera Basics
Different types of cameras (DSLR, mirrorless, point-and-shoot)
Camera parts and functions
Choosing the right camera for your needs
Lenses and Accessories
Types of lenses and their uses
Understanding focal length and aperture
Essential accessories (tripods, filters, flashes, etc.)
Module 3: Technical Skills and Manual Settings
Manual Mode Mastery
Using manual mode on your camera
Adjusting aperture, shutter speed, and ISO for different scenarios
Understanding depth of field and motion blur
Focusing Techniques
Autofocus vs. manual focus
Focus modes and points
Techniques for achieving sharp focus
Lighting and Exposure
Understanding natural light and artificial light
Using reflectors and diffusers
Balancing exposure in challenging lighting conditions
Module 4: Composition and Creativity
Advanced Composition Techniques
Framing and perspective
Leading lines, symmetry, and patterns
Using negative space effectively
Creative Photography
Experimenting with long exposures and motion
Using bokeh and shallow depth of field
Creative use of color and black-and-white photography
Module 5: Post-Processing and Editing
Introduction to Post-Processing
Importance of post-processing in photography
Overview of editing software (Adobe Lightroom, Photoshop)
Basic photo corrections (cropping, straightening, exposure adjustment)
Advanced Editing Techniques
Color correction and grading
Retouching and enhancing portraits
Creating HDR images and panoramas
Workflow and File Management
Organizing and managing your photo library
Understanding file formats (RAW vs. JPEG)
Exporting and printing your photos
Module 6: Specialized Photography Techniques
Portrait Photography
Lighting setups for portraits
Posing and directing subjects
Capturing candid and environmental portraits
Landscape Photography
Planning and scouting locations
Capturing landscapes in different weather conditions
Using filters (ND, polarizing) for landscapes
Street and Documentary Photography
Capturing candid moments in public places
Telling stories through images
Ethics and legal considerations in street photography
Module 7: Building a Photography Portfolio
Creating a Cohesive Portfolio
Selecting and curating your best work
Creating themes and stories through your portfolio
Designing an online portfolio and website
Marketing and Promoting Your Work
Social media strategies for photographers
Networking and building relationships in the industry
Approaching galleries and publications
Module 8: Industry Insights and Career Development
Understanding the Photography Industry
Different career paths in photography
Freelancing vs. working for an agency or studio
Building a personal brand and style
Business Skills for Photographers
Pricing your work and creating contracts
Managing client relationships
Continuing education and professional development
Additional Features
Guest Lectures and Workshops: Sessions by industry experts on various topics.
Hands-On Projects: Real-world projects to apply learned skills.
Feedback and Critique Sessions: Regular feedback from instructors and peers.
Online Resources and Community: Access to tutorials, forums, and networking opportunities.
This course structure ensures that students gain a solid foundation in photography, practical experience with essential tools and techniques, and preparation for a successful career in the photography industry.

0 notes
Text
Mastering GIF Creation with Photoshop: A Step-by-Step Guide
Are you ready to elevate your meme game with captivating GIFs? Look no further! In this tutorial, we'll delve into the world of GIF creation using the powerful tools of Photoshop. Whether you're a social media enthusiast or a digital artist, learning how to craft your own GIFs will add an exciting dimension to your online presence. Let's dive in!
Understanding GIF Images:
Before we embark on our GIF-making journey, let's grasp the essence of GIFs. Standing for Graphics Interchange Format, GIFs have been around since 1987, offering a versatile canvas for visual storytelling. Unlike static images, GIFs have the unique ability to display a series of frames, breathing life into your creations.
Despite their limited color palette of 256 colors, GIFs have found their niche in various domains, from advertising to entertainment.
Exploring Image Formats:
To fully appreciate GIFs, it's essential to understand how they stack up against other image formats:
GIF (Graphics Interchange Format): Perfect for compact animations and graphics, GIFs excel in web and email environments. With a color limit of 8 bits, they sacrifice photographic quality for portability.
JPG or JPEG (Joint Photographic Experts Group): Widely used for online images and printed photographs, JPEGs offer a balance between compression and quality. Ideal for digital photos and casual printing.
PNG (Portable Network Graphics): A lossless format designed to replace GIFs, PNGs support transparent backgrounds and millions of colors. Preferred by web developers for its versatility and superior color fidelity.
TIFF (Tagged Image File Format): Reserved for high-quality prints and professional publications, TIFF files boast unparalleled resolution and detail. Commonly used in the realm of fine art and archival preservation.
Creating a GIF in Photoshop:
Now, let's roll up our sleeves and dive into the process of making a GIF using Photoshop. Whether you're starting from scratch or converting a video, Photoshop offers a seamless workflow:
Organize Your Images: Gather a series of images that tell a cohesive story or convey a specific emotion. Ensure they're sequentially arranged to maintain the narrative flow of your GIF.
Launch Photoshop: Fire up your Photoshop software and get ready to unleash your creativity. If you're new to Photoshop, locate the software icon in your start menu and double-click to open. Read more..
0 notes
Text
Live Brief with Playground Games
Concept & Production #1
To speed up the conceptual side of things, I decided to combine concepting and production together so that we could have game-ready assets by the end. I really enjoyed this workflow as it gave me a lot of creative control.
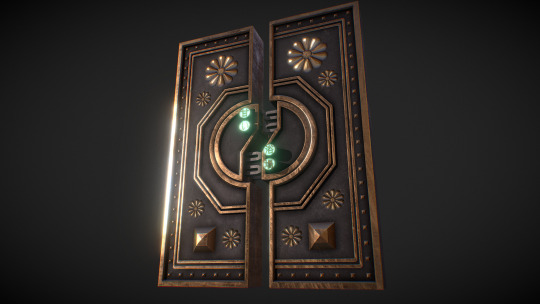
The first props I worked on were the door and a lantern. Because of the extremely tight deadline, the amount of props needing to be conceptualised and modeled and the amount I needed to learn, I used images I generated on MidJourney to inform most of the design. The majority of the tools I had to become familiar with during the modeling process were the quad-draw tool on a live surface (for detailed work), the circularize tool for the cut outs of the door, key-framing and parenting for the animations, the knife tool, and beveling to easily create edge loops for curving shapes on primitive geometry.
I generated this image using MidJourney and began to imagine how it would move in a Techno-Feudal Japan setting.
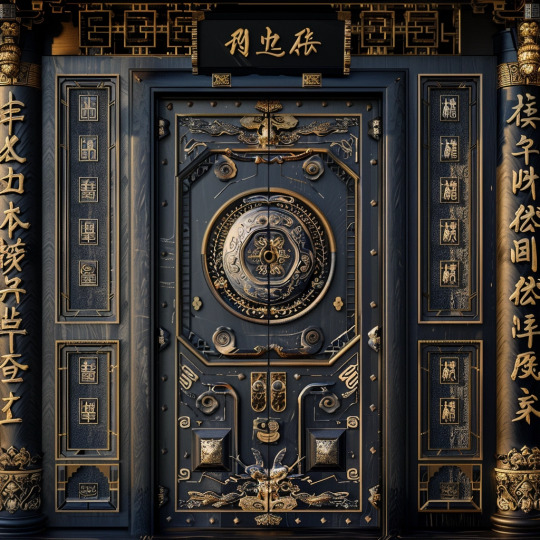
After I created this basic model, I tried animating it using parenting. The circular shapes in the center proved rather difficult as I couldn't rely on the "center pivot" function to center the pivot between the two parts. I had to move the pivot by eye using the shortcut "D" and try and align them both for the animation to work. This would later cause a problem for my team when they imported into Unreal, they were able to solve the problem by baking the animations in Maya.
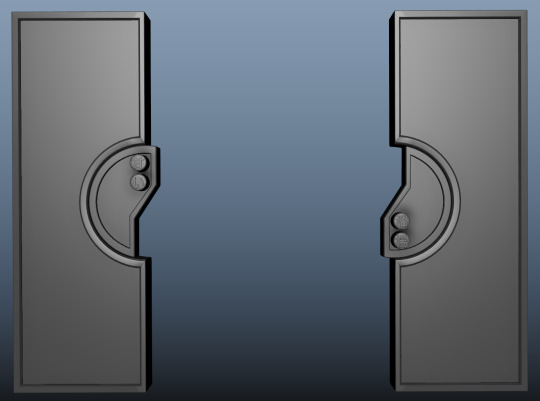
I was also able to key in a colour change to the shader for the lighting concept. The letters were created using the text to 3D function in Maya. The kanji says "Sweet Bathhouse" as an ode to Hansel and Gretel and the original idea of having a bathhouse as the set.
When I came to UVing the door, I used camera-based UV texturing for most of it, and Automatic mapping for the Kanji. I used the unfold and layout functions in the UV editor to create neat UV maps ready for Substance Painter. I gave each door it's own 4K texture map so I could get them looking as high-res as possible. Unfortunately, the UVing didn't work properly with the animations, so I had to delete the key frames and re-animate it after I had textured it.
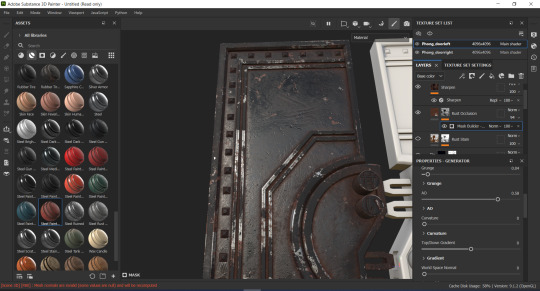
This was my fist time in Substance Painter, but after watching a quick tutorial, I found it quite intuitive to use due to it's similarity to Photoshop.
I baked my maps and then played around with different textures, layering them up and turning off layers within pre-designed textures to get the effect I wanted. I also added an emissive channel for the light effect which Unreal would need.


I wanted to include some more easter eggs on the door as Neal suggested we could add some sweet designs as a nod to the witches house in Hansel and Gretel. I researched traditional Japanese sweets and came upon Monaka which are sweet buns filled with red bean paste. I created an alpha to use in Substance Painter to have the design as a relief on the doors.


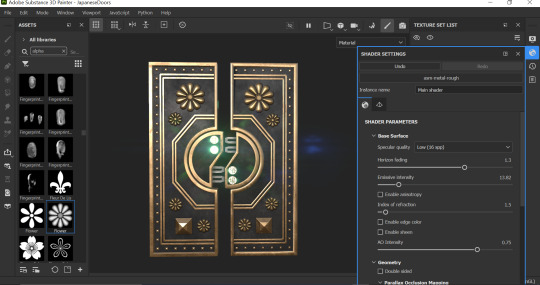
When it came to reanimate the door, I was able to refine the idea better than before, I was also able to keyframe the changing lights by switching out the geometry enirely with a red version, I did this by scaling out the green buttons and scaling in the red buttons to/from zero at the same time. I went into the texture maps I had exported and added a red zone into an unused section of the base color and emissive map for the red version. I then went into the UV editor and moved the UV's duplicated geometry for the colour change into the red zone. This technique was supposed to make the import into Unreal seamless, but unfortunately, they still ran into difficulties with the colour changing of the lights.


Here is the final model which I uploaded onto my Sketchfab account:
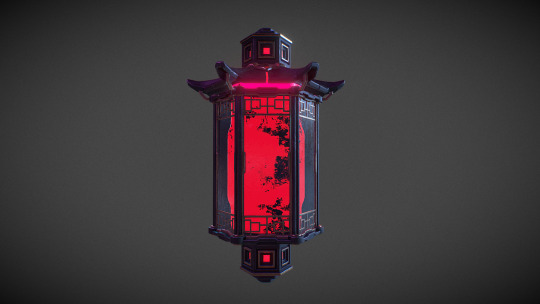
I had simultaneously been working on a Cyberpunk-Japanese lantern which I completed when I needed a break from figuring out the door animations. It's a fairly simple design which I based on these images I created in MidJourney, I used the bottom right one for the majority of the design.
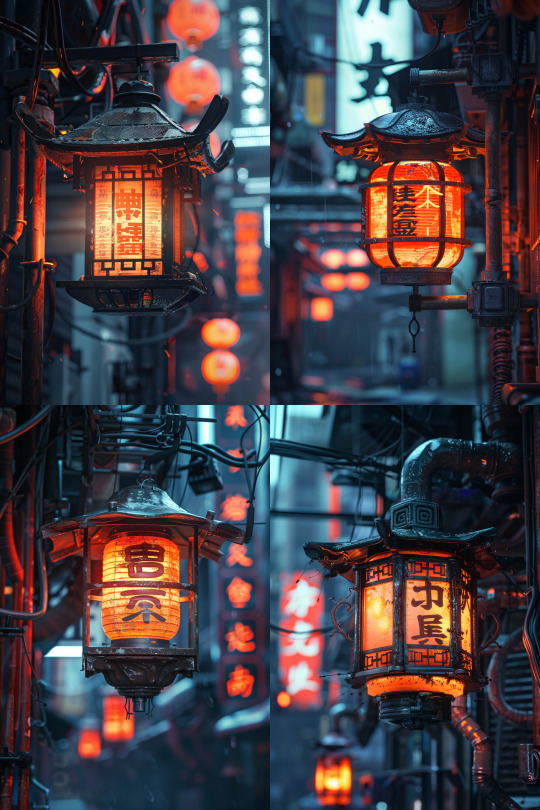
Because this was a small prop with repeating sides, I only modelled one panel, UV'd and textured it before bringing it back into Maya and duplicating it around. This meant I could have good texture economy for Unreal and maximise the texture quality of the lantern roof.
I used a similar pipeline to the doors and uploaded it to my Sketchfab account:
0 notes
Text
From Pixel to Perfection: Mastering the Art of PSD to WordPress | Xchop
Introduction to PSD to WordPress Conversion
In today's digital age, having a strong online presence is essential for businesses and individuals alike. One of the most popular and powerful platforms for creating and managing websites is WordPress. With its user-friendly interface and extensive customization options, WordPress has become the go-to choice for website development. However, if you have a unique design for your website created in Photoshop (PSD) format, you need to convert it into a WordPress theme. This process is known as PSD to WordPress conversion, and it allows you to bring your design to life on the web. In this article, we will guide you through the steps involved in mastering the art of PSD to WordPress conversion.
Understanding the Benefits of Converting PSD to WordPress
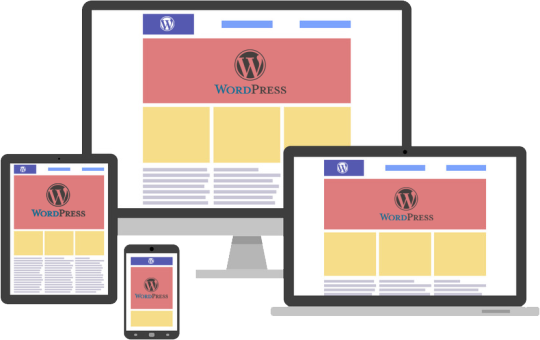
Before diving into the technicalities of PSD to WordPress conversion, it's important to understand why it is a beneficial approach. Converting your PSD design to WordPress offers several advantages. Firstly, it provides you with a responsive and mobile-friendly website. With the increasing use of smartphones and tablets, having a website that adapts to different screen sizes is crucial. WordPress themes are designed to be responsive, ensuring that your website looks great on any device.
Secondly, converting PSD to WordPress allows for easy content management. With the intuitive WordPress dashboard, you can easily update and modify your website's content without any coding knowledge. This flexibility empowers you to keep your website up-to-date with fresh content, resulting in better user engagement and search engine rankings.
Step-by-Step Guide to Converting PSD to WordPress
Now that we understand the benefits, let's dive into the step-by-step process of converting PSD to WordPress. The first step is to slice your PSD design into individual image assets. This involves separating different elements like the header, footer, menus, and content sections. Once you have the images ready, you need to convert them into HTML and CSS code. This step involves coding the structure, layout, and styling of your website using web technologies like HTML, CSS, and JavaScript.
Next, you need to integrate the HTML and CSS code into a WordPress theme. This is done by converting the static HTML and CSS files into a dynamic WordPress theme structure. You will need to create PHP template files and add WordPress-specific tags and functions to make your theme compatible with WordPress.
Choosing the Right Tools and Resources for PSD to WordPress Conversion
To ensure a smooth and efficient PSD to WordPress conversion process, it is important to choose the right tools and resources. There are several tools available that can simplify the conversion process. For slicing the PSD design, you can use tools like Adobe Photoshop or Sketch. These tools allow you to export individual image assets from your design.
For coding the HTML and CSS, you can use popular text editors like Sublime Text or Visual Studio Code. These editors provide syntax highlighting, auto-completion, and other features to streamline your coding workflow. Additionally, there are online resources and tutorials available that can help you learn and understand the intricacies of PSD to WordPress conversion.
Customizing the WordPress Theme with Elementor
Once you have converted your PSD design into a WordPress theme, you can further enhance the customization options using popular page builders like Elementor. Elementor is a powerful drag-and-drop page builder that allows you to visually design your website without any coding knowledge. With its extensive library of pre-designed templates and elements, you can easily create stunning and unique layouts for your website. Elementor also offers advanced features like animation effects, responsive editing, and WooCommerce integration, making it a versatile tool for customizing your WordPress theme.
Enhancing Your WordPress Website with Divi Theme
Another popular option for customizing your WordPress theme is the Divi theme. Divi is a multipurpose WordPress theme that comes with a built-in visual page builder. With its intuitive interface and extensive customization options, Divi allows you to create stunning and professional websites. It offers a wide range of pre-designed templates, layout options, and modules that can be easily customized to match your design requirements. Divi also provides advanced features like split testing, global elements, and responsive editing, making it a powerful tool for enhancing your WordPress website.
Creating a Custom WordPress Theme from Scratch
While using pre-designed themes and page builders can be convenient, sometimes you may need a completely custom WordPress theme to meet your unique design requirements. In such cases, you can create a custom WordPress theme from scratch. This involves creating the necessary PHP files, adding the required WordPress tags and functions, and styling the theme using CSS. Although creating a custom WordPress theme requires advanced coding skills, it offers complete control over your website's design and functionality.
Utilizing WordPress with Advanced Custom Fields (ACF)
Another way to enhance your WordPress website is by using the Advanced Custom Fields (ACF) plugin. ACF allows you to add custom fields to your WordPress posts, pages, and custom post types. This gives you the flexibility to create custom content types and add additional data to your website. For example, you can add fields for testimonials, portfolios, or product specifications. ACF also provides an intuitive interface for managing and displaying the custom fields, making it a powerful tool for extending the functionality of your WordPress website.
Converting a Custom Design into a WordPress Website
In addition to converting PSD designs, you can also convert custom designs created in other design tools like Adobe XD or Sketch into a WordPress website. The process is similar to PSD to WordPress conversion, where you need to slice the design into individual assets and convert them into HTML and CSS code. Once you have the code ready, you can integrate it into a WordPress theme following the same steps mentioned earlier. This allows you to bring your custom design to life on the WordPress platform and take advantage of its powerful features and functionality.
Converting a Figma Design to WordPress
Figma is another popular design tool that allows you to create stunning web and mobile designs. If you have a design created in Figma and want to convert it into a WordPress website, the process is similar to converting PSD or custom designs. You need to export the design assets from Figma and convert them into HTML and CSS code. Once you have the code ready, you can integrate it into a WordPress theme and customize it further using WordPress plugins and page builders.
Best Practices for Successful PSD to WordPress Conversion
To ensure a successful PSD to WordPress conversion, it is important to follow best practices. Firstly, optimize your images for web by compressing them without compromising quality. This will ensure faster loading times for your website. Secondly, make your theme lightweight by removing unnecessary code and scripts. This will improve the performance and speed of your website. Thirdly, test your website on different devices and browsers to ensure compatibility and responsiveness. Finally, regularly update your WordPress theme, plugins, and core files to keep your website secure and up-to-date.
Conclusion
Mastering the art of PSD to WordPress conversion opens up a world of possibilities for creating stunning and functional websites. Whether you are a beginner or an experienced developer, the step-by-step guide provided in this article will help you navigate the complex process with ease. By understanding the benefits, choosing the right tools, and following best practices, you can convert your unique designs into fully functional WordPress websites. And if you need professional assistance, Xchop is a leading PSD to WordPress conversion service provider that can deliver high-quality custom WordPress themes tailored to your specifications. Don't miss out on the opportunities that PSD to WordPress conversion offers. Start converting your designs from pixel to perfection today!
More Info: https://www.xhtmlchop.com/
#wordpress#wordpressdesign#psd to wordpress#webdesign#figma to html#divitheme#ACF#wordpress elementor#webdevelopment#bootstrap#wordpress acf#web#website#xchop
0 notes
Text
Unlocking Creativity with Photoshop Video Training
Visual content has become a potent communication tool in the digital age. From advertisements to social media updates, the demand for high-quality visuals is ever-growing. Photoshop, a versatile and powerful tool, has been a go-to for graphic designers and photographers. However, its potential extends beyond static images. Photoshop video training has emerged as a valuable resource for those looking to harness the software's capabilities for dynamic content creation.
The Evolution of Photoshop: From Stills to Motion
Initially designed for image editing, Photoshop has undergone a remarkable evolution. With the rise of multimedia, Adobe recognized the need to adapt. They seamlessly integrate the traditional image editing features with tools tailored for video production. This evolution has given birth to a new era where visual storytelling goes beyond static frames.

Photoshop Video Training: Bridging the Gap
While Photoshop's interface might seem familiar, diving into video editing requires a different skill set. They serve as a bridge, helping users transition from stills to motion seamlessly. Through comprehensive tutorials and hands-on exercises, learners can grasp the nuances of video editing within the familiar environment of Photoshop. This training empowers users to unlock the full potential of the software for dynamic content creation.
Creating Seamless Transitions and Effects
One of the critical advantages of Photoshop for video resides in its capacity to provide smooth transitions and effects. The software's robust set of tools allows users to manipulate layers, apply filters, and add stunning effects to video footage. They guide users through these techniques, providing insights into how to enhance storytelling through visual elements. From subtle colour corrections to dramatic visual effects, the possibilities are vast.
Integrating Graphics and Animation
Photoshop's prowess in graphic design seamlessly extends to video. Through Photoshop video training, users can learn to integrate graphics and animation into their video projects. Whether it's adding text overlays, creating animated logos, or incorporating dynamic illustrations, the software opens up a realm of creative possibilities. This integration of graphic design elements enhances the overall visual appeal of videos, making them more engaging and impactful.
Optimizing Workflow and Efficiency
Efficiency is crucial in any creative process. They not only teach the creative aspects but also focus on optimizing workflow. From organizing project files to utilizing keyboard shortcuts, learners discover techniques to streamline their video editing process. This emphasis on efficiency ensures that users can bring their creative visions to life without being bogged down by technicalities.
Mastering Advanced Features for Professional Results
As users progress through Photoshop training, they delve into advanced features that elevate the quality of their video projects. From advanced colour grading and compositing to utilizing 3D elements, the training equips users with the skills to achieve professional-level results. This mastery of advanced features sets apart those who use Photoshop for video casually from those who create visually stunning and polished content.

Conclusion:
In conclusion, it is a game-changer for those seeking to enhance their video editing skills within the familiar realm of Photoshop. The evolution of the software from stills to motion opens up new possibilities for dynamic storytelling. Aspiring creators can unlock their full potential through comprehensive training that covers seamless transitions, graphic integration, workflow optimization, and advanced features. For those eager to embark on this creative journey, photomanipulation.com offers a comprehensive resource to master Photoshop video editing. Explore the world of dynamic visuals and storytelling through the lens of Photoshop with expert guidance from Photo Manipulation.
Blog Source URL:
#manipulation photography#photoshop textures#photo stock portraits#photo manipulation#photoshop manipulation
0 notes
Photo


Creating an Animation with Photoshop
Navi from Zelda
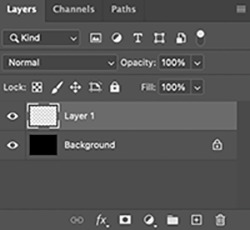
Getting Started
So, you need an image. But, the one you’re looking for is either under copyright or only exists in your mind. This leaves a few options: search tirelessly among the internet for an adequate option, pay another entity to make one on your behalf or make it of your own accord. Choices, choices…
There is certainly a chance that a viable option exists on the interweb — somewhere. But, is it worth your valuable time to flip rocks over all day? Maybe, maybe not.
Hunting down a novice or even a professional to execute the task for you is always a sure-fire way to provide a finished and possibly-well-polished product. Though, in many cases, you must pay for this service (especially as you slide up the scale of quality.) Or you may simply want an animation for a personal project. In this case, finding free animators on freelance websites is within the realm of possibilities. If this last one is you, best of luck. If not, let’s press on.
The final option is to piece together the project yourself. And that’s the route I have taken for my latest endeavor. Using Photoshop, I made a basic animation of Navi (the flying blue companion of Link’s — from Zelda (: specifically, Ocarina of Time.) A great game, I know!
The following will shed some light instruction on how I went about building my animation, along with some tools available in the very powerful application — Photoshop.
Setting Layers
Before any magical talking fairies can be forged, we first must supply a canvas on which we will place them. The first step is to open your Photoshop app. This project was enacted using Photoshop 2021.
Upon opening your app, the splash page should appear. This page will welcome you, the user. Along with a warm greeting from the Adobe team, you will find the sidebar on your left houses a button to create a new project or open a file. Click ‘create new’. Then choose the size appropriate for your means. Moving on…
So you have opened your new project, our first objective is one of painting a background on which our animation will be born. Any color will suffice, though a color which allows for contrast will be useful — at least until after our work is finished. Your first layer will be preselected and may be verified at the bottom-right of your screen. To color your background, use your ‘paint bucket tool’ (with your chosen color appended) to click and cover your first layer. This should shift the whole layer to your particular hue.
Once successful, create a new layer with the plus sign in the tiny toolbar (underneath your layer tab, in the bottom-right.) After the new layer is opened, ensure ‘layer 2’ is stationed above your first, freshly painted layer. Also, you will do well to commit this layer function to memory — as it will be used several more times when adding the wings for Navi…or other pieces to your specific project. Now, we should have one layer on bottom with a certain background color applied. Placed over that should be a fresh layer — ready for the body of our fairy friend.
Navi’s Blue-ish Body
Building the body for Navi is straight-forward. This calls for a series of orbs (three: one darker blue, a lighter blue and white-blue) stacked atop each other. To place these orbs, grab your ‘brush tool’ from the dedicated sidebar on your left. The paintbrush is what you’re looking for. Select that and continue to adjust the hardness (how strict or spotted the edges are — like a sharpie vs. a can of spray paint.) Also, choose the appropriate size for your Navi body. This process will be repeated for a total of three times; in accordance to the aforementioned color scheme and from the largest orb to the smaller and smallest, centered orbs. I hope this makes sense. If not, the images supplied should be of help. Onward!
Pin Your Wings
Next we need those two iconic sets of wings which keep Navi floating around Link’s head — chattering “Listen!” for every step of the epic legend of Ocarina of Time. For wings, we shall chose our ‘line tool’. This may be located in the same left-hand sidebar.
After equipping the ‘line tool’, some settings for it must also be adjusted. Those will include (but are not limited to): pixel width, stroke type (solid, dashed or dotted), stroke fill color and so on. Calibrate your ‘line tool’ and we can start drawing those wings.
Exactly how your wings look is up to you. The wings I drew are all visible in the images posted, but feel free to use your imagination. I’m sure you either already know how Navi looks — or can simply scrape the internet for some images. Regardless, draw your first line. Then we can move onto the intermediary ‘warp’ technique. Exciting, right?
If you were successful with constructing your first line (of the first wing,) then head to ‘edit’ (while still selecting the respective line) at the top of your screen. We need to ‘transform’ your line with the ‘warp’ transformation, so rather than a flat, straight line — you will be able to manipulate the line into a curve for your wings. Again, select your line. Then ‘edit’. ‘Transform’. ‘Warp.’ If you follow, let’s push forward…
Warping Wings and Such
Warping your elements will take a slight learning curve. Really, only slight. You will just have to accomodate yourself to the functions of warping. This feature will be used consistently throughout the construction of each wing. Really, just try to watch how your lines move in relation to the dots as you maneuver and you will be just fine! As for the color of the wings, I chose grey. So long as yours look the way you want, any shade is perfect. Onto some added markings…
Now that each of your wings have be brought to life, let’s place in some wing-like lines to add a bit of character. Again, like the wings, I used the line tool for this portion. The only difference which should be mentioned is the color. For the veins in each wing, I set the lines to a slightly darker grey. But, as with the wing color themselves, choose as you wish.
With the physical structures of each wing built, the last few steps are only finishing the wings and bringing them (in a sense) to life. To do so, we will add a ’gradient’ and ’outer glow’ to each. Both features can be added by right clicking the respective layer and selecting ‘blending options.’ Next, I will briefly cover each option…
Gradient to Add Perspective
For your gradient, you may adjust many dials, sliders and otherwise to get things tuned just right. Under the devoted (‘gradient’) tab you will see: style (linear, radial, angle, reflected or diamond), opacity, reverse, scale and so forth. Set each one just so and you will achieve the best angle for perceived lighting over Navi.
Outer Glow for Emphasis
As far as your ‘outer glow’ settings, follow the same procedure to access them… ‘layer’, right-click, ’blending options’, ‘outer glow’. This will deposit you into a very similar tab. Tune your glow’s opacity, noise, spread, size, range and so on. After this step, Navi should be ready for action!
Conclusion
As discussed originally, there are many ways to allocate animations for any project you come across. That said, building your own personal image and/or character from scratch is a great time and brings to rise plenty of new skills which truly are not too difficult to onboard.
Maybe you have no interest in building Navi, but hopefully this instructional article gave some tips and hints on how to better utilize the Photoshop application in your workflow.
1 note
·
View note