#Printing Unit Lifting Bevel Box
Explore tagged Tumblr posts
Visit Tumblr Blog
Explore Tumblr blogs with no restrictions, modern design and the best experience.
Last Seen Tumblr Blogs


Fun Fact
Tumblr posted its first advertisements in May 2012 and subsequently earned $13M in revenue.
Link
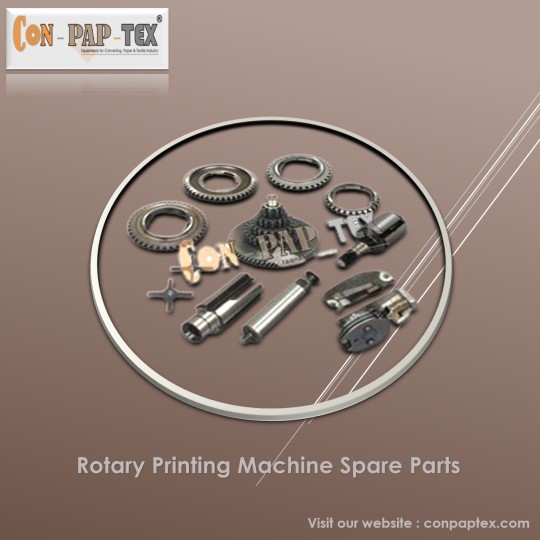
We are leading manufacturer, exporter and supplier of Spares for Stormac Stork Rotary Printing Machine Parts. Spares for Rotary Screen Printing Machine Like Printing Unit Lifting Bevel Box, Hand Wheel, Screen drive Gear Shaft, Screen Drive gear, Fork Assembly, Muff Coupling, Eccentric Type, Bearing, Rollers MS etc. Also, we are leading manufacturer of Rubber Roller, Rubber Fillet, Slitter Rewinding Machine, Web Guiding System and more.
#Screen Drive Gear#Screen Drive Gear Shaft#Printing Unit Lifting Bevel Box#Spares For Stormac Stork Rotary Printing Machine Parts#Bearing#Eccentric Type#Muff Coupling#Fork Assembly#Hand Wheel
0 notes
Text

We are a leading manufacturer, exporter, and supplier of Spare Parts for Rotary Printing Machine international standards for the last 25 years from India. Spares for Rotary Screen Printing Machine Like Printing Unit Lifting Bevel Box, Hand Wheel, Screen drive Gear Shaft, Screen Drive gear, Fork Assembly, Muff Coupling, Eccentric Type, Bearing, Rollers MS, etc. For more information:
Website: conpaptex.com
Email: [email protected]
Contact Us: +91-7940085305
2 notes
·
View notes
Link
Con-Pap-Tex is a Company Promoted by Experts Technocrats having more than 25 Years of Experience in Rotary Printing Machine, and Rotary Printing Machine Part. Spare Parts for Rotary Printing Machine Like Printing Unit Lifting Bevel Box, Hand Wheel, Screen drive Gear Shaft, Screen Drive gear, Fork Assembly, Muff Coupling, Eccentric Type, Bearing, Rollers MS etc.
#Spare Parts for Rotary Printing Machine#Rotary Printing Machine Part#Textile Machinery Parts#Rotary Printing Machine Spare Parts#Rotary Screen Printing Machine Parts
1 note
·
View note
Text
The cooperation between the inner diameter of the rolling bearing
Maintenance cycle and content 1.Maintenance cycle: It will be shut down once every 6 months for continuous operation. 2. Inspection and maintenance contents: (1) Check for breakdown, remove greasy dirt and debris in the gears and gearboxes, and analyze and replace the lubricating oil. (2) Check the cracks, abrasion and meshing conditions of the gears, and repair or replace them in severe cases. (3) Check the state of the gap between the bearing and the bearing pad, and perform maintenance and adjustment. (4) Overhaul, adjust backrest wheel and leather pad or replace. 2. Disassembly 1. Preparations before disassembly: (1) Discharge the lubricant in the gear box. (2) Remove the bolts at the joint of the gearbox cover and the gearbox flange. 2. When disassembling, fasten the gearbox cover with a sling and hang it with a lifting object. 3. Check the gaps of the gears and bearings and make a record. Take out the gears, clean and dry carefully. 4. Remove grease and dirt from the gearbox. Third, the quality standards of inspection and maintenance of various components (a) gears and housings 1. Gear teeth must be replaced when their thickness reaches 30%. 2. The fishing burr caused by the kneading of the teeth should be removed to make it smooth. Teeth are cracked or cracked and need to be replaced. 3. The joint surface of the upper cover and the housing flange should be lubricated to ensure tightness after installation. Use red oil to check every 100 mm. (2) Rolling bearings 1.
Measure the gap of the ball (roller). The maximum gap allowed for abrasion is generally as shown in Table 1. Table 1 Unit: mm2. The cooperation between the inner diameter of the rolling bearing and the shaft, and the cooperation between the outer diameter and the housing should comply with the rules. 3. When the surface of the ball or roller has defects that cannot be eliminated, such as pits, black spots, rust marks, and delamination, etc., it should be replaced. 4. When the gap between the non-separable bearing housing and the bearing exceeds the rules, the bearing should be replaced, or the outer circle of the bearing should be large and inserted into the sleeve. The inner circle of the sleeve should be processed according to the size required for cooperation with the bearing. For separable-bearing housings, the joint surfaces can be filed appropriately. 5, between the bearing and the bearing housing, do not agree to place gaskets. 6. Remove or install the bearing. When press-in cooperation, the bearing can be heated with 80 ℃ ~ 90 ℃ hot oil in advance and then easily removed or installed. When installing, it is necessary to hit the bearing inner hoop evenly with a sleeve and a soft pad. Never hit the bearing directly or apply force to the balls or rollers. (3) The clearance of the sliding bearing 1 and the bearing pad should conform to the rules in Table 2. Table 2 Unit: Millimeter 2. Check the contact condition of the bearing surface of the shaft and the bearing shell by painting with red oil. It is required that there should be 2 printing colors per square centimeter of the touch area, and it should be 60 in the middle of the bearing pad. ~ 90. Touch within the viewpoint. 3. The bearing bush tungsten gold should not have cracks, lack of meat, trachoma, and other defects. If the thickness of tungsten is too small, it should be recast. (IV) Shaft 1. Check the auxiliary and auxiliary neck for any defects such as damage and cracks. Can be repaired with a fine file, sanded with a fine cloth soaked with oil. 2.
The ellipse of the journal and the taper should not exceed 0.05 mm. Its surface finish: (1) Rolling bearings are not lower than VVV8. (2) The sliding bearing is not lower than VVVV10. 3. The bending degree of the shaft should be no more than 0.08 ~ 0.10 mm. Beyond the rules, a straight shaft should be used. (V) Backrest wheel 1. It is necessary to use the backrest wheel to remove the backrest wheel. It must not be damaged. 2. The gap between the joint surfaces of the two back wheels agrees to public service and shall comply with the rules in Table 3. Table 33. The plane clearance of the two back wheels should conform to the rules in Table 4. Table 4 IV. Installation 1. Before installation, the gears and journals should be cleaned and cleaned, then the gears should be heated to 120 ° C to 150 ° C with oil, and evenly installed by tightening things, and the gears and keys should not be blocked, The centerline of the shaft and gear is wrong. 2. The percentage of the actual touch area of the meshing gear that is installed must be satisfied with the requirements in Table 5: Standardize the percentage of the meshing area of the gears 3. The touch of the cast teeth should be checked after trial operation and should not be less than the width of the tooth / 3. 4. The radial gap between the top of the tooth and the root of the tooth must not be less than 0.20 times the modulus regardless of the machining or casting teeth. 5. The minimum side surface clearance of the gear meshing needs to conform to the rules. If there are no rules, refer to Table 5 and Table 6 for installation. Side clearance of spur gear 5 Side clearance of bevel gear 6 Side clearance of worm gear and worm should be 0.3 ~ 0.65 mm. When the worm is on and the worm wheel is ridiculous, the gap at the top of its teeth must not be greater than 1 mm. Like a worm, the gap on the tooth top of the worm wheel should not be smaller than the gap on the upper part of the bearing pad. 6. When the gears are jogging with each other, the lengths of the tooth widths that do not fit each other must not be greater than 2% of the tooth width. 7. The non-parallelism of the gear shaft shall not exceed the rules of the drawings. If there is no rule, it shall generally not be greater than 0.3 mm / m. When aligning the gear shaft, the contact surface of the teeth is good, but the parallel error of the shaft must be within the rule. 8. After the gears are assembled, it is necessary to have smooth operation. All gears that need to move in the axial direction must be able to move freely on the shaft. V. Test run and inspection 1. Before the test run, manually roll or mechanically roll the drive shaft of the reducer, and make the gear roll slowly for one week. Only when it is confirmed that there is no resistance, the official test run. 2. The lubricating oil in the gear box must be satisfied. Check the oil quantity by the liquid level gauge or the probe. 3. The reducer is idling for 1 hour first, if there is no abnormal phenomenon. It can run with load for 4 hours and can be fan system tested after normal operation. 4. During the inspection, there should be no oil leakage from the flange joint surface and the shaft seal. There should be no abnormal noise in the gear meshing. See Table 7 for the sound requirements. Table 75 for sound requirements in gear operation, bearing bush temperature should comply with the following rules: tungsten gold tile <65 ° C copper tile <60 ° C rolling bearing <70 ° C, its oscillation amplitude should not exceed 0.04 mm. 6. After the trial operation meets the requirements, if there is no abnormal phenomenon, the inspection procedures are processed according to the rules and regulations, and the production is officially transferred. 6. Operation and protection Often operate the protection operation (1) Turn the main shaft before driving, make the gear roll slowly for one week, and then start. (2) Check whether the bearing temperature is normal, whether the deceleration and vibration, and the leakage of the flange and shaft seal during lifting. If the temperature is too high, the speed reducer has a lot of vibration, it should be stopped for inspection. (3) Check that the oil level in the gearbox is within the regular marks and the pressure is normal. Refuel regularly. Lubricant trademarks should comply with the rules. (4) Check that the flange screws and foundation screws are not loose. If loose, tighten it in time. (5) Listen to the sound of the body without abnormal noise. (6) Always keep the body and operating environment clean.
1 note
·
View note
Photo


Overview
An intensive and productive week on the course, I wanted to put a focus on the narrative research essay task and balance this academic written nature of the project with the medium of stop motion animation. Additionally, I took the time to develop my skills within Maya: re-attempting the Flying Saucers task at home and playing around with the animation workspace. Whilst I was unable to make any significant progress on my digital metamorphosis project and the animated sketchbook assignment, I instead took the time to undertake extensive research into my chosen film of Into the Spider-Verse, alongside producing a range of stop motion iterations and preparations for the ‘box lift’ task.
As a result, I’ve been able to make a series of stop motion animations that go beyond the limitations of the brief, adding a sense of narrative and interaction between off-screen characters and am confident that I’ll be able to begin work on the first draft of my essay next week. With juggling several projects at a time, as I am now, it’s important to be able to focus on particular assignments. Splitting my time between these briefs has been difficult, but I feel like I’m working to strike a balance between my ambitions for each assignment and the limited time I have left.
Narrative Research This week, I was able to decide on an analytical direction for my essay and gather a range of research sources in preparation for the drafting process. My initial idea was to analyse the plot of Into the Spider-Verse, exploring how the creators not only presented an updated take on the Hero’s Journey storyline, but also told a refreshing new version of the classic Peter Parker Spider-Man origin story we all know.
Despite this, I realised that the film’s use of this hero narrative is nothing ground-breaking or particularly new. Rather, what makes Into the Spider-Verse rather of academic study is the animation and visual language: an experimental, alternative approach to animated filmmaking, which is already making waves in the industry. Instead of taking a theoretical approach into my chosen film, I began researching into the comic-inspired aesthetic and crisp, stuttery style of CG animation.
The film represents a ‘break-through’ in animated storytelling, pilling compositional and aesthetic inspiration from it’s comic book source material, adapting dynamic storytelling poses and graphic printing techniques to the animation. In my research for this essay, I wanted to take a look behind the scenes and how this new visual language came to be. Looking through the Art of Into the Spider-Verse book, and trawling through countless interviews, online articles and really anything I could find on the process and film itself led me to the work of visionary Alberto Mielgo, the 2012 Disney experiment Paper Man and how the filmmakers created the signature ‘crunchy’ animation style.
Having completed this extensive research into my chosen film, I’ve reached a place where I’m ready to begin the drafting process. With my own question and a range of research sources ranging from the academic literature of Paul Wells to videos breaking down the animation process of Into the Spider-Verse, next week I will begin writing my essay. My aim is to have a completed draft ready for my individual tutorial, in which I will likely be reducing the word count.
Digital Principles This week, I put a major focus on other projects - taking the time to produce iterations and further develop on the other tasks. As a result, I didn’t really have time to make any significant progress or development in this project.
Stop Motion This week, we were given our second stop motion exercise: to animate a character lifting up a box. With this task, I’m considering all of the basic principles of animation: specifically timing, anticipation and follow through - additionally to staging the sequence properly.
To begin the week, I took the time to prepare for this week’s stop motion task in a depth I’ve never really done before. Producing my own reference footage and sketching from this has allowed my poses to have an authenticity to them, and I was able to act out a range of characters and situations in the process. Having this additional research and preparation in the filmed reference has given me a solid understanding of the action I will animate.
For my first attempt at this task, I experimented with working from this live-action reference. Whilst this allowed me to see the filmed reference poses directly in Dragon Frame, this method of working also posed several problems - and ultimately resulted in a lacking first iteration. The armature’s movement jolted from one pose to another, the staging of the sequence was ineffective and the timing of the motion was simply wrong.
My main take away from the initial attempt was to consider the posing of my armature more - take the time to make sure the pose is correct, and easily understood by the audience. A second idea was to exercise some restraint on the movement and timing: to take multiple frames with little movement, as stillness can be just as effective as motion. On the flip side of this, I also wanted to explore how to create a fast motion, considering making larger moves between frames to believably communicate a quick movement.
With this in mind, I hired out the Stop Motion Studio in my own time and developed on the task, producing two more attempts. In comparison, these were much more successful and interesting than my first test. Taking the time to develop upon the tasks set in the workshop has allowed me to produce stop motion outcomes of a far higher quality and ambition as it lifts the pressure of time off my shoulders. With my own schedule, I was able to really get lost in the work, and allow me to present a more ambitious attempt at character performance and begin to hint at a narrative beyond simply the action itself.
Next week, we will be exploring a more complex stop motion sequence: having a character walk on screen, and visibly change their expression and emotion. In preparation for this, I will begin recording my own live action reference to get a better understanding of the movements and posing and produce a few storyboard iterations of the sequence.
Animated Sketchbook This week, I put a major focus on other projects - taking the time to produce iterations and further develop on the other tasks. As a result, I didn’t really have time to make any significant progress or development on this project.
Digital 3D This week, I took it upon myself to develop upon the previous Flying Saucer task, downloading Maya to use at home and rebuilding the sequence from scratch, using a more planned-out approach. With a humorous direction (the sheep is too heavy for the UFO, which then crashes), I sketched out quick, loose ideas for the sequence. Alongside these preliminary sketches, I also explored Pixar’s approach to the task, Lifted, which also presents a light-hearted take on an alien abduction. With this, I knew I wanted to follow a comical direction that works to effectively subvert the audience’s expectations.
Overall, this represents a far more exciting and successful response to the task. Through iterative development and my own perseverance with Maya, I have been able to challenge myself to create an ‘engaging, successful’ CG animation that puts a new, comic spin on the farm animal abduction’ plot in this short sequence. Something I am going to put a focus on is iterative development on my practical exploration: this was the main point in the feedback of my previous unit, and it’s something I’m constantly considering moving forward. Here, iterations have allowed me to explore and further flesh out this simple CG sequence, and complete an animation (that, whilst simple in composition) demonstrates my new understanding of Maya as an animation and modelling program.
Additionally, we were also set a new task within Maya: taking the focus away from animation, were challenged to explore the modelling potential of the 3D software. Firstly, we were introduced to the Modelling workspace - as we explored the various tools to edit and change an existing shape. This provided us with a range of tools, allowing us to extrude, edit and bevel surfaces of shapes in order to create new, more exciting ones.
Initially, I struggled with this process: but after spending time trying to get to grips with the extrusion tool and asking for feedback, I was able to get a basic understanding of the modelling process and produced a pencil in response. It’s not exactly visually impressive or appealing, but I see the value in this task as a way to introduce the basic foundations of more complex 3D modelling.
The final task was a little more demanding: in the limited time remaining, we were to produce a 3D radio. After experiencing several technical difficulties with the program, I managed to create a basic box-radio following the steps described by our tutor. What I’m finding is the luxury of time with learning these processes: the sessions, whilst helpful, are ultimately too short and fast-paced for me to properly grasp an understanding of the Maya processes. I am somewhat struggling with the modelling side of things, however, I want to develop this understanding and take the opportunity to explore the digital learning world of Linkedin Learning, something our tutor suggested in the session.
In my own time, I managed to complete the radio and add some colour - adding life to the object that I couldn’t really see beforehand. I’m also interested in the potential of rendering this object and seeing how it could move too. Perhaps it squashes and stretches whilst listening to music? It’s a small motion, but I feel like it would be a good independent development of this session and a way for me to add an understanding of the basic principles to my Digital 3D work.
#ba1b:weeklysummary#ba1b:introtostopmotion#ba1b:introto3d#ba1b:narrativetheory#ba1b:animatedsketchbook#ba1b:digitalprinciples
1 note
·
View note
Link
Textile Machinery Spare Parts Manufacturer like Stenter and Jigger Machine spare parts, Cloth Guider, Textile Rotary Printing Machine Spares form India. Over Feed for Stenter Machine. In the Textile Machinery, we manufacture, export & supply Stenter Machine, Chain Link Bottom Parts, Jigger Machine, Cloth Guider, Folding Machine, Rotary Printing Machine Parts, Bowl Mangle & Drying Range, Gear Set, Spinning & Weaving Machine, Rubber Rollers, and Rubber Fillet from India. We have been successfully manufacturing, exporting & supplying all types of above Textile machinery. We always have following Spares of Spinning & Weaving Machine readily available from Stock Heald Frames and Heald Frame Accessories, Reeds, Healds and Drop Pins, Temple Cylinder and Rings, Airjet. Rubber Roller, Wrinkle Removing Rolls, Banana Roller, Bow Roll, Metal Rolls, Metal Bow Expander Roll, Industrial Rollers, Hard Chrome Plated Rolls etc. Spares for Rotary Screen Printing Machine Like Printing Unit Lifting Bevel Box, Hand Wheel, Screen drive Gear Shaft, Screen Drive gear, Fork Assembly, Muff Coupling, Eccentric Type, Bearing, Rollers MS.

#Textile Machinery Spares Manufacturer#Textile Spare parts#Textile Machinery Spare Parts#Spare Parts of Textile Machine#Stenter Machine#Over Feed for Stenter Machine#Textile Rotary Printing Machine#Spinning and Weaving Machine#Wrinkle Removing Rolls#Metal Bow Expander Roll#Industrial Rollers#Banana Roller#Textile Spare Parts Suppliers
0 notes
Link
We “CON-PAP-TEX” are leading manufacturer, exporter and supplier of Rotary Spares, Spare Parts for Rotary Screen Printing Machine. Spares for Rotary Screen Printing Machine Like Printing Unit Lifting Bevel Box, Hand Wheel, Screen drive Gear Shaft, Screen Drive gear, Fork Assembly, Muff Coupling, Eccentric Type, Bearing, Rollers MS etc. Also, we are leading manufacturer of Rubber Roller, Slitter Rewinding Machine, Web Guiding System and more.

0 notes
Link
We are leading manufacturer, exporter and supplier of Spare Parts for Rotary Printing Machine international standard from last 25 years from India. Spares for Rotary Screen Printing Machine, Textile Machinery Parts. Like Printing Unit Lifting Bevel Box, Hand Wheel, Screen drive Gear Shaft, Screen Drive gear, Fork Assembly, Muff Coupling, Eccentric Type, Bearing, Rollers MS etc. Also, we are leading manufacturer of Rubber Fillet, Rubber Roller, Slitter Rewinding Machine, Web Guiding System and more.
#Spare Parts for Rotary Printing Machine#Rotary Printing Machine Part#Textile Machinery Parts#Rotary Printing Machine#Rotary Screen Printing Machine#Textile Machine#Printing Machine#Rotary Spare#Rubber Fillet#Rubber Rollers#Slitter Rewinding Machine#Web Guiding System
0 notes
Link

All type of Parts of Rotary Printing Machine Manufacturer, all types of Textile Machinery Spare Parts, Rotary Screen Printing Machine with longer durability. We are leading manufacturer, exporter and supplier of Spare Parts for Rotary Printing Machine international standard from last 25 years from India. Spares for Rotary Screen Printing Machine Like Printing Unit Lifting Bevel Box, Hand Wheel, Screen drive Gear Shaft, Screen Drive gear, Fork Assembly, Muff Coupling, Eccentric Type, Bearing, Rollers MS etc.
#Spare Parts For Rotary Printing Machine#Textile Machinery#Textile Machinery spare parts#Rotary Screen Printing Machine#Rotary Screen Printing Machines#Parts of Rotary Printing Machine#Parts of Rotary Printing Machines#Textile Machinerys#Textile Machinery parts
0 notes