#PyQt5
Explore tagged Tumblr posts
Visit Tumblr Blog
Explore Tumblr blogs with no restrictions, modern design and the best experience.
Last Seen Tumblr Blogs


Fun Fact
Tumblr Inc. has $15.1M in annual revenue.
Text
so, the big project i have been working on is a chat application that will be used for myself and a few select friends of mine. the name of this app is argon
i started working on the code for the prototype on january 9th of this year and i've made significant progress. the prototype is in customtkinter, but i've decided now that since this will be a large scale project, i should work with pyqt6. i have some experience with pyqt5, but not much with 6, so this will be a great learning experience for me ^_^
the prototype currently has
login / sign up features (connected to a sqlite3 database. NOTE: i made this choice just for the purpose of getting the project started. when it comes time for the app to be deployed, i will be using a postgresql database)
chat dashboard that shows the user all of their chats
a chat feature
not much because i've mainly been brainstorming and drafting what i want this to look like and how i want this to work. the prototype currently has 236 lines of code (with spacing and comments of course, so i imagine its around 205-215 in actuality). i am very excited to continue working on this project and share what i have eventually ^_^
7 notes
·
View notes
Text
PyQt5 – Different border color to lineedit part for non-editable Combo Box

In this article we will see how we can set different border color to the line edit part of the non editable combo box, line edit is the part of combo box which displays the selected item, it is editable by nature. In order to set and access the line edit object we use setLineEdit and lineEdit method respectively. In order to do this we have to do the following : 1. Create a combo box 2. Add item to the combo box 3. Create a QLineEdit object 4. Set border with different color to the QLineEdit object 5. Make […]
0 notes
Text
Python App Development Guide [2025]: Build Powerful Applications
Python is the third most popular programming language in 2025, especially for novice programmers and small business owners, and is known for its simplicity, versatility, and focus on code readability.
Python for app development allows developers to create scalable and efficient applications with minimal effort.

Why is Python So Popular for App Development?
Here are 8 key aspects of the popularity of Python for mobile app development.
1- Ease of Learning and Readability:
Python is often praised for its simple and readable syntax. Its code is easy to understand and write, making it an excellent choice for beginners and experienced developers. This ease of learning accelerates the development process and reduces the likelihood of errors.
2- Extensive Libraries and Frameworks:
It has a vast standard library that includes modules and packages for various functionalities. Additionally, numerous third-party libraries and frameworks simplify and speed up development. Popular frameworks such as Django and Flask are widely used for web development, while Kivy is popular for creating cross-platform mobile applications.
3- Versatility of Python App Development:
Python is a general-purpose programming language, making it versatile for different types of app development. Whether you’re working on web development, data analysis, machine learning, or artificial intelligence, Python has tools and Python libraries available to support your project.
4- Community Support:
Python has a large and active community of developers. This community support means that you can find solutions to problems, access documentation, and seek help easily. The collaborative nature of the Python community contributes to the language’s continuous improvement.
5- Cross-Platform Compatibility:
Python is a cross-platform language, meaning that applications developed in Python can run on various operating systems with minimal modifications. This flexibility is particularly beneficial for projects targeting multiple platforms such as Windows, macOS, and Linux.
Using Python for mobile app development involves several steps, and the approach can vary based on the type of application you want to build (web, mobile, desktop, etc.).
Below is a general guide on how to use Python for mobile app development:
Choose the Type of App
Web Development: For web applications, popular frameworks like Django and Flask are commonly used. Django is a high-level web framework that follows the Model-View-Controller (MVC) pattern, while Flask is a microframework that provides more flexibility.
# Example: Installing Django
pip install django
# Example: Creating a new Django project
django-admin startproject projectname
# Example: Running the development server
python manage.py runserver
Mobile Development: For mobile app development with Python, you can use frameworks like Kivy, BeeWare’s Toga, or tools like KivyMD (for material design).
These Python mobile development frameworks allow you to write Python code and deploy it to Android and iOS.
# Example: Installing Kivy
pip install kivy
# Example: Creating a basic Kivy app
python -m pip install kivy
Desktop Development: For desktop applications, frameworks like PyQt or Tkinter are commonly used. PyQt is a set of Python bindings for the Qt application framework, and Tkinter is the standard GUI toolkit included with Python.
# Example: Installing PyQt
pip install PyQt5
# Example: Creating a basic PyQt app
Below are the Simple Steps for Python App Development
Set Up the Development Environment: Install a code editor or Integrated Development Environment (IDE) suitable for Python development, such as VSCode, PyCharm, or Atom.
Learn the Basics of Python: If you’re new to Python, it’s essential to familiarize yourself with the basics of the language. Understand data types, control structures, functions, and object-oriented programming concepts.
Explore Framework Documentation: Depending on the framework you choose, explore the official documentation to understand its features, components, and best practices.
Write Code: Start writing the code for your application. Follow the structure and conventions of the chosen framework.
Test Your App: Write unit tests to ensure the functionality of your application. Use testing frameworks like unittest or pytest.
# Example: Installing pytest
pip install pytest
# Example: Running tests with pytest
pytest
Optimize and Debug: Optimize your code for performance and resolve any bugs or issues. Use debugging tools provided by your IDE or use print statements to troubleshoot.
Package and Distribute: Depending on the type of application, use tools like PyInstaller or cx_Freeze to package your application into executables for distribution.
# Example: Installing pyinstaller
pip install pyinstaller
# Example: Creating an executable with pyinstaller
pyinstaller your_script.py
Deploy: Deploy your application on the desired platform. For web applications, you might need to set up a server. For mobile apps, you can distribute them through app stores, and for desktop apps, users can download and install the executable.
Maintain and Update: Regularly maintain and update your application based on user feedback, feature requests, and bug reports. Remember that Python is a versatile language, and the specific steps may vary depending on the type of application and the chosen framework. Always refer to the official documentation for the tools and frameworks you are using.
Source of Content:Python App Development Guide
#PythonAppDevelopment#PythonApplicationDevelopment#PythonDevelopmentGuide#PythonforAppDevelopment#CustomPythonAppDevelopment#Pythonprogrammingforapps#Pythonmobileappdevelopment#Pythonwebappdevelopment#BenefitsofPythondevelopment
0 notes
Text
RDS Data Extraction with RFtap and Wireshark
RDS (Radio Data System) is a communication protocol standard used for embedding small amounts of digital information in traditional FM radio broadcasts. It enables radio stations to transmit data such as station identification, program information, and traffic updates.
To capture and decode RDS data, one method involves using a Software Defined Radio (SDR) along with GNU Radio and RFtap. GNU Radio provides a framework for creating software radios, while RFtap acts as a bridge between GNU Radio and conventional network monitoring and packet analysis tools like Wireshark.

Unfortunately, as of the time of writing, RFtap is no longer being maintained and does not work with the latest version of GNU Radio (version 3.10.10). This post offers guidelines for rebuild and using RFtap with the new GNU Radio release.
This post assumes that the reader has access to DVB-T dongles based on the Realtek RTL2832U and a PC running Ubuntu or Debian Linux. For this, I used an RTL dongle with Rafael Micro R820T tuner and Ubuntu 24.04 LTS release.
As the first step install the following GNU Radio build dependencies into the OS:
sudo apt-get install cmake libboost-all-dev \ liblog4cpp5-dev qtcreator qtbase5-dev \ qt5-qmake python3-cheetah python3-numpy \ python3-pygtk python3-gi python3-gi-cairo \ gir1.2-gtk-4.0
sudo apt install git g++ libgmp-dev swig \ python3-mako python3-sphinx python3-lxml \ doxygen libfftw3-dev libsdl1.2-dev \ libgsl-dev libqwt-qt5-dev libqt5opengl5-dev \ python3-pyqt5 liblog4cpp5-dev libzmq3-dev \ python3-yaml python3-click \ python3-click-plugins python3-zmq python3-scipy \ libcodec2-dev libgsm1-dev libusb-1.0-0 \ libusb-1.0-0-dev libudev-dev \ python3-setuptools
sudo apt install pybind11-dev python3-matplotlib \ libsndfile1-dev libsoapysdr-dev soapysdr-tools \ python3-pygccxml python3-pyqtgraph
sudo apt install libiio-dev libad9361-dev \ libspdlog-dev python3-packaging python3-jsonschema \ python3-qtpy
sudo apt remove swig
Next, clone and build Volk (Vector-Optimized Library of Kernels)
mkdir ~/rf cd rf git clone --recursive https://github.com/gnuradio/volk.git cd volk mkdir build cd build cmake -DCMAKE_BUILD_TYPE=Release -DPYTHON_EXECUTABLE=/usr/bin/python3 ../ make sudo make install sudo ldconfig
After installing the Volk library, we can proceed to build GNU Radio.
cd ~/rf wget https://github.com/gnuradio/gnuradio/archive/refs/tags/v3.10.10.0.tar.gz tar -xvf ./v3.10.10.0.tar.gz cd gnuradio-3.10.10.0 mkdir build cd build cmake -DCMAKE_BUILD_TYPE=Release -DPYTHON_EXECUTABLE=/usr/bin/python3 ../ make -j8 make test sudo make install sudo ldconfig

Now GNU Radio is installed with all necessary components. To enable RTL SDR support, we must build and install Osmocom RTL SDR libraries and SDR components.
cd ~/rf git clone https://gitea.osmocom.org/sdr/rtl-sdr.git cd rtl-sdr mkdir build cd build cmake ../ -DINSTALL_UDEV_RULES=ON make sudo make install sudo ldconfig
cd ~/rf git clone https://gitea.osmocom.org/sdr/gr-osmosdr cd gr-osmosdr mkdir build cd build cmake ../ make sudo make install sudo ldconfig
Before plugging in the RTL-SDR dongle, we need to prevent the kernel modules for the RTL-SDR USB device from being loaded into the kernel and taking ownership of the device. To do this, simply navigate to the /etc/modprobe.d directory and create a file called rtl-sdr-blacklist.conf with the following content:
# This system has librtlsdr0 installed in order to # use digital video broadcast receivers as generic # software defined radios. blacklist dvb_usb_rtl28xxu blacklist e4000 blacklist rtl2832 blacklist rtl2830 blacklist rtl2838
Next, you should clone and build the FM RDS/TMC transceiver module for GNU Radio.
cd ~/rf wget https://github.com/bastibl/gr-rds/archive/refs/tags/v3.10.tar.gz tar -xvf ./gr-rds\ -v3.10.tar.gz cd gr-rds-3.10 mkdir build cd build cmake .. make sudo make install sudo ldconfig
For the next steps, we need to have Wireshark and RFTap. Wireshark can be installed using a package manager.
sudo apt-get install wireshark
To run Wireshark without requiring root user permissions, use the following set of commands:
sudo dpkg-reconfigure wireshark-common sudo usermod -a -G wireshark $USER newgrp wireshark
A message may be prompted in the first step above and proceed by selecting the "Yes" option.
Now restart the OS and continue with the RFTap installation.
The official RFTap repository is no longer being maintained and is not compatible with newer versions of GNU Radio. For this step, please use the RFTap fork available in my GitHub repository. This version has been successfully tested with GNU Radio 3.10.10 and Wireshark 4.2.2.
cd ~/rf git clone https://github.com/dilshan/gr-rftap.git cd gr-rftap mkdir build cd build cmake .. make sudo make install sudo ldconfig
Now get the modifier version of rds_rx_rftap.grc from the above repository.

The Wireshark Dissector file for RDS data is also available in the repository. Copy it to the ~/.config/wireshark/plugins directory. Create the directories if they do not exist.
Launch Wireshark and monitor the loopback (lo) adapter. Start GNU Radio and execute the rds_rx.grc file, which was downloaded in the above step.
youtube
If all the steps are performed correctly, the RDS data should appear in the packet list pane as UDP messages. The dissected messages can be observed through the packet bytes pane.
0 notes
Photo

Python How To Make Drag And Drop Application in PyQt5 https://morioh.com/p/7904d39a8f7d?f=5c21fb01c16e2556b555ab32 #morioh #python #pyqt5
5 notes
·
View notes
Video
tumblr
Made a little widget.
10 notes
·
View notes
Text
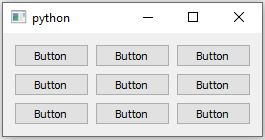
PyQt QGridLayout:
The techniques used to arrange or place the widgets in app is called Layouts. Now, we will discuss the PyQt QGridLayout with examples. why we need layouts? Her we will discus why we need layout when we have move() or resize() methods. To determine the correct size and position of every single widget in your forms. We have to do manual work. We have many devices and screen sizes, so while…
View On WordPress
0 notes
Text
[Solved][Python] FileNotFoundError: [Errno 2] No such file or directory: '/tmp/pip-build-8lcjii2e/PyQt5/setup.py'
[Solved][Python] FileNotFoundError: [Errno 2] No such file or directory: ‘/tmp/pip-build-8lcjii2e/PyQt5/setup.py’
Today when I configuring a new environment on new device (use pip3 install PyQt5), I got the following error message: (more…)

View On WordPress
0 notes
Photo

Enroll Now: zoom.us/j/85895191345 Attend Free Online Workshop on PyQT5 GUI Library In Python by Subba Raju Demo From: 20th October @ 2.00 PM (IST). For More Details: Visit: https://nareshit.com/new-batches-hyderabad/ Call: +91-9000994007, 9000994008, 9121104164 [email protected] Chat With Our TEAM : https://bit.ly/chatwithGuide Stay at Home, Stay Safe & Update Your Skills from Home #python #guilibrary #pyqt5 #workshop #engineering #online #training #education #software #programming #learnfromhome #nareshit https://www.instagram.com/p/CGhd-iKn4Kt/?igshid=dm0mb2r1s1xn
#python#guilibrary#pyqt5#workshop#engineering#online#training#education#software#programming#learnfromhome#nareshit
0 notes
Photo

Python How To Create Media Player In PyQt5 ☞ https://morioh.com/p/b88f72604879?f=5c21fb01c16e2556b555ab32
#python #programming #PyQt5
5 notes
·
View notes
Photo

PyQt5 How To Create PieChart With PyQtChart ☞ http://bit.ly/37fhVcu #PyQt5 #PyQtChart #PieChart
0 notes
Photo

PyQt5 How To Create PieChart With PyQtChart ☞ http://bit.ly/37fhVcu #PyQt5 #PyQtChart #PieChart
0 notes
Photo

Lockdown period used productively. Just completed beta version of Marathi Typing Tutor program. “MaTyTu” I used #python and #pyqt5 #GUI library for it. #marathi #maharashtradin #productivity #software #pythonprogramming #python #pythonlearning #pyqt #unicode #covid19 #lockdown2020 #lockdownlife (at Talegaon Dabhade) https://www.instagram.com/p/B_q01qEFGrS/?igshid=14zsd4wa3rfbu
#python#pyqt5#gui#marathi#maharashtradin#productivity#software#pythonprogramming#pythonlearning#pyqt#unicode#covid19#lockdown2020#lockdownlife
0 notes
Photo

PyQt5 How To Create PieChart With PyQtChart ☞ http://bit.ly/37fhVcu #PyQt5 #PyQtChart #PieChart
0 notes
Text
[Solved][MacOS] Big Sur 11.2.1 PyQt5's Window Cannot Be Showed
[Solved][MacOS] Big Sur 11.2.1 PyQt5’s Window Cannot Be Showed
I have used PyQt5 to make some simple tools for my daily use. After I switched my daily laptop from Linux to Mac OS, these tools have been working well. (more…)

View On WordPress
0 notes
Photo

PyQt5 How To Create PieChart With PyQtChart ☞ http://bit.ly/37fhVcu #PyQt5 #PyQtChart #PieChart
0 notes