#Sigma 150mm Macro
Text
French Hydrangea
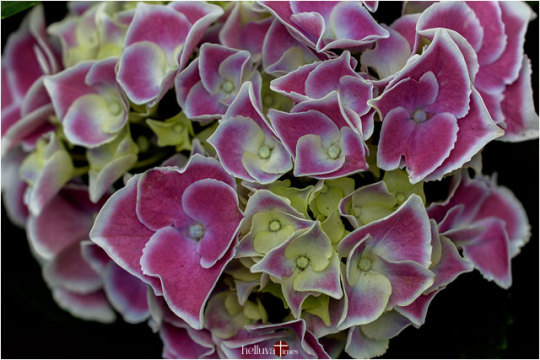
French Hydrangea looking fresh in the conservatory. Photo credit: Jonathan Chua.
Sometimes, I like using a macro lens like the Sigma 150mm to photograph flora. It gives me enough reach and at the same time allows me to work closely if needed.
#photographers on tumblr#canon eos rp#canon photography#flora fauna#flora photography#flower pics#french hydrangea#Hydrangea macrophylla#hydrangea photos#photography tips#sigma 150mm macro
3 notes
·
View notes
Text
The Mums Clan
This may now be viewed at helluva-times.com
#chrysanthemums#flora and fauna#flora photography#flower dome#gardens by the bay#gardening#canon eos rp#sigma 150mm macro#photographers on tumblr
8 notes
·
View notes
Text

Hello Tumblr
I am Wendy Verboom and I from Belgium. As a daily job I work in a residential and care center as a night care worker.
In my spare time I can almost always be found in nature here I come alive to photograph birds, deer, butterflies ,dragonflies ,flowers, etc… This is also the place where my inspiration for my toy photography comes from.
I actually started with lego photography by accident because my friend came across his old lego sets in his parents’ attic in 2017.
We then put the old sets back together again and that's how I got the idea to photograph the mini figures. Back then I also photographed a lot with the macro lens, but mainly butterflies and dragonflies and it would be great to be able to go out with the macro lens in winter as well. I did some research on the internet and there I saw some examples of Lego photography
I use my canon 70D and my sigma 105mm macro lens ,150mm or my old helioslens 44-2 because I like the softness and bokeh of that old lens.
It immediately gives a dreamy atmosphere without photoshop.
I really love taking pictures of my Lego minifigures they are so expressive that you can make your one story with them .
My slogan : Legominifigure meets nature !
I hope i inspired you to make your one shots of your toys .🍀
#lego#afol#brickcentral#legominifigures#legophotography#toyphotography#toypic community#toys#artists on tumblr#art#photography#storytelling#photoart
130 notes
·
View notes
Text
踊り場で 踊りながら撮った ネオワイズ

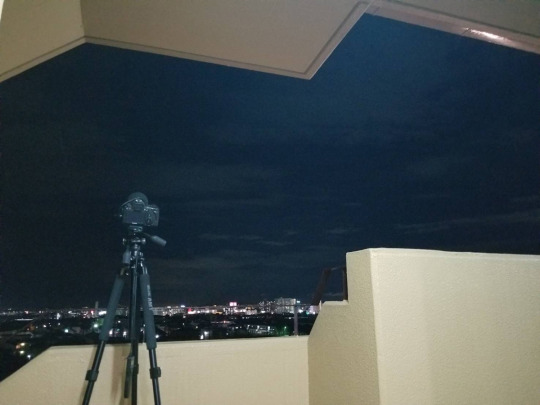
・SIGMA APO MACRO 150mm F2.8 EX DG OS HSM
・EOS6D HKIR改造 ISO1600 F2.8 1秒×6枚 固定
・ステライメージ8 フォトショップCC2018 トリミング
・PC:mouse computer DAIV ・Display:EIZO CS230
・2020/7/26 20:40~ 自宅マンション通路
0 notes
Video
Jumping Spider by Travis Hale
Via Flickr:
Jumping Spider Another of my Jumping Spider series of photos, captured with a Nikon D610, Sigma 150mm Macro & Raynox DCR250 Super Macro Adapter. The shot settings were 1/60 seconds, f/11, ISO 2000 and the photo was run through Topaz Denoise AI to remove the Noise, then it was edited in Skylum's Aurora HDR to bring out the shadows and highlights before being finished off in Skylum's Luminar 4 (AI Enhance & Structure AI). I ran the photo through affinity to remove some of the dirt from the porcelain tile the spider was sitting on which was distracting, the blue surface is the reflection of the sky from the black porcelain tile. <--For those that are interested, All the Socials --> Instagram: Trav.Hale, Twitter: @TravisHale, Facebook: TravHale 500px: TravisHale, Flickr: TravisH1984, Web: www.travishale.com
#arachnid < Labels#araneus < Labels#arthropod < Labels#close up < Labels#Eyes#Helicon Focus#insect < Labels#invertebrate < Labels#jumping#Jumping Spider#Luminar 4#Macro#macro photography < Labels#organism < Labels#Photography#Raynox DCR 250#Sigma 150mm Macro#Skylum#spider#spider < Labels#spider web#tiny#Topaz Denoise AI#wildlife < Labels#nature
6 notes
·
View notes
Text
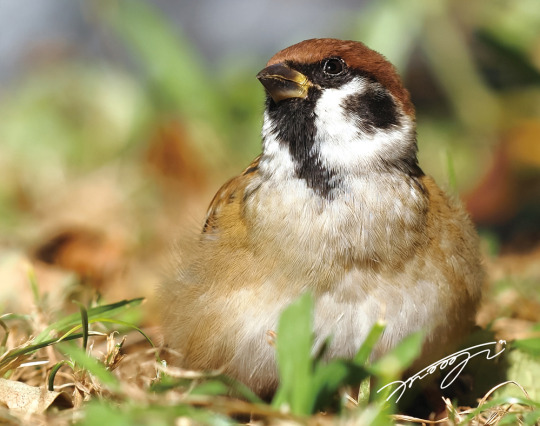
写真で振り返る『あした、どこかで。』#07
写真で振り返る『あした、どこかで。』#07 写真家の思いと作家の思い… ふたつが重なり合った一枚の写真 Blog『東京すずめ★これくしょん』に記事をアップしました。 #スズメ #あしたどこかで #裏話
View On WordPress
#E-5#News#OLYMPUS#SIGMA 150mm F2.8 MACRO HSM#sparrow#あしたどこかで#うえだこうじ#さえぐさはなえ#すずめ#スズメ#スズメ写真#テレビ#二つの思い#力強さ#強さ#振り返る#東京すずめ#癒し#野鳥写真#雀#鳥
9 notes
·
View notes
Video
flower 105 by sae kinoi
Via Flickr:
Sapporo City ( The central area of town / Botanical garden ) 2014 Summer / Bad company and Rose - 薔薇と悪友
#sapporo#hokkaido#japan#Flower#Rose#札幌市#北海道#北大植物園#薔薇#アブラムシ#SIGMA APO MACRO 150mm f2.8 EX DG OS HSM#Nikon D7100
5 notes
·
View notes
Photo
flower 1177 by kaifudo on Flickr
3 notes
·
View notes
Photo
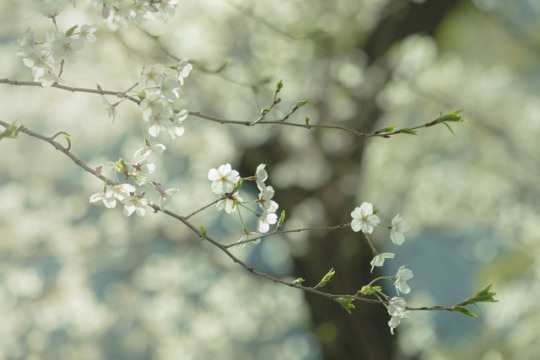
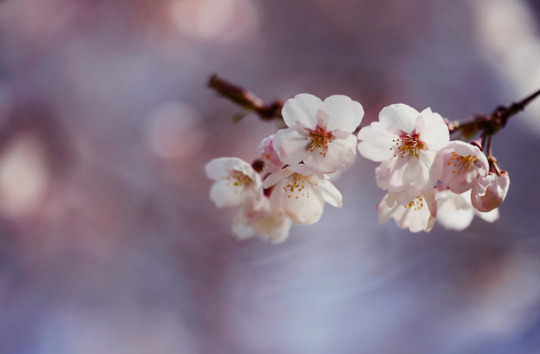
中野四季の森公園の桜
#Nikon#D750#Sigma#Sigma APO MACRO 150mm F2.8 EX DG OS HSM#Cherry blossom#Sakura#Nature#Spring#Flowers
28 notes
·
View notes
Video

flickr
California desert cactus patch, somewhere east of LA by edk7
Via Flickr:
Nikon Nikkormat FT + Kodachrome colour reversal slide film - copied by Nikon D610 + Sigma 150mm 1:2.8 APO macro DG HSM + Nikon SB800 flash cable-attached M419 DSC_2464 Anx2 1400h Q90
#Nikon Nikkormat FT#Kodachrome colour reversal slide film#edk7#1973#US#USA#California#landscape#hill#sky#soil#tree#haze#mountain#nature#rural#country#countryside#plant#vegetation#cactus#needle#pebble#stone#gravel#M419#desert
1 note
·
View note
Text
It’s No Bronzeback

One of three striped keelbacks finding themselves somehow marooned in the middle of a basin at the foot of a water cuscading feature in the Gardens by the Bay. Photo credit: Jonathan Chua.
Onsite, I had mistakenly thought that they were Common Bronzebacks but realized only when the images were viewed back home on the computer that these were not really as slender. They were eventually found to be Striped Keelbacks.
#photographers on tumblr#canon eos rp#canon photography#flora fauna#sigma 150mm macro#snake pics#striped keelback photos#wildlife photography#Xenochrophis vittatus
3 notes
·
View notes
Text
A Pink Camellia Tribute

The depth-of-field produced by a four thirds sensor may not be up to it in some situations but it isn’t really that bad. Close focusing and a little more care in the choice of backdrop or even using a fast lens could all still achieve the desired result.
#camellia#flora and fauna#flora photography#gardening#floral tribute#queen elizabeth#olympus em1#sigma 150mm macro#four thirds#photographers on tumblr
0 notes
Text
Tiny World to Close Encounters
Research
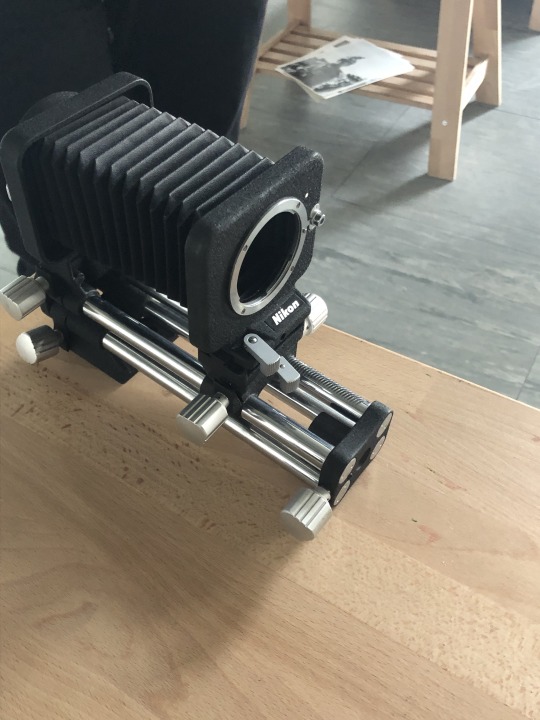
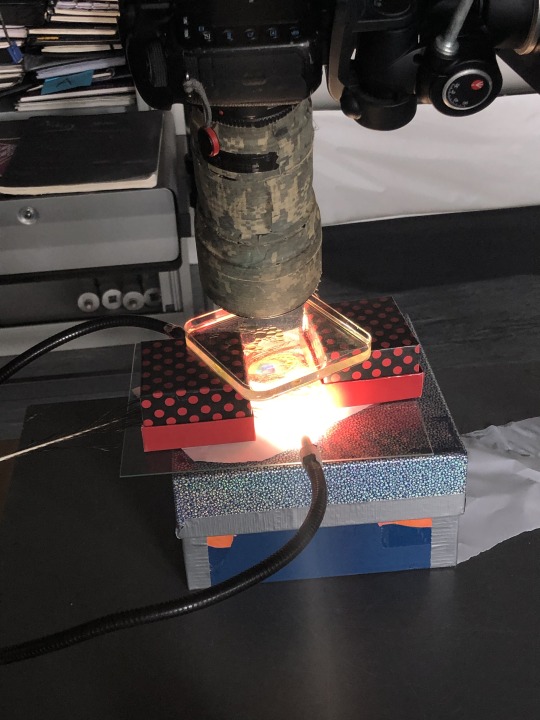
Building on our Tiny Worlds and feedback we received from class mates we developed further our macro skills by photographing a number of different types of objects using specialised macro equipment. Some of the equipment used:
· Specialised Macro lense - the one I used was a 150mm Sigma lense
· Bellows - which allows extreme close ups - the camera is attached at one end and lenses at the other
· Lighting - with long tube-like arm that can wraps a light source round a subject.
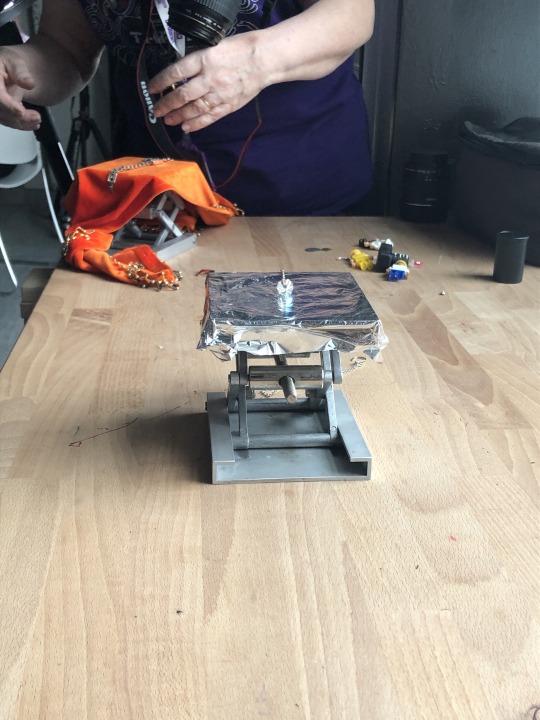
· Macro Table - small table for placing objects that can be raised to be nearer the camera
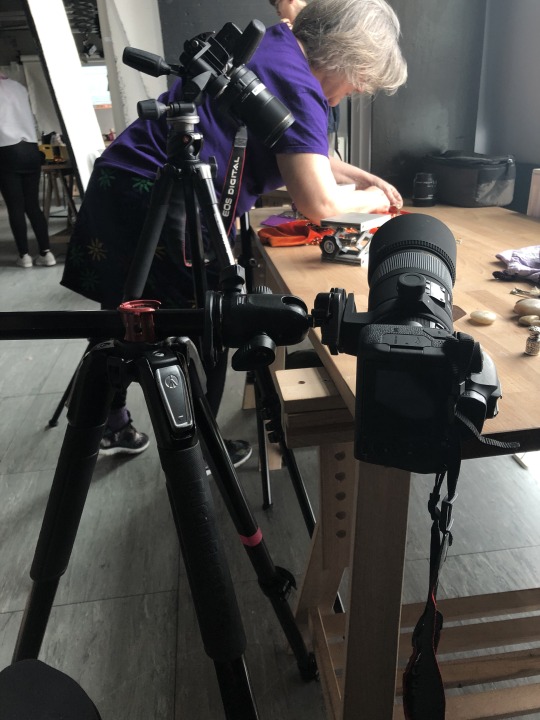
· Macro friendly tripods - i.e. with an extendable arm to allow close movement into detailed positions


Developing a Theme
I chose to take images of silver jewellery. Inspired by images that I had seen on Instagram, I tried to use rustic objects ( stones, old bolt) to develop the right ambience for the images. I experimented with different distances, angles of light, props and aperture.
Some considerations to take this forward:
· Clean the Jewellery - What may not seem obvious to the naked eye will be revealed once it gets blown up in the highly-detailed images taken by your digital camera.
· Instead of complicating the shot with other jewellery or a potentially distracting background, jewellery may be better off with a minimalist setup - on top of a wooden table, a plain white or reflective surface, or zoom in on key features to exclude the rest of the object using a wide aperture to blur out the background.
· Experiment with White Balance
· Make sure the camera is stabilised on a tripod- tripod ball head is best to get the fluid movement to obtain a desirable angle.
· Light the object well - A standard macro photography lighting setup should consist of at least two flash heads or continuous lights, one for the left of the subject and the other for the right.
· Precision focus
· Experiment with reflective surfaces
Some inspiration images:

Some Early Images & Evaluation
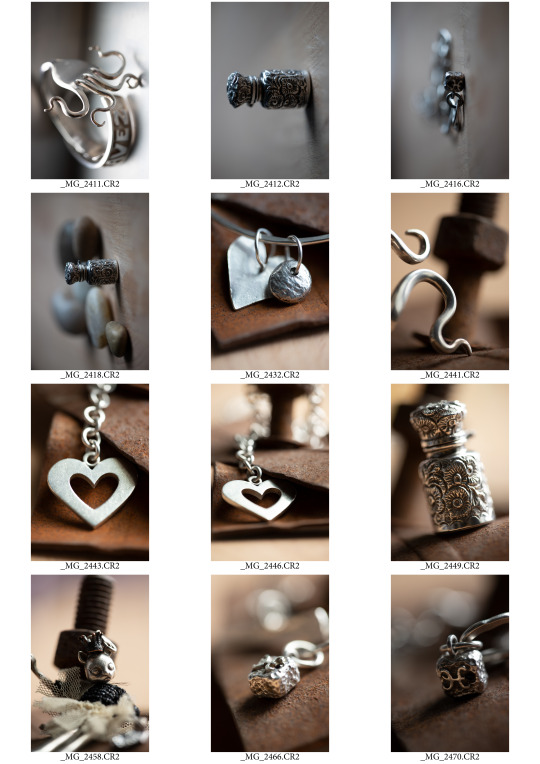
· Not all sharp - note to self always use tripod, the band width of sharpness is very limiting
· Using an aperture of about f4.0 achieved belter effect than f2.8 which became very hard to find any point of focus
· Need to experiment more with textures/back-grounds and what they actually add or detract from the jewellery
Further Work & Evaluation
I have continued to take further jewellery images, and also practiced some macro photography outside on location - in the country side - photographing tiny tiny plants and moss.
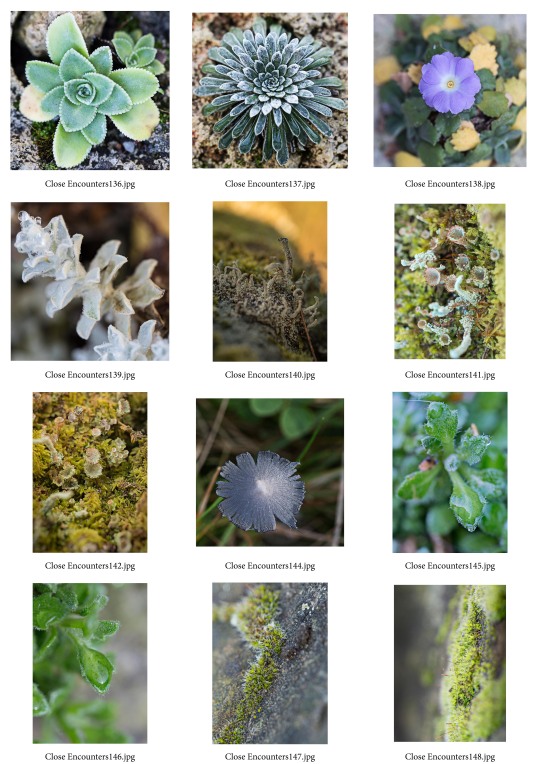
I am reasonably pleased with my finished results although sometimes it is difficult to define the line between close up photography and macro.
Key lessons in macro for me are:
· Always use a tripod
· Shoot on Av
· Shoot on live view so you can see results
· Start with an aperture of around f11. At first I thought I should use a large aperture around f4, but this really limits the band of focus
· Put the lens on manual focus
· Where possible use a manual lens and use the distance settings
· Experiment with lighting - in studio use studio and macro lights, on location lighting can be enhanced by phone torch
· Where possible once the lens focus is set up move the subject towards the camera rather than vice versa
2 notes
·
View notes
Text
らしんばん座のガム星雲
・SIGMA APO MACRO 150mm F2.8 EX DG OS HSM
・EOS6D HKIR改造 ISO3200 F2.8→F3.5 2分×33枚
・K-ASTEC レボルビングシステム
・GP2ガイドパック こたチューン ノータッチガイド
・ステライメージ8 フォトショップCC2019
・2020/2/23 19:37~ 和歌山県すさみ町 ベルヴェデーレ駐車場
0 notes
Photo
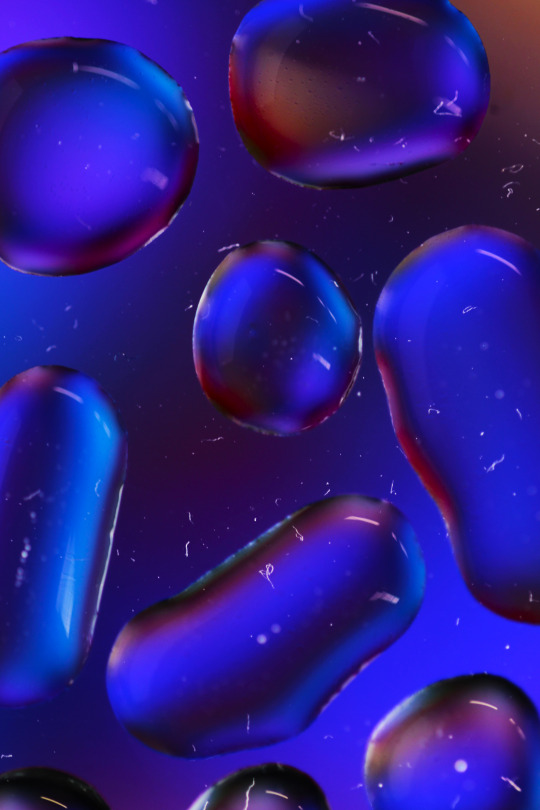

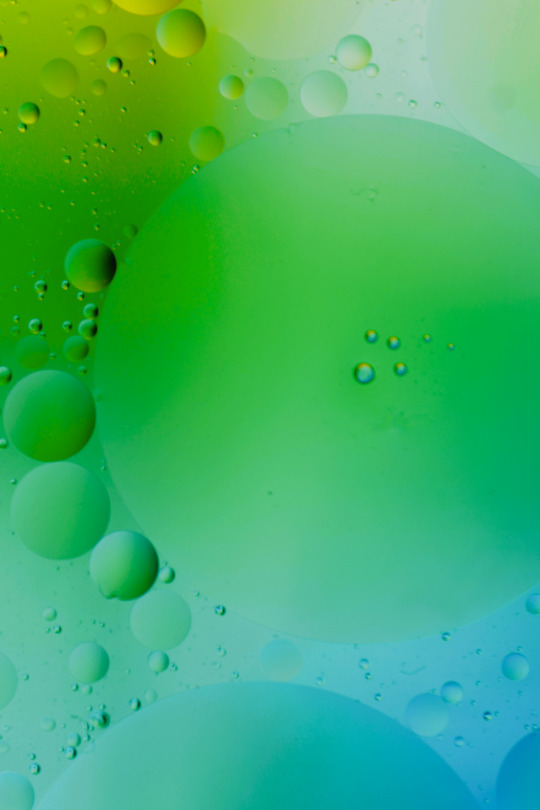
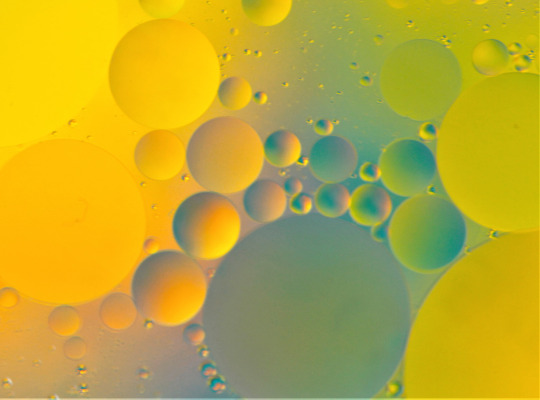
Water and Oil
the first two images were from the water droplet task where there was just some water droplets on a glass sheet on top of the ipad, the second images are from the water and oil task for both images i used the sigma 150mm APO macro lens 0.38-53m for both tasks
1 note
·
View note
Photo

Salut à tous, Comme convenu voici mon retour du test du fameux Tamron 35-150mm F2-2,8. Je vais aborder 4 thématiques qui m'intéressent particulièrement sur un nouvel objectif. - la polyvalence (quel type d'usage) - le piqué, la distorsion, le vignetage - l'ergonomie et la compacité - la qualité de L'AF continue et détection des visages et yeux avec le Sony Alpha 1 Pour cela je vous propose 3 séries de photos sur des thèmes différents - Vacances en famille - Astrophotographie et Paysages - Animalier Globalement niveau polyvalence c'est une très agréable surprise, je me suis essayé à l'animalier, au portrait, au paysage de jour et de nuit. Et très clairement l'objectif est au rendez-vous. Je dirai pour l'animalier qu'il ne remplacera jamais un 100-400mm ni même un 90mm Macro mais il est un très bon compromis entre les deux et permet de shooter de très bons clichés animalier à moyenne distance. Pour le portrait, il est juste incroyablement bon et polyvalent. En combinant son amplitude 35-150mm à sa grande capacité d'ouverture de F2-2,2 jusqu'à 60mm et les F2,2-2,5 jusqu'à 85mm, tamron nous offre un objectif lumineux permettant de beaux effets de bokeh à des distances très variables. Pour le paysage, les 35mm sont bien largement suffisants pour réaliser de très beaux paysages. La aussi, il ne remplacera pas un 14mm de chez Sony ou encore un 14mm-24mm Sigma mais vous le verrez dans mes clichés je me suis essayé à des clichés de la voie lactée et on peut tout de même faire des choses sympa même au 35mm qui a l'avantage d'ouvrir à F2 quand le sigma est un constant F2.8. Le paysage ce n'est bien entendu pas que du grand angle et la encore le passage de 35mm à 150mm est très pratique quand la nécessité se fait ressentir. Pour ce qui est du piqué, de la distorsion et du vignetage, la aussi Tamron fait très fort. La suite en commentaire. #sonyalpha #sonya #sony #sonyphotography #sonyimages #bealpha #photo #portraitphotography #alphaeucompetition #havefun #naturelovers #naturephotography #nature #discoverwithalpha #naturephotographer #portraits #cute #animallovers #famille #paysage #withmytamron #plage #hyeres #alpha1#avecmontamron @tamron_france (à Hyeres Coté D'azur) https://www.instagram.com/p/CVxPmvYIp5u/?utm_medium=tumblr
#sonyalpha#sonya#sony#sonyphotography#sonyimages#bealpha#photo#portraitphotography#alphaeucompetition#havefun#naturelovers#naturephotography#nature#discoverwithalpha#naturephotographer#portraits#cute#animallovers#famille#paysage#withmytamron#plage#hyeres#alpha1#avecmontamron
0 notes
Last Seen Blogs

its-a-mad-world-donnie
28:06:42:12

eve-ate-the-right-fruit
queer before the lord

indigo-child-kogane
Patience Yields Focus

violetiooo
scarlett

sandysmoved
May we be equal to the burden