#Smart HomeLab Server
Video
youtube
What's On My Smart HomeLab Server?
Home Assistant is at the centre of my Smart Home, but there are so many other amazing apps and services that go into making a secure, local and self hosted smart home - in this video I take you through a tour of all of the core apps and services I use in my Smart Home on a daily basis!
1 note
·
View note
Text
My Homelab/Office 2020 - DFW Quarantine Edition
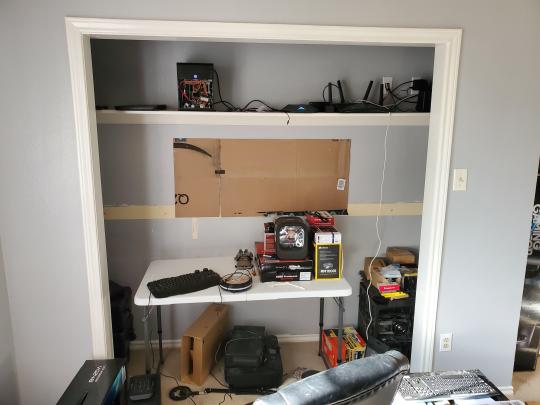
Moved into our first home almost a year ago (October 2019), I picked out a room that had 2 closets for my media/game/office area. Since the room isn't massive, I decided to build a desk into closet #1 to save on space. Here 1 of 2 shelves was ripped off, the back area was repainted gray. A piece of card board was hung to represent my 49 inch monitor and this setup also gave an idea how high I needed the desk.
On my top shelf this was the initial drop for all my Cat6 cabling in the house, I did 5 more runs after this (WAN is dropped here as well).
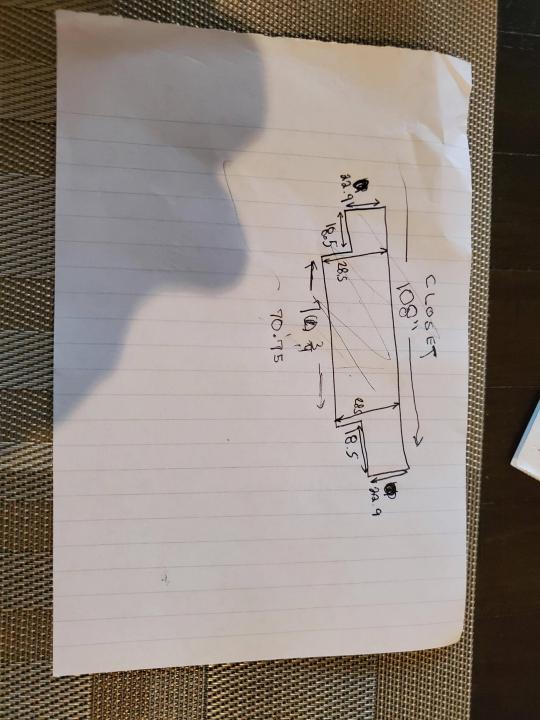
I measured the closet and then went to Home Depot to grab a countertop. Based on the dimensions, it needed to be cut into an object shape you would see on Tetris.
Getting to work, cutting the countertop.
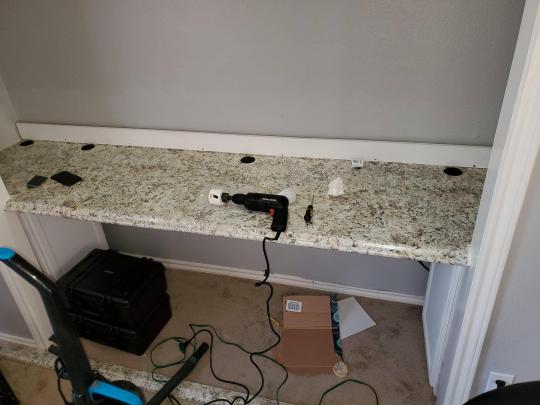
My father-in-law helped me cut it to size in the driveway and then we framed the closet, added in kitchen cabinets to the bottom (used for storage and to hide a UPS). We ran electrical sockets inside the closet. I bought and painted 2 kitchen cabinets which I use for storage under my desk as well.
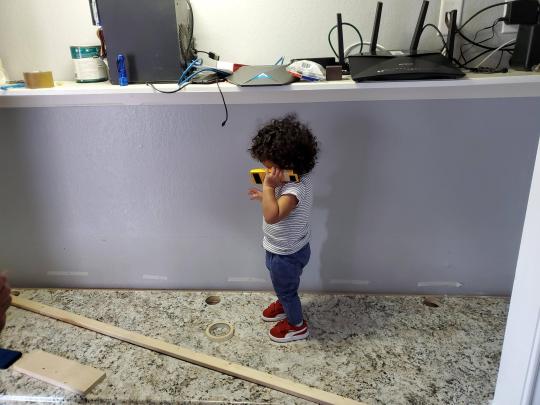
The holes allowed me to run cables under my desk much easier, I learned many of these techniques on Battlestations subreddit and Setup Wars on Youtube. My daughter was a good helper when it came to finding studs.
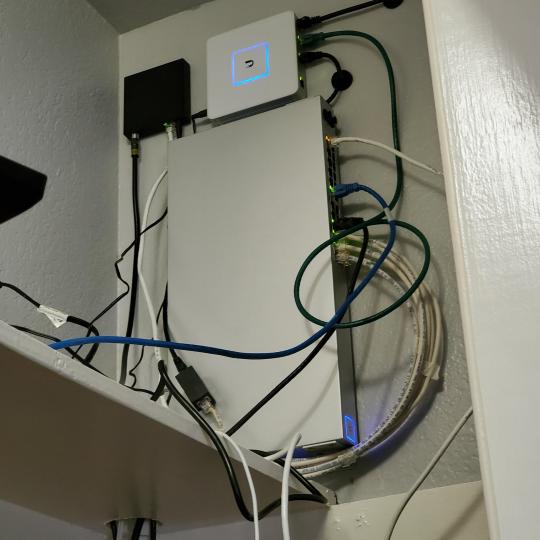
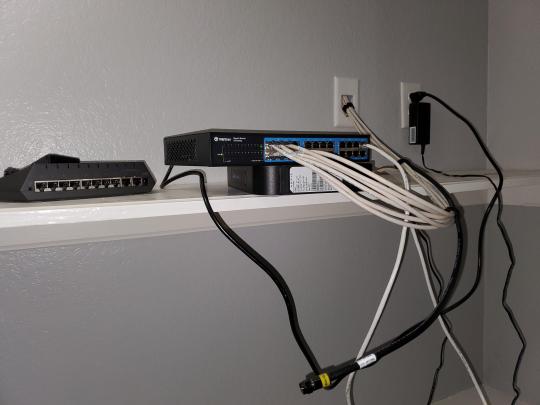
Some of my cousins are networking engineers, they advised me to go with Unifi devices. Here I mounted my Unifi 16 port switch, my Unifi Security Gateway (I'll try out pfSense sometime down the line), and my HD Homerun (big antenna is in the attic). I have Cat6 drops in each room in the house, so everything runs here. On my USG, I have both a LAN #2 and a LAN #1 line running to the 2nd closet in this room (server room). This shot is before the cable management.
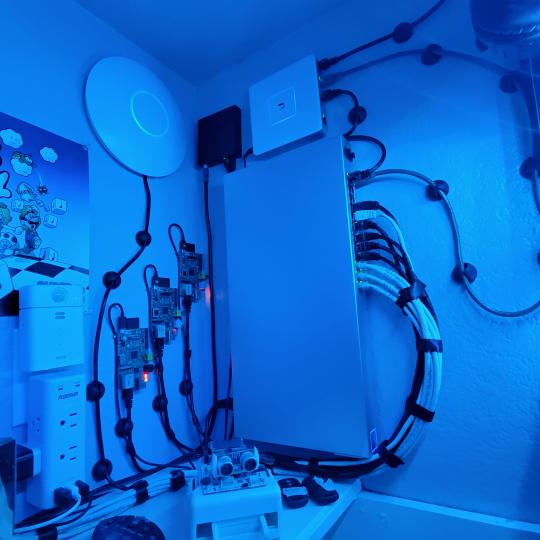
Cable management completed in closet #1. Added an access point and connected 3 old Raspberry Pi devices I had laying around (1 for PiHole - Adblocker, 1 for Unbound - Recursive DNS server, and 1 for Privoxy - Non Caching web proxy).
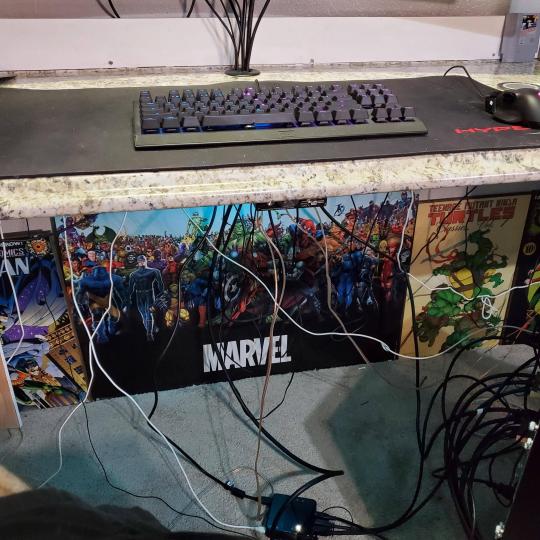
Rats nest of wires under my desk. I mounted an amplifier, optical DVD ROM drive, a USB hub that takes input from up to 4 computers (allows me to switch between servers in closet #2 with my USB mic, camera, keyboard, headset always functioning), and a small pull out drawer.
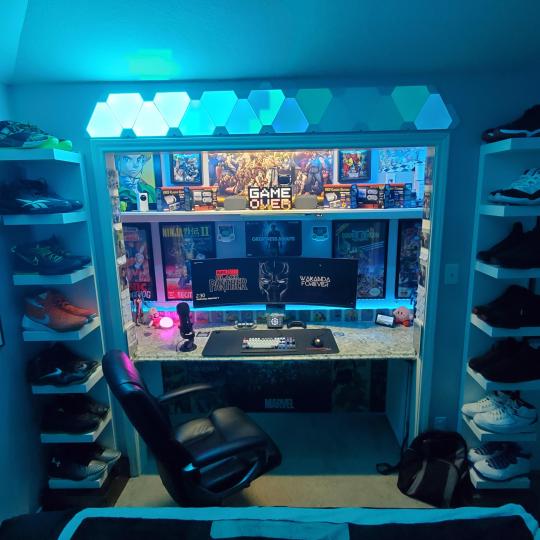
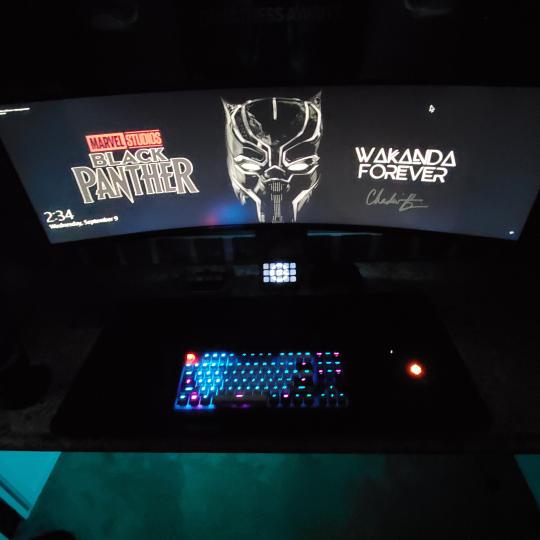
Cable management complete, night shot with with Nanoleaf wall lights. Unifi controller is mounted under the bookshelf, allows me to keep tabs on the network. I have a tablet on each side of the door frame (apps run on there that monitor my self hosted web services). I drilled a 3 inch hole on my desk to fit a grommet wireless phone charger. All my smart lights are either running on a schedule or turn on/off via an Alexa command. All of our smart devices across the house and outside, run on its on VLAN for segmentation purposes.
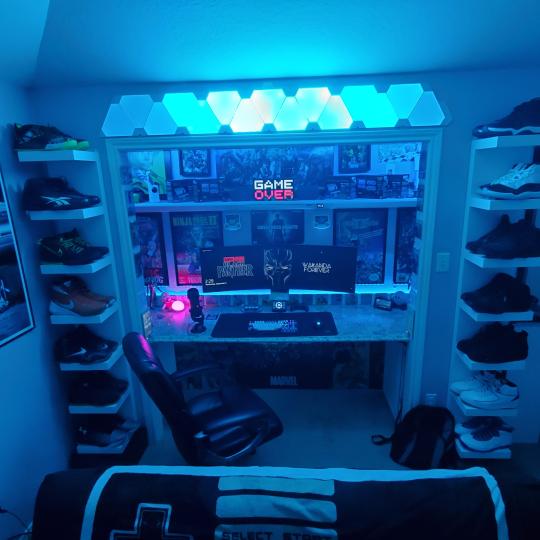
Quick shot with desk light off. I'm thinking in the future of doing a build that will mount to the wall (where "game over" is shown).
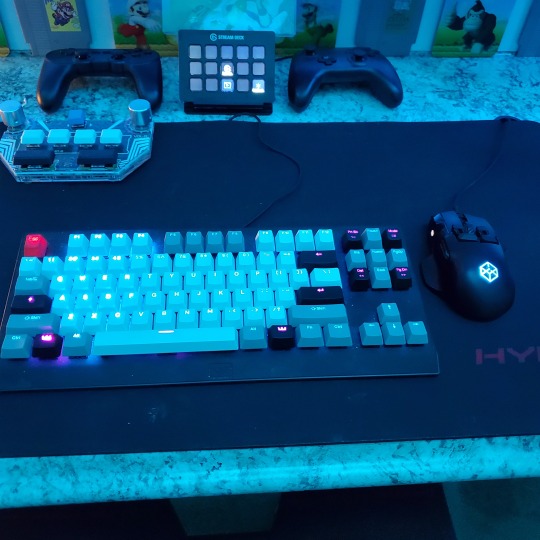
Wooting One keyboard with custom keycaps and Swiftpoint Z mouse, plus Stream Deck (I'm going to make a gaming comeback one day!).
Good wallpapers are hard to find with this resolution so pieced together my own.
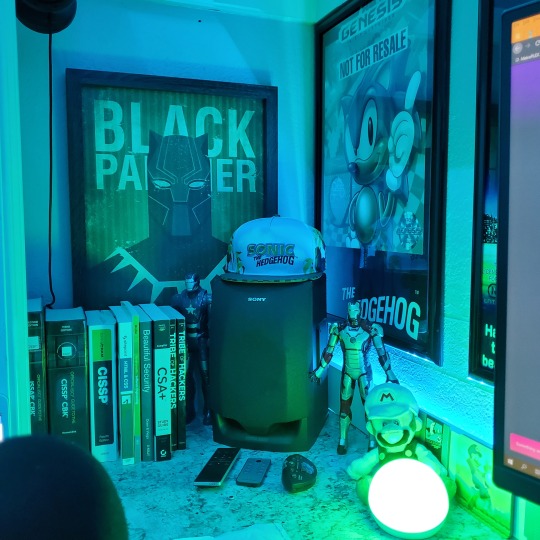
Speakers and books at inside corner of desk.
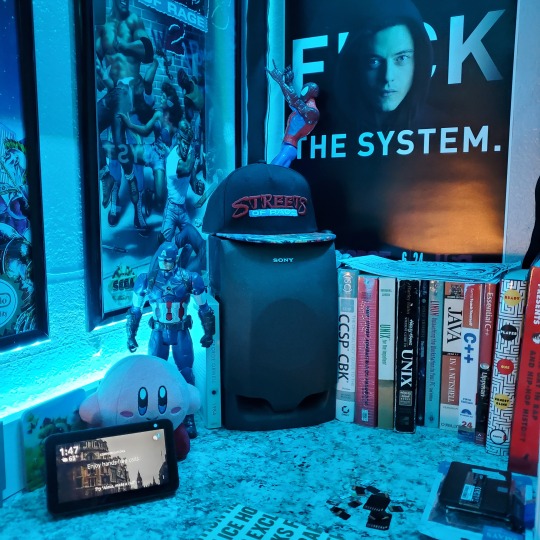
Speakers and books at inside corner of desk.
Closet #2, first look (this is in the same room but off to the other side). Ran a few CAT6 cables from closet #1, into the attic and dropped here (one on LAN #1, the other on LAN #2 for USG). Had to add electrical sockets as well.
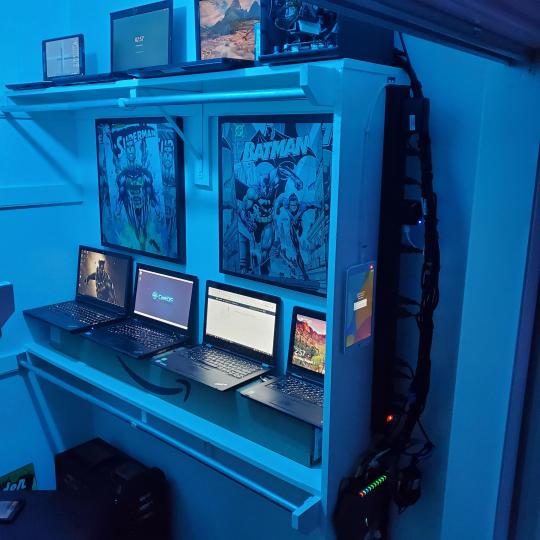
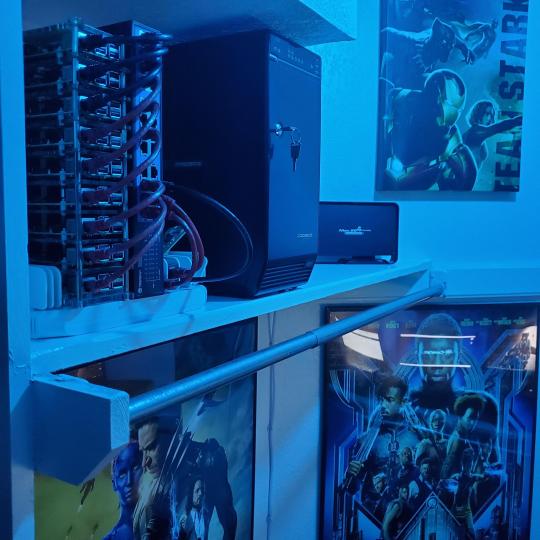
I have owned a ton of Thinkpads since my IBM days, I figured I could test hooking them all up and having them all specialize in different functions (yes, I have a Proxmox box but it's a decommissioned HP Microserver on the top shelf which is getting repurposed with TrueNAS_core). If you're wondering what OSes run on these laptops: Windows 10, Ubuntu, CentOS, AntiX. All of these units are hardwired into my managed Netgear 10gigabit switch (only my servers on the floor have 10 gigabit NICs useful to pass data between the two). Power strip is also mounted on the right side, next to another tablet used for monitoring. These laptop screens are usually turned off.
Computing inventory in image:
Lenovo Yoga Y500, Lenovo Thinkpad T420, Lenovo Thinkpad T430s, Lenovo Thinkpad Yoga 12, Lenovo Thinkpad Yoga 14, Lenovo Thinkpad W541 (used to self host my webservices), Lenovo S10-3T, and HP Microserver N54L
Left side of closet #2
**moved these Pis and unmanaged switch to outside part of closet**
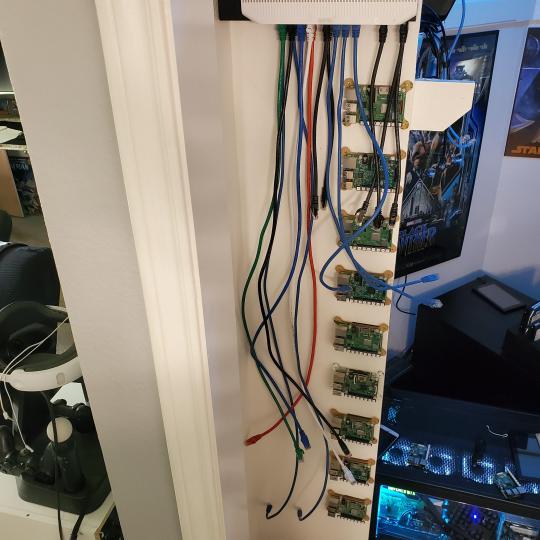
Since I have a bunch of Raspberry Pi 3s, I decided recently to get started with Kubernetes clusters (my time is limited but hoping to have everything going by the holidays 2020) via Rancher, headless. The next image will show the rest of the Pis but in total:
9x Raspberry Pi 3 and 2x Raspberry Pi 4
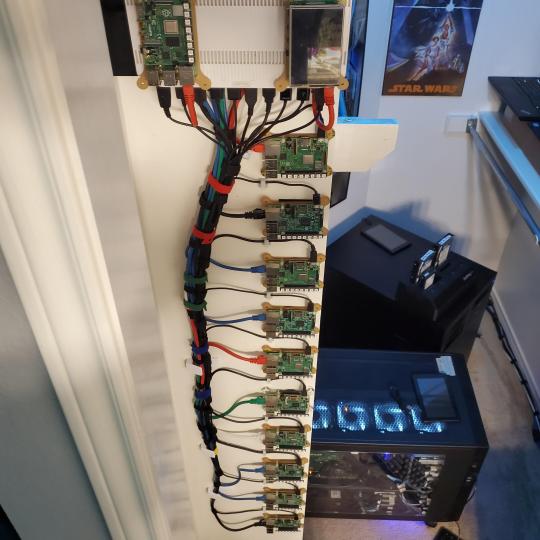
2nd shot with cable management. The idea is to get K3s going, there's Blinkt installed on each Pi, lights will indicate how many pods per node. The Pis are hardwired into a switch which is on LAN #2 (USG). I might also try out Docker Swarm simultaneously on my x86/x64 laptops. Here's my compose generic template (have to re-do the configs at a later data) but gives you an idea of the type of web services I am looking to run: https://gist.github.com/antoinesylvia/3af241cbfa1179ed7806d2cc1c67bd31
20 percent of my web services today run on Docker, the other 80 percent are native installs on Linux and or Windows. Looking to get that up to 90 percent by the summer of 2021.
Basic flow to call web services:
User <--> my.domain (Cloudflare 1st level) <--> (NGINX on-prem, using Auth_Request module with 2FA to unlock backend services) <--> App <--> DB.
If you ever need ideas for what apps to self-host: https://github.com/awesome-selfhosted/awesome-selfhosted
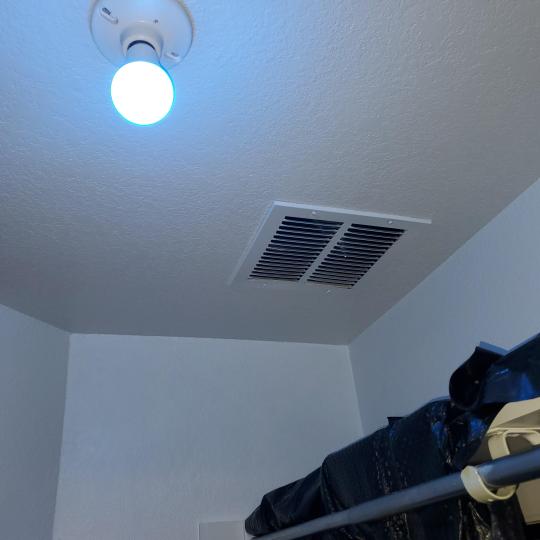
Homelabs get hot, so I had the HVAC folks to come out and install an exhaust in the ceiling and dampers in the attic.
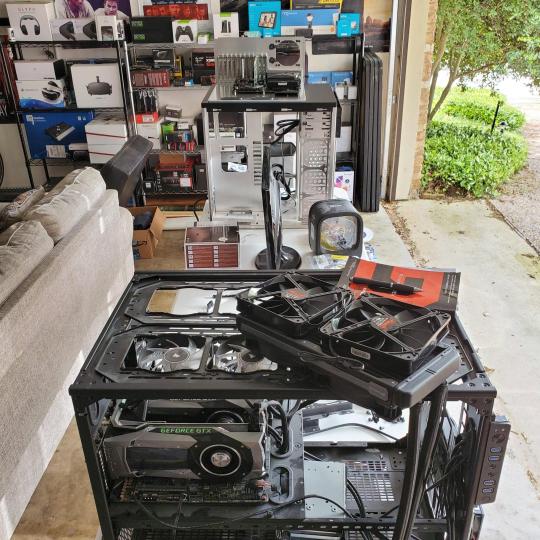
I built my servers in the garage this past winter/spring, a little each night when my daughter allowed me to. The SLI build is actually for Parsec (think of it as a self hosted Stadia but authentication servers are still controlled by a 3rd party), I had the GPUs for years and never really used them until now.
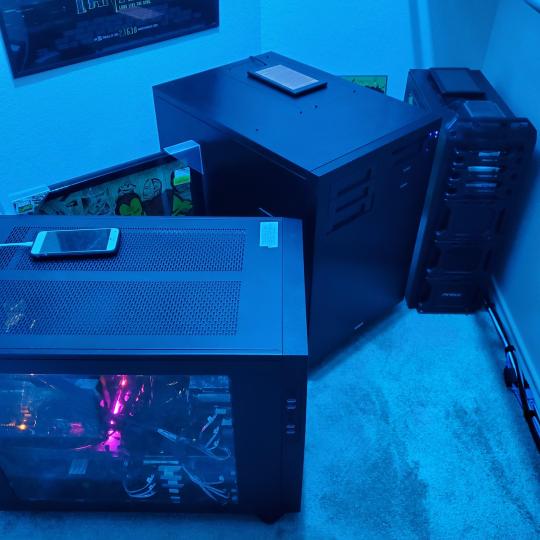
Completed image of my 2 recent builds and old build from 2011.
Retroplex (left machine) - Intel 6850 i7 (6 core, 12 thread), GTX 1080, and 96GB DDR4 RAM. Powers the gaming experience.
Metroplex (middle machine) - AMD Threadripper 1950x (16 core, 32 thread), p2000 GPU, 128GB DDR4 RAM.
HQ 2011 (right machine) - AMD Bulldozer 8150 (8 cores), generic GPU (just so it can boot), 32GB DDR3 RAM.
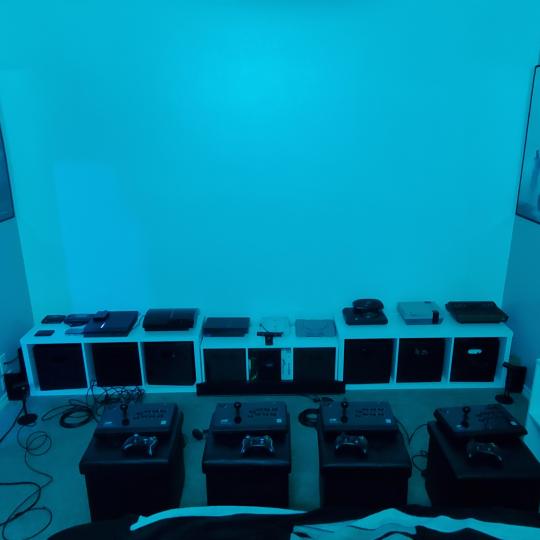
I've been working and labbing so much, I haven't even connected my projector or installed a TV since moving in here 11 months ago. I'm also looking to get some VR going, headset and sensors are connected to my gaming server in closet #2. Anyhow, you see all my PS4 and retro consoles I had growing up such as Atari 2600, NES, Sega Genesis/32X, PS1, Dreamcast, PS2, PS3 and Game Gear. The joysticks are for emulation projects, I use a Front End called AttractMode and script out my own themes (building out a digital history gaming museum).
My longest CAT6 drop, from closet #1 to the opposite side of the room. Had to get in a very tight space in my attic to make this happen, I'm 6'8" for context. This allows me to connect this cord to my Unifi Flex Mini, so I can hardware my consoles (PS4, PS5 soon)

Homelab area includes a space for my daughter. She loves pressing power buttons on my servers on the floor, so I had to install decoy buttons and move the real buttons to the backside.
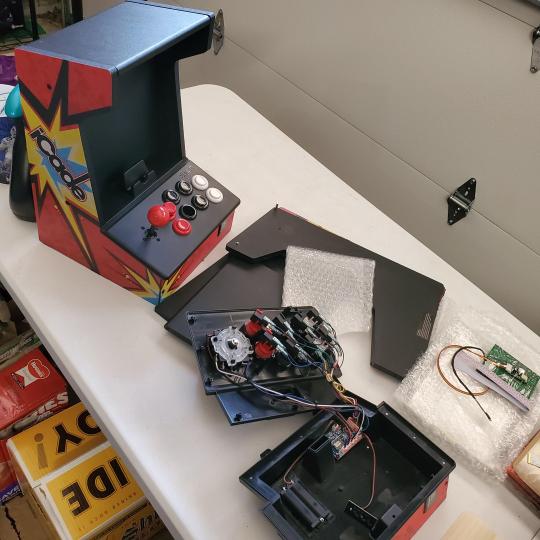
Next project, a bartop with a Raspberry Pi (Retropie project) which will be housed in an iCade shell, swapping out all the buttons. Always have tech projects going on. Small steps each day with limited time.
6 notes
·
View notes
Photo


The 2018 Battlestation! Workspace
Here are some of the products that make this workspace an Amazing Workspace:
Apple TV (3rd Gen)
TP-Link HS100 Smart Switch for desk lighting + Alexa integration
Other unlisted stuff:
NZXT H440 Case
I'm currently a sophomore in college still living at home, so battlestation/homelab space is severely limited.
x2 Toshiba SSDs in RAID 0
VMWare ESXi Hypervisor
Linksys E2000 in Bridge Mode (soon to be replaced with a Nighthawk EX7000 extender)
Mic Setup:
QLogic QLE2460 Fibre card (for experimenting with homelab)
16GB DDR4-3200 G.Skill Trident RGB
PERC H700 RAID Card
Phantom 48V Power Supply
Neewer NW-700 w/ Scissor Arm
Surround Sound: Logitech Z506 5.1 System
Cisco SG300-10 Managed Switch (with future SFP uplink)
MSI X370 SLI Plus AM4 Board
Obligatory cat tax. This is from earlier when he decided to sit and watch the fish instead of supervise me cleaning!
Yes this is used just for Discord :)
x2 Intel Xeon X5667 @ 3.06GHz
x1 WD 120GB HDD for ISO storage (soon to be replaced by x4 WD 500GB drives in RAID 10)
NVIDIA GTX 770 (2GB) SLI
TP-Link Archer 8e 802.11AC WiFi card
Amazon Echo Dot
Headphones: HyperX Cloud II
PDU: CyberPower CPS1215RM
Corsair K65 RGB + Corsair Scimitar RGB
Specs:
UPS: APC Back-Ups Pro 1500
Cable management certainly is not my forte! However, my battlestation doubles as a homelab so bundling all of these cables would be a nightmare!
Dell R610 Server
12GB DDR3 ECC RAM
Let's try this again, shall we? Last post got taken down for "self-deprecation."
A partially 3D printed Darth Vader head from work!
SoundBlaster Audigy FX sound card
SteelSeries Stratus XL
x1 WD 250GB SSD
AMD Ryzen 7 1700 (no OC)
QLogic QLE2460 Fibre Card
NW-3 Pop Filter
Ubiquiti EdgeRouter-X SFP
x2 Seagate 1TB HDDs
12 notes
·
View notes
Text
TP-Link T1700X-16TS Vs. T1700G-28TQ
Though 40G and 100G have been widely applied in big data center, 10G is still popular with small homelab. Many 10G switches on the market are designed to used with SFP transceiver module and 10G SFP+ transceiver module, while TP-Link has two 10G switches—T1700X-16TS And T1700G-28TQ, which are respectively characterized by 10GBASE-T RJ45 ports or 10/100/1000Mbps RJ45 Ports. This article will make a comparison between them.
Overview of TP-Link T1700X-16TS And T1700G-28TQ
As members of TP-Link’s T1700 Series 10G smart switches, TP-Link T1700X-16TS And T1700G-28TQ are designed to provide increased scalability, higher bandwidth, and enhanced performance. In addition, with physical stacking improving performance and simplifying management, both of them are able to provide reliable, cost-effective and resilient networking solutions for SMBs. As you can see, here are two figures. Figure 1. shows TP-Link T1700X-16TS and Figure 2. shows TP-Link T1700G-28TQ.
Figure 1. TP-Link T1700X-16TS
Figure 2. TP-Link T1700G-28TQ
TP-Link T1700X-16TS Vs. T1700G-28TQ
Similarities
Both of them support rich L2 features, including 802.1Q VLAN, Port Isolation, Port Mirroring, STP/RSTP/MSTP, Link Aggregation Groups, and 802.3x Flow Control function.
Both of them support supports L2+ feature static routing, which provides simple network segmentation by routing internal transmissions to make the flow of network traffic more efficient.
Both of them support IP-MAC-Port Binding, Port Security, Storm control, and DHCP Snooping, which help to protect the network from broadcast storms, ARP attacks, and more.
Both of them support 802.1X, which allows network clients to be authenticated through external Radius servers and the guest VLAN function allows non-802.1X clients to access specific network resources.
Both of them utilize rich QoS policies to support voice, data, and video services on one network.
Both of them support various user-friendly standard management features, such as intuitive web-based Graphical User Interface (GUI), industry-standard Command Line Interface (CLI), SNMP (v1/2/3), and RMON. Therefore, they are easy to use and manage.
Both of them support Dual Image to provide improved reliability and network uptime.
Differences
TP-Link T1700X-16TS is equipped with 12 x 10GBASE-T RJ45 ports and 4 x 10G SFP+ ports, providing 320 Gbps switching capacity. While TP-Link T1700G-28TQ is designed with 24 x 1GE ports and 4 x 10G SFP+ ports. As TP-Link T1700G-28TQ supports up to 6 units in a stack, it is able to provide 768 Gbps switching capacity.
TP-Link T1700X-16TS utilizes 10GBASE-T technology which provides a cost-effective method for migrating from current network to 10G Ethernet by using existing Cat5e/Cat6 short connections (up to 55 meters) and Cat6a/Cat7 connections (up to 100 meters). While with true physical stacking technology, up to six T1700G-28TQ units can be stacked with a single IP address, which provides enhanced scalability, simple management, and increased redundancy for high-density deployment.
TP-Link T1700X-16TS is a little larger than TP-Link T1700G-28TQ. The size of the former one is 440 x 220 x 44mm, while the latter one is 440 x 180 x 44mm.
TP-Link T1700X-16TS is designed with two smart fans. While TP-Link T1700G-28TQ utilizes a fanless design, which reduces the amount of ambient noise.
TP-Link T1700X-16TS can be used with 10GBASE-T copper SFP+ transceiver, 10G SFP+ transceiver and DAC cable. While TP-Link T1700G-28TQ can be used with Ethernet cable, 100/1000BASE-T SFP transceiver, 10G SFP+ transceiver and DAC cable.
TP-Link T1700X-16TS is more expensive than TP-Link T1700G-28TQ. You can find TP-Link T1700X-16TS at $ 950 US dollars and TP-Link T1700G-28TQ at $ 308 US dollars on Amazon.
Conclusion
From the above comparison, we can find that both TP-Link T1700X-16TS and TP-Link T1700G-28TQ have their own advantages. Before you make a decision, you’d better figure our what you most care about. If you want to use 10GBASE-T copper SFP+ transceiver, you can choose TP-Link T1700X-16TS. But if you want lower budget, then buy TP-Link T1700G-28TQ.
Originally published at: http://www.fiber-optical-networking.com/tp-link-t1700x-16ts-vs-t1700g-28tq.html
0 notes
Last Seen Blogs

verydinosaurdragon
Untitled

darksideoathkeeper
Darkside Oathkeeper

carlswg
...

headless-bastard
Untitled

helianthus03-blog
helianthus