#Thunderbolt display for mac pro
Text
CEXUAL MISHAPS
I rarely buy new. One's junk is my treasure, or so I thought -- sometimes junk is junk -- and my latest adventure taught me many lessons in upCEXing. Let me share the wisdom I inadvertently acquired dealing with CEX and old technology for the modern times.
This is a guide for whoever is looking to buy a used Mac and get the best value for a limited budget. Having done a lot of research during this bumpy adventure, this “essay” will answer the following existential questions:
• Can a Mac Pro shaped like a trashcan do the job today?
• Why dust off an old FireWire iSight camera and how?
• Is third party SSD blade worth the trouble?
• Which budget display comes close to Apple’s retina experience?
• Why choose an Intel Mac over a new M1 or M2 “affordable” and more powerful Mac Mini?
• Is CEX’s 24-month warranty risk-free?
My iMac 5K (late 2014) is dying. It's had three open heart surgeries (logic board replacements) within the first three years of its extended warranty. A few months after the warranty ended, I had to replace the power supply for a third party part which actually fixed several USB/Bluetooth/audio streaming dropout issues I had had from the start, issues that Apple’s geniuses attributed to software. A genius by script is a fool. Now, the iMac's wonderful screen's usable space is shrinking by the month, a beige fog thickening from the edges in, creating a widening trench where ghosts appear and fade away very, very slowly. The screen defects coupled with hardware errors that point to a bad core prompted me to look for a replacement machine. It had to be Intel. Apple's new M1 and M2 computers offer great power but no upgradeable route for the future, and many of my favourite software plugins are Intel only.
Initially I looked for a used Intel Mac Mini, which has just been discontinued by Apple with the introduction of their new M2 Mini. It had to be an i7. Sadly they go for a great lump of dough and they are highly desirable, therefore hard to find -- I love recycling, but hate the chase... During my search, I stumbled across the "trashcan" Mac Pro. To my surprise, people can’t seem to shift them on the second-hand market -- not desirable, therefore cheap and easy to find -- my kind of bargain.
I always wanted a "trashcan" Mac Pro. I once had the Power Mac G4 Cube, and find the late 2013 Pro (not so affectionally dubbed ‘trashcan’) a direct successor to my beloved Cube. It’s more than nostalgia, I assure you.
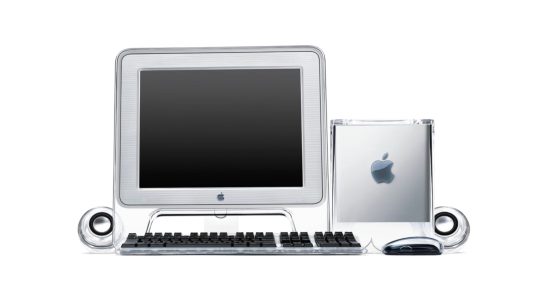
Power Mac G4 Cube 2000 - 2001
I chose CEX for their 24 month peace-of-mind warranty, and set the sat-nav for the closest Trashcan Pro available. The unit was pristine! I drove back home drooling, almost foaming at the mouth, I even resisted stopping for a toilet break -- I was the owner of the legendary "trashcan" Mac Pro! YES! The same one that went for £5K when new! I paid for it all in trade! BARGAIN!
Except it wasn't a bargain at all.
You saw that coming, of course; why would I write about happy times? The Trashcan Pro was trash. This would be the start of ongoing trials and tribulations which I hope to be done with by the time I finish writing this.

Mac Pro (Late 2013) 2013 - 2019
At first glance, the Mac Pro (late 2013) may appear like a step back from my iMac 5K (late 2014) but it actually supports a newer OS (Monterey vs the iMac's Big Sur). The Mac Pro is also still officially supported by Apple whilst the iMac became obsoletea few years back. Also, the Mac Pro's guts, including the CPU, can be upgraded up to a 12 core CPU, 128 GB RAM vs my iMac which is already maxed out with a consumer grade CPU (i7 4core), 32 GB RAM, 4 GB VRAM. It seemed like the right upgrade in theory, but I would not find out with a defective unit.
CEX has a 14-day return policy and a 24-month peace-of-mind warranty, YIPPEE!
I chose a different model located further away (London) and opted for delivery. Eventually, after an agonising week trying to rouse CEX out of their stupor (the item remained at 'stock-picking-in-progress' for five days), I received a unit that had surely gone through hell and back: scratches, discolouration, sticky spillage, dust, dust, dust, and I'm not talking fine dust; I pulled dust-bunnies from the grills the width of my pinky toe.
CEX has a 14-day return policy and a 24-month peace-of-mind warranty, so I gave it a chance.
Lesson starts here, my friends…
• SSD, or how to upgrade an old MAC’s storage.
Sadly, the Mac Pro came with a third party 512 GB SSD fitted with an adapter.

Adapters - buy cheap buy thrice!
Between 2012 and 2019, Apple used two types of connector for their SSD blades, both proprietary. In order to use a third party blade, one would need an adapter. The part is widely available and cheap. Thankfully? No. Apple rarely does things willy nilly. In order to work nice with the Mac, the SSD itself needs to comply to the Mac's and its OS' requirements, ECC being the start of many geeky terms I won't bore you with. So you think you can use any SSD with the said adapter? No. No you cannot. It might work for a little while, but you'll soon encounter issues with basic functionality. You'll see the blank folder-of-doom with the question mark. You'll have to zap the PRAM in order to force it to detect the SSD, which can only be done with a wired keyboard, I should add (I love "vintage", but I'm not a fan of wires). Latest Mac OS update that necessitates a restart will struggle to complete and leave you sitting at a blank screen hoping that another PRAM ZAP will do the trick. Beyond that, every time you turn the Mac off, the adapter will cause a kernel panic and have the Mac instantly reboot instead, punishing you for modding it with a cheap hack.

☒ 2012 - mid 2013 7-17 pin SSD APPLE connector

☑︎ Mid 2013 - 2019 12-16 pin SSD APPLE connector
Cometh OWC, the Mac friendly people who offer a solution at a premium price, of course. Their Aura Pro X2 blades offer speeds the Mac's old architecture can realise, but at 4x the price of SSD blades on the market, I decided to look secondhand. Remember CEX and their peace-of-mind warranty?
CEX happened to have a 1 TB OWC at a bargain price — oh goody! Several days later, the order got cancelled. Apparently they couldn't dispatch the item without further explanation and the item returned online for the taking. I tried again. I'm still waiting. I expect the same outcome, but I have decided to play along and see where that leads me.
In the meantime, I discovered that Apple used three manufacturers for their SSD blades: Samsung, Toshiba and Sandisk. They used two different connectors: 7-17 pin between 2012 and up to mid 2013, and 12-16 pin from mid 2013 up to 2019. Technically, it's possible to source out an OEM Apple part! Good news! CEX, 14 day, 24 month. Can’t go wrong… Unless the item remains in stock picking limbo and ends in cancellation. The OEM Samsung did not return in-stock, however, and I’m still waiting on the OWC...
Cometh eBay. £45 shipping included, Apple OEM made by Samsung, 512 GB, apparently in good condition. I should get it in 48 hours. More on the SSD saga later.
• DISPLAY for MAC peeps.
Coming from a 5K retina display at 218 PPI which looks like ink on paper -- no apparent pixelation -- I could not go for the common sub 100 PPI display. High pixel density monitors are not easy to find, mainly because the PC market caters to gamers (fast refresh rate performance over quality). You'll find plenty of 4K screens at 120 Hz, but what about PPI?
Well...
Research lead me to a 2016 LG 24inch 4K display which offers 185PPI and a displayport. LG has since updated the model, rebranding it under their ultrafine line which only adds 1 pixel “advantage” over the old one (186PPI)... But with the latter using USB-C connectivity, and being twice as expensive, the old model it is! CEX, 14-day, 24-month warranty… But there’s a snag… They don't ship displays. Collect only.
The nearest one of the three available was in Bradford, seventy miles from my door. I love an adventure — DAY TRIP! Bradford is a massive crater illuminated to the brim with rows and rows of fairylights, like standing at the heart of a gigantic beehive breeding glowing larvas. I enjoyed the sight. The CEX employees were lovely. I discovered Dunkin' Donuts had infiltrated the UK too! Bonus! I got a £10 box of 6 (3 maple, 3 Boston creams) possibly for the first and last time, at least on this side of the pond. Dunkin’ Donuts isn’t worth nearly £2 a piece. But I felt the rush of the adventure, and the fruition of a successful bargain hunt raised my spirit.
CEX was too busy to let me test the display. 14 day. 24 month. Can return it to any store. High spirits. Sugar rush. I chose the countryside roads. Sundown. Narrow lanes. No street light. Peaks, twists, the thickest fog I have ever encountered. An omen.

Home, safe, the display turned out to be complete garbage: rows of dead pixels; wide long “burn marks” or "smears" with a bubble on the physical surface of the screen. I began to ask myself what is a 14-day / 24-month warranty worth if everything I buy from CEX is unusable?! I promptly returned the display at my local CEX. Despite it all, spellbound by their 14-day / 24-month warranty, I gave them another chance. What are the odds that a second display turned out as bad as the first? Sheffield? Crystal Peaks? Haven’t been in a while, why not… I waited for the online confirmation the next day, but got a cancellation notice instead. Apparently, the display can’t be located.
(…)
Cometh eBay. Pristine condition. No warranty, but fuss-free. Lovely seller. Unit like new. Why was he selling such a wonderful display? Because he is using Windows, and Windows can’t scale a high pixel density display like the Mac does. My gain. Cheaper than CEX’s. Jackpot!
One last piece of the puzzle missing, though…
• SSD saga continued…
After a week, the 1 TB OWC gets cancelled at CEX on the day I received the 512 GB Apple OEM from eBay. I could finally test my new Trashcan Pro properly.
Let’s gather up the gear I’m playing with first.

My "new" kit
• Mac Pro (Late 2013) 3.5 GHz 6-Core Intel Xeon E5 with dual AMD FirePro D500 3 GB
£380 from CEX
I added 2x 16 GB 1866 MHz DDR3, leaving 2 empty slots for later IF the Mac Pro is a good egg. The good egg gets more ram. The bad egg goes back to CEX and I rethink the whole thing.
I switched the problematic third party SSD with an Apple OEM (Samsung) 512 GB SSD, bypassing the need for an unsupported adapter.
• LG 24inch 4K UHD IPS LED 24UD58-B DISPLAY
£130 on eBay
As close to Apple’s retina display as a budget monitor can get. I’m very pleased with this purchase. I work with it at a 3008 x 1692 scale. My eyes can’t focus at a close enough distance from the screen to notice any discernible pixelation. At 185 PPI versus the iMac’s 218 PPI, the window round edges aren’t as smooth, but by a narrow margin. You’d need to be as hopelessly finicky as me to notice.
• Accessories
Magic keyboard + trackpad (space grey), Apple HI-FI (more on that), ORICO SSD 10 Gbps enclosure + various USB3 external HDDs, Apple iSight camera (more on that).
First, I dressed the Apple OEM SSD with a layer of thermal tape then formatted it in online recovery mode (command + option + R on restart), and installed Monterey from scratch. Since, the Mac Pro has behaved like a Mac should.
LESSON #1: don’t use third party SSD with adapter.
I should add that I tested 3 different adapters — all resulted with a less than desirable outcome. Unless you prevent your Mac to ever go to sleep and never, EVER restart it — I can’t recommend a third party solution.
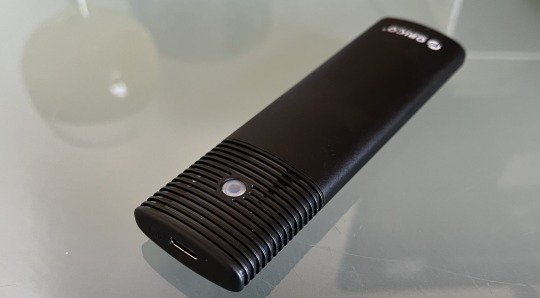
Orico 10 Gbps SSD enclosure
Since I had bought a WD 1 TB “green” SSD to test the setup with, I opted for an ORICO SSD enclosure for fast external storage, which brings us to the Mac Pro’s older connections problem.
However tempting it is to get a Thunderbolt 2 enclosure, HDD, RAID, etc… DON’T! I already had a G-TECH raid for my iMac 5K, and the external SSD enclosure proved faster despite being limited by the Mac Pro’s USB3 speed (5 Gbps versus Thunderbolt 2’s 20 Gbps) which comes down to the mechanical HDD’s limitation versus the SSD’s. And yes, the SSD on USB3 outperformed the 7200RPM RAID 0 speed on both small and large files using Blackmagic’s speed test software.
LESSON #2: don’t waste your time and money searching for a Thunderbolt 2 solution.
Many RAID enclosures or external HDDs with Thunderbolt 2 are now too old to be trusted, and unless the unit is designed for the Mac, their software won’t be supported with the latest Mac OS. My G-Tech works with the Mac’s own disk utility tool, but others don’t and will be formatted for Windows.

Apple Hi-FI still rockin'
Speakers… I have 2 HomePod Minis that I wrestled with for a while. I used them -- or tried to use them -- as a stereo pair. Ideally I wanted to reproduce the look of the old Powermac G4 Cube with its gorgeous spherical speakers (see G4 Cube picture at the very top). But the HomePod Minis never worked as expected with the iMac 5K nor with the Mac Pro. I suspect it comes down to the older bluetooth 4 as the HomePod Minis play well with my Macbook Air M1 (bluetooth 5). Never mind, my Apple HI-FI still works and the Mac Pro has and optical sound output. The HI-FI is a fabulous boombox. They are hard to find and fetch a fortune, but I’m lucky to have gotten one back then. Apple’s HI-FI truly sounds amazing.
LESSON #3: old gear is fun

Apple iSight Camera 2003 - 2006
Speaking of legacy products… I love Apple’s old iSight camera. With the iMac 5K sporting a superior and integrated cam, I benched the FireWire iSight Camera and never thought I’d use it again… Except, the Mac Pro doesn’t come with a webcam, and it’s enough that I have to stare at LG’s generic plastic design all day that I thought of resurrecting the old iSight for a bit of Apple chic.
But it has FireWire 400, I hear you say dismissively?
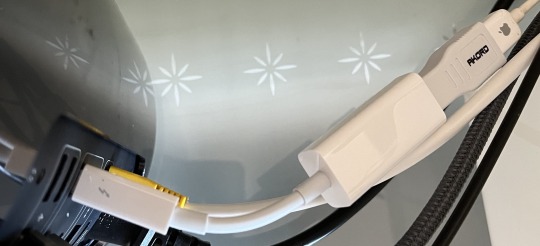
Thunderbolt to FireWire 800 + FW800 - FW400 adapters
I found Apple’s Thunderbolt to FireWire adapter on Amazon for a reasonable price, £2 more than the cheapest one on eBay or CEX. With a £3 FW800 to FW400 adapter, my iSight camera is standing proud above all this “new” kit and working fine. Nostalgia? No! Not “entirely”! I call it recycling. Good for the environment, and I look better in standard definition too!
• SO IS IT WORTH ALL THE FUSS?!!!
Or is it Mac-fanatic indulgence? The Mac Pro actually outperforms the iMac 5k on many things, and I got quite lucky. As it turns out, the first Mac Pro I returned was manufactured in February 2014, not long after the model was first introduced. The second one, which is running smoooooothly so far, was manufactured in October 2018, not long before the model was discontinued. How can you find out when your secondhand Mac was manufactured? Here’s the link for you.
PROS
• Runs Monterey like a top
• Faster with multi-thread computation (particularly with video encoding) than many newer Macs
• Standalone unit — if it goes bust, I still have a working screen — if the screen dies, I still have the Mac Pro
• Upgradable to impressive specs - CPU - RAM
• Can boot with Windows unlike the M1/M2 Macs
• Compatibility with existing software
• Still handles latest pro apps without a sweat
CONS
• Very slightly slower on every day single-thread tasks such as surfing and mail (more cores = lower GHz)
• Output: Thunderbolt 2 (legacy mini displayport connection), USB 3 (5 Gbps), HDMI 1.4 (30Hz @ 4K), bluetooth 4
• Expensive eGPU expansion only
Right, enough geeking about for a while. I do hope this has helped some of you.
1 note
·
View note
Text
2023 WWDC Keynote Recap
This year's keynote is expected to cover a few things.
New software updates to be released this fall
New Macs (specifically looking at a bigger MacBook Air and an updated Mac Studio)
Apple's Virtual Reality headset (Rumored to be named Reality Pro, powered by realityOS).
With that being said, let's get started!
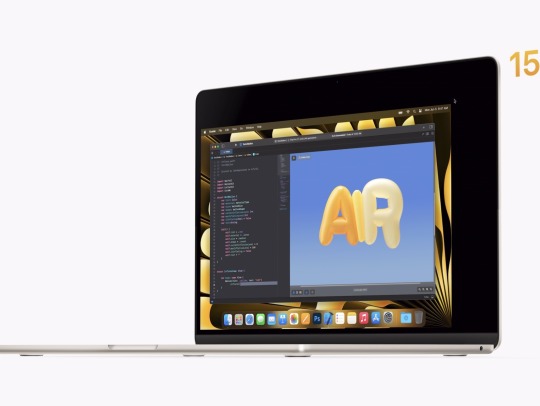
15” Macbook Air
11.5 mm thing; just over three pounds
Magsafe charging and two thunderbolt ports
Available in Midnight, Starlight, Silver and Space Gray
15.3” screen to be exact
18 hours of battery life
Six speakers
TLDR: we made the 13” Macbook Air bigger
Starting at $1299
Available to order today; ships next week
M2 13” Macbook Air dropping by $100 to $1099
M2 Mac Studio
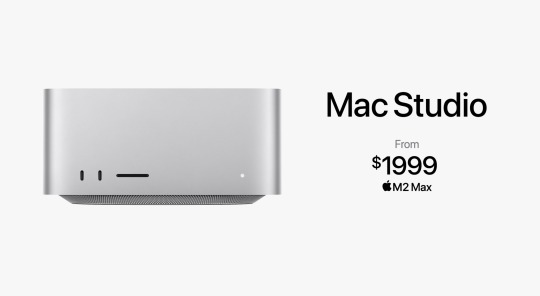
Updating to the M2 Max
Also announcing the M2 Ultra chip, double the performance of the Max
It’s literally two M2 Max chips put together
This thing is stupid powerful and none of you reading this will ever need this power
Faster HDMI ports
MAC PRO
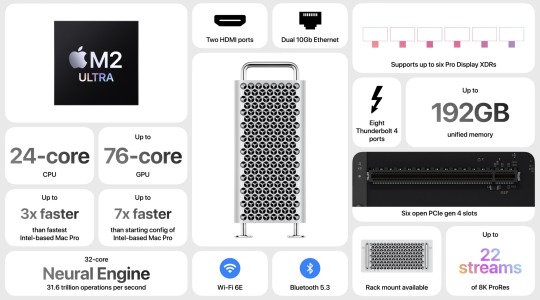
Was not expecting this omg
First Apple Silicon computer to have PCI expansion
All come with M2 Ultra
Afterburner card built directly into the Mac Pro
This is going to be so expensive.
8 Thunderbolt Port
iOS 17
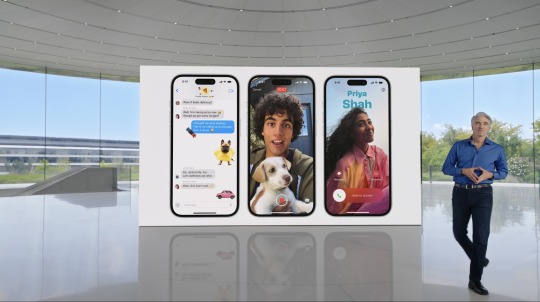
Phone, Facetime & Messages
Personalized contact posters for the phone app so you display how you want to on other people’s devices
Live Voicemail - you can see live transcriptions of Voicemails as people make them
FaceTime now has a “voicemail” function for when someone isn’t available
Messages is receiving stronger search functions
Group chats will jump to the first message you haven’t seen
Swipe on a bubble to reply directly to that message
Check In - let’s your friend know when you get home or let them know if you were delayed or something went awry
All end to end encrypted and on the device
iMessage apps are hidden behind button now to declutter the app
Stickers are being updated as well to be more powerful
Spending way too much time on stickers…
AirDrop
NameDrop - bring phones close together and you can choose to send someone selected contact details
This is basically that old Drop app people had ten years ago
For large files, you don’t have to stay right next to the person anymore
Autocorrect
Autocorrect now becoming stronger using AI (they wouldn’t use that word though)
Keyboard will do better at learning words (no longer changing your swear words to “duck”)
Dictation getting stronger as well with “not AI”
Journal

New App
Phone intelligently uses data from your phone to create details journal entries
Only uses the information you give it access to
Set reminders for when to make your journal entries
On device processing, end to end encrypted
Standby

When phone is on its side and charging, it will basically transform into a smart display
Shows clock, weather, alarm, calendar, etc.
Even remembers preferred view for where you are when you charge
Basically requires a MagSafe charger but i'd be curious if it would work while plugged in and sitting on its side
The Others

You no longer need to say “Hey” to activate Siri
May lead to a lot more accidental activations if not done correctly by Apple
Photos now creates albums of your pets!!
Offline Maps rolling out as well
iPadOS 17
Widgets & Lock Screen
Widgets are now interactive instead of just displaying info
Lock Screen
iPads getting the same lock screen features as last year’s iPhones finally
Up to 6 widgets on your lock screen
Live Activity features coming to the lock screen (like timers or order tracking)
The Others
Health app now coming to iPad and has been optimized for the larger screen
“The best device for PDFs” lol
Now easier to fill out PDF forms directly in apps like Mail and Notes and not having to switch to other apps
Multiple PDFs can be saved in the same note now, as well as collaborate on PDFs in a note
Better Stage Manager controls
External display support for FaceTime & conference calls
macOS Sonoma
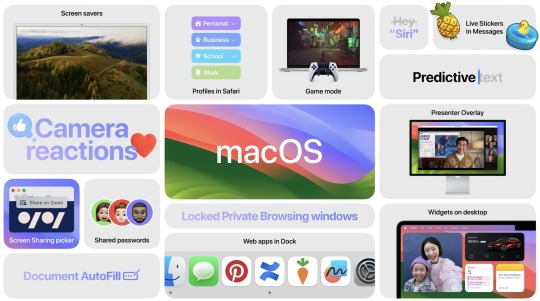
Screensavers & Widgets
Macs receiving the same type of screensavers that the Apple TV has
Widgets can be added to the desktop instead of hiding in notification center
Intelligently faded into the background or tint so they aren’t distracting when opening up apps
You can access iPhone widgets on Mac as long as iPhone is on the same Wi-Fi
All of this is just making me want a touchscreen Mac more
Gaming

On a Mac? lol
Introducing “Game Mode”
Optimizes CPU & GPU performance to make sure gaming is the priority
Lowers audio latency on AirPods
Game Porting Toolkit to make it easier for developers to bring games to the Mac
Video Conferencing

New ways to layer your conference calls with content you are sharing
New effects in calls just like iMessage
Looks cool but will take support from conferencing apps if I’m understanding correctly
Safari & Web Apps
Private browsing locks your private windows when you aren’t using them
Profiles feature let’s you customize your browser to what you’re doing, such as work or school or home
You can now turn websites into web apps, treating it as its own app instead of a tab in the browser
Third party apps allowed you to do this before but its nice that its integrated now
Audio & Home
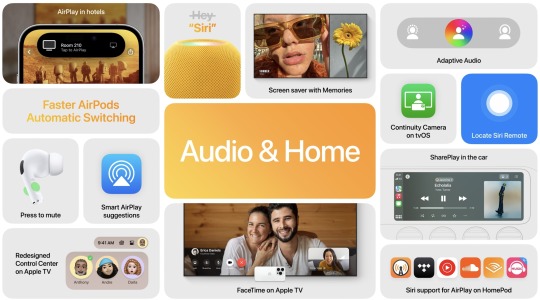
AirPods
Adaptive Audio - combines Noise Cancelling & Transparency modes
Lets you choose the level that’s appropriate for your current environment
AirPods sense when you start speaking and lower your music appropriately
Some really useful features... now if only the AirPods Pro would stay in my ears
AirPlay
Can use Siri on HomePod to start playing certain devices on your phone like SoundCloud
AirPlay in Hotels
Uses QR code to quickly connect your phone to your hotel’s TV
SharePlay in Carplay
tvOS
iPhone can locate the remote finally!
FaceTime on Apple TV
Wirelessly connects to iPhone to use the camera, and displays the caller on the TV for everyone to see
Also enables you to watch shows on your TV and stay on a call with friends to watch together
Zoom & Webex coming to the TV later this year
watchOS 10
It’s already been 10 years?!?!?!
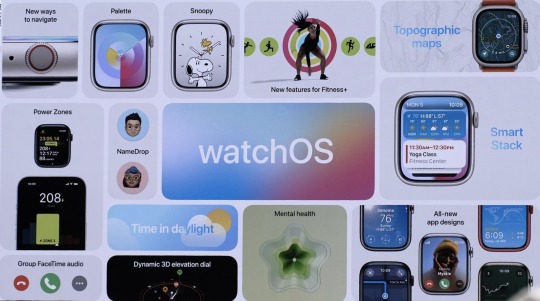
Widgets
Widgets now hidden right below the watch face so you can scroll to see more useful information quickly
Many apps updated to take better advantage of display and be more glanceable
Fitness
New Cycling features for the Watch
Shows power zones, show up on iPhone as live activity, connect to Bluetooth sensors in bikes
Will keep track of last place you had cellular connection
Last place you had service for SOS calls as well
More trails and trailheads added to Maps
You can see topographic map data now as well to see elevation on trails
Health
Watch now lets you to reflect on your mood & emotions throughout the day (also available on Phone)
Health app will correlate moods with activity and lifestyle changes
Vision Health
Focusing on Myopia
Apple Watch will sense amount of time in daylight for children to reduce risk of myopia
Screen Distance feature lets you know if your device is too close and will cause eyestrain
All health data is encrypted and not stored in the cloud
ONE MORE THING
Apple Vision Pro

Y’all just have to watch the video for this. If Apple delivers on what they’re showing then its a big moment.
youtube
•Uses hand & eye tracking to control the device. No controllers.
•Apps can react to the world around you
•Look at search fields and you can just start talking to fill it out
•Also the front of the device shows your eyes… its… weird…
•Calling it “Eyesight”
•Supposed to make it easier for people to see where you’re paying attention

•Again, this is such a weird new dynamic that its hard to describe here without seeing the visuals
•Works as a 3D Camera
•Turn any space into a 3D IMAX theater
OH BOB IGER IS HERE

• Ok actually watch this Disney demo. Wild stuff. But also consider of it half of it is probably fake.
•New R1 chip in addition to the M2 chip for the device.
•runs “virtually silent” so it makes some noise lol
•Device makes a 3D avatar of you for FaceTime calls. Like a lifelike avatar. Very different from how Meta does their calls
•New images streamed to the displays in 12 milliseconds

•visionOS is the name of the operating system here. The assumed name was realityOS.
•Lots of developers, including Adobe & Microsoft, building support for launch
•New app store for the device as well
•Unlocks via Optic ID, which uses your Iris and stores information encrypted on the device
•Device does not share data with developers about where you look on the screen
•Over 5000 patents went into this thing

•$3499
•Available early next year
•that’s both more expensive and later than what as expected
And that's a wrap. Some real interesting stuff shown today. Public Betas of the software updates should be available in about a month. And if you're looking for the new iPhones or watches, you're about three months too early. Check back in September for more on that!
You can view the whole keynote from today below or a quick video recap from Apple as well.
Recap: https://youtu.be/6_pru8U2RmM
Full Keynote: https://www.youtube.com/live/GYkq9Rgoj8E?feature=share
2 notes
·
View notes
Text
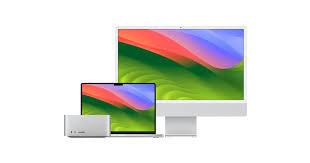
Apple bringt Mac mini und MacBook Pro mit M2 Prozessoren

Apple hat gestern nicht nur seine neuen M2 Pro und M2 Max Prozessoren vorgestellt, die die M1 Pro und M1 Max Prozessoren ablösen, sondern auch zwei neue MacBook Pro Modelle, in denen die neuen Prozessoren erstmals eingesetzt werden. Aber nicht nur das MacBook Pro, sondern auch der Mac mini wurde überarbeitet.
Apples kleinster Desktop-Mac ist jetzt sowohl mit M2 Prozessoren als auch mit den noch leistungsstärkeren M2 Pro Prozessoren erhältlich und mit WLAN 6E und Bluetooth 5.3 ausgestattet. Während das Modell mit M2-Prozessor über zwei Thunderbolt 4 Anschlüsse verfügt und den Anschluss von bis zu zwei Displays unterstützt, bietet das Modell mit M2 Pro-Chip Platz für bis zu drei Monitore und vier Thunderbolt 4 Anschlüsse.
Der neue Mac mini kann ab sofort vorbestellt werden. Die Auslieferung ist für den 24. Januar geplant. Der Mac mini mit M2 Prozessor ist ab 699 Euro erhältlich. Die Version mit M2 Pro Prozessor kostet mindestens 1549 Euro.
Insgesamt bietet Apple drei verschiedene Produktvarianten an, die sich nicht nur in der Art des verbauten Prozessors unterscheiden, sondern auch in der Größe des eingebauten SSD-Speichers.
Zeitgleich mit der Bekanntgabe der Verfügbarkeit des neuen Mac mini und der beiden neuen MacBook Pro Modelle wurde von Apple ein 19-minütiges YouTube-Video veröffentlicht, das die neuen Prozessoren und die neuen Rechner in Apple-typischer Manier vorstellt. Der Clip widmet sich sowohl dem Mac mini als auch dem MacBook Pro und geht auf die Leistungsunterschiede zwischen den drei nun verfügbaren Varianten des M2 Prozessors ein: M2, M2 Pro und M2 Max.
https://www.youtube.com/watch?v=6Ij9PiehENA
Read the full article
2 notes
·
View notes
Text
Best USB-C and Thunderbolt displays for Mac [July]
USB-C/Thunderbolt display options have really expanded over the last few years. While Apple’s Pro Display XDR isn’t the best fit for most Mac users at $5,000+, it also offers the more affordable Studio Display. But there are also lots of solid choices from LG, Samsung, BenQ, and more. Here are the best USB-C/Thunderbolt displays with many available in the $400-$1,600 range.
Update 7/16/24: For…
0 notes
Text
How to Connect A Monitor to A MacBook Pro

How to connect monitor to macbook pro
Guide to How to Connect A Monitor to A MacBook Pro: If your home office is designed around a Mac, or if you use a MacBook pro for business and frequently need to connect your display to it, you should ideally want the extra screen space that an external monitor provides.
It would seem difficult to connect ANY external display that is, one that isn’t Apple to an Apple device, but happily, “it just works”. As usual, connecting a non-Apple monitor to a Mac is really simple. Not a hack, not a workaround.
What is required in order to connect a Mac to an external monitor?
In addition to specifics about your Mac, you’ll need a few other items before you can start your setup. Here, we’re utilising a MacBook Air.
A USB Type-C cable that is compatible with USB 3.2 Gen 2 (if the specification is unclear, use a Thunderbolt 3 or higher cable)
A free Mac USB Type-C port
A USB Type-C PD port on an MSI monitor
In addition, if you already own a Dock or are using an earlier Mac, you can use HDMI to connect to an external monitor. But in this tutorial, we’ll be connecting using USB Type-C and main goal is to reduce the mess on your desk.
With just one wire, as laptops such as the MacBook Air may be charged and have an output displayed on an external monitor!
Faster charging for Type-C powered devices, such as a MacBook Air, is made possible by monitors with USB Type-C ports that support USB Power Delivery (USB PD) above 65W. On a suitable display, you might need to manually enable it through the OSD menu.
How to connect a monitor to a macbook pro
Let’s get started now that you have everything you need to connect your Mac to an external display!
Using the USB Type-C ports on both devices, connect your Mac and monitor with a Thunderbolt 3 or higher cable (a good quality USB 3.2 Gen 2 and above will work as well).
Next, click the icon in the upper-right corner of your MacOS control centre (accessible only on MacOS 11 Big Sur and newer). It should now be visible to you. In your Control Centre, select Screen Mirroring by clicking. When the settings window appears, the Displays option ought to be chosen. Additionally, you can go straight to System Settings and choose “Displays.”
This is where you can see the linked display. When your built-in MacBook display is chosen, open the drop-down menu and select “Extended display” if you wish to use the bigger external monitor as your primary display. For the same effect, you can alternatively choose the external display and designate it as the “Main Display.”
Choose your external display at this point. That’s the MSI MD271UL Business and Productivity Monitor in macbook instance.
For the optimal visual experience, select the appropriate colour profile on your external monitor to apply the manufacturer’s optimised colour settings to your display. The Colour profile of the MSI monitor is visible in macbook drop-down menu, as you can see. Of course, you might want to choose a different colour profile if you’re working on professional, color-sensitive projects!
You may adjust picture settings even more by utilising the Colour Temperature, Brightness, Contrast, and other settings found in the OSD menu on an MSI monitor.
After you select it, your Mac can now connect to an external MSI monitor.
You may adjust your display layout to perfectly match your workplace by using the “Arrange” option, so feel free to experiment until you find the perfect arrangement!
Remember that the USB Type-C cable’s quality counts. You will therefore occasionally get strange results if you use one that supports a lesser standard. For instance, one cable might only be able to charge your MacBook, and another might only be able to connect your monitor to a display signal.
To resolve troubles with connecting an MSI external monitor to your Mac or achieving simultaneous charging and display, it is most likely necessary to replace your current cable with a high-quality Thunderbolt 3 or higher one.
The fast-paced digital environment of today is enhanced by workstation extensions. You may create a more roomy and comfortable workstation by connecting your MacBook to a display. To get the best performance and image quality out of your MacBook, this article explains how to connect it to an external monitor simply.
Selecting the Appropriate Monitor
Choosing the right display is essential for the best possible experience. Take into account the following elements:
Dimensions and Resolution
4K monitors
Provide amazing clarity, ideal for work involving design and video editing.
1080p monitors
Ideal for general tasks like document editing and browsing.
Size
Because it strikes a good mix between size and desk space, a 27-inch monitor is a popular option.
Options for Connectivity
HDMI
Widely used and adaptable, works with the majority of monitors.
USB-C/Thunderbolt 3
With its fast data transfer and power delivery capabilities, USB-C/Thunderbolt 3 is a great option for modern MacBook pro models.
DisplayPort
High resolution and frame rates are offered via DisplayPort, which is why high-end graphics work and gaming are desired.
Essential Tools
Make sure you have these before hooking up your MacBook to a monitor:
Monitor
Fits your MacBook well.
Cables
The right cables for the connection (DisplayPort, USB-C, or HDMI).
Adapters
You could require adapters like USB-C to HDMI or Thunderbolt to DisplayPort if your MacBook is missing any ports.
A Comprehensive Guide for Linking a MacBook to a Display
Determine Your MacBook’s Ports
Check your MacBook to see which ports are available. Older MacBook models might have HDMI or Mini DisplayPort ports, although most modern MacBooks have USB-C/Thunderbolt 3 ports.
Attach the cord to your viewing device
Place the cable’s one end into the proper port on your monitor. Make sure your connection is secure to avoid display problems.
Attach the cord to the MacBook
Connect the cable’s other end to your MacBook. If required, match the port type with an adaptor.
Turn on the MacBook and monitor
As soon as your monitor turns on, make sure it is connected to the appropriate input source (USB-C, HDMI, etc.). Turn on your MacBook and watch how the screen stretches or rotates.
Modify the Display Configuration
On your MacBook, go to System Preferences > Displays. This is where you change the monitors’ resolution, orientation, and configuration. Drag the white menu bar to select the primary monitor if you have two monitors.
Enhancing Visual Display
Resolution Parameters
Comply with the native resolution of your display for optimal visual experience. Select Scaled under System Preferences > Displays, then select the maximum resolution that is offered.
Adjusting Colours
Monitor calibration ensures accurate colour representation. Select Calibrate under System Preferences > Displays > Colour. To get the best colour fidelity, adhere to the on-screen directions.
Rate of Refresh
Smoother graphics can be achieved with a greater refresh rate, particularly in video editing and gaming. Examine the specs of your display and change the refresh rate in System Preferences > Displays.
Read more on Govindhtech.com
#news#technews#technology#macbook#macbookair#macbookpro#monitor#macbooktomonitor#govindhtech#technologytrends
0 notes
Text
Unveiling the Most Powerful Mac: A Guide to High-Performance Computing
If you're in search of the most powerful Mac available, you've come to the right place. Apple's Mac lineup boasts impressive computing capabilities, catering to professionals and enthusiasts who demand exceptional performance for intensive tasks like video editing, 3D rendering, software development, and more. In this guide, we'll explore the pinnacle of Mac performance and highlight the most powerful Mac models currently offered by Apple.
Understanding Mac Performance
Before delving into specific models, it's important to understand the key components that contribute to Mac performance:
Processor (CPU): The heart of any computer, the processor determines how fast tasks can be executed. Apple's custom-designed M1, M1 Pro, and M1 Max chips offer groundbreaking performance with industry-leading efficiency.
Graphics (GPU): For graphics-intensive tasks like rendering and gaming, a powerful graphics processing unit (GPU) is essential. Macs equipped with dedicated GPUs deliver superior graphics performance.
Memory (RAM): Adequate RAM ensures smooth multitasking and efficient handling of large datasets. Higher RAM capacities are crucial for professionals working with demanding applications.
Storage (SSD): Solid-state drives (SSDs) offer faster read/write speeds and improved overall system responsiveness. Large SSD capacities are beneficial for storing and accessing large media files.
The Most Powerful Mac Models
Now, let's explore the Mac models that stand out as the epitome of performance and power:
Mac Pro (Late 2019):
Ultimate Performance: The Mac Pro is Apple's flagship desktop workstation designed for professional users with demanding workflows.
Modular Design: The Mac Pro features a highly modular design, allowing users to customize and expand the system with powerful hardware configurations.
Processor Options: Offers up to a 28-core Intel Xeon processor for unparalleled processing power.
Graphics: Equipped with AMD Radeon Pro Vega II Duo graphics for exceptional GPU performance.
Memory and Storage: Supports up to 1.5TB of RAM and multiple SSD modules for high-speed storage.
Mac Studio (2022):
Professional-Grade Performance: The Mac Studio is a powerful desktop workstation featuring Apple's custom M1 Max or M1 Ultra chip.
Compact Design: Despite its compact size, the Mac Studio delivers impressive performance comparable to the Mac Pro.
M1 Max/M1 Ultra Chip: Offers industry-leading CPU and GPU performance, making it ideal for creative professionals and power users.
Memory and Storage: Configurable with up to 128GB of unified memory and up to 8TB of SSD storage.
Connectivity: Features Thunderbolt 4 ports for high-speed data transfer and connectivity with external displays and peripherals.
Choosing the Right Powerful Mac
When deciding which powerful Mac is right for you, consider the following factors:
Workload: Determine the specific tasks and applications you'll be using the Mac for. For heavy-duty tasks like 3D rendering, video editing, and scientific simulations, the Mac Pro or Mac Studio is ideal.
Budget: High-performance Macs like the Mac Pro and Mac Studio come with premium price tags. Evaluate your budget and prioritize features based on your needs.
Future-Proofing: Invest in a Mac that can grow with your needs over time. Consider upgrading options for memory, storage, and peripherals.
Portability: If mobility is important, consider a powerful MacBook Pro with M1 Pro or M1 Max chip. While not as powerful as desktop workstations, MacBook Pros offer impressive performance in a portable form factor.
Final Thoughts
In conclusion, the most powerful Mac models, such as the Mac Pro and Mac Studio, represent the pinnacle of Apple's computing technology, delivering unmatched performance for professional users and enthusiasts. When choosing a powerful Mac, prioritize your specific workflow requirements, budget considerations, and future expansion possibilities.
Whether you opt for a desktop powerhouse like the Mac Pro or a compact yet powerful workstation like the Mac Studio, investing in the right Mac will elevate your productivity and creativity to new heights. Explore Apple's website or visit authorized retailers to learn more about the specifications and configurations available for these high-performance Mac models.
0 notes
Text
Apple M1 Ultra: All You Need To Know About This Powerful Chip
Apple has once again pushed the boundaries of innovation with its latest chip offering, the M1 Ultra. Announced in [insert date], this new silicon represents the pinnacle of Apple's in-house chip design prowess, promising unprecedented levels of performance and efficiency across a range of devices. Here's everything you need to know about this groundbreaking chip:
1. Unmatched Power: The M1 Ultra is Apple's most powerful chip to date, boasting an incredible 20-core CPU configuration. This configuration comprises a mix of high-performance and high-efficiency cores, ensuring optimal performance for a wide variety of tasks, from intensive computational workloads to everyday browsing.
2. Cutting-Edge Architecture: Built on a 5-nanometer process, the M1 Ultra leverages Apple's advanced chip architecture to deliver exceptional performance while maintaining energy efficiency. With a unified memory architecture and integrated graphics, this chip ensures seamless operation across different applications and workflows.
3. Graphics Performance: In addition to its impressive CPU capabilities, the M1 Ultra features a staggering 64-core GPU, providing unparalleled graphics performance for demanding tasks such as gaming, content creation, and professional-grade rendering. Whether you're editing high-resolution videos or playing the latest AAA titles, the M1 Ultra delivers stunning visuals and smooth gameplay.
4. Machine Learning Powerhouse: Thanks to its dedicated machine learning accelerator, the M1 Ultra excels at handling AI and ML tasks with ease. Whether it's real-time voice recognition, image processing, or natural language understanding, this chip delivers lightning-fast performance for a wide range of machine learning applications.
5. Enhanced Connectivity: The M1 Ultra incorporates advanced connectivity features, including support for Thunderbolt 4 and USB 4, enabling lightning-fast data transfer speeds and seamless integration with a wide range of peripherals and accessories. Whether you're connecting external displays, storage devices, or high-speed networking equipment, the M1 Ultra ensures optimal performance and compatibility.
6. Power Efficiency: Despite its impressive performance capabilities, the M1 Ultra remains incredibly power-efficient, allowing for extended battery life and reduced energy consumption. Whether you're using a MacBook, iMac, or Mac Pro powered by the M1 Ultra, you can expect exceptional performance without compromising on battery life or heat generation.
7. Future-Proofing: As with previous Apple silicon chips, the M1 Ultra is designed with future-proofing in mind, ensuring compatibility with upcoming software updates and applications. Whether you're a professional user or a casual enthusiast, investing in a device powered by the M1 Ultra guarantees a seamless and responsive computing experience for years to come.
In summary, the Apple M1 Ultra represents a significant leap forward in chip design, delivering unmatched performance, efficiency, and versatility across a range of devices. Whether you're a professional user or a casual enthusiast, the M1 Ultra sets a new standard for what's possible with silicon technology, reaffirming Apple's position as a leader in the industry.
#AppleM1#applem1ultra#powerful#M1Ultra#macossonoma#Macbook#macbookpro#macOS#review#imacgeeks#foryou#foryourpage#viralpage#viralposts2024#trendingtopic#trendingnow#SharePost#ShareMyPost
0 notes
Text
My Tech Setup
I’ll make separate posts for my software and bass guitar setups, but here’s my current tech hardware setup.

The overview. Details incoming!
MacBook Pro
My Mac is the center of it all — and I’m living the laptop-desktop lyfe.
Now, there are many things I like about living in Norway. And one of them, is that we’ve mandated by law that things like computers needs to have a 5-year warranty(ish). And this also applies to second-hand owners! So buying used Apple gear, is great here — and that’s how I bought my MacBook Pro when it was 10 months old.
It’s a 14-inch M1 Pro base model, with 512 GB of storage and 16 GB of RAM.
I do have to be mindful of the storage, and occasionally, I push the RAM. But it still works tremendously. I’ve never been this happy with a computer before.
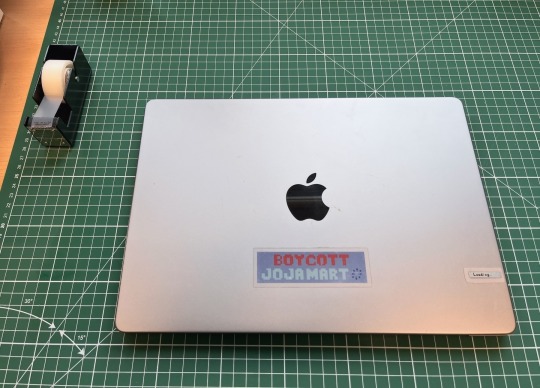
Did you notice the Macbook in the previous image?
Apple Studio Display
Yes, it’s too expensive — but no, it’s not the same as just having a 4k screen. **And look at everything that happens when I connect one Thunderbolt cable to my Mac! **👇🏻
Power to the Mac
Power to the Xiaomi Mi Monitor Light 🖇️ (Website)
Laneware Macro-1
Laneware LW-67 keyboard
Both with Less but better keycaps and
Boba U4 switches (U4Ts in the large buttons).
Lightning cable for the Apple Magic Trackpad
Universal Audio Volt 2 🖇️ (Website)
PreSonus Eris E3.5 🖇️ (Website)
Grado SR125 (I don’t have X, though) 🖇️ (Website)
Røde NT-USB Mini 🖇️ (Website)
I just love that I can unplug one cable, and just take my laptop home with me.

When I had this at my home office, I also connected ethernet to the spare port, a mouse in the USB-A hub, and some more stuff.

I've tilted the trackpad (and its wrist rest), to improve the ergonomics. I should probably get a split keyboard as well...
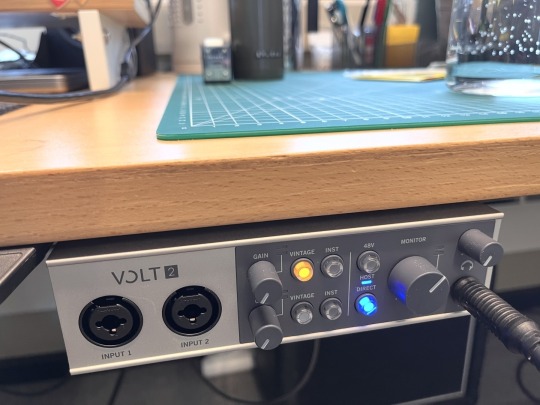
Makes it easier to connect both my headphones and speakers to the Mac, and I also use it for bass rehearsel and recording, and for testing pedal boards. Fastened with Dual Lock.

The mic and monitors are fine - nothing more, nothing less. But very practical!
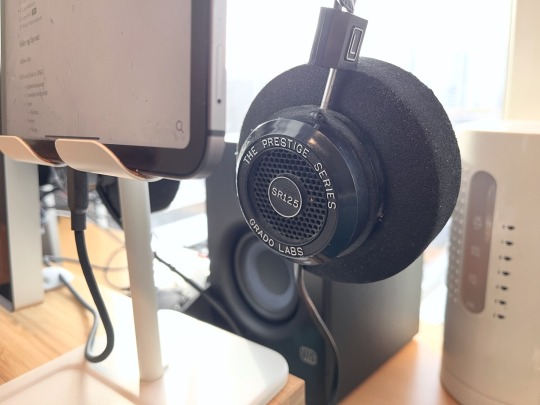
These sound great! Especially with Crinacle's EQ preset set through . Tons of leakage, though.
Desk accessories
The wool desk mat was custom ordered (to me previous, tiny, desk) from this Etsy store. The, equally custom, wrist rests are from this Etsy store.
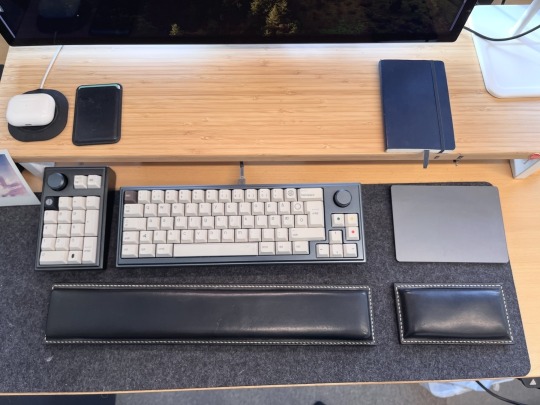
I almost never need a wallet - so Apple's MagSafe wallet is perfect. The Moleskin notebook is just as under used.
The iPad and headphones stand is IKEA’s (very cheap) Havrehoj. I like it a lot!

iPad
I have the iPad Pro 11-inch from 2018 (the first with the flat sides), with LTE and 256 GB of storage. I also bought this used — in 2019, and it still works well (even though I’m starting to notice that it’s 5.5 years old, with the occasional slowdown). I’m one of those who loves having LTE — as it’s so nice to never having to worry about internet connection. I also used it as my «whiteboard» when I was a teacher — and could just switch to LTE if the school’s network was struggling. 1
I also have the Apple Pencil and Magic Keyboard, which I like.
iPhone
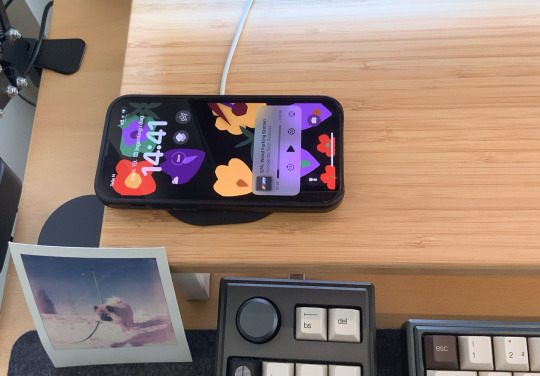
Not in the first image, as it took it.
I’m a noted Mini iPhone enjoyer, and my iPhone 13 Mini (in Midnight) has worked perfectly since the day I got it. It fixed all the issues of the 12 Mini, and is a top-tier iPhone IMO.
Here are some things I’ll say ’til the day I die (and will fight everyone who disagrees with 💪🏻):
The ordinary (potential) Mini buyer is on a long update cycle, and has also bought SE phones. So when the SE got updated half a year before the 12 Mini’s release, many of those had recently bought a phone — and this hurt the sales.
The 15 Plus phone also «flopped», but doesn’t get nearly the same amount of flak!
The lineup with the 13 Mini, 13, 13 Pro and 13 Pro Max was the perfect lineup. Apple should be able to include a mini phone in their trillion dollar pipeline anyway. I don’t have particularly small hands (I just like to be able to use my phone one-handed), but many people do and should be well-served as well.
Here’s to hoping the next SE is a Mini. 🤞🏻 (But I doubt it. And, my next phone is probably a Pro for the cameras anyway…)
I also have the first gen AirPods Pro. I really like them, but I’ve had some troubles with them, and had to return them a couple of times. Luckily, there’s the whole government mandated warranty — so even though I bought them in 2019, I got brand-new ones (for free) as late as the fall of 2023. 🙌🏻
No, it’s far from as nice to just share from your phone. ↩︎
1 note
·
View note
Text
The Ultimate Guide to Choosing the Right Type-C Cable for Your iPhone
The Ultimate Guide to Choosing the Right Type-C Cable for Your iPhone 15 Series in India
The iPhone 15 introduces a USB-C cable, following the universally accepted standard for charging, data syncing, and multimedia connectivity. This USB-C connector enables seamless charging and connections to Mac, iPad, AirPods Pro, external storage, and displays.
Pros of USB-C Port
The USB-C connector on your iPhone 15 opens up a world of possibilities, providing a universally accepted standard for charging, data syncing, and multimedia connections. Here are some key advantages:
Versatility: The USB-C port on iPhone 15 models allows you to charge your device and connect to a wide range of devices, including Mac, iPad, AirPods Pro (2nd generation), external storage devices, and displays.
Charging Efficiency: With a USB-C cable and a power adapter compliant with the USB-C standard, you can efficiently charge your iPhone. Using a 20W USB-C power adapter or higher-wattage adapter can enable faster charging, and you can also charge your iPhone by connecting it to the USB-C port on your computer.
Data Transfer: Connect your iPhone to iPad, Mac, or other computers for seamless data transfer using a USB-C cable compliant with the standard. You can connect external displays and other devices like MacBook Pro, Mac mini, Mac Studio, Mac Pro, iMac, MacBook Air etc that connect using a Thunderbolt 4 cable, Thunderbolt 3 cable or USB-C cable. The iPhone 15 Pro and iPhone 15 Pro Max support fast USB 3.2 Gen 2 speeds up to 10 Gbps with an optional USB 3 cable.
Device Charging: Your iPhone 15 can serve as a power source for other devices, such as AirPods, Apple Watch, or any USB Power Delivery-supported device, at up to 4.5 watts.
Audio Connectivity: The USB-C connector allows you to play audio through built-in speakers, AirPods, or other Bluetooth devices. You can also connect wired headphones or other audio accessories using the Apple USB-C to 3.5 mm Headphone Jack Adapter.
Advice for Cable Selection
Employing the universally recognized USB-C connector, both the iPhone 15 and iPhone 15 Plus facilitate:
MagSafe wireless charging up to 15W
Qi wireless charging up to 7.5W
Fast-charge capable:Up to 50% charge in around 30 minutes12 with 20W adapter or higher.
Featuring USB 2.0 data rates (480 Mbps)
In contrast, the iPhone 15 Pro and iPhone 15 Pro Max boast enhanced capabilities, accommodating
USB PD charge rates reaching 29W
Featuring USB 3.2 Gen 2×1 data rates at 10Gbps.
Check Device Standards: Ensure the cable matches your device’s needs. If your device supports Power Delivery, get a PD cable, and ensure the charging adapter also supports the same standards.
Use USB-C for Displays: Select cables that support data transfer speeds or list support for 4K or 8K video. Consider DisplayPort Alt Mode (DP Alt Mode) support for connecting displays and video sources.
Power Rating: Each USB-C cable is rated for a specific power amount. Higher wattage means faster charging. Consider the power needs of your device when selecting a cable.
Safe Charging Practices: It’s safe to use your phone while charging, but it may charge at a slower rate. Avoid using poorly made cables to prevent overheating and potential hazards.
The Best USB-C Cables for Your iPhone 15:
1. Zoom 100 USB Type C to C Cable UL1108BLK-0150:
Supports devices up to 100W.
Data transfer speed of up to 480mbps.
Inbuilt E-Mark chipset for stable power.
Ideal for use with laptops.
Note: Use with a Power Delivery Charger for optimal performance.
2. Quadlink 4 in 1 Type C to Type C PD65W Cable UL1055:
4-in-1 functionality for versatile use.
Supports power delivery for various devices.
Cable combinations include short type c cable – Type C, Type C – iPhone, Type C – USB 3.0 A, USB A – iPhone.
Ideal for users with multiple power delivery devices.
3. VoLo PD20 Type C to C 1m UL1051BLK:
Power delivery cable for phones demanding 20W power.
Compatible with 20W PD chargers for optimal charging efficiency.
Backward compatible with 18W Power Delivery & QC3.0/2.0.
Ensures complete charge and sync compatibility with new phones.
In conclusion, choosing the right USB-C cable for your iPhone 15 involves considering your device’s standards, usage scenarios, and the power requirements. Opt for reliable cables from reputable brands to ensure safety and optimal performance. The recommended cables offer a range of features to suit different needs, providing efficient charging and data transfer capabilities.
Original Source: The Ultimate Guide to Choosing the Right Type-C Cable for Your iPhone
#short type c cable#short cable#type c hubs#micro usb cables#wireless charger#3m / 5m hdmi cable#short lightning cable for iphone
0 notes
Text
imac pro performance
The iMac Pro, while it's a few years old now, was designed for high-end professional use, particularly for tasks demanding heavy computational power like video editing, 3D rendering, software development, and more. Here are some performance highlights:

Processor:
It was equipped with Intel Xeon processors, ranging from 8 to 18 cores, providing substantial processing power for demanding tasks.
Graphics:
The iMac Pro featured powerful Radeon Pro Vega graphics cards with up to 16GB of high-bandwidth memory, ideal for tasks requiring intensive graphics processing like 3D rendering and video editing.
Memory and Storage:
It supported up to 256GB of DDR4 ECC memory, allowing for efficient multitasking and handling large datasets. It also offered fast SSD storage, configurable up to 4TB.
Display:
The iMac Pro came with a stunning 27-inch Retina 5K display, offering sharp and vibrant visuals, which was crucial for professionals working on high-resolution content.
Connectivity:
It included a range of Thunderbolt 3 ports, offering high-speed data transfer, along with other standard ports for versatile connectivity.
The iMac Pro was tailored for professionals in fields like film production, graphic design, architecture, and other industries requiring significant computing power. However, Apple has since transitioned away from Intel processors and moved towards its M1 chip architecture for newer Macs, so the performance benchmarks and capabilities of the latest models may differ.
#install presets after effects mac#apple imac pros and cons#best imac for propresenter 7#ew imac pro coming#how to import presets into lightroom mac#how to install presets in after effects mac
0 notes
Text
Apple Scary Fast Event 2023: MacBook Pro and iMac with New M3 Chips Revealed
Scary Fast Event Unveils M3 Chipset Series and New MacBook Pro Lineup
Apple held its Scary Fast event today and made several significant revelations. The show was about the MacBook Genius and iMacs, so it was obvious that there was no report about iPads.
The new M3 chipset family, which contains the M3, M3 Genius, and M3 Max models, was the star of the current year’s Apple occasion. A new, speedier motor — said to be 60% quicker than the past model — is highlighted in the M3 Star and M3 Ace Max.
Three new MacBook Pro notebooks featuring the M3 chipset family have been released by Apple. Starting at $1,599, the new 14-inch MacBook Pro with M3 chipset will be accessible to consumers
Conversely, the more expensive 14-inch MacBook Pro with M3 Pro chipset ($1,999) and the 16-inch MacBook Pro ($2,499) models are both equipped with this processor.

New iMac with M3 Chips
Esteeming for the 14-inch MacBook Expert with Retina show starts at $1,599, while the 16-inch MacBook Pro is assessed at $2,499 comparatively.
The new M3 chips, which should surrender to twice the display over the previous age in comparable arrangement and assortment decisions, have furthermore been uncovered by the business as an update for the iMac. The starting expense of $1,299 will moreover apply to the new iMac.
The 25th commemoration of the iMac, one of the principal gadgets Steve Occupations uncovered upon his re-visitation of Macintosh in the last part of the 1990s, is being commended for the current year. Right off the bat in 1984, the Mac, the first Macintosh’s name, was uncovered.
iMac India pricing
In India, the iMac base model, which has 256GB of stockpiling and 8GB of brought together memory, costs ₹134900. The base model is presented in four variety choices: Pink, Green, Blue, and Silver. It has two Thunderclap or four USB associations.
Also Read: Apple’s ‘Scary Fast’ Event: How to Watch and What to Anticipate
Assessed at ₹1,54,900 in India, the iMac with a 10-focus GPU, 8GB of united memory, and 256GB of storing in like manner has two USB 3 affiliations, two Thunderbolt or USB 4 connectors, gigabit ethernet, and Contact ID closeness.
At ₹1,74,900, the first in class iMac is furnished with 512GB of stockpiling and 8GB of bound together memory. Seven variety varieties are presented for the better quality iMac: blue, green, pink, silver, yellow, orange, and purple.
Follow Digital Fox Media for latest technology news.
0 notes
Text
Easily Connect External Displays to a 2017 MacBook Pro
The 2017 MacBook Pro is a powerful and versatile laptop with many features and capabilities.
However, the Mac has many features, and it is important to learn it. Suppose you want to learn the basic features of Mac, like how to screenshot on Mac, how to use Mac, etc.

Then, must visit the mentioned blogging site. Here, you get all the information related to this term.
Although the 2017 MacBook Pro is a potent and adaptable laptop, adding an external display is a wonderful alternative to increase your workspace or view material on a bigger screen.
This thorough instruction will take you through every step of the process, whether you need to extend your desktop for more screen space or mirror your MacBook's screen for a presentation.
Overview of the 2017 MacBook Pro
Apple created the potent and adaptable 2017 MacBook Pro laptop. It rapidly became a favorite among professionals and creative people thanks to its svelte appearance, outstanding performance, and high-resolution Retina display.
However, the MacBook Pro's ability to connect to additional displays makes it one of its prominent features.
It enables users to enlarge their workspace, mirror their screen, or view content on a bigger screen.
This complete guide will explain the benefits of attaching extra displays to your 2017 MacBook Pro and walk you through the process step-by-step.
Need to Connect External Displays to a 2017 MacBook Pro
You should connect an extra display to your 2017 MacBook Pro for several reasons.
Productivity Gains: Attaching an external display can considerably boost your productivity.
Having numerous apps and windows active at once makes multitasking simple.
Enhanced Graphics and Video Editing: An external display with excellent resolution and color accuracy can offer a more precise and immersive workspace whether you're a creative professional working with graphics, video editing, or 3D modeling.
Gaming and Entertainment: When playing games on an external monitor, gamers can use a bigger screen and greater graphics performance.
You can watch movies, stream content, or share presentations on a bigger screen for entertainment, which enhances the viewing experience.
Collaboration and Presentations: An external monitor can be quite helpful for sharing your work with others in a conference room or during a meeting when working in teams or presenting presentations.
Extended Desktop: You may extend your desktop with an external display, giving you more screen space for different tasks.
This is especially helpful when handling numerous papers or complex data.
Now that we know how crucial connecting an external monitor to a 2017 MacBook Pro is, let's dig into the detailed instructions.
Requirements for Connecting an External Display to a 2017 MacBook
Ensure you have the following before connecting your 2017 MacBook Pro to an external monitor.
Compatible Display
Make sure you have an appropriate external display.
You'll need a monitor that supports Thunderbolt 3 (USB-C) because the 2017 MacBook Pro has these connectors.
To ensure compatibility, check the specifications of your display.
Correct Cable or Adapter
A suitable cable or adapter will probably be required to connect your MacBook to the external display.
You may require a USB-C to HDMI adaptor or a USB-C to DisplayPort cable, depending on the connection type of your display (HDMI, DisplayPort, VGA, etc.).
Latest macOS Updates
Make sure the most recent macOS version is installed on your MacBook Pro.
Maintaining your system's compatibility is essential, and Apple frequently provides updates that do so.
Steps to Connect External Displays to a 2017 MacBook Pro
When you have everything you require, connect your external display to your 2017 MacBook Pro by following these instructions.
Step 1: Power Off Your MacBook Pro
To prevent potential problems or damage, turn off your MacBook Pro before connecting any cables.
Step 2: Connect the Cable or Adapter
Connect the cable or adapter's one end to the MacBook Pro's Thunderbolt 3 (USB-C) port and the other to your external monitor.
Verify the security of the connection.
Step 3: Power On Your External Display
Check the input source on your external display before turning it on. Use the display's buttons or remote to change to the proper input if necessary.
Step 4: MacBook Pro Setup
Your MacBook Pro should instantly detect the external display once it is turned on and attached.
Alternatively, select "System Preferences" > "Displays." The display's arrangement, resolution, and mirroring settings can change here.
Step 5: Configure Display Settings
Mirror Displays: Select "Mirror Displays" to mirror your MacBook Pro's screen on an external monitor.
This is useful if you want the same content on two screens or for presentations.
Extend Displays: Uncheck "Mirror Displays" to spread your desktop across both displays. You have greater room to multitask as a result.
Step 6: Adjust Resolution and Arrangement
You can modify the resolution and configuration of your displays in the "Displays" settings to suit your tastes.
To arrange the displays on your desk as they are set up, drag & drop them there.
Step 7: Enjoy Your Dual Monitor Setup
Your external monitor is currently set up and connected.
Whether you want to use a larger screen for work, enjoyment, or productivity, you can profit from them.
Troubleshooting Tips
Consider these troubleshooting suggestions if you encounter difficulties throughout the setup procedure.
Check Cable Connections: Make sure all wires are firmly connected by checking the connections.
Restart your MacBook: Restarting your computer might sometimes solve connectivity problems.
Try Another Cable or Adapter: Make sure your macOS and graphics drivers are up to date by updating them. If the display is still not functioning, try using a new cable or adapter.
Check Monitor Compatibility: Make sure your external display is compatible with your MacBook Pro by checking the monitor compatibility.
Conclusion
Your computing experience can be greatly improved by adding an extra monitor to your 2017 MacBook Pro, giving you more screen space for work and entertainment.
You can set up and use a dual monitor setup without any problems if you follow the instructions in this article and consider the troubleshooting advice.
Connecting an external monitor is a useful and simple operation, whether you're a professional looking to increase productivity or just want a bigger screen for viewing movies.
1 note
·
View note
Text
What is the price of a MacBook in Dubai?
The MacBook Pro is a high-performance line of laptops produced by Apple Inc. that caters to professionals and power users. It features a slim and stylish design with a thickness of just 0.61 inches and weighs 3 pounds. The latest models feature Apple's M1 chip or Intel Core processors, providing excellent processing power and speed for demanding tasks such as video editing, graphic design, and programming. The MacBook Pro also has a stunning Retina display with True Tone technology, providing accurate colors and brightness that adapts to the ambient light in the room. MacBook price in Dubai is AED 10,599.
The laptop features a Touch Bar, a touch-sensitive strip above the keyboard that allows quick access to frequently used functions and controls. It also has a Touch ID sensor for secure login and online purchases. The MacBook Pro has multiple Thunderbolt 3 ports for high-speed data transfer and charging, an audio jack, and an SD card reader. iSTYLE also provides Mac repair service in Dubai.
0 notes
Text
Features of iMac vs. Mini: Which is better for you?

Apple desktops offer a variety of features and capabilities to suit a variety of user needs. In this category, the iMac and Mac Mini are popular choices for different user types.
iMac vs. Mini details
Professionals who need a clean visual canvas and aesthetic finesse love the iMac’s sleek all-in-one design and great display. The Mac Mini, with its small size and powerful 8-core CPU, is a versatile companion for performance and portability.
We’ll discuss Touch ID, video editing, and other features that make the iMac and Mac Mini appealing. After the journey, you’ll have the clarity to choose a desktop that matches your digital goals and lifestyle.
Features of iMac vs. Mini
Let’s examine iMac and Mac Mini features.
Interaction and audio
Magic Trackpad and spatial audio make iMac device interaction nuanced. This, combined with its all-encompassing display, makes the iMac a complete device that offers performance and an immersive user experience.
Design and style
The iMac’s sleek, all-in-one design is both attractive and clutter-free, demonstrating Apple’s design genius. This 24-inch iMac’s Retina Display is the centerpiece of its elegant and functional design.
Graphics skill
Another strength of these devices is graphics. The 7-core or 8-core GPU iMac performs well for moderate graphics-intensive tasks.
However, the Mac Pro or MacBook Pro may be better for graphics-intensive tasks.
Internal hardware and speed
iMac and Mac Mini have strong internal hardware and performance. In 2023, the Mac Mini got the M2 chip, while the iMac still has the M1.
M1 chips can handle daily tasks, but M2 chips perform better. Standards include an 8-core processor, 8GB RAM, and 256GB storage in both models.
Three more GPU cores make the Mac Mini with the M2 chip better for graphically intensive tasks.
Performance dynamics
With its M2 or M2 Pro chip, the Mac Mini excels in performance. Its small size belies its power, making it a versatile desktop solution for those seeking performance and flexibility. Our Mac Mini is designed to handle intensive tasks and multiple applications.
The Mac Mini has more raw processing power, but the iMac has a solid performance spectrum. Its high-resolution retina displays appeals to graphic designers and video editors.
Size, portability
The Mac Mini wins in size and portability. Similar to a larger Apple TV, it’s the smallest Mac. Mac Minis are compact but contain full computers.
The thin, sleek iMac looks like a monitor with all the hardware integrated into the bottom chin. Just under 10 pounds, the iMac can be moved, but not as easily as the Mac Mini. However, the Mac Mini can fit in a bag and be used anywhere with a TV. The Mac Mini is better for portability.
Port selection and connection
Mac Mini more ports and connectivity than iMac. Two Thunderbolt-equipped USB 4 ports on the M1 iMac require the optional power adapter with Gigabit Ethernet.
Mac Mini has Gigabit Ethernet, two Thunderbolt 4 ports, two USB-A ports, an HDMI 2.0 port, and the option to upgrade to 10 Gigabit Ethernet. The Mac Mini allows dongle-free peripheral and accessory connections, giving you more flexibility.
Communications and storage
SSD storage ensures fast data access and reliable storage on both devices. Choosing between an iMac and Mac Mini may come down to connectivity. The iMac is less flexible than the Mac Mini, which has many ports for peripherals.
Additional features include Wi-Fi
Wi-Fi keeps the iMac and Mac Mini connected. If your needs require higher performance and modularity, consider the Mac Studio.
Pricing is important when comparing the iMac and Mac Mini. The cheaper Mac Mini costs $599. Note that this price does not include a keyboard, mouse, or monitor. When accessories are included, the Mac Mini can cost over $1,000.
Basic M1 iMacs cost $1,299 and come with a high-resolution display, Magic Keyboard, and Magic Mouse. However, the base iMac model has some drawbacks that may make the Mac Mini appealing.
Read more on Govindhtech.com
0 notes
Last Seen Blogs

sketch-twentytwo
Sketch-22


ynbro
YNblr

kikowiec
IG: Kikowiec (more active)

kiirakira0313aya
ART CLASS for kids