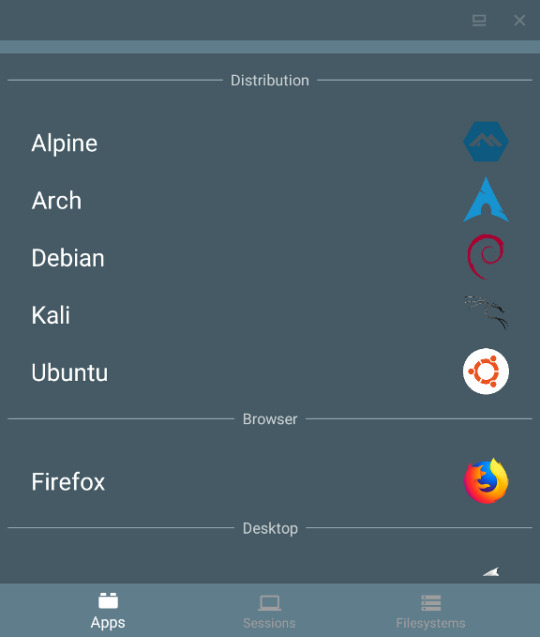
#Ubuntu18.04
Explore tagged Tumblr posts
Visit Tumblr Blog
Explore Tumblr blogs with no restrictions, modern design and the best experience.
Last Seen Tumblr Blogs


Fun Fact
Tumblr was created by web developers David Karp and Marco Arment.
Text
How to install Steam on Ubuntu Linux and start playing your favorite games

Do you want to play games on Ubuntu Linux using Steam? If yes, then here is a tutorial to know the command to install Steam and GUI setup for the same. PC gamers undoubtedly love Windows on their computers, however, if you want to follow a different route, you can even install Linux on your computer. There is no doubt, not all the popular titles are not available for Linux, but you can always look for workarounds to play with your favourite toys on your Linux system. However, if you have an account on Steam, you can find a number of cool free and paid games, which are Linux-ready out of the box. Steam is quite popular among gamers, and you can download it on your Linux with just a few steps. Read the full article
0 notes
Text
Installing Python3.8 on Ubuntu 18.04
sudo apt update
sudo apt install software-properties-common sudo apt update
sudo apt install python3.8 sudo nano /usr/bin/gnome-terminal Change #!/usr/bin/python3 to #!/usr/bin/python3.8
Now open a terminal and type “python3.8” Python 3.8.0 (default, Oct 28 2019, 16:14:01) [GCC 8.3.0] on linux Type "help", "copyright", "credits" or "license" for more information. >>>
0 notes
Video
How to Use RAR files in Ubuntu Linux [Quick Tip] | Beginning Ubuntu for ...
0 notes
Quote
ubuntuのresolvdにバグがあるらしく、迷惑メールフィルタの処理でそれにハマった。 端的に言ってしまうと、/etc/resolv.confはデフォルトでは/run/resolvconf/resolv.confにリンクされている。 その内容が127.0.0.??というループバックアドレスを指すのだが、ここに名前の問い合わせを行うと、 「Server returned error NXDOMAIN, mitigating potential DNS violation DVE-2018-0001」 というエラーメッセージが出力される。 なので、ここを参照しないように以下の手順を踏む。 面倒なので、sudo suした状態での実行例。 # unlink /etc/resolv.conf # ln -s /run/systemd/resolve/resolv.conf /etc/resolv.conf # systemctl restart resolvconf
ubuntu18.04のresolvconfバグ – gyms-web BLOG
1 note
·
View note
Link
via Twitter https://twitter.com/richard_raw
1 note
·
View note
Text
Termux、AndronixでUbuntuをインストール
タイトルだけ読むと役に立ちそうに見えるかもしれませんが、ほぼ日記的なメモで、世間一般にはあまり役に立たない記事になっていると思います。
これまではAndroidタブレットにUserlandというアプリを使って、Debian+xfce環境をインストールしてたまに使っておりました。今はひょっとしたら改善されているのかもしれませんが、その当時UserlandでもUbuntuをインストールして使いたかったのですが、Ubuntuをインストールしてxfceをインストールすると、themeファイルの一部が欠けてしまうのか、はたまた別の理由なのか、とにかくxfceの表示が乱れて上手くいかず、悪戦苦闘した結果、結局Ubuntuのインストールを諦めて、Debianとxfceの組み合わせで使っておりました。
ただこの環境でもxfceの動作があまり安定しておらず、例えばファイルブラウザのthunarを起動して、thunarからテキストファイルをダブルクリックしてテキストエディターを起動すると、thunarが��制終了。再度thunarを起動すると、先程起動したテキストエディターが強制終了…みたいなことが起きやすく、だんだんUserlandを使う機会が減っていきました。
Userlandで作ったLinux環境は、アプリを起動して使いたいLinux環境を選ぶだけで、Linux環境を立ち上げてVNCクライアントアプリまで自動で起動してくれるので、アプリとしては非常に使いやすいんですけれど、もっと動作が安定したUbuntu環境をAndroid上でも使いたいなぁ、と思ってググってみたところ、TermuxとAndronixというアプリのことを知り、今回試してみた次第。
Termuxアプリは色々なところで紹介されているので、詳しい使い方などは省きます。
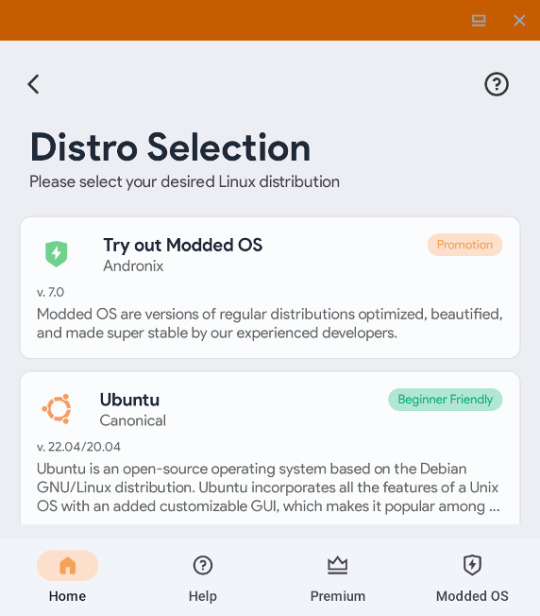
Andronixアプリは、TermuxでUbuntuをインストールするのに必要なコマンドを生成してくれるアプリといった感じのもので、インストールしたいUbuntuやデスクトップ環境をAndronixで選んでいくと、最終的にTermuxで入力するコマンドがコピーされるので、Termux上でコマンドをペーストして実行すると、Ubuntuやxfceなどのインストールが簡単にできる、という感じ。
で、当初AndronixでUbuntuの18.04をインストールしてみたところ、aptでインストールできるFirefoxのバージョンが59という、一体いつのバージョンだよ…という状況で、多少はFirefoxのバージョンが古くても我慢する気ではいたんですが、流石に古すぎるのでUbuntu18.04は断念。なら���新に近いUbuntu 22.04ならFirefoxも最新に近いバージョンがインストールできるのでは?と思ってインストールしてみるも、xfce関連の動作や設定があまり上手くいかず、こちらも断念。結局、Ubuntu20.04とxfceという環境に落���着きました。
ちなみに、Ubuntu20.04のaptでインストールされるFirefoxのバージョンは112と、かなり新し目でした。最初からUbuntu20.04にしとけば良かった…。

AndronixとTermuxでインストールしたUbuntu20.04+xfce環境は、UserlandのDebian+xfceと比べて非常に安定して使えます。ただ、いくつか個人的に気になる点があって、以下はそのメモです。
・fcitx-mozcが上手く動かない。
他のサイトにも書いてありましたが、インストールはちゃんと出来ているように見えるんですが、何度再インストールをしても上手くいきませんでした。通知アイコンがmozcに変わるところまではいくんですが、mozcの設定とかを選んでも起動しません。ターミナルでコマンドを打ち込んでも、エラーを表示することもなく、ただ起動しません。仕方がないので、日本語入力はfcitx-anthyを使うことにしました。こちらはちゃんと動きます。
・psコマンドが使えない
原因はさっぱり分かりませんが、procがマウントされていないとかなんとかのエラーが出ます。タスクマネージャーとかも起動はしますが、プロセス一覧などは表示されません。ただ、pgrepやpkillコマンドは使えるので、psコマンドが使えなくてもなんとかなる気はします。
・TermuxでのUbuntuの起動・終了が面倒
Termuxを起動して、bash start-ubuntu20.sh などと打ち込むとUbuntuが起動するので、さらに vncserver-start と打ち込むことで、やっとVNCクライアントアプリからUbuntu+xfceにアクセスできるようになります。
Ubuntuを終了する時は、Termuxアプリでまず vncserver-stop と打ち込んで終了するポート番号を入力してvncserverを終了、次に exit を入力してUbuntuを終了という手順が必要です。vncserverr-stopを実行しないでUbuntuを終了すると、次��Ubuntuを起動してvncserverを起動した時に、通常はポート1で起動するはずが、ポート2、ポート3…と別のポートでvncserverが起動することになって、VNCクライアントで接続するのが手間になります。
なので、うちではTermuxを起動したら、Ubuntuとvncserverを自動起動、Ubuntuを終了する際には、vncserverも自動終了するようにしてみました。
やり方は、Termuxは起動時に .bashrcファイルがあれば、それを読み込んで実行するらしいので、Termuxでテキストエディターのnanoが使えるなら nano .bashrc と打ち込んで.bashrcファイルに、bash start-ubuntu20.sh と入力して保存。これで次回からTermuxを起動するとUbuntuが自動的に起動します。
次は起動したUbuntu上の .profile を開いて、 vncserver-start を追加。これでUbuntuを起動した時に vncserver-start コマンドも自動化されます。さらに .profile の exit(){ などと書かれているところに pkill Xtigervnc とかを追加すると、UbuntuをTermux上で exit と打ち込んで終了する時に、起動中のvncserverも自動で終了してくれます。以下はうちの .profile の例。このやり方が正しいかどうかは定かではないので、やる場合は自己責任で。
#~/.profile: executed by Bourne-compatible login shells. if [ "$BASH" ]; then if [ -f ~/.bashrc ]; then . ~/.bashrc vncserver-start fi fimesg n 2> /dev/null || true exit() { #vncserver-stop pkill Xtigervnc if pgrep -f tiger >/dev/null;then unset -f exit exit else pkill dbus pkill ssh-agent pkill gpg-agent pkill pulseaudio unset -f exit exit fi }
vncserver-stop ではなく pkill Xtigervnc にしているところがミソ。まぁ、vncserver-stop でもダメではないんですが、Ubuntu終了時に起動しているvncserverをとにかく全部終了して欲しいだけなので、うちでは pkill Xtigervnc にしています。
・VNCクライアントの反応が鈍くなる
これはTermuxと直接関係はないんですけれど、VNCクライアントでUbuntuのデスクトップを表示させている場合、しばらくなにも操作をしていないと、VNCクライアント上の描画の更新が途切れがちになったり、マウスやキーボードの操作が遅れて反映されたりします。VNCサーバー側の仕様なのか、使用しているVNCクライアントアプリの仕様なのか、Androidの仕様なのか、よく分かっていませんけれど、解決方法はあります。
Ubuntuの画面が頻繁に更新されるように、なにか動画を再生し続けていれば良いのです。動画と言っても小さなGIFアニメを再生しっぱなしにするだけで良く、なのでうちではrubyで同じGIFアニメファイルをただ延々と再生するだけのプログラムを作って、常に画面の最前面に表示する��プションをONにして、画面の端っこに表示させたりしています。xffceの上側のパネルにはデジタル時計を秒数付きで常時表示させてはいるんですが、この程度の描画の変化・更新ではダメみたいで、小さめのGIFアニメならOKという感じです。
そんなこんなで、core i5のノートPCでXubuntuを使うのと比べると、Android上のUbuntu+xfce環境の動作は若干もっさり気味ですが、これまで使っていたUserlandのDebian+xfce環境よりも全然安定していて、これならAndroid上でUbuntuを使う場合は、UserlandからTermuxに完全に乗り換えできそうです。
0 notes
Text
0 notes
Text
The Best Budget Chia Farming Device-TerraMaster NAS: Guide to Earn Chia Coin
The Best Budget Chia Farming Device-TerraMaster NAS: Guide to Earn Chia Coin
About Chia
Due to the huge consumption of global computing resources and energy and the continuous price increase of computing hardware caused by the cryptocurrency represented by Bitcoin, some emerging cryptocurrency projects in recent years have begun to use cheaper hardware resources with lower energy consumption--hard disk. Chia, the recently exploded cryptocurrency, was created by Bram Cohen, the writer of BitTorrent. It is a way to obtain blocks with existing spare hard disk space distributed on global nodes. Chia blockchain version 1.0 was officially launched on March 19, 2021.
The principle of hard disk farming is that the user installs software, that is, uses the CPU or graphics card, and writes the hard disk with hash data through the corresponding algorithm to achieve plots of the unused space on the hard disk. This process is called "Plotting", which requires the use of a faster read and write speed SSD as a temporary storage disk. After completing a plot file, the Plotting software will transfer it to the hard disk used for farming. After the Plotting process is over, the farming program will scan the hash data on the hard disk, and then submit it to the main network for verification, and then the farming program will look for the best answer in the drawn Plotting files (farmer process) , and then send out rewards.
Someone vividly compares the principle of POC hard disk "farming" as "sending lottery tickets." To put it simply, the program is filled with lottery numbers on your hard disk, and the server will randomly draw a lottery from time to time. The larger allocated hard disk space and the longer online time is, the greater the probability of winning.
How to choose Chia farming device?
There are several ways to plant Chia, because Chia highly relies on flash memory and large-capacity HDD storage rather than high-end GPUs and CPUs. After a long time study, I finally made up my mind to experience this trend and chose a NAS device as the farming device considering the limited budget. That is TerraMaster F5-422:
PS: TerraMaster F8-422 with a larger capacity is also very suitable if you are rich and have lots of hard disks.
1. This is a 5-bay NAS, equipped with a 4-core 1.5 GHz CPU and 4 GB RAM. You can also add a DDR by yourself to have a total of 8 GB RAM. It supports HDD and SSD which will largely increase the efficiency of drawing.
2. I can easily and quickly install the Ubuntu operating system through USB to run Chia software on TerraMaster NAS. While on some of other brand NAS, it’s needed to install the Ubuntu system in NAS virtual machine before running Chia software. By comparison, the direct utilization efficiency of TerraMaster hardware should be the highest.
3. With the same price, the hardware configuration is much stronger and the cost performance is higher. The whole product is made of aluminum alloy shell, which looks relatively solid and reliable and with 2 large fans, heat dissipation won’t be a problem so the work can be done uninterruptedly.
Now, let me show you the process of installing the Chia software with TerraMaster NAS.

Chia Software Installation Guide
The Chia program can be installed and run in Windows, Linux, and MacOS. If you are running on a TerraMaster NAS device, you need to install the Ubuntu operating system to get a better experience. Please refer to the following steps to install the Ubuntu operating system directly on the TerraMaster NAS device.
1. TerraMaster X86 NAS device, recommended F5-422 or F8-422, and the memory should be expanded to at least 8GB.
2. Need to disassemble the device to remove the built-in Initboot USB.
3. Prepare a USB no less than 4GB to make Ubuntu USB boot media.
4. Prepare a 512GB or larger SSD for the cache of the Chia program
5. Prepare several HDDs, one of which is used to install the Ubunut operating system and you can also use a SSD with a capacity larger than 256GB. The core indicator of the Chia program is the hard disk capacity, so it is recommended to prepare an enterprise-level hard disk/NAS hard disk with a capacity of 8TB or above, and delete the hard disk partition in advance.
Make Ubuntu USB boot media
1. Download the Ubuntu18.04 installation package, download address: https://releases.ubuntu.com/18.04.5/ubuntu-18.04.5-desktop-amd64.iso
2. Use a USB to make boot media, the following is the steps to make USB boot media for Windows system
(1) Download and install the USB boot media creation tool, download address:
https://sourceforge.net/projects/win32diskimager/files/latest/download
(2) Insert the USB to a Windows computer and open the installed creation tool.
(3) Write the Ubuntu 18.04 operating system to the USB.

(4) Click the "Write" button and wait for the writing to be completed

Install Ubuntu in TerraMaster NAS
1. Insert the prepared USB to the USB3.0 interface of the TerraMaster NAS, and install a hard disk in bay 1 of the TerraMaster NAS. The hard disk is only used to install the Ubuntu operating system, and the TerraMaster NAS is connected to a monitor and a keyboard.
2. Turn on the TerraMaster NAS, enter the BOOT interface by pressing the key ‘F7’ on the keyboard, and select the USB to start.
3. After successful startup, the installation procedure of Ubuntu is shown as below.

4. Select the language on the left side of the page, click "Install Ubuntu", then select the keyboard layout and click "Continue"

5. Select ‘Normal installation’

6. Select ‘Erase disk and install Ubuntu’ and then click ‘Install Now’. This operation will format the hard disk data. If it has something important, be sure to back up the data in advance.


7. Click ‘Continue’, then select the time zone and set the user name and password. After the setting is completed, the installation will start.

Configure SSD cache and set HDD in JBOD
1. When the installation is complete, turn off the TerraMaster NAS, pull out the USB, and insert the SSD in bay 2.
2. Turn on the TerraMaster NAS, enter the BOOT interface by pressing key ‘F7’ on the keyboard, and select the hard disk installed with Ubuntu to start
3. After successfully logging in to the Ubuntu system, right-click on the desktop and select ‘Open Terminal’.

4. Execute the following command:
sudo –i
apt-get update
apt install mdadm
ll /sys/block
(This command is used to query the hard disk number, if you are looking for the second disk, find the corresponding identifier ata2)

5. Start configuring the SSD cache, find the drive letter corresponding to the SSD through the identifier of the above command, such as sdb, and execute the command:
mkfs.ext4 /dev/sdb
mkdir /mnt/md0
mount /dev/sdb /mnt/md0
6. Set the other hard disks in JBOD mode, the command is as follow:
mdadm -C /dev/md1 -l linear -c 128 -n 2 /dev/sd[cd]
mkfs.ext4 /dev/md1
mkdir /mnt/md1
mount /dev/md1 /mnt/md1
(The digit ‘2’ after the parameter -n represents the participation of two disks.
[cd] is the drive letter corresponding to the two disks, which can be adjusted according to the actual number of hard disks.)
Install Chia program
1. Open the Firefox browser and download the ‘chia-blockchain_1.1.5_amd64.deb’ version. Download address: https://github.com/Chia-Network/chia-blockchain/releases

2. Right-click the downloaded file chia-blockchain_1.1.5_amd64.deb, select ‘Open With Software Install’, and then select ‘Install’

3. Start the installation. After the installation is complete, click the program menu in the lower left corner, and enter ‘chia’ in the search bar to search for the chia program

4. Open the chia program

5. After creating the key, click ‘ADD A PLOT’

6. After configuring the temporary directory and the final directory, click ‘CREATE PLOT’

7. The configuration is complete.
8. Please refer to: https://hpool.com/tools for opening a farming pool, binding data, farming settings, etc.
With all the preparations get done, you can start hard working as a ‘farmer' and wait for a good harvest. If you have enough disk space, you can try Chia farming, and Chia has many farming pools. Chia official website has a calculator that can calculate how many Chia you can farm per day based on your hard disk space. Welcome to exchange and share your valuable Chia farming experience and skills and look forward to hearing your good news!

0 notes
Text
Notepad Plus Plus Mac Download

Notepad Plus Plus Download For Mac
Notepad Plus Plus Mac Download
Notepad Plus Plus For Mac Download
Download Text Editor For Windows 10. Free and safe download. Download the latest version of the top software, games, programs and apps in 2021. Download jetaudio plus for windows 10 64 bit for free. Multimedia tools downloads - jetAudio Plus VX by COWON and many more programs are available for instant and free download. Get the latest version from the Notepad developers by going to www.Notepad-plus-plus.org. If you have a version on your computer, confirm that you have the most recent version.
Linux OSVersionPackage FormatSupported SoftwareArchArch Linux2019.12.01(64-bit).deb, .shGIMP, KritaCentosCentos7.0(64-bit).rpm, .shGIMPCentos8(64-bit).rpm, .shGIMP, KritaDebiandebian-9.5.0-amd64-netinst(64-bit).deb, .shGIMP, Kritaelementary OSelementary OS 5.0(64-bit).deb, .shGIMP, Kritaezgo Linuxezgo14(64-bit).deb, .shGIMP, KritaFedoraFedora32(64-bit).rpm, .shGIMP, KritaMageiaMageia-7.1(64-bit).rpm, .shGIMP, KritaManjaromanjaro-xfce-20.1.2-201019(64-bit).deb, .shGIMPMintlinuxmint-18.2-cinnamon-64bit.deb, .shGIMP, KritaOpenSUSEopenSUSE-Tumbleweed(64-bit).rpm, .shGIMP, KritaPop!_OSpop-os_19.10(64-bit).deb, .shGIMP, KritaRed HatRed Hat7(64-bit).rpm, .shGIMPUbuntuUbuntu14.04(64-bit).deb, .shGIMP, KritaUbuntu16.04(64-bit).deb, .shGIMP, KritaUbuntu17.04(64-bit).deb, .shGIMP, KritaUbuntu18.04(64-bit).deb, .shGIMP, KritaUbuntu19.04(64-bit).deb, .shGIMP, KritaUbuntu20.04(64-bit).deb, .shGIMP, Krita
FunctionKrita 4.3.0Gimp 2.10.20Inkscape 0.92Pen Pressure SensitivityTiltMouse FunctionEraser Button (Stylus:PH01, P06)Switch between Pen and Eraser Modes*If you have any further queries, please do not hesitate to contact us at [email protected].
Jetaudio plus for windows 10 64 bit
Most people looking for Jetaudio plus for windows 10 64 bit downloaded:
Download
4 on 408 votes
etAudio PLUS VX is a program that allows you to play various music and video files. https://briefsublimeenthusiast.tumblr.com/post/645354205604937728/deus-ex-human-revolution-directors-cut-inventory-mod.
Download
2.6 on 7 votes

Convert various digital video files to supported target file formats.
Notepad Plus Plus Download For Mac
Download
4.1 on 33 votes
jetAudio is a multimedia player software that offers a playback option and multimedia file editor and burning capabilities.
Download
4.5 on 1068 votes
Notepad Plus Plus Mac Download
Notepad is a source code editor and Notepad replacement for Windows.

Notepad Plus Plus For Mac Download
Similar choice
0 notes
Text
CSCI203/CSCI803 ASSIGNMENT 3-implementation of database transactions Solved
CSCI203/CSCI803 ASSIGNMENT 3-implementation of database transactions Solved
This assignment includes the tasks related to implementation of database transactions. Prologue If VirtualBox is not installed yet then install it on your system first. It is explained at https://documents.uow.edu.au/~jrg/115/cookbook/e1-1frame.html how to install and how to use VirtualBox. Use one of the links given below to download Ubuntu18.04-64bits-MongoDB4.2.2-08-JAN-2020.ova file with an…

View On WordPress
0 notes
Quote
Ubuntu用にOneDriveの公式クライアントが用意されていないため、代りにOneDrive Free Clientとういうものを使いました。使って見たところ問題なく動作しており、同期が反映されるまでの時間も数十秒〜分程度と割と短いです。
Ubuntu18.04でOneDriveを使うための手順
2 notes
·
View notes
Photo

Instalacion de Microsoft Office 2016 en Ubuntu 18.04 | Actualizado a 2020 http://ehelpdesk.tk/wp-content/uploads/2020/02/logo-header.png [ad_1] Link del post para la instalació... #comoinstalaroffice2016enlinux #comoinstaroffice2016enubuntu #dataanalysis #datamodeling #datavisualization #excel #exceldashboard #excelformulas #excelfunctions #excelmacros #excelvba #gnu #gnulinux #instalacióndeoffice2016enubuntu #instalaroffice2016enubuntu #linux #microsoftaccess #microsoftoffice #microsoftoffice365 #microsoftpowerbi #microsoftproject #microsoftword #officeproductivity #pivottables #powerpivot #powerpoint #sap #ubuntu #ubuntu18.04
0 notes
Photo

How To Upgrade Ubuntu 18.04 Or 19.10 To Ubuntu 20.04 LTS? | MrHacker.Co #howtoupgradeubuntu #linux #opensource #ubuntu #ubuntu18.04 #hacker #hacking #cybersecurity #hackers #linux #ethicalhacking #programming #security #mrhacker
0 notes
Text
0 notes
Text
Dell Vostro 15 3581 Intel Core i3 7th Gen 15.6-inch Laptop (4GB/1TB HDD/DOS) (Black, 2.03kg)
New Post has been published on https://apzweb.com/dell-vostro-15-3581-intel-core-i3-7th-gen-15-6-inch-laptop-4gb-1tb-hdd-dos-black-2-03kg/
Dell Vostro 15 3581 Intel Core i3 7th Gen 15.6-inch Laptop (4GB/1TB HDD/DOS) (Black, 2.03kg)


Price: (as of Jan 01,1970 00:00:00 UTC – Details)

Get this Intel Core i3 7th Gen 15.6-inch Laptop with 4GB/1TB HDD/DOS.
Memory & Storage: 4GB RAM DDR4 | Storage: 1TB 5400 rpm | Display: 15.6-inch HD (1366 x 768) Anti-Glare LED-Backlit Non-touch Display Operating System: UBUNTU18.04 | Optical Drive:Tray load DVD Drive (Reads and Writes to DVD/CD) Graphics: Intel HD Graphics 620 with shared graphics memory | Battery: 42WHr Battery 3-Cell Lithium ION Battery Warranty: This Genuine Dell Laptop Comes With 1 Year Domestic Warranty From Dell Covering Hardware Issues And Not Covering Physical Damage.
0 notes