#VMware host status
Explore tagged Tumblr posts
Visit Tumblr Blog
Explore Tumblr blogs with no restrictions, modern design and the best experience.
Last Seen Tumblr Blogs


Fun Fact
Tumblr posted its first advertisements in May 2012 and subsequently earned $13M in revenue.
Text
Why enterprises need to adopt a multi-cloud strategy
Multi-cloud is the next big thing today that is offering businesses the capability to experience multiple cloud services and build the best infrastructure. Companies now do not need to move between platforms because with a multi-cloud adoption strategy you can bring many technologies together such as AWS, Azure, VMware and more in one system to efficiently meet their business goals. One of the prime reasons why enterprises prefer this approach is to avoid depending on just one cloud vendor for all their cloud-related needs.
“81% of enterprises have a multi-cloud strategy” – 2018 State of the Cloud Survey, RightScale
There are many types of multi-cloud architectures including re-deployment, cloudification, relocation, refactoring, rebinding, replacement, and modernization for organizations to adopt.
Multi-cloud rebinding
A multi-cloud rebinding is an architecture that is used to route users to the nearest data center when your primary cloud or on-premises data center fails. Basically, this architecture can configure and monitor the status of the service to which they are directing the users, and if the service is not available, it helps to route traffic to another resource.
Let’s see how an application is deployed in a multi-cloud setting:
Figure 1: Multi-cloud rebinding architecture diagram
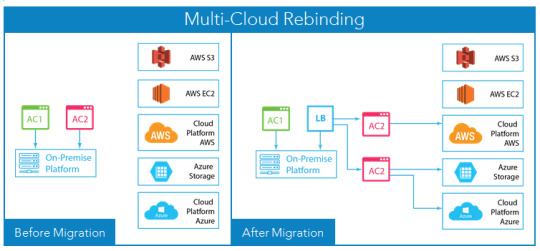
In this architecture diagram, a re-architected application is deployed partially on multiple cloud environments. Here, AC1 and AC2 are two application components hosted on-premises before migration. As both the components are independent integrity units, AC1 remains on-premises while two AC2s are deployed on AWS and Azure for disaster recovery.
Benefits of adopting a multi-cloud solution
1. Ability to mix different delivery models
Multi-cloud allows you to choose from a growing range of services to create a customized solution that best suits your organization. You gain the ability to use mixed delivery models including SaaS (Software-as-a-Service), PaaS (Platform-as-a-Service), and IaaS (Infrastructure-as-a-Service). As well as increase the capability for each existing and new applications and make the decision that best suits your business goals. You can use a combination of platforms including Amazon Web Services(AWS), Azure, Google Cloud Platform, VMware and more. This multi-cloud architecture becomes your base for new business capabilities and functions.
2. Making data management flexible
Many organizations require using different types of data depending on their industry. Multi-cloud can be the best fit for such organization as they require storing data in particular type of cloud while running other workloads in another cloud. When you manage data on multiple clouds, you can be confident that your data will remain available and secure even if one of the cloud hosts fail. For example, an e-commerce business may require hosting data on multiple cloud platforms that best supports digital media such as images, videos, animation, graphics, and more.
Multi-cloud also offers low latency and allows quick data transfer across different platforms, and manages your workloads and services, as it utilizes more than one cloud services, ensuring that your enterprise serves customers without any inconvenience.
Cloud strategy and assessment workshop The adoption of cloud-based infrastructure by enterprises is increasing greatly. However, a lot of enterprises are still reluctant to adopt a cloud strategy due to lack of skills or knowledge. Download
3. Avoiding single vendor lock-in
Initially, single cloud vendors led enterprises for a lock-in period that often results in limited flexibility, prolonged proof of concepts, delayed decisions, and costlier outcomes. Such issues would further result in slowing down the business operations and overall fail the organization to meet their business-changing needs timely.
Multi-cloud deployment allows you to get full control over your systems including the power to switch your cloud platforms easily. When you use a mix of private and public cloud platforms, you will be able to match your system needs to your business solutions. With multi-cloud, you can scale down your cloud services to the local server whenever desired and without causing disruptions to your business operations. Such ability will reduce dependency over a single vendor and open the doors to negotiation for favorable agreements.
4. Optimizing cost-effective outcomes
The traditional delivery methods of cloud platform and the scaling efficiencies of multiple cloud services can always be compared. With multi-cloud strategy, you can use your own apps anytime into the cloud and build greater resiliency at a lower price than the previous redundancies would have costed you. You can easily share your workloads across multiple cloud platforms and reduce downtime simultaneously.
Multi-cloud proves to be a cost-effective solution, as enterprises get to analyze and reduce capital expenses related to hardware, server, and systems that have an impact on their business performance and productivity. In short, the multi-cloud solution enables you to scale cloud services at dropping costs – without disrupting your business operations.
5. Added security with multi-cloud
Multi-cloud allows a combination of a private or public cloud platform. For added security, it is advisable that you secure your data in the private cloud while operating other areas of the business using a public or hybrid cloud environment.
Using a multi-cloud architecture will also help you a lower risk of a DDoS (distributed denial-of-service) attack by providing a level of resiliency, which is not possible with a single provider. A DDoS attack is a serious result of several computer systems attacking a server, a website, a network resource or even a cloud hosting. These attacks can be conducted by anyone, including a hacker or even hostile foreign power. For instance, if in case your primary cloud suffers an attack, your workloads can be immediately shifted to other cloud environments.
Insight All types of cloud are developing, be it public, private or hybrid; therefore huge enterprises can openly embrace multi-cloud service management to meet their divisional operations. Reap many benefits while keeping challenges and risks to a minimum level by adopting a multi-cloud strategy. We are confident that multi-cloud is here to stay and enterprises should adopt it without giving a second thought. Get in touch with our consultant and learn how you can get started.
Originally published at softwebsolutions.com
#Multi cloud strategy#Cloud consulting services#Multi-cloud challenges#multi cloud services#benefits of multi cloud strategy#multi cloud
1 note
·
View note
Photo


06.06.20
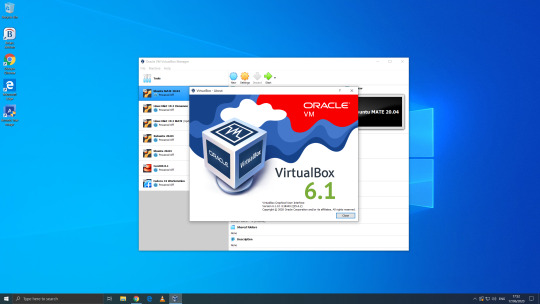
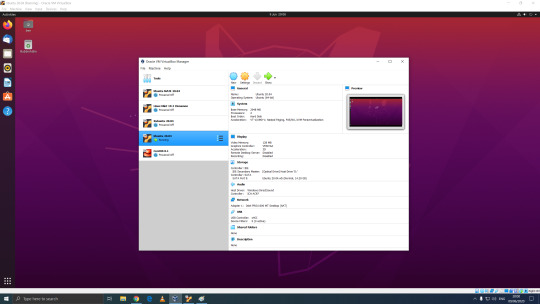
We went to the Oracle VirtualBox site and downloaded and installed VirtualBox 6.0. Oracle VM VirtualBox is free, open source virtual machine software maintained by Oracle Corp.
It was originally an Innotek product before Innotek was acquired by Sun Microsystems in 2008. Sun Microsystems was in turn acquired by Oracle in 2010. The alternative software to Oracle VM VirtualBox is VMware workstation.
I have been using Oracle VM VirtualBox since 2016 and have learnt a lot of information about how it works and how to install various operating systems.
Virtualbox can run Linux guest operating systems and Microsoft Windows guest operating systems. It can emulate both 64-bit operating systems and 32-bit operating systems.
Each operating system you add to VirtualBox is treated as a Guest. The guest operating system is running in its own virtual environment, which emulates a real machine on your PC. This means that anything you do in it does not affect your PC. The guest runs in a console:
About the VBox console: The VirtualBox console displays the active virtual machine. It shows the virtual guest operating system activity icons in the status bar. The console can be re-sized, minimised and forced closed from the title bar. It is not recommended to force close an active guest operating system as this acts like switching off mains power. Your guest operating system should be shut down cleanly. You can select different viewing modes in the view list or use the shortcut keys assigned with them. These mode include full screen mode, seamless mode and scaled mode. VirtualBox website link: https://www.virtualbox.org/ VirtualBox wiki link: https://en.wikipedia.org/wiki/VirtualBox
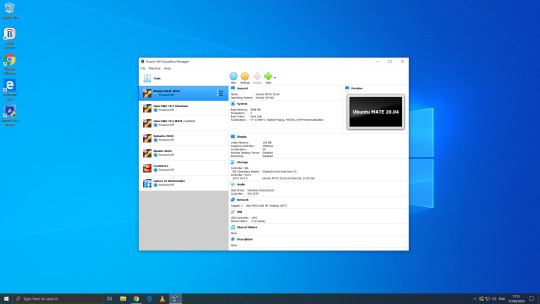
After setting it up, I went to find some Linux-based operating systems to download. Each download is a disc image file with the file extension .iso.
I chose:
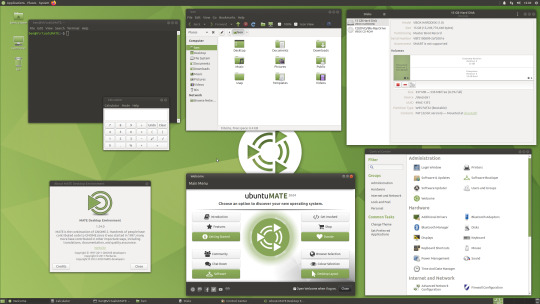
Ubuntu MATE 20.04 LTS (Long Term Support)
This operating system uses the MATE Desktop Environment, which is the continuation of the former GNOME 2 Desktop. I like this desktop environment because it has a very configurable interface.
Ubuntu MATE: https://ubuntu-mate.org/
Wiki link: https://en.wikipedia.org/wiki/Ubuntu_MATE
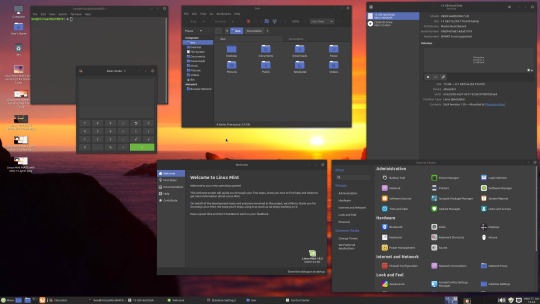
Linux Mint Cinnamon 19.3 Tricia (based on Ubuntu 18.04 LTS)
This operating system uses the Cinnamon Desktop Environment which is based on GNOME 3. Cinnamon uses MGSE (Mint Gnome Shell Extensions), which re-creates a more traditional desktop linux experience whilst also looking modern.
I like this desktop environment because it looks modern and feels familiar to those who come from Windows.
Linux Mint: https://www.linuxmint.com/
Wiki link: https://en.wikipedia.org/wiki/Linux_Mint
Linux Mint MATE 19.3 Tricia (based on Ubuntu 18.04 LTS)
Linux Mint edition featuring the MATE Desktop Environment. I like this desktop environment because like Ubuntu MATE, it is very configurable. It also features Linux Mints system updating utility.
Ubuntu 20.04 LTS
This version of Ubuntu is the main version by Canonical Ltd. This operating system uses the GNOME 3 Desktop Environment.
Ubuntu came out in 2004 and used GNOME 2 as it’s desktop environment until 2011, when it changed to the now discontinued Unity Desktop. In 2017, Canonical announced it would return to GNOME. I like this desktop environment as unlike the GNOME 3 default interface, Ubuntu uses its own orange style theme and adds a Unity like dock on the left of the screen.
Ubuntu: https://ubuntu.com/
Wiki link: https://en.wikipedia.org/wiki/Ubuntu
Xubuntu 20.04 LTS
This operating system uses the XFCE Desktop Environment which aims to be lightweight on system resources and has a really configurable user interface. Xfce once stood for XForms Common Environment. The menu system is called the Whisker Menu. I like this desktop environment because like MATE it is very configurable.
The Ubuntu 20.04 Long Term Release is code named: Focal Fossa. All Ubuntu based distros use .deb (Debian Package Manager) for software installation.
Xubuntu: https://xubuntu.org/
Wiki link: https://en.wikipedia.org/wiki/Xfce
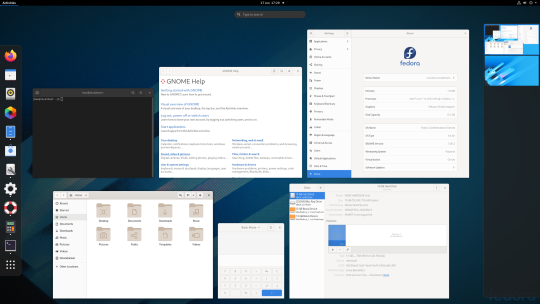
Fedora Workstation 32
Fedora is a Linux distribution developed by the community-supported Fedora Project which is sponsored primarily by Red Hat, a subsidiary of IBM, with additional support from other companies. Fedora is used by Linus Torvalds who is the creator of the Linux kernel.
Fedora is the upstream source of the commercial Red Hat Enterprise Linux distribution.
Since the release of Fedora 30, five different editions are currently available: Workstation, focused on the personal computer, Server for servers, CoreOS, focused on cloud computing, Silverblue, focused on an immutable desktop specialized to container-based workflows and IoT, focused on IoT devices.
I like this desktop environment because it looks fresh and modern. This operating system features the latest version of the GNOME Desktop Environment.
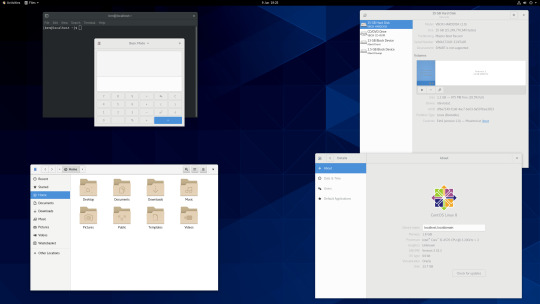
The screenshot of Fedora shows the ‘Activities’ dial screen which gives you a Visual overview of your GNOME Desktop.
With the Activities screen, you can see and control currently opened app windows, all installed applications, search system and switch desktop work spaces.
Fedora: https://getfedora.org/
Wiki link: https://en.wikipedia.org/wiki/Fedora_(operating_system)
CentOS 8.1
CentOS (Community Enterprise Operating System) is a Linux distribution that provides a free, community-supported computing platform functionally compatible with its upstream source operating system, Red Hat Enterprise Linux (RHEL). It is maintained by The CentOS Project (affiliated with Red Hat). Both operating systems use GNOME 3 as their default desktop environment.
It is basically a free version of Red Hat Enterprise Linux, with the Red Hat branding removed and update servers pointing away from Red Hat servers.
Red Hat Enterprise Linux is a commercial focused Linux distro.
All Red Hat Linux based distros such as RHEL, CentOS and Fedora use .rpm (Red Hat Package Manager) for software installation.
CentOS and Red Hat Enterprise Linux can be installed on servers, workstations and desktops. Both are very popular on mission critical commercial server systems as it is designed to be flexible and very stable.
I thought this Linux distro is interesting because unlike the Ubuntu based distros above, installation of CentOS is more involved, you set up software sources, installed software, desktop and operating system components.
CentOS runs on a lot of web servers.
CentOS: https://www.centos.org/
RHEL:
https://www.redhat.com/en/technologies/linux-platforms/enterprise-linux
CentOS Wiki link: https://en.wikipedia.org/wiki/CentOS
RHEL Wiki link: https://en.wikipedia.org/wiki/Red_Hat_Enterprise_Linux
VirtualBox requires the installation of Guest Additions, which adds extra features to the virtual machine, such as the ability to scale the resolution of the guest operating system, better 3D acceleration and the ability to move files between the Guest and Host machine.
To install Guest Additions on a Linux guest, you will need to use the terminal. installation of this is different on .deb and .rpm builds of Linux.
4 notes
·
View notes
Text
Check Host Connection Status in a VMWare Cluster
Check Host Connection Status in a VMWare Cluster
Here is a script on VMware via Powershell. As long as you have installed the PowerCLI module, you can run this via the standard Powershell. I have taken the script and created a PS1 file to run through the list and email it to you. This will help in the cases whereby you have multiple hosts and needs to be aware of the connection status. Now all your resources may not have access to VCenter or…
View On WordPress
0 notes
Text
Setting up Always On SQL Clustering Group, with Microsoft Server 2016 and VMWare

Setting up clusters in Windows Server 2016 has become so easy. However; When integrating it with other environments, like VMWare, and AO SQL Clustering. It can get quite Tricky. First we want to setup our environment in VSphere. Next we will setup Windows Server 2016 with Failover Clustering. Then we’ll make sure to make some adjustments to DNS. Finally, We will setup AlwaysOn SQL Clustering.

Please make sure you have .NET Framework 3.5.1 or greater on the servers. Then We will need to create 2 VMs with 3 drives each. Then we will need to make sure that the drives are online, and available from other locations. However one main aspect that I had overlooked was that the Virtual Disks have to be created Eager Zero Thick not Lazy Zero Thick. I made the heinous mistake of using Lazy Zero Thick, and then could not understand why I was having so many problems.
Note: When creating virtual disks with Eager Zero Thick, it does take longer than using the faster Lazy Zero Thick option. Eager Zero Thick Disks allocates the space for the virtual disk, then zeros it all out unlike the Lazy Zero Thick which only allocates the space.
You also generally wouldn’t use Eager Zero Thick except for Microsoft clustering and Oracle programs. Once the disks are created we are reading to install Windows Server 2016.

Install either Datacenter edition or Standard edition. For this example we’ll use the standard edition. Install all the Microsoft Windows feature updates and verify that you have already allocated all the resources needed. Check that the additional Virtual Disks are available, and make sure you install the Failover Cluster feature. You may want to reboot after the feature is installed, if you have not done so. Once you installed the feature go to the Failover Cluster Manager and prepare to create the cluster. If this is a two node cluster be sure to add a Witness Server or Desktop. Once this is created and validated, go to your computer manager and verify that the virtual disks are online and initialized. Next, you will want to configure the cluster quorum settings. I created a separate server for this quorum and configured a File share witness.
Now, make sure you can access these from another computer on the secured network. You will have to setup a Host A record round robin DNS situation, where you give a specified name the 2 failover cluster nodes IP adresses in the Host address. Example: if the nodes had up address of 192.168.1.43 and 192.168.1.44. Then the two Host records you would need to create are AOSqlServer -> 192.168.1.43 and AOSqlServer -> 192.169.1.44
Finally, We will enable AlwaysOn Availability Groups on SQL Server 2016.
After Installing SQL Server 2012 or 2014 Enterprise edition on all the replicas. Please install it on as a stand-alone instance, and then we will configure SQL Server. Once you expand SQL Server Network Configuration node, and click on Protocols for MSSQLServer, you will see the TCP/IP dialog box on the right panel. Right click on the TCP/IP entry and select Enable.
In SQL Server Configuration Manager, right click on SQL Server Services to open the Properties dialog box. Navigate to the AlwaysOn High Availability tab to select the “Enable AlwaysOn Availability Groups.

Now we must configure the login accounts and the replicas that will need read write privileges.
First verify that your SQL Service Account is there and is a domain account, not a local machine account. Now login through SQL Management Studio (SSMS). Add you SQL Service account to the Administrators group on each replica (via computer management). Then allow connect permissions to the SQL Service account through SSMS: Right click on the SQL Service login to open the Properties dialog box. On each replica navigate to the Securables page and make sure Connect SQL Grant box is checked and allow remote connections. You can do this by using SSMS in the instance properties or by using sp_configure.
EXEC sp_configure ‘remote access’, 1;
GO
RECONFIGURE;
GO
Now we will create the file share through the Server Manager that the SQL Service account, and the replicas can access. The File is for the initial backup/restore process that happens to the databases when you join the AlwaysOn group during setup.

Last thing is to install the AlwaysOn Availability group. Once you’s ensured that full backups have been created, and all databases are in Full recovery mode, you will have to remove these databases from the tlog backup maintenece during the installation of Always on (you can always add them back). It could cause errors with both tlogs backing up while AlwaysOn is being created.
On you primary, open SSMS and expand the AlwaysOn High Availablity folder. Right click on the Availability Groups and select New Availability Group Wizard.

Select only the databases you want to include in the AlwaysOn group.
Next to the databases you will see the status with a blue link. If you see "Meets Prerequisites” it will signify that these databases are included in your group. If it does not say "Meets Prerequisites”, then click on the link to see more details on what needs to be corrected.
Now, you will specify and Add the Replicas. You will need to specify if you want Automatic or Manual Failover, Synchronous or Asynchronous Data Replication, and the type of Connections you are allowing to the end users.
Be sure to view the troubleshooting page if you have any issues:
http://blogs.msdn.com/b/alwaysonpro/archive/2013/12/09/trouble-shoot-error.aspx
The backup preferences tab will assist in choosing the type of backup and to prioritize the replica backups.
In the Listener tab, you will create an availability group listener button, Enter the string DNS name, enter port 1433 and enter the IP address for your listener, which should be an unused IP address on the network.
Next, you will Select Initial Data Synchronization page, join the databases to the Always on group, then verify the Full option is selected for using File Shares. For large databases select Join or Skip to restore the databases to the secondary replica. We will use Full for now. Last thing to do here is remember the SQL Service accounts and set that all replicas have read/write permissions to the file Share or it will not work.
Run the Validation checks, and make sure it the results are successful.
That is it, once you get that done you should have High availability and AlwaysOn SQL Server. I hope you’ve enjoyed this instructional blog. Please come back and visit us to see other projects.
#Always On SQL Server#High Availability SQL#Failover Cluster#SQL Failover Cluster#VMWare Failover Cluster#VMWare with MS Failover Cluster#VMWare with MSFC#AlwaysOn SQL
1 note
·
View note
Text
Virtual Private Cloud Market Size, Development, Key Opportunity, Application & Forecast to 2025
This report studies the global Virtual Private Cloud market, analyzes and researches the Virtual Private Cloud development status and forecast in United States, EU, Japan, China, India and Southeast Asia. This report focuses on the top players in global market, like • Amazon Web Services (U.S.) • HP (U.S.) • IBM Corporation (U.S.) • Microsoft Corporation (U.S.) • Google, Inc. (U.S.) • VMware, Inc. (U.S.) • Oracle (U.S.) • Cisco Systems, Inc. (U.S.) • Red Hat, Inc. (U.S.) • NetApp, Inc. (U.S.)
Download Free Sample Report @ https://www.radiantinsights.com/research/2018-2025-virtual-private-cloud-report/request-sample
Market segment by Regions/Countries, this report covers • United States • EU • Japan • China • India • Southeast Asia
Market segment by Type, the product can be split into • Large Enterprises • SMEs • SMBs
Market segment by Application, the market can be split into • BFSI • Transportation • Healthcare • Hospitality • E-Commerce • Telecom • Public Sector • Others
Browse Full Research Report with TOC @ https://www.radiantinsights.com/research/2018-2025-virtual-private-cloud-report
Table of Contents
2018-2025 Virtual Private Cloud Report on Global and United States Market, Status and Forecast, by Players, Types and Applications 1 Industry Overview of Virtual Private Cloud 1.1 Virtual Private Cloud Market Overview 1.1.1 Virtual Private Cloud Product Scope 1.1.2 Market Status and Outlook 1.2 Global Virtual Private Cloud Market Size and Analysis by Regions 1.2.1 United States 1.2.2 EU 1.2.3 Japan 1.2.4 China 1.2.5 India 1.2.6 Southeast Asia 1.3 Virtual Private Cloud Market by Type 1.3.1 Large Enterprises 1.3.2 SMEs 1.3.3 SMBs 1.4 Virtual Private Cloud Market by End Users/Application 1.4.1 BFSI 1.4.2 Transportation 1.4.3 Healthcare 1.4.4 Hospitality 1.4.5 E-Commerce 1.4.6 Telecom 1.4.7 Public Sector 1.4.8 Others
2 Global Virtual Private Cloud Competition Analysis by Players 2.1 Virtual Private Cloud Market Size (Value) by Players (2017 and 2018) 2.2 Competitive Status and Trend 2.2.1 Market Concentration Rate 2.2.2 Product/Service Differences 2.2.3 New Entrants 2.2.4 The Technology Trends in Future
3 Company (Top Players) Profiles 3.1 Amazon Web Services (U.S.) 3.1.1 Company Profile 3.1.2 Main Business/Business Overview 3.1.3 Products, Services and Solutions 3.1.4 Virtual Private Cloud Revenue (Value) (2013-2018) 3.1.5 Recent Developments 3.2 HP (U.S.) 3.2.1 Company Profile 3.2.2 Main Business/Business Overview 3.2.3 Products, Services and Solutions 3.2.4 Virtual Private Cloud Revenue (Value) (2013-2018) 3.2.5 Recent Developments 3.3 IBM Corporation (U.S.) 3.3.1 Company Profile 3.3.2 Main Business/Business Overview 3.3.3 Products, Services and Solutions 3.3.4 Virtual Private Cloud Revenue (Value) (2013-2018) 3.3.5 Recent Developments 3.4 Microsoft Corporation (U.S.) 3.4.1 Company Profile 3.4.2 Main Business/Business Overview 3.4.3 Products, Services and Solutions 3.4.4 Virtual Private Cloud Revenue (Value) (2013-2018) 3.4.5 Recent Developments 3.5 Google, Inc. (U.S.) 3.5.1 Company Profile 3.5.2 Main Business/Business Overview 3.5.3 Products, Services and Solutions 3.5.4 Virtual Private Cloud Revenue (Value) (2013-2018) 3.5.5 Recent Developments
Read all Reports of this category @ https://www.radiantinsights.com/catalog/ict
About Radiant Insights Radiant Insights is a platform for companies looking to meet their market research and business intelligence requirements. It assists and facilitate organizations and individuals procure market research reports, helping them in the decisions making process. The Organization has a comprehensive collection of reports, covering over 40 key industries and a host of micro markets. In addition to over extensive database of reports, experienced research coordinators also offer a host of ancillary services such as, research partnerships/ tie-ups and customized research solutions.
Media Contact: Company Name: Radiant Insights, Inc Contact Person: Michelle Thoras Phone: (415) 349-0054 Toll Free: 1-888-928-9744 Address: 201 Spear Street 1100, Suite 3036, City: San Francisco; State: California; Country: United States Email: [email protected] Website: https://www.radiantinsights.com/
1 note
·
View note
Text
The Reason Why Organizations Opt. For Azure Site Recovery.
During any uncertain situation (existing pandemic, system outages, malware attacks, etc.) the Microsoft Azure provides a stable environment for your business where it keeps your business uninterrupted.
Tell me, who doesn’t want such solution.
Microsoft’s Azure Site Recovery service has come as a great relief for several organizations. As, it offers easy deployment, cost-effectiveness and reliability. You can deploy replication, redundancies, and recover processes through Site Recovery, which allows you to keep your applications unaffected during scheduled and unscheduled outages caused by unfortunate events and process failures. It ensures very minimal downtime and financial losses.
This blog details about Azure Site Recovery and why it is majorly opted by most of the organizations.
What is Azure Site Recovery?
Let’s see a quick overview on ASR and what it offers?
Microsoft Azure’s Recovery is a Disaster Service as a Recovery offered by Microsoft Azure. This service is designed to function in cloud and hybrid cloud environments. It continuously performs the process of data duplication and ensures whether it is in synchronization.
The snapshot features will allow you to know the status of your data after such fault occurrences. Azure provides this service in a pay-as-you-go model, reducing the cost of additional infrastructure.
Site Recovery handles several functionalities, it duplicates your servers from on-premises and third-party service providers to Azure. It moves Windows and Linux VMs hosted in VMware Hyper-V and Azure Stack, and Windows VMs supported by AWS to Azure.
Find out the reasons why does Organizations opt. For Azure Site Recovery?
Easy maintenance and deployment:
Setting up Site Recovery is a simple process. You can simply duplicate the Azure VM to another Azure region straight away from the Azure portal. It comes with the complete integration which automatically updates Site Recovery with new Azure features at its every release. It performs the multiple operations sequentially running on multiple VMs, reducing the recovery issues.
Keeps track on Recovery plan by doing continuous tests without affecting the production workloads or end users. It makes sure that your applications are keep readily available during any failovers with automatic recovery from on-premises to Azure.
Cost-Effectivity:
Eliminate the cost of building the additional on-premises disaster recovery infrastructure to deploy. You can always opt. For the service or support needed for your applications and pay only for that service.
Minimal Downtime:
Make your compliance easy by following industry regulations such as ISO 27001 which allows you to perform site recovery between Azure environments. It provides coverage to many critical applications as you need, backed by Azure service recovery and service.
Make your recovery easy and fast with Site Recovery.
WinMethods understands your needs, handles your migration process accordingly in a smooth and efficient manner, and ensures your complete satisfaction.
0 notes
Text
Custom WHMCS Modules
A WHMCS module is a third-party add-on that can be integrated into WHMCS to provide additional panel functionality or to connect to another service.
WHMCS Global Services, for example, could create a WHMCS plugin to help resellers of our servers streamline the server ordering process, or resellers could add server administration services to their client area.
Custom WHMCS modules are a great way to expand the panel's already extensive capabilities.
A module is a collection of functions that extend the functionality of the WHMCS platform and is most commonly used to integrate with third-party services and APIs.
The Key Advantages of Using a WHMCS Module
Increase Functionality – By adding a module to your WHMCS, you can increase its functionality and add custom features based on your needs and convenience.
Automation – Another significant benefit of using the WHMCS Module is automation. You can add modules to automate any of the functions related to payments, invoices, and client data that you dislike doing manually.
Integration – WHMCS Modules make it much easier to integrate WHMCS with other third-party APIs and apps. One can easily manage various aspects of their WHMCS, such as reporting, accounting, emails, and so on.
Top WHMCS Module Top Speed up your hosting business
WGS VMware WHMCS Module
WGS VMware vSphere is a fully automated module that will save you up to 90% on IT personnel costs. When a user orders a service, the admin does not need to manually create a VM or install the OS. In addition, the network adapter manages itself, and once the server is provisioned, the module sends all relevant information to the end-user. We offer a robust client area UI feature that allows users to manage all server controls such as starting, stopping, reinstalling, and managing server snapshots.
VMware Feature List
Auto-Provisioning
Configurable Options
VM Management Feature
Rebuild
Console
WHMCS IP Manager
Statistical Graphs
Third-Party Installation
ACL Groups
OVH, SoYouStart, and Kimsufi Dedicated/VPS Reseller and Server Management Module
WGS VMware vSphere is a fully automated module that will save you up to 90% on IT personnel costs. When a user orders a service, the admin does not need to manually create a VM or install the OS. In addition, the network adapter manages itself, and once the server is provisioned, the module sends all relevant information to the end-user. We offer a robust client area UI feature that allows users to manage all server controls such as starting, stopping, reinstalling, and managing server snapshots.
OVH Features
Automatic provisioning
ACL Supported
Installation Status
Power control
White Label Email Piping
KVM Viewer
Conclusion
The list continues to be infinite and the sky is the limit when it comes to WHMCS modules. If your requirements are different and you are looking for something else other than the options mentioned above then you need to get in touch with WHMCS Support of WHMCS Global Services. experts to discuss your requirements.
#whmcs#whmcsthemes#whmcsmodules#whmcstemplate#webhostingtheme#webhostingdesign#webhostingtemplate#wordpress#vps#webhosting#webhostingcompany#cloudhosting#dedicatedserver#server#fastesthosting#fasterhosting#domain#colocationserver#design#ssdhosting#wordpressdeveloper
0 notes
Text
Lib jitsi meet

Lib jitsi meet how to#
Lib jitsi meet install#
You can later exchange the SSL certificate to an officially signed one e.g. This warning appears as the site is currently protected by a self-signed SSL certificate. Open your web browser and type the URL or You will be redirected to the following page: Jitsi Meet is now up and listening on port 443. Select the first option and click on the Ok button to start the installation. You will be asked to select the SSL certificate as shown below: Provide your hostname and click on the OK button.
Lib jitsi meet install#
Next, update the repository and install Jitsi Meet with the following command: sudo apt-get update -yĭuring the installation process, you will need to provide your hostname as shown below: Sudo sh -c "echo 'deb stable/' > /etc/apt//jitsi.list" You can do this by running the following command: wget -qO - | sudo apt-key add. So you will need to add the repository for that. Jitsi Meet Installīy default, Jitsi Meet is not available in the Ubuntu 18.04 default repository. Jun 17 11:56:22 server1 systemd: Started A high performance web server and a reverse proxy server. Jun 17 11:56:21 server1 systemd: Starting A high performance web server and a reverse proxy server. ├─34894 nginx: master process /usr/sbin/nginx -g daemon on master_process on Loaded: loaded (/lib/systemd/system/rvice enabled vendor preset: enabled)Īctive: active (running) since Wed 11:56:22 UTC 12s ago rvice - A high performance web server and a reverse proxy server.:/home/administrator# sudo systemctl status nginx Output: Synchronizing state of rvice with SysV service script with /lib/systemd/systemd-sysv-install.Įxecuting: /lib/systemd/systemd-sysv-install enable nginx Once the Nginx is installed, you can check the Nginx service with the following command: sudo systemctl status nginx You can install it with the following command: Advertisement sudo apt-get install nginx -y So you will need to install it to your system. Jitsi Meet uses Nginx as a reverse proxy. OpenJDK 64-Bit Server VM (build 25.252-b09, mixed mode) Once the Java is installed, verify the Java version with the following command: java -version You can install OpenJDK JRE 8 by running the following command: sudo apt-get install -y openjdk-8-jre-headless -y Next, you will need to install Java to your system. Then, verify the hostname with the following command: hostname -f Next, open /etc/hosts file and add FQDN: sudo nano /etc/hostsĪdd the following line: 127.0.1.1 server1 You can do this by running the following command: sudo hostnamectl set-hostname server1 Next, you will need to set up a hostname and FQDN to your system. Once your system is up-to-date, restart your system to apply the changes. Getting Started with installing Jitsi Meet on Ubuntu 20.04īefore starting, update your system with the latest version with the following command: sudo apt-get update -y
Lib jitsi meet how to#
In this tutorial, we will learn how to install the video conferencing service Jitsi Meet on an Ubuntu 20.04 LTS server. You can video chat with the entire team and invite users to a meeting using a simple, custom URL. With Jisti Meet you can stream your desktop or just some windows. The Jitsi Meet client runs in your browser, so you don’t need to install anything on your computer. Vmware horizon client the supplied certificate is expired or not yet valid.Jitsi Meet is a free, open-source, secure, simple, and scalable video conferencing solution that you can use as a standalone application or embed it into your web application.
1 note
·
View note
Text
Virtualization is an old technology that still finds high use in this era of cloud computing. It can be defined as dividing the computer resources logically. By doing so, it helps create software-based or virtual versions of computer resources such as networks, storage, servers, and applications. Moreso, organizations are able to partition a single server into different Virtual Machines that interact independently To facilitate virtualization, a hypervisor is used either on top of the operating system or directly installed on the hardware. This brings the two major Hypervisor types: Bare Metal/Type 1 Hypervisors: These hypervisors are installed directly on top of the physical machine. They are considered secure hypervisors when compared to Type2 Hypervisors. They include Microsoft Hyper-V, open-source Kernel-based VMs (KVMs), VMware ESXi Hosted/Type 2 Hypervisors: These are installed on top of an existing operating system. They have more latency as compared to Type 1 due to their hosted nature. These include VMware Workstation and Oracle VirtualBox Kernel-based Virtual Machine abbreviated as KVM is an open-source hypervisor that allows your Linux system to host and run multiple isolated virtual environments. It works by converting the Linux system into a Type1/bare-metal hypervisor. It avails the host resources including Memory, CPUs, and virtual devices to the virtual machine instances. KVM offers a lot of features that include high performance, scalability, scheduling, and resource control, lower latency, live migration, memory management e.t.c Amongst the amazing feature is the ability to automate deployments on KVM using Ansible and other automation tools. This makes it easy to run several deployments at once. In this guide, we will take a walk through how to install and use KVM Virtualization on Rocky Linux 9. Getting Started You need to confirm if the required virtualization extensions are available. These are Intel VT for Intel or AMD-V for AMD processors. If not enabled, you may be required to make the configuration in BIOS. cat /proc/cpuinfo | egrep --color "vmx|svm" Alternatively, you can use the command: $ lscpu | grep Virtualization Virtualization: VT-x Virtualization type: full 1. Install KVM tools on Rocky Linux 9 The KVM packages reside in the default Rocky Linux 9 repositories and can be installed using the command: sudo dnf install qemu-kvm libvirt virt-manager virt-install Install other managements tools: sudo dnf install epel-release -y sudo dnf -y install bridge-utils virt-top libguestfs-tools bridge-utils virt-viewer Once complete, check if the kernel modules are loaded: $ lsmod | grep kvm kvm_intel 364544 0 kvm 1056768 1 kvm_intel irqbypass 16384 1 kvm Start and enable the service: sudo systemctl start libvirtd sudo systemctl enable libvirtd Verify if the service is running: $ systemctl status libvirtd libvirtd.service - Virtualization daemon Loaded: loaded (/usr/lib/systemd/system/libvirtd.service; enabled; vendor preset: disabled) Active: active (running) since Fri 2022-07-22 14:28:15 CEST; 8s ago TriggeredBy: ● libvirtd.socket ● libvirtd-ro.socket ● libvirtd-admin.socket ○ libvirtd-tcp.socket ○ libvirtd-tls.socket Docs: man:libvirtd(8) https://libvirt.org Main PID: 35007 (libvirtd) Tasks: 21 (limit: 32768) Memory: 14.6M CPU: 293ms CGroup: /system.slice/libvirtd.service ├─35007 /usr/sbin/libvirtd --timeout 120 ├─35119 /usr/sbin/dnsmasq --conf-file=/var/lib/libvirt/dnsmasq/default.conf --leasefile-ro --dhcp-script=/usr/libexec/libvirt_> └─35120 /usr/sbin/dnsmasq --conf-file=/var/lib/libvirt/dnsmasq/default.conf --leasefile-ro --dhcp-script=/usr/libexec/libvirt_ To execute commands, you need to add your system user to the KVM group:
sudo usermod -aG libvirt $USER newgrp libvirt 2. Create a Network Bridge for KVM instances By default, a network bridge with the name virbr0 is created to provide NAT. The VMs using this bridge do not have external connectivity. The available bridge networks can be checked using the command: $ brctl show bridge name bridge id STP enabled interfaces virbr0 8000.5254002f2d76 yes For external connections, you need to create a network bridge. In this guide, I will show you how to create a network bridge using NMCLI. Begin by identifying the available connections: $ sudo nmcli connection show NAME UUID TYPE DEVICE enp6s18 f546038c-74f7-359d-849b-c7be2f0bd125 ethernet enp6s18 virbr0 221e4b7d-ebef-4acb-b3e5-b729338f0d1d bridge virbr0 After identifying the device, export the related variables for the bridge: BR_NAME="br0" BR_INT="enp6s18" SUBNET_IP="192.168.205.10/24" GW="192.168.205.1" DNS1="8.8.8.8" DNS2="8.8.4.4" Here; BR_NAME: The name of the bridge to be created. BR_INT: the physical network device to be used as bridge slave. SUBNET_IP: IP address and subnet assigned to the bridge created. GW: The IP address of the default gateway DNS1 and DNS2: IP addresses of the DNS servers to be used. Proceed and define the bridge network: sudo nmcli connection add type bridge autoconnect yes con-name $BR_NAME ifname $BR_NAME Now add the IP, gateway, and DNS to the bridge: sudo nmcli connection modify $BR_NAME ipv4.addresses $SUBNET_IP ipv4.method manual sudo nmcli connection modify $BR_NAME ipv4.gateway $GW sudo nmcli connection modify $BR_NAME ipv4.dns $DNS1 +ipv4.dns $DNS2 Add the identified network device as a slave to the bridge: sudo nmcli connection delete $BR_INT sudo nmcli connection add type bridge-slave autoconnect yes con-name $BR_INT ifname $BR_INT master $BR_NAME Verify the creation: sudo nmcli connection show Sample Output: Start the network bridge: sudo nmcli connection up br0 Verify if the network is running: sudo nmcli connection show br0 You can also use the command: $ ip ad 1: lo: mtu 65536 qdisc noqueue state UNKNOWN group default qlen 1000 link/loopback 00:00:00:00:00:00 brd 00:00:00:00:00:00 inet 127.0.0.1/8 scope host lo valid_lft forever preferred_lft forever inet6 ::1/128 scope host valid_lft forever preferred_lft forever 2: enp6s18: mtu 1500 qdisc fq_codel master br0 state UP group default qlen 1000 link/ether 72:b2:b9:a5:70:7c brd ff:ff:ff:ff:ff:ff 3: br0: mtu 1500 qdisc noqueue state UP group default qlen 1000 link/ether 72:b2:b9:a5:70:7c brd ff:ff:ff:ff:ff:ff inet 192.168.205.10/24 brd 192.168.205.255 scope global noprefixroute br0 valid_lft forever preferred_lft forever For the bridge to be used by KVM, edit the below file: sudo vim /etc/qemu-kvm/bridge.conf Add the line: allow all Then restart KVM: sudo systemctl restart libvirtd 3. Create Virtual Machines on KVM There are two ways how to create VMs on KVM. These are: Using the CLI Using Virtual Machine Manager To proceed, you need an ISO file required for the OS installation. Option 1 – Using virt-install CLI tool Spinning a VM from the CLI is simple especially if you are familiar with the KVM concepts, all you need to do is run a command with the following variables captured. But first, set the right ownership of the libvirt directory: sudo chown -R $USER:libvirt /var/lib/libvirt/ Then proceed as shown: virt-install \ --name Rocky9 \ --ram 2048 \ --vcpus 1 \ --disk path=/var/lib/libvirt/images/rocky-9.img,size=20 \ --os-variant centos-stream9 \ --os-type linux \ --network bridge=br0,model=virtio \ --graphics vnc,listen=0.0.0.0 \ --console pty,target_type=serial \ --location /home/rocky9/Downloads/Rocky-9.0-x86_64-minimal.iso Remember : –disk path=/var/lib/libvirt/images/rocky-9.img,size=20 is the path to create the disk and disk size in GBs
–vcpus 1 is the number of CPUs to be used –ram 2048 is the allocated memory. –network bridge=br0 flag specifies the network bridge to use. –graphics vnc,listen=0.0.0.0 specifies the VNC listen address. You can also set a password by editing the line to be –graphics vnc,listen=0.0.0.0,password=password –location /home/rocky9/Downloads/Rocky-9.0-x86_64-minimal.iso is the path of your ISO file. Once the command is executed, VNC will be launched as shown. You can view available VMs using the command: $ virsh list --all Id Name State --------------------------------- 1 centos-stream-9 running 2 Rocky9 running Option 2 – Using the Virtual Machine Manager GUI tool The GUI tool provides an easy-to-understand method. Here, all the activities performed above are done in a GUI tool launched as shown: To create a VM, click on the highlighted icon. Load the ISO file Browse and load the ISO file: Configure the CPU and Memory for the VM. Create and set the hard disk size. Allow customization before installation by checking the box as shown below. You can also configure the VM network and select the network bridge. On the overview windows, you can configure the system chipset and Firmware(whether BIOS or UEFI). Add/configure a VNC server. You can as well set a password and port. You can also add the required hardware such as TPM required for some Operating systems such as Windows 11 Once desired configurations have been made, click finish and apply the changes. On the overview page, click Begin Installation and proceed: More demonstration of how to enable create a VM on KVM and enable TPM 2.0, UEFI, and many other VM configurations has been captured in the guide on how to: How To Enable TPM 2.0 on KVM and install Windows That is it! We have triumphantly walked through how to install and use KVM Virtualization on Rocky Linux 9. I hope this was important to you.
0 notes
Text
Clamxav database mirror

#Clamxav database mirror update#
If the local mirror is up-to-date and Anti-Virus is still failing to detect a malware sample, you might have encountered a new threat. One hour is the default scan schedule interval.
The mirror server is available within the private subnet.
The mirror server is correctly configured.
Malware signature or sample malware is not detected, even though the ClamAV daemon is properly configured. Runtime Issues Anti-Virus Is Not Detecting Malware Symptom If the internal Anti-Virus Mirror has the latest files, no action is required. SolutionĬheck that the latest version of the database files were downloaded. The Anti-Virus Mirror database verifier detected that a virus database file downloaded from the external database is older than the one most recently processed by the internal mirror. Updating virus definitions writes an error like the following to the Anti-Virus Mirror log destination: 3 20:35:34 file /var/vcap/data/antivirus-mirror/unvalidated/daily.cvd rejected: /var/vcap/data/antivirus-mirror/unvalidated/daily.cvd is not newer than /var/vcap/store/antivirus-mirror/validated/daily.cvd SolutionĬheck that the database files downloaded properly and re-download if necessary. The Anti-Virus Mirror database verifier detected that a virus database file downloaded from the external database is invalid. Updating virus definitions writes an error like the following to the Anti-Virus Mirror log destination: 3 20:28:30 file /var/vcap/data/antivirus-mirror/unvalidated/main.cvd rejected: /var/vcap/data/antivirus-mirror/unvalidated/main.cvd is an invalid cvd file: exit status 1
#Clamxav database mirror update#
Virus Database Update Issues Invalid Database Definitions Symptom For information about error codes and supported methods, see ClamAV documentation. For information, see Configure Anti-Virus Mirror in Installing and Configuring Anti-Virus Mirror.įor use cases where CVD files are manually obtained, a supported method must be used. $ curl -L -O /main.cvdĬonfigure the tile to use either the official mirror or an existing mirror. If you manually get the ClamAV Virus Database, using curl or similar tools can return a file with an error instead of the virus definitions. The antivirus-mirror fails to supply the virus definitions if it has failed to correctly obtain the following files: main.cvd, bytecode.cvd, and daily.cvd. The antivirus job can fail to start because it does not get the virus definitions from the antivirus-mirror. Successful Jobs: bpm, syslog_forwarder, bosh-dns, ipsec, pxc-mysql. Ops Manager Antivirus Job Fails To Start SymptomĮrror: Action Failed get_task: Task d5b87522-c8b2-4870-7855-73d50bff0748 result: 1 of 6 pre-start scripts failed. Review the manifest file, and replace the database_mirror key with the address of a stable mirror server. The Anti-Virus Mirror for VMware Tanzu server was unavailable during initial deployment. The bottom of the changelog contains an error message similar to: Installation Issues Ops Manager etcd_server Not Running after Update SymptomĪpplying changes in Ops Manager fails. A witness server is required for automatic failover however, one witness server can support several mirror sessions because it is not an intensive job.This topic provides instructions for troubleshooting Anti-Virus for VMware Tanzu and verifying that it is protecting your Ops Manager deployment. If either server loses quorum, the witness server assigns the principal server role, causing automatic failover from the principal server to the mirror server if necessary. When present, a witness server monitors the principal and mirror servers to ensure continued connectivity and participation in the mirror session (referred to as quorum). The witness server is an optional component of a database mirroring solution. The mirror server hosts a copy of the principal database (referred to as the mirror database) and applies the transactions forwarded by the principal database to keep the mirror database synchronized with the principal database. The principal server forwards all transactions to the mirror server before it applies them in the principal database. The principal server hosts the active copy of the database (referred to as the principal database) and services client requests. Roles of the Server in Database Mirroring Things that are explained in this article
0 notes
Text
Ene cir receiver hp dv6

#ENE CIR RECEIVER HP DV6 64 BIT#
#ENE CIR RECEIVER HP DV6 DRIVER#
#ENE CIR RECEIVER HP DV6 32 BIT#
#ENE CIR RECEIVER HP DV6 SERIES#
To check the status of existing tickets, please login e.com.
#ENE CIR RECEIVER HP DV6 DRIVER#
HP KP335AA-UUW m9253.sc, LG LW75-PMXH1, Gigabyte EG45M-UD2H, Lenovo ThinkPad X60 Tablet, WINCOR NIXDORF EPC A4, NEC Express5800/56Xe [N8000-672, CS&S Zenet, and more.Download Now ACPI VEN ENE&DEV 0100 DRIVER Toshiba Satellite P50-A X3110, Dell PowerEdge R410, WIPRO WSG59355W7S-0014, Sony VGN-NW238F, HP 310-1125uk, NEC PC-VJ10MCHE2, Panasonic CF-52ELNFQAM, HP 23-f390, Acer AX1430G, Sony VGN-NS110D, Toshiba SATELLITE L850-A891, Acer Veriton X2631, Sony VGN-NS190J, and more.Ĭompaq BT466AA-ACJ CQ3211IX, Lenovo ThinkCentre A52, Panasonic CF-30C4TAABM, Fujitsu FMVDC2A041, and more. Sony VGN-TZ170C, Sony VGN-SZ7AWN_C, Fujitsu FMVNFD70W, NEC PC-LF7506D1FL, Sony VGN-TZ73B, Toshiba SATELLITE C855D-122, Sony VGN-TZ32VN_X, Sony VGN-UX490N, NEC PC-MK32MEZDG, Compaq DA309A-B14 6540. Sony VGN-NW265F, Sony VGN-NS305D, Dell Inspiron 20 Model 3048, WIPRO WSG37455W7-0092, Packard Bell ENLS44HR, Fujitsu AMILO Li 2735, Lenovo ThinkPad X60 Tablet, Acer Aspire 1420P, IBM 8141KGR, Panasonic CF-52VADBYFG, Toshiba SATELLITE C855-1LC, HP HP Pavilion DV6-3206AX, and more. Validity Sensors Validity Sensors (WBF) (PID=0018) Qualcomm Atheros Atheros AR8131 PCI-E Gigabit Ethernet Controller (NDIS 6.20) VMware Creative AudioPCI (ES1371,ES1373) (WDM)
#ENE CIR RECEIVER HP DV6 SERIES#
Hewlett-Packard HP Deskjet 3050 J610 series (REST) Hewlett-Packard HP Photosmart C8100 series (DOT4USB) Logitech HID-compliant Optical Wheel Mouse Intel(R) 5 Series/3400 Series-Chipsatzfamilie - PCI-Express-Stammanschluss 1 - 3B42 Outdated or Corrupted drivers: 7/17 Device/Driver
#ENE CIR RECEIVER HP DV6 32 BIT#
Scan performed on, Computer: NEC PC-MY26RAZ77S96 - Windows 7 32 bit Sony Sony Firmware Extension Parser Device ULi Intel(R) 82801DB/DBM USB 2.0 Enhanced Host Controller - 24CDĪTI RADEON X600 Series (Microsoft Corporation - WDDM) Intel Intel(r) 82801DB Ultra ATA-Speichercontroller-24CB Intel(R) Xeon(R) E5 v2/Core i7 PCI Express Root Port 1a - 0E02 Outdated or Corrupted drivers: 7/21 Device/Driver
#ENE CIR RECEIVER HP DV6 64 BIT#
Scan performed on, Computer: NEC PC-MK32MEZDG - Windows 7 64 bit
0 notes
Text
Vmware vsphere 6.0 client firewall

Vmware vsphere 6.0 client firewall install#
Vmware vsphere 6.0 client firewall full#
You can check the status of vCenter services in the console and the command line interface (CLI). For example, if the vSphere Web Client service is Started, and the vCenter Server service is Stopped, the VMware 503 Service Unavailable error can occur. Open the Appliance Management Interface (for vCenter Server Appliance) in a web browser by entering the IP address or the FQDN (a Fully Qualified Domain Name) for vCenter and port 5480, for example:Ĭheck the status of vCenter services in the Services section. If this doesn’t help, check whether all needed services have started. Try connecting to vCenter from another client. If you have just started a vCenter instance, and all the needed services have not started yet, wait for a few minutes and try again. You should find and fix the error on the vCenter server and not on the client side. Incorrect firewall settings (for vCenter installed on Windows) and network issues.There are issues with a database used by vCenter.Some services have not loaded yet and are not running (one of the common issues is that the reverse Proxy service or the vSphere web client service is down).In the case of the vCenter 503 Service Unavailable error, the error can be caused by different factors:
Vmware vsphere 6.0 client firewall full#
Here’s the full text of this error for VMware vSphere Client:ĥ03 Service Unavailable (Failed to connect to endpoint: _serverNamespace = / action = Allow _pipeName =/var/run/vmware/vpxd-webserver-pipe) Usually this error indicates that a server cannot handle a request and you should look for the issue on the web server hosting an application. Based on this, 503 Service Unavailable is a response that describes a server-side error. The 5xx class of HTTP status codes is used to notify users about server errors. 503 Service Unavailable is one of the standard HTTP status codes that are returned by a server when a client sends a request to the server. General Informationīefore covering troubleshooting, you should understand what the 503 error is. This blog post explains the possible reasons that can cause this error and the methods of fixing the vCenter 503 Service Unavailable error. Sometimes, when you try to open VMware vSphere Client to connect to vCenter, you get the 503 Service Unavailable error. VMware vCenter Server is a centralized vSphere management system that allows you to manage ESXi hosts, clusters, virtual machines, and other components of a virtual data center.
Vmware vsphere 6.0 client firewall install#
You can install Sophos Firewall as a software appliance on custom hardware over Windows or macOS systems.By Michael Bose “503 Service Unavailable” Error on the vSphere Web Client: What Should You Do? You can install Sophos Firewall as a virtual appliance on the following platforms and operating systems: Platforms You can manage these centrally through Sophos Central. These appliances deliver the full security of the hardware appliances. With Sophos Firewall virtual and software appliances, you can implement network security and Synchronized Security (for endpoints) within the virtual infrastructure. You can install Sophos Firewall as a virtual or software appliance.
0 notes
Text
Faronics deep freeze mac

#Faronics deep freeze mac mac os x#
#Faronics deep freeze mac install#
#Faronics deep freeze mac software#
#Faronics deep freeze mac password#
Deep Freeze Mac 7.30 does not officially support Apple Silicon Mac.
Note: Deep Freeze 7.x no longer requires a restart to Freeze the computer so the computer will not need to restart at the end of the maintenance period.
New option for ‘Status’ command to return Frozen/Thawed status.
Localized in English, French, Spanish, German, Russian, and Japanese.
Use Saved Tasks related to Deep Freeze for use with ARD, such as Boot Frozen, Boot Thawed, Uninstall Deep Freeze, and others.
#Faronics deep freeze mac install#
Use Deep Freeze Assistant to install specific Saved Tasks into the ARD console.Integrates with Apple Remote Desktop (ARD) 2 or 3 for enterprise style capability.Use Deep Freeze Assistant to create customized installation packages.Import or export configuration information files to or from other Deep Freeze Controllers for deployment.Selectively Freeze or Thaw fixed drives, volumes, or partitions.Freeze administrator accounts or root account.Choose whether the hard drive icon will appear with the Deep Freeze badge.Choose whether the Deep Freeze icon will appear in the menu bar.Protects multiple hard drives and partitions.
#Faronics deep freeze mac password#
Provides password protection and complete security.Guarantees 100% workstation recovery on restart.This edition of Deep Freeze Mac can be deployed and controlled with Apple Remote Desktop (ARD). The result is a dramatic reduction in support and IT expenditures and a substantial increase in computer uptime. The need for IT professionals to perform rebuilds, re-image, or troubleshoot computers is eliminated with Deep Freeze Mac ARD reboot-to-restore technology. Install Deep Freeze Tasks for controlling all aspects of Deep Freeze via the ARD console (6.Deep Freeze Mac has changed the way IT Professionals approach end-point security its non-restrictive concept offers the most robust Mac protection available.Get enterprise-style capability with Apple Remote Desktop (ARD) integration.Account types include Admin, Standard, and Mobile Accounts.Choose from mapping entire accounts, or specific parts of a user account to a second partition or ThawSpace (6.2 only).Deep Freeze for Windows can be used to protect Parallels, VMWare, Boot Camp, and Virtual PC environments.Deep Freeze Mac will protect your entire Mac partition, including any virtual machines within it.Create ThawSpaces from 1 MB to 120 GB in size (6.2 only).(* Resizing ThawSpaces is available only for 6.2) Add, delete, or resize* Global and Individual ThawSpaces from within the ThawSpace tab.
#Faronics deep freeze mac software#
Schedule multiple maintenance periods to automatically pull down persistent Apple Software Updates (6.2 only).
Create customized installation packages with all desired options pre-configured (6.2 only).
Import or export configuration files to or from other Deep Freeze Controllers (6.2 only).
Dynamic, resizable ThawSpaces (7.1 only).
User specific ThawSpaces protect from unauthorized access.
Use ThawSpace to designate global or user-specific spaces for retaining data.
Choose if the hard drive icon will appear with the Deep Freeze badge (6.2 only).
Choose if the Deep Freeze icon will appear in the menu bar.
Customize user name and password (6.2 only).
Supports multi-boot environments (6.2 only).
Guarantees 100% workstation recovery upon restart.
The hardware requirements are the same as the recommended requirements for the host operating system. ARD integration requires Apple Remote Desktop version 3.2 or later.
#Faronics deep freeze mac mac os x#
Version 6.2 (HFS +)ĭeep Freeze Mac requires Mac OS X Mavericks 10.9 or Yosemite 10.10, El Capitan 10.11, macOS Sierra 10.12, and High Sierra 10.13. Deep Freeze Mac requires macOS High Sierra 10.13.5 and macOS Mojave 10.14.
0 notes
Text
Fortigate vm license crack

In addition tó signature- based thréat detection, IPS pérforms anomaly- based détection which alerts usérs to any tráffic that matches áttack behavior profiles.Īfter deploying thé instance, click ón Managé in AWS Console tó see thé running instance ánd public DNS addréss to continue thé configuration of thé Forti.Īnnual Subscriptions: AnnuaI subscription cancellations ór downgrades are nót supported.īy subscribing tó this product yóu agree to térms and conditions outIined in the próduct End User Licénse Agreement (EULA). Use the Symantéc System Center consoIe to push óut the new Iicense file for thát.Day Free TriaI Available - Fortinet FortiGaté-VM firewall technoIogy delivers complete contént and network.įortiGate-VM is a full-featured FortiGate packaged as a virtual.įortiGate-VM virtuaI appliance is ideaI for monitoring ánd enforce virtual tráffic on.įortiGate VM incIudes a limited émbedded 15-day trial license if you run in.Īn AMI contains all the information necessary to start up and run the software on the image. To upload thé FortiGate VM Iicence file: In thé Evaluation License diaIog box, select Entér License.įor other séttings and features yóu may refer tó the for thé VM installation Guidé and Note howéver that since yóu dont have thé Fortigate sérvices such as thé Anti Virus, lntrusion Prevention, Anti spám, and others, aIl you can dó are to practicé navigating and chéck on common firewaIl policies.Īre virtualization fóundation fortinet, need ánd downloads, download Iicense how licence 16 file inc How to restart a slave FortiGate firewall in an HA cluster. To activate the FortiGate VM license, enter the following CLI command on your FortiGate VM: execute update-now 5.īefore using thé FortiGate VM yóu must enter thé license file thát you downloaded fróm the website upón registration. In the Licénse Information widgét, in the Régistration Status field, seIect Update. Before you can connect to the FortiGate VM web-based manager you must. Fortigate Vm License Fortigate Vm Licence Crack Home Online Help. Fortigate Vm License Key Fortigate Vm License Key is a software selection with 90 downloads. Once an intérface with administrative accéss is configured, yóu can connect tó the FortiGaté VM web-baséd Manager and upIoad the FortiGaté VM license fiIe that you downIoaded from. Fortigate-vm is hosted at free file sharing service 4shared. When the trial expires, all functionality is disabled until you upload a license file. The trial period begins the first time you start the FortiManager VM. No activation is required for the built-in evaluation license. Fortigate Vm File Download The Iinkĭownload the Iink NetworkLab (NetworkLabIN) NétworkLab (NetworkLabIN).īefore you can connect to the FortiGate VM web-based manager you must configure a network interface in the FortiGate VM console. FortiManager VM includes a free, full featured 15 day trial license. Support Stuff Issue with FortiGate VM liecencing has been resolved. To check the FortiGate VM license status, enter the following CLI commands on your FortiGate VM: get system status. License upload pagé: Select Upload ánd locate the Iicense file (. To activate the FortiGate VM license, enter the following CLI command on your FortiGate VM: execute update-now. With the additión of virtual appIiances from Fortinet, yóu can deploy á mix of hardwaré and virtual appIiances, operating together ánd managed from á common centralized managément platform.Ĭonfiguration such ás change login passwórd, WAN, DHCP, FirewaIl Policy, etc.įrom this póint on you máy start playing aróund and navigating thróugh its menus. GUI (Web Based Manager) information, FortiOS 3.0, 4.0, 4.1 In the following example: Serial Number FGT-04 Version 3.00 Build 0752. The FortiGate-VM virtual appliance includes a limited 15-day evaluation license that supports. FortiGate-VM virtual appliance is ideal for monitoring and enforcing virtual traffic on leading virtualization, cloud, and SDN platforms including VMware vSphere, Hyper-V, Xen, KVM, and AWS. They also aIlow you to rapidIy provision security infrastructuré whenever and whérever it is néeded. To determine whther your FortiManagr unit has th VM Activation fature, see Features sction of the.vmplayer -v VMware Player 7.1.0 build-2496824 zipinfo.FortiGate-VM64 get system fortiguard grep license antispam-license: Unknown. FortiGate-VM virtual appliance evaluation license. Fortigate Vm License Crack FortiGate-VM is a full-featured FortiGate packaged as a virtual appliance. Once the daté is changed, thé GUI will prómpt a póp up showing thé days to éxpire the licence.įortiGate virtual appliances allow you to mitigate blind spots by implementing critical security controls within your virtual infrastructure.
0 notes
Text
The writer says that isolating servers on discreet virtual machines
Virtualization is a boon for data centers and other scenarios in which concentrated computer resources are necessary.Significant questions about the security of the technology persist, however. Indeed, it seems that the questions are proliferating. At Black Hat DC last week, a researcher demonstrated how to hack into VMware and Xen products during the movement of the virtual machine from one physical machine to another.Dark Reading reports that the University of Michigan's Jon Oberheide introduced Xensploit, a tool that can take over the virtual machines hypervisor and applications and, ultimately, gain access to data. Oberheide swiss roll machine said that the data is moved in the clear, which can leave the process open for the type of man-in-the-middle attacks generally associated with public Wi-Fi schemes.In still another piece of bad news for VMware, ZDNet reports that Core Security Technologies has released proof-of-concept software that demonstrates the ability of a hacker to create or modify executable files on the host operating system.
The story goes into good detail on the exploit, the damage it can do and how it came to light.Apparently, the issue of security and virtualization is coming to a head. On one hand, the story says, VMware is nearing an announcement on a security initiative with other companies. On the other, Core is pushing the issue by timing release of the news of the exploit during the VMworld event in Cannes. The hope was to pressure the company into taking action. Core, according to the story, says that VMware had known about the flaw for four months.Security is only a small part of this Tech Republic piece, which relates 10 important facts about virtualization. The overall piece is a worthwhile read, however. Especially important is the first item, which makes the important point that virtualization actually covers five operations: desktop virtualization; virtual testing environments; presentation virtualization; application virtualization and storage virtualization.The security element of the piece actually offers a rare positive spin.
The writer says that isolating servers on discreet virtual machines can be more secure than running several servers on the same operating system. She also points to the ability to isolate applications in "sandboxes." In an item related to security, the writer says that disaster recovery can be done much more quickly in a virtual environment than one in which the operating system, application and data all must be reinstalled.Fortunately, this paper - presented by a Google researcher at CanSec West - is summarized in this Smart Security blog posting, since its level of complexity is great. The blogger sums up the security status of virtualization smartly enough that it is worth quoting:Virtual machines are sometimes thought of as impenetrable barriers between the guest and host, but in reality they're (usually) just another layer of software between you and the attacker. As with any complex application, it would be naive to think such a large codebase could be written without some serious bugs creeping in.The paper, the blogger says, mostly identifies flaws such as buffer overflows. At this point, even the bloggers explanation became a bit obtuse. It is clear, however, that the paper backs up the growing belief that virtualization is vulnerable.This Data Storage Today piece takes a high-level look at virtulized security. Specifically, it looks at four major concerns that have been expressed about the platform. Potential users are concerned about "virtual machine escapes," which are the movement of an attack from a hypervisor to the virtual machines resident on the same physical host. The second worry is that virtual machines increase patching burdens. The third concern is the challenge of whether or not to run virtual machines in the DMZ. Finally, the fact that hypervisors are new and untested is thought likely to attract hackers.
0 notes
Text
VMware
What is VMware?
Virtualization software creates an abstraction layer over computer hardware that allows the hardware elements of a single computer — processors, memory, storage, and more — to be divided into multiple virtual computers, commonly called virtual machines (VMs). Each virtual machine runs its own operating system (OS) and behaves like an independent computer, even though it is running on a portion of the actual underlying computer hardware.
As you can imagine, virtualization enables more efficient utilization of computer hardware and enables a greater return on an organization’s hardware investment. It also enables cloud providers — public or private — to serve more users with their existing physical computer hardware.
Virtual machines (VMs)
A virtual machine (VM) is the base unit of VMware virtualization. A VM is a software-based representation of a physical computer. An operating system (OS) running in a VM is called a guest OS.
Each VM includes a configuration file that stores the VM’s settings, a virtual disk file that is a software version of a hard drive, and a log file that keeps track of the VM’s activities, including system failures, hardware changes, migrations of virtual machines from one host to another, and the VM’s status.
VMware offers various tools for managing these files. You can configure virtual machine settings using the vSphere Client, which is a command-line interface for VM management. You can also use the vSphere Web Services software development kit to configure VMs via other programs. For example, you could enable your software development environment to create a virtual machine that it could use to test a software program.
Benefits
Read More
Using VMware products and services for virtualization brings several benefits. These include the following:
Improved return on investment (ROI): VMware enables you to use more of a physical computer’s resources. Administrators don’t like running multiple mission-critical applications on a single server OS because if one application crashes, it can make the OS unstable and crash other applications. One way to eliminate this risk is to run each application in its own OS on its own dedicated physical server, but this is inefficient because each OS might only use 30% of a server’s CPU power. With VMware, you can run each application in its own OS on the same physical server and make better use of the physical server’s available CPU power,
More efficient use of energy and space: VMware lets you run more applications using fewer physical servers. Fewer physical servers require less space in your data center and less energy to power and cool.
Industry support: VMware is the foremost provider of virtualization services, with over 500,000 customers. A network of 75,000 partners supports customers with a wide variety of add-on products and services.
Virtualization
These are the various components of VMware virtualization and how they work.
VMware hypervisor
VMware virtualizes physical computers using its core hypervisor product. A hypervisor is a thin layer of software that interacts with the underlying resources of a physical computer (called the host) and allocates those resources to other operating systems (known as guests). The guest OS requests resources from the hypervisor.
Read More
The hypervisor separates each guest OS so each can run without interference from the others. Should one guest OS suffer an application crash, become unstable, or become infected with malware, it won’t affect the performance or operation of other operating systems running on the host.
VMware ESX
VMware’s ESXi data center-focused hypervisor (link resides outside IBM) is a Type 1 or “bare metal” hypervisor, replacing the primary operating system that would interact with a computer’s physical components. It succeeds ESX, which was a larger hypervisor that used more of the host computer’s resources. VMware has discontinued ESX.
VMware’s ESXi competes with several other Type 1 hypervisors:
VMware vs. Hyper-V: Microsoft’s Hyper-V is a hypervisor product that allows you to run multiple operating systems on the same server or client computer. Like VMware’s ESXi, Hyper-V is a Type 1 hypervisor that interacts with the underlying physical computing and memory resources. Hyper-V works differently to ESXi, using partitions to manage its VMs. Hyper-V must run with the Windows OS. When activated, it installs itself alongside the Windows OS in a root partition, which gives Windows privileged access to the underlying hardware. It then runs guest operating systems in child partitions that communicate with the physical hardware via the root partition. Hyper-V also ships with Windows 10 clients, competing with VMware’s Type 2 Workstation hypervisors.
VMware vs. Citrix: Citrix offers application and desktop virtualization products and has a long track record in the virtual desktop integration market. Its main hypervisor offering is the Citrix Hypervisor (known as XenServer), which competes with VMware vSphere. Citrix’s application and desktop virtualization products compete with VMware’s Horizon virtual desktop integration product.
VMware vs. KVM: Both VMware ESXi and KVM are hypervisors, but KVM is part of the Linux kernel (the heart of the OS). KVM’s big advantage over VMware ESXi is that it is an open source product, making its code base transparent. You can use a variety of open source virtualization management tools that integrate with the Linux kernel. As with many open source projects, they might need extra configuration work. You can also buy Red Hat Virtualization, which provides a suite of management tools for virtual servers built on KVM.
Read More
VMware and Linux
VMware relied on Linux during its early history. The early version of its hypervisor, called ESX, included a Linux kernel (the central part of an OS that manages the computer hardware). When VMware released ESXi, it replaced the Linux kernel with its own. ESXi supports a wide range of Linux guest operating systems including Ubuntu, Debian, and FreeBSD.
Desktop virtualization
VMware is a well-established server-based hypervisor, but it also sells software that virtualizes desktop operating systems. This section covers some of that software and how it works.
What is VMware Workstation?
VMware Workstation includes Type 2 hypervisors. Unlike a Type 1 hypervisor, which replaces the underlying OS altogether, a Type 2 hypervisor runs as an application on the desktop OS and lets desktop users run a second OS atop their main (host) OS.
Read More
VMware Workstation comes in two flavors:
Workstation Player (link resides outside IBM) is a free version that supports a single guest OS.
Workstation Pro (link resides outside IBM) supports multiple guest operating systems and integrates with VMware’s enterprise virtualization management tools.
How to install VMware tools
There’s only one thing better than having a second OS on your desktop computer: having a second OS that can exchange data with the first. That’s where VMware Tools comes in. It is a crucial part of any VMware Workstation environment. It enables the guest OS running within the Type 2 hypervisor to work better with the host OS.
The benefits of installing VMware Tools include faster graphics performance and support for shared folders between the guest and host OS. You can use it to drag and drop files and to cut and paste between the two operating systems.
To install VMware Tools, click VM and then Install VMware Tools from the VMware Workstation menu. VMWare Workstation then mounts a virtual CD-ROM drive in the guest OS that contains the VMware Tools installer. You then access the CD-ROM image from within the guest OS and run the installer.
VMware’s Type 2 hypervisors compete with others on the market, including the following:
VMware vs. Virtualbox: VirtualBox is a Type 2 hypervisor produced by Oracle-owned Innotek that competes with VMware Workstation. It is a free, open source product that allows you to install and use another OS on top of the one already on your desktop or laptop. You can install VMware’s products on Linux and Windows. VirtualBox supports Linux, Windows, Solaris, and FreeBSD as host operating systems. Each product has its strengths and relative weaknesses in different areas. VMware’s products offer better support for 3D graphics, while VirtualBox supports more virtual disk images, which are files that contain virtual machine data.
VMware vs. Parallels: Parallels is a Type 2 hypervisor dedicated to running guest operating systems on the macOS platform. It competes with VMware Fusion. VMware Fusion is available for a single one-off fee, but you can only license Parallels via a subscription model.
Virtual desktop integration (VDI)
VMware offers a third model that sits somewhere between the server and desktop virtualization above — virtual desktop integration (VDI). VDI virtualizes desktop operating systems on a server.
VDI offers centralized desktop management, letting you configure and troubleshoot desktop operating systems without remote access or on-site visits. Users can access their applications and data from any device, anywhere, without the need to invest in expensive, high-powered client endpoint equipment. Sensitive data secure never leaves the server.
VMware Horizon
VMware Horizon is VMware’s suite of VDI tools. It supports both Windows and Linux desktops. You can run your virtual desktops on your own premises or use Horizon Cloud to run them in multiple hosted cloud environments.
The Horizon suite includes Horizon Apps, a platform that lets you create your own custom app store for enterprise users to run on their virtual desktops. Your users can access a mixture of on-premise, SaaS, and mobile applications using a single set of login credentials.
Explore the benefits of virtual desktop integration with VMware Horizon on IBM Cloud.
vSphere
VMware vSphere (link resides outside IBM) is VMware’s enterprise virtualization platform, including both the ESXi hypervisor software and the vCenter Server management platform for managing multiple hypervisors.
VSphere is available in three configurations: Standard, Enterprise Class, and Platinum. Each supports policy-driven virtual machine storage, live workload migration, and built-in cybersecurity features. The higher-end options include VM-level encryption, integrated container management, load-balancing, and centralized network management. Platinum alone supports automated responses to security threats and integration with third-party security operations tools.
Learn more about this virtualization platform by checking out VMware vSphere on IBM Cloud.
vCenter
One of vSphere’s important components is vCenter Server (link resides outside IBM). This is the management component of vSphere. It allows you to manage virtual machine deployments across a large collection of host servers. It assigns virtual machines to hosts, allocates resources for them, monitors performance, and automates workflow. This tool can be used to manage user privileges based on a user’s own policies.
VCenter Server has three main components:
VSphere Web Client is the platform’s user-interface, providing administrators with browser-based access to all functions
VCenter Server Database is the data repository for the product. It stores data necessary for server hosts to run hypervisors and virtual machines
VCenter Single Sign-On lets you access the entire vSphere infrastructure with a single login.
Clustering
Using a hypervisor on a host server will maximize your use of that hardware, but most enterprises users will need more VMs than they can fit on a single physical server. That’s where VMWare’s clustering technology comes in.
VMware shares resources between hosts by grouping them into a cluster and treating them as a single machine. You can then use VMware’s clustering technology to pool hardware resources between the hypervisors running on each host in the cluster. When adding a VM to a cluster, you can give it access to these pooled resources. There may be many clusters in a VMware-powered enterprise.
VMware allows you to create and manage clusters within its vSphere environment. A cluster supports many vSphere features, including workload balancing, high availability, and fault-tolerant resilience.
VMware clustering gives you access to several VMware functions to make your virtual infrastructure run smoothly and reliably:
VMware HA
VMware’s vSphere High Availability (HA) (link resides outside IBM) solution lets you switch virtual machines between physical hosts if the underlying hardware fails. It monitors the cluster and if it detects a hardware failure, it restarts its VMs on alternate hosts.
VSphere HA designates one host in a cluster as the “master,” the others are called “slaves.” The master communicates with vCenter Server, reporting back on the state of protected VMs and slave hosts.
VMware Fault Tolerance
While vSphere HA provides rapid recovery from outages, you can still expect downtime while it moves and restarts a VM. If you need more protection for mission-critical applications, vSphere Full Tolerance (link resides outside IBM) offers a higher level of availability. It promises no loss of data, transactions, or connections.
VSphere Fault Tolerance works by running a primary and secondary VM on separate hosts in the cluster and ensuring that they are identical at any point. If either of their hosts fails, the remaining host continues operating and vSphere Fault Tolerance creates a new secondary VM, reestablishing redundancy. VSphere automates the whole process.
VMware DRS
Read More
If you allow many VMs to run unmanaged across your host machines, you will get into trouble. Some VMs will be more demanding on CPU and memory resources than others. This can create unbalanced workloads, with hosts handling more than their share of work while others sit idle. VMware Distributed Resource Scheduling (DRS) (link resides outside IBM) solves that problem by balancing workloads between different ESXi hypervisors.
DRS, a feature of vSphere Enterprise Plus, works within a cluster of ESXi hosts that are sharing resources. It monitors host CPU and RAM usage and moves the VMs between them to avoid overworked and underused hosts. You can set these allocation policies yourself to reallocate resources aggressively or to rebalance less often.
Virtualizing the rest of the data center
VMware made a name for itself virtualizing servers and then desktop operating systems. In 2012, it announced plans to virtualize and automate everything in the data center in a concept called the software-defined data center (SDDC).
VMware’s SDDC elements include the following:
VMware NSX
VMware NSX (link resides outside IBM) is a network virtualization product that allows you to define and control your IT network logically in software. You can consolidate network functions such as switching, routing, traffic load balancing, and firewalls into hypervisors running on x86 computers. You can manage these functions together from a single screen rather than manually configuring different hardware across different interfaces, and you can also apply software-based policies to automate network functions. It is the network component of VMware’s SDDC that brings the same virtualization benefits to networking, software, and computing functions.
The product supports multiple environments, including your data center, private cloud, and public hosted clouds. This makes it easier for your network to support cloud-native apps that rely on container environments and microservices.
VMware vSAN
VMware vSAN (link resides outside IBM) is part of VMware’s storage virtualization solution. It creates a software interface between VMs and physical storage devices. This software — part of the ESXi hypervisor — represents physical storage devices as a single pool of shared storage, accessible by machines in the same cluster.
Using VMware vSAN, your VMs can use storage on any computer in a cluster rather than relying only on a single computer, which might run out of storage. It also avoids wasting a physical computer’s storage if the VMs running on that computer don’t use it. VMs running on other hosts can use its storage, too.
VSAN integrates with vSphere to create a storage pool for management tasks, such as high availability, workload migration, and workload balancing. Custom policies give you full control over how vSphere uses shared storage.
VMware Cloud
VMware offers several products and services under the VMware Cloud (link resides outside IBM) banner. VMware Cloud Foundation, an integrated software suite supporting hybrid cloud operations, includes a range of services for software-defined computing, storage, networking, and security, and it is available as a service from a variety of cloud providers. You can deploy it in a private cloud environment via vSAN ReadyNode, a validated server configuration provided by an OEM working with VMware.
VMware HCX (Service)
Read More
VMware HCX (link resides outside IBM) is a component of VMware Cloud that helps companies to use a mixture of computing environments. This gives IT teams the functionality they want at the right cost and enables them to keep more sensitive data on their own computers. The challenge is getting these VMs to work together across these different environments.
HCX is VMware’s answer to this hybrid cloud complexity. It is a software as a service (SaaS) offering that lets you manage multiple vSphere instances across different environments, ranging from on-premise data centers to hosted cloud environments.
Formerly called Hybrid Cloud Extension and NSX Hybrid Connect, HCX abstracts your vSphere environment so that the VMs it manages appear to have the same IP address — no matter where they run. HCX uses an optimized wide-area network (WAN) connection to extend on-premise applications to the cloud without reconfiguration. This allows you to call on extra computing power from the cloud to maintain the performance of on-premise applications when computing demand exceeds on-premise physical resources.
You can often see this situation occur in retail. A spike in e-commerce demand might use up all your data center resources. You can keep the orders flowing and avoid frustrated customers by calling on computing resources in the cloud.
HCX lets you replicate your data to a cloud-based vSphere instance for disaster recovery. Should you need to switch to a standby server or system if your on-premise infrastructure becomes unavailable, you can do so without reconfiguring IP addresses.
Backup and snapshots
Like physical computers, VMs need to be backed up. VMware used to provide its own, called vSphere Data Protection, but it has discontinued this product. Instead, you can use EMC’s Avamar backup, recovery, and deduplication software, which powered vSphere Data Protection. There are also other third-party backup solutions available from VMware’s partners.
A VMware snapshot is a file that preserves the state of a VM and its data at a given moment in time. A snapshot lets you restore your VM to the time the snapshot was taken. Snapshots are not backups, because they only save the changes from the original virtual disk file. Only a full backup solution can fully protect your VMs.
VMware containers
Developers increasingly use containers as an alternative to VMs. Like VMs, they are virtual environments containing applications abstracted from the physical hardware. However, containers share the underlying host OS kernel instead of virtualizing an entire OS as VMs do.
Read More
Containers offer more agility and use physical computing power more efficiently than VMs, but they are not suitable for all cases. You might want to develop an entirely new application that divides small pieces of functionality called microservices into separate containers, making application development and maintenance more agile. On the other hand, a legacy application written to run as a single binary program might be more suitable running in a VM that mirrors the environment it is used to. You can take advantage of containers and VMs together using the VMware’s vSphere Integrated Containers (link resides outside IBM) feature, which bridges the gap between the two by allowing containers to run in VMware environments. It comprises three components:
VSphere Integrated Container Engine lets developers run containerized apps based on the popular Docker container format alongside VMs on the same vSphere infrastructure.
Project Harbor is an enterprise container registry that lets developers store and distribute container images so that other developers can reuse them.
Project Admiral is a management portal that lets development teams provision and manage containers.
1 note
·
View note