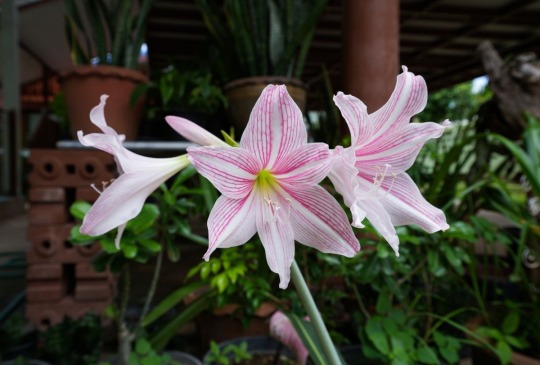
#and 2) where is the indirect lighting? or plants????
Text
"i've always wanted to be surrounded by your things" okay mr. sap machine but i know your secret other reason is that you did the math and realized that aneki isn't gonna want to crash at your place if you live in your boyfriend's studio lol
#i was like MAKE IT MAKE SENSE KUROSAWA and then i figured out a way to make it make sense#i mean okay the REAL reason is that kurosawa isn't attached to his place; it's just another way he tried to make himself perfect#and one of the things he loves about adachi is his imperfection and how it releases him (kurosawa) from the need to be perfect#so his own place probably feels very sterile and suffocating whereas adachi's little apartment is freeing and real#at least he brought his bed to adachi's studio. for them both to have to fit on adachi's bed would get old#i like to think aneki is kind of a princess and she liked staying at his old place because it was so nice#i'm sure she got to sleep in the bed while he had to take the futon#so i don't think she would be up for slumming it in kurodachi's teeny tiny little lovenest#not that there's anything wrong with adachi's apartment! it's quite nice really. it's just 1) pretty small for two grown people to share#and 2) where is the indirect lighting? or plants????#cherry magic#cm movie spoilers#my posts
26 notes
·
View notes
Text
Pretty Pink Plants

(Disclaimer- I'm not a professional gardener, these are just some plants I thought were pretty and researched slightly. If you're looking into becoming a plant parent then I recommend you research these plants some more.)

Calla Lillies
Calla Lillies can live both indoors and out. For them to prosper inside, they must be potted in moist soil and kept in rooms that range from 60-80 degrees Fahrenheit, along with being exposed to a decent amount of light.

String of Hearts
String of hearts is an easy plant to grow indoors and serves as a cute plant you can hang or place on shelves, and they can also be propagated.

Polka dot Plants
Polka dot Plants thrive both indoors and outdoors, growing best in rich soil and indirect amounts of sunlight. Similarly to the String of Hearts, it too can be propagated.

Pink Lilies
Pink Lilies can survive both inside and out. They prefer humid environments and need to be watered about once a week.

Tulips
With the proper care, tulips can grow indoors, in fact they can be grown in glass vases. The plant most commonly kept outdoors live best in a sunny yet cool room, and if potted should be watered 2 to 3 times a week to keep the soil moist.

Fuchsias
Though Fuchsia’s are mostly outdoor hanging plants, ideal for deck and porches, they can be grown inside with proper moister and indirect sunlight and can serve as a lovely way to liven up a room.

Pink Princess Philodendrons
Pink Princess Philodendrons can be grown indoors and more commonly thrive in humility and indirect light. The plant can easily be propagated.

Calathea White Stars
Calathea White Stars prefer indirect sunlight and can live in tropical environments and indoors. It's somewhat difficult to grow, most commonly requiring a draining soil mix and can propagate as well.

Peonies
Peonies can live indoors, serving as a cute decoration in any room although they require about 5 to 6 hours of sunlight daily, so remember to keep them in a sunny room.

Astilbe
Astilbes can be grown indoors and outdoors, but if you consider growing them indoors, place them in a spot where they can get about 4 to six hours of sunlight daily.
#girlblogging#girlhood#pink#i’m just a girl#pink aesthetic#pink blog#pastel pink#that girl#just girly posts#just girly things
22 notes
·
View notes
Note
Since you've gifted with so many orchid rambles, I've decided asking you will be a lot more fun thank asking Google lol
Are orchids difficult to take care of? :0 they've got a reputation for being a very persnickety plant, but I've heard somewhere that stores often put awful/incorrect instructions for how to take care of them, so their difficulty may not ~actually~ be their fault. Thoughts? 🤔
Hahaha, I fully support asking me over Google!! I've gotten a lot of my orchid information from various direct sources (feat. my mom, Aislin, Reddit, and MissOrchidGirl on YouTube) because you are extremely correct: the information that most shops give, especially grocery store orchid labels, is wildly inaccurate!
Personally, I find your usual grocery store phalaenopsis orchids to be one of the easiest plants to take care of, and also that they're bred to bloom repeatedly and prolifically. I have a grocery store orchid that's been holding onto the same flowers for nine months, which is abjectly ridiculous. My grocery store phals will bloom twice a year and typically hold blooms for 3-6 months. At long as you set them up correctly, they're very low maintenance!
The main thing is that while they're easy plants, they are also different from the houseplants that most people are used to and that's what trips people up. For example: they're epiphytes so you can't plant them in soil, it will eventually kill them! You also should not water them with ice cubes like some labels advise: they are tropical plants that don't appreciate a shock of cold water, and it's often not enough water. The other thing is that most orchids bought from grocery or big box stores are not set up/potted for success in a home environment. A lot of people bring orchids home only for them to die soon after, and it's often due to the conditions they bought the orchid in (or, uh, occasionally, thinking that the flowers fading is the same as the whole plant dying).
The basic three fundamentals of keeping orchids I like to espouse:
Repot them into a fresh orchid bark mix and a clear orchid pot with slotted sides (you can then put this in a prettier cache pot like I do) within a month of acquisition. This way you know they're not drowning in pure sphagnum moss, old seedling dirt plugs, or decomposing old bark, all of which may cause root rot and kill the plant. Repot once every 1-2 years. Here's a good video on it!
Water them by soaking the whole pot in room temperature water for 15 minutes or so. You know they're ready for water when the potted roots turn silvery rather than vibrant green (this is where the clear pot comes in handy), but usually about once a week is also good! You may also add orchid fertilizer into this water for greater success in growth and blooming.
Put them somewhere bright without direct afternoon sunlight. A north window that gets bright indirect light, or an east window that gets some morning sunlight. Harsh afternoon sunlight may burn them, but they do enjoy a lot of light when possible.
And that's it! Just the correct amount of light, water about once a week, and putting them in a better potting mix than what they came in. You can get more involved than that if you want, but for the average person I think this is really what it comes down it.
Now, I have more orchids than just phalaenopsis orchids (I have two oncidiums, one dendrobium nobile, one cattleya, and three phalaenopsis hybrids) that can require slightly different care, so if you get something different from the standard "moth orchid," it's a good idea to look up specific care requirements. But phals are generally really easy in my personal opinion!
18 notes
·
View notes
Note
What are ur thoughts ?
There’s an ig live with sjm and her friend steph where Steph asks if Azriel will be getting book. Sarah excitedly says she “Cant confirm anything yet, but once we get to the end of SF we will know who the next book is about” (indirect answer from Sarah but directly after steph asks about Azriel book)
It almost feels like she’s saying “I can’t say it officially for legal reasons but the question about Azriel— YES”
Ive seen the clip where Sarah is asked if we will see Elain in next book and Sarah answer “we’ll see her in some form.” The way she answered this didn’t sound nearly as enthusiastic
(My point is wouldn’t Sarah sound just as excited when she starts writing Elain’s book; she comes off as someone who can’t contain her excitement while writing about her characters when they’re in the forefront of her mind )
That's definitely one way of looking at it and I think many would agree with you!
But SJMs phrasing in response to the question was "when you get to the end of the book, I think you'll know who the next one is about and Azriel's JOURNEY is one I'm very excited to write about.
First, at the end of the book we're told it's Beron, Koschei and the treaty they still need to worry about. It's specifically stated those are the threats they need to focus on versus Gwyn and Emerie joking how the Illyrians will be "in hysterics for decades." The end of the book also ends with Nesta placing Elain's rose carving on their fathers grave as a permanent marker of the beauty and good he'd tried to bring into their world (Elain is often symbolized by roses and is full of light, kindness and generosity). Nothing at the end of SF points to an Az related plot in my opinion, because Koschei, the treaty and Beron are things more strongly connected to Elain and Lucien. While the treaty is something Mor was working on, she's not been able to accomplish it and Az is definitely not going to be the character who tries to secure Vallahan's signature, that's a job for emissary's and courtiers.
Second, way back when Sarah spoke about how the second the sisters came back on page in book 2 she realized that they had their own journey's beyond what Feyre was seeing and that she'd like to write their own books someday.
She then spoke about, because she knew early on where she wanted the sisters stories to go, she was able to plant seeds for their journey's early on in ACOMAF, ACOWAR and even ACOSF for Elain.
Journey is different than a character getting the next book. Journey is all the information the author lays out for a character to build up to their eventual book.
When we have lines like "She has no interest in him anyway" (Az in regards to Elain and Lucien), and "I think Lucien will never be good enough for her." and "I'll defeat him with little effort" I feel strongly that Az's "journey" is going to involve him seeing exactly how Elain is very much interested in Lucien, that Lucien is extremely good enough for her and he's not really going to be able to defeat Lucien with little effort. When we have a character like Az going off half-cocked and arrogant, authors don't usually reward that behavior by giving the character a HEA of their own while the characters he belittled are left suffering. Remember Az rejected Elain and hurt her, he claimed she couldn't handle the Trove, claimed Lucien wasn't good enough. Narratively speaking it makes more sense for them to prove him wrong first before he gets his HEA.
Also, SJM was very quiet on Rhys before ACOMAF and said she was so excited to finally be able to gush about him after the books release. She was very quiet on Chaol to the point that readers thought she hated him only to later say how she had been building up for his story for a long time, people needed to just wait for it to all come together. Sometimes, her going quiet on a character has meant she's getting ready to give them a book.
As far as "you'll see some of Elain in the next book", I'm not sure why that's being taken as she's not getting the next book. There was no way for Sarah to answer that question any other way. "Elain is going to be in the book a lot" and people would use that as confirmation she's next. "Elain is not in the book much" and that confirms she's not the next POV. Since they have wanted to keep the next book a secret, she answered in a way that keeps everyone guessing.
While I do understand why some are taking her IG Live with Steph and using it as confirmation of Az, I think it's safe to say that nothing in these interviews is true confirmation of who is next. If they wanted us to know, they would have come out and told us but it's been said time and again that when the time does come, Bloomsbury is going to want to make it a thing so until then mum's the word.
We have no way of knowing whether she's trying to throw readers off, keep them guessing, phrasing things in a way that is purposely ambiguous, and so on. At this point I think everything is on the table for who's next because valid arguments can be made for all sides.
17 notes
·
View notes
Text


Begonia Maculata, aka Polka Dot Begonia, after and before.
I have a weird love/hate relationship with this plant.
On one hand, it was one of my earliest plants (bottom picture when I first got it about 2 years ago). As shown by the top two pictures (recent), it's a large, pretty beautiful plant.
It also grows like fuckin' crazy.
What's not pictured here is that I've had three different runs of cuttings from this fucking thing, all of which have grown into enormous monsters on their own. I've had to give two of them away lest my entire window is taken up by these goddamn begonias. I've given up and decided to just let this one grow however big it wants. Fine, you win.
The plant store near me says these are difficult to grow. Either I have absolutely perfect conditions to grow these things or they're lying.
Care below.
Begonia maculata are members of the Begoniaceae family. Like rexes, these are often kept indoors as houseplants (although I have a friend who keeps one outdoors in their garden). Much like rexes, they, too, are kept more for their foliage than their flowers.
Unlike rexes, these are fibrous-rooted. There's actually four different categories of begonias overall -- fibrous-rooted, rhizomatous, and tuberous. There's a lot of sub-categories in these categories (more information here). Rexes are rhizomatous, while a lot of the outdoor garden varieties are tuberous.
I assume caring for this plant is easy as shit based on my own experiences, but I guess your mileage may vary. You can slap them in your standard garden store soil easily. Watering, too, is pretty easy -- just water them when the soil is kinda dry or the pot is light. These guys aren't as dramatic as rexes, but they still prefer a bit more water. In terms of light, give 'em the ol' indirect sunlight. They prefer regular indoor home humidity (35-50%), and general temperatures around 70F/21C.
Propagating this plant is extremely easy. Cut in-between nodes (generally where leaves grow out of), put in a cup of water, and you're done. I usually leave 3-5 cuttings in there until their roots have essentially grown together to the mold of the cup, then just slap that baby in a pot.
3 notes
·
View notes
Text
progress in the balcony garden
I traded one of my sea urchin echinopsis children for 2 snake plant cuttings which will live in the window hanging pots until I'm sure they're rooted, then one will likely go into the hallway bathroom.


I've planted a large quantity of hummingbird blend wildflower seeds in the large planter. I'm hoping they'll germinate soon and bloom and just make the whole balcony feel more special.
I also planted some Thyme from an Herb Rocket, some kind of fast-growing seed kit from dollar tree. I don't know if it will work, I'm just following the instructions and hoping for the best. I think I'll get another one of these small plastic planters for my spearmint seeds. I'll also need pots eventually for the lavender plants and new spider plant children, but I'm avoiding plastic pots (and broke) so it might be a while. I should probably move the African violet to a real pot too.


The spider plant in question is doing very well, it's flowered twice now and new children are already forming from the old flowers. There are also new flower buds forming so I think it will flower again soon. I may pot the existing child soon for giving away. The child I potted 2 weeks ago is now living by the window in my bedroom. I didn't notice the flowers at first because the whole branch was behind the blinds, but one day while outside I saw them through the window. I pulled the branch in front of the blinds because the flowers are sticking to the blinds and also because Rookie kept batting at them where I couldn't see.


The African violet was wilting and a lot of the flowers had died back, so I reported it. And it wilted even worse. I pruned all the Dead flowers and leaves back and reduced the amount of watering, a few days later it looked slightly better but not by much. Finally I realized it wasn't supposed to be getting full sun, so I moved it back to the hanging pots inside so that the temperature is more stable and the light, while plentiful, is indirect. And it already looks so much better!!! It's got a few more blooms and the leaves and flowers are significantly perked up. My one concern is overwatering it again.
My hesitation to repot it into a ceramic pot is vecause the plastic one fits so nicely into this silver colored ceramic, but honestly I should probably just pot it in the ceramic and be done with it. There's no drainage holes so I'll have to buy more river stones to place in the bottom.

The basil plant looks great, especially since I pruned off the dead stems from when I dropped it and pruned off a bunch of the tops as well. I haven't been eating it, so I had just been leaving it to grow. Turns out you really are supposed to prune it back to encourage growth. I might try drying out some of the leaves in the dehydrator next time to preserve it til I need it, instead of just dumping it over the railing.

My roomate and I both have lavender plants that are both on the balcony. Mine has been in full sun, but Lilly's was on the table where it got more shade for a while. I've been checking the soil of both frequently and while I've had to water mine a few times in the last couple weeks, hers has stayed suspiciously moist. I moved it to get more sun but I noticed today that it has a yellowish tint forming on it compared to mine. I'm suspecting potential dry rot, but the soil on top isn't warm to the touch yet so I'd have to dig into the roots a bit to confirm. I won't repot it without her permission.

The beeblossom used to have red stems and leaves but since the flowers have cone and gone, it's turning green. I've never cared for or really seen one of these plants before so I'm uncertain if this is a bad thing. The texture also seems slightly different. I am not a veteran in this but I bet pruning the dead flowers and leaves will help the plant out a bit. Also, the soil shrinks into the center of the pot making watering a pain since it just runs down the sides and onto the ground. I keep forgetting that I need to buy a pot to plant this in. Beeblossom doesn't yield any results on Google, so the species listed on the tag is Gaura Lindheimeri. It flowers in hot pink.

Finally, I didn't like how all the plants looked just in a line (which also made some of them difficult to reach behind the table) and I still don't have the means to buy or build a bench to raise them on, so I arranged them all around the Thyme planter for now. The succulents and lavender are in the back since they need significantly less water and this is a pretty wet region. Except for Nina the echinopsis, she's at the front for some reason. (I probably put her there so I wouldn't get stabbed watering whatever I swapper places with her). I should probably move her do she doesn't get overwatered and dry rotted. The Thyme needs to be watered twice a day to germinate so I've been keeping a good watch of this part of the plant empire.
Which reminds me, the plastic planters didn't have drainage holes so I stabbed it with a knife and accidentally created a larger hole than intended. Which I covered with a store receipt before pouring the river stones in so they wouldn't fall out. Hopefully the paper isn't too toxic. By the time it biodegrades, the soil should be mixed in with the stones enough to hold them in place.

5 notes
·
View notes
Text
How to plant and grow ginger in your home garden

Growing ginger in your home garden can be a rewarding experience. Here's a step-by-step guide on how to plant and grow ginger:
Selecting Ginger Rhizomes: Choose fresh, plump ginger rhizomes from a reliable source. Look for ones with well-developed "eyes" or small buds, as they indicate growth potential.
2. Preparing the Rhizomes: Before planting, soak the ginger rhizomes in water overnight to encourage sprouting.
3. Choosing a Container: Ginger can be grown in containers or directly in the ground. If you're planting in a container, make sure it's at least 12 inches deep to accommodate the ginger's root system.
4. Preparing the Soil: Use well-draining, rich soil. You can mix compost or aged manure into the soil to enrich it. Ensure the soil pH is around 6.0 to 6.8, slightly acidic to neutral.
5. Planting Ginger: Plant the ginger rhizomes with the eyes facing upward, about 2 to 4 inches deep in the soil. Space multiple rhizomes about 6 to 8 inches apart if planted in a container.
6. Watering: Keep the soil consistently moist but not waterlogged. Water the ginger immediately after planting and continue to water regularly, especially during dry periods.
7. Light Requirements: Ginger prefers partial shade to full shade. Place the container or plant it in a location where it receives indirect sunlight.
8. Temperature and Humidity: Ginger thrives in warm and humid conditions. Maintain temperatures between 75°F and 85°F (24°C and 29°C). If growing indoors, ensure adequate humidity by misting the plant or using a humidifier.
9. Fertilizing: Feed the ginger plants with a balanced fertilizer once a month during the growing season. You can use a fertilizer with a higher potassium content to promote rhizome growth.
10. Mulching: Apply a layer of organic mulch, such as straw or wood chips, around the ginger plants to help retain moisture and suppress weeds.
11. Pest and Disease Control: Keep an eye out for common pests like aphids and spider mites. If detected, treat them promptly with insecticidal soap or neem oil. Additionally, ensure good air circulation to prevent fungal diseases.
12. Harvesting: Ginger can be harvested when the plant is about 8 to 10 months old. You can gently dig around the base of the plant to harvest the rhizomes. Harvest only what you need, leaving some rhizomes in the soil to continue growing.
By following these steps, you can successfully grow ginger in your home garden and enjoy the fresh flavor and numerous health benefits it provides.
#healthy living#healthcare#plants#indoor plants#garden#plantlife#health and nutrition#plant#house plants#plantblr#potted plants#tropical plants
5 notes
·
View notes
Note
you said you wanted people to ask you about plants soooo
whats your favorite plant/flower? and maybe some of the symbolism behind it?
AHHHH THANK U!!!!!! my fav flower is smth I think about a lot. my current fav, tho, is probably amaryllis (pronounced like am-uh-RILL-is btw). I WISH I had one, but the temps where I live are so high, it wouldn’t do great cuz they like average temps (in growth) and low 40s (in dormancy). for lighting it needs darkness (in dormancy) and medium light in growth. it’s a BEAUUUUUTIFUL winter or spring bloomer….n it almost looks like a lily. blooms in clusters and it has different colors + species.
they often symbolize stuff involving strength, ie pride/determination, which is something I LOVE in plant symbolism. OH YEAH AND “AMARYLLIS” IS A GREEK NAME AND IT MEANS “TO SPARKLE”!!!!!!!!!!!!!!!!!!!
hold on here’s a pic of one I got online


the leafs remind me of daffodil leafs almost hehe,,,
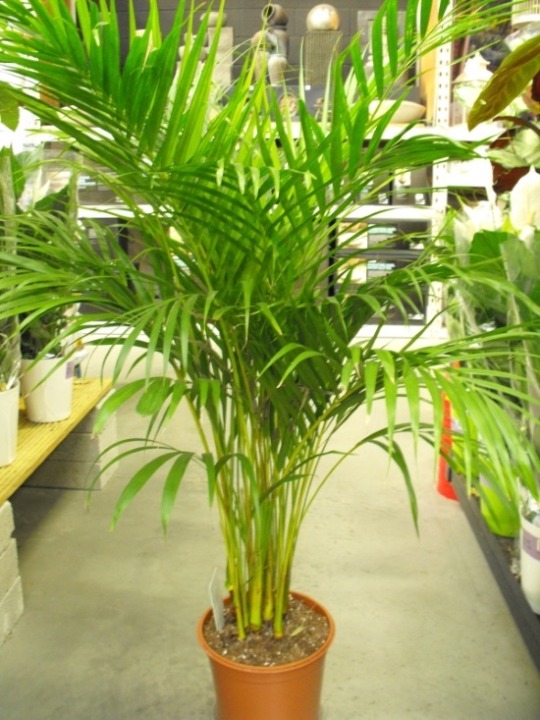
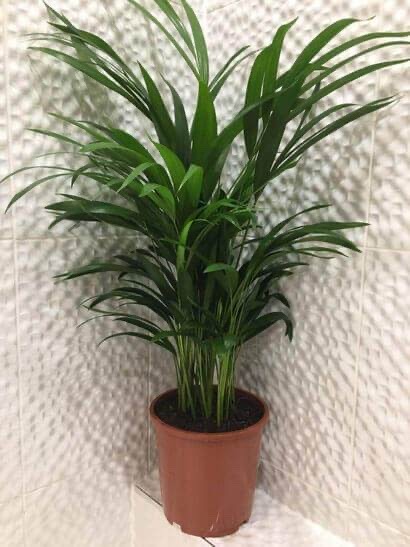
OK ALSO my fave plant (specifically houseplants tho) is smth kinda hard to answer. I like butterfly palms (always wanted one but never got one), chinese evergreen (I have one Yas), avocado trees (i messed mine up when I tried growing my own), prayer plants (I have one…I always do tho), and rubber plants (I also have one). I used to always wish I had a butterfly palm and I never ended up getting one. here’s what they look like


i know they usually have rather positive connotations stemming from Ancient Rome and Greece? but I’m not too sure on symbolism outside of flowers.
one of the prettiest houseplants that is very easy to take care of is pothos. they usually live from 5-10 years. they’re pretty resilient! they love bright indirect light. And get this: they can literally rapidly adapt to their environment, their cell functions can change just from their conditions and everything. they are simple to manage— every time you water them, you should let the soil dry out first (so every 1-2 weeks or so). you don’t need to mist it either. they’re also beautiful, so I would rly recommend this if you are chronically ill, disabled, elderly, very depressed, have executive dysfunction, etc etc.
another resilient and pretty plant is a peace lily. they come in a couple different colors. I know someone who’s had the same HUGE peace lily pot for like 15 years. I’d recommend this if you’ve just started liking plants and are currently obsessed with them, because it loves humidity and to ALWAYS have moist soil. if it’s not wet, the tips of the leaves tend to turn brown which is bad. to help with humidity, I recommend sphagnum moss on the soil. they love misting.
if you want a plant that you can walk past and mist if you wanna, but can’t bring urself to water it directly v often? I recommend something like a spider plant. They’re pretty interesting and you’ve probably seen one before. they like to be misted very often, but they only need to be directly watered after the soils dried. it’s like pothos care but for executive dysfunction.
my fav plant as far as symbolism goes? probably daffodils and hyacinth, mainly for its themes of forgiveness. if you didn’t know, that’s why I usually draw daffodils w/ basil when I get the chance. also: something something white egret orchid something something.
ANYWAYS THANK YOU FOR THE QUESTION :3 SORRU FOR THE RANTING
#plants#houseplants#plant posting#watch as the annoying white boy goes on a lengthy rant abt plants that made him stop crying and think abt plants or whatever
6 notes
·
View notes
Text
Hydroponics - the future of farming or a passing trend?
In the ever-evolving landscape of agriculture, hydroponics has emerged as a buzzword. But is it truly the future of farming, or just another fleeting trend? Let’s dive into the debate.
The Promise of Hydroponics
Hydroponics, the method of growing plants without soil, promises a revolution in agriculture.
Hydroponics:
Light – constant control of the requirements in light that is needed for each type of crop
Water- conservation of water, reduces water usage up to 70-90% less than traditional farming
Nutrients- adding specific nutrient mixtures and water will spread the nutrients to the crops’ vs traditional farming use of soil
Imagine a world where crops are grown in nutrient-rich water, stacked vertically in urban centers, and harvested year-round. This isn’t science fiction; it’s happening now. Proponents argue that hydroponics can solve many of our agricultural woes:
Efficiency: Hydroponics uses up to 90% less water than traditional farming. In a world where water scarcity is a growing concern, this is a game-changer.
Space Utilization: Vertical farming allows for high-density crop production in urban areas, reducing the need for vast tracts of farmland.
Climate Resilience: With controlled environments, hydroponics can produce consistent yields regardless of whether conditions.
Allows crops to be grown closer to cities, offering the same or next day delivery of fresh produce, that currently take 1-2 weeks to get from farm to store/restaurant. This also allows for a longer shelf life (crops can last for up to 3 weeks in a refrigerator).
An indirect benefit from commercial hydroponic farming is the increase in new green jobs – expanding the opportunity for our next generations to take farming to a whole new level!
The Skeptics’ View
However, not everyone is convinced. Critics argue that hydroponics is more hype than substance:
High Initial Costs: Setting up a hydroponic system requires significant investment in technology and infrastructure.
Energy Consumption: Maintaining controlled environments and artificial lighting can lead to high energy usage, potentially offsetting the environmental benefits.
Nutrient Management: The reliance on synthetic nutrient solutions raises questions about sustainability and long-term soil health.
The Organic Debate
One of the most contentious issues is whether hydroponically grown produce can be considered organic. Traditional organic farmers argue that true organic farming requires soil to build fertility and ecological balance. The U.S. Department of Agriculture, however, has allowed hydroponic produce to be certified as organic, sparking heated debates.
The Verdict
So, is hydroponics the future of farming or just a fad? The answer isn’t black and white. Hydroponics offers innovative solutions to some of agriculture’s biggest challenges, but it also comes with its own set of problems. Whether it will become a staple of our food system or fade into obscurity depends on how these challenges are addressed.
Conclusion
Hydroponics is at a crossroads. It has the potential to revolutionize agriculture, but only if we can overcome the hurdles of cost, energy use, and sustainability. As with any innovation, its success will depend on continuous improvement and adaptation. Whether you’re a believer or a skeptic, one thing is certain: hydroponics is a topic worth discussing.
I’ve given you some small pointers to start - now it’s time for you to chime in…
What do you think?
Is hydroponics the future of farming, or just another passing trend?
Share your thoughts by commenting below and join the conversation!
1 note
·
View note
Text
How to take care of potted flowers ?
Potted flowers can brighten any space, both indoors and outdoors, but they require specific care to thrive. Here’s a guide to help you nurture your potted blooms and keep them vibrant.
1. Choosing the Right Pot
Size: Ensure your pot is large enough to accommodate the flower’s root system. A pot that’s too small can restrict growth.
Material: Clay pots are porous and allow for good airflow, while plastic pots retain moisture better. Choose based on your plant’s needs.
Drainage: Always opt for pots with drainage holes to prevent waterlogging, which can lead to root rot.
2. Selecting the Right Soil
Quality Potting Mix: Use a high-quality potting mix designed for potted plants. It typically contains a blend of peat moss, vermiculite, and perlite for optimal drainage and nutrients.
pH Levels: Check the pH level appropriate for your specific flower type; most prefer slightly acidic to neutral soil.
3. Watering
Frequency: Water your potted flowers when the top inch of soil feels dry. Overwatering can be just as harmful as underwatering.
Method: Water thoroughly until it drains from the bottom. Avoid letting the pot sit in standing water.
4. Sunlight Requirements
Location: Place your potted flowers where they receive the right amount of sunlight. Most flowers prefer 6-8 hours of indirect sunlight.
Rotation: Rotate your pots every few weeks to ensure even growth on all sides.
5. Fertilizing
Type: Use a balanced, water-soluble fertilizer every 4-6 weeks during the growing season (spring and summer).
Dilution: Always follow the manufacturer’s instructions for dilution to avoid over-fertilization, which can harm your plants.
6. Pruning and Deadheading
Pruning: Regularly trim any dead or yellowing leaves to encourage new growth and prevent disease.
Deadheading: Remove spent blooms to encourage more flowering and keep your plants looking tidy.
7. Pest Management
Regular Checks: Inspect your flowers regularly for signs of pests like aphids, spider mites, and mealybugs.
Natural Remedies: Use insecticidal soap or neem oil for treatment, focusing on affected areas.
8. Seasonal Care
Winter: If your potted flowers are not frost-hardy, bring them indoors before the first frost. Adjust your watering schedule as indoor air can be drier.
Summer: Be mindful of increased evaporation in hot weather; you may need to water more frequently.
9. Repotting
Timing: Repot every 1-2 years or when you notice roots growing out of the drainage holes.
Process: Gently remove the plant from its pot, shake off excess soil, and place it in a new pot with fresh potting mix.
Conclusion
With a bit of care and attention, your potted flowers can flourish and bring joy to your space. By understanding their specific needs—regarding light, water, soil, and nutrients—you can cultivate a thriving floral display. Enjoy the process, and watch your flowers bloom beautifully!
1 note
·
View note
Text
Creating a Zen Space at Home: Your Guide to Peace and Tranquility
In today’s fast-paced world, finding a space where you can unwind and reconnect with yourself is more important than ever. A Zen space at home provides a sanctuary of peace and tranquility, allowing you to escape the stresses of daily life. Rooted in the principles of simplicity, mindfulness, and harmony, Zen-inspired design helps you cultivate a serene environment that nurtures your well-being. Here’s how to create a Zen space at home that promotes relaxation and inner calm.

1. Start with Decluttering
A clutter-free environment is essential for creating a Zen space. Clutter not only distracts the mind but also disrupts the flow of energy in a room, making it difficult to relax with our office interior designers in noida.
Pro Tip: Begin by decluttering your space. Keep only the essentials and remove items that don’t serve a purpose or bring you joy. Organize your belongings in a way that keeps surfaces clean and clear. Consider using minimalist storage solutions, such as concealed cabinets or floating shelves, to maintain a tidy and serene environment.
2. Incorporate Natural Elements
Nature plays a crucial role in Zen design. Bringing natural elements into your home helps create a calming atmosphere and promotes a sense of connection with the environment.
Pro Tip: Use natural materials like wood, stone, and bamboo in your furniture and decor. Incorporate plants, such as bonsai trees, bamboo stalks, or succulents, to add life and greenery to your space. A small indoor water feature, like a fountain or a bowl of water with floating candles, can also introduce the soothing sound of water, enhancing the overall tranquility.
3. Choose a Soft, Neutral Color Palette
Color has a significant impact on mood and energy levels. In a Zen space, a soft, neutral color palette creates a calm and harmonious environment that soothes the senses.
Pro Tip: Opt for colors inspired by nature, such as soft whites, gentle greys, muted greens, and earthy browns. These tones create a peaceful and balanced backdrop that promotes relaxation. Avoid bright or bold colors that can be stimulating or distracting. You can introduce subtle pops of color through natural elements like plants or through soft textiles like cushions or rugs.
4. Focus on Simple and Functional Furniture
Zen design emphasizes simplicity and functionality. Furniture should be minimalistic, comfortable, and free from unnecessary ornamentation, allowing you to focus on the essentials.
Pro Tip: Choose furniture with clean lines and natural materials, such as a low wooden bed frame, a simple tatami mat, or a meditation cushion. Avoid overcrowding the space with too much furniture. Instead, focus on pieces that serve a clear purpose and contribute to the overall sense of calm. For seating, consider floor cushions or a low sofa to encourage a grounded and connected feeling.
5. Create a Sense of Balance and Harmony
Balance and harmony are key principles in Zen design. Achieving a sense of equilibrium in your space fosters a feeling of peace and stability with interior designers in india.
Pro Tip: Arrange furniture and decor in a way that promotes symmetry and balance. For example, place matching lamps on either side of a bed or arrange seating in a way that encourages conversation and connection. Use natural elements like rocks, plants, or water features to balance the energy in the room. Avoid overcrowding or placing too many items in one area, as this can create a sense of imbalance.
6. Incorporate Soft, Diffused Lighting
Lighting is crucial for setting the mood in a Zen space. Soft, diffused lighting creates a warm and inviting atmosphere that encourages relaxation.
Pro Tip: Use a combination of natural light and soft, indirect lighting to create a serene ambiance with top10 interior designers in newdelhi. Sheer curtains can help diffuse natural light, while lamps with soft, warm bulbs can create a cozy glow in the evening. Consider using paper lanterns, candles, or salt lamps to add a gentle, calming light to your space. Avoid harsh overhead lighting, as it can be too intense and disrupt the peaceful atmosphere.
7. Introduce Scent and Sound
Scent and sound play important roles in creating a sensory experience that enhances relaxation and mindfulness in a Zen space.
Pro Tip: Use essential oil diffusers, incense, or scented candles to fill your space with calming aromas like lavender, sandalwood, or eucalyptus. These scents promote relaxation and mental clarity. For sound, consider playing soft, ambient music or nature sounds, such as flowing water or birdsong, to create a soothing auditory environment. A small indoor fountain can also add the gentle sound of trickling water, further enhancing the Zen vibe.
8. Designate a Space for Mindfulness Practices
A Zen space should encourage mindfulness practices like meditation, yoga, or deep breathing. Having a dedicated area for these activities can help you develop a regular routine and deepen your practice.
Pro Tip: Set aside a quiet corner of your home for mindfulness practices with best interior designer in newdelhi. Keep this space free from distractions and clutter, and furnish it with items that support your practice, such as a meditation cushion, yoga mat, or a small altar with meaningful objects. Consider adding a low table for candles, incense, or a statue that represents peace or tranquility.
9. Personalize Your Space
While Zen design emphasizes simplicity, it’s also important to infuse your space with elements that reflect your personal journey and bring you comfort with office interior designers near me.
Pro Tip: Incorporate personal touches like a favorite piece of artwork, a meaningful quote, or a photograph that inspires you. Choose items that resonate with your sense of peace and well-being. Remember, the goal is to create a space that feels uniquely yours, while still maintaining the overall sense of simplicity and harmony.
10. Practice Mindful Maintenance
A Zen space requires mindful maintenance to preserve its sense of calm and order. Regularly tidying and caring for your space helps sustain the peaceful environment you’ve created.
Pro Tip: Set aside time each day to tidy up, clear clutter, and refresh your space. Consider this process a form of mindfulness practice, allowing you to stay connected to your environment and maintain its tranquility. Keep your Zen space simple and organized, avoiding the accumulation of unnecessary items.
Conclusion
Creating a Zen space at home is about more than just design—it’s about cultivating an environment that supports your well-being and fosters a sense of peace and tranquility. By incorporating natural elements, choosing soft colors, focusing on simplicity and balance, and engaging your senses with soothing sounds and scents, you can transform your home into a sanctuary that promotes relaxation and mindfulness.
At GoDecor, we’re here to help you design a Zen space that reflects your personal journey and enhances your well-being. Whether you’re looking to create a serene corner for meditation or transform your entire home into a peaceful retreat, our team of experts can guide you every step of the way contact us interior designers contact number. Let us help you bring harmony and tranquility into your living space, so you can enjoy a life of balance and peace.
1 note
·
View note
Text
Phalaenopsis Orchids: A Blooming Beauty in New Zealand
Phalaenopsis orchids, often referred to as “Moth Orchids,” are one of the most popular and widely cultivated orchids in the world. Their exotic beauty, vibrant colors, and relatively easy care make them a favorite among both novice and experienced gardeners. In New Zealand, where gardening is a cherished hobby, Phalaenopsis orchids have found a special place in many homes and gardens.
Why Phalaenopsis Orchids?
Phalaenopsis orchids are renowned for their stunning flowers that can last for several months, making them a long-lasting and rewarding plant to grow. Their blooms come in a wide array of colors, from pure white to deep magenta, often with unique patterns and speckles that add to their appeal. These orchids are also known for their adaptability, thriving in the controlled indoor environments common in New Zealand homes.
Growing Phalaenopsis Orchids in New Zealand
Growing Phalaenopsis orchids in New Zealand is relatively straightforward, but there are a few key factors to ensure their success:
1. Light:
Phalaenopsis orchids prefer bright, indirect light. Direct sunlight can scorch their leaves, so placing them near an east or west-facing window is ideal. In New Zealand’s variable climate, it’s important to shield them from the intense midday sun, especially in summer.
2. Temperature and Humidity:
These orchids thrive in temperatures between 18°C and 30°C. New Zealand’s temperate climate suits them well, but during colder months, it’s crucial to keep them away from draughts and ensure they’re in a warm, stable environment. Maintaining humidity around 50-70% is ideal, which can be achieved by placing a humidity tray or a small humidifier near the plant.
3. Watering:
One of the most common mistakes with Phalaenopsis orchids is overwatering. They prefer to dry out slightly between waterings. In New Zealand’s often humid climate, watering once a week is generally sufficient, but this can vary depending on the season and the specific conditions in your home. Always ensure that the potting medium is well-draining to prevent root rot.
4. Fertilization:
Feeding Phalaenopsis orchids with a balanced, water-soluble fertilizer every two weeks during their growing season (spring and summer) can help promote healthy growth and vibrant blooms. In New Zealand, it’s easy to find orchid-specific fertilizers at garden centers.
5. Repotting:
Phalaenopsis orchids should be repotted every 1-2 years, ideally after they’ve finished blooming. This helps refresh the potting medium and provides the roots with more space to grow. In New Zealand, specialized orchid potting mixes are readily available, ensuring that your orchids have the right environment to thrive.
Where to Buy Phalaenopsis Orchids in New Zealand
Phalaenopsis orchids are widely available across New Zealand, from local garden centers to online stores. Many specialty nurseries offer a diverse range of colors and varieties, allowing you to choose the perfect orchid to complement your home or garden.
Some popular places to buy Phalaenopsis orchids in New Zealand include:
Kings Plant Barn: With locations in Auckland, Kings Plant Barn offers a wide variety of orchids, including Phalaenopsis, along with expert advice on care.
Palmers Garden Centre: A nationwide chain with a strong reputation for quality plants, including a stunning selection of Phalaenopsis orchids.
Online Nurseries: Several online nurseries ship Phalaenopsis orchids across New Zealand, allowing you to browse a wide selection from the comfort of your home.
Conclusion
Phalaenopsis orchids are a delightful addition to any New Zealand home or garden, offering months of beautiful blooms with the right care. Whether you’re a seasoned orchid enthusiast or a beginner looking to add some exotic flair to your indoor space, these orchids are an excellent choice. By following a few simple guidelines, you can enjoy the beauty of Phalaenopsis orchids year-round, bringing a touch of elegance and nature into your life.
0 notes
Text
Snake Plant Mastery: Expert Tips on Growing, Repotting, and Propagation
Snake plants, or Sansevieria, are a beloved choice for home gardeners. Their striking appearance and hardy nature make them a staple in many households. If you're looking to master the art of growing snake plants, repotting, and propagation, you’ve come to the right place. This guide offers expert tips to help you keep your snake plants thriving and multiply them effortlessly.

Why Snake Plants?
Snake plants are a fantastic choice for anyone looking to add a touch of greenery to their home. They’re not only visually appealing but also incredibly easy to care for. Think of them as the low-maintenance friends of the plant world—always there when you need them but never demanding too much of your time.
Getting Started: Basic Care Tips
Before diving into advanced techniques, it’s crucial to understand the basics of snake plant care. These plants are renowned for their resilience, but they do have some specific needs. Make sure to provide them with the right amount of light, water, and soil, and you'll have a thriving plant in no time.
Perfect Light Conditions
One of the reasons snake plants are so popular is their adaptability to various light conditions. They can thrive in low light, but they also do well in bright, indirect light. Imagine them as the chameleons of the plant world—able to adjust to their surroundings with ease. Place them in a spot where they’ll get some light, but don’t stress if your home doesn’t have perfect lighting conditions.
How to Water Your Snake Plant
Watering is one of the simplest yet most important aspects of snake plant care. These plants prefer to dry out completely between waterings. Overwatering is a common mistake and can lead to root rot. Think of it this way: your snake plant would rather be a bit thirsty than over-saturated. Check the soil; if it’s dry a couple of inches down, it’s time to water.
Choosing the Right Soil
The right soil mix can make a big difference in your snake plant’s health. They thrive in well-draining soil, which prevents excess water from sitting around the roots. A mix designed for succulents or cacti is ideal. This type of soil mimics the plant’s natural environment and ensures it gets the drainage it needs to stay healthy.
When and How to Repot
Repotting is an essential part of snake plant care. You’ll need to repot when the plant outgrows its current container or if the soil has degraded. Typically, this is every 2-3 years. Repotting helps refresh the soil and provides more space for the plant to grow. Choose a pot that’s slightly larger than the current one to avoid shocking the plant.
Repotting Tips for Success
When repotting, start by carefully removing the plant from its pot. Gently loosen any tightly bound roots. Place the plant in its new pot with fresh soil, and ensure it’s planted at the same depth as before. Water lightly after repotting to help the plant settle into its new home. Remember, repotting can be a bit of a shock for the plant, so give it some time to adjust.
Propagating Snake Plants: A Step-by-Step Guide
Propagation is a fun way to expand your collection or share plants with friends. Snake plants are particularly easy to propagate, either through leaf cuttings or root division. Let’s break down each method to help you get started.
Leaf Cuttings: How to Do It Right
Leaf cuttings are a popular propagation method. Start by selecting a healthy leaf from the base of the plant. Cut it close to the soil using a clean, sharp knife. Allow the leaf to dry for a few days so the cut end calluses over. Then, plant the callused end in well-draining soil. Water lightly and wait for new roots to develop. This method is like taking a piece of the plant’s DNA and growing a new one.
Root Division: A Simple Method
Root division is another effective way to propagate snake plants. Carefully remove the plant from its pot and separate the root ball into smaller sections. Each section should have its own roots and leaves. Re-pot each section into its own container with fresh soil. This method is like splitting a large family into smaller, equally thriving units.
Common Issues and Solutions
Even with minimal care, snake plants can encounter problems. Yellowing leaves often indicate overwatering, so adjust your watering schedule and ensure proper drainage. Pests like mealybugs can be a concern; treat them with insecticidal soap or neem oil. Regularly inspect your plants to catch any issues early.
Seasonal Care for Your Snake Plants
Snake plants are quite adaptable, but seasonal changes can affect their needs. In winter, reduce watering and keep the plant away from cold drafts. In warmer months, you can increase watering and resume regular fertilizing. Seasonal adjustments help ensure your plant remains healthy and vibrant throughout the year.
Design Ideas for Snake Plants
Snake plants are incredibly versatile in home design. Their tall, upright leaves work well in both modern and traditional settings. You can use them as striking focal points or as part of a larger plant arrangement. Try placing them in stylish pots to complement your decor and enhance your living space.
Fun Facts About Snake Plants
Did you know that snake plants can perform photosynthesis at night? Unlike most plants that do this only during the day, snake plants convert CO2 into oxygen while you sleep. This unique trait not only makes them great for improving air quality but also adds a bit of natural magic to your home.
Conclusion
Mastering the art of growing, repotting, and propagating snake plants can transform your home into a lush, vibrant space. These hardy plants offer numerous benefits, from air purification to aesthetic appeal, and with a little care, they’ll thrive in your home. Whether you’re a seasoned gardener or a beginner, snake plants are a rewarding choice that brings both beauty and practicality to your living space.
0 notes
Text
Discover the Five Most Beautiful Flowers and How to Cultivate Them for Your Garden
If you’ve ever dreamed of transforming your garden into a vibrant paradise, you’re in for a treat. Imagine stepping outside and being greeted by the most beautiful flowers, each one more breathtaking than the last. It’s not just a dream—it’s a possibility with the right knowledge and care. In this guide, we’ll explore five of the most beautiful flowers and share expert tips on how to cultivate them in your garden. Let’s dive in and get started!

Picture this: a garden that’s alive with color, where every flower is a masterpiece. The secret to achieving this vibrant vision is knowing which flowers to grow and how to care for them. In this article, we’ll explore five of the most beautiful flowers that can turn any garden into a blooming paradise. From classic roses to cheerful sunflowers, these flowers will add beauty and charm to your outdoor space. Ready to get started? Let’s dive into the world of beautiful blooms!
1. Roses: The Classic Beauty
Roses are often hailed as the quintessential garden flower. Their timeless beauty and variety of colors make them a favorite among gardeners. Whether you prefer classic reds or delicate pastels, roses can bring a touch of elegance to any garden.
Care Tips:
Sunlight: Roses thrive in full sun. Aim for at least 6 hours of direct sunlight each day.
Soil: They need well-drained soil enriched with organic matter. Mixing in compost can provide essential nutrients.
Watering: Water deeply but infrequently. Avoid wetting the leaves to reduce the risk of fungal diseases.
Pruning: Prune roses in early spring to remove dead or diseased wood and to encourage healthy growth.
2. Orchids: The Exotic Wonders
Orchids are known for their stunning, intricate blooms and exotic appeal. While they’re often associated with indoor cultivation, many orchid varieties can thrive outdoors in suitable climates.
Care Tips:
Light: Orchids prefer bright, indirect light. Too much direct sunlight can harm their delicate leaves.
Humidity: High humidity is key for orchids. Consider using a humidity tray or misting the plants to maintain moisture levels.
Watering: Allow the top inch of soil to dry out before watering again. Ensure good drainage to prevent root rot.
Temperature: Orchids generally prefer temperatures between 60-75°F (15-24°C). Keep them away from temperature extremes.
3. Tulips: The Vibrant Showstoppers
Tulips are famous for their vibrant colors and elegant shapes. They’re a popular choice for spring gardens and can create a spectacular display when planted in groups.
Care Tips:
Planting: Plant tulip bulbs in the fall, about 6-8 inches deep. They need a cold period to bloom properly.
Sunlight: Tulips thrive in full sun but can also tolerate partial shade.
Soil: Ensure well-drained soil to prevent waterlogging. Tulips don’t like sitting in wet soil.
Watering: Water the bulbs after planting and keep the soil moist but not soggy until they start to grow.
4. Peonies: The Luxurious Blooms
Peonies are renowned for their large, fragrant flowers and lush foliage. They add a touch of luxury to any garden with their stunning blooms and rich colors.
Care Tips:
Sunlight: Peonies do best in full sun but can also grow in partial shade.
Soil: They need well-drained, fertile soil. Adding compost or aged manure can improve soil quality.
Watering: Keep the soil consistently moist but not waterlogged. Peonies appreciate regular watering during dry spells.
Support: Taller varieties may need staking to keep their large blooms from flopping over.
5. Sunflowers: The Cheerful Giants
Sunflowers are the epitome of joy with their bright yellow petals and towering stems. They’re perfect for adding height and a splash of sunshine to your garden.
Care Tips:
Sunlight: Sunflowers require full sun, so plant them where they’ll get at least 6-8 hours of direct sunlight each day.
Soil: They prefer well-drained soil with plenty of organic matter. Adding compost can enhance soil fertility.
Watering: Water regularly, especially during dry periods. Sunflowers need consistent moisture to support their growth.
Space: Allow plenty of space between plants as they can grow quite large and need room to spread out.
Choosing the Right Location for Your Flowers
The location you choose for your flowers can significantly impact their growth and health. Consider factors like sunlight, soil type, and space requirements when planning your flower beds. For example, roses and sunflowers need plenty of sunlight, while orchids and peonies can tolerate partial shade.
Soil Preparation and Fertilization
Healthy soil is the foundation for beautiful flowers. Prepare your soil by incorporating organic matter such as compost. This improves soil structure, fertility, and drainage. Regularly fertilize your flowers according to their specific needs to ensure they get the nutrients required for vibrant blooms.
Watering Needs and Techniques
Proper watering is crucial for flower health. Most flowers benefit from deep, infrequent watering, which encourages strong root growth. Adjust your watering routine based on weather conditions and the specific needs of each flower type. Be mindful not to overwater, as this can lead to root rot.
Pruning and Maintenance Tips
Pruning helps maintain the shape and health of your flowers. Remove dead or diseased parts regularly to prevent the spread of diseases. Deadheading, or removing spent blooms, encourages new growth and prolongs the flowering period.
Dealing with Common Pests and Diseases
Flowers can attract pests and diseases that may affect their appearance and health. Keep an eye out for common issues like aphids on roses or fungal infections on orchids. Address problems promptly with appropriate treatments to keep your flowers looking their best.
Seasonal Care for Optimal Growth
Each flower type has specific seasonal needs. For example, tulips need to be planted in the fall, while sunflowers should be planted in the spring. Adjust your care routine according to the season and the specific requirements of your flowers.
Designing a Stunning Flower Bed
Creating a beautiful flower bed involves choosing complementary colors and arranging flowers to create visual interest. Mix different flower types and heights to add depth and dimension to your garden. Consider adding elements like mulch or decorative stones to enhance the overall look.
The Joys of Growing Beautiful Flowers
Growing beautiful flowers is not just about enhancing your garden's appearance; it’s also about the joy and satisfaction that comes from nurturing something and watching it flourish. Flowers can bring a sense of peace and accomplishment, making your gardening efforts truly rewarding.
Conclusion
Creating a garden filled with the most beautiful flowers is within your reach. By understanding the needs of each flower and providing the right care, you can enjoy a vibrant and flourishing garden. From classic roses to cheerful sunflowers, these stunning blooms will add color and charm to your outdoor space. So, roll up your sleeves and start planting—your dream garden is just a few steps away!
0 notes
Text
How to save rubber Plants leaves drooping?

How to fix drooping rubber plant leaves
With their large, glossy leaves and smooth satin-like sheen rubber plants (Ficus elastica) add style to homes as well offices and the average family can take care of them. But even the toughest plants have their own set of challenges, one such challenge being drooping leaves. Understanding why your rubber plant has droopy leaves so that you can correctly diagnose and treat the issue is paramount. This guide will cover everything you need to know in order to prevent your rubber plant from drooping leaves.
Understanding the Causes
It is important to figure out why the leaves are drooping before you can take on this problem. This is due to some of the following factors
1. Watering: Frequent cause for drooping leaves, both overwatering and under watering can lead to sagging rubber plant leaves. Signs of roots rot in an overwatered plant could lead to drooping leaves. On the flip side, plants that are UNDER-watered may droop as they do not have enough moisture and nutrients.
2. Light: Bright, indirect light is best for Rubber plants. The plant may become spindly and its leaves will probably droop when it does not have enough light. Conversely, too much direct sunlight can scorch the leaves and wilt them.
3. Temp and Humidity: These plants love warm temperatures in moderate to high humidity. Any type of stress, such as extreme temperatures or sudden drafts can cause your fiddle leaf fig to droop.
4. Pests and Diseases: Spider mites or mealybugs infestations as well as fungal and bacterial diseases harm the plant by drooping its leaves. Look for Pests or Spots on Your Plant
5. Soil Nutrient Deficiencies: A deficiency in important nutrients that the soil is unable to provide could be another reason for your plant-leaves turning yellow and drooping. For the rubber plants to be healthy and vibrant, they will need a balanced fertilizer.
How to save a rubber plant with wilting leaves
1. Assess Watering Practices
· How Do You Know When To Water Orchids: Feel the Soil It can help to test how moist or dry that your orchid soil is. If dry to the touch: it is time to water. If muddy, wait a couple more days to water. Rubber plants do not appreciate constantly wet soil — they like to dry out slightly between waterings.
· Modify watering schedule: Make sure you do not give it too much water. RUBBER PLANT Overwatering a rubber plant causes no harm, but it does not like to have wet feet. If you believe it might be overwatering, only water when the top inch of soil is dry. You might have to re-pot in fresh well-draining soil, if the plant was waterlogged.
2. Optimize Light Conditions
· A rubber plant growth can be achieved by bright indirect light. If your plant is in a low light area, place it to an area that will receive better sunlight. If it has been placed in direct sunlight, relocate the plant to an area where light is diffused through curtains or blinds.
· Get a Grow Light: If you rubber plant is not getting available light in your home, think about adding grow lights.
3. Keep the temperature and humidity in check
· Keep an even temperature: Rubber plants like it to be between 60 and 75°F (15-24°C). Do not place the plant where it might experience drafts, like near heaters or air conditioning units, because sudden temperature changes can stress your string of pearls.
· Raise Humidity — Especially during the dry winter months in homes. You can put a humidifier, keep a tray of water around it or you may just spray the leaves.
4. Check for Pests and Diseases
· Control: Regularly check for pests such as spider mites, aphids or mealybuigs on the leaves and stems. Check for Yellow Spots, Webbing & Sticky Substance
· Feed It: If aphids are found, apply insecticidal soap or neem oil to the plant. With plants, you might have to prune off infected parts and use proper fungicides or bactericides for the disease.
5. Address Nutrient Deficiencies
· How to fertilize right: During the growth phases (spring and summer) you should feed your rubber plant with a liquid, water-soluble fertilizer every 4-6 weeks. Do NOT over-fertilize which can cause excessive salts in the soil.
· Repot if required: in case your plant has now not been repotted shortly it could get pleasure from new soil. Use well-draining potting mix and a lotted rubber kite.
Recovery and Prevention
After taking care of its immediate needs, watch your rubber plant to see if it gets better. Even if the foliage on the plant is drooping, it will not recover immediately but given proper care, new growth can be expected. To keep future issues from developing, have consistent care established:
· Take care of them wisely: Make a watering plan that fits your plants. Make sure that the pot is well draining (if too much water collects at the bottom then it could become soggy).
· Give It Lots of Light: put the plant in a room with lots and indirect light. Reposition it if need be.
· Maintain Regular Conditions: Do not place the plant in fluctuating temperatures or drafts.
· Maintenance: Keep an eye out for pests and diseases, regular fertilization.
0 notes
Text
Dracaena fragrans Massangeana low light care tips
Dracaena fragrans Massangeana, commonly known as the “Happy Plant” or “Corn Plant,” is a popular houseplant known for its lush green leaves with vibrant yellow stripes. One of the reasons it's so beloved is its adaptability, particularly its ability to thrive in low light conditions. However, to keep your Dracena fragrans massangeana happy plant healthy and vibrant in low light, there are specific care tips you should follow.
1. Choosing the Right Location
While Dracaena Massangeana can tolerate low light, it’s important to find the right spot in your home. Place the plant in an area where it can still receive some indirect light, such as a few feet away from a north-facing window or in a room with filtered light. Avoid placing it in complete darkness or areas with no natural light, as even low light-tolerant plants need some light to photosynthesize.
2. Adjusting Watering Practices
In low light conditions, Dracaena Massangeana’s growth will slow down, meaning it requires less water. Overwatering is a common issue with this plant in low light, as the soil takes longer to dry out. To prevent root rot, allow the top inch of soil to dry out before watering again. Use your finger to check the soil’s moisture level, and water only when necessary. It’s better to underwater than to overwater in low light situations.
3. Monitoring Leaf Health
In low light, you may notice that the leaves of your Dracaena Massangeana might become darker, and the vibrant yellow stripes may fade slightly. This is a normal response to reduced light, as the plant adjusts to its environment. However, if you see yellowing or browning leaves, it could be a sign of overwatering or stress. Prune any damaged leaves with clean scissors to keep the plant looking tidy and to promote new growth.
4. Fertilizing Sparingly
Dracaena Massangeana doesn’t need much fertilizer, especially in low light conditions. Feeding the plant too much can lead to a buildup of salts in the soil, which can damage the roots. Fertilize lightly once every 2-3 months during the growing season (spring and summer) using a balanced, water-soluble fertilizer. During fall and winter, when the plant’s growth naturally slows, you can skip fertilization altogether.
5. Cleaning the Leaves
Dust can accumulate on the leaves, particularly in low light conditions, where air circulation might be reduced. Clean the leaves regularly by wiping them with a damp cloth to remove dust and maintain their ability to absorb light. This also helps to keep the plant looking its best and prevents potential pest infestations.
6. Rotating the Plant
To encourage even growth, rotate your Dracaena Massangeana every few weeks. This ensures that all sides of the plant receive equal light exposure, preventing it from leaning towards the light source.
Conclusion
Caring for Dracaena fragrans Massangeana in low light conditions is relatively simple as long as you adjust your care routine to suit its environment. By choosing the right location, adjusting watering practices, and paying attention to the plant’s overall health, you can keep your Dracaena Massangeana thriving, even in less-than-ideal lighting. With proper care, this resilient plant will continue to be a beautiful, low-maintenance addition to your indoor space.
0 notes
Last Seen Blogs

flutterslime
just stim gifs

safehomeinspection
safehomeinspection

folkdevilist
Folkdevilist

crimsonshadowx
crimsonshadow

love-me-purple
just another danganronpa writing blog