#arduino explained
Explore tagged Tumblr posts
Visit Tumblr Blog
Explore Tumblr blogs with no restrictions, modern design and the best experience.
Last Seen Tumblr Blogs


Fun Fact
12.7% of mobile users access Tumblr.
Text
Helium Network a maior rede de LoRaWAN do mundo
A Helium network é uma rede LoRaWAN descentralizada que utiliza uma estrutura de blockchain de modo que cada gateway atue como um validador e minerador de pacotes transacionados, essa estrutura garante um maior crescimento da rede com alta segurança.
A Helium network é uma rede LoRaWAN descentralizada que utiliza uma estrutura de blockchain de modo que cada gateway atue como um validador e minerador de pacotes transacionados, essa estrutura garante um maior crescimento da rede com alta segurança. 1 O que é Helium network? Basicamente, a Helium Network é uma rede sem fio descentralizada, código-aberto, que utiliza tecnologias LoRaWAN e 5G –…

Ver no WordPress
#helium lorawan#helium network#helium network architecture#helium network australia#helium network blockchain#helium network explained#helium network news#lorawan#lorawan architecture#lorawan arduino#lorawan devices#lorawan network#lorawan range
0 notes
Text
2035 me talking about how i worked on the state-sponsored mandatory feminization initiative in the exact same tone 2025 me uses when explaining that i worked on shark tracking tags but never got to see any actual sharks i was just looking at the data in R doing a fourier transform to get tailbeat frequency or writing Arduino code to go on the chips
11 notes
·
View notes
Text
It's hard to explain because I barely remember the context around it but In 4th grade i had some sort of after school club activity that involved various projects with Arduino. I dont remember the actual programming part, just the act of hot gluing stuff together to make shit such as a small strange vehicle and a model of a structure with working lights. The building I decided to make was a very simplistic house shape, I think decorated with little LED lights for Christmas or new years because it was right before winter break, but I am pretty sure I added this minotaur figure to live there and there was a sign that said the year was 8200 or some absurd number? I think i was laser focused on this shit since birth seemingly without reason
2 notes
·
View notes
Text
5 Arduino Courses for Beginners
Robotics, automation, and do-it-yourself electronics projects have all been transformed by Arduino, an open-source electronics platform. Entering the world of Arduino may seem intimidating to novices, but the correct course may make learning easier and more fun.
Arduino Step-by-Step: Getting Started (Udemy)
This extensive Udemy course is designed for complete novices. It provides an overview of Arduino's fundamentals, describing how the platform functions and assisting students with easy tasks like using sensors and manipulating LEDs.
Key Highlights:
thorough explanations for novices.
practical projects with practical uses.
instructions for configuring and debugging your Arduino board.
Introduction to Arduino (Coursera)
The main objective of this course is to introduce Arduino programming with the Arduino IDE. It goes over the fundamentals of circuits, programming, and connecting various parts, such as motors and sensors.
Key Highlights:
instructed by academics from universities.
access to a certificate of completion and graded assignments.
Concepts are explained in length but in a beginner-friendly manner.
Arduino for Absolute Beginners (Skillshare)
For those who want a quick introduction to Arduino, this brief project-based course is perfect. You'll discover how to configure and program your Arduino board to produce interactive projects.
Key Highlights:
teachings in bite-sized chunks for speedy learning.
simple projects for beginners, such as sound sensors and traffic light simulations.
Peer support and community conversations.
Exploring Arduino: Tools and Techniques for Engineering Wizardry (LinkedIn Learning)
This course delves deeply into Arduino programming and hardware integration, drawing inspiration from Jeremy Blum's well-known book. It is intended to provide you with the skills and resources you need to produce complex projects.
Key Highlights:
advice on creating unique circuits.
combining displays, motors, and sensors.
Code optimization and debugging best practices.
Arduino Programming and Hardware Fundamentals with Hackster (EdX)
This course, which is being offered in partnership with Hackster.io, covers the basics of Arduino hardware and programming. You may experiment with real-world applications because it is project-based.
Key Highlights:
Course materials are freely accessible (certification is optional).
extensive robotics and Internet of Things projects.
interaction with teachers and other students in the community.
Arduino is a great place to start if you want to construct a robot, make a smart home gadget, or just pick up a new skill. The aforementioned courses accommodate a variety of learning preferences and speeds, so every novice can discover the ideal fit. Select a course, acquire an Arduino starter kit, and set out on an exciting adventure into programming and electronics!
To know more, click here.
2 notes
·
View notes
Text
Devlog 1 (1/25/24): Why This Is Pointless
In my intro post, I mentioned how it would be much easier to map the 12 chromatic notes of Western music to the 3 action buttons and 8 directions of Undertale, and how I won't be doing that for purely aesthetic reasons. I also want to mention why everything I'm doing to my violin is completely stupid.
If you want to follow in my footsteps, you shouldn't do it the way I'm doing it. You probably can't.
My violin is a Yamaha EV-205 five-string electric from the late aughts/early 10's. I recently learned that this violin is no longer in production, so there's no way your standard Joe Schmoe can pick up this tutorial, nor would they want to if they were in the market for an electric violin, because they already sell electric violins that are MIDI controller enabled. You should buy that and follow the software specs of CZR drums and their MIDI-to-controller software partner/whatever. I simply do not want to spend more money on an electric violin when I already have one with the right hardware (individual pickups for each of the five strings). So I will be voiding the warranty that likely no longer exists and busting open my violin to see what I can patch together.
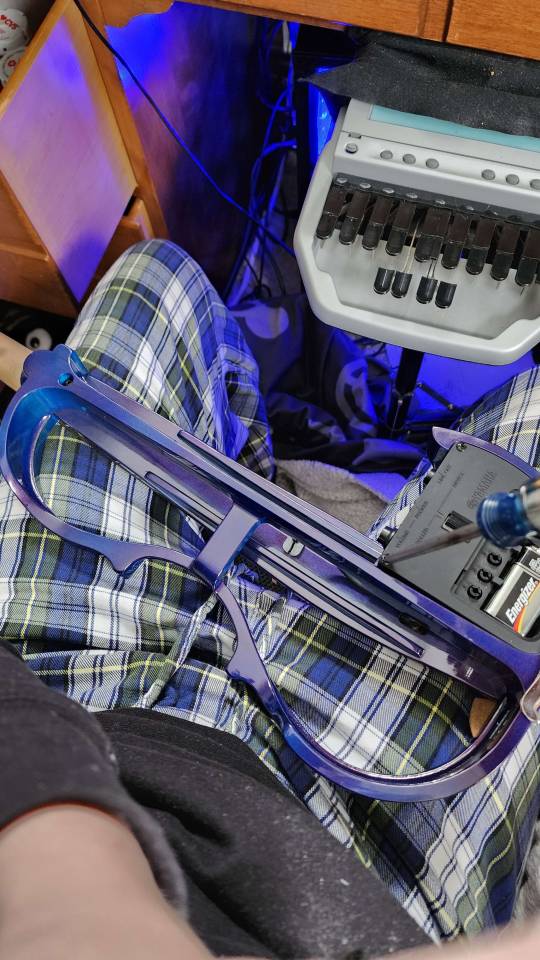
When I busted this component (pictured above) open I immediately found a not-so-complex PCB where I could locate each of the individual string inputs. I have yet to see whether those ports will give me the inputs I need - golly, I have yet to learn how to solder enough to access those ports!! - but the visibility gives me hope. it doesn't look hard, especially for someone who has been low-key interested in soldering for like 15 years (since my Pokemon Gold copy's battery died and I learned the ways to replace it) but I can't say I know exactly what data flows through that part of the circuit and how easy it would be to extract and manipulate.
I've done a lot of research into what I would need to take analog audio signal(s) and transform them into MIDI or some other binary/digital data. The first thing I found was an Arduino library, so I knew this wouldn't be hard. I only have one Arduino (knock-off) and I didn't like the idea of buying four more (one for each string) to get the MIDI values when I would probably be connected to a computer the whole time no matter what.
This led me to where I'm sitting pretty right now, at a Python library (Python being my favorite language) that uses its GitHub .md file to explain why Markov chains are important. Reader, do you know how much I love Markov chains? Did you know that in my sophomore year of college I created a musical AI by programming Markov chains in Python??? How is it that all of my interests loop in upon each other in the same way that my first and only job out of college involved natural language processing in Python just like my senior project where I did language analysis on okcupid profiles???? Is time in fact a flat circle? I don't have time to think about this because I want to program violin to play undertale pleas
Where I'll be starting is with this library and with monophonic input (one note at a time rather than interpreting multiple notes at once e.g. multiple strings played simultaneously) to make a controller of any kind work. But I have a lot of reading to do to see how Markov chains are involved. With it being both Python and linear algebra, I have the capacity to adjust the code to do whatever I want it to do. Given this insane opportunity I can't not do all the research possible to finetune things to my precise desires. If I were satisfied with "good enough", I would be playing monophonic input the whole way through. Let's go insane, boys.
5 notes
·
View notes
Text
I have an anti tech field so strong that my computers and phone frequently just fry for no reason anyone can explain. I once reformated my laptop in college, my laptop that at the time did nothing but access the school blackboard, write essays in word, and message three best friends/partners from home on AOL messenger, and the laptops motherboard burst into actual flames. For no reason.
Current electronics kill count since then is three charging cables, a video card fried, a hardrive spontaneously corrupted so bad IT professionals were asking me if I lived under some sort of giant EMP field, three phone screens developing ghost touches, and more pairs of headphones speakers blowing out than I can count.
My friend once got one of those touch light sensor things where you can touch it and it lights up a light bulb (he was working on an Arduino doing programming stuff). It wouldn't work for me and only me. In fact when other people touched it and lit it up I could dim the bulb by touching them.
127K notes
·
View notes
Text
What is a Space Adventure Coding Kit? A Beginner’s Guide

In today’s digital world, learning to code is becoming an important skill for people of all ages. Coding helps develop creativity, problem-solving, and critical thinking skills. If you're looking for a fun and exciting way to get started with coding, a Space Adventure Coding Kit is a great option. These kits mix the excitement of space exploration with the basics of computer programming. In this article, we will explain what a Space Adventure Coding Kit is, how it works, and why it’s perfect for beginners who want to learn how to code.
What is a Space Adventure Coding Kit?
A Space Adventure Coding Kit is a learning tool designed to teach coding in a fun and engaging way. These kits usually come with physical parts like sensors, circuit boards, and programmable devices, along with software that helps you code your own space-themed projects. The idea behind these kits is to teach coding while taking you on a space adventure.
These kits are made for all kinds of learners, from young kids (around age 8 and up) to teenagers and adults. The space theme adds an element of fun and curiosity, making it easier for beginners to enjoy the learning process.
Key Parts of a Space Adventure Coding Kit
The specific contents of a Space Adventure Coding Kit can vary, but here are some common parts you’ll find in most kits:
Programmable Microcontroller or Board: Most kits have a small computer board (like Arduino or Raspberry Pi) that controls the kit’s components. This board is where you write and upload your code, making it the central piece of the kit.
Sensors and Motors: These kits often include sensors such as light, temperature, or motion sensors. They might also include motors or LED lights, which can be used to make your projects move or light up. These parts allow you to interact with the real world using your code.
Wires and Connectors: To set up your kit, you’ll need wires and connectors to connect the different parts together. These are necessary for making sure everything works and communicates properly.
Coding Software: A Space Adventure Coding Kit comes with software that helps you write and test your code. Beginner-friendly platforms like Scratch or Blockly are commonly used. If you’re more experienced, you might get to use programming languages like Python or JavaScript.
Instruction Guides and Tutorials: Most kits come with easy-to-follow instructions, guides, or videos that explain how to put everything together and code your space-themed projects.
Space-Themed Challenges: The kit might also come with fun, space-related challenges. For example, you could build a spaceship that moves or simulate a space mission. These projects help keep you motivated and learning by creating something cool.
How Does a Space Adventure Coding Kit Work?
Here’s how a typical Space Adventure Coding Kit works:
Setting Up the Hardware: First, you need to physically set up the components. This means connecting the microcontroller, sensors, and other parts together using the wires and connectors. You will learn about how the parts work together during this step.
Learning the Basics of Coding: Once everything is set up, you’ll start writing code to control the sensors and devices. If you're a beginner, you might use visual coding platforms like Scratch, where you drag and drop code blocks. As you get better, you can try text-based languages like Python or JavaScript.
Testing the Code: After writing the code, you upload it to the microcontroller. Then, you test it by interacting with the components. For example, you could make a rover move by programming it to respond to sensors, or you could program a light to turn on when certain conditions are met.
Iterating and Improving: Once you’ve tested your code, you may find things that need improvement. Coding is a process of trial and error, so you’ll try different approaches, fix mistakes, and make your project better over time.
Space Adventure Projects: The space theme comes to life in different ways. You might build a robot to explore a planet, program a spaceship to launch, or create a space station that tracks environmental changes. These projects help you apply your coding knowledge to real-world problems.
Why is a Space Adventure Coding Kit Great for Beginners?
Space Adventure Coding Kits offer many benefits, especially for beginners. Here’s why they’re a great choice:
Fun and Engaging: Coding can seem complicated at first, but the space theme makes it exciting. Learning to code becomes more enjoyable when you’re working on projects like sending a spaceship into space or exploring distant planets.
Hands-On Learning: These kits let you physically build and program your projects. This hands-on approach helps you understand how the different parts of a computer system work together, making the learning process more practical and less abstract.
Real-World Skills: The skills you learn with these kits, like logical thinking, problem-solving, and basic programming, are valuable in many different fields, including technology, engineering, and science.
Clear Instructions: Space Adventure Coding Kits are designed with beginners in mind. They usually come with easy-to-follow guides that walk you through each step, so you never feel lost. These instructions help you gain confidence as you learn.
Encourages Creativity: As you move through the kit’s lessons, you’ll get the chance to create your own space-themed projects. This lets you be creative and come up with new ideas. Whether you’re building a space station or designing a new planet, you can make your project your own.
A Great Introduction to STEM: A Space Adventure Coding Kit introduces you to the exciting world of STEM (Science, Technology, Engineering, and Mathematics). It shows how coding and space exploration are connected, sparking interest in these subjects and encouraging you to explore them further.
Who Can Benefit from a Space Adventure Coding Kit?
Space Adventure Coding Kits aren’t just for kids. They can be used by people of all ages and skill levels. Here’s who can benefit:
Children (Ages 8-12): These kits are perfect for younger kids who are just starting to learn about coding. The fun space theme keeps them engaged while teaching them basic programming skills.
Teenagers: Teenagers who want to dive deeper into coding can use these kits to explore more advanced concepts and work on challenging projects. The kits give them the tools to expand their skills.
Beginners of All Ages: Even adults who have no previous coding experience can benefit from these kits. The step-by-step lessons make it easy for anyone to get started with coding.
Educators and Parents: Teachers and parents can use these kits as teaching tools to introduce coding to students or children. They’re great for making learning fun and helping kids develop an interest in technology and science.
Conclusion
A Space Adventure Coding Kit is a fantastic way for beginners to learn how to code. It combines the excitement of space exploration with the basics of programming, making learning fun and hands-on. These kits are a great way to develop important skills like problem-solving, creativity, and logical thinking. Whether you’re a child, teenager, adult, or educator, a Space Adventure Coding Kit offers an exciting way to start your coding journey. The space theme adds a sense of adventure, and the projects help make coding feel more like a game. With easy instructions and plenty of opportunities to be creative, a Space Adventure Coding Kit is a fun way to learn about technology and explore the wonders of space.
0 notes
Text
Creativity 2 February Learning to use Arduino more efficiently

Having explained that I learned to code better in arduino, in this post I will show that I also learned to use more of its functions efficiently. Arduino microcontrollers have what is called digital and analog pins. The analog pins can read a voltage level, between 0 and 5 volts. The digital volts can do much more, and some of them have a pulse with modulation (pwm) function, which can emit various voltages on different levels, as well as measure different levels or times too. I also found out how many different discreet voltage levels my arduino can read, and that it has a certain refresh rates was a great help. Learning all of this was important for using arduino more efficiently and using its functions better.
0 notes
Text
213729 Fine Arts Research & Development: Honors ⋆ WEEK 3
Monday kicked off with a brief Fourth Year-only discussion with Simon! We'll no longer have Tim or his workshop downstairs - instead we'll need to do induction courses for the 3D workshop all the way in Block 11.
Our Independent Project Outline is due shortly (which I am horrendously behind on). As Kieran pointed out, the IPO, presented as a 'quiz' on Stream, needs to first have "finish attempt" ticked, followed by "submit".
I came across a powered speaker (of dubious functionality) in the hallway, which I brought to my space. Before heading to the lecture, Eugene recommended I contact the technical personnel from the Music block for all my Arduino-based soldering needs.
From a glance over the CoCA website, I'm guessing the guy to contact is Adam Dransfield.


I've been fascinated lately with music that generates itself. My Model:Cycles groovebox comes with a sequencer with a 'chance' function, allowing patterns to generate randomly, turning music into a balance of probability.
Martsman ▶ “Generating algorithmic Jungle music based on the Fibonacci Sequence in Pure Data” https://youtu.be/OwkacnSUn10?feature=shared

I met up with Mike for a one-on-one on Tuesday, bringing my SP-202 along for some extra reference.
Explaining my work idea, along with the growing imperative to construct my own sampler for the piece, Mike instead entertained the possibility of having Ableton - a highly 'able' music software - perform the same function.
From there, I could wire up a custom midi control for the audience to interact with, a task which would still require a bit of electrical handiwork, just significantly less so.
These were the notes I took during our conversation.
Make the system first (using a proxy MIDI), THEN build a single midi button
Feedback loop → Music without human → "Auto-visual feedback system"
Not actually Ableton, it's Max MSP → You can just have Max MSP, there are operators (hardware) that you can assign to it, giving it functionalities → Instead of going through a multi step recording interface
MAX MSP (Ableton) has patches, saves time, good problem solving, design → Node tree
So how do I get a Max MSP license? $9 a month, will need internet connection → Student version → Max for Live or Max MSP?
Will I even need an induction? → All I'm making is a MIDI controller
Computer overheating? Have hatch in back open, computer breathability
Patches available to download: Auto chop? → Auto sequencer?
A single midi button, streamlines audience action
"Generative drum sample" → "How to make a generative drum machine"
Like those talking hamsters
Movement further: start adding knobs and other functionality
Fahsai last year: motion camera, sound variables patched to movement → Made a 'human' that you touched to make sound.
There's facial recognition patches too, you could remove the button and have it make sound from your face
On Wednesday I had a one-on-one with Israel, and talked about my work so far - or lack there of! had a bit of a vent about the amount of time CPRM class had been taking up lately, but it was good to speak my general directive aloud.
Back at home, I forked out the $28 per month subscription for Max MSP... with the standard plan. Indeed there was a student plan that I was eligible for, but the swindlers didn't provide any monthly option for it!

0 notes
Note
Oh, no, I love programming too, but the teacher didn't really explain much to us, he gave us the code at first and then asked us to modify it, but didn't explicitly tell us what everything did so I just learned the minimum. Scratch and app inventor, however, were easy to learn, so I did.
Damn, I mean i guess i did a similar thing with this project, but I am learning C++ for general arduino use (or general use in general i guess)
#neat language#weird and very fickle#but neat#weird to me i should say#pokeblr#rotomblr#rotumblr#self insert faller#hey nobody
1 note
·
View note
Text
Week 3 Lab (2/6) Blink
The goal of this lab is to understand how Digital Outputs work and how to create them. using Arduino hardware. By constructing a simple circuit and uploading pre-created code via the Arduino IDE, we will control an LED to blink at a set interval.
Description of Circuit and Creation:
This circuit consists of an LED connected to a digital pin on the Arduino, along with a 220 Ohm resistor to limit current flow and prevent damage to the LED. The Arduino sends a HIGH (5V) signal to turn the LED on and a LOW (0V) signal to turn it off, creating a blinking effect.
The long leg (anode) of the LED is connected to digital pin 13 on the Arduino.
The short leg (cathode) of the LED is connected to one end of a 220Ω resistor.
The other end of the resistor is connected to GND (ground) on the Arduino.
The Arduino is powered via USB or an external power supply.
Explaining the Code:
Observations:
After uploading the code to the Arduino Uno, the LED started blinking on and off at a 1-second interval, confirming the correct operation of digital outputs.
Increasing or decreasing the delay() values changed the speed of the blinking.
If the LED did not blink, checking wiring connections and ensuring the resistor was properly placed helped troubleshoot the issue.
This experiment demonstrates how digital signals work, where an Arduino can control an LED using simple HIGH/LOW commands.
Q&A
1. What is an Arduino IDE?
The Arduino IDE (Integrated Development Environment) is the software used to write, compile, and upload code to an Arduino microcontroller. It allows a simple interface for programming and testing electronic projects paired with Arduino hardware.
2. What is a Digital Input?
A Digital Input is a signal received by the Arduino that can be either HIGH (1) or LOW (0). Examples include buttons, sensors, and switches that provide ON/OFF signals.
3. What is a Digital Output?
A Digital Output is a signal sent from the Arduino to control external components, such as LEDs, buzzers, and motors. In this experiment, the LED is controlled using digitalWrite() to turn it ON or OFF.
4. What are Microcontroller Pins?
Microcontroller Pins are physical connection points on an Arduino board that allow it to interact with sensors, actuators, and other devices. They can be input pins (reading data) or output pins (sending signals).
5. What does pinMode() do?
The pinMode() function sets up an Arduino pin as INPUT or OUTPUT. In this lab, pinMode(ledPin, OUTPUT); tells the Arduino to use pin 13 to send signals to the LED.
6. What does digitalWrite() do?
The digitalWrite() function sends a HIGH (5V) or LOW (0V) signal to a digital pin. In this experiment, it controls the LED's ON/OFF states.
7. What does delay() do?
The delay() function pauses the execution of the code for a specific amount of time, measured in milliseconds. In this experiment, delay(1000); causes a 1-second delay between turning the LED ON and OFF.
Challenges/Trouble-Shooting:
The only challenge I faced during this lab was my adapter was not the correct kind to transfer the software into the hardware in order to make the LED work properly. This was fixed by changing the adapter used to connect the Arduino board to the hardware.
In conclusion, this project successfully demonstrated how to use digital outputs in Arduino to control an LED. By setting up a simple circuit and writing code, we learned how to use pinMode() to configure pins, digitalWrite() to send signals, and delay() to control timing.This helped me understand how microcontrollers interact with physical components.
Below is a schematic and demo video of the lab:
xx

1 note
·
View note
Text
Student Program for Innovation in Science and Engineering is a launching pad toward possibility
New Post has been published on https://thedigitalinsider.com/student-program-for-innovation-in-science-and-engineering-is-a-launching-pad-toward-possibility/
Student Program for Innovation in Science and Engineering is a launching pad toward possibility
When you ask MIT students to tell you the story of how they came to Cambridge, you might hear some common themes: a favorite science teacher; an interest in computers that turned into an obsession; a bedroom decorated with NASA posters and glow-in-the-dark stars.
But for a few, the road to MIT starts with an invitation to a special summer program: not a camp with canoes or cabins or campgrounds, but instead one taking place in classrooms and labs with discussions of Arduinos, variable scope and aliasing, and Michaelis-Menten enzyme kinetics. The classroom and labs are in Barbados at the Cave Hill campus of the University of the West Indies, and all the students are gifted Caribbean high schoolers, ages 16-18, who’ve been selected for the extremely competitive Student Program for Innovation in Science and Engineering (SPISE). Their summer will not include much time for leisure or lots of sleep; instead, they’ll be tackling a five-week high-intensity curriculum with courses in university-level calculus, physics, biochemistry, computer programming, electronics and entrepreneurship, including hands-on projects in the last three. For several students currently on campus, SPISE was their gateway to MIT.
“The full story is even bigger,” says Cardinal Warde, MIT professor of electrical engineering and founder of SPISE, who is originally from Barbados in the Caribbean. “Over the past 10 years, exactly 30 of the 245 students in total from the SPISE program have attended MIT as undergrads and/or graduate students.”
While many SPISE alumni have gone on to Harvard University, Stanford University, Caltech, Princeton University, Columbia University, the University of Pennsylvania, and other prestigious schools, the emphasis on science and technology creates a natural pipeline to MIT, whose faculty and instructors volunteered their time and expertise to help Warde design a curriculum that was both challenging and engaging.
Jacob White, the Cecil H. Green Professor in Electrical Engineering, was one of the first of those volunteers. “When Covid forced SPISE to run remotely, Professor Warde felt it was critical to continue having hands-on engineering labs, and sought my help,” White explains. “Kits were cobbled together using EECS-donated microcontroller boards, motors and magnets; Dinah Sah (the SPISE director) got those kits to students spread over half-a-dozen islands.” White, and several of his graduate students, collaborated to write a curriculum that would give the students enough grounding in fundamentals to empower them to create their own designs.
Play video
In 2021, students worked from home due to the Covid-19 pandemic. The rigor of SPISE projects, however, remained high, thanks to the curriculum contributions of EECS Professor Jacob White, among others. Here, students show off their maglev projects. Video: Department of Electrical Engineering and Computer Science
When SPISE returned to in-person education, Steve Leeb, the Emanuel E. Landsman (1958) Professor in the Department of Electrical Engineering and Computer Science (EECS) and a member of the Research Laboratory of Electronics (RLE), was inspired by the challenge of teaching electronics remotely.
“SPISE is exactly the kind of opportunity we’re looking for in the RLE educational outreach programs: bright, enthusiastic young folks who would benefit from new perspectives on science and engineering — a community of folks where we can bring new perspectives, share energy and excitement, and, ideally, make lifelong connections to our academic programs here at MIT. It’s a natural fit that benefits us all,” says Leeb, who, together with his graduate students, adapted the portable “take-home” Electronics FIRST curriculum pioneered at MIT and taught in course 6.2030. “The Electronics FIRST exercises and lectures are designed to connect electronic circuit techniques — digital gates, microcontrollers, and other electronics technologies — that are recognizable as elements of commercial products,” says Leeb. “So the projects naturally engage students in building with components that have a connection to commercial products and product ideas. This flows naturally into a ‘final project’ that the students create in SPISE, a product of their own conception, for example a music synthesizer.”
Crucially, the curriculum isn’t simplified for the high school students. “We adapted the projects to fit the different program length — SPISE is shorter than a full MIT term,” says Leeb. “We did not reduce the rigor or challenge of the activities, and, in fact, have brought new ideas from the SPISE students back to campus to improve 6.2030.”
Departments beyond EECS pitched in to develop SPISE, with major teaching contributions coming from the Department of Physics, where Lecturer Alex Shvonski, Senior Technical Instructor Caleb Bonyun, and Senior Technical Instructor Joshua Wolfe, who also manages the Physics Instructional Resource Lab, collaborated on developing hands-on projects and on the teaching for both Physics I and Calculus I courses. Additional supplies came from the MIT Sea Grant Program, which supplied underwater robots to SPISE for six consecutive years before the Covid-19 pandemic. (In the wake of the pandemic, the program pivoted to focus on embedded systems.)
But the core inspiration for SPISE doesn’t come from an academic department at all. “SPISE was based on a model that’s proven to work: MITES,” explains Ebony Hearn, executive director of the MIT Introduction to Technology, Engineering, and Science. “The program, which offers access and opportunity to intensive courses in science, technology, engineering, and math for talented high school students in every zip code, has helped thousands of students for nearly 50 years gain admission to top universities and pursue successful careers in STEM while being immersed in a community of caring mentors and leaders in the profession.”
The shared DNA of the two programs is no coincidence. Cardinal Warde has been the faculty director of MITES for the past 27 years, and took the lessons of five decades of the transformative pre-college experience into account when envisioning an equivalent program in the Caribbean. Much like MITES, SPISE encourages its participants to develop a sense of belonging in STEM and to picture the possibilities at top schools; over the years, the program has added sessions with admissions officers from MIT, Columbia, Princeton, and U Penn. “SPISE changed my perspective of myself,” says Chenise Harper, a first-year student at MIT who is currently interested in Course 6-5 (Electrical Engineering With Computing). “It gave me the confidence to apply to universities I thought were completely out of my reach.”
Harper’s trajectory is exactly what the designers of the program hoped for. “We have been very successful with the shorter-term goal of increasing the numbers of Caribbean students pursuing advanced degrees in STEM and grooming the next generation of STEM and business leaders in the Region,” says Dinah Sah ’81, director of the program (and wife of Cardinal Warde). “We have SPISE graduates who have, or are currently pursuing, graduate degrees at the top universities around the world, including (but not limited to) MIT, Stanford, Harvard, Princeton, Dartmouth, Yale, Johns Hopkins, Carnegie Mellon, and Oxford, including a Rhodes Scholar. We fully believe that SPISE graduates represent part of the next generation of STEM and business leaders in the Caribbean and that SPISE has played a significant role in their trajectories.”
Notably, the SPISE program also includes an element of entrepreneurship, encouraging students to envision tech-based solutions to problems in their own backyards. Keonna Simon, who hails from St. Vincent and the Grenadines, developed a business pitch with other SPISE participants for an innovative “reverse vending machine.” “In the Caribbean, tourism is a key contributor to the economy, but littering is an issue that detracts from the beauty of our islands and harms our abundant marine life,” explains Simon, now a junior majoring in Course 6-7 (Computer Science and Molecular Biology). “Our project aimed to tackle this by placing reverse vending machines in heavily polluted areas. People could deposit recyclable plastic bottles, and the machine would convert the weight of the plastic into cash rewards on a card, redeemable for discounts at supermarkets.”
One SPISE alum, Quilee Simeon, decided to work on a renewable energy system at SPISE as a way of addressing global warming’s effects on his homeland of St. Lucia. “I chose to work on the renewable energy project, where we designed and built a prototype wind turbine using low-resource materials like PVC pipes. It was exciting because I thought it had real applications to developing island states like ours, where we don’t have an abundance of the manufacturing materials used in larger countries, and we are disproportionately affected by climate change,” says Simeon. “So building cheap and effective renewable energy resources was, in my view, an important problem to tackle.”
As Simeon worked on his prototype turbine and tackled late nights with his new classmates at SPISE, he realized how different the experience was from his prior schooling. For most students, the summer program is a first time away from home — but for all, it is the first exposure to the firehose-like experience of tackling multiple college-level courses with simultaneous assignments and problem sets. “It was honestly a primer to MIT,” says Simeon. “They not only challenged us with rigorous math and science, but also provided guidance on college applications and explained the vast opportunities a STEM degree could unlock. SPISE changed my view of myself as a scholar, though probably in an unexpected way. I thought I was smart before attending SPISE, but I realized how much I didn’t know and how many things were lacking or wrong with the style of education I had grown used to (rote learning, memorization, etc.). SPISE made me realize that being a scholar isn’t just about consuming knowledge — it’s about creating and applying it.”
The difficulty of the SPISE curriculum is a deliberate choice, made to aid students in preparing for higher education, confirms Sah. “When we started SPISE in 2012, [we decided] to focus on teaching the fundamentals in each of the courses … The homework problems and the quizzes would require the application of these fundamentals to solving challenging problems. This is in distinct contrast to rote memorization of facts, which is the method of learning these students had generally been exposed to. So, yes, this was in fact a very deliberate choice, and a critical change that we wanted to bring to these very high-potential students in their approach to learning and thinking.”
MIT’s emphasis on creative, outside-the-box thinking was just the beginning of the culture shocks that awaited SPISE students who made the transition to an American university from the summer program. Many are surprised by the American students’ habit of referring to their professors by first name, which would be considered disrespectful at home. Conversely, small daily interactions in the Northeast can feel remote and chilly to Caribbean students. “Moving from a small island with just around 100,000 people to Harvard was initially jarring,” says Gerard Porter, who participated in SPISE in 2017 before attending Harvard for his undergraduate degree. “In my first year, I was often met with puzzled stares when I greeted strangers in an elevator or students in my dorm whom I did not know personally. I quickly learned that politeness meant something very different in the Northeastern United States compared to the warm Caribbean.”
Other SPISE alumni report experiencing similar chilliness �� literally. Quilee Simeon’s first winter in Cambridge was jarring. “I knew about the concept of winter and was told to expect cold weather, but I never actually knew how cold ‘cold’ was until I felt it myself,” says Simeon. “That was terrible!” Ronaldo Lee, a first-year from Jamaica interested in computer science and electrical engineering, found warmth among fellow SPISE alumni here at MIT. “Nothing beats the tropical climate! But honestly, the community at MIT has been amazing. I was surprised by how quickly I felt comfortable, thanks to the incredible people around me. The Black and Caribbean community especially made me feel at home; I’ve met some truly fascinating, driven, and like-minded people who’ve become close friends. One of the biggest surprises was discovering how similar we all are, despite our different cultural backgrounds. Everyone here is incredibly smart and shares a common drive to make the world a better place and pursue exciting STEM projects.”
The common drive to improve the world through STEM is evident in the paths the SPISE alumni have taken.
Gerard Porter, now a graduate student in the Kiessling Group within the Department of Chemistry at MIT, conducts research “focusing on unraveling the biological roles of glycans that cover all cells on Earth. I work on developing chemical tools to study critical regions of the bacterial cell wall that have been relatively unexplored.” Porter hopes that learning more about the molecular mechanisms at play within cell walls will open the doorway to the development of novel antibiotics.
Quilee Simeon has discovered an affinity for computational neuroscience, and is currently developing a computational model of the C. elegans nervous system. “My hope is that this model organism will prove fruitful for computational neuroscience research as it has for biology,” says Simeon, who plans to work in industry after graduation.
Computational biology has also captured the attention of junior Keonna Simon, who is excited to take courses such as 6.8711 (Computational Systems Biology: Deep Learning in the Life Sciences), saying, “This nexus holds a lot of potential for solving complex biological problems through computational methods, and I’m eager to dive deeper into that space!”
Chenise Harper found SPISE’s emphasis on bringing tech entrepreneurship home inspiring. “Living in the Caribbean has stimulated a dream of a future where robots are partners in rebuilding our community after natural disasters,” she says. “There are also so many issues that I would like to one day contribute to, like climate change issues and even cybersecurity. Electrical Engineering with Computing is the kind of major that will allow me to at least touch on the areas I am interested in, and allow me to explore both software and hardware concepts that excite me and will inspire me to develop a concrete way to give back to the community that has lifted me up to where I am now.”
Ronaldo Lee also found his academic home in computer science and electrical engineering, fabricating and characterizing perovskite solar cells in his Undergraduate Research Opportunities Program project and building a small offshore wind turbine for the Collegiate Wind Competition as part of the MIT WIND team. “I’d love to focus on the energy sector, particularly in improving the grid system and integrating renewable energy sources to ensure more reliable access,” says Lee. “I want to help make energy access more sustainable and inclusive, driving development for the region as a whole.”
Lee’s plans are perfectly in line with the long-term goals set by Warde and Sah as they planned SPISE. “Diversifying the economies of the region and raising the standard of living by stimulating more technology-based entrepreneurship will take time,” says Sah. “We are optimistic that our SPISE graduates will, with time, change the world to make it a better place for all, including the Caribbean.”
#000#Admissions#amazing#American#Antibiotics#applications#approach#attention#beats#Beauty#biochemistry#Biology#boards#box#Building#Business#caltech#Careers#cave#cell#Cells#challenge#change#chemical#chemistry#Classes and programs#climate#climate change#code#college
0 notes
Text
Bluetooth DC Motor Control with Android
Bluetooth DC Motor Control with Android: Complete Guide for EEE Final Year Project Introduction Project Overview Required Components Circuit Diagram Explanation Step-by-Step Implementation Guide Arduino Code Explained Testing the Project Conclusion Introduction Bluetooth DC Motor Control with Android is a popular and practical project for Electrical and Electronics Engineering (EEE) students,…
0 notes
Text
Robotics for Kids
In a time when technology permeates every part of our lives, exposing kids to robotics at a young age is not only in style but also essential. Children can explore the world of science, technology, engineering, and mathematics (STEM) in an entertaining and instructive way through robotics, which blends creativity, problem-solving, and technical skills.
Tools and Kits for Kids’ Robotics
Mindstorms using LEGOsLEGO Mindstorms, a well-liked option for novices, blends the excitement of construction with the difficulty of programming.
Kits for Arduino StartersArduino kits are ideal for older children since they use practical projects to teach the fundamentals of electronics and programming.
The Raspberry PiWith the help of this inexpensive mini-computer, children may learn to code and integrate hardware to create complex projects.
Robotic SpheroYounger children love these spherical robots. Drag-and-drop coding applications make it simple and entertaining to program them.
Robotics by VEX: To encourage experiential learning, VEX provides a variety of kits and curricula suited to various age groups and ability levels.
How to Get Started with Robotics for Kids
Begin with easy projects.Start with simple kits or online guides that explain basic ideas such as motors, sensors, and circuits.
Employ programming languages that are kid-friendly. Coding is made accessible and enjoyable by platforms such as Scratch, Blockly, and Python for novices.
Join Camps or Clubs for RoboticsRobotics clubs and summer camps are offered by numerous schools and community centers, giving children a nurturing atmosphere in which to learn and develop.
Promote Competition ParticipationKids are encouraged to test their limits and demonstrate their abilities by events like FIRST LEGO League and RoboCup Junior.
Investing in children's robotics is a wise investment. We can encourage the upcoming generation of innovators and problem-solvers by fostering their curiosity and giving them the appropriate resources and direction. The journey starts with your child taking a single step into the fascinating world of robotics, regardless of whether they have aspirations of constructing robots for space exploration or just like playing with gadgets.
To know more, click here.
0 notes
Text
Robotics | Electronics Clap
1. "Emerging Robotics Trends: What's Next in 2024?"
Content: Examine major breakthroughs in AI-powered robotics, human-robot collaboration, and sectors rapidly adopting these technologies. Include key statistics and expert predictions on where robotics is heading in the next five years.
2. "How Robotics Is Transforming the Job Market"
Content: Discuss the impact of automation on various industries, including benefits like efficiency and challenges such as job displacement. Highlight new skills required in a robotics-centric job market.
3. "A Guide to Building Your First DIY Robot"
Content: Provide a step-by-step tutorial for beginners to build a basic robot using affordable tools like Arduino. Include a list of required components, basic programming tips, and common pitfalls to avoid.
4. "Sustainability Meets Technology: Eco-Friendly Robotics"
Content: Explore how robotics is contributing to environmental sustainability, from waste sorting robots to automated farming solutions that reduce resource use. Profile innovative companies leading this change.
5. "Top Robotics Startups to Watch in 2024"
Content: Introduce readers to the most promising startups in the field, explaining their unique solutions and potential impacts. This could include startups focusing on healthcare robotics, AI integration, or educational tools.
6. "The Role of Robotics in Modern Education"
Content: Analyze how educational institutions incorporate robotics into their curriculums to teach programming, problem-solving, and engineering. Mention competitions like FIRST Robotics as practical learning platforms.
0 notes
Text
A Passive Infrared (PIR) sensor detects infrared radiation emitted by objects, especially humans. The sensor outputs a digital signal (HIGH or LOW) depending on whether it senses motion. It’s called "passive" because it doesn’t emit any energy; it just senses the infrared rays from the surrounding environment.
How PIR Sensors Work:
The PIR sensor consists of two key components:
Pyroelectric sensor: Detects infrared radiation.
Fresnel lens: Focuses the IR signals on the pyroelectric sensor. When a warm body (like a human) moves across the sensor’s field of view, the infrared radiation changes, and the sensor detects this change, sending a HIGH signal.
Components Required:
Arduino (e.g., Uno, Nano, or Mega)
PIR Sensor
Jumper Wires
Breadboard
LED (for visual feedback)
220Ω Resistor (for the LED)
Circuit Diagram:
sql
Copy code
[Insert a simple diagram showing the connections between Arduino, PIR sensor, and LED]
Connections:
Connect the VCC pin of the PIR sensor to the 5V pin of the Arduino.
Connect the GND pin of the PIR sensor to GND on the Arduino.
Connect the OUT pin of the PIR sensor to digital pin D2 on the Arduino.
Optionally, connect an LED to pin D13 (with a 220Ω resistor for safety) to provide a visual indicator when motion is detected.
Arduino Code:
Now that you have connected the PIR sensor, let’s upload some code to the Arduino. The following code reads the PIR sensor’s output and lights up an LED when motion is detected.
cpp
Copy code
// PIR Sensor Pin Definitions
int pirPin = 2; // Connect the PIR sensor output pin to D2
int ledPin = 13; // LED pin (optional for motion indication)
void setup() {
pinMode(pirPin, INPUT); // PIR sensor as input
pinMode(ledPin, OUTPUT); // LED as output (optional)
Serial.begin(9600); // Initialize Serial Monitor
}
void loop() {
int pirState = digitalRead(pirPin); // Read PIR sensor's output
if (pirState == HIGH) { // Motion detected
digitalWrite(ledPin, HIGH); // Turn on LED
Serial.println("Motion detected!");
} else { // No motion
digitalWrite(ledPin, LOW); // Turn off LED
Serial.println("No motion");
}
delay(1000); // 1 second delay between readings
}
Explaining the Code:
pinMode(): Defines whether the pin is an input or output.
digitalRead(): Reads the PIR sensor output (HIGH or LOW).
digitalWrite(): Controls the LED based on sensor output.
Serial.begin(): Starts serial communication for debugging.
When the PIR sensor detects motion, the pirState variable becomes HIGH, turning on the LED and printing "Motion detected!" to the serial monitor.
Testing the Setup:
Connect your Arduino to your computer and upload the code.
Open the Serial Monitor from the Arduino IDE (Tools > Serial Monitor).
Wave your hand in front of the PIR sensor to test if it detects motion.
If motion is detected, the LED will light up and the message will appear in the Serial Monitor.
Adjusting the PIR Sensor Sensitivity:
Most PIR sensors come with two potentiometers for adjusting sensitivity and delay time. Sensitivity determines the range of detection, and delay time sets how long the output remains HIGH after motion is detected.
Sensitivity Potentiometer: Rotate to increase or decrease detection range.
Delay Time Potentiometer: Adjust how long the PIR sensor output stays HIGH after motion.
Applications of PIR Sensors:
Home Security Systems: Detect intruders and trigger alarms or cameras.
Smart Lighting: Automatically turn lights on when someone enters a room.
Automatic Door Openers: Use PIR sensors to detect approaching people and open doors.
Energy-Efficient Devices: Turn off appliances or lights when no motion is detected, reducing power consumption.
Troubleshooting:
False Positives: If the sensor triggers without motion, reduce the sensitivity or place the sensor in a more controlled environment.
No Motion Detection: Double-check the wiring and ensure that the sensor is properly powered and connected to the correct pins.
Conclusion:
You have successfully interfaced a PIR sensor with an Arduino to create a basic motion detection system. This simple project can be expanded into various applications like security alarms, smart home systems, and automation projects.
By following this blog, beginners will get a solid foundation in interfacing a PIR sensor with an Arduino. Advanced users can add features like buzzer alarms, wireless communication, or integra
ChatGPT can make mist
0 notes