#beci
Text
Anthony Fineran (B 1981), Beci Nada, 2022
0 notes
Text
mtas finally came out on switch so i can PLAY!!!!!!! 🤩
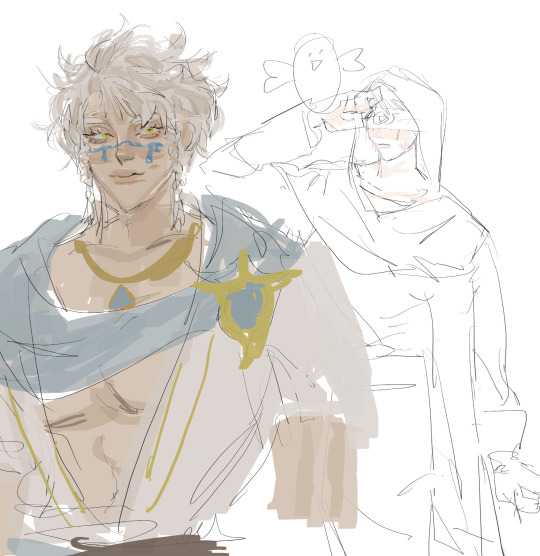
#myart#oc#mtas#it’s a little getting used to becis the graphics and lags but i enjoy it sm thru alldat….#her name is dian!!! dee-en hehe#currently being rivals 2 lovers with qi i started fights with him on accident while trying out little things but i won so…🙏🏼#so excited to work my way thru this game… altho slowly bcs work has been so mean 2 me …
5 notes
·
View notes
Photo
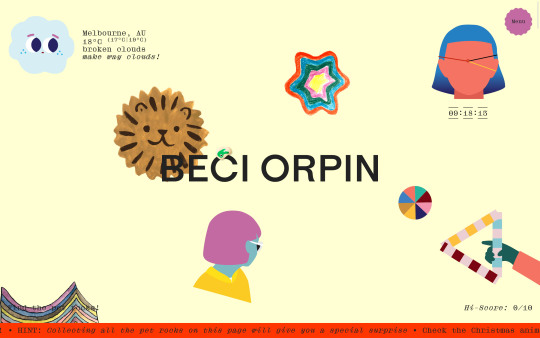
http://beciorpin.com/
#Beci Orpin#design#studio#designer#illustrator#Melbourne#Australia#portfolio#illustrations#2022#Week 50#website#web design#inspire#inspiration#happywebdesign
15 notes
·
View notes
Text
Book Covers of Note, June 2023
View On WordPress
#alex merto#beci kelly#ben wiseman#beth steidle#book covers#book covers 2023#book covers of note#Books#design#eric fuentecilla#janet hansen#jaya miceli#jaya nicely#john gall#luke bird#nico taylor#olga grlic#philip pascuzzo#rafi romaya#richard ljoenes#wh chong
5 notes
·
View notes
Video
2 notes
·
View notes
Text
what if god's a nihilist
1 note
·
View note
Text
Nevir lokoing at cohg syrup thesan
#Dawg#I DIDNT RBEN KNOW THIS COULD HSPOEN#OUGHHHHHH#IM SEEING PEOPLE IN MY VISION WHO AREBT RELY THETE N STUFF#but I thkmk my spelling is getting btter becis I syop ped shaking so hird
0 notes
Text
BECIS - Waste Heat Recovery Solution
BECIS waste heat recovery solution reduces GHG emissions and brings energy cost-savings to your plant. A waste heat recovery system helps save the cost of cooling towers and reduces steam consumption.

For more information, please visit: https://be-cis.com/energy-as-a-service/waste-heat-recovery/
0 notes
Text
Quick and Easy Gluten Free by Becky Excell & The Gluten-Free Cookbook by Cristian Broglia
In his latest review, @srotzschthomas (recently diagnosed as coeliac) discovers two indispensable gluten-free cookbooks

View On WordPress
#Becky Excell cookbook review#Becy Excell#Cristian Broglia#Cristian Broglia cookbook review#Gluten free cookbook review
0 notes
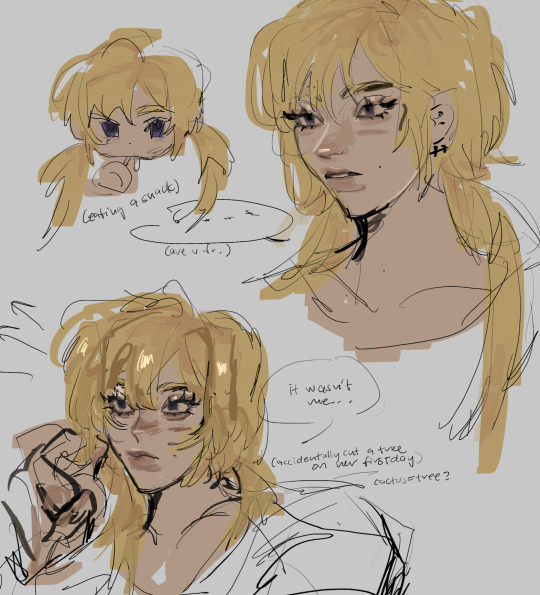
Text
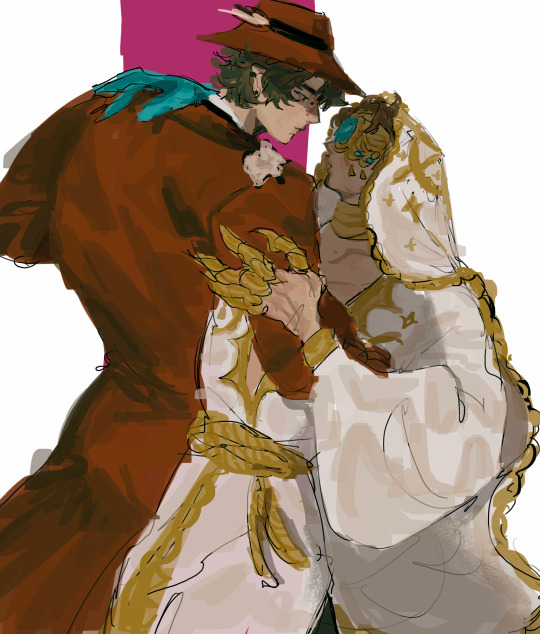
#throwback
#myart#idv#elinort#idv seer#idv prospector#drew dis awhile back but#i jus got silly nostalgic and wanted to doodle dem becis i was so obsessed wen i was like 19/20
2 notes
·
View notes
Text
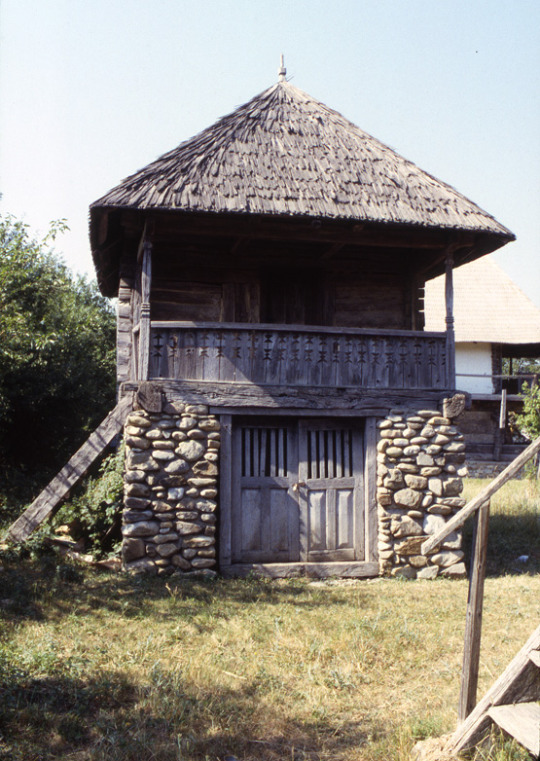
Odaie de Haine pe Beci, Folk Architecture Museum of Gorj
Cârligei, Romania
This service structure from the village of Cârligei has a stone base and interlocking timber plank upper level. The building sits next to the 19th century dwelling within the same gospodărie, or homestead. The ground level is a storage cellar, and the upper serves for clothing storage, and has a porch (privdor) for outdoor activities. The wedge shaped wooden shingles appear to have been formed to take advantage of the natural splitting planes of the wood.
(photo 2000)
88 notes
·
View notes
Text
Book Covers of Note, March 2024

View On WordPress
#alex merto#arneaux#arsh raziuddin#beci kelly#book covers#book covers 2024#book covers of note#Books#craig fraser#david pearson#design#emily mahon#jack smyth#jason arias#joanne o&039;neill#juliana lee#kaitlin kall#karl spurzem#luke bird#lynn buckley#math monahan#nathan burton#stephanie cui#steve leard#tree abraham#tyler comrie
0 notes
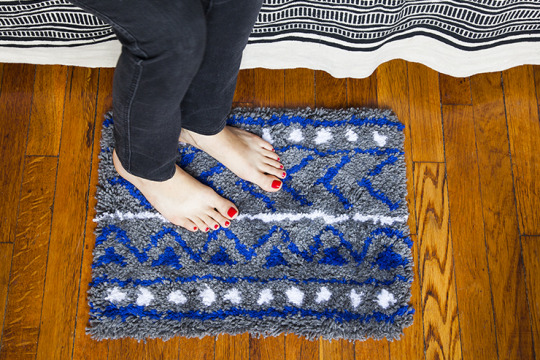
Text
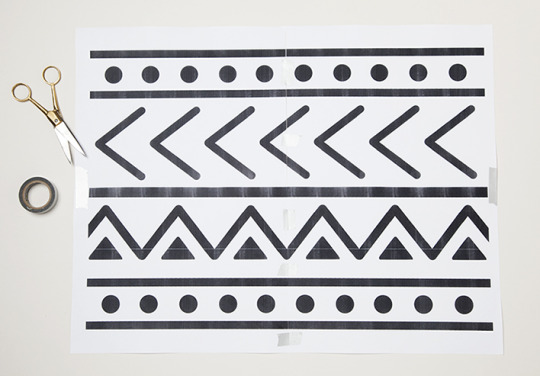
DIY Latch Hook Rug
Project by Jessica Marquez:
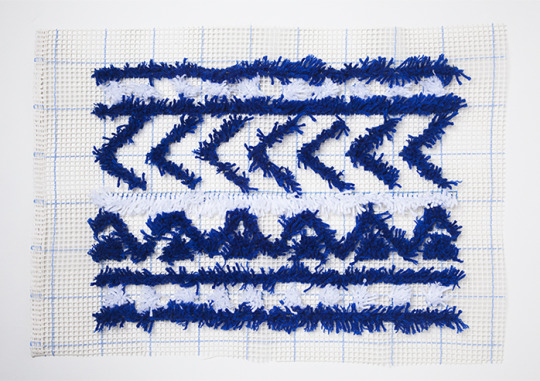
Latch hooking is something I did when I was young, and just thinking about making this project filled me with nostalgia — joyful, creative play with zero pressure. One thing that I forgot was just how long a project like this can take. Give yourself at least a few weeks to make this, but don’t be discouraged by the time commitment. It’s an incredibly satisfying project to complete. With quick craft projects, you rarely develop the rhythm that comes from a longer craft process, like latch hooking, knitting, or embroidery. It’s physical and meditative. I’ve always loved the process of making as much as — and sometimes even more than — the finished piece itself. Plus, it’s the perfect time of year to get cozy while making a warm rug and binge-watching your favorite shows. (I highly recommend the shows I devoured while making this: Chef’s Table and Master of None). My motivation for this rug was the thought of waking up on a cold morning and having the first thing I touch be a warm, fluffy handmade rug under my feet.
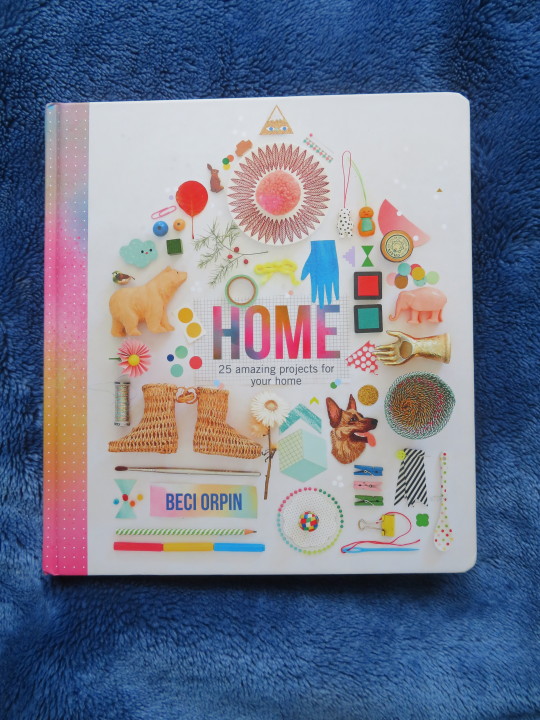
This project is inspired by one of my favorite designers, Beci Orpin, who shared a bold and colorful hook rug project in her book Make & Do. Here I created a unique geometric pattern, reminiscent of mud cloth, with pops of color. I can totally see this looking great as a monochromatic rug, too. I hope you give this a try — I know you’ll enjoy the process and the finished, cozy rug you’ll make. —Jessica

Materials
Printed pattern
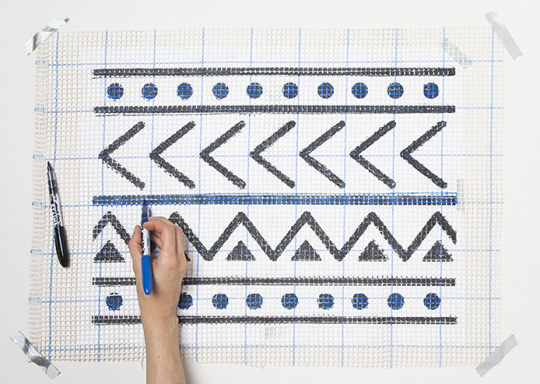
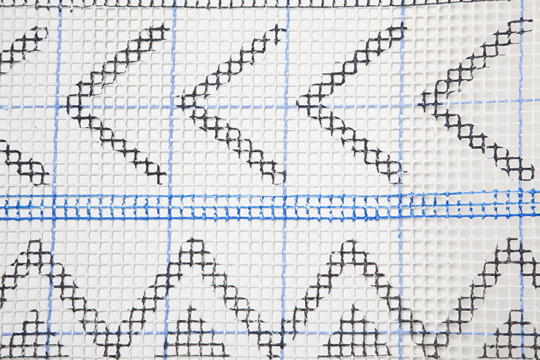
20 x 25” piece of latch hook rug canvas
Sharpie (Stained Sharpies work well)
Tape
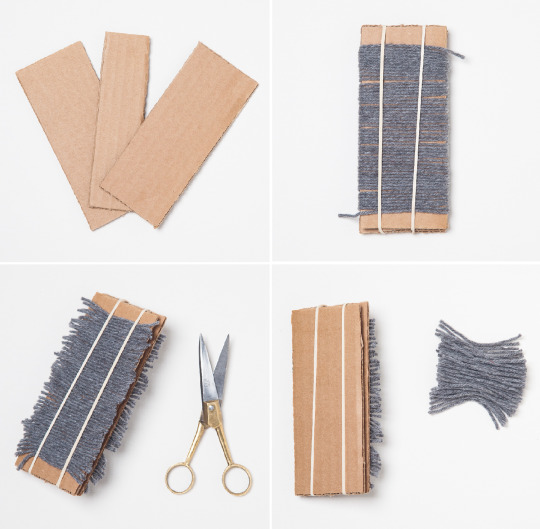
Cardboard pieces (2) 2 ¼” x 8, (1) 2 x 8”
Rubberbands
Scissors
2 Skeins of yarn (268 yds each, medium “4” weight) in your main color
1 Skein of blue and white or your preferred colors
Latch hook
Iron-on Rug Binding
Instructions
1. Print the pattern out using Adobe and select “tile” in the print window. Tape the pattern together. The final size is 15 x 20”. You can also draw out your own pattern using graph paper to map out your design.
2. Transfer your pattern. Iron the latch hook canvas flat to make it easier to work with, Layer the pattern under the latch hook canvas, lining it up with the grid. Tape in place and trace over the pattern with a sharpie.
3. Cut your threads. Sandwich the narrowest cardboard piece in between the two wider pieces. Wrap the yarn around the cardboard with consistent tension. You don’t need to wrap tightly. You can slide down and gather the wrapped yarn to fit more onto the cardboard. Once it’s full, cut the tail end, secure the threads with rubber bands and then cut up the length of the cardboard piece on each side. There should be enough space on each side for your scissors to cut between the layers of cardboard. Aim for consistent yarn lengths, about 2 1/4″ long.
4. Time to latch hook. Color by color, latch hook the rug working side to side, bottom to the middle and then flipping over. One canvas square is one knot or loop of thread(s). Follow the pattern by placing the latch on the top portion of the canvas square. Insert the latch hook into and out of a square, leaving the top of the square under the open latch hook. Slide two pieces of yarn around the latch hook. Pinch the ends of the thread making sure both sides are even. Cross the yarn over into the open latch and pull the hook down through the canvas. Pull the yarn to tighten the loop.
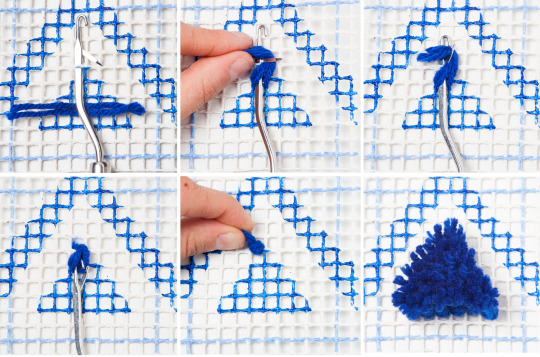
NOTE: When I began the rug, I started out only using one piece of thread per loop, but felt that it wasn’t thick enough for a rug. I decided to double the threads. Different yarn weights might require more or less threads. Different types of yarn will also create different textures.
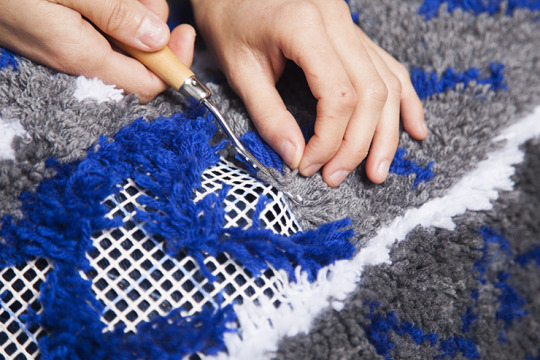
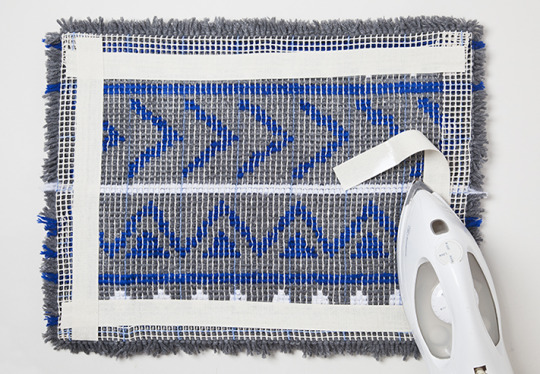
5. Bind the edges. First, flip over the canvas to see if you’ve missed any squares and fill them in as needed. Trim the edges to about 1 to 11/2” around. Press the edges of the canvas down. Measure out the length of the binding for each side and cut. Place the waxy side of the binding down halfway over the canvas edge and press firmly with an iron on the wool setting for about 10 seconds. Lastly, give it a haircut. Trim down any pieces of yarn that are sticking out for an even surface.
Tip: You can add a no-slip backing, which also protects the threads from fraying.

12 notes
·
View notes
Text

Becy on Skye by Sturmsucht
Instagram | Homepage
5 notes
·
View notes
Note
muie lgtv muie la bulangii da nu le dau la muie fiindca asta si.ar dorii
te rog lasa-mi familia din beci
4 notes
·
View notes
Last Seen Blogs

drawingsfromthefrogwar
maggie's art :)

immortalaesthetics
Immortal Aesthetics

asiermorais
Sketches & Stuff

vijayadentalcare
Untitled

song-ty
제목 없음