#bootstrap plugins
Explore tagged Tumblr posts
Visit Tumblr Blog
Explore Tumblr blogs with no restrictions, modern design and the best experience.
Last Seen Tumblr Blogs


Fun Fact
Tumblr’s reach among the 26-to-35-year-olds in the US is 11%.
Link
Memahami plugin dalam membuat aplikasi
#arti plugin#arti Framework#Plugins bootstrap Snippets#Breadcrumb pada bootstrap#Skrip_Button_pada_bootstrap
0 notes
Text
[solved] WP Bootstrap loader causes many plugins to fail
[solved] WP Bootstrap loader causes many plugins to fail
WP Bootstrap loader is an essential component of WordPress that helps load essential plugins, themes and other scripts that WordPress relies on. However, WP Bootstrap loader can also cause many plugins to fail. This can cause many problems and impact the performance of your WordPress website. WordPress plugins are designed to extend the functionality of WordPress. When you install a plugin, it is…
View On WordPress
0 notes
Text
Component Libraries: Should You Build Your Own or Use a Prebuilt One?

Component libraries are a vital tool in web application development in maintaining uniform design, shortening the time taken to develop web applications and improving reusability of the code. Some developers find this dilemma; should they create a component library or use an existing one? In addition, they help reduce the struggle while building well-designed and interactive websites because of the availability of animation-oriented UIs such as Accentricity UI among others. Now, let’s get more to the point in order to help you find the right way.
What is a Component Library?
Component libraries are collections of reusable UI elements such as buttons, forms, modals, and more— and are intended to reuse the components across several projects. Such libraries not only guarantee a consistent look of an application but also save time and costs during its implementation because the elements have been already coded. So, there's no need to build components from scratch.
Prebuilt Component Libraries

Prebuilt Component Libraries
Prebuilt component libraries are the ready-made collections of different UI components that are specifically designed and optimized for common use cases that developers can face during development. Some well-known examples include:
Material-UI (MUI):
A library based on React and it follows Google's Material-UI design, MUI allows a comprehensive set of components customization.
Ant Design:
It's an UI design system framework for enterprise-level products, ant design offers built-in themes and a rich set of UI components.
Bootstrap:
It's an widely-used CSS framework that provides basic components and a responsive grid system.
Pros of Prebuilt Libraries :
Rapid Development: Prebuilt libraries save a lot of time of the developers by providing pre-designed reusable components that you can quickly integrate into your project.
Standardized Design: They help ensure a consistent user experience across different screens and features.
Community Support: Many prebuilt libraries come with robust community support, providing a wealth of tutorials, plugins, and enhancements.
Cons of Prebuilt Libraries
Limited Customization: Customizing components to fit your unique design can sometimes be difficult, leading to constraints on flexibility.
Performance Overhead: Many prebuilt libraries come with extra features you may not need, which can bloat your codebase.

Pros And Cons of Prebuilt Libraries
Animation-Centric Libraries: Bringing UIs to Life
In recent years, a new category of libraries has emerged, specifically focused on providing built-in animations and smooth UI transitions. These libraries not only offer pre-designed components but also emphasize adding dynamic, interactive features to web applications.
Here are some popular examples of animation-focused libraries:
Lottie
Category: Animation Integration Library

Lottie:The industry standard for motion design
What it Offers: Lottie allows you to render animations created in Figma or Adobe After Effects as JSON files using the built-in plugins. These animations are then rendered natively on the web, offering high-quality motion without a heavy performance impact.
Why It’s Useful: Lottie is perfect for apps or websites requiring rich, scalable animations that are lightweight. It’s commonly used for logos, loading animations, and subtle UI effects. Unlike other component libraries, it focuses purely on bringing visual design elements from tools like Figma & After Effects into the web environment.
Accentricity UI
Category: Hybrid Component and Animation Library
What it Offers:
Accentricity UI combines traditional UI components with built-in support for smooth animations and transitions. It offers a wide range of components like buttons, forms, modals, and navigation menus, but with an added layer of predefined animations, making it easier to create interactive, dynamic interfaces.
In addition to these standard components, Accentricity UI provides responsive behaviors and subtle animation effects like hover states, fade-ins, and sliding transitions that enhance user engagement. The library's components are fully customizable, allowing developers to easily adjust animation timings, easing functions, and durations to match the look and feel of their brand, ensuring both visual appeal and performance across devices.
Why It’s Useful:
Think about it, what would be easy for a dev? Making a custom component with tons of animation which the dev has to write from scratch and polish it before the deadline or use a library, where the dev can make use of the library with the built-in support to combine the custom designed elements with smooth animations and transitions offered by the library.
It’s particularly helpful for developers who want the convenience of a prebuilt library but need polished, built-in animations to enhance user experience without writing complex animation code from scratch.
Framer Motion
Category: Animation-focused Component Library (React)

Framer Motion
What it Offers:
Framer Motion is a powerful library for React that allows you to create fluid animations and micro interactions with minimal effort. It supports interactive features like drag, scroll, and spring-based animations, which makes it ideal for interactive & highly animated UIs. It also provides easy-to-use APIs for gesture-based animations and layout transitions, offering developers extensive control over complex animations while maintaining simplicity in implementation.
Why It’s Useful:
Framer Motion combines the simplicity of component libraries with the flexibility of advanced animation frameworks, making it easy to enhance user interfaces with dynamic visual effects. It’s a great choice for React developers who want to integrate animation without compromising performance or adding significant overhead. With its built-in optimizations for smooth rendering, Framer Motion ensures high-quality animations that enhance both usability and visual appeal.
Should You Use Prebuilt Animation Libraries?
The role of animations is really important in web applications to enhance the UX(user experience), by making interfaces feel more fluid and interactive makes user's remember the website due to its great experience. Since users are constantly getting used to smooth effects, micro-interaction and dynamic feedback, animations are no longer viewed as a good to have feature but are rather considered as a must have feature. Prebuilt animation libraries like Framer Motion and GSAP (GreenSock Animation Platform) simplify this process by providing powerful, flexible tools that allow developers to integrate complex animations without having to manually manage every aspect of motion or dive deep into animation theory.
Advantages of Animation-Centric Libraries

Advantages of Animation-Centric Libraries
Ease of Use
Prebuilt animation libraries abstract away the complexities of coding animations from scratch. Without manually writing keyframes, easing functions, or browser-optimized transitions, developers can simply use predefined APIs to implement fluid animations. This drastically reduces development time, as many animation details are handled by the library, letting developers focus on building features and interactions rather than tweaking animations for performance or cross-browser compatibility. For example, with a few lines of code, animations can be applied to any UI element, making the development process much more efficient.
Advanced Features
Many animation libraries offer advanced features that go far beyond basic transitions like fade-ins and slide animations. These include timeline control, scroll-triggered animations, physics-based interactions, and even 3D transformations. For instance, timeline control allows developers to create synchronized sequences of animations, which can be used to create smooth, coordinated interactions across multiple elements. Scroll-based animations enhance user engagement by triggering effects as the user scrolls, perfect for parallax websites or content reveal effects. Physics-based animations, such as spring-based drag-and-drop or object bouncing, add natural, realistic movement to interactive elements, elevating the overall experience. Additionally, 3D transformations provide extensive control over how objects rotate, scale, or move in three-dimensional space, something that is cumbersome to achieve with native CSS alone.
See What Happens Next
#webdevelopement#werbooz#own website#build vs prebuilt component library#custom UI components#prebuilt UI libraries#web development#Material-UI#Ant Design#Bootstrap#Framer Motion#Accentricity UI#animation libraries#best UI libraries 2024#component library pros and cons#web app development#UI design optimization#web performance#web development trends
2 notes
·
View notes
Text
Bootstrap 5 Select Dropdown Enhancer - AvalynxSelect
AvalynxSelect is a JavaScript plugin that transforms the regular <select> element into a Bootstrap dropdown component with support for live search, custom styles, scrollable lists, and more. How to use it: 1. Download the main script avalynx-select.js and insert it into your Bootstrap project. <link rel="stylesheet" href="/path/to/cdn/bootstrap.min.css" /> <script…

View On WordPress
3 notes
·
View notes
Text
Frontend Frameworks for Web Development

Frontend Frameworks for Web Development, creating captivating and user-friendly websites and web applications is essential for businesses to thrive. With the increasing demand for dynamic and interactive web experiences, frontend development has become more crucial than ever.
To meet these demands efficiently, developers rely on frontend frameworks, which streamline the development process and enhance productivity.
In this comprehensive guide, we'll explore the world of frontend frameworks for web development, covering everything from key factors to consider when choosing a framework to the top options available in India.
Overview of Frontend Frameworks for Web Development
Frontend frameworks are collections of pre-written code, libraries, and tools that expedite the process of building user interfaces for websites and web applications.
These frameworks provide developers with a structured approach to frontend development, offering ready-made components, templates, and utilities to streamline common tasks.
By leveraging frontend frameworks, developers can achieve consistency, maintainability, and scalability in their projects while focusing more on functionality and user experience.
These frameworks often follow the principles of modularization and component-based architecture, facilitating code reuse and making development more efficient.
Key Factors to Consider in a Frontend Frameworks for Web Development
When choosing a frontend framework for web development, several key factors should be considered:
Community Support: Opt for frameworks with active and robust communities. A strong community ensures ongoing support, frequent updates, and a wealth of resources such as documentation, tutorials, and plugins.
Performance: Evaluate the performance metrics of the framework, including page load times, rendering speed, and resource utilization. A lightweight and efficient framework can significantly impact the user experience.
Flexibility and Customization: Assess the framework's flexibility in accommodating project requirements and its customization options. Look for frameworks that allow developers to tailor components and styles to suit specific design needs.
Learning Curve: Consider the learning curve associated with the framework, especially if you're working with a team of developers with varying skill levels. Choose a framework that aligns with your team's expertise and resources.
Compatibility and Browser Support: Ensure that the framework is compatible with a wide range of browsers and devices, particularly if your target audience includes users with diverse preferences and devices.
Updates and Maintenance: Check the framework's update frequency and long-term maintenance plans. Regular updates and proactive maintenance are essential for addressing security vulnerabilities and compatibility issues.
7 Best Frontend Frameworks for Web Development in India
Now, let's explore some of the top Frontend Frameworks for Web Development widely used by developers in India:
React.js: Developed by Facebook, React.js is a popular JavaScript library for building user interfaces. It emphasizes component-based architecture and virtual DOM for efficient rendering. React's ecosystem includes tools like React Router for routing and Redux for state management.
Angular: Backed by Google, Angular is a comprehensive frontend framework for building robust web applications. It provides features such as two-way data binding, dependency injection, and modular development. Angular offers a full-fledged ecosystem with Angular CLI for project scaffolding and Angular Material for UI components.
Vue.js: Vue.js is an advanced JavaScript framework known for its simplicity and flexibility. It allows developers to incrementally adopt its features and integrate it into existing projects easily. Vue.js offers reactive data binding, virtual DOM, and a rich ecosystem of plugins and components.
Bootstrap: Bootstrap is a popular CSS framework for building responsive and mobile-first websites. It provides a grid system, pre-styled components, and responsive utilities, allowing developers to create sleek and consistent designs quickly. Bootstrap is highly customizable and offers extensive documentation and community support.
Svelte: Svelte is a relatively new frontend framework that focuses on compiling components at build time rather than runtime. This approach results in highly optimized and lightweight web applications. Svelte's simplicity and performance make it an attractive choice for developers seeking efficiency and speed.
Tailwind CSS: Tailwind CSS is a utility-first CSS framework that provides a set of low-level utility classes for building custom designs. It offers a highly customizable and expressive approach to styling, enabling developers to create unique and responsive interfaces without writing custom CSS. Tailwind CSS is gaining popularity for its developer-friendly workflow and rapid prototyping capabilities.
Foundation: Foundation is a responsive front-end framework developed by ZURB, known for its modular and customizable nature. It offers a comprehensive set of CSS and JavaScript components, as well as a robust grid system and a variety of UI elements. Foundation is well-suited for building modern and accessible web projects.
Conclusion for Web Development
Choosing the right Frontend Frameworks for Web Development is crucial to the success of your website development. Consider factors such as community support, performance, flexibility, and compatibility when evaluating different frameworks. Each framework has its strengths and weaknesses, so assess your project requirements and development preferences carefully before making a decision.
Whether you opt for React.js, Angular, Vue.js, or any other frontend framework, prioritize learning and mastering the chosen tool to maximize its potential and deliver exceptional web experiences. Keep abreast of new developments, best practices, and emerging trends in frontend development to stay ahead in this ever-evolving field.
FAQs for Web Development
Q: Which frontend framework is best for beginners?
A: Vue.js and React.js are often recommended for beginners due to their relatively gentle learning curves and extensive documentation.
Q: How do I choose between Angular and React for my project?
A: Consider factors such as project requirements, team expertise, and ecosystem preferences. Angular offers a comprehensive solution with built-in features, while React provides more flexibility and a vibrant ecosystem.
Q: Are frontend frameworks necessary for web development?
A: While not strictly necessary, frontend frameworks greatly simplify and expedite the web development process, especially for complex and dynamic projects. They provide structure, consistency, and efficiency, ultimately enhancing productivity and user experience.
Q: Can I use multiple frontend frameworks in the same project?
A: While technically possible, using multiple frontend frameworks in the same project can lead to complexity, conflicts, and maintenance challenges. It's generally advisable to stick to a single framework to maintain code consistency and streamline development.
More Details
Email: [email protected]
Website: https://censoware.com/
#web development#website development#software development#web developers#pythonprogramming#phpdeveloper#javascriptdeveloper#mern stack development#mobile app development
2 notes
·
View notes
Photo
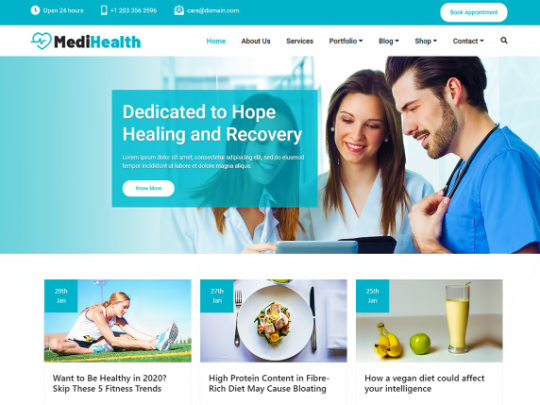
The best and popular medical and healthcare premium WordPress theme for your business. MediHelath Premium theme is designed on the latest Bootstrap 4.x version which is fully responsive and suitable for all types of portable devices. With multiple templates, you can design and develop websites for hospitals, doctors, clinics, health centers, or community health centers, medical stores, health services, drug stores, spa & massage centers. The theme is compatible with popular WordPress plugins like Yoast SEO, Jetpack, Elementor Page Builder, Gutenberg, Block-Enabled, WooCommerce, WPML, Contact Form 7, WPForms, Wordfence Security, WP Super Cache and more.
Medihealth-Free: https://bit.ly/3Oziep0 Medihealth-Premium: https://bit.ly/3npLLFR
6 notes
·
View notes
Note
fuck it
tell me about your neovim config
Ok so I have put like literal hours upon hours into making my editor look just right and honestly I don't ever expect it to truly be perfect
Literally fucking everything is lazy loaded with the exception of my colorscheme and kinda technically my bufferline and startscreen and also my plugin manager bc you can't really lazy load that
I'm getting the absolute maximum performance out of my config and I want it to go as fast as possible
I have like 15 ms load times on average bc of just how much stuff is just not loaded at the start
Because I use lazy.nvim for my plugin manager, everything is cached as well, so that helps it go even faster on top of basically everything only loading when it absolutely needs to
And it's fully bootstrapping too
Literally you just clone it to .config/nvim and everything gets set up automatically
All of the plugins get installed, and all of my LSPs, linters, and formatters get installed automatically with some mason.nvim extensions
Of course, since I'm always working on my config, there is still come jank left over from a previous plugin manager I used to use called packer.nvim
It was ok but like performance-wise it wasn't very good :/
And you also had to close and reopen neovim to get all of the plugins to install correctly
But with lazy.nvim, all of the issues I had with packer.nvim were immediately solved and my config is blazing fucking fast
I also made the choice of splitting my config across multiple files so I have finer grained control over the core aspects of my config, being my non-plugin keymaps, autocommands, and options
They all have their own separate files which are required by my init.lua, which basically just requires four files and doesn't contain any actual config
All of it is blazing fast and I love to constantly tinker and mess with it, figuring out what plugins I don't need, what plugins I do need, and how I can improve it in general
Neovim is blank canvas and I have made it into an artwork with so many hours that I've lost count of
Anyway here's a link to it:
5 notes
·
View notes
Text
Freelance Web Development: Required Skillsets and Certifications
In today's digital world, businesses are prioritizing their online presence more than ever. As a result, the demand for skilled professionals in web development is rapidly growing. Whether you're aiming to become a Freelance Web Developer, a Freelance Web Designer, or a Freelance Website Developer, having the right combination of technical skills and certifications is essential.
This article explores the key skillsets and certifications needed to succeed in freelance web development, especially for professionals in Singapore—a booming hub for tech innovation and digital services.
The Growing Importance of Freelance Web Development
The rise of digital marketing, e-commerce, and mobile apps has created countless opportunities for freelancers. Businesses are increasingly turning to Freelance Website Designers and Freelance Web Developers to build modern, scalable, and responsive websites.
In tech-savvy regions like Singapore, the demand for top-tier Web Developer Singapore and Website Designer Singapore professionals is especially strong. If you're considering a career in web design Singapore, the time to upskill is now.
Technical Skillsets Every Freelance Web Developer Needs
1. HTML & CSS
These are the fundamental building blocks of web development. HTML structures the content, while CSS styles it. Any Freelance Web Designer Singapore or Freelance Website Developer Singapore must master these core languages.
2. JavaScript
JavaScript is essential for interactive elements like sliders, pop-ups, and dynamic forms. Proficiency in JavaScript (and frameworks like React or Vue.js) is highly desirable for both Web Designer Singapore and Web Developer Singapore roles.
3. Responsive Design
Websites must perform seamlessly across various devices. Knowing how to build responsive layouts using CSS Grid, Flexbox, or frameworks like Bootstrap is a must for a Freelance Website Designer or Freelance Web Developer Singapore.
4. Version Control (Git & GitHub)
Freelancers often work solo or with teams remotely. Version control systems help manage changes efficiently. Knowledge of Git is crucial for any Freelance Website Developer or Website Developer Singapore.
5. Backend Development
Skills in backend languages such as PHP, Python, Ruby, or Node.js are important for creating dynamic websites. A well-rounded Freelance Web Developer Singapore should be comfortable managing both front-end and back-end operations.
6. Databases
Understanding relational databases like MySQL or PostgreSQL and non-relational databases like MongoDB is important for dynamic data-driven websites. These are vital for any Freelance Website Developer Singapore.
7. Content Management Systems (CMS)
Many clients prefer CMS platforms like WordPress, Joomla, or Drupal for easy content updates. A successful Freelance Website Designer Singapore must know how to develop and customize themes and plugins.
Soft Skills That Make a Difference
Technical skills alone aren’t enough. Freelancers must also possess the following soft skills:
1. Communication
Clear communication helps align expectations and avoid misunderstandings. Clients prefer working with a Website Designer Singapore who can explain technical concepts in simple terms.
2. Time Management
Handling multiple clients and deadlines requires top-notch time management. Effective planning is key for a Freelance Web Designer juggling different projects.
3. Problem-Solving
Whether debugging a script or dealing with client requests, strong problem-solving skills are crucial for any Freelance Web Developer Singapore.
4. Client Management
Freelancers must learn how to handle contracts, invoices, and project updates professionally. A polished, business-minded approach adds credibility to your web design Singapore services.
In-Demand Certifications for Freelance Web Developers
Certifications serve as proof of your skills and commitment to continuous learning. They can also help you stand out in competitive markets like Singapore.
1. Google UX Design Professional Certificate
Offered via Coursera, this certification is excellent for Freelance Web Designers focusing on user experience. It covers wireframes, prototypes, and user testing.
2. freeCodeCamp Certifications
Free and comprehensive, these certifications include Front-End Development, Responsive Web Design, JavaScript Algorithms, and more. Ideal for Freelance Web Developers on a budget.
3. W3C Front-End Web Developer Certificate
This certification, offered in partnership with edX, is ideal for those who want credibility as a Freelance Website Developer Singapore. It covers HTML5, CSS, and JavaScript fundamentals.
4. Meta Front-End or Back-End Developer Certificates
Meta (formerly Facebook) offers highly respected certificates through Coursera. These are valuable for Web Developer Singapore professionals aiming to boost their technical profile.
5. Microsoft Certified: Azure Fundamentals
If you want to work with cloud-based web hosting or app deployment, this certification is a strong asset for Website Developer Singapore freelancers.
6. AWS Certified Cloud Practitioner
For freelancers dealing with scalable web solutions, AWS knowledge is increasingly in demand. This certification adds significant weight to your portfolio.
7. Adobe Certified Professional: Web Authoring
Ideal for Freelance Website Designers who work with Adobe Dreamweaver and Creative Cloud tools. It certifies your ability to design and maintain professional-quality websites.
Specialized Skillsets for Singapore-Based Freelancers
1. Localization & Multilingual Websites
Clients in Singapore often target diverse audiences. Skills in creating multi-language websites (including Mandarin, Malay, and Tamil support) can boost your appeal as a Freelance Website Designer Singapore.
2. Understanding Local SEO
Being proficient in local SEO helps your clients get noticed online. This is essential for a Freelance Web Developer Singapore targeting small businesses.
3. Data Privacy & PDPA Compliance
Familiarity with Singapore's Personal Data Protection Act (PDPA) is a bonus. Clients trust Website Developer Singapore professionals who prioritize legal compliance and data security.
Freelance Tools to Master
The right tools can significantly enhance productivity. Here are a few tools every Freelance Web Designer Singapore or Web Developer Singapore should know:
Visual Studio Code – Lightweight and powerful code editor.
Figma / Adobe XD – For UI/UX design.
Trello / Asana – Project management.
Slack / Zoom – Client communication.
Canva – Basic graphic design for non-designers.
Mastering these tools adds to your capabilities as a top-performing Freelance Website Developer or Web Designer Singapore.
How to Showcase Your Skills
1. Build an Impressive Portfolio
Include case studies that highlight problem-solving, design thinking, and measurable results. A strong portfolio is a must for any Freelance Web Designer Singapore.
2. Create a Professional Website
Your own website should demonstrate your design and development capabilities. It’s your digital business card—especially important for standing out in the web design Singapore scene.
3. Get Testimonials and Reviews
Positive feedback builds trust. Ask past clients to leave testimonials that you can feature on your site. This is highly effective for Freelance Web Developer Singapore professionals building a reputation.
Conclusion
The freelance web development industry is thriving, offering abundant opportunities for skilled professionals. Whether you're a Freelance Web Designer, Freelance Website Developer, or a Web Developer Singapore, having a solid foundation in both technical and soft skills is crucial.
Additionally, obtaining relevant certifications can validate your expertise and give you a competitive edge, especially in saturated markets like Singapore. The combination of practical experience, verified knowledge, and strong communication will ensure your long-term success in web design Singapore.
For anyone looking to build a successful freelance career, continuous learning and adaptation are key. Start with the basics, earn your certifications, and gradually expand your services. Whether you're a Freelance Web Designer Singapore working on front-end projects or a Freelance Website Developer Singapore managing full-stack solutions, the future is full of possibilities.
Visit https://www.freelancewebdesigner.sg to learn on Website development in Singapore.
#freelance web designer singapore#website developer singapore#web design singapore#web designer singapore#web developer singapore#website designer singapore
0 notes
Text
WordPress vs. Custom CMS: Choosing the Right Platform
So you're building a website and can't decide between WordPress and a custom CMS? Trust me, I've been there. It's like choosing between buying a house that's already built or constructing one from scratch. Both have their perks, but the right choice depends on what you actually need.
I've worked with dozens of clients who've struggled with this exact decision. Some went with WordPress and loved it. Others needed something custom-built. Let me share what I've learned from real projects so you can make the right call.
The WordPress Route: Your Ready-Made Solution
WordPress powers over 40% of the web for good reason. It's like moving into a fully furnished apartment – everything you need is already there.
When WordPress Makes Perfect Sense
You Need Speed to Market One client came to me with a tight deadline for their startup launch. They needed a professional website in three weeks. WordPress was the obvious choice. We had their site live in 10 days, complete with blog, contact forms, and e-commerce functionality.
Budget is a Major Factor Let's be honest – money matters. A WordPress site can cost anywhere from $500 to $5,000, while custom development starts at $10,000 and easily goes into six figures. If you're bootstrapping or have limited resources, WordPress stretches your dollar further.
You Want Extensive Plugin Ecosystem Need SEO tools? There's Yoast. Want e-commerce? WooCommerce has you covered. Social media integration? Dozens of options. WordPress has over 60,000 plugins, which means someone has probably already solved your problem.
WordPress Success Stories from My Experience
A local restaurant owner wanted online ordering during COVID. We used WordPress with WooCommerce and had their ordering system running in two weeks. They processed over $50,000 in orders in the first month alone.
Another client, a consulting firm, needed a professional blog to establish thought leadership. WordPress's content management made it easy for their team to publish articles without technical knowledge. Their organic traffic increased 300% in six months.
The WordPress Downsides (And They're Real)
Performance Can Be Sluggish WordPress sites often load slowly, especially with multiple plugins. One client's site took 8 seconds to load before we optimized it. That's an eternity in web terms.
Security Requires Constant Vigilance WordPress's popularity makes it a target. I've seen clients get hacked because they didn't update plugins promptly. You need regular maintenance, backups, and security monitoring.
Customization Limitations Sometimes you hit WordPress's walls. One client wanted a unique booking system that didn't exist as a plugin. We spent weeks trying to force WordPress to do something it wasn't designed for.
The Custom CMS Path: Built for Your Exact Needs
A custom CMS is like designing your dream home from the ground up. Everything fits perfectly because it's made specifically for you.
When Custom Development Is Worth It
You Have Unique Business Logic A logistics company needed to integrate with multiple shipping APIs, manage complex pricing rules, and generate custom reports. No existing CMS could handle their workflow. We built a custom solution that automated 80% of their manual processes.
Performance Is Critical One e-commerce client was losing sales due to slow page loads. Their WordPress site couldn't handle high traffic during flash sales. We rebuilt with a custom CMS optimized for their specific use case – page load times dropped from 6 seconds to under 1 second.
You Need Advanced Integrations A SaaS company required deep integration with their existing software, custom user dashboards, and complex permission systems. A custom CMS gave them exactly what they needed without compromise.
Custom CMS Success Stories
A manufacturing company needed a portal where distributors could access product specifications, place orders, and track shipments. WordPress couldn't handle the complex B2B workflow. Our custom solution increased distributor satisfaction by 40% and reduced support tickets by 60%.
Another client, a nonprofit, needed to manage volunteers, donations, and events with specific reporting requirements for grants. The custom CMS we built automated their grant reporting and saved them 20 hours per month.
The Custom Route Challenges
Higher Initial Investment Custom development requires significant upfront investment. Budget $15,000-$100,000+ depending on complexity. That's a tough pill to swallow for many businesses.
Longer Development Time While WordPress sites can launch in weeks, custom development takes months. Plan for 3-6 months minimum for a robust custom CMS.
Ongoing Maintenance Responsibility With great power comes great responsibility. You'll need ongoing development support for updates, bug fixes, and new features. This means either having in-house developers or a long-term relationship with a development agency.
Making Your Decision: A Framework That Works
Here's the decision framework I use with clients:
Choose WordPress If:
Your budget is under $10,000
You need to launch within 1-2 months
Your requirements are fairly standard (blog, basic e-commerce, contact forms)
You have limited technical resources
Content management by non-technical users is a priority
Choose Custom Development If:
You have unique business processes that don't fit standard solutions
Performance and scalability are critical
You need extensive third-party integrations
Security requirements are extremely high
Your budget allows for $15,000+ investment
You have long-term development resources
The Hybrid Approach: Best of Both Worlds
Sometimes the answer isn't either/or. I've successfully used WordPress as a content management system while building custom functionality around it. One client used WordPress for their blog and marketing pages but had a custom application for their core business logic.
Another approach is starting with WordPress and migrating to custom development as you grow. This lets you validate your business model before making a larger investment.
Real Talk: What Most Businesses Actually Need
After working with hundreds of clients, here's the truth: 80% of businesses are better served by WordPress initially. The speed to market, cost-effectiveness, and extensive ecosystem make it the practical choice.
The 20% who need custom development usually know it. They have specific requirements that can't be met any other way, or they've outgrown WordPress's capabilities.
Making It Work: Tips for Success
If You Choose WordPress:
Invest in quality hosting (avoid $3/month shared hosting)
Keep plugins minimal and updated
Use a reputable theme or invest in custom design
Plan for ongoing maintenance and security
If You Go Custom:
Start with a detailed requirements document
Plan for 20-30% budget overrun
Establish ongoing development relationship early
Focus on core functionality first, add features later
The Bottom Line
The WordPress vs. custom CMS decision isn't about which is better – it's about which is better for your specific situation. WordPress gets you moving quickly and cost-effectively. Custom development gives you exactly what you need but requires more investment.
Most successful businesses start with what gets them launched fastest, then evolve their platform as they grow. There's no shame in starting with WordPress and moving to custom development later. In fact, it's often the smartest approach.
The key is being honest about your current needs, resources, and timeline. Don't build a custom Ferrari when a reliable Toyota will get you where you need to go.
What's your situation? Are you looking to launch quickly and cost-effectively, or do you have unique requirements that demand a custom solution? The answer to that question will guide you to the right choice.
0 notes
Text
Build any landing-page site design without coding - Stream WordPress one-page theme - All you need to build an exceptional one-page website style easily with anchors without coding and with a drag & drop live page builder https://visualmodo.com/theme/stream-wordpress-theme/ Build your own one-page/landing-page that converts and grow your brand! ⚓️📱💻🖥️
webdesign #HTML5 #CSS3 #template #plugins #theme #wordpress #onepage #pagebuilder #landingpage #bootstrap #anchor #navigation
0 notes
Link
Memahami plugin dalam membuat aplikasi
#arti plugin#arti Framework#Plugins bootstrap Snippets#Breadcrumb pada bootstrap#Skrip_Button_pada_bootstrap
0 notes
Text
How Web Development Companies Choose the Right Tech Stack for Your Project
When starting a web development project, one of the most critical decisions is choosing the right technology stack—the combination of tools, programming languages, frameworks, and databases used to build and run your website or application. A skilled Web Development Company doesn’t just pick trendy tools—they strategically select a tech stack that fits your goals, budget, scalability, and long-term vision.
This decision shapes the performance, security, development speed, and maintainability of your project. Let’s explore how professional web development companies approach tech stack selection—and why it makes all the difference.
1. Understanding Project Requirements
Every project is unique. Before recommending any technologies, a web development company conducts in-depth discovery sessions to understand your:
Business goals
Target audience
Required features
Budget and timeline
Integration needs (CRM, APIs, payments, etc.)
Expected user volume and growth potential
For example, a content-heavy blog needs different tools than a real-time messaging app or an enterprise eCommerce platform.
Why it matters: The right stack should align with the core functionality and complexity of your specific project.
2. Frontend Stack Considerations
The frontend stack determines how your website looks and behaves for users. Agencies typically choose from frameworks and libraries such as:
React.js – Ideal for interactive, high-performance UIs
Vue.js – Lightweight and easy to integrate
Next.js – Server-side rendering and SEO-friendly features
Tailwind CSS or Bootstrap – For fast, responsive styling
The choice depends on user experience requirements, SEO priorities, and how dynamic the interface needs to be.
Why it matters: A responsive, fast-loading frontend increases engagement and improves SEO performance.
3. Backend Stack Considerations
The backend stack powers the logic behind the scenes—data processing, server responses, user authentication, etc. Common choices include:
Node.js – Non-blocking, event-driven, great for scalable applications
Python with Django/Flask – Ideal for fast MVPs and data-heavy platforms
PHP with Laravel – Secure and well-supported, especially for CMS-based sites
Java or .NET – Enterprise-level applications with complex infrastructure
Database decisions (e.g., MySQL, MongoDB, PostgreSQL) are also influenced by the type of data, relationships, and scalability needed.
Why it matters: Backend choices directly impact performance, security, and future extensibility.
4. Scalability and Long-Term Maintenance
A web development company always plans for growth. If you’re building an MVP now but expect to scale to thousands of users, the tech stack must be capable of handling that without requiring a complete rebuild.
This means selecting tools with a strong community, active support, and modular architecture. Headless CMS options, API-first architectures, and microservices are often chosen for their flexibility.
Why it matters: A scalable stack ensures your platform evolves with your business—not against it.
5. Team Expertise and Community Support
An experienced web development agency won’t just chase trends—they choose tools their team is proficient in and that have strong community ecosystems. This means faster development, fewer bugs, and access to trusted libraries and plugins.
Tools with large communities (like React, Laravel, or Node.js) are easier to maintain and integrate with new technologies as they emerge.
Why it matters: Established tools reduce technical debt and development risks.
6. Security and Compliance
Depending on your industry, your tech stack may need to meet specific security standards—HIPAA for healthcare, PCI-DSS for eCommerce, or GDPR for data protection. Developers choose technologies with built-in security features, encryption protocols, and access control layers.
They also avoid stacks with known vulnerabilities or outdated dependencies.
Why it matters: A secure foundation protects your business and user data from the start.
7. Third-Party Integrations and DevOps
Will your project need payment gateways, CRM tools, marketing platforms, or cloud services? The chosen stack must allow easy integration with third-party APIs. In addition, agencies consider DevOps tools for continuous integration, deployment, monitoring, and scaling—often using platforms like Docker, AWS, or Vercel.
Why it matters: A tech stack that plays well with your ecosystem leads to smoother operations and automation.
Final Thoughts
Choosing the right tech stack isn’t just about technical specs—it’s about aligning with your business goals, user needs, and growth plans. A trusted Web Development Company brings a strategic, experience-backed approach to this decision, ensuring that your platform is stable, scalable, and ready for the future.
With the right combination of frontend frameworks, backend technologies, databases, and DevOps tools, your project can launch faster, perform better, and adapt more easily over time. Don’t leave your tech stack to chance—build with purpose, and partner with experts who know how to get it right from the start.
0 notes
Text
Best VAT compliance audit service in the UAE

Best VAT Compliance Audit Service in the UAE: Is Your Business Really Covered? Let’s be honest—nobody wakes up excited about VAT compliance. It’s dry, technical, and let’s not sugarcoat it… kind of a headache. But here’s the kicker: ignoring it or brushing it off? That’s a fast track to HMRC knocking at your door—or worse, unexpected penalties that hit harder than a surprise tax bill after a record sales month.
So, what makes a VAT compliance audit service in the UAE the best? And more importantly, how do you know it’s the right fit for your business—whether you’re a scrappy startup, a scaling SME, or a seasoned enterprise juggling multiple VAT registrations?
Let’s break this down.
Why VAT Isn’t Just a ‘Finance Problem’ Anymore You might think VAT lives and dies in your accounting department. But here’s the thing—VAT touches everything: pricing strategies, supply chain decisions, cross-border sales, and even how you market certain offers. One incorrect VAT treatment, and suddenly you’re refunding customers, backpedaling on ad campaigns, or cleaning up a compliance mess.
It’s not just about "getting the numbers right." It’s about risk reduction, business agility, and trust.
Startups often don’t realise this until they’re already under review. Enterprises? They know it—some the hard way.
So What Does a ‘Best’ VAT Compliance Audit Service Actually Look Like? Honestly, it’s not the flashiest website or the slickest pitch deck. The best services quietly do the heavy lifting in the background, and they do it consistently. Here's what sets them apart:
✔️ Deep UAE VAT Expertise (And EU Knowledge Too) They get the quirks of the UAE VAT system. They understand how Brexit changed things. They know when zero-rating applies and when it doesn’t—and they’ve seen what happens when someone thinks they’re exempt but isn’t.
✔️ Custom-Tailored Reviews No cookie-cutter audits. The best providers walk through your operations—from your Shopify plugins to your shipping invoices—so the audit actually means something.
✔️ Tech-Integrated, Human-Led Software is great (love a good automation!), but someone still needs to interpret the data. The best services use tools like Xero, QuickBooks, or Sage integrations, but also offer real conversations with tax professionals.
✔️ Transparent Reporting You shouldn’t need a PhD in finance to read your VAT audit report. Look for services that show red flags clearly, explain fixes, and offer ongoing guidance—not just a spreadsheet of problems.
Rapid Business Solution: A Quiet Giant in VAT Compliance Now, I wouldn’t mention them if they didn’t walk the talk. Rapid Business Solution has carved out a reputation as one of the UAE’s most reliable names in VAT compliance audits—and no, they’re not just for the big dogs.
From boutique e-commerce brands to mid-sized tech firms scaling across the EU, they’ve helped businesses stay compliant without drowning them in jargon. Clients often mention their ability to "speak human," not just tax code. And that's a skill.
What’s refreshing? Their audits are not about pointing fingers. They're about helping businesses stay agile, confident, and ahead of HMRC—not playing catch-up.
Startups, You’re Not Too Small for This We get it. You're bootstrapping, wearing five hats, and VAT is just another annoying admin task that keeps falling down the list. But here's a wild stat—70% of VAT penalties in the UAE could’ve been avoided with basic audit checks.
That’s money you could’ve reinvested in product, ads, or maybe, just maybe, a breather for your team.
Startups benefit most from audits when they’re early—before bad habits set in. Don’t wait for your first HMRC inquiry to scramble for answers.
SMEs and Enterprises: Complexity Isn’t a Badge of Honor As your operations grow, so do the layers: different VAT schemes, industry-specific exemptions, international thresholds, and maybe even group VAT registration. It adds up—fast.
The best audit services don’t just identify errors. They help you build scalable, VAT-compliant systems so you're not rebuilding processes every year. For SMEs on the verge of entering new markets, this is crucial. For enterprises already juggling multiple jurisdictions, it’s non-negotiable.
Honestly, the difference between a decent and a great VAT compliance audit service? The latter will tell you what you didn’t even know to ask.
A Quick Reality Check: Do You Need a VAT Audit? Ask yourself (and answer honestly):
Have you changed your business model recently? Started selling cross-border? Outsourced your bookkeeping? Had more than one staff member handling VAT returns? Applied multiple VAT rates across services? If you nodded to even one, a compliance audit isn’t just nice to have—it’s essential.
Marketing Teams, You’re Part of This Too Strange as it sounds, VAT affects pricing pages, product bundling, shipping promos, and even ad copy. If your team’s running campaigns that cross borders or include mixed-rate goods/services, miscommunication with finance can lead to compliance headaches—or worse, unhappy customers.
Working with a VAT audit partner who gets how departments intersect isn’t a luxury—it’s a huge relief.
How Often Should You Do a VAT Compliance Audit? There’s no one-size-fits-all answer, but a good rule of thumb is:
Annually for steady operations Quarterly if you're rapidly growing, selling internationally, or switching systems Immediately if you’ve had a VAT investigation, late returns, or system overhauls A quick tip? Schedule it like a dentist appointment. Regular checkups beat painful emergencies every time.
Final Thoughts: It’s About Peace of Mind, Not Paperwork The best VAT compliance audit service in the UAE? It isn’t the one with the flashiest slogan. It’s the one that sees your blind spots, speaks your language, and helps you sleep better at night—knowing your business is on the right side of the taxman.
If you're serious about growth and not just surviving the next VAT deadline, give Rapid Business Solution a shout. They’re not just auditors—they’re your early-warning system in disguise.
Follow this website rapid business solution: https://rapidbs.ae/
0 notes
Text
ColibriSM Nulled Script 1.4.3

Unlock the Power of Social Media with ColibriSM Nulled Script Looking to build your own dynamic and fully-featured social networking platform? The ColibriSM Nulled Script is the ultimate PHP-based solution designed for developers and entrepreneurs who want to create a modern, sleek, and intuitive social media experience—all without breaking the bank. Best of all, you can download ColibriSM Nulled Script completely free from our website today. What Is ColibriSM Nulled Script? ColibriSM is a premium PHP script that replicates the core functionality of major social media platforms such as Facebook, Twitter, and Instagram. Designed with speed, security, and customization in mind, ColibriSM allows users to share posts, images, and videos, follow each other, comment, and react—all wrapped in a modern, responsive interface. This nulled version gives you full access to all premium features, letting you explore, test, and even deploy a full-scale network without the typical licensing fees. Technical Specifications Script Type: PHP, MySQL Frontend: Bootstrap 4, jQuery Backend: Secure and optimized PHP framework Database: MySQL 5.7+ Server Requirements: Apache/Nginx, PHP 7.4+, OpenSSL, cURL Why Choose ColibriSM Nulled Script? Here’s why the ColibriSM Nulled Script is the top choice for developers and startups: Full Customization: Modify layouts, modules, and features with ease. Modern UI: Clean, mobile-friendly design that provides a native app-like experience. Advanced Features: User profiles, timelines, notifications, live messaging, and more. Performance Optimized: Lightweight code ensures fast page loads and responsive performance. Multilingual Support: Ready for international deployment with RTL compatibility. Ideal Use Cases for ColibriSM Nulled Script Whether you're launching a niche social network or building a private platform for a school, company, or organization, ColibriSM adapts effortlessly. Here are just a few examples of its versatility: Student and Alumni Networks Business or Professional Communities Creative and Artistic Social Hubs Private Corporate Platforms Localized Community Networks Simple Installation Guide Getting started with ColibriSM is fast and easy: Download the ColibriSM Nulled Script package from our website. Upload files to your hosting server via FTP or file manager. Set up your MySQL database and import the included SQL file. Edit the config.php file with your site settings and database credentials. Run the installation wizard and follow the on-screen prompts. Start customizing your platform to fit your brand or community. You’ll have a fully-functional social network live within minutes. FAQs About ColibriSM Nulled Script Is the ColibriSM Nulled Script safe to use? Yes, the version provided on our site is thoroughly scanned and tested to ensure it’s free from malicious code or backdoors. However, we always recommend using it on a development or test server first. Can I monetize my platform with this script? Absolutely! ColibriSM Nulled Script includes advertising modules and third-party integration options, making it easy to implement revenue streams. Does the nulled version have all premium features? Yes, this version gives you unrestricted access to every feature, including media uploads, real-time chat, dark mode, and more. Final Thoughts For those who are ready to bring their social networking idea to life, ColibriSM delivers everything you need. With its robust feature set, user-friendly interface, and complete customizability, it’s the go-to choice for developers and digital innovators. Download it today and start building your digital community. Want to enhance your platform's SEO performance? Don’t miss out on the powerful Yoast seo nulled plugin available on our site. Also, check out the avada nulled theme for a beautiful and customizable frontend experience.
0 notes
Text

The Role of Responsive Design Tools in CRO
Discover how responsive design tools enhance user experience and improve conversion rates through mobile optimization.
Source: https://cro.media/insights/ux-ui/role-of-responsive-design-tools-in-cro/
As the internet landscape increasingly shifts toward mobile-first usage, responsive web design tools have become integral to modern web development. The tools examined in the article reflect a broader trend of prioritizing mobile responsiveness, which is crucial not only for aesthetics but also for conversion rate optimization (CRO). Websites that function smoothly across a variety of devices significantly enhance user experience, reduce bounce rates, and improve conversion potential.
CRO and the Importance of Mobile-First Design
One of the main drivers behind the use of responsive design tools is the surge in mobile web traffic. With 65.47% of internet traffic in 2023 originating from mobile devices, businesses can no longer afford to overlook the mobile experience. Mobile-friendly websites aren't just about looking good—they are essential for keeping users engaged and converting them into customers.
Poor mobile experiences often lead to higher bounce rates and diminished brand perception. In the context of CRO, even a minor issue with responsiveness—such as slow loading times, awkward layout adjustments, or broken links—can directly impact conversion rates.
Analyzing Key Responsive Design Tools for CRO
Bootstrap: Speed and Simplicity for Quick Prototyping
Bootstrap’s pre-built responsive components allow designers to quickly implement flexible grid systems, which is a key aspect of ensuring that websites look great on any device. From a CRO perspective, the rapid prototyping facilitated by Bootstrap can be essential for testing different layouts and optimizing user flows, especially in the early stages of a website’s design.
The grid system also makes it easier to structure a layout that adapts seamlessly to mobile, reducing the chances of users abandoning the site due to poor design. This adaptability is crucial for maintaining engagement and ultimately improving conversion rates.
Elementor: Customization Without Code for WordPress Sites
For WordPress-based websites, Elementor stands out as an easy-to-use page builder with responsive editing capabilities. It allows designers to adjust and preview mobile and tablet views with ease, a functionality that directly supports CRO efforts. By optimizing design specifically for smaller screens, businesses can reduce friction and ensure that calls to action (CTAs) are visible and functional on mobile devices.
Elementor’s drag-and-drop interface also makes it easier for non-technical users to collaborate with designers and developers, improving workflow efficiency and shortening the time to launch—all crucial for optimizing the customer journey.
Figma: Collaborative Design with Flexibility
Figma excels in real-time collaboration, allowing teams of designers and developers to work together efficiently. From a CRO standpoint, Figma’s ability to create flexible components and test responsiveness during the design phase is a significant advantage. The real-time feedback loop helps designers tweak elements for mobile, ensuring the layout remains functional and aesthetically pleasing, which enhances the user experience and conversion opportunities.
Sketch: Design with a Focus on UI/UX
Though not as intuitive as Figma, Sketch’s vector-based tools and responsive design features cater to more experienced designers. Its comprehensive plugin library supports advanced customization, which is essential for creating unique and tailored user experiences that align with the brand’s goals. In CRO, a smooth, visually consistent experience across devices can significantly boost user trust and improve conversion rates.
Marvel and Mockplus: Prototyping and Interactive Feedback
Both Marvel and Mockplus focus on the prototyping and testing stages of the design process. By allowing designers to build responsive wireframes and prototypes, these tools make it easier to iterate quickly and test how different layouts function across various screen sizes. Marvel’s focus on collaboration, particularly for teams, ensures that responsive design is built into the feedback process from the outset, supporting a more fluid and user-centered design evolution—a key component of effective CRO.
Froont and Responsive Design Checker: Specialized Tools for Testing
For developers who already have a strong tech stack but need quick, reliable testing of responsiveness, Froont and Responsive Design Checker are invaluable. They allow designers to verify that a site’s layout works across multiple devices, ensuring that potential CRO issues related to mobile responsiveness are caught early. This ensures that users don’t encounter problems that could harm their experience, leading to higher retention and better conversions.
Connecting Responsive Design to CRO
In the context of CRO, responsive design isn’t just about creating visually appealing websites—it’s about building experiences that foster engagement and drive actions. Websites optimized for mobile not only cater to the largest and most diverse group of users but also reduce barriers that may prevent users from converting. Every tool mentioned above contributes to making that optimization process more efficient, from prototyping and design to testing and collaboration.
Performance and Load Speed
Responsive design also affects website load times, an increasingly important factor in CRO. Mobile users are especially sensitive to slow load times, with many leaving a page if it takes too long to load. Many of the tools listed—especially frameworks like Bootstrap and Foundation—offer built-in mobile-first approaches that can significantly improve performance on mobile devices, further enhancing conversion rates.
Final Thoughts on Tools and CRO Integration
Responsive design tools are not just helpful—they are essential for optimizing the mobile user experience, which is directly tied to conversion rates. From ensuring that sites perform well across various devices to streamlining the collaboration process between developers and designers, these tools reduce friction and enhance the user journey. By adopting the right responsive design tool, businesses can ensure that their websites are optimized for every device, improving both user satisfaction and conversion potential.
0 notes
Photo
Image Gallery Premium Design Elegant Responsive WordPress Image Galleries With Built In Multiple Light Box Features Image Gallery WordPress Plugin is a premium extension for WordPress websites. Image Gallery is the best plugin among WordPress gallery plugins. Create the most beautiful gallery in a few minutes and enjoy the resultant Image Gallery. WordPress Plugin is one of the easiest plugins to use, even if you are new in WordPress. The plugin core features are six lightbox styles, thumbnails re-order and drag n drop, link gallery, masonry gallery, 2d transition and shadow & glow hover effects, multiple gallery columns layouts, gallery spacing, well documented and video tutorials. The six lightbox styles are blue imp lightbox, pop trox lightbox, viewer lightbox, bootstrap 3 lightbox and LD lightbox.
Demo-Site: https://bit.ly/3IJOjc8 Free-Plugin: https://bit.ly/3ZAODAJ
5 notes
·
View notes