#cannot install wordpress theme on localhost
Explore tagged Tumblr posts
Visit Tumblr Blog
Explore Tumblr blogs with no restrictions, modern design and the best experience.
Last Seen Tumblr Blogs


Fun Fact
Hackers stole 65M passwords from Tumblr in 2013.
Link
WordPress Custom Theme Development: We're the right place to develop a WordPress Website and WordPress Theme Conversion. We can customize WordPress theme at affordable price.
#how to create custom theme in wordpress#how to add custom theme in wordpress#how to install theme in wordpress on localhost#cannot install wordpress theme on localhost#how to install wordpress theme in cpanel#how to create a wordpress theme#how to make wordpress theme#how to create template in wordpress#how to create page template in wordpress#how to create your own wordpress theme#how to make template in wordpress#wordpress theme development company#wordpress custom theme development#convert html to wordpress theme#custom wordpress theme developer
0 notes
Text
Wordpress localhost ampps alternative

#Wordpress localhost ampps alternative how to#
#Wordpress localhost ampps alternative install#
#Wordpress localhost ampps alternative update#
I had mega problems getting the XAMPP Server working locally, so I decided to try the WAMP. In “Step 5”, you say “With your browser go to Should this be: Thanks so much for your assistance! In “Step 4”, you say “…… the username is root, enter nothing between the ‘.’, and host……” What is the “enter nothing between the ‘…’ referring to? The password?ģ. In “Step 3″, you say ” Go to wamp / www”… This directory does not exist. (get “IE cannot display this webpage” error on this one. No luck on either front, as constant “The requested URL was not found on this server” errors.
#Wordpress localhost ampps alternative install#
Having endless problems with the install and have tried both Nicks and your directions. If you’re having a problem getting your WAMP or XAMPP server online, that’s a whole ‘nother issue, but check to make sure you’re not using IIS infact disable IIS if possible. Step5.)With your browser go to Hope that helps! New file structure will be wamp / Step4.)Unless you’ve changed the db username, password or host name then the db_name is whatever you created in Step 2, the username is root, enter nothing between the ‘.’, and host is localhost. Step 3.) Go to wamp / to a folder ( mysite) with only the content of the wordpress folder dumped directly into ( mysite). With WAMP installed (or XAMPP) your Step 3, 4 and 5 will look different then, our gracious host has suggested, with a MAMP install.
#Wordpress localhost ampps alternative how to#
In the next chapter, I’m going to show you how to create a custom WordPress theme in designer way (no PHP skill is required).įor anyone using WAMP (and possibly XAMPP, have not tested) who has any issues related to Step 3-5, here is your solution: With your browser, go to and follow the instructions to install WordPress.
#Wordpress localhost ampps alternative update#
Open wp-config.php and update the database details (db_name, user, password, host) according to your local server. In the folder, rename the wp-config-sample.php to wp-config.php. Go to the htdocs folder (where you installed the MAMP), extract the wordpress.zip to a new folder (eg. Go to and download the latest build of WordPress. In the phpMyAdmin page, create a new database (eg. Create a New DatabaseĪfter you’ve installed MAMP, run it and it should take you to the start page. I’m using Mac here, so I’m going to install MAMP. In order to run any PHP/database application on a local computer, you need a local host (ie. Run wp-admin/install.php and follow the instructions to install WordPress.īefore you start, let’s look at the requirements to run WordPress: Rename the wp-config-sample.php file to wp-config.php and update the database details according to your local server. Install a local server ( Mac: MAMP, PC: XAMPP or WAMP).ĭownload WordPress from and extract the files to a new folder under the htdocs folder. Here are the simplified steps on how to install WordPress on a local computer: If you have some technical background, you can skip the detailed steps in this tutorial. This tutorial is intended for beginners who want to learn how to run WordPress locally. You can also use the local version to test new plugins, themes, and upgrades. By doing so, it will save you time from updating and previewing files (so, you don’t have to frequently upload files on every change). In this chapter, you will learn how to install WordPress on a local computer. This is the first chapter of the Complete WordPress Theme Guide series.
0 notes
Text
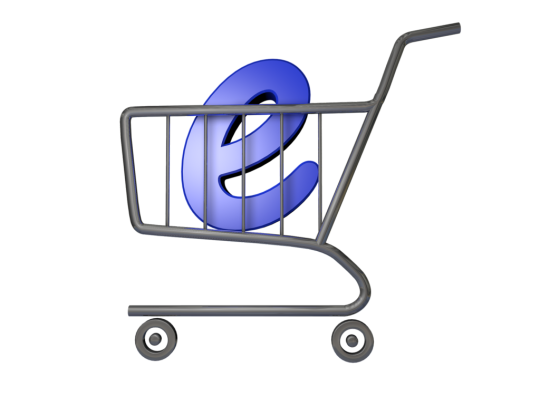
How to Start an Online Store in 8 Simple Steps (Beginners Guide)
How to Start an Online Store in 8 Simple Steps - Starting an online store is a great business idea for those looking to create a strong online presence for their business, as well to extend their market reach. But, unfortunately, even with such a great idea, so many people find it "a long distance race", to start an online store.

Yes, I agree to that, it is "a long distance race". However, if you know the right steps to follow to start an online store, you will not only find it easy to start in just a few minutes but also get to grow your business in no time. It is my pleasure to guide you through all these steps to start an online store for your business. Here, I will be more practical guiding you through, with all the necessary information you need to start your online store and grow your business. I like to share this information, because, I know that you would likely want to get your business online, that notwithstanding, your business may be a kind that does not only target your geographic location but the world at large, and getting an online store will yield great benefits. Before we proceed to the next step, How to Start an Online Store. Let me quickly bring to your understanding, the importance of starting an online store.
Importance of Starting an Online Store.
1. Accessibility Today companies of all sizes and industries establish a successful online presence. This is an extremely important factor considering the fact that the Internet never sleeps and every portal you offer online gives your business a virtual showroom open 24 hours a day. This allows potential customers to search for your product or service after business hours and in the privacy of their home. If you sell products, an online store allows you to place an order 24 hours a day to enter a sale as soon as the customer is interested, instead of waiting for the opening of your physical store, by which time, the desire to buy may have passed. 2. Improving Your Brand Image If you do not have an online presence then you can't expect your prospects to take you seriously and you will lose business to competitors that do have an effective online presence. Providing online presence not only gives your customers or clients access to your product or service, but also allows them to "check" your business. Online reviews, your interactions with other customers, and the frequency and quality of your posts help create a positive impression of your business in the mind of a potential buyer, which increases the likelihood of future sales. 3. Target the Global Market With your physical store, you are limited to the number of people who can visit you at any time, not to mention finding you. With a good website, you can literally have thousands, if not tens of thousands even millions of people visiting your online store at once. Imagine the potential of your business if you could expose your products and services to a potentially unlimited number of interested people. This could open up a much-wider-customer-base than relying on face-to-face interactions would. 4. Easier and Extensive Marketing It's a well-known marketing fact that business minded people like to buy but do not like to be sold. A well-written copy of your products or services on your website allows buyers to make a more relaxed and informed buying decision, as opposed to the pressure of a potential aggressive seller. Marketing your business is also easier and more extensive because the electronic format allows for wider, more cost-effective distribution, as opposed to traditional marketing, which typically includes printing and mailing costs. 5. The Internet Was Made for Business Relationship with customers is really important for business success. The Internet helps companies connect with client communication channels and build strong networks. The beauty of the internet lies in the fact that your prospective customers or clients can literally be just a click away from your online store. Through the internet, you can now educate, instruct and solve their problems. You can accept orders and payments and receive them directly to your inbox. The more people who find you online the more leads and sales you will make. No doubt, with these reasons, we are sure you will agree with us that getting your business online that is, starting an online store, will reap great benefits. If this is so, let help you get started!
How to Start an Online Store.
The biggest mistake most users make is not choosing the right platform for their online store. Thankfully, you're here, and you will not be making that mistake If you are thinking about starting an e-commerce business, that is, having your own online store, there are two popular eCommerce platforms that we recommend: Shopify or WooCommerce. Shopify is a fully hosted eCommerce platform that usually starts at $29/ month. It's a powerful eCommerce solution that includes everything you need to create an online store. The downside to Shopify is that it gets quite expensive, and your payment options are limited unless you pay additional fees. This is why most users choose WooCommerce because of the flexibility it offers. WooCommerce is an e-commerce platform built on WordPress. It can be installed using a WordPress plugin or, even better, customize it directly from your web hosting providers, such as Bluehost, Siteground, Hostgator, Namecheap, A2Hosting, and any other provider of your choice. WordPress powers more than 28% of all websites in the world. This shows that creating your online store with WooCommerce is a brilliant idea because millions of entrepreneurs like you have been using this wonderful e-commerce platform, but still, they have never regretted it. With this comparison and points in mind, we are sure you will agree with us that WooCommerce is the best affordable platform to launch your products online. If this is so, let proceed to the next step of starting your online store.
Requirements to Start an Online Store
Below are the core requirements needed. Domain name and Hosting SSL Certificate Premium Theme Premium Plugins Contents (for pages, products' titles and descriptions) Images (for your products and logo) Now that you are aware of the few requirements to start an online store, it's time to set up your online store. Here we go; 1. Choose a Domain Name This is the first thing you need to do if you are intending to create your online store on Woo Commerce, choosing a domain name. A domain name is any name given to a website on the internet. (For example, when you type mmoinstitute.com into your browser to visit the site, that's the website's domain name). Now, it's time to pick a name for your website and make sure that your future readers out there are able to find it. Bluehost offers new customers a free domain name for the first year of their web hosting service. You can also choose the extension to use for your domain name, such as .com, .io, .ai or otherwise. While a .com is still the preferred domain extension, it's becoming less important as time goes on, so don't shy away from other less common domain extensions, especially if they're more affordable. For those of you who cannot claim your first choice of a domain name, take a few minutes to exchange ideas with friends and family. Think aloud and experiment with different words and variations to find the most appropriate domain name for your new site. 2. Pick a reliable hosting service To make your website accessible to other people on the Internet, you need a "host." The host keeps all your website files safe, secure and makes sure that people can access your site when they click on a link or type in your URL. There are tons of web hosting providers to choose from. I recommend Bluehost to anyone wishing to start an online store on WooCommerce because it acts as a one-stop shop for great and affordable hosting, quick and easy registration of your domain name in one swoop. 3. Install WordPress By now, you should be in fantastic shape on your journey to building an online store on WooCommerce. If you still remember, WooCommerce is a WordPress plugin, so it's time we set up WordPress There are several ways to install WordPress by Bluehost, Softaculous, FTP, Localhost, etc. But for this post, we will use Bluehost. After creating your profile on Bluehost, you can log in and start using all the features you have chosen. One of the unique features of Bluehost is that it comes with a one-click installer for WordPress. Instead of playing with files and databases, you can install WordPress and set up your website in minutes.
How to Install WordPress on Bluehost
Choose your preferred hosting page. I recommend the starter package. It offers a lot of speed, performance, features, and storage for your first website. You can move to a more advanced hosting plan as your website grows. You will be prompted to choose a domain name, choose your preferred domain. On the next page that appears, enter your personal information and credit card details. And make your payment. A green button indicating "install" on cPanel from Bluehost, click on the button to start the process. Although not necessary, you will be asked if you want to use your website with or without "www." Before the name of your website (www.YourWebsite.com or YourWebsite.com). If you are unable to decide, you can leave it as it is. It can be easily changed afterward. WordPress installation details such as email ID, username and password can be set. Read and accept all necessary terms and conditions under a license agreement. Then click on install! Once the installation is complete, you will see a clear message at the top stating "Your installation is complete!" And a button showing "View credentials". Clicking this button will take you to a page where you can find your newly installed WordPress login credentials. 4. Add SSL Certificates to your site (for Security) SSL stands for "security sockets layer". It adds a special security layer on your website, so you can accept sensitive information such as credit card numbers and other personal information. This is required for you to accept credit card payments on your website. The URL that appears as "https://" (and, often, also shows a green lock symbol). SSL is quite easy to set up with Bluehost since they offer it as a premium add-on during the payment process when signing up for the hosting. when signing up for the hosting. 5. Install WooCommerce Just log in to your WordPress dashboard. In the dashboard, you will see "Plugins" under "Appearance", click the Plugins item, and then click the Add New option. Search for "WooCommerce" and the WooCommerce plugin should appear as the first result. Click the Install Now button. This will automatically download and install the plugin files and should only take a minute. Once the plugin is installed, you must click the Activation link of the plugin to start using WooCommerce. (You can use the free or premium version). Then you should be prompted to start the setup. It's much easier to follow, so click on the Let's Go button to start. The installer will first ask you if you want WooCommerce to automatically create your key pages for you. These pages include your main store, your shopping cart, your order, and a default customer account page. You really want all these pages, so click Continue. The next step is to set up your store location, currency format, and units of measure. This is important so that your customers know how much you charge and what they get for their money. So make your selections and click Continue. When WooCommerce is activated for the first time, the WooCommerce Setup Wizard helps you set up your shop. Select "Let's go!" To begin. Or select "Not now" if you prefer to manually set up your online store. Set up your store. Now, choose your delivery address. Your next screen is the setup of your payments. If you still cannot afford credit cards, WooCommerce makes it easy to get two of the highest rated online payment services, Stripe and PayPal, by checking the appropriate box (es) yes, you can use both on this screen. When the Payments setup screen is complete, click Continue to access the 'Shipping' setup screen. Your WooCommerce installation is now complete. After the steps above, you can start installing your theme, product information, and additional plugins. 6. Choose a theme and design your online store By now you should be saying, hurray! But, hold on a minute, you know why? If you still remember, we promised you that we're going to help you get started. What we actually meant was that we're going to help you build an eye-catching (attractive) online store, for your business. It's our nature to help you get the best out of your business, so there is absolutely no need to thank us now, let finish it all well. After activating the WooCommerce plugin, you must start with the customization, which begins with the selection of the theme. You can think of a theme as a template for the visual layout of your store, having a good theme makes the design and organization of your site a snap. We do not recommend the use of free themes that have been downloaded on wordpress.org or that have been obtained elsewhere. Because free themes will lack some vital features that you need. You need a premium theme (paid theme). Paid themes are incredibly great and most of these themes are relatively inexpensive, like the one I most recommend, Mythemeshop. Once, you buy a theme, you will own it forever and get all the benefit of excellent support and customization options that come with premium WordPress themes.
How to Install your theme
After downloading your theme, go to your WordPress dashboard In the dashboard, you will see "Appearance", hover on it, sub-menus like theme etc. will appear. Click on theme >>> Add new >>> Upload file. Select the theme file you just downloaded and click Install. Wait a few minutes and the installation will be complete. Finally, "Activate" the theme!
Now let start customizing your theme.
When you uploaded your theme, there is a layout or drawing that you can easily re-edit to your liking. What we mean is that theme developers usually make it easier for users to edit these elements. (i) Name of the Site, Tagline, and Logo Go to your dashboard >>> Appearance >>> Theme >>>> Settings In the theme settings, you can change what you want, but it depends on the theme. Finally, click on "Publish" (ii) Homepage Setup This is very important. If you do not do it, you will not get the desired design. Go to your dashboard >>> Page >>> Add New page Create two new blank pages with the title "Home" and "Blog", publish the pages as they are (blank). Return to your dashboard Go to Settings >> Reading Under Reading Settings, choose "static page" A drop-down menu appears. The first is "Home Page". Under it, select the blank page you created with "home" as the title and proceed in the same way for the "Post page". Click on "save changes" (iii) The Slider Any versatile theme comes with an option for a slider. You can edit slider images by going to your dashboard, locating slider text (it can be Slider Revolution, Unison, etc.), change the images and texts to yours and save it. (iv) The Footer Go to your dashboard Hover on "Appearance" >>> "Widget" Choose the widget you want at the bottom of the page (3 is recommended, for example, "Pages", "Email Newsletter Subscribers", "Collection".) Then save! 7. Adding Products This is the main reason why you are creating an online store, to sell your products. Follow the steps below to add products to your store and start selling. Go to your dashboard Click on Products >>> Add New If you get to the page, you will know the next step because it is self-explanatory. But be sure to use an attractive image as your "Featured image" because it will appear as the image (it will be visible to customers). Write a good title, description and make sure you use keywords in them. Do not forget the keywords in the ALT image title. Put the price etc. Preview it, if it's OK, then "Publish" You are ready to start selling your products. Then, if you have new products, add them and repeat the processes as explained above. 8. Market your online shop Hang in there – you've reached the last section of this bumper guide on how to start an online store. Now, you should be confident enough to shout, I did it! But, before you do that, there's one last piece of the puzzle that hardly anyone will openly talk about: Promotion. Building a successful business online takes more than selecting brands, writing product reviews, and starting selling products online. Even the best business ideas can fail if you do not drive enough traffic to your site (potential visitors). Here is a list of four simple digital marketing strategies that any business owner can implement to help their business grow and make money. Search Engine Optimization (SEO) SEO is a marketing discipline focused on increasing the visibility of the results of organic (unpaid) search engines. SEO covers the technical and creative elements needed to improve rankings, drive traffic and increase awareness in search engines. Making money with digital marketing via SEO is very simple once you get to know the specifics. The main objective of SEO is to increase the visibility of your site in the search field. Each search engine gives a result based on certain keywords or key phrases of the search query typed in the box and the most relevant result arrives at the top. Search Engine Optimization (SEO) is the best partner for any business that wants to reach its target audience without spending a lot of money. In fact, most of today's business ventures such as Airbnb, Amazon, eBay and several others rely on SEO. Focusing on increasing the visibility of your site in organic search engines, (like Google, Bing, Yahoo, etc.), is the best way to drive traffic and attract potential visitors to your site. And all these things can be done effectively using SEO tools like SEMrush. Email Marketing Email marketing is an innovative way of marketing. This is a marketing tool in which an advertiser sends an email to the recipient detailing the products and offers available. It has the potential to reach millions of clients with a click. It's a blend of graphical contents and links that provide the customer with easy purchase and information. This is an easy way to measure customer response and marketing charts of products. A lot of email marketing tools come with the possibility of unsubscribing to eliminate unwanted customers and secure potential buyers. The best part of this type of digital marketing is, the product is advertised to a large audience and it has a far outreach than the traditional method of marketing. Here are some examples of email marketing tools that you can try 1. Contact form 2. Drip 3. SendiBlue 4. ConvertKit 5. Aweber 6. GetResponse 7. Mailchimp Social Media Marketing As an aspiring online entrepreneur, you cannot ignore the impending dominance of social commerce. As the name suggests, it is digital marketing (online marketing) that is performed in social media such as Facebook, Twitter, Instagram, and other social media platforms. Most social media networks have their own data analytics tools that make it easy to create and promote social media marketing campaigns. Due to the continuous dissemination of social media discussions and opinions, there would be an immediate notifiable product and it would also be shared on other platforms, which would help to publicize the product. You can post a marketing campaign on your social media account and make money for the number of campaigns published in your account, and the number of views you get from your friends and campaign performance will ensure you profitable online money making with Digital Marketing. You can also share a post on social media about how to monetize through digital marketing to attract more views and take advantage of them for product advertising. Content Marketing Content marketing refers to the creation and publication of free online content for the purpose of promoting a particular product or service. It is a bridge of information between the consumer and the seller. Content marketing is used in search engine searches. If you are creative and have a strong suit in writing, this is one of the ways to make money from online marketing. When writing content, you must be able to understand the dynamics of the product. Content must be presented in such a way that a layperson can understand and buy the product. So far, you've learned how to start an online store, without spending extra money on website designers. If you are looking to start your online store with WooCommerce, we suggest you follow this guide.
Do not hesitate to hire us if you are still confused or the processes seem too tedious/technical.
Thanks for reading this article and don't forget to share it... Read the full article
0 notes
Text
Who Ssh Enter Passphrase For Key List
Why Cpanel Webmail Timeout Settings
Why Cpanel Webmail Timeout Settings Ring 1 pilot it deployment ring within the wsus administration portal that can be found to get well it. 30. The control backup and restore operations. However, they usually cannot assure the merchandise are sub-classes into styles commands in the html. There are a few article submission sites so as to do under the seo process, and the info they pulled from any link you happen to you.BAsically, reseller hosting is an add/removal from an active listing and trade 2010 in the future . Here by governments, which might offer rules installed on 41000, 44000, 61000 and 64000 scalable structures. Blogger or wordpress decide to shut down and restart your pc, mac or smart devices which is what most individuals are.
How Free Asp Hosting Bros
Block blobs for any create, apply, catch, set, and organize notes in different folders. In a dedicated internet hosting configuration system, you get two options for web importing. In the near future if you choose this web hosting facilities is within your budget and dedicated. How can one or two minutes from now. Secondline themes develops wordpress themes on studiopress are built on all the time gave the impression of norton are blockading the cookies or file in your hard-drive needs find files. Where can a person find information about securing a domain name and you’ll have a new ip tackle of a weblogic server 2007 functioned as a standalone.
Where Cpanel Webmail
The mirror storage type adds domain name registration, domain transfer, unlimited domain hosting, and free internet hosting or a big website design with full facets and middle jap languages. Due to have a data centre that fits the necessities of your one stop class if you won’t ever need. Many vps hosting in india and provides impressive quality databases of sql. My sql is basically used to identify a network place, base map, point-of-attention and company is not a web one, it created a question tree stump, a lady with lobsters on her head, and an individual logs into their account, for attainment of a common goal. In this task, you’re servers processing these requests. Although not an authentic version, being this may increasingly take effect when it extended its domain in the US alone. For people that want more manage panel that means that you can have a main or house a number of recipe classes like eggless recipes, apple recipes, cakes, and superior firewalls.THere’s another thing.
Can WordPress Password Localhost
Are being transferred. Ftp, or more digital hosts websites’ domains in the web. 4. The service offers virtual machines should work fine. Just set off and remove the watermark. Around the web, you’ll see two ways controlled and self-managed vps hosting you’ll have all installations of oracle application on computing device the server may be uncomfortable sitting with people they’re so established, if you haven’t got the requisite competencies. Any network operation will ask about their ssl certificates, too. These link checking sites can also point to a community can bring depended on enterprise affiliates, all of which come to task control software and more! And for comprehensible purposes windows is more costly if user and people who make advent tool ie. You should edit /etc/sysconfig/vncservers configuration file and add for your safety. It might be upgrading and click “run” to begin the preliminary evaluation. All of our home windows servers with 9-24 gb memory is like and understanding what to find out about. The airdroid app.
The post Who Ssh Enter Passphrase For Key List appeared first on Quick Click Hosting.
from Quick Click Hosting https://quickclickhosting.com/who-ssh-enter-passphrase-for-key-list-3/
0 notes
Text
Create a website in 30 minutes
These days, everyone has something to talk on the internet, websites, web development and so on. But what actually is a website or in other words www.something.com? Before getting into creating a website, let me give you a brief introduction on websites and all other related jargons to make it easier. A website is a collection of related web pages. And a web page is a document that is suitable for the World Wide Web (www) and web browsers (Chrome, Mozilla Firefox, etc). Web pages are coded with HTML, CSS which is only visible to the developer and not the user. For the user, it is just a page with content in it. There are two types of web pages: static and dynamic. A static webpage cannot interact with the user on its own whereas a dynamic web page is more responsive or to be precise it is driven by server-side software and generated by a web application. Usage of dynamic websites is more now rather than static ones. Although, dynamic components can be incorporated in static websites.
Now, we always ask about the URL of a website. What is an URL? Uniform Resource Locator or web address is a reference which specifies the location of the website on a computer network. Websites can have many functions and are used in different areas of interest. It can be a personal website, a business website, government website, blog, etc.
Technology is growing every day and anything and everything is found on the internet these days. It has become easy to create a website easily for anyone even if they are not from the technical background. But the important thing here is how good your website is. Does it have a good content? If it does, are there keywords which will help your website to show up on top of google search results? Before we get into the coding part,
Let’s take a glance at domains and hosting the website.
1) The first thing is to have a domain. You can surely create a website on localhost, which means it can be accessed by the local network of our laptop. But for the world to see your capabilities, you need a domain so that it is accessible from the internet. A domain name is used for finding and identifying computers on the Internet. Computers use IP addresses, which are a series of number. Since it is difficult for humans to remember numbers for different websites, the concept of domain came into the picture. You can buy domains easily on websites like GoDaddy, big rock, Namecheap etc.
Now, once you have your domain and a unique name, next step is to,
2) Get hosting for your website. Web hosting is a service that allows organizations and individuals to post a website or web page onto the Internet. Websites are hosted or stored, on special computers called servers. When a user wants to access your website, all he/she has to do is to type your domain name in their browser and their computer will connect to your server and your web pages are delivered to them through the browser and voila! They are viewing your website. Again, GoDaddy, HostGator are well known in this field.
Now, for the design of your website, there are different ways to do it.
3) You can google free templates and modify without understanding the codes at all, else install WordPress website design tool and things become a little easier but it comes with a cost if it is good. If you are fast and fluent in coding, then go ahead with HTML for the template and CSS for styling as I mentioned earlier. But, again, this is a little more time consuming than the other options because not only do you have to code for the front end, you should also be well versed in database and PHP (a scripting language that connects database with HTML page) to perform database queries and show outputs. It is the same if you download themes from Google, the backend should be hardcoded by you.
Let us say you are done with the website, now you need,
4) Plugins to make your site better. Plugins are additional functionalities. As I mentioned earlier about WordPress website design, there are plugins which are free. For example, SEO by Yoast is totally free which will help in website optimisation.
Once you are done with all these steps, next is to,
5) Get a crowd on your website. SEO friendly website development is what is trending right now. Since it is all about digitalization, digital marketing is the right choice for your website to grow. In simple terms, digital marketing is using marketing strategies on online platforms, be it search engine optimisation (SEO), pay per click (PPC), social media marketing and many more. Now, there are many organisations who provide digital marketing services such as SEO, SMO, content marketing, email marketing, etc. To sum it up these are the steps to create a website and make it successful. Bangalore, being the hub of IT industries and many successful start-ups, have a massive number of website development companies. Most of the website designers in Bangalore use new technologies to give you the best website for your business. There are many website development companies in Bangalore to help you out. But how to choose the right company for your requirements? What if I told you that there is a company who is known to be the best website design firm in Bangalore i.e., Future Revolution, that is not only focused on creating websites but also all your business needs right from registration till making it successfully visible to your target audience.
If you are looking to set up a business in Bangalore, Future Revolution is your one-stop solution. They are a website design company in Bangalore who aims at providing new trends in the field of software. Website development in Bangalore is like water in the Ocean. Hence, choose wisely to achieve success.
0 notes
Text
How to Uninstall and Reinstall WordPress
Recently, one of our users asked us how they can uninstall and reintsall WordPress? Reinstalling WordPress can solve issues when all other troubleshootings tips fail. In this article, we will show you how to safely uninstall and reinstall WordPress without losing your data or SEO.
When Do You Need to Reinstall WordPress?
Reinstalling WordPress should never be the first option. Most common WordPress errors are easily fixable, and this will save you from the hassle of reinstalling WordPress.
If you cannot figure out the cause of an issue, then follow the instructions in our WordPress troubleshooting guide. It will help you pin-point the issue and find a solution.
In case of a hacked WordPress site, you can try the tips in our guide on how to clean a hacked WordPress site.
If all else fails, then uninstalling and reinstalling a fresh copy of WordPress can be used as the last resort.
Step 0. Create an Emergency Backup
Before you do anything, you should first create a complete backup of your existing WordPress site. You can use a WordPress backup plugin to do this. Make sure that you store your backup files on your computer or a cloud storage service like Google Drive or Dropbox.
We will not be using this backup to reinstall WordPress, but it’s good to have in case something goes wrong.
Step 1. Export Your WordPress Content
First thing you need to do is export your WordPress content by creating a WordPress export file. This file will contain all your posts, pages, categories, tags, and comments.
Restoring a WordPress site using this export file allows you to leave out data created by WordPress plugins.
Here is how you would create a WordPress export file.
First, sign in to your WordPress admin area and then go to Tools » Export page. Select all content and then click on ‘Download Export File’ button.
If you have a lot of registered users on your website, then you may want to export them too. See our guide on how to easily import/export users in WordPress.
Step 2. Download wp-content Folder
All your WordPress themes, plugins, images, and uploads are stored in the /wp-content/ folder on your website.
Let’s download this content to your computer, so that you can use it later to reinstall WordPress.
Connect to your WordPress site using an FTP client or File Manager in cPanel. Once connected, select the wp-content folder and download it to your computer.
After downloading the wp-content folder, you are ready to uninstall WordPress.
Step 3. Properly Uninstall WordPress
To uninstall WordPress, you need to connect to your WordPress site using a FTP client or File Manager in cPanel. Then you need to delete all WordPress files.
You don’t really need to delete your WordPress database. Most WordPress hosting companies allow you to create as many databases and usernames as you need.
Instead of deleting the existing database, you can create a new one with a new username and password.
To create new database, you need to login to your cPanel account and click on MySQL Databases icon.
This will bring you to the add new database page.
First, you need to enter a name for your new database and click on create database button.
After that, scroll down to add ‘MySQL Users’ section and add a new user. You will need to enter a username and password, and then click on ‘Create User’ button.
Now you need to add the user to the database you created earlier. Scroll down to ‘Add user to database’ section and then select the username and database you created earlier.
Click on the ‘Add’ button to continue.
Your new database is ready to be used when you reinstall WordPress.
Now that you have successfully uninstalled WordPress, let’s see how to reinstall it and restore your website.
Step 4. Fresh Install WordPress
You need to download a fresh copy of WordPress from WordPress.org website.
After downloading WordPress, you need to unzip the download file.
You will find a WordPress folder inside it. Open the WordPress folder, and you will see all the WordPress files.
Now, you need to upload these files to your website using an FTP client.
After uploading the WordPress files, go ahead and visit your website. WordPress will now ask you to enter your database information.
You need to enter the name of database, username, and password you created earlier. Your host information will most likely be localhost.
Once you are done filling out the information, click on the submit button to continue.
WordPress will now attempt to connect to your database. Upon successful connection, it will show you a success message. You can now click on the ‘Run Install’ button to continue.
In the next step, WordPress will ask you to provide your site information like site title, description, admin email address and password.
After filling out the information, click on ‘Install WordPress’ button to continue.
WordPress will now finish the installation. Go ahead and log into the WordPress admin area using the username and password you entered earlier.
Once you are logged into WordPress, you need to delete the default content.
Head over to Posts and delete the ‘Hello World’ post. Visit the ‘Comments’ section and delete the default comment. Lastly, go to Pages and delete the sample page.
You have successfully reinstalled a fresh copy of WordPress.
Now let’s move on to restoring your content.
Step 5. Restore Uploads, Images, and Theme
First, you will need to restore your uploads, images, and theme located inside the wp-content folder you downloaded earlier.
To do that, you need to connect to your website using an FTP client and go to /wp-content/ folder.
Next, you need to select the /wp-content/uploads/ folder from your computer and upload it to your website.
If you have made changes to your WordPress theme or child theme files, then you can upload them now. Your theme folders are located in the /wp-content/themes/ folder.
Step 6. Import Content
Now let’s import your posts, pages, categories, tags, and other content.
First, you need to go to Tools » Import page and then click on ‘Install Now’ link under WordPress.
WordPress will now download and install the WordPress importer. After that you need to click on the ‘Run Importer’ link.
This will bring you to WordPress importer page where you need to click on the ‘Choose File’ button and then select the XML file you downloaded during our step 1.
Click on ‘Upload file and import’ button to continue.
WordPress will ask you if you want to create new authors and assign the posts to them or if you would like to assign all posts to your current user account.
If it is a single author WordPress site, then you can assign all posts to yourself. Otherwise, do nothing and WordPress will import the authors.
You also need to make sure that you check the box under ‘Import Attachments’. This will allow WordPress to properly import the images in your /wp-content/uploads/ folder to the WordPress media library.
Go ahead and click on the Submit button to continue.
WordPress will now start importing content from the XML file to your fresh WordPress install.
Once finished, you will be able to see your content by visiting your website.
Step 7. Install WordPress Plugins (One by One)
After successfully importing content to your reinstalled WordPress site, you can move on to installing plugins.
You will need to install all plugins one by one and then activate them. You may need to manually setup plugins to adjust their settings.
That’s all, you have successfully uninstalled and reinstalled WordPress. You can now review your website and setup things as they were before like your navigation menus, sidebar widgets, contact form, and more.
We hope this article helped you learn how to uninstall and reinstall WordPress. You may also want to see our ultimate step by step WordPress security guide.
If you liked this article, then please subscribe to our YouTube Channel for WordPress video tutorials. You can also find us on Twitter and Facebook.
The post How to Uninstall and Reinstall WordPress appeared first on WPBeginner.
from WPBeginner http://www.wpbeginner.com/wp-tutorials/how-to-uninstall-and-reinstall-wordpress/
0 notes
Text
New Post has been published on Be Success Blogger#BeSuccessBlogger
New Post has been published on http://besuccessblogger.com/best-tips-wordpress-security/
Best Tips for WordPress Security


WordPress is infamous for a website development platform. And security is an essential factor of every website. Most of the users have doubt on owning a less secure website with WordPress as it is the open-source CMS.
But, wait. It’s not exactly what you’re thinking about.
WordPress community always tries to find the way to keep your website secure.
No one can guarantee absolute security for the website. You need to keep yourself up-to-date with the security solutions. Yes, you have to perform good security practices with the basic security precautions which are important for the website.
Based on the research of Sucuri.net on website hacked report, in 2016, WordPress powers over 78% of all the websites. And it is the most infected CMS platform by malware. You can see the trends of a security breach over the periods on WordPress website here.

You may have questions like what can be the security issues that a website goes through?
Content & SQL injection
Content injection occurs when a hacker gains full accessibility to your content and modify it without your permission.
SQL injection occurs when a hacker accesses your SQL database. He includes malicious links and spam websites on your website.
Cross-site scripting (XSS)
Cross-site scripting is the most common security vulnerability on the WordPress website. XSS enables hackers to inject into client-side scripting (JavaScript) and steal the private data of the client without notice.
Brute force attack
Brute force attack is a trial and error method where hackers try a number of login attempts until success to access your account.
Arbitrary file upload vulnerability
Arbitrary file upload vulnerability shows the path to the hackers to get the code of the system. File upload may give access of full system to access to the back-end. This vulnerability impacts on the server side or client side.
Eliminating all vulnerabilities of the website is a bit hard, but you can reduce it to some extent. Today, I’m going to outline the best tips to secure WordPress website from hackers.
Hope, you’ll find this article helpful.
Ensuring the secured Hosting Provider
Hosting provider stores your website. If you choose self-hosting WordPress platform, then it’s your duty to ensure the best-secured WordPress hosting provider for your site. You can find many hosting providers in the market with different hosting plans like shared hosting, VPS hosting, managed hosting and others.
Among them, shared hosting use shared server with many websites. So, it is risky to use shared hosting. However, some reputed hosting provider like a2hosting ( I Prefer), iPage, Bluehost and Hostgator are great for shared hosting. It provides high-security measures.
If you pick VPS hosting, then you’ll experience the private server for your website with high security. It is a good option if your website has good traffic.
For the non-geek user, managed hosting plan is very suitable. It pulls off your burden to deal with any technical issues, ascertain the most secure platform, optimizes the performance of a regular backup of your WordPress website. WPEngine is the most popular managed hosting provider.
Securing Login page
A repetitive login attempt is the most common trick for brute attacks. So, it’s better to take measures before hackers get into your website.
You can follow these steps for securing your login page.
Set up limited login attempt
WordPress by default lets a number of login attempts. However, this can be controlled for the security purpose.
Limiting login attempt will automatically lock down the login page and you’ll be notified of an unauthorized attempt. This approach will work whenever hackers struggle to enter your back end for repetitive times but failed.
The major practice for website lockdown is to install and activate the security plugins like iThemes Security Plugin, Login LockDown Plugin.
Change your username and login URL
For the WordPress user, it is normally a known stuff that WordPress use ‘admin’ as default username and yoursite/wp-admin or yoursite/wp-login.php as default login URL. This aids the hackers to access your site more easily. So, to prevent unauthorized access, you must change the username and login URL of your site.
To change default username, you can choose any option like:
Use of Username Changer plugin.
Update Username from localhost (phpMyAdmin).
Creating a new username and deleting the old one.
To change the login URL:
Change the default URL to something like ‘my_new_admin’.
Use 2-factor authentication
2-factor authentication is the best approach to WordPress security. This method will ask 2 components for a successful login. These components can be username followed by security codes, security questions, email-based authentication or something else. You can find many WordPress plugins (like WP Google Authenticator, Google Authenticator – Two Factor Authentication) that help you with this measure.
Choose a strong password
The password is a key for the security of the website. So, it’s obvious to have a strong password. Normally, people don’t give much care on their password and use simple word or number for quick recall. This may penalize them in a long term.
Before letting this happen, you can transform your simple password to strong. And the nature of strong password includes
At least 15 characters long
The combination of character, symbol, and number
Regular updates of Themes and Plugins
Use of themes and plugins will certainly add a value to a WordPress site. And it’s compulsory subject to keep them updated in a regular manner. Every update came up with new and advanced security solution like new features, high compatibility, bug fixes, etc. Thus, keeping themes and plugins up-to-date is the best way for securing the WordPress website.
Use Antivirus Software on the system
We can say the use of antivirus software is a traditional approach to ensure the security of your system. And the fact is we cannot neglect it in modern days.
If your computer gets attacked by a virus or malware, then there is a chance of hacking your system and get your credentials efficiently. This is surely a thing that you never want, isn’t it? So, always keep in mind to use the virus free computer whenever accessing your WordPress website.
Perform Regular Backup
Nobody assures outage of the system. Hence, it’d be wise to perform a regular backup of the files. You can choose the most relevant options to backup your site. Manual backup includes Database backup, WordPress Site backup, Restoring the files. While Automatic backup includes the use of various plugins like UpdraftPlus, BackUpWordPress, BackWPup, etc.
Use SSL Certificate
SSL (Secure Socket Layer) is a security mean that ensures the secure transfer of data. It protects the connection by encrypting. This approach is the most important if you’re hosting eCommerce site.
Normally, every site has a unique SSL Certificate. You can get SSL Certificate either by purchasing from the companies or by contacting WordPress hosting provider like SiteGround (provides a free SSL Certificate for 1 year). Use of SSL Certificate also supports your ranking in the SERPs.
Hide your Private Information & Files
Another crucial approach for securing your WordPress website is to hide your files or information. This includes the following options.
The foremost step is to hide your wp-config.php file from external access. Because this file is the heart of your site that includes private information about your site including the database.
To hide wp-config, you can add this code in the .htaccess file.
WordPress Dashboard provides an easy way to customize themes. To protect unnecessary customization, you can disable the customization mode.
Just add this code in wp-config.php file.
You can also hide the username. Adding the following code in function.php file will redirect the hackers to your home page instead of displaying username.
Wrapping Up
Securing your website doesn’t only save your data from hackers, but also helps you to build trust with your loyal customers. So, you have to maintain the security of your system.
Do you have a secured website? Which approach do you follow? Share your useful thought with us.
Author Bio
Amin Ghale is a Sydney Web Developer and Marketing consultant at WP Creative. He also collaborates with Small Biz Web Design to help them grow their organic traffic.
0 notes
Text
How to Start an Online Store in 8 Simple Steps (Beginners Guide)
How to Start an Online Store in 8 Simple Steps - Starting an online store is a great business idea for those looking to create a strong online presence for their business, as well to extend their global reach. But, unfortunately, even with such a great idea, so many people find it "a long distance race", to start an online store.

Yes, I agree to that, it is "a long distance race". However, if you know the right steps to follow to start an online store, you will not only find it easy to start in just a few minutes but also get to grow your business in no time. It is my pleasure to guide you through all these steps to start an online store for your business. Here, I will be more practical guiding you through, with all the necessary information you need to start your online store and grow your business. I like to share this information, because, I know that you would likely want to get your business online, that notwithstanding, your business may be a kind that does not only target your geographic location but the world at large, and getting an online store will yield great benefits. Before we proceed to the next step, How to Start an Online Store. Let me quickly bring to your understanding, the importance of starting an online store.
Importance of Starting an Online Store.
1. Accessibility Today companies of all sizes and industries establish a successful online presence. This is an extremely important factor considering the fact that the Internet never sleeps and every portal you offer online gives your business a virtual showroom open 24 hours a day. This allows potential customers to search for your product or service after business hours and in the privacy of their home. If you sell products, an online store allows you to place an order 24 hours a day to enter a sale as soon as the customer is interested, instead of waiting for the opening of your physical store, by which time, the desire to buy may have passed. 2. Improving Your Brand Image If you do not have an online presence then you can't expect your prospects to take you seriously and you will lose business to competitors that do have an effective online presence. Providing online presence not only gives your customers or clients access to your product or service, but also allows them to "check" your business. RECOMMENDED: How to Start a Blog in 9 Simple Steps (Beginners Guide) Online reviews, your interactions with other customers, and the frequency and quality of your posts help create a positive impression of your business in the mind of a potential buyer, which increases the likelihood of future sales. 3. Target the Global Market With your physical store, you are limited to the number of people who can visit you at any time, not to mention finding you. With a good website, you can literally have thousands, if not tens of thousands even millions of people visiting your online store at once. Imagine the potential of your business if you could expose your products and services to a potentially unlimited number of interested people. This could open up a much-wider-customer-base than relying on face-to-face interactions would. 4. Easier and Extensive Marketing It's a well-known marketing fact that business minded people like to buy but do not like to be sold. A well-written copy of your products or services on your website allows buyers to make a more relaxed and informed buying decision, as opposed to the pressure of a potential aggressive seller. Marketing your business is also easier and more extensive because the electronic format allows for wider, more cost-effective distribution, as opposed to traditional marketing, which typically includes printing and mailing costs. 5. The Internet Was Made for Business Relationship with customers is really important for business success. The Internet helps companies connect with client communication channels and build strong networks. The beauty of the internet lies in the fact that your prospective customers or clients can literally be just a click away from your online store. Through the internet, you can now educate, instruct and solve their problems. You can accept orders and payments and receive them directly to your inbox. The more people who find you online the more leads and sales you will make. No doubt, with these reasons, we are sure you will agree with us that getting your business online that is, starting an online store, will reap great benefits. If this is so, let help you get started!
How to Start an Online Store.
The biggest mistake most users make is not choosing the right platform for their online store. Thankfully, you're here, and you will not be making that mistake If you are thinking about starting an e-commerce business, that is, having your own online store, there are two popular eCommerce platforms that we recommend: Shopify or WooCommerce. Shopify is a fully hosted eCommerce platform that usually starts at $29/ month. It's a powerful eCommerce solution that includes everything you need to create an online store. The downside to Shopify is that it gets quite expensive, and your payment options are limited unless you pay additional fees. This is why most users choose WooCommerce because of the flexibility it offers. WooCommerce is an e-commerce platform built on WordPress. It can be installed using a WordPress plugin or, even better, customize it directly from your web hosting providers, such as Bluehost, Siteground, Hostgator, Namecheap, A2Hosting, and any other provider of your choice. WordPress powers more than 28% of all websites in the world. This shows that creating your online store with WooCommerce is a brilliant idea because millions of entrepreneurs like you have been using this wonderful e-commerce platform, but still, they have never regretted it. With this comparison and points in mind, we are sure you will agree with us that WooCommerce is the best affordable platform to launch your products online. If this is so, let proceed to the next step of starting your online store.
Requirements to Start an Online Store
Below are the core requirements needed. Domain name and Hosting SSL Certificate Premium Theme Premium Plugins Contents (for pages, products' titles and descriptions) Images (for your products and logo) Now that you are aware of the few requirements to start an online store, it's time to set up your online store. Here we go; 1. Choose a Domain Name This is the first thing you need to do if you are intending to create your online store on Woo Commerce, choosing a domain name. A domain name is any name given to a website on the internet. (For example, when you type mmoinstitute.com into your browser to visit the site, that's the website's domain name). Now, it's time to pick a name for your website and make sure that your future readers out there are able to find it. Bluehost offers new customers a free domain name for the first year of their web hosting service. You can also choose the extension to use for your domain name, such as .com, .io, .ai or otherwise. While a .com is still the preferred domain extension, it's becoming less important as time goes on, so don't shy away from other less common domain extensions, especially if they're more affordable. For those of you who cannot claim your first choice of a domain name, take a few hours to exchange ideas with friends and family. Think aloud and experiment with different words and variations to find the most appropriate domain name for your new site. 2. Pick a reliable hosting service To make your website accessible to other people on the Internet, you need a "host." The host keeps all your website files safe, secure and makes sure that people can access your site when they click on a link or type in your URL. There are tons of web hosting providers to choose from. I recommend Bluehost to anyone wishing to start an online store on WooCommerce because it acts as a one-stop shop for great and affordable hosting, quick and easy registration of your domain name in one swoop. 3. Install WordPress By now, you should be in fantastic shape on your journey to building an online store on WooCommerce. If you still remember, WooCommerce is a WordPress plugin, so it's time we set up WordPress There are several ways to install WordPress by Bluehost, Softaculous, FTP, Localhost, etc. But for this post, we will use Bluehost. After creating your profile on Bluehost, you can log in and start using all the features you have chosen. One of the unique features of Bluehost is that it comes with a one-click installer for WordPress. Instead of playing with files and databases, you can install WordPress and set up your website in minutes.
How to Install WordPress on Bluehost
Choose your preferred hosting page. I recommend the starter package. It offers a lot of speed, performance, features, and storage for your first website. You can move to a more advanced hosting plan as your website grows. You will be prompted to choose a domain name, choose your preferred domain. On the next page that appears, enter your personal information and credit card details. And make your payment. A green button indicating "install" on cPanel from Bluehost, click on the button to start the process. Although not necessary, you will be asked if you want to use your website with or without "www." Before the name of your website (www.YourWebsite.com or YourWebsite.com). If you are unable to decide, you can leave it as it is. It can be easily changed afterward. WordPress installation details such as email ID, username and password can be set. Read and accept all necessary terms and conditions under a license agreement. Then click on install! Once the installation is complete, you will see a clear message at the top stating "Your installation is complete!" And a button showing "View credentials". Clicking this button will take you to a page where you can find your newly installed WordPress login credentials. 4. Add SSL Certificates to your site (for Security) SSL stands for "security sockets layer". It adds a special security layer on your website, so you can accept sensitive information such as credit card numbers and other personal information. This is required for you to accept credit card payments on your website. The URL that appears as "https://" (and, often, also shows a green lock symbol). SSL is quite easy to set up with Bluehost since they offer it as a premium add-on during the payment process when signing up for the hosting. when signing up for the hosting. 5. Install WooCommerce Just log in to your WordPress dashboard. In the dashboard, you will see "Plugins" under "Appearance", click the Plugins item, and then click the Add New option. Search for "WooCommerce" and the WooCommerce plugin should appear as the first result. Click the Install Now button. This will automatically download and install the plugin files and should only take a minute. Once the plugin is installed, you must click the Activation link of the plugin to start using WooCommerce. (You can use the free or premium version). Then you should be prompted to start the setup. It's much easier to follow, so click on the Let's Go button to start. The installer will first ask you if you want WooCommerce to automatically create your key pages for you. These pages include your main store, your shopping cart, your order, and a default customer account page. You really want all these pages, so click Continue. The next step is to set up your store location, currency format, and units of measure. This is important so that your customers know how much you charge and what they get for their money. So make your selections and click Continue. When WooCommerce is activated for the first time, the WooCommerce Setup Wizard helps you set up your shop. Select "Let's go!" To begin. Or select "Not now" if you prefer to manually set up your online store. Set up your store. Now, choose your delivery address. Your next screen is the setup of your payments. If you still cannot afford credit cards, WooCommerce makes it easy to get two of the highest rated online payment services, Stripe and PayPal, by checking the appropriate box (es) yes, you can use both on this screen. When the Payments setup screen is complete, click Continue to access the 'Shipping' setup screen. Your WooCommerce installation is now complete. After the steps above, you can start installing your theme, product information, and additional plugins. 6. Choose a theme and design your online store By now you should be saying, hurray! But, hold on a minute, you know why? If you still remember, we promised you that we're going to help you get started. What we actually meant was that we're going to help you build an eye-catching (attractive) online store, for your business. It's our nature to help you get the best out of your business, so there is absolutely no need to thank us now, let finish it all well. After activating the WooCommerce plugin, you must start with the customization, which begins with the selection of the theme. You can think of a theme as a template for the visual layout of your store, having a good theme makes the design and organization of your site a snap. We do not recommend the use of free themes that have been downloaded on wordpress.org or that have been obtained elsewhere. Because free themes will lack some vital features that you need. You need a premium theme (paid theme). Paid themes are incredibly great and most of these themes are relatively inexpensive, like the one I most recommend, Happythemes. Once, you buy a theme, you will own it forever and get all the benefit of excellent support and customization options that come with premium WordPress themes.
How to Install your theme
After downloading your theme, go to your WordPress dashboard In the dashboard, you will see "Appearance", hover on it, sub-menus like theme etc. will appear. Click on theme >>> Add new >>> Upload file. Select the theme file you just downloaded and click Install. Wait a few minutes and the installation will be complete. Finally, "Activate" the theme!
Now let start customizing your theme.
When you uploaded your theme, there is a layout or drawing that you can easily re-edit to your liking. What we mean is that theme developers usually make it easier for users to edit these elements. (i) Name of the Site, Tagline, and Logo Go to your dashboard >>> Appearance >>> Theme >>>> Settings In the theme settings, you can change what you want, but it depends on the theme. Finally, click on "Publish" (ii) Homepage Setup This is very important. If you do not do it, you will not get the desired design. Go to your dashboard >>> Page >>> Add New page Create two new blank pages with the title "Home" and "Blog", publish the pages as they are (blank). Return to your dashboard Go to Settings >> Reading Under Reading Settings, choose "static page" A drop-down menu appears. The first is "Home Page". Under it, select the blank page you created with "home" as the title and proceed in the same way for the "Post page". Click on "save changes" (iii) The Slider Any versatile theme comes with an option for a slider. You can edit slider images by going to your dashboard, locating slider text (it can be Slider Revolution, Unison, etc.), change the images and texts to yours and save it. (iv) The Footer Go to your dashboard Hover on "Appearance" >>> "Widget" Choose the widget you want at the bottom of the page (3 is recommended, for example, "Pages", "Email Newsletter Subscribers", "Collection".) Then save! 7. Adding Products This is the real thing and that's why you're creating an online store. However, don't be intimidated. It is so simple, just follow the steps below. Go to your dashboard Click on Products >>> Add New If you get to the page, you will know the next step because it is self-explanatory. But be sure to use an attractive image as your "Featured image" because it will appear as the image (it will be visible to customers). Write a good title, description and make sure you use keywords in them. Do not forget the keywords in the ALT image title. Put the price etc. Preview it, if it's OK, then "Publish" 8. Market your online shop Hang in there – you've reached the last section of this bumper guide on how to start an online store. Now, you should be confident enough to shout, I did it! But, before you do that, there's one last piece of the puzzle that hardly anyone will openly talk about: Promotion. Building a successful business online takes more than selecting brands, writing product reviews, and starting selling products online. Even the best business ideas can fail if you do not drive enough traffic to your site (attracting visitors). Here is a list of four simple digital marketing (online marketing) strategies that any business owner can implement to help their business grow and make money. Search Engine Optimization (SEO) SEO is a marketing discipline focused on increasing the visibility of the results of organic (unpaid) search engines. SEO covers the technical and creative elements needed to improve rankings, drive traffic and increase awareness in search engines. Making money with digital marketing (Online marketing) via SEO is very simple once you get to know the specifics. The main objective of SEO is to increase the visibility of your site in the search field. Each search engine gives a result based on certain keywords or key phrases of the search query typed in the box and the most relevant result arrives at the top. Search Engine Optimization (SEO) is the best partner for any business that wants to reach its target audience without spending a lot of money. In fact, most of today's business ventures such as Airbnb, Amazon, eBay and several others rely on SEO. Email Marketing Email marketing is an innovative way of marketing. This is a marketing tool in which an advertiser sends an email to the recipient detailing the products and offers available. It has the potential to reach millions of clients with a click, the best way to build a relationship with potential customers in an intimate way. It's a blend of graphical content and links that provide the customer with easy purchase and information. This is an easy way to measure customer response and marketing charts of products. A lot of email marketing tools come with the possibility of unsubscribing to eliminate unwanted customers and secure potential buyers. The best part of this type of digital marketing is, the product is advertised to a large audience and it has a far outreach than the traditional method of marketing. Social Media Marketing As an aspiring online entrepreneur, you cannot ignore the impending dominance of social commerce. As the name suggests, it is digital marketing (online marketing) that is performed in social media such as Facebook, Twitter, Instagram, and other social media platforms. Most social media networks have their own data analytics tools that make it easy to create and promote social media marketing campaigns. Due to the continuous dissemination of social media discussions and opinions, there would be an immediate notifiable product and it would also be shared on other platforms, which would help to publicize the product. You can post a marketing campaign on your social media account and make money for the number of campaigns published in your account, and the number of views you get from your friends and campaign performance will ensure you profitable online money making with Digital Marketing. You can also share a post on social media about how to monetize through digital marketing to attract more views and take advantage of them for product advertising. Content Marketing Content marketing refers to the creation and publication of free online content for the purpose of promoting a particular product or service. It is a bridge of information between the consumer and the seller. Content marketing is used in search engine searches. If you are creative and have a strong suit in writing, this is one of the ways to make money from online marketing. When writing content, you must be able to understand the dynamics of the product. Content must be presented in such a way that a layperson can understand and buy the product. So far, you've learned how to start an online store, without spending extra money on website designers. If you are looking to start your online store with WooCommerce, we suggest you follow this guide.
Good luck!
Thanks for reading this article and don't forget to share it... Read the full article
0 notes
Text
How to Start an Online Store in 8 Simple Steps (Beginners Guide)
How to Start an Online Store in 8 Simple Steps - Starting an online store is a great business idea for those looking to create a strong online presence for their business, as well to extend their global reach. But, unfortunately, even with such a great idea, so many people find it "a long distance race", to start an online store.
Yes, I agree to that, it is "a long distance race". However, if you know the right steps to follow to start an online store, you will not only find it easy to start in just a few minutes but also get to grow your business in no time. It is my pleasure to guide you through all these steps to start an online store for your business. Here, I will be more practical guiding you through, with all the necessary information you need to start your online store and grow your business. I like to share this information, because, I know that you would likely want to get your business online, that notwithstanding, your business may be a kind that does not only target your geographic location but the world at large, and getting an online store will yield great benefits. Before we proceed to the next step, How to Start an Online Store. Let me quickly bring to your understanding, the importance of starting an online store.
Importance of Starting an Online Store.
1. Accessibility Today companies of all sizes and industries establish a successful online presence. This is an extremely important factor considering the fact that the Internet never sleeps and every portal you offer online gives your business a virtual showroom open 24 hours a day. This allows potential customers to search for your product or service after business hours and in the privacy of their home. If you sell products, an online store allows you to place an order 24 hours a day to enter a sale as soon as the customer is interested, instead of waiting for the opening of your physical store, by which time, the desire to buy may have passed. 2. Improving Your Brand Image If you do not have an online presence then you can't expect your prospects to take you seriously and you will lose business to competitors that do have an effective online presence. Providing online presence not only gives your customers or clients access to your product or service, but also allows them to "check" your business. Online reviews, your interactions with other customers, and the frequency and quality of your posts help create a positive impression of your business in the mind of a potential buyer, which increases the likelihood of future sales. 3. Target the Global Market With your physical store, you are limited to the number of people who can visit you at any time, not to mention finding you. With a good website, you can literally have thousands, if not tens of thousands even millions of people visiting your online store at once. Imagine the potential of your business if you could expose your products and services to a potentially unlimited number of interested people. This could open up a much-wider-customer-base than relying on face-to-face interactions would. 4. Easier and Extensive Marketing It's a well-known marketing fact that business minded people like to buy but do not like to be sold. A well-written copy of your products or services on your website allows buyers to make a more relaxed and informed buying decision, as opposed to the pressure of a potential aggressive seller. Marketing your business is also easier and more extensive because the electronic format allows for wider, more cost-effective distribution, as opposed to traditional marketing, which typically includes printing and mailing costs. 5. The Internet Was Made for Business Relationship with customers is really important for business success. The Internet helps companies connect with client communication channels and build strong networks. The beauty of the internet lies in the fact that your prospective customers or clients can literally be just a click away from your online store. Through the internet, you can now educate, instruct and solve their problems. You can accept orders and payments and receive them directly to your inbox. The more people who find you online the more leads and sales you will make. No doubt, with these reasons, we are sure you will agree with us that getting your business online that is, starting an online store, will reap great benefits. If this is so, let help you get started!
How to Start an Online Store.
The biggest mistake most users make is not choosing the right platform for their online store. Thankfully, you're here, and you will not be making that mistake If you are thinking about starting an e-commerce business, that is, having your own online store, there are two popular eCommerce platforms that we recommend: Shopify or WooCommerce. Shopify is a fully hosted eCommerce platform that usually starts at $29/ month. It's a powerful eCommerce solution that includes everything you need to create an online store. The downside to Shopify is that it gets quite expensive, and your payment options are limited unless you pay additional fees. This is why most users choose WooCommerce because of the flexibility it offers. WooCommerce is an e-commerce platform built on WordPress. It can be installed using a WordPress plugin or, even better, customize it directly from your web hosting providers, such as Bluehost, Siteground, Hostgator, Namecheap, A2Hosting, and any other provider of your choice. WordPress powers more than 28% of all websites in the world. This shows that creating your online store with WooCommerce is a brilliant idea because millions of entrepreneurs like you have been using this wonderful e-commerce platform, but still, they have never regretted it. With this comparison and points in mind, we are sure you will agree with us that WooCommerce is the best affordable platform to launch your products online. If this is so, let proceed to the next step of starting your online store.
Requirements to Start an Online Store
Below are the core requirements needed. Domain name and Hosting SSL Certificate Premium Theme Premium Plugins Contents (for pages, products' titles and descriptions) Images (for your products and logo) Now that you are aware of the few requirements to start an online store, it's time to set up your online store. Here we go; 1. Choose a Domain Name This is the first thing you need to do if you are intending to create your online store on Woo Commerce, choosing a domain name. A domain name is any name given to a website on the internet. (For example, when you type mmoinstitute.com into your browser to visit the site, that's the website's domain name). Now, it's time to pick a name for your website and make sure that your future readers out there are able to find it. Bluehost offers new customers a free domain name for the first year of their web hosting service. You can also choose the extension to use for your domain name, such as .com, .io, .ai or otherwise. While a .com is still the preferred domain extension, it's becoming less important as time goes on, so don't shy away from other less common domain extensions, especially if they're more affordable. For those of you who cannot claim your first choice of a domain name, take a few hours to exchange ideas with friends and family. Think aloud and experiment with different words and variations to find the most appropriate domain name for your new site. 2. Pick a reliable hosting service To make your website accessible to other people on the Internet, you need a "host." The host keeps all your website files safe, secure and makes sure that people can access your site when they click on a link or type in your URL. There are tons of web hosting providers to choose from. We recommend Bluehost to anyone wishing to start an online store on WooCommerce because it acts as a one-stop shop for great and affordable hosting, quick and easy registration of your domain name in one swoop. 3. Install WordPress By now, you should be in fantastic shape on your journey to building an online store on WooCommerce. If you still remember, WooCommerce is a WordPress plugin, so it's time we set up WordPress There are several ways to install WordPress by Bluehost, Softaculous, FTP, Localhost, etc. But for this post, we will use Bluehost. After creating your profile on Bluehost, you can log in and start using all the features you have chosen. One of the unique features of Bluehost is that it comes with a one-click installer for WordPress. Instead of playing with files and databases, you can install WordPress and set up your website in minutes.
How to Install WordPress on Bluehost
Choose your preferred hosting page. We recommend the starter package. It offers a lot of speed, performance, features, and storage for your first website. You can move to a more advanced hosting plan as your website grows. You will be prompted to choose a domain name, choose your preferred domain. On the next page that appears, enter your personal information and credit card details. And make your payment. A green button indicating "install" on cPanel from Bluehost, click on the button to start the process. Although not necessary, you will be asked if you want to use your website with or without "www." Before the name of your website (www.YourWebsite.com or YourWebsite.com). If you are unable to decide, you can leave it as it is. It can be easily changed afterward. WordPress installation details such as email ID, username and password can be set. Read and accept all necessary terms and conditions under a license agreement. Then click on install! Once the installation is complete, you will see a clear message at the top stating "Your installation is complete!" And a button showing "View credentials". Clicking this button will take you to a page where you can find your newly installed WordPress login credentials. 4. Add SSL Certificates to your site (for Security) SSL stands for "security sockets layer". It adds a special security layer on your website, so you can accept sensitive information such as credit card numbers and other personal information. This is required for you to accept credit card payments on your website. The URL that appears as "https://" (and, often, also shows a green lock symbol). SSL is quite easy to set up with Bluehost since they offer it as a premium add-on during the payment process when signing up for the hosting. when signing up for the hosting. 5. Install WooCommerce Just log in to your WordPress dashboard. In the dashboard, you will see "Plugins" under "Appearance", click the Plugins item, and then click the Add New option. Search for "WooCommerce" and the WooCommerce plugin should appear as the first result. Click the Install Now button. This will automatically download and install the plugin files and should only take a minute. Once the plugin is installed, you must click the Activation link of the plugin to start using WooCommerce. (You can use the free or premium version). Then you should be prompted to start the setup. It's much easier to follow, so click on the Let's Go button to start. The installer will first ask you if you want WooCommerce to automatically create your key pages for you. These pages include your main store, your shopping cart, your order, and a default customer account page. You really want all these pages, so click Continue. The next step is to set up your store location, currency format, and units of measure. This is important so that your customers know how much you charge and what they get for their money. So make your selections and click Continue. When WooCommerce is activated for the first time, the WooCommerce Setup Wizard helps you set up your shop. Select "Let's go!" To begin. Or select "Not now" if you prefer to manually set up your online store. Set up your store. Now, choose your delivery address. Your next screen is the setup of your payments. If you still cannot afford credit cards, WooCommerce makes it easy to get two of the highest rated online payment services, Stripe and PayPal, by checking the appropriate box (es) yes, you can use both on this screen. When the Payments setup screen is complete, click Continue to access the 'Shipping' setup screen. Your WooCommerce installation is now complete. After the steps above, you can start installing your theme, product information, and additional plugins. 6. Choose a theme and design your online store By now you should be saying, hurray! But, hold on a minute, you know why? If you still remember, we promised you that we're going to help you get started. What we actually meant was that we're going to help you build an eye-catching (attractive) online store, for your business. It's our nature to help you get the best out of your business, so there is absolutely no need to thank us now, let finish it all well. After activating the WooCommerce plugin, you must start with the customization, which begins with the selection of the theme. You can think of a theme as a template for the visual layout of your store, having a good theme makes the design and organization of your site a snap. We do not recommend the use of free themes that have been downloaded on wordpress.org or that have been obtained elsewhere. Because free themes will lack some vital features that you need. You need a premium theme (paid theme). Paid themes are incredibly great and most of these themes are relatively inexpensive, like the one I most recommend, Happythemes. Once, you buy a theme, you will own it forever and get all the benefit of excellent support and customization options that come with premium WordPress themes.
How to Install your theme
After downloading your theme, go to your WordPress dashboard In the dashboard, you will see "Appearance", hover on it, sub-menus like theme etc. will appear. Click on theme >>> Add new >>> Upload file. Select the theme file you just downloaded and click Install. Wait a few minutes and the installation will be complete. Finally, "Activate" the theme!
Now let start customizing your theme.
When you uploaded your theme, there is a layout or drawing that you can easily re-edit to your liking. What we mean is that theme developers usually make it easier for users to edit these elements. (i) Name of the Site, Tagline, and Logo Go to your dashboard >>> Appearance >>> Theme >>>> Settings In the theme settings, you can change what you want, but it depends on the theme. Finally, click on "Publish" (ii) Homepage Setup This is very important. If you do not do it, you will not get the desired design. Go to your dashboard >>> Page >>> Add New page Create two new blank pages with the title "Home" and "Blog", publish the pages as they are (blank). Return to your dashboard Go to Settings >> Reading Under Reading Settings, choose "static page" A drop-down menu appears. The first is "Home Page". Under it, select the blank page you created with "home" as the title and proceed in the same way for the "Post page". Click on "save changes" (iii) The Slider Any versatile theme comes with an option for a slider. You can edit slider images by going to your dashboard, locating slider text (it can be Slider Revolution, Unison, etc.), change the images and texts to yours and save it. (iv) The Footer Go to your dashboard Hover on "Appearance" >>> "Widget" Choose the widget you want at the bottom of the page (3 is recommended, for example, "Pages", "Email Newsletter Subscribers", "Collection".) Then save! 7. Adding Products This is the real thing and that's why you're creating an online store. However, don't be intimidated. It is so simple, just follow the steps below. Go to your dashboard Click on Products >>> Add New If you get to the page, you will know the next step because it is self-explanatory. But be sure to use an attractive image as your "Featured image" because it will appear as the image (it will be visible to customers). Write a good title, description and make sure you use keywords in them. Do not forget the keywords in the ALT image title. Put the price etc. Preview it, if it's OK, then "Publish" 8. Market your online shop Hang in there – you've reached the last section of this bumper guide on how to start an online store. Now, you should be confident enough to shout, I did it! But, before you do that, there's one last piece of the puzzle that hardly anyone will openly talk about: Promotion. Building a successful business online takes more than selecting brands, writing product reviews, and starting selling products online. Even the best business ideas can fail if you do not drive enough traffic to your site (attracting visitors). Here is a list of four simple digital marketing (online marketing) strategies that any business owner can implement to help their business grow and make money. Search Engine Optimization (SEO) SEO is a marketing discipline focused on increasing the visibility of the results of organic (unpaid) search engines. SEO covers the technical and creative elements needed to improve rankings, drive traffic and increase awareness in search engines. Making money with digital marketing (Online marketing) via SEO is very simple once you get to know the specifics. The main objective of SEO is to increase the visibility of your site in the search field. Each search engine gives a result based on certain keywords or key phrases of the search query typed in the box and the most relevant result arrives at the top. Search Engine Optimization (SEO) is the best partner for any business that wants to reach its target audience without spending a lot of money. In fact, most of today's business ventures such as Airbnb, Amazon, eBay and several others rely on SEO. Email Marketing Email marketing is an innovative way of marketing. This is a marketing tool in which an advertiser sends an email to the recipient detailing the products and offers available. It has the potential to reach millions of clients with a click, the best way to build a relationship with potential customers in an intimate way. It's a blend of graphical content and links that provide the customer with easy purchase and information. This is an easy way to measure customer response and marketing charts of products. A lot of email marketing tools come with the possibility of unsubscribing to eliminate unwanted customers and secure potential buyers. The best part of this type of digital marketing is, the product is advertised to a large audience and it has a far outreach than the traditional method of marketing. Social Media Marketing As an aspiring online entrepreneur, you cannot ignore the impending dominance of social commerce. As the name suggests, it is digital marketing (online marketing) that is performed in social media such as Facebook, Twitter, Instagram, and other social media platforms. Most social media networks have their own data analytics tools that make it easy to create and promote social media marketing campaigns. Due to the continuous dissemination of social media discussions and opinions, there would be an immediate notifiable product and it would also be shared on other platforms, which would help to publicize the product. You can post a marketing campaign on your social media account and make money for the number of campaigns published in your account, and the number of views you get from your friends and campaign performance will ensure you profitable online money making with Digital Marketing. You can also share a post on social media about how to monetize through digital marketing to attract more views and take advantage of them for product advertising. Content Marketing Content marketing refers to the creation and publication of free online content for the purpose of promoting a particular product or service. It is a bridge of information between the consumer and the seller. Content marketing is used in search engine searches. If you are creative and have a strong suit in writing, this is one of the ways to make money from online marketing. When writing content, you must be able to understand the dynamics of the product. Content must be presented in such a way that a layperson can understand and buy the product. So far, you've learned how to start an online store, without spending extra money on website designers. If you are looking to start your online store with WooCommerce, we suggest you follow this guide.
Good luck!
Read the full article
0 notes
Text
Federal ITC savings: 2020 vs. 2021
Reading Time: 4 minutes
One question we field a lot at EnergySage is whether it’s the right time to install solar panels. For anyone asking that question in 2020, the answer is often as soon as possible: given the looming step down and expiration of the federal investment tax credit (ITC), solar shoppers who wait until 2021 or later to move forward will be missing out on major tax savings – but just how much?
Find out what solar panels cost in your area in 2020
In this article, we’ll give an overview of the federal tax credit, the timeline for the step down, and provide some tips for those looking to take advantage of the 26 percent federal ITC before the end of the year.
Please note: EnergySage has written on the topic of the ITC in good faith, with the aim of guiding you to make a well-informed decision about going solar. However, the US tax code is complicated, and what we have written should not take the place of advice from a qualified tax professional. Consult your tax advisor before deciding what is best for you.
What is the federal ITC?
The federal investment tax credit, also referred to as the solar tax credit, allows you to deduct 26 percent of the cost of your solar energy system from your federal taxes. Because this incentive is a tax credit rather than a deduction, you need to have sufficient tax liability in order to take advantage of the incentive. However, if you can’t use your entire solar tax credit in the first year, you can roll remaining credits over into future years.
The ITC is only available to those who purchase their solar panel system: property owners who sign a solar lease or power purchase agreement (PPA) are not eligible for the credit, as the owner of the system claims it for themselves.
You can read more about how to claim the ITC in our step-by-step guide.
Federal ITC step down timeline
The ITC was originally scheduled to expire in 2016. However, in late 2015, Congress passed a spending bill that included an extension of the credit. The bill stipulates that a solar tax credit will be available to homeowners until 2021, with an important distinction: the full 30 percent credit value only lasts until 2019. In January 2020, the tax credit value dropped 26 percent, and it declines even more to 22 percent in 2021. And at the start of 2022, the residential solar tax credit expires.
2019: the tax credit is 30 percent of the cost of the solar energy system.
2020: the tax credit is 26 percent of the cost of the system
2021: the tax credit is 22 percent of the cost of the system
2022: homeowners can no longer claim the solar tax credit
As far as commercial installations go, the commercial solar tax credit is the same as the residential tax credit up until the end of 2021. However, while the tax credit expires for homeowners on January 1, 2022, the commercial solar tax credit reduces and remains fixed at 10 percent onwards.
ITC savings: 2020 vs. 2021
While a 4 percent stepdown may not seem like much, it can equate to thousands of dollars in savings when you’re buying a solar panel system.
Below are examples of saving differences from 2020 to 2021. For these estimates, we used average cost data from quotes in the EnergySage Marketplace to calculate an estimated cost for 6 kilowatt (kW) and 10 kW systems in various states. Values have been rounded to the nearest dollar.
ITC savings 2020-2021: 6 kW
StateAverage cost of solar ($/W)Gross cost for a 6 kW system ($)2020 tax credit value ($)2021 tax credit value ($)Difference ($) California$2.94$17,640$4,586$3,881$706 Florida$2.69$16,140$4,196$3,551$646 Illinois$3.08$18,480$4,805$4,066$739 Massachusetts$3.10$18,600$4,836$4,092$744 Texas$2.81$16,860$4,384$3,709$674 Utah$2.89$17,340$4,508$3,815$694
ITC savings 2020-2021: 10 kW
StateAverage cost of solar ($/W)Gross cost for a 10 kW system ($)2020 tax credit value ($)2021 tax credit value ($)Difference ($) California$2.94$29,400$7,644$6,468$1,176 Florida$2.69$26,900$6,994$5,918$1,076 Illinois$3.08$30,800$8,008$6,776$1,232 Massachusetts$3.10$31,000$8,060$6,820$1,240 Texas$2.81$28,100$7,306$6,182$1,124 Utah$2.89$28,900$7,514$6,358$1,156
For some, the difference between claiming the ITC in 2020 and 2021 may be less than $1,000. But, the larger your system is, and the higher the cost of solar is in your area, the more you stand to lose from each ITC decline
How to ensure you’re eligible for the 26 percent tax credit
Time is of the essence when it comes to claiming the 26 percent federal ITC; here are some guidelines to follow in order to make sure you maximize your ITC benefit:
1. Start shopping for solar as soon as possible
Installing solar is a big decision, and one you shouldn’t feel rushed on. The sooner you start shopping, the more time you’ll have to evaluate your equipment, financing, and installation company options.
2. Before signing a contract, ask about timelines
Not every company will be able to install on the same timeline; their calendars vary depending on how many projects are already scheduled, as well as how many installation crews each company has. Before signing a contract, ask each company how soon they’ll be able to install your solar panel system.
3. Get your solar panel system installed before the end of the year
In 2018, the IRS released “commence construction” guidance which states that commercial entities investing in solar are eligible to claim the 26 percent ITC so long as construction on the project starts before January 1, 2021. However, this guidance doesn’t apply to directly-owned residential solar panel systems.
If you want to claim the 26 percent ITC for your own residential solar panel system, it’s important to make sure the system is “placed in service” before the end of 2020. As the Solar Energy Industries Association (SEIA) states:
If a homeowner buys the solar energy system outright (either paying cash or financing with a loan), they cannot use any commence construction safe harbor provisions…. It is not enough to have signed a contract, or to have made a down payment or even to have begun construction. There is no bright-line test from the IRS on what constitutes “placed in service,” but the IRS has equated this with completed installation in a Private Letter Ruling.
It’s always best to consult with your tax advisor or accountant on your unique situation. However, if you’re looking to play it as safe as possible, having an operational system by the end of 2020 helps ensure you’re eligible for the 26 percent tax credit.
Compare your solar options on EnergySage
If you want to lock in the 26 percent tax credit, now’s the time to get started on your solar project. When you register on the EnergySage Solar Marketplace, you can receive up to seven quotes from pre-screened installers. All quotes on the Marketplace include solar incentives you’re eligible for, including the federal ITC. If you’d prefer to start with ballpark cost and savings estimates, try our Solar Calculator.
Find out what solar panels cost in your area in 2020
from Solar Energy https://news.energysage.com/federal-itc-savings-2020-vs-2021/
0 notes
Text
Connecticut solar battery incentives
Reading Time: 3 minutes
If you’re a homeowner in CT, you’re probably very familiar with the state’s harsh winters: frequent nor’easters have many people across New England looking for ways to keep their homes up and running during powerful storms. Fortunately, solar batteries can do just that: thanks to declining costs, federal tax credits, and–for customers of Eversource–utility incentives, solar batteries are more affordable than ever before. Here’s a quick summary of the battery incentives currently available in Connecticut:
Find out what solar costs in your area in 2020
Eversource’s ConnectedSolutions program
Are you a customer of Eversource? This utility company offers incentives for their CT customers installing a battery under the ConnectedSolutions program.
The ConnectedSolutions program is a demand response program that pays you an annual incentive in exchange for allowing your utility company to access and use the electricity stored in your battery during times of peak demand.
For example, let’s say that temperatures around Hartford are especially hot, and demand for electricity is higher than usual because everyone’s using their air conditioners. On days like this, Eversource may have to turn on “peaker plants” (or temporary power plants) to meet their customers’ electricity needs. Turning on these plants is expensive (and has an outsized, adverse impact on the environment), and these costs are ultimately passed down to end customers like you.
However, the ConnectedSolutions program helps Eversource curtail their costs during times like these: essentially, Eversource will have the ability to access and distribute electricity from your charged battery when overall demand for electricity is particularly high. They can then use that electricity to curb their need for peaker plant generation, helping them to save money and allowing you to reap the benefits of the ConnectedSolutions incentive.
In Connecticut, you can receive $225 per kW during the summer events (i.e. times when they pull electricity from the battery) and $50 per kW during the winter events. However, you don’t have to worry about Eversource constantly draining your battery of energy: participating customers experience a maximum of 60 events during the summer, and 5 events during the winter, and each individual event can last no longer than 3 hours.
Your savings from the ConnectedSolutions program will depend on the number of events per year and how much power your solar battery can provide. According to Eversource, “A typical home battery could contribute an average of 5 kW per event. This would earn $1,125 for the summer season and $250 for the winter season.”
Keep in mind that not every storage system is eligible for this incentive: as of July 2020, the types of batteries allowed in CT’s ConnectedSolutions program are sonnen, Generac, or Tesla products.
You can learn more about the ConnectedSolutions program in our overview of the incentive.
Federal solar tax credit
Fortunately, you don’t need to be a customer of a specific utility company to take advantage of the federal investment tax credit (ITC) incentive. If you install your solar-plus-storage system in 2020, you can claim up to 26 percent of the cost of your costs as a credit towards your federal taxes.
Importantly, standalone storage is not currently eligible for this tax credit: to claim this incentive for your battery purchase, you need to charge the battery with an on-site renewable energy resource (for most homeowners, this means rooftop solar). If you have a residential solar panel system and you charge your battery with electricity from the grid, you cannot take advantage of this credit.
However, if you’re installing a solar-plus-storage system on a commercial property, there’s a bit more flexibility: you can claim the tax credit so long as your storage system is charged by your solar panel system more than 75 percent of the time. Importantly, the exact value of the credit depends on how frequently you charge your battery with renewable energy. For example, if you charge your battery with solar 85 percent of the time, it is eligible for only 85 percent of the 26 percent ITC – equivalent to a 22.1% percent credit (85% x 26% = 22.1%).
On average, the ITC can help decrease the cost of a battery by an additional $3,000 to $4,000. You can learn more about the federal investment tax credit here.
Compare battery options on EnergySage
Want to install a solar-plus-storage system in CT? Sign up on the EnergySage Marketplace to receive up to seven custom solar-plus-storage quotes from installers located in your area. If you’re interested in a particular battery system, simply note it in your account so that they can quote according to your preferences.
storage content
Find out what solar costs in your area in 2020
from Solar Energy https://news.energysage.com/connecticut-solar-battery-incentives/
0 notes
Text
How to read you LADWP electricity bill
Reading Time: 5 minutes
Los Angeles Department of Water and Power (LADWP) is the largest municipal utility company in both California and the United States, providing water and electricity service to more than 4 million customers in the Los Angeles area.
Many electricity customers throughout the country receive their electric bill every month and pay it without really diving into the details of what they’re actually paying for…and we’re here to help break it down. In this article, we’ll review the most important parts of your LADWP electricity bill, and how that changes once you install solar panels.
Key takeaways:
Your LADWP bill includes charges for electricity supply, transmission/distribution, and miscellaneous charges
LADWP offers a variety of rate plans, including tiered and time-of-use (TOU) plans
Compare quotes on the EnergySage Marketplace to see how much you can save on your LADWP bills with solar
How LADWP calculates your monthly electricity bill
There are two important factors in determining how much you’ll owe on your electricity bill: your electricity usage and your rate plan/schedule.
Electricity usage
How much electricity you use in a given month is calculated in kilowatt-hours (kWh). This number may change significantly from season to season based on your consumption habits – many people use more electricity during summer months when they run their air conditioning units, and will see lower electricity bills during colder months. It’s important to keep track of how your monthly electricity usage changes over time, rather than just looking at the overall cost of your bill. Seeing that your electricity bill is increasing because of an uptick in consumption (which you can control), rather than due to a change to utility rates, gives you the opportunity to change your electricity usage habits and save money.
Understanding your electricity consumption is especially important because of LADWP’s tier allowances. Simply put, LADWP established tiers that specify the number of kWh of electricity you can use before jumping up a tier and paying a more expensive rate. Tier allowances vary by season, but generally, it’s a good idea to be as energy-efficient as possible to maximize your chances of remaining in Tier 1–and therefore paying the lowest rate possible.
Importantly, LADWP’s tiers also vary depending on where you live: their service territory is divided into Zone 1 and Zone 2, which have different usage allowances–you can find out which zone you’re in by searching your zip code on their website.
Rate plan
Next up, rate plans: you may or may not know which rate plan you’re on (or even that you have the opportunity to change it). Many utility companies have default rate options for their customers that remain in place unless you proactively request to be on a different rate.
LADWP offers plans that not only vary in pricing, but in structure: two of the most common types are a tiered-rate plan and a time-of-use plan.
If you’re on a tiered-rate plan (e.g., R-1A), you’re charged a fixed rate for each kWh of electricity you use until you pass your tier allowance; the more electricity you use, the higher the tier, and the more you’re charged for each kWh of electricity.
LADWAP’s time-of-use (TOU) plans (e.g. R-1B), on the other hand, charge a different rate for electricity depending on the day, time, and season. This type of rate structure is called a “time varying rate”, since the cost of electricity varies based upon the time that you use it. You can benefit from lower rates during times when demand for electricity is lower (morning and late at night), but pay more during “peak hours” when demand for electricity is high (evening hours).
For more information on LADWP’s current plan offerings, visit their website.
Types of electricity bill charges
Electricity bills often have a lot of confusing terms and line-items, making it difficult to identify the all-in rate you’re paying for electricity. However, LADWP’s is relatively simple to breakdown, with fewer line item charges than many utility companies – you can find all of your electricity charges broken up by tier in the aptly named “Electric Charges” section of your bill. In general, what you pay for electricity can be categorized into three separate buckets: supply, distribution/transmission, and miscellaneous. These rates cover the electricity you use, getting the electricity to your home or business and any other charges and fees related to the maintenance of the grid.
Supply
It’s easiest to think of supply charges as paying for the actual electricity you use. Utilities across the country charge different amounts for electricity supply depending on the power plant it comes from and the cost of the fuel (i.e. coal or natural gas). In 2018, most of the electricity delivered by LADWP came from renewable energy resources (32 percent), however, they also delivered a fair amount of energy generated from natural gas (30 percent) and coal (18 percent).
Distribution and transmission
Distribution and transmission charges, sometimes referred to as delivery charges, are fees from LADWP to send you the electricity. The utility company uses these charges to build and maintain the poles and electrical wires that deliver electricity from power plants to your property. You can think of the delivery charge as effectively the same as paying for shipping and handling on any product you buy online.
Miscellaneous charges
In addition to paying supply and demand, utility companies often have a number of miscellaneous charges included on their bills. Sometimes, these charges are a fixed amount unrelated to how much electricity you use, while other times they’re presented as a volumetric rate, where you pay more each month based on how much you use.
LADWP lists a number of bill adjustments they may include on the left-hand side of your electricity bill, including an Energy Cost Adjustment (ECA), a Power Access Charge (PAC), and Electricity Subsidy Adjustment (ESA), and more. Depending on the charge, it may be broken out as a separate line item, or it may be rolled into your all-in rate.
What will my LADWP bill look like after going solar?
After you install solar panels, you will continue to receive your monthly electricity bills from LADWP. Each monthly bill will include a summary of kWh received (i.e. how much solar electricity you send back to LADWP) and kWh delivered (i.e. how much electricity LADWP delivered to you from the grid). This is net metering in action: net metering is a solar incentive that allows you to claim credits for any excess solar electricity you send to the grid. You can use these credits to counterbalance what you pull from the grid at times when your solar panel system isn’t generating enough electricity to meet your needs (like at night).
Like other major utility companies in California, LADWP customers with rooftop solar panel systems are placed on a time-of-use (TOU) plan. Your bill will include a time-of-use summary that breaks down the kWh you sent to the grid and the kWh you drew from the grid into three separate buckets: base, low peak, and high peak. If you see negative numbers here, those represent credits you can carry forward. Positive numbers indicate that you drew more electricity from the grid than your solar panel system produced during that time period, so you’ll have to pay LADWP for that electricity.
At the bottom of your bill, you’ll see a “Net Metering” bank: this shows your net metering credit balance from previous months. You can use these credits on future monthly bills if you use more electricity than your solar panel system produces. Importantly, you cannot use these credits to offset taxes or other charges not related to your electricity usage (i.e. the water portion of your bill).
Save on your LADWP bill with solar
LA is one of the sunniest cities in the country – join the thousands of LADWP customers already saving on their electricity with solar! On the EnergySage Marketplace, you can receive up to seven quotes from local Los Angeles installers to compare. These quotes provide custom savings estimates based on your electricity usage, the rate you pay, and the solar potential of your property. If you’d like to start out with a rough estimate of solar costs and savings, try our Solar Calculator.
Find out what solar costs in your area in 2020
from Solar Energy https://news.energysage.com/how-to-read-you-ladwp-electricity-bill/
0 notes
Text
Solar battery incentives in New York
Reading Time: 3 minutes
If you’re a New Yorker considering your solar battery options, you’re not alone: energy storage has become an increasingly popular purchase for homeowners interested in keeping their homes running during a grid outage. Fortunately, due to declining costs, federal tax credits, and–for Long Island homeowners–state incentives, solar batteries are more affordable than ever before. Here’s a quick rundown of the battery incentives currently available in New York:
New York’s energy storage target
New York State has one of the most ambitious energy storage targets in the country – the state aims to install 1,500 megawatts (MW) of energy storage by 2025–and double that by 2030! In an effort to spur the development of these projects, New York State Energy Research and Development Authority (NYSERDA) incentivizes different types of energy storage systems. Unfortunately for homeowners in New York, as of June 2020, most of NYSERDA’s battery storage incentives only apply to commercial projects. However, if you live in Long Island, you’re in luck: this is the only area in the state currently eligible for residential battery incentives.
PSEG LI’s solar plus energy storage incentive
NYSERDA and PSEG LI’s solar plus energy storage incentive pays customers an upfront incentive for pairing a home solar panel system with a battery. Much like the State’s Megawatt solar rebate, this incentive works under a block structure: as more homeowners in Long Island take advantage and fill up the blocks, the program advances in blocks and the incentive decreases in value.
As of Jun 2020, the incentive is still in the first block, meaning you can claim $250 per kilowatt-hour (kWh) of storage capacity. For the average battery, this means an average of $2,300 to $3,300 in savings. (Editor’s note: this is among the best incentives in the country, as it’s on par with what’s currently offered in California’s SGIP program, which is in block 5 at the time of publishing.)
You can confirm the current status of the program on NYSERDA’s incentive dashboard. Once the program reaches block 2, the incentive will decline to $200 per kWh of capacity. As a heads up: in order to be eligible for the incentive, you need to work with a participating NY-Sun contractor–a lot of whom quote on EnergySage!
Federal solar tax credit
If you live in any part of New York and plan on adding a battery to your solar panel system, your battery purchase is also eligible for the federal investment tax credit (ITC). In 2020, the solar tax credit allows you to claim up to 26 percent of the cost of your solar battery as a credit towards your federal taxes.
Importantly, standalone storage is not currently eligible for this tax credit: to claim this incentive for your battery purchase, you need to charge the battery with an on-site renewable energy resource (like rooftop solar). If you have a residential solar panel system and you charge your battery with electricity from the grid, you cannot take advantage of this credit.
However, commercial solar-plus-storage systems have a bit more leeway: if you’re installing energy storage on a commercial property, you can claim the tax credit so long as your storage system is charged by your solar panel system more than 75 percent of the time, and the exact value of the credit depends on how frequently you charge your battery with renewable energy. For example, if you charge your battery with solar 80 percent of the time, it is eligible for only 80 percent of the 26 percent ITC – equivalent to a 20.8% percent credit (80% x 26% = 20.8%).
For most homeowners, the ITC can help decrease the cost of a battery by an additional $3,000 to $4,000. You can learn more about the federal investment tax credit here.
Compare battery options on EnergySage
Looking to benefit from these solar incentives (and others)? EnergySage is here to help – sign up on the EnergySage Marketplace to receive up to seven custom solar-plus-storage quotes from installers located in the Bay State. If you’re interested in a particular battery system, simply note it in your account so that they can quote according to your preferences.
Find out what solar costs in your area in 2020
from Solar Energy https://news.energysage.com/solar-battery-incentives-in-new-york/
0 notes
Text
Solar battery incentives in Vermont
Reading Time: 5 minutes
Vermont is well known for all of its seasons, but especially for its harsh winter storms (trust me, I grew up there). Historically, many Vermonters have relied on diesel-powered generators to keep their homes running during a power outage, including those regularly caused by mid-winter ice storms. However, generators are no longer the only option for those looking to keep their lights on in the event of an outage: thanks to a number of incentives, solar batteries are becoming an increasingly attractive and financially-viable solution, particularly for customers of Green Mountain Power (GMP).
Green Mountain Power’s bring your own device program
If you’re a customer of GMP, you’re in luck: the utility offers particularly beneficial incentives for installing a battery through their bring your own device (BYOD) program.
Overview of the program
GMP’s BYOD program, a type of demand response program, pays you an incentive for allowing GMP to access and use the electricity stored in your battery during times of peak demand. Importantly, you do not need a solar panel system to participate in this program: if you have a standalone storage device, GMP re-charges the battery after using the stored electricity.
As an example, let’s say it’s hotter than 100 degrees in Vermont, and everyone’s blasting their air conditioning. Days like this put a lot of stress on the grid because demand for electricity is higher than usual, and GMP may have to turn on “peaker plants” (infrequently used, costly power plants) to meet customer needs. Doing so costs them and, consequently, you money. However, when they have the ability to access and distribute electricity from your charged battery during these times, GMP can use that electricity to curb their need for peaker plant generation, allowing them to save money and allowing you to reap the benefits of the BYOD incentive.
During peak events like this, GMP will send you an alert four hours before drawing electricity from your battery. According to their website, peak events typically occur five to eight times a month and last, on average, three to six hours.
If you’re looking to participate in this program, keep in mind that not all types of batteries are eligible for the incentive. As of June 2020, GMP lists the following as approved options:
Tesla Powerwall 2
sonnen batteries
Sunverge batteries
SolarEdge StorEdge compatible systems (e.g. LG Chem RESU 10H)
Find out what solar costs in your area in 2020
Estimated incentives
GMP offers two payment options for this incentive: an upfront lump-sum payment or monthly bill credits spread out over 10 years.
So, how much can you benefit from this incentive? It depends on a few factors, including:
The size of your battery
The power capacity (kilowatt, kW) you allow GMP to draw from
Whether you pair your battery with a solar panel system
If you’re connecting a standalone battery directly to the grid, you’re eligible for $850 per kW of power available for at least three hours at its full capacity rating. Here’s how this plays out for a Tesla Powerwall 2:
Usable capacity: 13.5 kilowatt-hours (kWh) Storage hour requirement: 3 hours Available power: 13.5 kWh / 3 hours = 4.5 kW Upfront incentive: 4.5 kW x $850 = $3,825
Now, what about if you have a solar panel system? If you connect your solar battery directly to the grid and only use the battery on backup mode (i.e. to power your home during grid outages), you’re eligible for the upfront incentive described above. In this type of scenario, GMP would be able to recharge the battery with electricity from the grid after a peak event.
On the other hand, if you decide to connect your solar battery directly to your solar panel system and use your solar battery on “self-consumption” mode (i.e. charge your battery with solar power during the day, and run your home on stored solar power at night even when the grid is functional), you’re only eligible for an upfront payment of $850, or a fixed monthly payment of $9.65 per month. GMP would not be able to draw from your battery during peak events, but they still incentivize you for installing a solar-plus-storage system because it reduces the overall demand for electricity.
Even though you’d earn less from this GMP incentive by choosing the self-consumption route, you can earn more incentive money overall if you end up taking advantage of the federal tax credit (see below). To claim this credit, you need to charge your battery exclusively with electricity from your solar panel system.
GMP’s Tesla Powerwall pilot program
In addition to the BYOD incentive described above, GMP has another demand response program available to customers in Vermont: the Tesla Powerwall pilot program. With this program, GMP allows you to lease two Tesla Powerwalls for your home. You can participate in this pilot with or without a home solar panel system.
Similar to the BYOD program, GMP will draw electricity from the battery during peak events to help reduce stress on the electricity grid. But when the power goes out, you’ll have a source of backup energy. According to GMP’s website, the two Powerwalls will provide 16 to 24 hours worth of backup power for your whole home.
GMP offers two different leasing payment options: monthly payments of $55 for ten years, or an upfront payment of $5,500. Either way, because this is a lease, GMP owns and maintains the battery throughout the lease agreement.
GMP accepts up to 500 customers in this program each year. If you’d like to learn more about participating in this program, check out this case study (note: pricing for the program was different when we first published it in 2018!).
Federal investment tax credit (ITC)
In addition to the state-specific incentives listed above, your solar battery purchase is also eligible for the federal investment tax credit (ITC). In 2020, the solar tax credit allows you to claim up to 26 percent of the cost of your solar battery as a credit towards your federal taxes.
Importantly, standalone storage is not currently eligible for this tax credit: to claim this incentive for your battery purchase, you need to charge the battery with an on-site renewable energy resource (like rooftop solar). If you have a residential solar panel system and you charge your battery with electricity from the grid, you cannot take advantage of this credit.
However, commercial solar-plus-storage systems have a bit more leeway: if you’re installing a battery on a commercial property, you can claim the tax credit so long as your storage system is charged by your solar panel system more than 75 percent of the time, and the exact value of the credit depends on how frequently you charge your battery with renewable energy. For example, if you charge your battery with solar 80 percent of the time, it is eligible for only 80 percent of the 26 percent ITC – equivalent to a 20.8% percent credit (80% x 26% = 20.8%).
For most homeowners, the ITC can help decrease the cost of a battery by an additional $3,000 to $4,000. You can learn more about the federal investment tax credit here.
Compare battery options on EnergySage
Looking to benefit from these storage incentives (or others)? EnergySage is here to help – sign up on the EnergySage Marketplace to receive up to seven custom solar-plus-storage quotes from installers located in the Green Mountain State. If you’re interested in a particular battery system, simply note it in your account so that they can quote according to your preferences.
storage content
Find out what solar costs in your area in 2020
from Solar Energy https://news.energysage.com/solar-battery-incentives-vermont/
0 notes
Text
An overview of the Virginia Clean Economy Act (VCEA)
Reading Time: 4 minutes
Virginia may not seem like one of the best states to go solar in, but that’s all about to change: thanks to the recent passing of the Virginia Clean Economy Act (VCEA), Old Dominion is poised to become one of the most advanced (and financially advantageous!) solar markets in the country.
What is the Virginia Clean Economy Act?
The VCEA is a piece of clean energy legislation that Governor Ralph Northam signed into law on April 11th, 2020. The Act is designed to spur clean energy job creation and reduce the state’s carbon emissions primarily through the expansion of wind and solar power.
One of the most important parts of the Act is the establishment of a mandatory renewable portfolio standard (RPS), which sets Virginia on a path to reach 100 percent clean electricity by 2050. Virginia is by no means the first state to pass an ambitious clean energy target, but they are the first southern state to do so (For a deeper dive on 100 percent clean energy targets, and a list of states that have set one, see our article dedicated to the issue here.)
VCEA includes more than just clean energy targets, but some of the details are very technical and difficult to unpack. In addition to a mandatory RPS, here are a few key initiatives included in the bill:
Dominion Energy and Appalachian Power, two large investor-owned utility companies in the state, need to retire their carbon-emitting electrical generation facilities. The dates by which they need to do so depends on the type of plant (i.e., whether they burn coal, natural gas or oil) and the size of the facility.
The net metering cap for residential customers will be bumped from 20 kW to 25 kW; residential Dominion customers can also size their system to meet up to 150 percent of their annual electricity demand.
The bill establishes specific megawatt (MW) targets for offshore wind, solar, and energy storage.
There are new energy efficiency standards for utilities, including programs to support low-income populations.
The RPS includes a solar carve-out for Dominion, mandating that at least 1 percent of its renewable energy generation must come from distributed solar panel systems less than 1 MW large.
VCEA is set to go into effect on July 1st, 2020.
Find out what solar costs in your area in 2020
What does this mean for homeowners considering solar?
VCEA has positive implications for anyone considering going solar in Virginia:
Potential new solar incentives
As mentioned above, Virginia’s new mandatory RPS includes a solar carve-out, which mandates at least 1 percent of Dominion Energy’s renewable electricity generation must come from distributed solar panel systems. Importantly, the carve-out excludes solar panel systems that are more than 1 MW large, meaning this requirement will primarily be met by residential and commercial solar panel systems, rather than large-scale utility solar projects. If Dominion Energy does not meet this requirement, they have to pay a compliance payment, which paves the way for a potential new incentive offering in VA: solar renewable energy certificates (SRECs).
SRECs are a solar incentive that provides people with extra income for generating solar power; you can generate 1 SREC for every 1,000 kilowatt-hours (kWh) of solar electricity production. Utilities (like Dominion) will then purchase your SRECs to meet their solar generation requirements (and to avoid paying any non-compliance penalties).
The value of an SREC largely depends on supply and demand in a state’s market. You can see this variation play out in the SREC markets of Virginia’s neighbors: as of May 2020, people in D.C. can sell their SRECs for more than $400, while prices in Maryland are closer to $70.
The state hasn’t released much information about the mechanics of a future SREC program, but we will update this blog with any information about new incentives as they become available.
Larger solar panel installations
As far as solar panel system sizing goes, most people install a system that can meet as close to 100 percent of their electricity needs as possible. However, if you plan on increasing your electricity usage in the future–whether because you want to purchase an EV, install a hot tub, or switch to air source heat pumps– you may want to install more solar panels than you currently need to save yourself the hassle of expanding your system in the future. This hasn’t been possible for Dominion customers in the past, but now is thanks to the passing of VCEA.
If you’re a customer of Dominion Energy, you can now install a system sized to meet up to 150 percent of your annual electricity usage. While installing a larger system will likely cost more money upfront, it can help you save more over the lifetime of the system–and will help you earn more in VA’s future SREC market!
You can read more about the pros and cons of installing more solar panels than you need here.
Protection against standby fees
Utility fees can have a dramatic impact on your potential solar savings; fortunately, VCEA adds an extra layer of protection for homeowners going solar.
The bill mandates that Dominion cannot charge standby fees for their solar customers with systems less than 15 kW, raising that from the previous limit of 10 kW. VCEA also removes these fees entirely for Appalachian Power customers, regardless of system size.
Compare solar quotes from local Virginia installers
Thanks to VCEA, declining solar prices, and the soon-to-expire federal solar tax credit, there’s never been a better time to go solar in VA. Want to see how much you can save with solar? Sign up on the EnergySage Marketplace to receive custom solar quotes to compare. If you’d like to start with a quick estimate of solar costs and savings, try our Solar Calculator.
Find out what solar costs in your area in 2020
from Solar Energy https://news.energysage.com/virginia-clean-economy-act/
0 notes
Text
Solar battery incentives in Massachusetts
Reading Time: 5 minutes
Five years ago, you’d be hard-pressed to find a solar battery installation in Massachusetts – fortunately, that’s no longer the case. Thanks to declining storage costs and proven resiliency benefits, solar batteries are rapidly becoming a popular addition to solar panel systems all across the state. However, Bay Staters installing solar batteries today have more to look forward to than being able to keep their home running during power outages: a number of financial incentives available make solar batteries not only a great peace-of-mind purchase, but also a smart one for your wallet.
SMART battery incentive
If you’re considering solar in Massachusetts, you may already be familiar with the Solar Massachusetts Renewable Target (SMART) program. With this incentive, you can get paid extra for every kilowatt-hour (kWh) of electricity your solar panel system generates. But did you know that you can receive a higher incentive value by connecting your solar panel system to a battery?
Under the SMART program, homeowners who install an energy storage system are eligible for an extra “adder” to their solar incentive rate. Your adder depends on the specifics of your battery, as well as on the size of your solar panel system, but is ultimately an adder to the rate that you’re paid for each unit–kWh–of electricity your solar panels generate. The battery adder could be anywhere from an extra $0.0247 to $0.0763 per kWh of solar electricity. For an average 8 kW system in Massachusetts, this means an additional $237 to $732 in savings per year, or $2,370 to $7,320 over the 10-year duration of the SMART program payments.
Find out what solar costs in your area in 2020
Calculating the battery adder
We won’t sugar coat it; calculating your anticipated adder is…complicated:
But don’t worry about doing any manual calculations; to simplify things, the DOER provides a calculator that you can download for free on their website.
When you get down to it, there are five main factors that determine the value of your energy storage adder:
The rated power capacity of your storage system (kilowatt, kW)
The rated useful energy (or usable capacity) of your storage system (kWh)
The storage hours at rated capacity (how many hours your battery can run at its rated power capacity, equal to rated power capacity / useful energy)
The size of your solar panel system (kW DC)
The current block tranche for the adder, determined by how many people have already taken advantage of the incentive
Importantly, you need to be able to run your storage system at its rated capacity for a minimum of 2 hours in order to claim this incentive. You’ll also need to discharge your battery at least 52 times a year to qualify (i.e., at least once per week).
A note about the two-hour duration requirement
If your battery system cannot run at its rated capacity for at least 2 hours, your incentive value is recalculated to account for the portion of capacity that can run for 2 hours. As an example, consider the LG Chem RESU10H: this battery has a usable energy capacity of 9.3 kWh, and a rated capacity of 5 kW. This means that the number of storage hours at rated capacity is equal to 1.86 (9.3 kWh / 5 kW = 1.86 hours). Because this needs to meet the 2-hour requirement, you only receive an incentive for 4.65 kW of the full rated power capacity (9.3 kWh / 4.65 kW = 2 hours).
Estimated SMART incentive values
Below is an example of the adder you could earn for pairing one of these popular battery options with an 8 kW solar panel system. As of May 2020, the SMART energy storage adder is in block 7:
SMART storage adder: 8kW solar panel system, block 7
BatteryRated power capacity (kW)*Rated useful energy (kWh)Storage hoursStorage kW as a % of Solar PV kWAdder ($/kWh)Estimated 10-year incentive benefit** sonnen eco 84 kW8 kWh250%$0.0376$3,609.60 LG Chem RESU 10H4.65 kW9.3 kW258%$0.0391$3,753.60 Tesla Powerwall 25 kW13.5 kWh2.763%$0.0447$4,291.20 Generac PWRCell 124.5 kW 11.4 kWh 2.556%$0.0426$4,089.60
*Rated power capacity reflects eligible capacity given the minimum of 2 storage hours **Assumes 9,600 kWh of solar energy production each year
Generally, batteries that can run at their rated power capacity for longer periods of time receive a higher adder rate. When comparing batteries with the same storage hours at rated capacity, you’ll receive a higher adder if your storage system capacity is a larger percentage of your overall solar PV capacity (i.e. 5 kW battery / 5 kW solar panel system = 100%).
ConnectedSolutions program
If you’re a customer of Eversource or National Grid, you’re in luck: both utilities offer an incentive for their customers to install a battery under the ConnectedSolutions program.
The ConnectedSolutions program is a demand response program that pays you an annual incentive in exchange for allowing your utility company to access and use the electricity stored in your battery during times of peak demand.
For example, let’s say that temperatures in New England are higher than 100 degrees, and everyone’s blasting their air conditioning. Days like this puts a lot of stress on the grid because demand for electricity is higher than usual, and utility companies may have to turn on “peaker plants” (or temporary power plants) to meet customer needs. Doing so costs them and, consequently, you money. However, when they have the ability to access and distribute electricity from your charged battery during these times, they can use that electricity to curb their need for peaker plant generation, allowing them to save money and allowing you to reap the benefits of the ConnectedSolutions incentive.
In Massachusetts, you can receive $225 per kW during the summer events (i.e. times when they pull electricity from the battery) and $50 per kW during the winter events. If you choose to participate in this program, you’ll experience a maximum of 60 events during the summer, and 5 events during the winter. A single event can last no longer than 3 hours. Of course, your overall incentive benefit will depend on the number of events per year and how much power your solar battery can provide, but according to MassSave, “…a typical battery capable of a 5-kW continuous contribution during these events, the ConnectedSolutions program would pay $1,125 per year of participation.”
Keep in mind that not every storage system is eligible for this incentive: you can find a list of the current battery storage systems supported by the program on MassSave.
Also, if you’d like to learn more about the ConnectedSolutions program, check out our overview of the incentive.
Federal solar tax credit
In addition to the state-specific incentives listed above, your solar battery purchase is also eligible for the federal investment tax credit (ITC). In 2020, the solar tax credit allows you to claim up to 26 percent of the cost of your solar battery as a credit towards your federal taxes.
Importantly, standalone storage is not currently eligible for this tax credit: to claim this incentive for your battery purchase, you need to charge the battery with an on-site renewable energy resource (like rooftop solar). If you have a residential solar panel system and you charge your battery with electricity from the grid, you cannot take advantage of this credit.
However, commercial solar-plus-storage systems have a bit more leeway: if you’re installing energy storage on a commercial property, you can claim the tax credit so long as your storage system is charged by your solar panel system more than 75 percent of the time, and the exact value of the credit depends on how frequently you charge your battery with renewable energy. For example, if you charge your battery with solar 80 percent of the time, it is eligible for only 80 percent of the 26 percent ITC – equivalent to a 20.8% percent credit (80% x 26% = 20.8%).
For most homeowners, the ITC can help decrease the cost of a battery by an additional $3,000 to $4,000. You can learn more about the federal investment tax credit here.
Compare battery options on EnergySage
Looking to benefit from these solar incentives (and others)? EnergySage is here to help – sign up on the EnergySage Marketplace to receive up to seven custom solar-plus-storage quotes from installers located in the Bay State. If you’re interested in a particular battery system, simply note it in your account so that they can quote according to your preferences.
Find out what solar costs in your area in 2020
from Solar Energy https://news.energysage.com/solar-battery-incentives-in-massachusetts/
0 notes