#how to create template in wordpress
Explore tagged Tumblr posts
Visit Tumblr Blog
Explore Tumblr blogs with no restrictions, modern design and the best experience.
Last Seen Tumblr Blogs


Fun Fact
28.6 is the average number of monthly visits per US mobile user.
Note
Hi!!
I’ve been super inspired by your blog and want to try coding my own personal website from scratch, I’m just not sure where to go for hosting it! Is Wordpress a must even without using templates? Every resource on this turns out to be an ad for Squarespace. What worked for you/what would you recommend?
Thank you!
hi hi, i put the source code for my website up on github yesterday (link below), and as most personal blogs by like nerdy folks it doesn't use a CMS or anything but a static site generator (in my case eleventy) which allows you to write blog posts and stuff in templates with usually markdown and then compiles it all to static html files so your site requires barely any resources and doesn't really have ANY attack surface. feel free to look at how i did my site to get a bit of an idea of the possibilities!
953 notes
·
View notes
Note
Hi!! I wanted to say that I loved reading about your journey of creating a personal website. I'm still unsure between Vercel and Netlify. I have a small question to ask. See, one of the reasons I want to make a website is to archive drawings and journal/sketchbook. Would you have any tips for creating an area on my website just for the diary/journal, which has tags, files for each entry, etc.?
Bello!

Really happy to hear about your interest in websites! I want everyone to make their own site so I don't have to log into social media and get instant tummyaches ♥
Vercel vs Netlify: I think I settled on Vercel for absolutely no reason whatsoever. I just made a site on Netlify, then tested on Vercel, and now I have like 5 websites on Vercel so I just kept using it LOL. I'm sure a more tech-savvy person would know the difference - I think they have certain integrations with specific programs.
Creating a diary or journal with tags:
There's a couple of different ways you can do that, with different levels of work needed.
you got me yapping again:
This sadgrl tutorial might be outdated and may or may not work, but explains the process better than I can.
Easiest: make a journal on Dreamwidth, or another blogging site (wordpress??) that allows easy tags and RSS feed, and embed that RSS feed onto your site.
This requires almost no HTML set-up, and the easiest to organize tags, but you don't truly have the data on your own site since it's just embedded.
When I snuck into a web design class at college, this was one of the methods that the professor used for a blog within a portfolio site LOL.
Shit like wordpress is what a LOT of ~professional~ sites do for their blog section. They code it separately from the main site haha. It's the most popular thing, but not necessarily the best. And wait til you read on what the CEO of wordpress has been having meltdowns about... he owns tumblr too!
It's made with a tutorial for Neocities if that's what you use.
Medium: Set up zonelets.
It will require some HTML and JS editing, but will help automate making headers/footers for each page of a blog.
I've never used it myself, but I see other people speak highly of it.
HARD FOR ME CUZ I'M A GORILLA: I believe a lot of professional web devs will slap your face with their coding cock until you use a static site generator (SSG) to make your site.
You will need some coding knowledge to set up the tagging system since it doesn't come with it enabled by default. But it's made explicitly to be an alternative to big Static Site Generators which are...
It requires some more intimidating knowledge, because it's a lot of scripts that turn files that are not HTML/CSS/JS into plain HTML.
Also you have to use the command line, and that doesn't come with buttons that tell you what you can do. You have to copy/paste all that shit or memorize the code to 'dev build astro' and it all looks silly.
I've used Eleventy, and now am using Astro. Other people use Hugo or Jekyll or some other stuff with crazy names like Glup Shitto. I hate all these sites cuz none of the words mean anything to me. This is a common theme for me and tech. I don't know what NODES or CONTENT or ISLANDS are!!!
I had the most success attempting to learn how to use a SSG by downloading a template and altering it with github + VScodium. Here's the template page for Astro. You click on a theme you like, and it takes you to its github page. (If you don't want to use evil Microsoft stuff sorry. Skip this entire section.) Follow the instructions on the page for "forking" the glup shitto. When it tells you to run commands, I run those commands through the terminal window in VScodium. These tutorials never tell you what these commands do cuz they assume you already know. Usually those commands automatically install the files you need onto your computer, and create the final files.
You can see my wip here for a "tag system" that SHOULD show members of a web listing haha but I don't know what I'm doing and I have a reading disorder AND don't know cumputer good.
THEORETICALLY this will be the simplest and easiest way to maintain tags and files, because after you set it up you just have to write the "content" of the blog page. And you don't have to set up the header/footer ever again. I see the vision, and potential, but I am not there yet when it takes me 5 hours a day to figure out what any of the words in the documentation mean and I don't want to ask an actual tech person cuz they will be like 'obviously just press the Blip on the Repository and then Suck My Ass in the command line".
(side note I haven't updated fujofans in like a year cuz I'm struggling with this part to make updating easier).
Con: the final HTML/CSS code is really ugly if it's "minified", and a lot of themes use """"""professional"""""" CSS libraries like Bootstrap and Tailwind that I honestly think are ugly cuz that's what every fuckin' tech website uses to style their pages and make them look Professional and Minimalist with stupid code like style="500-w dark-gray-balls D-cup-bra" on every single element. Even Toyhouse uses Bootstrap. Eugh!
But maybe you're smarter than me and can wrangle these things better!
That was really long. Woops. I hope you can slug through this wall of text and find something helpful. Feel free to email me if you have any more specific questions. I may or may not be helpful.
If someone else sees this and has better suggestions for making BLOGS, please chime in. I'm begging you.
64 notes
·
View notes
Note
I've been poking around your website, I really like it.
I'm inspired to put together my own silly site, you've made a lot of posts about that. I know how to get started with a website builder or whatever, but that's kind of boring.
I'd like to imitate the look of Ao3's log in page.
I have several specific Ao3 searches that the 'favorite tag' section just can't manage. I have all of those links in a google docs but it's boring and clumsy. I want buttons to press.
Your website mimics wiki, so... can you point me in the direction to get started mimicing Ao3?
My website doesn't just mimic wikipedia, it is a MediaWiki site, which means that from the ground up the software it's running on is the same software as Wikipedia. When I write pages, I'm using wiki markdown ==Like This== for section subheads and [[like this]] to direct to other pages on the site, etc.
The reason that I chose to do this is because it's relatively easy to set up a site this way; I don't know enough about CSS to get a site to look like Wikipedia without running it on mediawiki software, and I don't know enough about CSS to get something to look like Ao3 without running it on OTW software.
Like MediaWiki, the OTW archive software is also open source, so you theoretically could set up a literal archive of your own, but it is not *easy.*
Walter from Squidge.org has created documentation for implementing OTW's software and has talked about helping others to set it up as well, so that is one option.
If that's not the kind of labor you're looking for (and it won't be for a lot of people! it certainly wasn't for me!) you could try something like using a site like wordpress and building a custom template. That would *also* be a lot of work (in terms of learning CSS) but might be easier than figuring out the whole backend as well as getting the visuals you want.
88 notes
·
View notes
Text
Once More - On Creating a Personal Website
Over the weekend, I wrote the above post on my main blog about a new FREE webhost called Nekoweb. While I still use Neocities myself, I just wanted to toss this out here as an alternative, especially given where sites like this and WordPress are going in terms of the lack of your content's safety and your control of your work.
Learning basic HTML is pretty straightforward, and there's lots of templates out there to get you started. Once you get the hang of it, you might surprise yourself with how much fun you have designing your own site and not being held back by anyone else's design and content choices!
The cool thing is, you can make your own website, then link your stuff here (like I did above) to share it to any social media you like. But it's not TIED specifically to Tumblr or X or Bluesky because you host it somewhere else. So, you can still post it to social media to get the word out about your writing or art, while maintaining control of where it lives in the long run.
HTML files can be backed up. So if something happens to your host, as long as you keep your website files on your computer or other media, you can always turn around and upload it to a new host. No fear of having your stuff wiped forever because it's locked in a social media account database you can never reach.
Just some considerations!
113 notes
·
View notes
Note
Hey Krad, do you have any advice for starting a website like yours? I love the idea of starting a website to host my fandom and personal portfolio, and maybe get back a piece of the old internet. How did you put yours together?
hey there! great question, and the good news is there's a lot of ways to go about it.
the bad news is, there's a lot of ways to go about it.
to simplify things, there's kind of ... three "tiers" to the back-end of how to create a website. let's break it down below.
high ease, low customization. (wix, weebly, squarespace, etc. you pay a company + they give you a bunch of themes and pre-made pages for you to drop images in.) can have one of these online in 2-3 hours, but it often "feels" templated and sterile.
medium ease, medium customization. (making a theme from scrach with tumblr's custom code editor, hybrid sites with some pages in pure code, some with wordpress grafted onto some subdomains). this is what i'd classify my site as, as I use wordpress for my logs for brainless updating. while i'm confident coding single/static pages, i just don't have the time or brainwidth right now to make a complex archiving system.
low ease, high customization. (neocities, pure html/css/coding). the downsides to this is oftentimes these sites are not phone-friendly, and there's a steep learning curve. but for the quintessential "old internet" experience, by far the best route to take. there's also something really empowering about learning why things work the way they do.)
some of this can be super intimidating if you're starting from 0 coding knowledge; there's no shame in switching to a templating software. hell i started with weebly and dicking around in tumblr's custom code template for a solid 5 years before making my current site, and that was with a previous 5 years of sketchy html experience) you're not gonna learn everything overnight.
but! as long as you keep a curious and inquisitive mind, you can't go wrong.
one last encouragement: there's kind of a mini renaissance with custom sites right now, especially in neocities circles, so you're kinda in luck in that there's more resources than ever. i love scumsuck's guides, and fancoders (the community) is also all over this too.
good luck!
60 notes
·
View notes
Text
What is a Website? A Complete Beginner’s Guide

In today’s digital age, having an online presence is not a luxury — it’s a necessity. Whether you're a business owner, content creator, or just someone curious about the web, understanding what a website is and how it functions is essential. In this guide, we’ll cover everything you need to know about websites, their components, types, benefits, and how to create one.
What is a Website?
A website is a collection of publicly accessible web pages that are linked together and share a single domain name. These pages are hosted on a web server and can include text, images, videos, forms, and other elements that users interact with online.
In simpler terms, a website is your virtual space on the internet — like your home or office in the digital world. It allows you to communicate, sell, educate, entertain, or showcase anything to a global audience.
Why is a Website Important Today?
In a world dominated by smartphones, search engines, and social media, a website acts as your central hub online. Here's why it’s important:
Visibility: A website helps you appear in search results when people look for your products, services, or information.
Credibility: A professional-looking site builds trust among your audience.
Accessibility: Your website is available 24/7, allowing customers to reach you anytime.
Marketing: It's the foundation for all your digital marketing efforts.
Sales: With e-commerce, your website can directly generate revenue.
Core Components of a Website
Every website has several key components that make it function properly:
1. Domain Name
This is your site’s address (e.g., www.digitalcreator.org.in). It’s what users type in their browser to visit your site.
2. Hosting Server
Web hosting stores your website’s data and serves it to users when requested.
3. Content Management System (CMS)
A CMS like WordPress, Joomla, or Shopify makes it easy to build and manage content on your website without coding.
4. Web Pages
These include the homepage, about us, contact, services, blog, etc., that make up your website.
5. Navigation
Menus and internal links guide visitors through your website.
Types of Websites
Different websites serve different purposes. Here are some common types:
1. Business Website
Used by companies to promote services, share information, and connect with clients.
2. E-commerce Website
Allows users to buy and sell products online. Examples include Amazon and Flipkart.
3. Portfolio Website
Ideal for creative professionals to showcase their work.
4. Blog or Personal Website
Used by individuals to share ideas, stories, or niche content regularly.
5. Educational Website
Used by schools, institutions, or educators to provide learning materials.
6. Non-profit or Government Website
Focused on delivering information and services to the public.
How to Create a Website (Step-by-Step)
Creating a website doesn’t require you to be a tech expert. Follow these steps:
Step 1: Choose a Domain Name
Pick a short, relevant, and memorable domain name. Make sure it reflects your brand or purpose.
Step 2: Get Web Hosting
Choose a reliable hosting provider like Bluehost, SiteGround, or Hostinger.
Step 3: Select a CMS or Website Builder
Use platforms like WordPress, Wix, or Shopify to start building your website.
Step 4: Design Your Website
Choose a theme or template. Customize colors, fonts, and layout to match your brand.
Step 5: Add Content
Create and publish pages like Home, About, Services, and Contact. Use quality visuals and optimized text.
Step 6: Optimize for SEO
Use keywords (like website) naturally, optimize images, and ensure fast load speed.
Step 7: Launch and Promote
Once satisfied, make your website live. Share it on social media and start your SEO or ad campaigns.
Best Practices for a Great Website
Responsive Design: Ensure your site works well on all devices.
Fast Loading Speed: Use compressed images and optimized code.
Clear Navigation: Make it easy for users to find what they need.
Secure (HTTPS): Use an SSL certificate to protect data.
Call-to-Action (CTA): Guide visitors toward actions like “Buy Now” or “Contact Us.”
Examples of Great Websites
A well-designed and fully functional example is www.digitalcreator.org.in. It demonstrates how a website can showcase services, build trust, and attract new clients efficiently.
LSI Keywords to Keep in Mind
While writing or optimizing your website, include these Latent Semantic Indexing (LSI) keywords to enhance search performance:
Web design
Online presence
Website development
Internet site
Web page
Digital platform
Domain and hosting
CMS (Content Management System)
Website builder
E-commerce site
Frequently Asked Questions (FAQs)
1. What is the purpose of a website?
A website helps individuals or businesses share information, sell products, provide services, or connect with others online.
2. How much does it cost to build a website?
Costs vary based on design, features, and hosting. Basic websites can cost as low as ₹3,000–₹10,000, while advanced ones may go up to ₹1 lakh or more.
3. Do I need coding skills to create a website?
No. Tools like WordPress or Wix allow you to build a full website without writing any code.
4. How long does it take to build a website?
A simple website can be built in 1–2 days. More complex sites may take a few weeks.
5. What makes a website successful?
A successful website is user-friendly, fast, mobile-optimized, secure, and offers valuable content with clear calls-to-action.
Conclusion
Understanding what a website is is the first step toward establishing your digital footprint. Whether you're planning to launch a personal blog, online store, or professional portfolio, your website will serve as the foundation of your online presence.
If you're ready to build or improve your website, visit www.digitalcreator.org.in — your one-stop destination for digital marketing and website development solutions.
2 notes
·
View notes
Note
Do you use any particular CMS for your website to make managing pages easier? Genuinely interested in how your backend runs. Hope this question is okay!
No, I am a fool and I do all updates manually. If you look at any of the pages you'll see it's static html, with occasional forays into javascript to make some of the navigation tricks work. I do use tumblr for the update blog since it creates an RSS feed for the like five people who still use them, but that's about it.
I think you should use a CMS if you can find one that does what you want, but don't let that prevent you from ever starting at all. If you don't mind updates taking a little extra time, just do it all in html. It's future-proofed, any shmuck can learn it in a day :) Personally, I needed something uber flexible that would let me change whatever I needed in the template whenever I needed to change it, and I couldn't figure out how to make Wordpress do that. So I did it my way and it's worked just fine.
24 notes
·
View notes
Text
Why Your Business Needs Expert WordPress Development?

1. WordPress: The Platform Built for Growth
WordPress powers over 40% of websites globally—and for good reason. It’s flexible, customizable, and SEO-friendly. Whether you need a sleek portfolio, a content-driven blog, or a high-converting e-commerce store, WordPress adapts to your business needs.
But just having a WordPress site isn't enough. You need experts who know how to unleash its full potential. That’s exactly where expert WordPress website development services step in to make a real difference—turning ideas into digital experiences that work.
2. Custom WordPress Web Design That Reflects Your Brand
Think of your website as your digital storefront—it should feel like your brand, speak your language, and instantly connect with your audience. Generic templates and cookie-cutter designs just don’t cut it anymore.
At Cross Atlantic Software, our team specializes in creating fully customized WordPress web design solutions. We take the time to understand your brand, audience, and business goals—then design a website that communicates your identity with clarity and impact.
From choosing the right color palettes and typography to structuring user-friendly navigation and responsive layouts, our designs are both beautiful and functional.
3. Speed, Security, and Scalability by Professional Developers
Having a fast, secure, and scalable website is crucial—not just for user experience but also for search engine rankings.
Our skilled WordPress web developers at Cross Atlantic Software don’t just build websites—they engineer digital experiences. We optimize every aspect of your site, from lightweight coding to secure plugins and future-ready architecture.
Whether it’s integrating payment gateways, custom plugins, or third-party APIs, our developers ensure that your site runs smoothly and grows with your business.
4. Search Engine Optimization (SEO) Built-In
What good is a stunning website if no one finds it?
A professional WordPress site should come optimized from the ground up. We integrate best SEO practices into the development process, including keyword placement, metadata, mobile responsiveness, site speed, and more.
This means your website won’t just look good—it will perform well in search results, helping you attract more organic traffic and potential customers.
5. User Experience That Keeps Visitors Coming Back
Today’s users are impatient. If your website is clunky, confusing, or slow, they’ll bounce within seconds.
Our WordPress website development services focus on creating seamless user experiences—fast-loading pages, intuitive navigation, clear call-to-actions, and a design that adapts across all devices.
Great UX doesn’t just please your visitors—it builds trust and drives conversions.
6. Looking for “WordPress Experts Near Me”? We’ve Got You Covered
We know how important it is to work with a team that understands your market. Whether you're searching for WordPress experts near me or want a team that communicates closely and understands your local business context, Cross Atlantic Software bridges the gap.
We offer both local and remote development services, with dedicated project managers who ensure smooth communication and progress at every step.
So, even if we’re not just around the corner, we work as if we are—collaboratively, transparently, and efficiently.
7. You Deserve the Best WordPress Designers Near You
A good design is more than just visual appeal—it’s a strategic asset.
Our WordPress designers near me service ensures you get the best of both creativity and conversion strategy. We blend aesthetics with analytics to craft websites that not only look great but also guide your visitors towards taking action—whether that’s filling out a form, making a purchase, or signing up for your newsletter.
8. Reliable Support and Maintenance
Launching a site is just the beginning.
We offer ongoing support, maintenance, backups, and updates to ensure your website stays healthy and competitive. If you ever run into issues or want to scale, our team is just a call or click away.
In a digital landscape that’s constantly evolving, your website should not only keep up—but lead. Don’t settle for average. With Cross Atlantic Software, you get access to top-tier WordPress website development services that are tailored, tested, and trusted.
Whether you're looking for WordPress web design, reliable WordPress web developers, or trying to find the best WordPress experts near me, we’re here to help.
#wordpress web design#WordPress web developers#WordPress experts near me#WordPress website development services
2 notes
·
View notes
Text

Step-by-Step Guide to Selling Digital Products with Ease
The digital economy is booming, and selling digital products—like eBooks, courses, templates, or printables—has never been more accessible. With low startup costs and limitless scalability, it’s an ideal venture for creators and entrepreneurs. Here’s how to start your journey effortlessly:
1. Identify Your Niche & Audience
Begin by pinpointing a niche you’re passionate about and that has demand. Research communities on social media, forums, or platforms like Reddit to understand pain points. For example, if you’re skilled at graphic design, consider offering Canva templates for small businesses. Narrowing your focus helps you stand out.
2. Validate Your Idea
Before investing time, validate demand. Use surveys, polls, or pre-sale offers to gauge interest. Share a concept on Instagram or LinkedIn and ask followers if they’d buy it. Tools like Google Forms or Gumroad’s pre-order feature can simplify this step.
3. Create Your Product
Focus on quality and usability. Use tools like Canva for design, Teachable for courses, or Adobe Audition for audio guides. Keep it simple—start with one product (e.g., a PDF workbook) before expanding. Ensure it’s professionally presented and solves a specific problem.
4. Choose a User-Friendly Platform
Select a platform that handles hosting and sales. Options like Gumroad, Ko-fi, or Etsy are beginner-friendly. For more control, use Shopify or WordPress with WooCommerce. Prioritize platforms with built-in marketing tools and analytics.
5. Set Up Payments & Pricing
Integrate secure payment gateways like Stripe or PayPal. Price your product strategically: research competitors, consider value-based pricing (e.g., $29 for a time-saving template bundle), or offer tiered options (basic vs. premium).
6. Launch & Market Smartly
Build anticipation before launching. Share snippets on social media, collaborate with micro-influencers, or offer limited-time discounts. Use email lists (start with free lead magnets) and SEO-friendly product descriptions to drive organic traffic.
7. Prioritize Customer Support
Automate delivery using platforms like SendOwl to avoid manual work. Create a FAQ section and respond promptly to queries. Positive reviews boost credibility, so encourage feedback with follow-up emails.
8. Analyze & Scale
Track sales and customer behavior with analytics tools. Identify top-performing marketing channels and double down. Expand your offerings based on demand—turn a popular eBook into a video course, or bundle products for upsells.
Final Thoughts
Selling digital products is a rewarding way to monetize your skills. By starting small, validating ideas, and leveraging the right tools, you can build a sustainable online business with minimal friction. Ready to launch? Your audience is waiting!
Take the first step today—create, share, and grow. The digital world is yours to conquer.
(Word count: 500)
This guide balances actionable steps with encouragement, ensuring readers feel empowered to start their digital product journey without overwhelm. Each section is concise, with practical examples to inspire immediate action.
#explore#digital marketing#digital product#selling#Sell digital products#Digital product creation#Online business ideas#Passive income strategies#Niche research#Audience validation#Low startup costs#Digital product platforms (e.g.#Gumroad#Etsy#Shopify)#Value-based pricing#Email list building#Social media marketing#SEO-friendly content#Customer support automation
2 notes
·
View notes
Text
How to Make Passive Income Online
In today’s digital age, making passive income online has become more accessible than ever. Passive income allows you to earn money with minimal ongoing effort after the initial setup. Whether you want to supplement your existing income or build a full-time online business, there are various ways to generate passive income. Here are some of the best methods:
1. Start a Blog
Blogging can be a great way to earn passive income by monetizing content through ads, affiliate marketing, and digital product sales.
How It Works: Write high-quality content targeting a specific niche.
Income Sources: Display ads, sponsored posts, and affiliate marketing.
Tools Needed: A domain, hosting service (like Bluehost or SiteGround), and a content management system like WordPress.
Tip: Focus on SEO to attract organic traffic.
2. Create and Sell Online Courses
If you have expertise in a particular field, you can create and sell online courses on platforms like Udemy, Teachable, or Skillshare.
How It Works: Develop structured course content and upload it to an online learning platform.
Income Sources: One-time purchases or subscription-based access.
Tools Needed: Video recording equipment, course planning software, and an LMS (Learning Management System).
Tip: Offer free mini-courses to attract students and upsell premium content.
3. Affiliate Marketing
Affiliate marketing involves promoting other companies’ products and earning a commission for each sale generated through your referral link.
How It Works: Share affiliate links in blog posts, social media, or YouTube videos.
Income Sources: Commissions from product sales.
Tools Needed: An affiliate program like Amazon Associates, ShareASale, or CJ Affiliate.
Tip: Promote products you genuinely use and trust.
4. Sell Digital Products
Selling digital products is a great way to make passive income because they require no inventory or shipping.
How It Works: Create eBooks, templates, printables, stock photos, or software and sell them online.
Income Sources: Sales through platforms like Gumroad, Etsy, or Shopify.
Tools Needed: Design software like Canva, Adobe Photoshop, or a digital marketplace.
Tip: Automate delivery using online platforms.
5. Invest in Dividend Stocks
Dividend stocks allow you to earn passive income through regular payouts from companies in which you invest.
How It Works: Buy shares in dividend-paying stocks and collect payouts.
Income Sources: Stock dividends.
Tools Needed: A brokerage account like Robinhood, Fidelity, or Vanguard.
Tip: Reinvest dividends to compound your earnings over time.
6. Create a YouTube Channel
YouTube offers multiple monetization options, making it a lucrative passive income source.
How It Works: Upload engaging videos on a topic of interest.
Income Sources: YouTube AdSense, sponsorships, and affiliate marketing.
Tools Needed: A good camera, microphone, and video editing software.
Tip: Be consistent and create valuable content to grow your audience.
7. Dropshipping Business.
How It Works: Set up an online store and partner with a supplier.
Income Sources: Profit margins from product sales.
Tools Needed: Shopify, WooCommerce, or BigCommerce.
Tip: Focus on trending products with high demand.
8. Sell Stock Photos & Videos
If you’re a photographer or videographer, selling stock images and videos can be a great passive income stream.
How It Works: Upload high-quality images and videos to stock websites.
Income Sources: Royalties from stock websites like Shutterstock, Adobe Stock, or Getty Images.
Tools Needed: A professional camera and photo editing software.
Tip: Research in-demand content to maximize earnings.
9. Write and Sell an Ebook
If you have knowledge or experience in a subject, writing an eBook can generate passive income.
How It Works: Publish an eBook and sell it on platforms like Amazon Kindle or Gumroad.
Income Sources: Royalties from book sales.
Tools Needed: Writing software like Scrivener or Microsoft Word.
Tip: Promote your book through social media and blogging.
10. Rent Out Property on Air.
If you own property, you can rent it out on Airbnb for short-term stays.
How It Works: List your property and manage bookings.
Income Sources: Rental income from guests.
Tools Needed: An Airbnb account and a well-furnished property.
Tip: Optimize your listing with high-quality photos and great customer service.
3 notes
·
View notes
Text
Best Web Design and Hosting for Small Business
User experience (UX) is a top priority for a successful small company website. This features responsive layouts that guarantee smooth surfing across devices, clear information hierarchy, and easy navigation. Websites should captivate users with eye-catching graphics, excellent photos, and interactive features that are consistent with the brand's identity. For small businesses looking to establish a strong online presence, investing in quality web design and reliable hosting is paramount.
Creating a powerful brand identity is essential. In order to create a unified image that makes an impression on visitors, this entails using logos, colors, and font consistently throughout the website. Retaining user interest also requires interesting material that speaks to the demands of the target audience, including educational blog entries and captivating product descriptions.
How to Make a Website for a Small Business
Select a User-Friendly Website Builder: Website construction is made easier by the intuitive interfaces of platforms like as Squarespace, Shopify, and Wix. Because these builders frequently have drag-and-drop capabilities, consumers can alter their websites without knowing any code23.
Choose a Domain Name and Register It
A memorable domain name is crucial for internet branding and represents your company's identity. Make sure it is pertinent to your services and simple to spell.
Select a Trustworthy Web Hosting Provider
The performance of the website depends on the hosting provider selection. Important things to think about are:
Uptime Promise: To reduce downtime, look for hosts that have 99.9% uptime.
Loading Speed: To improve user experience, try to keep page load times under three seconds.
Features of Security: To safeguard your site2, be sure the server offers SSL certificates, frequent backups, and virus detection.
Customer service: For prompt problem solving, round-the-clock assistance can be essential.
Create the Visual Identity for Your Website
Make an eye-catching layout that complements the style of your brand. Make use of top-notch photos and keep design components consistent.
Plan the Navigation and Site Structure
Logically arrange your information to make it easier to navigate. A site with a clear structure makes it easier for people to find information fast.
Create Key Pages
Home, About Us, Services/Products, Blog, and Contact Us are all important pages. Every page should contribute to the general objectives of the website while fulfilling a distinct function.
Top Web Design Platforms for Small Businesses
WordPress:
Flexible and customizable with thousands of plugins and themes.
Ideal for businesses looking for scalability and SEO features.
Wix:
Drag-and-drop functionality for easy website creation.
Suitable for businesses without technical expertise.
Squarespace:
Modern templates and built-in e-commerce features.
Perfect for visually appealing designs.
Shopify:
Best for small businesses focused on e-commerce.
Features include inventory management, payment integration, and analytics.
Weebly:
Affordable and user-friendly.
Ideal for small businesses needing basic functionality.
#Best Web Design and Hosting for Small Business#website#website design#seo services#digital marketing#web design#web development#usa news#usa
3 notes
·
View notes
Text
Elitehost - The Ultimate Web Hosting & WHMCS WordPress Theme
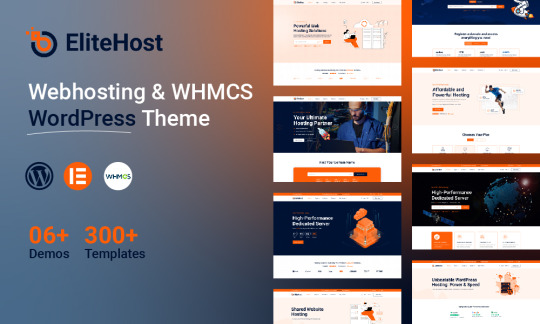
Are you ready to take your web hosting business to the next level? Meet Elitehost, the all-in-one WordPress theme crafted specifically for hosting providers, domain resellers, and web service businesses. Packed with powerful features, a modern design, and seamless WHMCS integration, Elitehost makes it easy to create a professional, user-friendly website that stands out from the competition.
Why Choose Elitehost for Your Hosting Business?
Elitehost is more than just a WordPress theme—it's a complete solution for web hosting businesses. Whether you’re starting from scratch or upgrading your existing site, Elitehost offers everything you need to succeed.
Key Features of Elitehost WordPress Theme
WHMCS Integration
Manage billing, client accounts, and support with WHMCS, the leading automation platform for hosting businesses. Elitehost includes a WHMCS template compatible with the latest version (8.8+).
Elementor Page Builder
Build stunning pages with drag-and-drop ease using the Elementor Page Builder. Customize every element to match your brand’s identity without any coding.
One-Click Demo Import
Get your site up and running in minutes with pre-built demos. Import content, layouts, and styles with a single click, saving you time and effort.
Live Domain Search
Provide an effortless domain search experience with Elitehost’s AJAX-powered live domain search. Visitors can find and register domains quickly and easily.
Currency Converter
Enhance the user experience with real-time currency conversion, making it easier for international clients to understand your pricing.
Responsive and SEO-Optimized Design
Elitehost ensures your site looks great on all devices while helping you climb search engine rankings with its SEO-friendly structure.
Multiple Layout Options
Choose from multiple header and footer layouts to create a unique look. With over 50+ inner pages, you can easily showcase your services, plans, and business information.
Lifetime Updates and Support
Enjoy lifetime free updates and reliable support to keep your site running smoothly.
Who is Elitehost For?
Elitehost is perfect for:
Web Hosting Companies: Streamline operations with WHMCS and showcase hosting plans effortlessly.
Domain Resellers: Provide a smooth domain registration process with live search and other tools.
Tech Startups: Launch a professional website with cutting-edge features in no time.
Agencies: Build hosting websites for clients with customizable layouts and an intuitive builder.
How to Get Started with Elitehost?
Purchase and Install
Buy Elitehost from ThemeForest and install it on your WordPress site.
Import the Demo
Use the one-click demo import feature to set up a fully functional website instantly.
Customize Your Site
Use Elementor to modify pages, headers, and footers to align with your brand.
Integrate WHMCS
Connect WHMCS for automated client management and billing.
Launch and Promote
Go live and start promoting your site through SEO, social media, and online marketing.
Conclusion
Elitehost is the ultimate WordPress theme for hosting businesses. With its robust features, WHMCS integration, and modern design, it’s never been easier to create a professional and engaging website. Whether you're a startup or an established business, Elitehost provides the tools you need to attract customers and grow your hosting services.
Ready to elevate your hosting business? Explore Elitehost today on ThemeForest and experience the difference!
2 notes
·
View notes
Text
👉 Neuro Review ✅ Features, Pricing, Bonuses, Discount and OTOs 🚀

🧠 Overview
Neuro Review is a cutting-edge AI-powered tool designed to simplify content creation, video editing, and marketing efforts by leveraging advanced automation and analytics. Perfect for marketers, content creators, and small business owners. 🚀
👉 Click Here for Get Instant Access Neuro 🖰 >>


👉 Click Here for Get Instant Access Neuro 🖰 >>
✨ Features of Neuro Review
AI-Powered Content Creation 🖋️ Automatically generates high-quality, SEO-friendly articles, product reviews, and blog posts.
Video Review Editor 🎥 Create and edit product review videos with ease using templates and AI assistance.
Voiceover Generator 🎙️ AI-powered voiceovers in multiple languages and accents.
Analytics Dashboard 📊 Track performance metrics like views, engagement, and conversions.
Integration Capabilities 🔗 Works seamlessly with platforms like WordPress, Shopify, and YouTube.
Multilingual Support 🌍 Expand your reach with content and videos in multiple languages.
User-Friendly Interface 😌 Intuitive and beginner-friendly design to save time and effort.
💲 Pricing
Front-End Plan: Starts at $47 one-time. Includes core features like content creation and video editing.
OTO 1: Pro Version 🚀: Price: $97 one-time Unlock advanced features like unlimited projects, premium templates, and analytics.
OTO 2: Agency License 🏢: Price: $197 one-time Offers agency rights, client management tools, and bulk project handling.
OTO 3: Reseller License 🔁: Price: $297-$497 Allows you to sell the tool and keep 100% of the profits.
👉 Click Here for Get Instant Access Neuro 🖰 >>
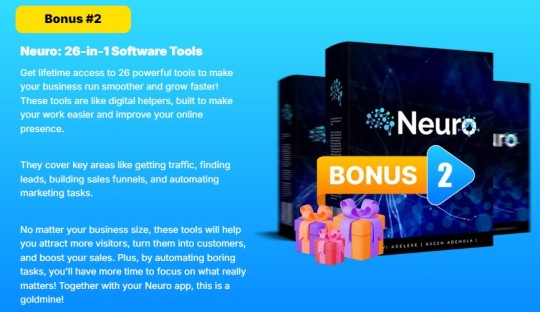
🎁 Bonuses
When purchasing Neuro Review through promotional links, you may receive:
Exclusive Training Videos 📚 Master the platform and its features with detailed tutorials.
Content Marketing Toolkit 🛠️ E-books and resources to enhance your marketing strategy.
Custom Templates 🖼️ Unique designs for faster project completion.
Lifetime Updates 🔄 Stay ahead with the latest features at no extra cost.

👉 Click Here for Get Instant Access Neuro 🖰 >>

👉 Click Here for Get Instant Access Neuro 🖰 >>


👉 Click Here for Get Instant Access Neuro 🖰 >>
🔥 Discounts and Special Deals
Early Bird Offer: Get 20% off during the launch week.
Bundle Discount: Save up to 30% by purchasing the full OTO package.
Use Coupon Code: 30% Off Cyber Monday Offer For The First 25 People!
🚀 Why Choose Neuro Review?
Saves time with automation.
Boosts productivity and engagement.
Offers versatility with content and video creation tools.
👉 Click Here for Get Instant Access Neuro 🖰 >>
💬 Final Thoughts
Neuro Review is an excellent choice for anyone looking to streamline content and video marketing efforts. With its advanced features and competitive pricing, it's a must-have tool for modern marketers. 🌟

👉 Click Here for Get Instant Access Neuro 🖰 >>
Frequently Asked Questions!
Q. Do I need any experience to get started?
None, all you need is just an internet connection.
And you’re good to go
Q. Do I need to purchase anything else for it to work?
Nop, Neuro is the complete thing.
You get everything you need to make it work. Nothing is left behind.
Q. Is there any monthly cost?
Depends, If you act now, NONE.
But if you wait, you might end up paying $997/mo
It’s up to you.
Q. How long does it take to make money?
Our average member made their first sale the same day they got access to Neuro.
Q. What if I failed?
While that is unlikely, we removed all the risk for you.
If you tried Neuro and failed, we will refund you every cent you paid
Q. How can I get started?
Awesome, I like your excitement, All you have to do is click any of the buy buttons on the page and secure your copy of Neuro at a one-time fee
👉 Click Here for Get Instant Access Neuro 🖰 >>
#apollo neuro review#apollo neuro#neuro review#review#nclex neuro review#apollo neuro reviews#apollo neuro device#neuro#neuro nclex review#brooks neuro review#reviews apollo neuro#reviews#reviews of apollo neuro#apollo neuro review reddit#apollo neuroscience review#nclex review neuro disorders#neuro disorders nclex review#apollo review#neurogum review#apollo neuro review: hrv training with vibration#apollo neuro band#board review#nclex review#marketing#affiliatemarketing#onlinemarketing#software#preview#digitalmarketing
2 notes
·
View notes
Text
How to Quickly Duplicate a Page in WordPress for Easy Reuse

Duplicating a page in WordPress is a fast and efficient way to replicate content or layouts without having to start from scratch. WordPress itself doesn’t offer an option for this, but with the right approach, it’s easy to learn how to duplicate an entire page in WordPress. For a step-by-step guide, check out our article on How to Duplicate a Page in WordPress.
Why Duplicating a Page is Useful
There are several reasons you might want to duplicate a page:
You need a similar layout for different pages on your site.
You want to quickly create landing pages for marketing campaigns.
You’re making updates to a page but want to keep the original version as a backup.
How to Duplicate an Entire Page in WordPress
The two main ways to duplicate a page in WordPress are through plugins or manually copying content.
Duplicating with a Plugin
Using a plugin is the easiest and quickest method to make a duplicate page. Here’s how:
Install and activate a plugin like "Duplicate Post" or "Duplicate Page."
Go to your WordPress dashboard and navigate to "Pages."
Hover over the page you wish to duplicate and click on "Clone" or "Duplicate."
A new draft will be created with the same content, layout, and settings as the original.
This method ensures you don’t miss any important page settings or SEO configurations.
Manually Copying a Page
Another option is to manually duplicate a page by copying the content from the original page into a new draft. However, you’ll need to reapply any settings like SEO, featured images, or custom templates.
How Do I Duplicate a WordPress Site?
If you need to go beyond just a page and duplicate your entire WordPress site, tools like "Duplicator" or "All-in-One WP Migration" are designed for this purpose. To duplicate a WordPress site, you’ll need to:
Install one of these migration plugins.
Export your current site’s data.
Import the site backup into a new WordPress installation.
Make adjustments to URLs and settings as needed for the new site environment.
This method will give you a complete copy of your site, including all content, settings, and plugins.
Best Practices for Duplicating Pages
Duplicating pages can be a powerful tool in your website management. Whether for A/B testing, marketing campaigns, or simply saving time, knowing how to duplicate an entire page or even a full site can help streamline your workflow. Keep in mind that using plugins for this task is much faster than manually duplicating content, especially if you’re handling multiple pages.
Conclusion
Duplicating a page in WordPress is a simple process, especially with the right tools. Whether using a plugin or doing it manually, the ability to easily replicate content can save you time and effort. For more details on how to duplicate an entire page in WordPress, check out our full guide on How to Duplicate a Page in WordPress.
3 notes
·
View notes
Text

Best Offline Website Builder Software: Building Websites without Internet
In today's world, having an online presence is vital for businesses and individuals alike. Whether you’re a small business owner, a freelancer, or someone looking to showcase your portfolio, having a website is no longer a luxury—it's a necessity. While plenty of online website builders are available, such as Wix, Squarespace, and WordPress, not everyone has access to a stable internet connection. This is where offline website builders come in handy.
Offline website builder software allows you to create, edit, and design websites without being connected to the internet. Once your design is complete, you can publish it online when you’re ready. These tools are excellent for those who prefer to work on their websites offline, whether due to limited internet access or personal preference. In this article, we'll explore some of the best offline website builder software available, and their features, pros, and cons.
Why Choose Offline Website Builders?
Before diving into the best offline website builders, let’s first discuss why you might want to use an offline builder over an online one. There are several reasons why someone might prefer to work offline:
No Need for Constant Internet Access: With offline website builders, you can create your website at your own pace, even if you don’t have a stable internet connection.
Increased Control and Flexibility: Many offline builders allow you to work directly with HTML, CSS, and JavaScript. This provides more control over the design and functionality of your website.
Faster Load Times: Since everything is stored locally, there’s no need to wait for images, templates, or other assets to load over the internet. This can significantly speed up your design process.
Backup and Security: All your website files are stored on your local machine, which means you don’t have to worry about server outages or security breaches affecting your website.
Best Offline Website Builder Software
Now that we understand the benefits of offline builders, let’s dive into some of the best offline website builder software available today.
1. Adobe Dreamweaver
One of the most well-known and robust tools for building websites is Adobe Dreamweaver. A part of the Adobe Creative Cloud suite, Dreamweaver is a powerful tool that allows users to design, code, and manage websites. It is widely used by both beginners and advanced users alike.
Key Features:
Code and Design View: Dreamweaver offers both a visual editor and a text-based code editor. You can toggle between the two as you design your site.
Live Preview: You can view a live preview of your site as you make changes, allowing you to see exactly how it will look once published.
Responsive Design: Dreamweaver makes it easy to create responsive websites that look great on all devices.
Supports Multiple Languages: You can use Dreamweaver to code in HTML, CSS, JavaScript, and more.
Pros:
Highly customizable for developers.
Supports a wide range of web technologies.
Excellent support for responsive design.
Cons:
Steep learning curve for beginners.
Requires a subscription to Adobe Creative Cloud.
Best For: Professional developers and those familiar with HTML and CSS.
2. Mobirise
Mobirise is a free offline website builder software that allows users to create mobile-friendly websites with ease. It’s a great tool for those who don’t have extensive coding knowledge but still want to create a professional-looking site.
Key Features:
Drag-and-Drop Builder: Mobirise uses a drag-and-drop interface, making it easy for beginners to use.
Pre-made Templates and Blocks: The software comes with a variety of templates and content blocks, which you can customize to your liking.
Mobile-Friendly: Websites built with Mobirise are automatically responsive and optimized for mobile devices.
Works Offline: You can work on your website completely offline and then publish it when you're ready.
Pros:
Easy to use for beginners.
Free to use, with optional paid themes and extensions.
Supports Google AMP and Bootstrap 4.
Cons:
Limited customization compared to more advanced builders.
Requires third-party hosting for publishing.
Best For: Beginners and small business owners who need a simple and quick solution.
3. Pinegrow
Pinegrow is a desktop website builder that allows users to create responsive websites using a visual editor. What sets Pinegrow apart is its focus on providing professional web designers and developers with powerful tools while still being accessible to beginners.
Key Features:
Drag-and-Drop Interface: Pinegrow allows users to drag and drop elements onto the page, making it easy to build layouts without coding.
Real-time Multi-page Editing: With Pinegrow, you can edit multiple pages of your site at once, and changes are reflected in real time.
Framework Support: Pinegrow supports popular frameworks such as Bootstrap, Tailwind CSS, and Foundation.
Responsive Design: The builder makes it easy to create responsive websites that look good on all devices.
Pros:
Supports frameworks like Bootstrap and Tailwind.
Suitable for both beginners and advanced users.
Provides a good balance between code-based and visual editing.
Cons:
Some users might find the interface cluttered.
Not as beginner-friendly as other builders.
Best For: Web designers and developers who want more control over their designs without sacrificing ease of use.
4. WYSIWYG Web Builder
WYSIWYG Web Builder is another offline website builder that’s popular among beginners. The acronym stands for "What You See Is What You Get," meaning the design view shows you exactly what your final website will look like.
Key Features:
Visual Editor: You don’t need to know any coding to create a website with WYSIWYG Web Builder. Simply drag and drop elements onto the page.
Pre-made Templates: Choose from a variety of templates and customize them to suit your needs.
Responsive Web Design: Create websites that are optimized for mobile devices.
Extensions: WYSIWYG Web Builder supports a wide range of extensions that can add functionality to your site, such as image galleries, sliders, and contact forms.
Pros:
Easy for beginners to use.
No coding required.
Offers a wide range of pre-made templates.
Cons:
Limited customization options for advanced users.
Some features are outdated compared to more modern builders.
Best For: Beginners who want a simple, no-coding-required website builder.
5. Webflow (with Offline Features)
Although Webflow is primarily an online website builder, it offers a unique option to work offline through its desktop application. Webflow is ideal for designers who want to create sophisticated websites without diving too deeply into code. It combines the ease of a visual editor with the power of custom coding.
Key Features:
Responsive Design: Webflow lets you create fully responsive websites that look great on all devices.
CMS Integration: Webflow has a built-in CMS, making it easy to manage dynamic content like blogs or product catalogs.
Custom Code: For users who want more control, Webflow allows the addition of custom HTML, CSS, and JavaScript.
Offline Capabilities: The Webflow desktop app allows users to work on their designs without being connected to the internet, and then sync changes once they’re back online.
Pros:
Combines visual design with the power of code.
Great for designers and developers who want flexibility.
Offline capabilities through the desktop app.
Cons:
Steeper learning curve compared to drag-and-drop builders.
Premium features require a subscription.
Best For: Designers and developers who need advanced features and offline editing capabilities.
Conclusion
Choosing the best offline website builder software largely depends on your level of expertise, specific needs, and the type of website you want to create. If you're a beginner looking for a straightforward solution, tools like Mobirise or WYSIWYG Web Builder are excellent choices. For more advanced users or those who prefer to have greater control over their design and code, Adobe Dreamweaver, Pinegrow, and Webflow offer the features and flexibility you need.
if you need more information then see more>>>
2 notes
·
View notes
Text

Which Page Builder Plugin is the Best: Elementor, Beaver Builder, or Divi?
Are you ready to build a stunning website but feeling overwhelmed by the choices of page builder plugins? You're not alone! Let's dive into the world of WordPress page builders and uncover which one might be your perfect match.
The Big Three: Elementor, Beaver Builder, and Divi
Before we start our showdown, let's meet our contenders:
Elementor: The new kid on the block that's taken the WordPress world by storm.
Beaver Builder: A reliable veteran known for its stability and ease of use.
Divi: The Swiss Army knife of page builders, packed with features and design options.
Battle of the Builders: Pros and Cons
Let's break down the strengths and weaknesses of each:
Elementor
Pros:
Intuitive drag-and-drop interface
Huge library of templates and widgets
Active community and frequent updates
Cons:
Can slow down your site if overused
Premium version required for advanced features
Beaver Builder
Pros:
Clean, bloat-free code
Excellent for team collaborations
Consistent updates and stability
Cons:
Fewer fancy effects compared to competitors
Slightly higher learning curve for beginners
Divi
Pros:
All-in-one theme and builder solution
Vast array of design options
Lifetime pricing option available
Cons:
Can be overwhelming for newcomers
Potential lock-in to the Divi ecosystem
Introducing Element Pack: The Dark Horse
While the big three dominate discussions, let's not overlook a rising star - Element Pack by BdThemes. This Elementor addon brings some unique advantages to the table:
Performance-Focused: Optimized code that doesn't bog down your site
Versatile Widgets: Adds functionality without the need for multiple plugins
Regular Updates: Constantly evolving with new features and improvements
Compared to standalone builders, Element Pack enhances Elementor's capabilities without the learning curve of a completely new system. It's like supercharging your car instead of buying a new one!
How to Choose the Right Page Builder for Your Project
Selecting the perfect page builder isn't one-size-fits-all. Here's how to make the right choice:
Assess Your Skill Level: Beginners might prefer Elementor or Divi's user-friendly interfaces.
Consider Your Budget: Beaver Builder and Element Pack offer great value for professionals.
Evaluate Your Needs: Complex designs? Divi or Elementor with Element Pack might be your best bet.
Think Long-term: Consider the ecosystem and potential for growth.
Test Drive: Most offer free versions or trials. Give them a spin!
Remember, the best page builder is the one that helps you create beautiful, functional websites efficiently. Whether you choose the versatility of Elementor, the stability of Beaver Builder, the all-in-one approach of Divi, or decide to supercharge your experience with Element Pack, you're on your way to website building success!
Ready to start creating? Explore these options, and don't forget to check out Element Pack for that extra boost of functionality and performance!
#PageBuilderComparison#ElementorVsBeaverBuilder#DiviPageBuilder#BestPageBuilder#WordPressPlugins#WebDesignTools#DragAndDropBuilder#PageBuilderShowdown#WebsiteBuildingMadeEasy#DesigningWithEase
2 notes
·
View notes