#canon powershot camera models
Note
Do you sell any of these statues?
Yeah, pretty often. I've got a few to put up for sale this week actually.
#my camera broke#tried getting new batteries but no it's the actual camera itself that's fucked#so I guess I'll have to use my shitty phone camera#honestly pretty mad about the camera situation that thing was a pretty major investment and I've only been using it for 2-3 years#other sculptor has an earlier model of Canon powershot and that thing has lasted him like 10 years#granted I do use mine a lot more heavily#it's not sitting in a box and being used 3 times a year#oh yeah the pieces are a Yi qi- Tianyulong- Fur-bearing trout- the catfish bust- and a Deinonychus bust#also have a full size Velociraptor almost done but that one's gonna be pricey
9 notes
·
View notes
Text
Landscape Photo Recipe (Redux)
@ameliablair asked:
I just bought my first non-phone camera (Canon PowerShot SX70 HS). I travel a lot and want to take great photos of the landscapes I see. What would you recommend for someone who is essentially a novice? So far I've been afraid to change the settings from "auto" but I want to use the full capabilities of this camera!
__________________________
This is the very first time I have presented this information. There was definitely not another post where I screwed up and gave bad advice.
Nope.
Didn't happen.
This post is basically just reformatted and corrected but there are a few "Note from Froggie" sections with updated info. I promise this is the final final final version.jpg of this post.
Okay, I am going start with a simple recipe for setting up your camera to take landscape photos. This will get you decent results 80-90% of the time unless you are in very challenging lighting circumstances. So, either a very dark area or an area that has very dark spots and very bright spots at the same time.
First, you will need to figure out the size of your sensor. This can usually be found by googling the model of your camera and adding "sensor size" to the search. If you are using a smartphone you can skip this step.
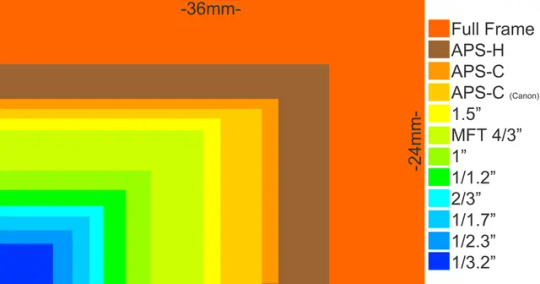
(The PowerShot SX70 HS has a 1/2.3" sensor size.)
I'm going to create 3 different recipes. Match your sensor size with the appropriate one.
Large sensors. (APS-C/Full Frame)
Medium sensors. (Micro 4/3 or MFT or 4/3")
Small sensors and smartphones. (1" or smaller)
Large recipe...
Put camera on tripod or stable surface.
Set timer to a delay of 1 second.
Put camera in Av or Aperture Priority Mode.
Set f-stop to f/8 or f/11. (Test both.)
Set ISO to lowest setting. (Usually 100.)
Let the camera decide the shutter speed automatically.
Focus 1/3 of the way into your framing.
Press the button, stand back, and let the camera take the shot.
Medium recipe...
Put camera on tripod or stable surface.
Set timer to a delay of 1 second.
Put camera in Av or Aperture Priority Mode.
Set f-stop to f/5.6 or f/8. (Test both)
Set ISO to lowest setting. (Usually 100.)
Let the camera decide the shutter speed automatically.
Focus 1/3 of the way into your framing.
Press the button, stand back, and let the camera take the shot.
Small recipe...
Put camera on tripod or stable surface.
Set timer to a delay of 1 second.
Put camera in Av or Aperture Priority Mode.
Set f-stop to the widest setting. (Lowest f-stop number)
Set ISO to lowest setting. (Usually 100.)
Let the camera decide the shutter speed automatically.
Focus 1/3 of the way into your framing.
Press the button, stand back, and let the camera take the shot.
So for the PowerShot mentioned, if you are zoomed all the way out, you would set the f-stop to f/3.4. If you are zoomed all the way in, it would be f/6.5. Basically just keep lowering the f-stop until it won't budge any lower.
Let's quickly go over these settings and get an understanding of why they work so well for landscapes.
Why a tripod?
For landscapes you want to have great detail and low noise in the photos. So you have to shoot at a very low ISO to avoid noise. But if you don't have a lot of light, the shutter speed could get very slow. If you don't put the camera on a tripod, the slow shutter speed will cause motion blur.
Note from Froggie: I just learned the PowerShot has optical image stabilization of 5.5 stops (which is great!). It's possible you may be able to take some photos without a tripod, but a tripod will *guarantee* sharp photos. I would say if it is fairly sunny, you can avoid the tripod. That said, sometimes stabilization can do funky things when a camera is on a tripod. So I would recommend turning off IS when on a tripod. But do your best to remember to turn it back on.
Why the 1 second timer?
Any movement could introduce motion blur into your photo—even the action of pressing the shutter button. Setting a delay allows the camera to be perfectly still. A shutter remote trigger works as well.
Why Aperture Priority Mode (Av)?
This is a semi-auto mode that allows you to set the aperture but then the camera will decide the shutter speed for you.
Why f/11? (for large sensors)
Unlike portraits where blurring out the background can create separation of your subject, landscapes are all about detail and capturing everything in front of you. A wide aperture (low f-stop number) will have a shallow depth of field, meaning only a small sliver of your photo will be in focus. A narrow aperture (high f-stop number) will have a very deep depth of field.
However, you don't want to choose an aperture that is too small, like f/16 or f/22 unless you really need an extra long exposure. Once you get past f/11 something called "diffraction" starts to blur the image and cause you to lose detail. Camera lenses tend to be their sharpest somewhere between f/5 and f/11.
f/11 is a pretty safe aperture that will most likely get your entire landscape in focus, be in the sharpest range of your lens, and avoid the diffraction blurring.
But it might also be worth taking shots at f/5 and f/8 and see how your camera and lens perform at those settings. And if there is something in your photo that is super close to you and you are worried it may not be in focus, taking safety shots at f/16 and f/22 is fine. A slight blurring might be preferable to something being out of focus. ALWAYS TAKE SAFETY SHOTS!
But usually f/8 or f/11 is the sweet spot and will get you the results you are seeking.
Why don't I use f/11 on a smaller sensor?
Physics!
Smaller sensors already have a very deep depth of field so everything will pretty much be in focus in most landscape shots. It's one less thing you have to think about, so that is nice. If you want a detail explanation you can read the rest of this section. Otherwise, feel free to skip to the next question.
There is a concept called "crop factor" which can help explain how a lens and sensor will behave compared to a Full Frame camera. This is called the "35mm Equivalent" due to a full frame sensor being modeled after a 35mm piece of film.
The PowerShot has a crop factor of 5.5x because it is 5.5 times smaller than a full frame sensor. Which means the depth of field and field of view would behave the same as a full frame camera if you multiply the focal length and aperture by 5.5x.
The PowerShot's minimum focal length is *technically* 3.8mm. But we don't know how wide that field of view is without a reference. So we convert it to a 35mm full frame sensor by multiplying by 5.5x and we get 21mm.
21mm on a full frame camera is typically considered wide angle. Wide angle just means you can fit more stuff in your frame. So at that focal length you can fit a bunch of stuff in your photo.
The PowerShot's maximum focal range is 247mm. If you multiply that by 5.5x, you get a whopping 1365mm! (Actually you don't, so there must be some other variable in the lens design that affects the number, but... close enough!)
1365mm is really really telephoto. Like, you can take photos of the moon with that. On a full frame camera you would need to spend $20,000 to get a telephoto lens with that much zoom. Which is a fun advantage to having a smaller sensor, but you definitely need to use a tripod to get clean shots at that focal range.
You also need to multiply the aperture to figure out the depth of field. The minimum aperture on the Powershot is f/3.4. Due to my brain not mathing very well in my head, I cheated and used this great crop factor calculator to figure out the 35mm equivalent.
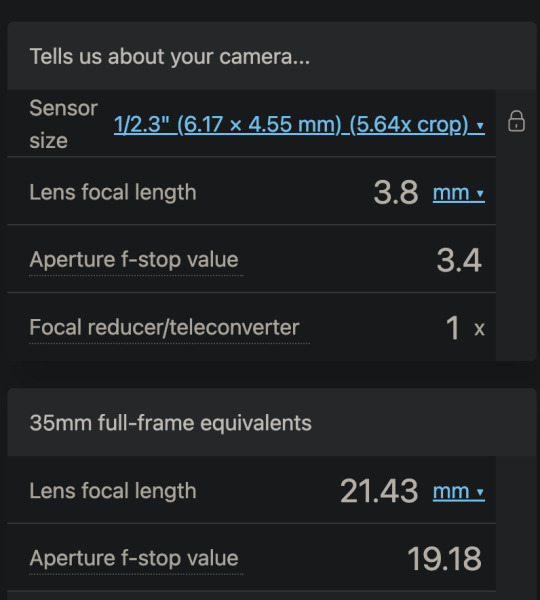
So the PowerShot's minimum aperture would have the same depth of field as f/19.18 on a full frame camera. Which is way beyond f/11, so unless you want to do a long exposure photo of a waterfall or clouds or something, you can just leave the camera on it's lowest f-stop number and be assured everything will be in focus.
Also, the PowerShot has a "variable aperture" which means the minimum aperture changes as you zoom in. So if you end up zooming all the way to 247mm (1356mm), your aperture will automatically change to f/6.5. This will expand your depth of field even more.

So at max zoom, you'll have an f-sop of f/36. Which means you are going to need a lot of light to get usable images when zoomed in that much. Again, a tripod will allow you to achieve that.
Why ISO 100 (or lowest ISO available)?
Some cameras have the ISO set to automatic. You may need to check your manual or a tutorial to learn how to adjust it manually. But if you have a tripod, you can set it to 100 and keep it there. Just remember to put it back on auto when you aren't using a tripod.
ISO is like the volume knob on a stereo. If you put your ear next to a speaker when no music is playing you can usually hear a faint white noise. That is always there in everything you play. And as you turn up the volume, that noise floor gets louder and louder. And if you turn up the volume too much, that noise can cause distortion and poor audio quality.
There is noise in every digital photo. And the lower you keep the ISO, the less noticeable that noise is. But if you do not have a ton of light, it can be very difficult to keep the noise low without a long shutter speed and a tripod.
Why an automatic shutter speed?
Not using a full manual mode is fine. There are some old school photographers that believe you need to dial in every setting yourself. But camera metering systems are very good these days and may be better at judging exposure than you are.
That said, it might be worth learning how your "exposure compensation" feature works on your specific camera. This will allow you to raise or lower the exposure quickly if you think the camera didn't judge the scene properly.
So if you think the image is too bright, lower the exposure compensation a few clicks and see what you think. You have plenty of room on your memory card to take safety shots.
Why focus 1/3 of the way into the frame?
The point of focus will have an area in front and behind that will also be in focus. That is your depth of field. When you are fairly close to your subject, that depth of field is symmetrical. 50% of the depth of field will be in front of your subject and 50% will be behind your subject. I'll use this thing I made for another post to visualize.

The subject would be the baby's eye in this case. That is the point of focus and the area in front and behind is the depth of field.
But as you get farther away from your subject that ratio becomes asymmetrical. More area behind the point of focus will be in focus than in front.
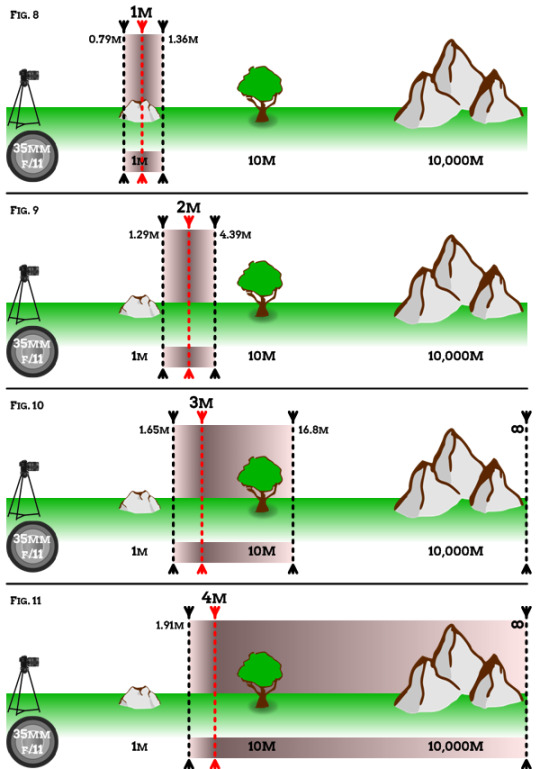
There are actually apps and websites that help you calculate this ratio, but as a general rule of thumb for landscapes, most photographers will assess the farthest thing and the closest thing and choose a focus point at about 1/3 the distance between them.
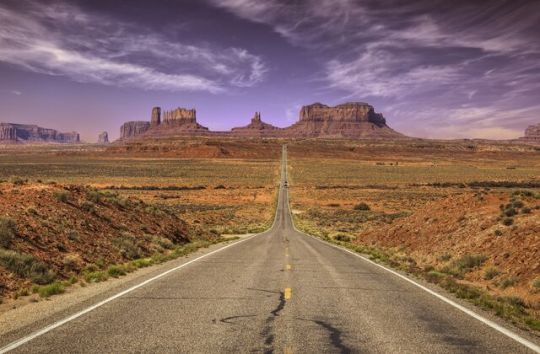
So in this photo the mountains are the farthest thing and the road is the closest thing. If you divide that area into thirds and focus around 1/3, you will probably get everything you want in focus.
You don't have to get too precious about this unless you are shooting at very wide apertures (low f-stop number like f/4 and below). At f/8 and above, at these distances, it's actually difficult to *not* get everything in focus.
The only thing that can make landscape focusing a bit more challenging is if you want something very close in the foreground in focus. Like a cool rock or a statue or a person. In that case, I would take several photos and focus on a few different spots ranging from near to far away as a safety precaution.
Hopefully all of that gave you some context for all of my suggested settings.
But these settings are not magic. There are a few other variables to consider when trying to achieve a cool landscape photos.
First, the good news. If it is a bright sunny day, you can use this recipe without the tripod. Your shutter speed will be fast enough not to introduce motion blur into your images.
Now the bad news... don't take landscape photos during a bright sunny day unless you want to make a default Windows background.

Bright sunny days are often very challenging to make interesting photos. I'm not saying it cannot be done, but it requires a pretty stunning scene to make work. Yes, blue skies are beautiful, but they don't always make the most compelling photographs.
You already have settings that will work most of the time. You have the technical ingredients, but you need a few artistic ones to finish the recipe...
A stunning vista.
Good composition.
Interesting light.
Finding a cool location is usually just a matter of google or exploration.
Good composition comes with learning and experience.
And interesting light requires patience.
Sunrise, sunset, blue hour, and night time are all great times to find great light. Sometimes an overcast day with thick clouds can be more interesting than a sunny day. You may have to revisit a scene several times to find the best conditions for a cool photo. But during these times you're probably going to need that tripod I mentioned. When there is less available light, your shutter speed will be slower, and without a tripod things could get blurry.
If you don't have a tripod and there isn't a lot of light, you will need to know the reciprocal rule to make sure your shots turn out okay. The reciprocal rule tells you the slowest shutter speed you can use without introducing motion blur.
Your lens has a focal length expressed in millimeters. The reciprocal rule states that you should set the shutter speed to 1/focal length. So if your lens is a 50mm, you want your shutter speed to be no slower than 1/50.
The Powershot mentioned in this question has a focal range of 21-1365mm. So all the way zoomed out, you would not want to set the shutter speed slower than 1/20. And all the way zoomed in you probably want to shoot for 1/1200 or 1/1400. Although you can probably get away with 1/500 if you have steady hands.
Note from Froggie: The reciprocal rule changes a bit if you have some sort of image stabilization. Due to a brain fart, I did not notice the PowerShot had this feature. The image stabilization adds 5.5 stops to the reciprocal rule when it is activated. So, if you are shooting at 1365mm, the nearest shutter speed would be 1/1400. You can divide 1400 by 5.5 to figure out the slowest shutter speed.
That means, you can *theoretically* shoot at max zoom with a shutter speed of 1/250 without motion blur.
Also, if there is anything physically moving in your photo, it could have a motion trail at slower shutter speeds. Sometimes this is a cool effect that can make cars and people look ghostly. Depending on how fast things are moving, these motion trails can start around 1/50 shutter speed.
So, if you are in low light and you don't have a tripod, here is the new recipe...
Put camera in Tv or Shutter Priority Mode.
Set f-stop as wide as it will go (lowest f-stop number).
Set ISO to AUTO.
Without IS: Set the shutter speed to 1 over focal length. (eg 1/20)
With IS: Set shutter speed to 1 over focal length ÷ stops of stabilization. (eg 1/(20÷5) = 1/4)
Focus 1/3 of the way into your framing.
Press the button.
This might result in noisy photos. That is the compromise you'll have to make. But there are some great denoise features in image editing software now that can help.
That brings me to my final tip... editing landscapes will always make them better. It is very difficult to balance the dynamic range (the range of the brightest thing and darkest thing) without processing your images. This will be even easier if you shoot in RAW mode. But you can still edit JPEGs as well.
Lightroom is currently the best software for processing photography. But there are other options that do a great job as well, including a few free ones. But I'm afraid you'll have to do some googling for that, as I am not current on the best applications other than Lightroom.
Knowledge more than anything will help you improve your photography. You can take amazing photos with a Powershot or a smartphone or a $200 DSLR. You just need to understand the fundamentals.
I highly recommend checking out this free photography course. Tony will help you understand all of this on a deeper level and you can watch it in the span of a weekend.
I hope all of that was helpful. Feel free to ask questions if you have trouble.
Oh, and if you need a cheap tripod, this Amazon Basics one is only $20. It is light and easy to carry around, but it probably won't hold up to much abuse. That said, it's a great place to start and once you gain more experience you can upgrade to something nicer later on.
25 notes
·
View notes
Note
that's the specific name model of your camera??
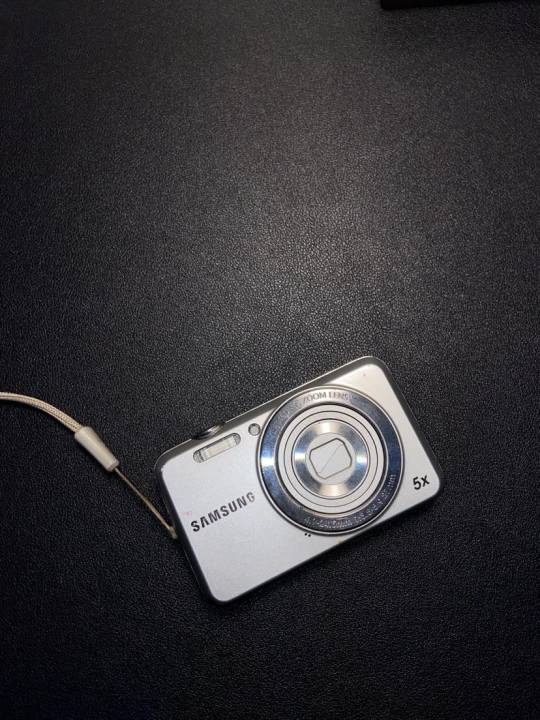
hiiii i have three cameras that i post with regularly so here are the specific models:
kodak easyshare c913
nikon coolpix s60
canon powershot sd1200 IS
also sorry i took so long to respond, i didn't see this for some reason!! >.<
13 notes
·
View notes
Note
sorry if this has been asked before but what camera do you use? your photography is one of my favorites on here ♡
hi :) thank u so much
i use a few different ones
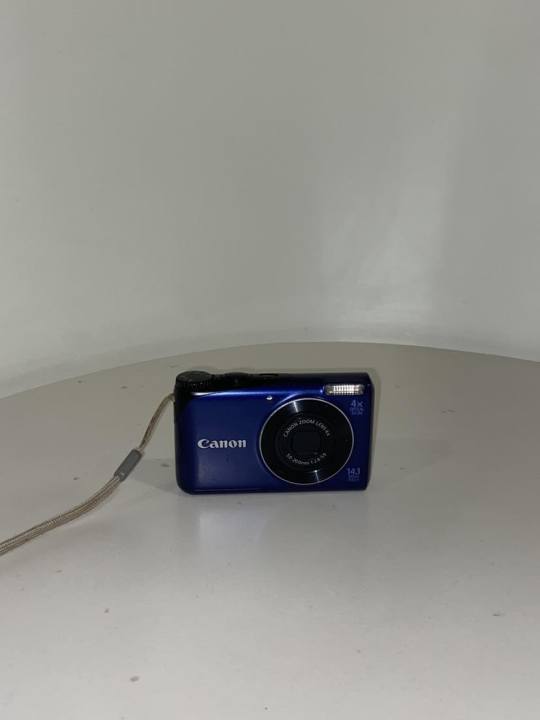
- 2008 model canon powershot sd790 IS, i try to organize these with my digicam tag. i have actually been using this camera since then, aside from an emergency replacement last year. i love it, you can get it for like $80 on ebay, no notes.
- i have a panasonic lumix gx85 m43 camera body with a few different lenses, but the one i use most often and post with on here is an olympus m.zuiko 17mm f/1.8 fixed lens. it’s a little pricey but it has the most beautiful soft focus of light. i really like to record scenes in video and then use stills from them for a more lived in effect. i do the same with the digicam and the exports barely need edited they are so cool
- i don’t use or post film very often but i do like to use fujifilm disposable cameras and i have an instax for the occasional instant polaroid type, those may be on here
- i also use my phone for a lot tbh, i have an iphone 14 pro
then for editing i mostly use lightroom, desktop and app, but honestly i do like the native photo app editor too
9 notes
·
View notes
Text
Old picture of Barbara

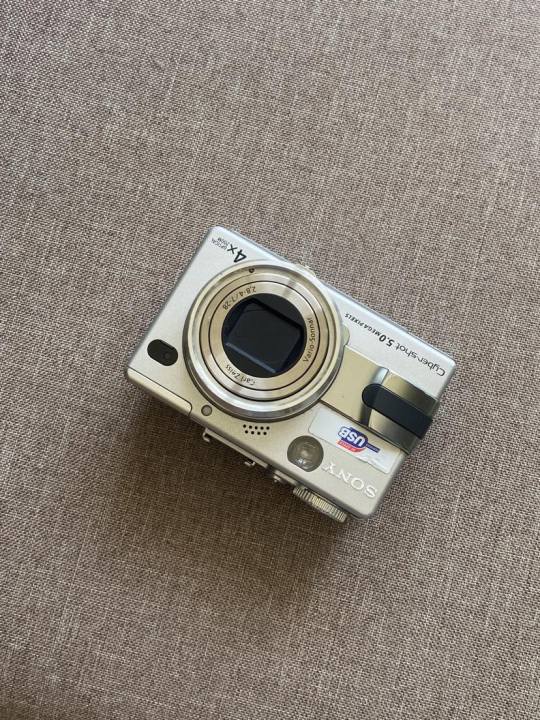
Canon Powershot A310; 2004
[ENG] I don't know the exact date of this photo because it's not in the EXIF data. Probably, by digging through my hard drive, I could figure it out, but it doesn't really matter. The year was definitely 2004, with a high degree of certainty. I was very proud of this photo at the time. I thought I had finally managed to capture something worthwhile. Those were my first steps with some intention. I had been taking photos before, but it was more of a casual, occasional snapping. Around that time, I acquired my first digital camera. These were the days when a camera on a phone was an accessory in just one or two models. So, I got my first digital camera and started reading about photography, watching videos, and learning. Self-education was a gradual process for me, and it still is. Learning never really stops, unless we intentionally decide to end it, just as we begin with the intention to learn.
[PL] Nie znam dokładnej daty tego zdjęcia bo nie ma jej w exifie. Pewnie grzebiąc na dysku twardy udałoby się to ustalić ale nie ma to znaczenia. Rok był wtedy 2004 z dużą dozą pewności. Strasznie byłem wtedy z tego zdjęcia dumny. Uważałem, że w końcu mi jakieś wyszło. To były moje pierwsze kroki z jakąś tam intencją. Fotografowałem co prawda już wcześniej ale to takie było wycieczkowo - okazyjne pstrykanie. Mniej więcej wtedy nabyłem swój pierwszy aparat cyfrowy. A były to czasy kiedy aparat w telefonie to było dołączane akcesorium w jednym czy dwóch modelach. No więc: Nabyłem swój pierwszy aparat cyfrowy i zacząłem czytać na temat fotografii. Oglądać filmy. Uczyć się. Powoli mi to samouctwo szło. Z resztą do tej pory idzie. Nauka nie kończy się nigdy. Chyba, że sami ją zakańczamy z wyraźną intencją. Tak jak z intencją zaczynamy się uczyć.
2 notes
·
View notes
Link
Check out this listing I just added to my Poshmark closet: Canon PowerShot SD1000 7.1MP Digital Elph Camera with 3X Optical Zoom (Silver).
0 notes
Text
I'm not doing photography anymore, I said after the order for a replacement battery for my 11 year old camera was made. I may well be still burned out after so long, but the battery I have for my DSLR is the one that came with it and it doesn't hold a charge for as long as it used to. It's a Nikon D1500, so it's long since discontinued. I'd rather not get a new model if I'm only expecting to use it on vacation.
In other news, my mom unearthed my long-lost Canon PowerShot from a closet while cleaning. I can't, for the life of me, remember how I lost it in... I don't know, 2012? 2013? For what it's worth, the AA batteries in that one had a 2018 expiration date, so I replaced those and... The LCD is black, but I can see the pictures on the card through the viewfinder. :[
And I know it really has been a long time since I used the Canon because the first picture I saw was of Leif, one of our late Norwegian Forest cats. He was as sweet as they come and I'm missing him terribly again.
Vacation is weeks away for me. It's already kind of a given that I bring my DSLR. It's partly old habits kicking in, though I still like using the telephoto lens.
1 note
·
View note
Text
Time-Lapse Photography: Cameras, Duration, and Best Choices
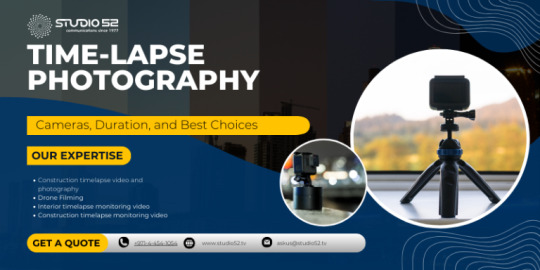
Time-lapse photography is a captivating art that allows us to condense hours, days, or even years into a few seconds of mesmerizing visuals. It’s a technique that has gained immense popularity in recent years, thanks to the advancements in camera technology and the ease of sharing these stunning creations on social media. In this comprehensive guide, we will delve deeper into the world of time-lapse photography, focusing on the cameras you should consider, the optimal duration for your time-lapses, and the best time-lapse camera to make your time-lapse projects truly stand out.
The Magic of Time-Lapse Photography
Before we delve into the technical aspects, let’s take a moment to understand the enchantment behind time-lapse photography. At its core, time-lapse photography is the art of capturing a series of still images at specific intervals and then playing them back as a sequence. This technique condenses time, revealing subtle movements and transformations that are otherwise imperceptible to the naked eye.
Imagine watching a flower bloom, the clouds dance across the sky, or a bustling cityscape transform from day to night in just a few seconds. Time-lapse photography allows us to witness these beautiful moments in a way that traditional photography or video cannot.
Choosing the Right Camera
Selecting the right camera is the cornerstone of successful time-lapse photography. Your choice of camera will greatly influence the quality and flexibility of your time-lapse projects. Here are some considerations to keep in mind when choosing your camera:
1. DSLR or Mirrorless Cameras
DSLR (Digital Single-Lens Reflex) and mirrorless cameras are the preferred choices among time-lapse enthusiasts. They offer interchangeable lenses, manual settings, and excellent image quality. These cameras allow you to have full control over your shots, enabling you to adjust exposure settings to capture the perfect image. Some top choices in this category include the Canon EOS 5D Mark IV and the Sony Alpha a7 III.
2. Compact Cameras
Compact cameras are more portable and user-friendly, making them a great option for beginners or those who want a more straightforward experience. Despite their smaller size, many compact cameras offer impressive time-lapse capabilities. Models like the Sony Cyber-shot RX100 VII and the Canon PowerShot G7 X Mark III are excellent choices for those on the go.
3. GoPro Action Cameras
For outdoor time-lapses or capturing extreme conditions, GoPro action cameras are unbeatable. They are rugged, waterproof, and can capture stunning 4K time-lapses. The GoPro HERO9 Black, for example, is a great option for adventurers and outdoor enthusiasts.
4. Smartphone Cameras
Don’t underestimate the power of your smartphone. Many modern smartphones offer built-in time-lapse modes that can produce impressive results. Apps like Hyperlapse and Lapse It Pro further enhance your smartphone’s time-lapse capabilities. This accessibility means that anyone with a smartphone has the potential to explore the world of time-lapse photography.
Setting the Duration
The duration of your time-lapse can significantly impact its visual appeal and storytelling. Here are some guidelines to help you determine the ideal duration for your project:
1. Short Time-Lapses (1-10 seconds)
Short time-lapses, typically lasting between 1 to 10 seconds, are ideal for capturing fast-moving subjects. These include scenes like traffic, bustling cityscapes, or waves crashing on the shore. To create a sense of urgency and motion in your time-lapse, use shorter intervals between shots, such as 1-2 seconds.
2. Medium Time-Lapses (10 seconds – 2 minutes)
Medium-length time-lapses are versatile and can capture a wide range of subjects. Shooting at intervals of 2-5 seconds works well for most scenarios, including cloud movements, construction projects, or natural landscapes. This duration provides enough context for viewers to appreciate the subtle changes taking place.
3. Long Time-Lapses (2 minutes or more)
For slower transformations like the blooming of flowers, the changing of seasons, or the transition from day to night, longer time-lapses are the way to go. Shoot at intervals of 5-10 seconds or more to create smooth and captivating sequences. Longer time-lapses allow viewers to witness gradual changes and immerse themselves in the beauty of the unfolding story.
Capture Every Moment with Precision! Hire Us Today for Expert Timelapse Camera Services
Best Practices for Stunning Time-Lapses
Creating breathtaking time-lapses goes beyond just selecting the right camera and setting the duration. To ensure your time-lapse stands out and ranks well among others, here are some best practices to follow:
1. Stable Support
Stability is crucial in time-lapse photography. Even the slightest camera movement can ruin a sequence. Invest in a sturdy tripod or specialized time-lapse equipment to keep your camera stable throughout the shoot. If you’re shooting in windy conditions or on unstable terrain, consider using sandbags or anchor your tripod to prevent vibrations.
2. Manual Mode
While some cameras offer automatic time-lapse modes, shooting in manual mode is often preferred. Manual mode gives you complete control over exposure settings, including aperture, shutter speed, and ISO. This control allows you to adapt to changing lighting conditions and maintain consistent image quality throughout your time-lapse sequence.
3. Intervalometer
To capture precise intervals between shots, invest in an intervalometer or use your camera’s built-in time-lapse feature. Intervalometers allow you to set the duration between each frame, ensuring that your time-lapse flows smoothly and consistently. Be sure to calculate the interval based on the duration you want to achieve.
4. Post-Processing
Editing is a crucial step in time-lapse photography. Use software like Adobe Premiere Pro or LRTimelapse to enhance colors, remove flicker, and add creative effects. Post-processing can elevate the visual quality of your time-lapse video and help you achieve a polished and professional look.
5. Storytelling
While technical aspects are important, remember the storytelling element in your time-lapse. Think about the story you want to tell and the emotions you want to evoke in your audience. A compelling narrative can elevate your work and engage your viewers on a deeper level.
Conclusion
Time-lapse photography is a captivating art form that requires creativity, patience, and the right equipment. By carefully choosing your camera, setting the duration effectively, and following best practices, you can create stunning time-lapse sequences that captivate viewers and stand out in the world of online content. So, pick up your camera, experiment with different subjects and durations, and embark on a journey to capture the passage of time like never before. Your next viral time-lapse masterpiece might just be a click away, waiting to amaze and inspire audiences around the world.
FAQ
Q: What is time-lapse photography?
A: Time-lapse photography is a technique of capturing a series of still images at specific intervals and then playing them back as a sequence, creating a condensed and sped-up video.Q: What is the best camera for time-lapse photography?
A: The best camera for time-lapse photography depends on your needs and budget, but some popular options include DSLRs, mirrorless cameras, compact cameras, GoPro action cameras, and smartphone cameras.Q: How do I set the duration of my time-lapse?
A: The duration of your time-lapse will depend on the subject you are shooting and the effect you want to achieve. Shorter time-lapses are ideal for capturing fast-moving subjects, while longer time lapses are better for slower transformations.Q: What are some best practices for creating stunning time-lapses?
A: Some best practices for creating stunning time-lapses include using stable support, shooting in manual mode, using an intervalometer, and post-processing your footage.Q: How can I use time-lapse photography to tell a story?
A: To use time-lapse photography to tell a story, think about the message you want to convey and the emotions you want to evoke in your audience. Choose a visually appealing subject that will capture the viewer’s attention. Then, use your camera settings and editing techniques to create a time-lapse that is both informative and engaging.
Contact us today at +971-04-454-1054 or mail us at [email protected]
#video production company#video production services#video production company in UAE#video time lapse#construction time lapse camera#timelapse camera#timelapse video production dubai#construction timelapse service#best construction timelapse company#timelapse video camera#time lapse camera#timelapse video#time lapse camera for construction#timelapse camera for construction#construction timelapse camera#time lapse construction camera#construction time-lapse camera#timelapse service in dubai#time lapse video camera#Timelapse Video Service#Timelapse Video Production#Best long term time lapse videos for construction sites#timelapse video production#time lapse company#timelapse videography#time lapse video company#time lapse video services#best timelapse video maker in uae#timelapse production#time lapse studio
0 notes
Text


Through-the-viewfinder photography.
A weird alternate process trend that popped up in the late noughties and vanished again, where you shoot through the veiwfinder of another camera, essentially using the viewfinder as an effects filter.
Left is a Canon Powershot A720 shooting through the viewfinder of a Kodak Brownie C. Right is same Canon shooting through the viewfinder of a similar Brownie, though the exact model escapes my memory. The colours really pop.
Both images straight out of camera, just cropped and shrunk.
1 note
·
View note
Text
fascination for anything vintage and classic: digital camera collection
Today, I felt the need to pour my thoughts onto these pages about my digital camera collection and how it all came to be. It's a peculiar passion that took root within me, driven by a desire for the nostalgia that vintage cameras provide. You see, there's something about those old cameras that stirs my soul, a feeling I can't quite put into words. But the road to finding my place in this digital camera world wasn't without its twists and turns.
I've always been drawn to the charm of vintage cameras—the way they feel in my hands, the satisfying clicks of their mechanisms, and the rush of nostalgia they bring. The only setback was the hassle and cost of scanning film. That's when I stumbled upon a delightful compromise: vintage digital cameras. These remarkable devices offer the crispness and sentimental essence of film, while also embracing the convenience of the digital age. It's a balance that resonates deeply with me, even if others can't quite understand why I choose vintage digital cameras over the sleek iPhones and fancy DSLRs of today.
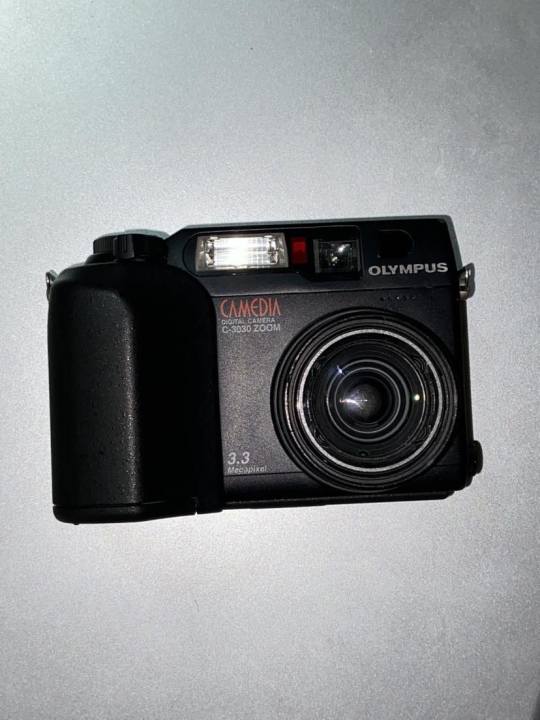
In my collection, each camera holds a unique place, like a dear friend with its own quirks and qualities. Take the Olympus Camedia C-3030, for instance. It's a true trailblazer in the world of digital cameras, reminding me of the excitement and endless possibilities that unfolded when digital photography was still in its infancy. Holding it in my hands, I can almost feel the anticipation that must have surrounded those early digital camera enthusiasts.


Then there's the Samsung ES80, a little gem that surprises me with its versatility and stylish design. It may not be the most renowned model out there, but its simplicity and reliable performance have made it a faithful companion for capturing spontaneous moments. Sometimes, it's the underdogs that steal our hearts, right?


Of course, I couldn't forget the Canon Powershot A2200. Ah, Canon, a name synonymous with excellence in the digital camera world. This particular model combines the crisp image quality I seek with an interface that's friendly even to those new to photography. Holding a Canon camera brings a sense of comfort, knowing that it will faithfully capture the essence of the scenes before me.


Then there's the charming Papershoot Camera, a delightful creation made from recycled paper. It is such a unique camera and it takes me back to the roots of photography, reminding me of the simple joy of composing a photograph. Its minimalist nature encourages me to slow down and appreciate the artistry of each shot. In a world that moves at a rapid pace, this camera is a soothing reminder to take things one click at a time.


And last but not least, my dear Sony Cybershot DSC-V1, a perfect blend of vintage aesthetics and modern features. Its sleek design, reminiscent of the film cameras of yesteryears, captures breathtaking images that transport me to another time. It's a testament to the fact that technology can be infused with the spirit of the past, resulting in a harmonious blend of old and new.


I realize that not everyone understands my fascination with vintage digital cameras. After all, we live in a world where smartphones and fancy DSLRs dominate the market. But for me, it goes beyond technical specifications and trends. It's about the emotional connection, the way these cameras transport me to a different era, filling me with a sense of nostalgia and inspiration. I could talk about my cameras for hours and not get tired of it.
Through my collection, I'm reminded of the sheer joy that photography brings me, the unique perspective it offers. Each camera tells a story, capturing fragments of time that I can revisit whenever I desire. As I continue to explore the world through the lens of these vintage digital cameras, I'm filled with gratitude for the way they ignite my imagination and transport me to a different time and place.
Until next time.
1 note
·
View note
Text
In the vast world of YouTube, content creators have mastered the art of capturing their audience's attention with engaging videos. From lifestyle vlogs to tutorials and gaming streams, YouTubers rely on high-quality cameras to bring their ideas to life.
If you've ever wondered what cameras your favorite YouTubers use to create such captivating content, you've come to the right place. In this blog post, we'll explore the world of YouTube cameras, delving into the diverse range of options available to content creators today. So, let's dive in and uncover the secrets behind their video production.
Understanding the Basics:
Before we jump into specific camera models, it's essential to grasp some basic concepts that YouTubers consider when choosing their cameras. These factors can greatly impact the overall quality and aesthetics of their videos. Let's take a look at the most important considerations:
a. Sensor Size:
The sensor size affects image quality, low-light performance, and depth of field. Larger sensors generally offer better image quality and more control over background blurring.
b. Resolution:
Higher resolutions, such as 4K or even 8K, provide sharper and more detailed videos. However, keep in mind that higher resolutions also require more processing power and storage space.
c. Autofocus:
Fast and accurate autofocus is crucial for maintaining sharpness, especially when shooting moving subjects or when using shallow depth of field.
d. Low-Light Performance:
The ability to capture high-quality footage in low-light conditions is a significant consideration, as many YouTubers film in a variety of environments.
e. Optical Image Stabilization (OIS):
This feature reduces camera shake, resulting in smoother, more professional-looking footage, particularly when shooting handheld.
READ ALSO: Best Camcorders For YouTube - Beginners and Expert friendly
Popular Camera Choices:
Now that we understand the key factors, let's explore the cameras favored by YouTubers across different genres:
a. DSLR and Mirrorless Cameras:
DSLRs (Digital Single-Lens Reflex) and mirrorless cameras are two popular options among YouTubers due to their versatility, interchangeable lenses, and excellent image quality. Some popular choices include the Canon EOS 90D, Sony Alpha a7 III, and Fujifilm X-T4.
b. Action Cameras:
Action cameras, known for their compact size and durability, are frequently used by vloggers and outdoor enthusiasts. The GoPro Hero series and DJI Osmo Action are renowned for their ruggedness, image stabilization, and wide-angle lenses.
c. Point-and-Shoot Cameras:
Point-and-shoot cameras offer a balance between simplicity and functionality. They are compact, easy to use, and often feature built-in lenses with a broad zoom range. Popular models include the Sony RX100 VII and Canon PowerShot G7 X Mark III.
d. Smartphone Cameras:
With advancements in smartphone technology, many YouTubers opt to shoot their videos using smartphones. Modern smartphones, such as the iPhone 13 Pro and Samsung Galaxy S21 Ultra, offer remarkable image quality and advanced video capabilities.
Additional Gear and Accessories:
Apart from the camera itself, YouTubers often use additional gear and accessories to enhance the quality of their videos:
a. Microphones:
Good audio is as essential as clear visuals. External microphones, such as the Rode VideoMic Pro and Audio-Technica AT2020, can significantly improve sound quality, reducing background noise and enhancing voice clarity.
b. Lighting:
Proper lighting helps YouTubers achieve a more professional and well-lit appearance in their videos. Softbox lights, ring lights, and LED panels, like the Neewer 660 LED Video Light, are popular choices to enhance lighting conditions.
c. Tripods and Stabilizers:
To keep their shots steady and prevent shaky footage, YouTubers often use tripods and stabilizers. Options range from compact tabletop tripods to larger, more robust options like the Manfrotto 504X.
Conclusion:
As you can see, the world of YouTube cameras is vast and varied, catering to the diverse needs and preferences of content creators. The camera you choose ultimately depends on your specific requirements, budget, and the type of content you aim to create.
Remember, while the camera plays a crucial role, it's your creativity, storytelling, and personality that truly captivate your audience. So, whether you opt for a DSLR, an action camera, or a smartphone, the key is to leverage the tools at your disposal to share your unique perspective with the world. Now, armed with this knowledge, it's time to embark on your YouTube journey and start creating amazing content.
0 notes
Text
The Best Waterproof Cameras With Wifi_ Reviews And Comparisons
Let's look at the key words in this article waterproof camera with wifi.
The Best Waterproof Cameras with Wifi: Reviews and Comparisons
When it comes to capturing your outdoor adventures, nothing beats the convenience of a waterproof camera with wifi. Whether you’re snorkeling in the Caribbean or skiing in the Alps, a waterproof camera can help you capture stunning images and videos without worry. But with so many models out there, how do you know which one is the best? Here’s a look at the top waterproof cameras with wifi on the market and how they compare.
Olympus TG-5 Waterproof Camera
The Olympus TG-5 is one of the best waterproof cameras with wifi on the market, boasting a 12-megapixel sensor and 4x optical zoom lens. It’s waterproof up to 50 feet and can withstand extreme temperatures, making it the perfect companion for any adventure. The camera also has built-in GPS, so you can geotag your images and videos. The TG-5 is also capable of capturing 4K video, making it a great choice for aspiring videographers.
GoPro HERO7 Black Waterproof Camera
The GoPro HERO7 Black is the perfect choice for anyone looking for an adventure-ready waterproof camera with wifi. It’s waterproof up to 33 feet and can withstand extreme temperatures. It also boasts a 12-megapixel sensor and 4K video capture, making it a great choice for capturing stunning images and videos. The HERO7 Black also has built-in HyperSmooth stabilization, so you don’t have to worry about shaky footage.
Sony RX100 VI Waterproof Camera
The Sony RX100 VI is a powerful waterproof camera with wifi that’s perfect for capturing stunning images and videos. It’s waterproof up to 33 feet and can withstand extreme temperatures. The camera boasts a 20-megapixel sensor and 24-200mm zoom lens, so you can capture everything from wide-angle landscapes to close-up wildlife shots. The RX100 VI also has 4K video capture and a pop-up electronic viewfinder, making it a great choice for any level of photographer.
Fujifilm XP140 Waterproof Camera
The Fujifilm XP140 is a great choice for anyone looking for a budget-friendly waterproof camera with wifi. It’s waterproof up to 65 feet and can withstand extreme temperatures. The camera has a 16-megapixel sensor and 5x optical zoom lens, so you can capture stunning images and videos. The XP140 also has built-in wifi, so you can easily share your images and videos with friends and family.
Canon PowerShot D30 Waterproof Camera
The Canon PowerShot D30 is an excellent waterproof camera with wifi that’s perfect for capturing stunning images and videos.
0 notes
Text
The Best Waterproof Cameras With WiFi Connectivity – A Comprehensive Guide
As we examine it more closely, it becomes apparent that it has a vast and complex history that is worth exploring waterproof camera with wifi.
When you’re headed out on a beach vacation or a dive trip, you want to make sure you have a camera that can keep up with the elements. Waterproof cameras with WiFi connectivity are the perfect choice for recording your memories during the adventure. Not only are they waterproof, but they also have a WiFi connection so you can share your photos and videos with your friends and family in real-time.
There are several options to choose from when it comes to waterproof cameras with WiFi, from basic point-and-shoot models to advanced DSLRs. Here, we’ll take a look at some of the best waterproof cameras with WiFi available on the market today.
Olympus Tough TG-6
The Olympus Tough TG-6 is a rugged point-and-shoot camera that’s great for underwater photography. It’s waterproof up to 50 feet and also shockproof, dustproof, and freeze-proof. It has a 12-megapixel sensor and a 25-100mm zoom lens. It also has a WiFi connection, so you can easily share your photos and videos with your friends and family.
Nikon W300
The Nikon W300 is another great option for waterproof cameras with WiFi. It’s waterproof up to 100 feet and shockproof up to 7 feet. It has a 16-megapixel sensor and a 5x optical zoom lens. It also has built-in WiFi, so you can easily transfer photos and videos to your smartphone or tablet.
Sony Cyber-Shot DSC-RX100 VI
The Sony Cyber-Shot DSC-RX100 VI is a great choice for an advanced waterproof camera with WiFi. It’s waterproof up to 50 feet and has a 20.1-megapixel sensor and a 24-200mm zoom lens. It also has a WiFi connection, so you can easily transfer photos and videos to your smartphone or tablet.
Canon PowerShot G7 X Mark II
The Canon Power
0 notes
Text
How to find serial number on canon camera box

#How to find serial number on canon camera box serial number
#How to find serial number on canon camera box series
#How to find serial number on canon camera box serial number
The serial number is located on the bottom of the product in the box marked ‘serial number’.
#How to find serial number on canon camera box series
Examples: EOS-1DS Mark III: EOS-1D Mark IV (EOS-1 Series Images David Newton for Canon Europe. Recommended DSLRs Recent Firmware Updates Camera Articles. On the EOS-1 series cameras, the serial number will appear as a multi-digit white sequenced number engraved in the frame around the label on the camera's bottom. 1 This new camera included slow shutter speeds and a number of other changes and improvements, described in the page on the Canon S camera 1939 Canon S Canon S and Later Development of Canon Rangefinder Cameras. Generally, the serial number is located underneath the binoculars although on IS models, this will be located on the battery door of the product. Supporting the Nikon F-mount on the Internet since 1994. The serial number is located at the back of the product as indicated in the image below. The serial number for printing calculators is located either on a white sticker on the bottom of the product preceded by the letters ‘NO’, or on the original product packaging as indicated in the images below. The serial number will be displayed as shown in the image below:.This tells you if it has a US/Canada warranty and would be serviceable at service centers here. Check out each one carefully, based on the advice given above, and narrow it down to a few choices. did the camera come with the North America (US & Canada) warranty card in the box with the serial number pre-printed on that card which matches the serial number of the body. This will usually bring up a range of cameras matching or close to your criteria. The serial number will typically appear as black text within a silver box. This should not be confused with the model number showing above the printed serial number. The serial number can also be located using the projectors menu system by following the simple steps below: The easiest way to find the exact camera you’re looking for is to type the name and model into the search box at the top of the eBay screen. On older PowerShot cameras, the serial number of the camera is located on the bottom of the camera printed on the sticker near the tripod. But does it still cut it in 2021 Here's the best canon cameras that offer great value. The serial number for all projectors will always be a combination of letters and numbers and can be located on the bottom of the product as shown in the images below: Canon has been the first choice for years whenever I needed a camera.
0 notes
Link
Check out this listing I just added to my Poshmark closet: Canon PowerShot SD1000 7.1MP Digital Elph Camera with 3X Optical Zoom (Silver).
0 notes
Text
Silkypix jpeg photography 3.0

#SILKYPIX JPEG PHOTOGRAPHY 3.0 PRO#
#SILKYPIX JPEG PHOTOGRAPHY 3.0 SOFTWARE#
#SILKYPIX JPEG PHOTOGRAPHY 3.0 ISO#
#SILKYPIX JPEG PHOTOGRAPHY 3.0 PLUS#
#SILKYPIX JPEG PHOTOGRAPHY 3.0 PROFESSIONAL#
Without making any changes to your original digital images. Photographers, designers and many regular users will get all the competent elements by the program.
#SILKYPIX JPEG PHOTOGRAPHY 3.0 PRO#
SILKYPIX Developer Studio Pro 11 turns your Digital Camera RAW files into great images offering a handy set of tools for convenient RAW developing.
#SILKYPIX JPEG PHOTOGRAPHY 3.0 PROFESSIONAL#
SILKYPIX corresponds to more than 700 different models digital camera and are supported from professional photographers and shutter bugs. Alternatively if you want to skip straight to results taken in a more controlled environment, head on to our Panasonic LX3 Studio Resolution page.SILKYPIX is “RAW development software” that generates a high-resolution picture from the RAW data of a digital camera and offers accurate color from shadows through to highlights. Speaking of which, you can see a comparison of this same scene taken in RAW at the bottom of this page. The LX3’s images can also benefit from adjustments to the in-camera processing, or of course by shooting in RAW and processing later.
#SILKYPIX JPEG PHOTOGRAPHY 3.0 ISO#
Results like these prove a decent quality compact at its lowest sensitivity can deliver superior results to a DSLR when coupled with a budget lens.īut back to the compacts, where we’d say the Canon G9 delivers preferable results to the LX3 at 80 ISO (so long as you watch for blown highlights), but you may be surprised to see what happens when the sensitivity is increased. But as we’ve seen before, the kit lens is really letting the side down here, delivering a disappointingly soft result in some areas, particular in the third row, taken from the lower right corner. This is particularly apparent in the final row of crops.Īs for the Canon 450D / XSi, its default image processing (like most DSLRs) is more restrained than even an enthusiast’s compact, so side by side, its results look relatively flat. Punchier image processing by default is undoubtedly a factor in the G9’s crisper output, but it also has a sharp lens which, with its two extra Megapixels, is definitely resolving visibly greater detail overall. The LX3’s crops do however look slightly dull compared to the Canon G9, and there’s also optical softness in the crop of the mountain ridge from the top left corner. That’s certainly been a wise decision here as in the first row of crops, the Canon G9’s brighter exposure has resulted in blown highlights. The crops are taken from the upper left, center, lower right and lower left portions of the originals and presented here at 100%.įirst things first: as you’ll see here and on our Gallery page, the Lumix LX3 tends to err on underexposure, presumably to protect highlight areas from saturation. The image left was taken with the Panasonic Lumix DMC-LX3 at 7mm f4 and with a sensitivity of 80 ISO the original JPEG measured 4.19MB. The lenses on each camera were adjusted to deliver the same vertical field of view. To compare real-life performance we shot the same scene with the Panasonic Lumix DMC-LX3, Canon PowerShot G9 and Canon EOS 450D / XSi within a few moments of each other using their Program modes, best quality JPEG and lowest ISO settings. Support this site by price checking below Outdoor resolution / Studio resolution / High ISO Noise Panasonic Lumix DMC-LX3 results continued… Now let’s look at the Lumix LX3’s resolution in a studio environment. As always, you may also achieve better results with alternative RAW development software. Some tweaking will definitely be required, but it’s worth it if you want to get the best from the LX3. Silkypix, like most RAW developers, offers a broad range of adjustments though, and it’s possible to match the in-camera JPEG style or improve on it. The RAW file processed in Silkypix with the default settings is much more refrained and appears fuzzy in comparison. The two samples below show significantly different approaches to image processing.
#SILKYPIX JPEG PHOTOGRAPHY 3.0 SOFTWARE#
Below are 100% crops taken from the original JPEG file alongside the RAW version, processed with the supplied Silkypix Developer Studio 3.0SE software using its default settings.
#SILKYPIX JPEG PHOTOGRAPHY 3.0 PLUS#
We photographed the scene here in the Lumix LX3’s RAW plus Fine JPEG mode, allowing us to directly compare images created from exactly the same data. Panasonic Lumix DMC-LX3 results : Outdoor resolution / Studio resolution / High ISO Noise
1 note
·
View note
Last Seen Blogs

h0mosapien
Flung Out Of Space

mahergames-blog
Untitled

magnolia-butch
Forgiveness is Yours


ghostjon48
GhostJon