#django vscode
Explore tagged Tumblr posts
Visit Tumblr Blog
Explore Tumblr blogs with no restrictions, modern design and the best experience.
Last Seen Tumblr Blogs


Fun Fact
Total funding amounts to $125.3M.
Text
Django provides a signals framework that allows certain senders to notify a set of receivers when certain actions occur. This can be very useful for decoupling components of your application and keeping your code modular. Django's built-in signals can be used for model events by utilizing the django.db.models.signals module. Here's a step-by-step guide on how to use Django signals for model events
#django#django python#django developers#wagtail cms#django cms#django mongodb#django framework#django software#django framework python#celery with django#django use#django vscode#installing django#pandas django#stackoverflow#jsx#web design#web dev#web development#website#programming#backedn#backend eng#tech#technology#engineering
0 notes
Text
VS Codeで仮想環境が効かない!?Django開発環境構築でハマったエラーの全記録
この記事は、Windows環境でPythonとDjangoを使って開発を始めた際、Visual Studio Code(VS Code)上で仮想環境の設定に関して発生した複数のトラブルについて記録したものです。仮想環境を有効にしたはずなのにPythonが見つからない、Djangoサーバが起動しない、ライブラリが入っていない、など……。その一つ一つが地味に時間を削るものばかりで、この記事が誰かの参考になればと思って残しておきます。
PowerShellで仮想環境に入れない
最初のつまずきは「仮想環境のアクティベート」でした。私は PowerShell を使って以下のコマンドを実行しました。
venv\Scripts\activate
すると、以下のようなメッセージが返ってきました:
モジュール 'venv' を読み込むことができませんでした。
これは PowerShell では activate ではなく、Activate.ps1 を使う必要があるためです。
.\venv\Scripts\Activate.ps1
この修正で無事仮想環境に入ることができましたが、これはまだ始まりに過ぎませんでした。
仮想環境に入ったのにPythonが使えない
仮想環境に入った状態で Django の開発サーバーを起動しようとしました:
python manage.py runserver
しかし、なんと返ってきたエラーはこれ:
No Python at '"/usr/bin\python.exe'
WindowsでなぜUnix風のパス?しかも usr/bin の後に python.exe が混ざっているという奇妙な状態でした。
実はこれ、仮想環境が正しくアクティベートされているように見えて、VS Code が別の仮想環境(C:\Python\.venv)を参照していたことが原因でした。プロジェクト直下の .venv を使いたいのに、VS Code の設定が上位のグローバル仮想環境を見に行っていたのです。
where python が効かない
仮想環境内で where python を実行しても何も返ってきませんでした。そこで外部の cmd.exe を使って同じコマンドを打つと、次のように表示されました:
C:\Python\WonderPasNavi\.venv\Scripts\python.exe C:\Users\user\AppData\Local\Programs\Python\Python39-32\python.exe
この結果から、PowerShell 内での仮想環境のパスが正常に反映されていないことが分かりました。どうやら VS Code の PowerShell ターミナルでは環境変数 PATH の更新がうまく行われていなかったようです。
見えない .vscode と仮想環境指定
VS Code の仮想環境設定は通常、プロジェクト直下の .vscode/settings.json に保存されます。しかしこのフォルダが作成されていなければ、VS Code がどの Python を使うべきか迷ってしまいます。今回は .vscode フォルダが存在しておらず、設定ファイルもない状態でした。結果、Python拡張機能が以前の仮想環境を優先してしまっていたわけです。
Djangoサーバは起動したが…
仮想環境を再度正しくアクティベートして、python manage.py runserver を実行。すると、今度は次のエラーが表示されました:
ModuleNotFoundError: No module named 'django_bootstrap5'
そうです、ライブラリが入ってなかったんです。プロジェクトの settings.py に 'django_bootstrap5' が記述されているにも関わらず、依存パッケージが仮想環境にインストールされていませんでした。
対処法は単純です。
pip install django-bootstrap5
これでエラーは解消され、ついにサーバが起動しました。ここまでくるのに何時間かかったことか……。
まとめ:「この苦労を…」
VS Code + Python + Django の仮想環境構築は、一見簡単そうに見えて、罠が多いです。
仮想環境の activate の方法は PowerShell / CMD で異なる
VS Code の Python拡張は過去の設定を引きずることがある
ターミナルごとに仮想環境の有効化状態が違う可能性がある
仮想環境の python.exe が本当に使われているか確認するには where python が超重要
この苦労を、未来の自分や他の誰かが繰り返さないように、この記事を残します。
「仮想環境、ちゃんと動いてる?」って思ったら、まずは where python で確認しよう。
タグ: #Python #Django #VSCode #仮想環境 #トラブルシューティング #初心者向け
2 notes
·
View notes
Text
VS Code is a code editor. It is open source.
You can code in:
HTML
CSS
JavaScript
Python
Java
C
C++
and much more
#vscode#vs#code#wysiwyg#editor#free#list#html#css#javascript#java#c#c++#python#yaml#flutter#django#asp#go#matlab#cs#compsci#computer#science#web#development#software#engineer#resource
0 notes
Text
Education_Developer Project Lifecycle
I see a lot of people here on codeblr want to start some project but, not really know the best way to get started. To rectify this, hear is my very in depth guide on how to get started. Read this entire post (some of these are started early but its milestone is later).
Note, I highly suggest the use of Github and will be referencing some things that are specific to it (like Wikipedia pages). If you prefer some other method that's fine just be aware you may be making your life harder than it needs to be.
Milestone 1: Form Teams
Find your people, exchange contact information and determine a time to meet up, consistently. If you are working solo, ignore some of the instructions for this section. That is not to say ignore the parts about consistency and time management. In fact, because you are working solo that should be even more important.
At the first meeting establish chat service (teams, slack, google chat, discord). Establish the frequency of the meetings and how often everyone should check their messages (ex: every 24 hours). Discuss the options about the project.
Platform: Android, django, iOS, react native, etc.
IDE: Xcode, WebStorm, VSCode, etc. Note that modern IDEs now have built-in methods for sharing your editor view with teammates: code together, code with me, etc.
Backend: firebase, postgresql, not needed, etc.
Libraries
APIs you will access
Package manager: npm, yarn, gradle, etc.
Finally, discuss the roles you all want on the team, what should one person focus on, who is the manager, editor, client rep, tester, researcher, repo master, master of specific tech, analyst etc.
Deliverables:
Add a wiki page (or more) to your repo titled "Team Organization" and list there the decisions you made from above, along with any pother pertinent information for the team.
Add a page to your wiki titled "Project Description" which should be kept updated as you make decisions about your project. It should contain these sections:
Description: a short description of your project,
Technologies: a list of the technologies you plan to use: frameworks, libraries, hosting services, etc.
Client: your client's name and contact info, if you have one, otherwise just say "Startup."
Milestone 2: Personas and User Stories
If you have a client who wants you to build the app, or you have identified a group of users for your app, then try to meet with them. Ask them what they do? (that is relevant to why they will use the app), why they want the app? how do they currently do the things they want the app to do? etc. If this is a startup answer those questions and more.
The point of this section is to better understand the users of this website. You need to make personas and user stories and record them so that you can reference them as you complete this project. It is very easy to loose sight of who will be using your product and assume they know more than they actually do.
Deliverables:
Add at least three personas to your wiki. These should cover 3 distinct user-types for your app. Each Persona must have a name, photo, and personal history.
Add a "User Stories" wiki page with at least 9 user stories covering the most common use cases for your app. They should all be of the form: As <the name of one of your personas> I want a <feature> so that I can <satisfy a need>.
Milestone 3: Design
For those that are more artsy than everyone else, now is your time to shine. Use a tool like Pencil, figma, justinmind, balsamiq, mockflow.com to design your product.
Your design should include:
An image for each of the major screens and dialogs of your app. Show all the widgets in their proper placement. Name each screen and write some text to explain how actions in one screen will lead to other screens.
In the case of a widget-free apps, you should include diagrams for all the major 'areas', animation stills that detail the most common animations and game mechanics (for example, Super Mario would have a set of drawings showing Mario jumping, punching up, and landing on a Goomba's head), as well as story boards if they are more relevant to your game.
A goal of the design is for you to think about the usability of your app. Try to 'use' the app in your mind: simulate how a user might use the app. Printing the screens into sheets of paper of the correct size and shuffling them as you pretend to use the app is a very common way to test the usability.
Another goal is to save you time. Remember that making a change now, like adding or deleting a screen, is a thousand times easier than if you wait until after you have written the code.
Deliverable: Add one page to your wiki called "Design" and add the images of your design here, along with some textual description of each screen and what it is used for.
Milestone 4: Requirements
This will be the main requirements document for your project. If you were charging a client for your work, this document would form part of that contract, specifying exactly what features your software will implement. The other part of the contract would be the payment details.
The document includes the design you made before (so, embed or add links to those images) but extends on that with detailed descriptions of all the desired features.
You will also mark each feature with one of:
Required: Core functionality of the app. Must have these for it to even start working.
Desired: Added functionality, usability, features, cosmetic features.
Aspirational: Other cool stuff you would like to add
Remember: all good programmers should understate what can be done and then over deliver. If you think something is going to take you 4 weeks, tell the client it will take 8. Then, when it inevitably takes you 6 weeks, you will seem ahead of schedule. On a similar note, if the client is asking for a lot of shit, say no. Now is not the time to be a people pleaser. If you want to please them, do it as a surprise addition, after basic functionality has been achieved.
Roughly the required features are those that need to get done first before anything else can even get started: things like logins, navigation menu, connection to backend, etc. They lay the foundation for building the app. An app that only implements the required features will at most get a passing grade in the class: 70.
The desired features are what make your app worth using. They make the app functional, attractive, and easy to use. Roughly, an app that implements all the desired features gets a 90 in the class.
The aspirational features make your app a professional-quality app. Implementing some of these moves it towards 100.
Deliverables:
Make a Requirements wiki page and list your requirements there.
Each item should succinctly explain a feature.
Each one will have a number. You can add sub-numbering, 1.1, 1.2, 1.2.1, etc. if you want.
Each one will be marked as either: Required, Desired, or Aspirational.
Add all the Proof of Concept Issues to your GitHub Issues with label:enhancement, milestone:Proof Of Concept. These are what you will implement first.
Milestone 5: Research
As a developer, you need to be intimately familiar with the technologies you are or could be using. You need to understand the pros, cons, and requirements of each library and platform that is relevant to your project. Thus, you need to be up to date on technology and, since technology seems to be always changing, this will be something you need to do throughout your career.
Specifically, you need to
Know about the various platforms available to you: their options and limitations.
Know about the various libraries that you can use to make your work easier.
Download, install, and build sample 'Hello world' apps using the most promising technologies. It is not enough to just read about it, you have to do it in order to learn.
Learn how to use the specific framework+libraries you choose to use for the project by building little apps with them.
Learn to use your package manager.
All of the above needs to be done before you start coding together with your team. Do not assume your teammates will teach you. You are responsible for learning.
This milestone will take a lot of time and work, which is why you should start working on this milestone as soon as that first meeting occurs where you discussion options.
Deliverable: Create a separate repo (I suggest naming it research-<projectname>) where you will place your sample project built using your team's chosen framework. The project will be more than just "hello world", or cut-n-paste from a tutorial. Start with tutorial code but, add you own code to their code. The app should have some minimal interactivity: user enters some data, program does something with it and shows the user.
Milestone 6: Architecture
Now that you are comfortable working with your chosen framework, you will write a document that roughly describes the big parts of your code. The structure will depend a lot on your chosen framework.
If you are building a webapp then you will probably list the set of database tables (models, for example: rails:ActiveRecords, meteor:Collections, etc), the set Views, and the set of Controllers. For webapps you should also list the of your URLs app, and what lives at each one.
If you are building an Android app then you will list your Activities or Fragments, along with their corresponding Views, as well as your model Java classes. You will also list your database tables (firebase, sqlite, localStorage, etc) if you need persistence, which almost everyone does.
Think deeply about your design. Go over the most common use-cases and check how those will be accomplished in code: which methods will be invoked? do the methods have references to all the objects they need in order to perform their job? Remember that your main goal is *de-coupling** the various classes: the fewer references (method arguments, global variables) they need, the easier your life will be.
Deliverable: Add architecture document to the wiki containing:
List all the languages/frameworks/libraries/services/APIs you plan to use. Explain how they will tie together. For example: This will be a native Android app written in Kotlin, using the android.graphics library, using firebase real-time database for cloud data, and firebase authentication for user accounts.
What package/build manager will you use? npm, gradle, yarn, flutter, pipenv, etc.
List what each person will work on. Everyone must make significant code contributions, or they will fail the class, see Syllabus.
Make sure all the images (if any) are embedded in the wiki page and hosted at GitHub.
Make sure the wiki page is easy to read.
If you are building a webapp:
Deployment How will you deploy? Which hosting provider(s)? Automation? Scripts? Explain.
Are you using Virtual Machines (vmware, vbox, etc) or Containers (docker) for development or deployment? Explain.
Is it a SPA or traditional? or mix? Explain. (My web application development lectures explain the difference.)
List of URLs you will implement. Explain any search arguments in English. Link (actual hyperlink) each URL to the page it shows in your Detailed Design milestone.
If implementing a REST API, document it. List all methods, parameters, and give English description of what they do.
The Views of your app. Embed the images from your Design Milestone. Typically, a webpage includes multiple views. For example, this webpage has a Header, Menu, and Content views (at least).
The Database schema: set of tables/documents with list of attributes and their types. Describe each table and attribute in English.
List of common queries you expect will be needed. Do any of then need to join tables?
If you are building a mobile or desktop app:
Release: How will you create and deliver a binary to testers? Explain. Note that the testers include us (the teachers of this class, when we grade your app). You must deliver a simple to install app: double-click to install.
Are you using Virtual Machines (vmware, vbox, etc) or Containers (docker) for development? If so, explain.
The Models for your app. These could be UML class diagrams, or just models with attributes (with type) and descriptions (in English).
How will your app maintain state? in memory? or database? or both? Note this in your Model Classes.
If you are using a db-backend (say firebase) then include the Database schema: set of tables/documents with list of attributes and their types.
List of common queries you expect will be needed. Do any of then need to join tables?
The Views of your app: name, describe. Embed the images from your Design Milestone. Typically, one page in the app is composed of multiple View elements.
Below will be complete as I do for my Capstone project.
Source Control
Ethical, Legal, and Security Considerations
Proof of Concept (PoC)
PoC Demo
Testing
Beta Release
RC1 Release
Quality Assurance
Website
1.0 Release
Final Demo Video
#erozcodes#studyblr#codeblr#education#self study#production cycle#scrum#devlifecycle#this shit can be so painful and I hope this can help
3 notes
·
View notes
Text
Python App Development Guide [2025]: Build Powerful Applications
Python is the third most popular programming language in 2025, especially for novice programmers and small business owners, and is known for its simplicity, versatility, and focus on code readability.
Python for app development allows developers to create scalable and efficient applications with minimal effort.

Why is Python So Popular for App Development?
Here are 8 key aspects of the popularity of Python for mobile app development.
1- Ease of Learning and Readability:
Python is often praised for its simple and readable syntax. Its code is easy to understand and write, making it an excellent choice for beginners and experienced developers. This ease of learning accelerates the development process and reduces the likelihood of errors.
2- Extensive Libraries and Frameworks:
It has a vast standard library that includes modules and packages for various functionalities. Additionally, numerous third-party libraries and frameworks simplify and speed up development. Popular frameworks such as Django and Flask are widely used for web development, while Kivy is popular for creating cross-platform mobile applications.
3- Versatility of Python App Development:
Python is a general-purpose programming language, making it versatile for different types of app development. Whether you’re working on web development, data analysis, machine learning, or artificial intelligence, Python has tools and Python libraries available to support your project.
4- Community Support:
Python has a large and active community of developers. This community support means that you can find solutions to problems, access documentation, and seek help easily. The collaborative nature of the Python community contributes to the language’s continuous improvement.
5- Cross-Platform Compatibility:
Python is a cross-platform language, meaning that applications developed in Python can run on various operating systems with minimal modifications. This flexibility is particularly beneficial for projects targeting multiple platforms such as Windows, macOS, and Linux.
Using Python for mobile app development involves several steps, and the approach can vary based on the type of application you want to build (web, mobile, desktop, etc.).
Below is a general guide on how to use Python for mobile app development:
Choose the Type of App
Web Development: For web applications, popular frameworks like Django and Flask are commonly used. Django is a high-level web framework that follows the Model-View-Controller (MVC) pattern, while Flask is a microframework that provides more flexibility.
# Example: Installing Django
pip install django
# Example: Creating a new Django project
django-admin startproject projectname
# Example: Running the development server
python manage.py runserver
Mobile Development: For mobile app development with Python, you can use frameworks like Kivy, BeeWare’s Toga, or tools like KivyMD (for material design).
These Python mobile development frameworks allow you to write Python code and deploy it to Android and iOS.
# Example: Installing Kivy
pip install kivy
# Example: Creating a basic Kivy app
python -m pip install kivy
Desktop Development: For desktop applications, frameworks like PyQt or Tkinter are commonly used. PyQt is a set of Python bindings for the Qt application framework, and Tkinter is the standard GUI toolkit included with Python.
# Example: Installing PyQt
pip install PyQt5
# Example: Creating a basic PyQt app
Below are the Simple Steps for Python App Development
Set Up the Development Environment: Install a code editor or Integrated Development Environment (IDE) suitable for Python development, such as VSCode, PyCharm, or Atom.
Learn the Basics of Python: If you’re new to Python, it’s essential to familiarize yourself with the basics of the language. Understand data types, control structures, functions, and object-oriented programming concepts.
Explore Framework Documentation: Depending on the framework you choose, explore the official documentation to understand its features, components, and best practices.
Write Code: Start writing the code for your application. Follow the structure and conventions of the chosen framework.
Test Your App: Write unit tests to ensure the functionality of your application. Use testing frameworks like unittest or pytest.
# Example: Installing pytest
pip install pytest
# Example: Running tests with pytest
pytest
Optimize and Debug: Optimize your code for performance and resolve any bugs or issues. Use debugging tools provided by your IDE or use print statements to troubleshoot.
Package and Distribute: Depending on the type of application, use tools like PyInstaller or cx_Freeze to package your application into executables for distribution.
# Example: Installing pyinstaller
pip install pyinstaller
# Example: Creating an executable with pyinstaller
pyinstaller your_script.py
Deploy: Deploy your application on the desired platform. For web applications, you might need to set up a server. For mobile apps, you can distribute them through app stores, and for desktop apps, users can download and install the executable.
Maintain and Update: Regularly maintain and update your application based on user feedback, feature requests, and bug reports. Remember that Python is a versatile language, and the specific steps may vary depending on the type of application and the chosen framework. Always refer to the official documentation for the tools and frameworks you are using.
Source of Content:Python App Development Guide
#PythonAppDevelopment#PythonApplicationDevelopment#PythonDevelopmentGuide#PythonforAppDevelopment#CustomPythonAppDevelopment#Pythonprogrammingforapps#Pythonmobileappdevelopment#Pythonwebappdevelopment#BenefitsofPythondevelopment
0 notes
Text
A Beginner's Guide to Learning Python
Python is one of today's most popular programming languages, thanks to its simplicity, readability, and versatility. Whether you're interested in data science, web development, automation, or other tech fields, Python is a fantastic starting point. Here's a comprehensive guide to help you begin your Python learning journey. For individuals who want to work in the sector, a respectable python training in pune can give them the skills and information they need to succeed in this fast-paced atmosphere.

Grasp Basic Programming Concepts
Before diving into Python, it's beneficial to understand fundamental programming concepts. Familiarize yourself with variables, loops, conditionals, and functions. Online resources like Codecademy’s “Introduction to Programming” course or Harvard’s CS50 course provide a strong foundation.
Set Up Your Python Environment
First, install Python on your computer. Visit the official Python website to download the latest version and follow the installation instructions for your operating system.
Next, set up a development environment. Beginners often find IDEs like PyCharm or text editors like Visual Studio Code (VSCode) helpful. These tools offer features such as syntax highlighting, debugging, and code suggestions, making coding more accessible and efficient.
Master Python Syntax and Fundamentals
Begin by learning Python's syntax and core concepts. Websites like W3Schools and TutorialsPoint offer excellent introductory tutorials. Focus on these essential topics:
Variables and Data Types
Basic Operators
Control Flow (if statements, for and while loops)
Functions
Lists, Tuples, and Dictionaries
Python’s official documentation is also an invaluable resource for in-depth understanding.
Practice with Projects and Challenges
Hands-on practice is crucial for mastering Python. Start with simple projects and gradually tackle more complex ones. Websites like LeetCode, HackerRank, and Codewars offer coding challenges that help solidify your knowledge.
Here are a few beginner project ideas:
Calculator: Create a basic calculator for simple arithmetic operations.
To-Do List: Develop a command-line application to manage a to-do list.
Web Scraper: Use libraries like Beautiful Soup to scrape data from a website. Enrolling in python online training can enable individuals to unlock full potential and develop a deeper understanding of its complexities.
Explore Python Libraries and Frameworks
Python’s extensive range of libraries and frameworks is one of its greatest strengths. These tools can significantly enhance your productivity and expand your capabilities. Some essential libraries to explore include:
NumPy and Pandas: For data manipulation and analysis.
Matplotlib and Seaborn: For data visualization.
Flask and Django: For web development.
Requests: For making HTTP requests.
Beautiful Soup: For web scraping.

Join the Python Community
Engage with the Python community to enhance your learning experience. Join forums like Reddit’s r/learnpython, Stack Overflow, or the Python Discord server. These platforms offer opportunities to ask questions, share your progress, and receive feedback from experienced developers.
Stay Updated and Keep Learning
The tech field is always evolving, and Python is no exception. Stay updated with the latest developments by following Python-related blogs, subscribing to newsletters, and participating in webinars and conferences. Websites like Real Python and the Python Software Foundation blog are excellent resources for staying current.
Conclusion
Learning Python is a rewarding journey that opens numerous opportunities in the tech industry. By grasping the basics, practicing regularly, exploring libraries, and engaging with the community, you can master Python and apply it to various real-world problems. Consistency is key—keep coding, stay curious, and enjoy the process. Happy coding!
0 notes
Text
The Ultimate Guide to Becoming a Python Full Stack Developer: From Front-End to Back-End Development
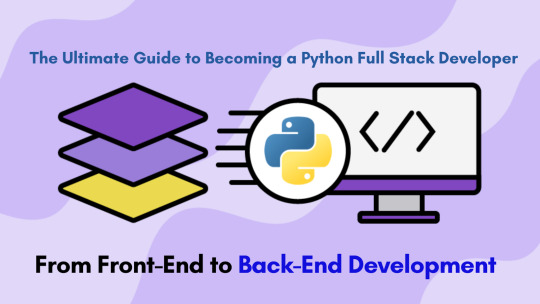
In today's dynamic tech landscape, the role of a Python Full Stack Developer is increasingly in demand. Mastering both front-end and back-end development not only makes you more versatile but also opens up a myriad of career opportunities. This guide will take you through the essential skills and steps needed to become a proficient Python Full Stack Developer.
Understanding Full Stack Development
Full stack development involves working on both the front-end and back-end of a web application. The front-end is what users interact with, while the back-end handles the server, database, and application logic.
Front-End Development
As a Python Full Stack Developer, you need a solid grasp of front-end technologies. Here are the key areas to focus on:
HTML/CSS: The backbone of any web page. HTML structures the content, and CSS styles it. Understanding these is crucial for building responsive and aesthetically pleasing interfaces.
JavaScript: The scripting language of the web. It adds interactivity and dynamism to your web pages. Frameworks like React, Angular, or Vue.js are also worth learning.
Front-End Frameworks: These include Bootstrap, Tailwind CSS, and others that help in quickly designing and customizing web interfaces.
Back-End Development
The back-end is where Python shines. Here’s what you need to know:
Python Programming: Mastering Python is essential. Focus on its syntax, data structures, and libraries.
Django/Flask: These are the most popular Python frameworks for web development. Django is known for its robustness and includes a lot of built-in features, whereas Flask is more lightweight and flexible.
Database Management: Understanding databases is crucial. Learn SQL and how to interact with databases using ORM (Object-Relational Mapping) tools like SQLAlchemy.
APIs: Knowing how to create and consume APIs (Application Programming Interfaces) is fundamental. RESTful APIs are commonly used in web development.
Essential Tools and Technologies
Version Control
Git is the industry standard for version control. Learn how to use Git for tracking changes in your codebase and collaborating with other developers.
Development Environments
Familiarize yourself with Integrated Development Environments (IDEs) like PyCharm, VSCode, or Sublime Text. These tools enhance productivity and ease debugging.
Testing and Debugging
Writing tests ensures your code works as expected. Learn about unit testing, integration testing, and tools like pytest. Also, become proficient in debugging tools to quickly resolve issues.
Building Projects
Practical experience is invaluable. Start by building small projects and gradually increase their complexity. Here are some ideas:
To-Do App: A simple project that helps you understand the full stack workflow.
Blog Platform: Incorporate user authentication, CRUD operations, and front-end frameworks.
E-commerce Site: Integrate payment gateways, product listings, and user management.
Continuous Learning and Improvement
The tech industry evolves rapidly. Stay updated with the latest trends and technologies by:
Joining Developer Communities: Engage with communities like Stack Overflow, GitHub, and Python forums.
Attending Workshops and Conferences: Participate in events like PyCon to network and learn from experts.
Following Influential Developers: Keep up with blogs, YouTube channels, and social media profiles of renowned Python developers.
Career Path and Opportunities
As a Python Full Stack Developer, you have various career paths to choose from:
Web Developer: Build and maintain websites and web applications.
Software Engineer: Develop complex software solutions across various domains.
DevOps Engineer: Focus on automating and streamlining the development process.
The demand for Python Full Stack Developers is high across industries such as tech, finance, healthcare, and more. Companies value developers who can handle both front-end and back-end tasks, making you a valuable asset in any team.
Conclusion
Becoming a Python Full Stack Developer is a rewarding journey that requires dedication, continuous learning, and practical experience. By mastering both front-end and back-end technologies, you'll be well-equipped to build comprehensive and efficient web applications. Embrace the challenge, stay curious, and keep coding!
0 notes
Text
Adding authentication to Django REST Framework (DRF) views involves configuring authentication classes in your DRF settings. DRF provides a variety of authentication classes that you can choose from based on your project's requirements. Here's a general guide on how to add authentication to DRF views
#django#django python#django developers#wagtail cms#django cms#django mongodb#django framework#django software#django framework python#celery with django#django use#django vscode#installing django#pandas django#stackoverflow#jsx#web design#web dev#web development#website#programming#backedn#backend eng#tech#technology#engineering
0 notes
Text
WEB DEVELOPMENT

What is Web Development?
Web development is the process of designing, building, and maintaining websites and web applications. It involves various aspects such as web design, content creation, client-side/server-side scripting, and network security. Web development can range from creating simple static pages to developing complex web-based applications, social networks, and e-commerce platforms.
Key Components of Web Development
Web development is typically divided into three main areas:
Front-End Development:
Role: Focuses on the visual aspects and user interface (UI) of a website. It's what users see and interact with directly.
Technologies:
HTML (HyperText Markup Language): Structures the content on the web.
CSS (Cascading Style Sheets): Styles the content, adding layout, colors, and fonts.
JavaScript: Adds interactivity and dynamic behavior to web pages.
Popular Frameworks and Libraries: React, Angular, Vue.js, Bootstrap.
Tools: Text editors (VSCode, Sublime Text), browser developer tools, version control systems (Git).
Back-End Development:
Role: Manages the server, database, and application logic. It's the behind-the-scenes functionality of a website.
Technologies:
Programming Languages: Python, Ruby, PHP, Java, JavaScript (Node.js).
Frameworks: Express.js, Django, Ruby on Rails, Laravel, Spring.
Databases: MySQL, MongoDB, PostgreSQL.
Tools: Web servers (Apache, Nginx), cloud services (AWS, Azure).
Full-Stack Development:
Role: Combines both front-end and back-end development skills. Full-stack developers can handle the entire web development process.
Benefit: Versatility and the ability to manage both client-side and server-side development.
0 notes
Text
Python With Django
Python courses in Nepal offer a comprehensive learning experience for individuals keen on mastering one of the most versatile and in-demand programming languages in the world. Python is renowned for its simplicity, readability, and wide range of applications across various industries, making it an essential skill for aspiring programmers, data scientists, web developers, and more.
If you would like to take a Python course in Nepal. You can check out this website. They offer a Python with Django course.
Course Module For Python With Django
1. Module 1
Module 1 starts off with an introduction, Django Installation, Django Project Setup, Working directories in Django and many more basic Python needs. It should take about 2 hours to finish module 1 and dive in deeper.
2. Module 2
Module 2 includes settings.py, Concept of apps, Request object, URLs in Django, URL concatenation, Dynamic URLs and many more. It also takes about 2 hours to understand this module.
3. Module 3
Module 3 includes Introduction to HTML, CSS and JS, Bootstrap for web development, Django Templates, Static hosting in Django and other Django principles. It is a module of 6 hours.
4. Module 4
Module 4 provides Function-based views and introduces class-based views, database settings, using SQLite database in Django, VScode extension for SQLite Database, Migrations and their commands, Introduction to Django admin, Creating a table model in Django and so on. It is an 8-hour module.
5. Module 5
In the 5th module, you learn to use HTML forms with Django, Media upload in Django, Create a simple CRUD application using function-based views and HTML forms (with Bootstrap) and so on.
There are many other modules and they make you fluent in Python. You can click here to learn more and enrol now.
For other similar courses, check this website.
0 notes