#easy social share buttons for wordpress
Explore tagged Tumblr posts
Visit Tumblr Blog
Explore Tumblr blogs with no restrictions, modern design and the best experience.
Last Seen Tumblr Blogs


Fun Fact
Tumblr’s reach among the 26-to-35-year-olds in the US is 11%.
Text
Top WordPress Plugins to Supercharge Your Website in 2024

Building and maintaining a WordPress site is both exciting and challenging. While the platform provides a robust foundation, the true power of WordPress lies in its plugins. From enhancing site functionality to improving user experience, WordPress plugins are indispensable tools for developers, businesses, and bloggers alike. In this blog, we’ll explore the best WordPress plugins that can transform your website into a highly functional, user-friendly, and SEO-optimized powerhouse.
What Are WordPress Plugins?
WordPress plugins are software add-ons designed to extend the functionality of your WordPress site. Whether you need to improve site speed, enhance SEO, secure your website, or add unique design features, there’s likely a plugin for that. Plugins allow both beginners and advanced users to customize their sites without coding expertise.
With over 60,000 plugins available on the WordPress Plugin Directory alone, the options can feel overwhelming. Choosing the right plugins for your website’s goals is critical for success. Below, we’ve rounded up some of the most essential WordPress plugins to consider.
Must-Have WordPress Plugins for Every Website
1. Yoast SEO
SEO is crucial for driving organic traffic to your site, and Yoast SEO is one of the best tools for optimizing your content. This plugin provides on-page optimization tips, readability analysis, and technical SEO tools to help your site rank higher on search engines.
2. Elementor
Looking to build a visually stunning website without hiring a designer? Elementor is a drag-and-drop page builder that makes designing websites easy. Its intuitive interface and vast array of widgets allow you to create professional-looking pages in minutes.
3. WPForms
For websites that rely on user interaction, a contact form is a must-have feature. WPForms allows you to create customizable, mobile-responsive forms effortlessly. Whether it’s contact forms, surveys, or payment forms, this plugin has you covered.
4. WooCommerce
If you’re running an online store, WooCommerce is the go-to plugin. It transforms your WordPress site into a fully functional e-commerce platform, complete with features for product listings, payment gateways, and inventory management.
5. Akismet Anti-Spam
Spam comments can clutter your website and ruin user experience. Akismet Anti-Spam automatically filters out spam comments, keeping your site clean and professional.
6. Jetpack
Created by Automattic, the team behind WordPress, Jetpack is a multipurpose plugin offering features like performance optimization, security, site analytics, and social media integration.
7. Rank Math
Another excellent SEO plugin, Rank Math provides advanced features like schema integration, keyword tracking, and detailed analytics. It’s an excellent alternative to Yoast SEO for more advanced users.
8. UpdraftPlus
Backup and restoration are critical for any website. UpdraftPlus allows you to schedule automatic backups and store them securely on cloud services like Google Drive or Dropbox.
9. Smush
Site speed plays a major role in user experience and search engine rankings. Smush compresses images without compromising quality, helping your site load faster.
10. MonsterInsights
Understanding how visitors interact with your site is essential. MonsterInsights integrates Google Analytics directly into your WordPress dashboard, offering real-time insights into traffic, user behavior, and more.
11. W3 Total Cache
Slow-loading websites lose visitors and revenue. W3 Total Cache improves website performance by caching static files and optimizing server resources.
12. Sucuri Security
Cybersecurity is non-negotiable in today’s digital landscape. Sucuri Security offers malware scanning, firewall protection, and blacklist monitoring to keep your site secure.
13. Social Snap
Boost social media engagement with Social Snap, a powerful social sharing plugin. It offers customizable sharing buttons and in-depth analytics to track your social media performance.
14. Litespeed Cache
For websites hosted on LiteSpeed servers, LiteSpeed Cache is a high-performance optimization plugin that enhances speed and reduces server load.
15. TablePress
If your site needs to display complex data, TablePress is a lifesaver. It lets you create and manage tables without requiring any coding knowledge.
Why Use WordPress Plugins?
Enhanced Functionality: WordPress plugins extend the capabilities of your site, making it easier to achieve your goals.
Ease of Use: Many plugins are beginner-friendly and require no technical expertise.
Scalability: Whether you’re running a blog, an e-commerce store, or a portfolio, plugins grow with your needs.
Cost-Effective: Most plugins offer free versions with premium features, making them accessible for all budgets.
Tips for Choosing the Right WordPress Plugins
Identify Your Needs: Start by determining what features your site requires.
Check Reviews and Ratings: Plugins with high ratings and positive reviews are generally more reliable.
Update Frequency: Look for plugins that are updated regularly to ensure compatibility with the latest WordPress version.
Avoid Overloading: Too many plugins can slow down your site. Stick to essential ones.
Final Thoughts
WordPress plugins are the backbone of a successful website. By selecting the right ones, you can enhance your site’s functionality, user experience, and performance. Whether you’re aiming to boost your SEO, secure your site, or create stunning designs, there’s a plugin tailored for your needs.
Experiment with the plugins mentioned above and watch your WordPress site thrive. Remember to regularly review your plugin list and update them to ensure optimal performance.
4 notes
·
View notes
Text
Create Inline & Floating Social Share Bars With The Socializer.css
Socializer.css is a CSS library that makes it easy to create inline or floating share buttons for all major social platforms including Facebook, Twitter, WhatsApp, Reddit, LinkedIn, Pinterest, and more. With 6 button shapes, 9 hover effects, 5 text styles, and over 15 customization options for borders, backgrounds, and shadows – you have over 13,000 possible variations to fit any design…

View On WordPress
2 notes
·
View notes
Text
How to Launch and Grow a Profitable Custom Pin Button Business Online

Custom pin buttons are small, versatile, and packed with personality. From political campaigns and social causes to brand promotions and fan merchandise, pin buttons have long been a tool for expression. Today, thanks to advancements in eCommerce and design tools, selling custom pin buttons online has become a low-investment, high-reward business opportunity.
This guide walks you through how to successfully launch, sell, and grow your online pin buttons business—-from product design to fulfillment and marketing.
Why Pin Buttons Make a Great eCommerce Product
Selling pin buttons is an attractive option for many reasons:
Low production cost
Easy to customize and scale
Lightweight and cheap to ship
Suitable for many niches–music, activism, hobbies, humor, etc.
Perfect for bulk orders, giveaways, or peersonalized gifting
Whether you’re a designer, a brand, or a creative entrepreneur, buttons offer a flexible canvas and a large market potential.
Choose your niche: Successful online sellers typically cater to a specific group. Define your audience before designing your pin buttons. Here are a few popular niches:
Pop culture fans
Pet lovers and animal advocates
Gamers and tech geeks
Activists and cause-based communities
Pride and identity expression
Humor and sarcasm-themed
Motivational and inspirational phrases
Design Unique and Shareable Buttons: Your designs are your biggest selling point. Consider offering:
Custom text and image uploads
Pre-designed collections
Personalized name tags or event badges
Select the Right Button Types and Sizes: Buttons come in various shapes and backings. Common options include:
Round buttons (1”, 1.5”, 2.25”, etc)
Square or rectangular buttons
Magnetic back, pin back, or clothing-safe backs
Choose Your Production Method: You can either print and press your own buttons using button-making machines or use a print-on-demand partner to handle production and fulfillment.
DIY Button Production
Higher control over quality and margins
Requires equipment and storage space
POD Fulfillment Services
Great for startups with no upfront inventory
Provides like Printful, Teespring, and Zazzle offer pin button printing
Build a User-Friendly Online Store: Set up a store using eCommerce platforms like:
Shopify: Easy to use and beginner-friendly
WooCommerce: Customizable and ideal for WordPress users
Magento: Great for larger businesses needing scalability
Market Your Business Creatively: Marketing is the heartbeat of any eCommerce business. Try these tactics:
Social Media Marketing
Share relatable content and button collections on Instagram, TikTok, and Pinterest
Create short videos showing the design process or unboxing
Collaborations
Partner with influencers or niche communities
Offer co-branded or exclusive designs
Email & Retargeting
Collect emails with a “10% off” offer
Run abandoned cart and follow-up campaigns
Event & Bulk Sales
Offer packages for weddings, parties, nonprofits, and conventions
Provide a Great Customer Experience: Your store should offer:
Easy reordering of past designs
Clear return and shipping policies
High-quality previews of custom buttons
Fast and reliable customer support
Analyze, Adapt, and Scale: Once orders start coming in, use analytics tools to track:
Best-selling designs
Customer demographics
Conversion rates
Abandoned cart patterns
Final Thoughts: Start Small, Think Big
Selling custom pin buttons online is a fun, creative, and profitable business idea that doesn’t require huge investment upfront. With the right tools – such as a WooCommerce, Shopify, or Magento Design Tool, combined with creative marketing and great customer service – you can turn your designs into a thriving eCommerce venture.
0 notes
Text
How to Start a Blog on WordPress: Step-by-Step Guide for Beginners

Thinking about starting your own blog? Whether you want to share personal experiences, promote a business, or build a following, blogging is one of the most rewarding digital ventures. And the best part? You don’t need to be a web developer to get started — WordPress makes it incredibly easy.
In this guide, you’ll learn how to start a blog on WordPress step-by-step. From choosing a domain to publishing your first post, we’ll walk you through everything you need to know.
Step 1: Choose a Domain Name and Hosting
Before your blog goes live, you need two things:
A domain name (your blog’s address, like myblog.com)
A hosting provider (the service that stores your website files and makes them accessible on the web)
Choose a domain that reflects your content or brand. It should be simple, memorable, and relevant.
For hosting, go for a provider that offers fast speeds, WordPress support, and good customer service. Many WordPress-optimized hosting options include Bluehost, Hostinger, SiteGround, and Kinsta.
Step 2: Install WordPress
Most hosting services offer one-click WordPress installation, which means you don’t need to touch any code. Once installed, you’ll be able to log into your WordPress dashboard and begin building your site.
If you're unsure about installation, a WordPress Development Company in Udaipur can handle it for you and ensure your blog starts off on the right foot.
Step 3: Pick the Right Theme
Your WordPress theme determines the design and layout of your blog. The right theme should be responsive, fast, and easy to customize.
Recommended free themes for bloggers:
Astra: Lightweight and highly customizable
Neve: Clean design and fast performance
OceanWP: Great for personal or business blogs
Hestia: Stylish and multipurpose
You can preview and install themes directly from your WordPress dashboard by going to Appearance > Themes.
Step 4: Install Essential Plugins
Plugins extend the functionality of your blog. Here are a few essential ones to start with:
Yoast SEO or Rank Math: Improve your blog’s visibility on Google
WPForms: Create contact or feedback forms
UpdraftPlus: Backup your site regularly
Akismet: Filter spam comments
Jetpack: Boost security and track analytics
Just go to Plugins > Add New to install any of these tools.
Step 5: Customize Your Blog Settings
Before publishing your first post, tweak the following:
Site Title and Tagline: Set this under Settings > General
Permalinks: Use “Post name” under Settings > Permalinks for SEO-friendly URLs
Logo and Favicon: Upload branding elements via Appearance > Customize
Navigation Menu: Set up a user-friendly menu to help readers explore your content
Customizing these elements makes your blog look polished and professional.
Step 6: Create Essential Pages
Every blog should have a few key pages in addition to posts:
About Page: Share your story and mission
Contact Page: Let readers reach out via a form or email
Privacy Policy: Important for compliance and trust
Blog Page: Display all your recent articles
You can create these by navigating to Pages > Add New in the dashboard.
Step 7: Write and Publish Your First Blog Post
Now comes the exciting part—writing!
Click on Posts > Add New to begin. Use the Gutenberg block editor to:
Add headings, paragraphs, and images
Embed videos or social media posts
Insert buttons and call-to-action sections
Focus on delivering value to your readers. Whether it’s a tutorial, personal story, or industry insights—make it engaging and easy to read.
Step 8: Promote Your Blog
Once published, don’t just sit back—promote your post to drive traffic:
Share on social media (Facebook, Instagram, LinkedIn)
Join relevant blogging communities
Use email marketing tools to notify subscribers
Leave thoughtful comments on related blogs with a link back to yours
Promotion is just as important as creation when it comes to growing your audience.
Step 9: Optimize for SEO
Search engine optimization helps people find your blog via Google. Follow these tips:
Use an SEO plugin to set titles and meta descriptions
Add internal links to related content
Use keywords naturally in your content
Add alt tags to your images
Submit your sitemap to Google Search Console
SEO is a long game, but it's essential if you want to rank and reach new readers.
Step 10: Keep Your Blog Updated
Consistency is key in blogging. Update your blog regularly with fresh content to keep readers engaged and encourage search engines to crawl your site more often.
Here are some blog post ideas:
How-to guides
Listicles
Personal stories
Product reviews
Interviews
Opinion pieces
Also, keep your plugins, themes, and WordPress version updated to avoid security risks.
Why Choose WordPress Over Other Platforms?
Here’s why WordPress stands out among blogging platforms:
Fully customizable
Open-source and free
Scalable with thousands of plugins
Mobile- and SEO-friendly
Great community support
Unlike limited platforms like Blogger or Wix, WordPress gives you full ownership and flexibility.
If you're serious about long-term growth, design, and performance, it's wise to consult a trusted web design company in Udaipur to fine-tune your theme, layout, and mobile responsiveness.
Final Thoughts
Starting a blog on WordPress is one of the smartest decisions for aspiring writers, entrepreneurs, and businesses. It’s easy to use, rich in features, and backed by a vast community of developers and users.
With the right theme, plugins, and a content plan, you’ll be well on your way to building a successful blog that attracts, informs, and inspires.
0 notes
Text
Social Share nulled plugin 7.8

Unlock the full potential of your website with the Social Share nulled plugin – a powerful, feature-rich tool that brings all the premium social sharing capabilities to your WordPress site absolutely free! Designed for speed, functionality, and seamless integration, this nulled version delivers the same professional features as the original premium plugin, helping you boost engagement, drive traffic, and grow your audience effortlessly. Share buttons, customizable layouts, and smooth performance come standard, with no licensing restrictions. Whether you're a blogger, marketer, or small business owner, the Social Share nulled plugin offers the freedom and flexibility you need—without the cost. Download now and enjoy the benefits of a premium plugin without spending a dime. It's easy, reliable, and fully accessible for everyone looking to enhance their site’s social reach!
0 notes
Text
Product Likes nulled plugin 1.1.3

Unlock Premium Features for Free with the Product Likes Nulled Plugin Looking for a powerful way to boost user engagement on your WordPress site without spending a fortune? The Product Likes nulled plugin offers all the premium features of the original—completely free! Whether you run an eCommerce store, a blog, or a membership site, this plugin helps visitors express their preferences effortlessly, enhancing interaction and retention. Best of all, you get full functionality without paying a dime. Keep reading to discover why this is the perfect addition to your website! Why Choose the Product Likes Nulled Plugin? The Product Likes nulled plugin is a must-have for any WordPress site looking to improve user engagement. This tool allows visitors to "like" products, posts, or pages, creating a more interactive experience. Unlike limited free versions, this nulled edition unlocks all premium features—customizable buttons, analytics, and seamless integration—without restrictions. By choosing a nulled version, you save money while still enjoying top-tier functionality. Plus, it’s easy to install and works just like the paid plugin, making it a smart choice for budget-conscious website owners. Key Advantages: 100% Free – No hidden costs or subscription fees. Full Premium Features – No limitations compared to the original. Easy Setup – Install and activate in minutes. Enhanced Engagement – Encourage visitors to interact with your content. Technical Specifications The Product Likes nulled plugin is designed for seamless performance on any WordPress site. Here’s what you can expect: Compatibility: Works with WordPress 5.0+ and all major themes. PHP Version: Requires PHP 7.2 or higher. Database Support: Fully compatible with MySQL 5.6+. Regular Updates: Includes the latest security patches. Top Features & Benefits This plugin isn’t just about adding a "like" button—it’s about enhancing your site’s functionality in multiple ways. Here’s what makes it stand out: 1. Customizable Like Buttons Match the design to your brand with adjustable colors, sizes, and placements. 2. Real-Time Analytics Track which products or posts get the most likes and optimize your content strategy. 3. Social Sharing Integration Boost visibility by allowing users to share liked items on social media. 4. Lightweight & Fast No bloated code—ensures your site stays fast and responsive. Who Should Use the Product Likes Nulled Plugin? This plugin is ideal for: eCommerce Stores – Let customers "like" products for wishlists or recommendations. Bloggers – Increase reader interaction by allowing likes on posts. Community Sites – Encourage members to engage with content. Affiliate Marketers – Identify popular products to promote. How to Install the Product Likes Nulled Plugin Getting started is simple: Download the plugin file from our site. Upload to your WordPress dashboard (Plugins > Add New > Upload). Activate and configure settings under Product Likes in your admin panel. Enjoy! Your like buttons will now appear based on your preferences. Frequently Asked Questions Is the Product Likes nulled plugin safe to use? Absolutely! We thoroughly test all files to ensure they’re clean and fully functional. Will it slow down my website? No—the plugin is optimized for speed and won’t affect performance. Can I use it with other plugins? Yes, it integrates smoothly with most WordPress plugins, including popular eCommerce tools. Where can I find more nulled WordPress themes? Check out our collection for premium-quality free themes! Ready to transform your site? Download the nulled plugins today and enjoy premium features at no cost!
0 notes
Text
IG Reel Downloader: Easily Save Your Favorite Instagram Reels
Instagram Reels have taken the social media world by storm. With short, engaging videos becoming one of the most popular forms of content, users are constantly looking for ways to save and download their favorite Reels for offline viewing or sharing. This is where an IG Reel Downloader comes into play.
In this article, we’ll dive into what an IG Reel Downloader is, why people use it, and how to download Instagram Reels quickly and safely.
What is an IG Reel Downloader?
An IG Reel Downloader is a tool or online service that allows users to download Instagram Reels to their device. Since Instagram doesn’t offer a built-in download button for Reels, these tools provide a simple workaround to save videos directly to your phone, tablet, or computer.
Most IG Reel downloaders are free, web-based, and do not require any software installation. Some also come in the form of mobile apps or browser extensions.
Why Use an IG Reel Downloader?
There are several reasons why users choose to download Reels using these tools:
Offline Viewing: Save Reels for when you don’t have internet access.
Reposting Content: With proper credit, you can repost Reels on your own profile or other platforms.
Inspiration or Research: Content creators often save Reels to study trends, transitions, or editing styles.
Sharing with Others: Easily send Reels via messaging apps like WhatsApp or Telegram.
Whether you're a content creator, digital marketer, or just a casual user, downloading Reels can make content consumption more convenient.
How to Use an IG Reel Downloader
Using an IG Reel Downloader is usually a straightforward process. Here’s a simple step-by-step guide:
Find the Reel: Open Instagram and navigate to the Reel you want to download.
Copy the Link: Tap the three dots (…) on the Reel and select “Copy Link.”
Visit an IG Reel Downloader Website: Open a trusted IG Reel Downloader tool in your browser.
Paste the Link: Paste the copied URL into the downloader’s input box.
Download the Reel: Click the download button, and the video will be saved to your device.
It’s that easy!
Best IG Reel Downloader Tools
Here are a few popular IG Reel downloader tools you can try:
SnapInsta.app
SaveInsta
InstaFinsta
iGram.io
Instadp.io
These tools typically support multiple media types including Reels, Stories, and IGTV videos.
Safety Tips When Downloading IG Reels
While downloading Reels is legal for personal use, it’s important to keep a few safety tips in mind:
Avoid Downloading from Suspicious Sites: Stick to reputable tools to avoid malware or phishing scams.
Respect Copyrights and Privacy: Don’t repost someone else’s content without permission or proper credit.
Don’t Share Personal Info: Reliable downloader tools won’t ask for your Instagram login credentials.
Final Thoughts
With the rise of short-form video content, tools like an IG Reel Downloader have become essential for many users. Whether you want to save inspirational content, share fun videos with friends, or study trends as a content creator, these tools make the process quick and hassle-free.
Always use IG Reel downloaders responsibly, and enjoy having your favorite content at your fingertips—anytime, anywhere.
Let me know if you want a version optimized with meta tags or formatted for WordPress/HTML.
1 note
·
View note
Text
WP Socializer is a #WordPress plugin to add share buttons on your website. 🎉 Free ⚡ Lightweight & fast 🎨 Beautiful, powerful yet easy to use 📱 Mobile ready & responsive Check it out - https://www.aakashweb.com/wordpress-plugins/wp-socializer/
0 notes
Text
10 Best Free Social Media Plugins for WordPress – Speckyboy
New Post has been published on https://thedigitalinsider.com/10-best-free-social-media-plugins-for-wordpress-speckyboy/
10 Best Free Social Media Plugins for WordPress – Speckyboy
WordPress and social media are a powerful combination. And there are plenty of ways to integrate platforms like Facebook, Instagram, X, or TikTok into your website. You can display social content on your site, allow users to share your content, or add functionality like social logins.
The social platform landscape is also changing. The Fediverse makes it easier to integrate with services like Mastodon or Bluesky. It allows you to publish in multiple places via a unified protocol. The WordPress ecosystem has embraced this model.
Social media’s importance is evident in the number of available plugins. You’ll find options for top platforms that offer a variety of functions. There’s something available for every niche.
With that in mind, let’s look at some top social media plugins for WordPress!
ActivityPub turns your WordPress website into a federated profile. It publishes your content to multiple platforms that support the Fediverse (Mastodon, among others). Followers will then see your blog posts in their feeds. The neat aspect is that your profile name is consistent across federated platforms.
Users follow you on the service of their choice and enjoy your content. It’s a great way to nurture an online community.
This plugin solves a longstanding problem for those posting to multiple social networks. It combines your Facebook, Instagram, Pinterest, and Twitter/X profiles into an attractive grid layout embedded on your site. It creates better awareness of your profiles and ensures users won’t miss anything.
AddToAny is a longtime favorite that makes it easy for visitors to share your content. It works with every social platform you can imagine – there’s also an option to share via email. In addition, you can customize the design and location of the plugin’s sharing UI. This plugin is perfect for taking full control of social sharing.
Open Graph is a protocol for sharing rich content on social platforms like Facebook and Twitter/X. This plugin allows you to customize the Open Graph tags generated by your content.
Thus, content looks how you want when embedded into social media. The plugin works with all WordPress content and integrates with WooCommerce, Yoast SEO, and others.
Posting links to your content across multiple platforms is a pain. Blog2Social makes it easier by automating the process.
The free version works with Bluesky, Facebook, LinkedIn, Threads, and more. There’s also an add-on that works with Twitter/X and a premium version with advanced features. It turns a tedious task into a piece of cake.
WP Social is a suite of tools for adding social media to your WordPress website. First, you’ll find sharing buttons that work with a selection of social platforms. You can customize the layout and services displayed.
A social counter shows how many times your content was shared on a particular service. Lastly, a social login/registration function lets users create an account using one of nine compatible services (Facebook, GitHub, Google, etc.). It may be the only social plugin you need.
You can use Jetpack Social to automate content sharing and increase engagement. Share posts and WooCommerce products automatically and use the included scheduling tools to choose the perfect timing.
The plugin integrates with multiple services and adds helpful tools to the Block Editor. If you have a Jetpack Social plan, you’ll have access to the social image generator feature.
Here’s a plugin that helps spread the word about your WooCommerce products. It adds a custom set of social sharing icons to individual product pages.
Here are options for icon placement, shape, and order. There’s also a handy “copy to clipboard” option so users can grab your product’s URL. The pro version includes a “floating” icon bar, tooltips, and more.
Video creators will love Feeds for YouTube. It’s a tool for easily embedding a YouTube channel into your WordPress website. You can customize the look of your feed and even display multiple feeds.
The plugin will check for new videos hourly (or choose a custom interval), so your site will always show the latest content. The Pro version adds compatibility with live broadcasts via the YouTube Live API.
Use AdTribes to expand the reach of your WooCommerce store. The plugin creates product feeds that integrate with services like Facebook and Google. Filtering options let you choose which products and what product data is included in your feed. Now, customers can view your products right from their social feeds.
Seamlessly Add Social Media to WordPress
Integrating social media into your website has real benefits. For example, embedding a feed adds dynamic content and builds awareness. Even better is that feeds are relatively simple to set up. From there, it’s smooth sailing.
The other big benefit is the opportunity to add functionality. Social logins make it easier for users to register for your site. And product feeds entice users to visit your online shop.
The idea is to reach people where they are. The options above (and the untold number of other social plugins) help you do so. The possibilities are almost limitless.
Social Media WordPress Plugin FAQs
What Are Social Media Plugins for WordPress?
They’re plugins that allow you to connect your WordPress site with various social media platforms. They offer sharing buttons, auto-posting to social media, and allowing you to display your social feeds on your site.
Who Should Use Social Media Plugins?
They’re perfect for website owners who want to improve their social media presence, like bloggers, businesses, and online retailers, or anyone looking to increase their site’s engagement through social media.
Can Social Media Plugins Help in Growing My Site’s Audience?
Yes, by making sharing effortless and displaying your social activity, these plugins can attract more visitors and encourage them to interact with your content.
More Essential Free WordPress Plugins
Related Topics
#ADD#add-on#API#awareness#Blog#buttons#Cake#channel#clipboard#Community#content#creators#data#Design#display#easy#email#Essential WordPress Plugins#Facebook#Features#free plugins#Full#functions#generator#github#Google#Graph#grid#hourly#how
0 notes
Text
The Power of Smart Control Design in Blogging
In the digital age, creating a successful blog requires more than just good content. It demands structure, efficiency, and a seamless user experience. SmartControlDesign plays a crucial role in optimizing blogs to enhance readability, engagement, and overall functionality. Whether you are a seasoned blogger or just starting, understanding the importance of intelligent design can make a significant impact on your blog’s performance.
The Role of Smart Control Design in Blogging
Every successful blog is built on a solid foundation of smart design elements. These include intuitive navigation, optimized layouts, and interactive components that keep readers engaged. When you implement SmartControlDesign, you are essentially structuring your blog in a way that improves user experience and encourages visitors to stay longer.
https://www.smartcontroldesign.com/wp-content/uploads/bfi_thumb/Blogging_Site-qu2ygpvu8gquoes3gupabsc95lolhca2xa7f08kfq0.jpg
1. Enhancing User Experience
A blog should be easy to navigate, visually appealing, and free from clutter. Smart control design ensures that readers can find what they are looking for without unnecessary distractions. By using well-defined categories, a clear menu, and strategically placed call-to-action buttons, bloggers can guide their audience effortlessly through their content.
2. Mobile Optimization
Today, a majority of readers access blogs from their smartphones. A responsive design ensures that the blog adapts to various screen sizes without compromising readability or functionality. SmartControlDesign includes mobile-friendly layouts, fast-loading pages, and easy-to-click buttons that improve the mobile browsing experience.
3. SEO-Friendly Structure
A well-structured blog is not only user-friendly but also search engine friendly. Optimized headings, proper use of meta tags, and keyword placement can improve search rankings. SmartControlDesign incorporates these elements, making it easier for search engines to crawl and index your blog, ultimately increasing visibility.
The Importance of Smart Control Design in Blogging Strategy
A blogging strategy without smart control design is like a house without a solid foundation. Here’s how a well-designed blog contributes to success:
1. Higher Engagement and Retention Rates
A well-designed blog keeps readers engaged. By using interactive elements such as comment sections, social media sharing buttons, and embedded videos, bloggers can encourage audience participation. SmartControlDesign also ensures a consistent flow of information that makes reading more enjoyable.
2. Faster Loading Speeds
Page speed is a crucial factor in blogging success. If a blog takes too long to load, visitors are likely to leave before even reading the content. A properly optimized SmartControlDesign minimizes load times by reducing unnecessary elements, compressing images, and leveraging caching techniques.
3. Better Content Presentation
Content is king, but how you present it matters just as much. A well-structured blog with clear headings, bullet points, and easy-to-read fonts enhances comprehension. Using contrasting colors, whitespace, and interactive features ensures that the content remains engaging and digestible.
Implementing Smart Control Design in Blogging
Now that we understand the benefits of SmartControlDesign, let's explore how to implement it effectively.
1. Choose the Right Blogging Platform
Selecting a blogging platform that supports smart design elements is crucial. Platforms like WordPress, Wix, and Squarespace offer customizable templates that cater to different blogging needs. Choose a theme that aligns with your content style and audience preferences.
2. Optimize Your Blog Layout
A clutter-free layout with a clear hierarchy of information ensures that readers can navigate seamlessly. Use:
A clean and organized homepage
Easy-to-read fonts and proper spacing
Clearly defined sections with relevant images and videos
3. Prioritize Mobile-Friendly Design
Make sure your blog is mobile-friendly by using:
Responsive themes
Scalable images
Fast-loading scripts
4. Improve Readability with Smart Typography
Using the right typography enhances readability. Stick to:
A simple and professional font style
Proper font size (16px or larger)
Adequate line spacing
5. Integrate Interactive Elements
Enhancing user engagement through interactive components makes a blog more dynamic. Consider adding:
Polls and quizzes
Comment sections
Social media sharing options
The Future of Blogging with Smart Control Design
As technology evolves, so do blogging trends. Incorporating SmartControlDesign ensures that your blog remains ahead of the curve. Future trends may include:
AI-driven personalization: Blogs tailored to individual user preferences
Voice search optimization: Structuring content to align with voice search queries
Augmented reality (AR) integration: Enhancing storytelling through immersive experiences
Conclusion
Blogging is more than just writing—it’s about delivering an exceptional user experience. By implementing SmartControlDesign, bloggers can create visually appealing, highly functional, and engaging platforms that keep readers coming back for more. Whether you’re a beginner or an experienced blogger, prioritizing smart design will set your blog up for long-term success.
Are you ready to take your blogging experience to the next level? Start integrating SmartControlDesign today and see the difference it makes!
0 notes
Text
News Website Designing Services: Build a Powerful & Engaging News Platform
In today’s fast-paced digital world, having a well-designed news website is essential for delivering real-time information to audiences worldwide. Whether you are an independent journalist, a media company, or a startup, a professional and user-friendly news website is crucial for credibility and audience engagement.
Our News Website Designing Services ensure that your platform is modern, fast, and SEO-optimized, helping you reach a wider audience while maintaining a seamless user experience. This article will guide you through the importance of a well-structured news website, key features, and how our expert services can help you create a top-tier news portal.
Why Do You Need a Well-Designed News Website?
A news website serves as a digital hub where readers consume the latest updates, insights, and breaking news. A poorly designed platform can lead to high bounce rates, lower user engagement, and poor search engine rankings.
Benefits of a Professionally Designed News Website:
✅ Faster Load Speed – Ensure quick access to breaking news updates. ✅ SEO Optimization – Rank higher on Google and attract more visitors. ✅ Mobile-Friendly Design – Cater to the growing number of mobile users. ✅ Enhanced Readability – Improve user experience with clean layouts. ✅ Scalability & Security – Handle large volumes of traffic with ease.
Key Features of a High-Quality News Website
1. Responsive & Mobile-Friendly Design
Your news website must work seamlessly across all devices, including desktops, tablets, and smartphones. A mobile-first approach ensures a wider reach and better user engagement.
2. SEO-Optimized Structure
A well-structured news website should follow SEO best practices to improve visibility on search engines. This includes proper HTML formatting, optimized images, fast loading speed, and schema markup for news articles.
3. User-Friendly Navigation
Clear categories, search functionality, and easy navigation enhance user experience. Visitors should quickly find the latest news without hassle.
4. Multimedia Integration
Adding high-quality images, videos, and infographics keeps your audience engaged and makes your content more interactive.
5. Real-Time Updates & Breaking News Section
A well-designed news website should feature real-time updates to keep readers informed of the latest developments.
6. Secure & Scalable Hosting
A news website must be able to handle sudden spikes in traffic. Cloud hosting solutions and CDN (Content Delivery Network) integration ensure high performance.
7. Social Media Integration
Make sharing easy by integrating social media buttons that allow users to share articles instantly.
8. Advertisement Management
Monetization options such as Google AdSense, sponsored content, and banner ads should be seamlessly integrated without disrupting user experience.
9. Newsletter & Subscription Options
Building an email subscriber base helps in delivering personalized news updates and increasing audience retention.
10. Content Management System (CMS)
A powerful CMS like WordPress, Joomla, or Drupal allows easy content updates and management for journalists and editors.
How Our News Website Designing Services Help You
We provide custom news website design solutions tailored to your specific requirements. Our expertise ensures that your site is professional, engaging, and optimized for success.
Our Services Include:
✅ Custom Website Design – We create a unique, visually appealing layout based on your brand. ✅ SEO Optimization – We implement advanced SEO strategies to boost search rankings. ✅ Mobile & Speed Optimization – Ensure fast load times and mobile compatibility. ✅ Secure Hosting & Maintenance – Keep your website secure and updated regularly. ✅ Monetization Strategy – Integration of AdSense, affiliate marketing, and premium content access. ✅ CMS Setup & Training – Empower your team to manage and update content with ease. ✅ Social Media & Newsletter Integration – Expand your audience reach and engagement.
Steps to Create a High-Performance News Website
Step 1: Requirement Analysis
We discuss your needs, goals, and target audience to develop a customized website plan.
Step 2: Wireframe & Design Mockups
Our team creates user-friendly and visually appealing website mockups.
Step 3: Development & Testing
We build a fast, secure, and SEO-optimized news website with real-time testing.
Step 4: Content & SEO Implementation
We add high-quality news content, integrate multimedia, and apply SEO best practices.
Step 5: Launch & Ongoing Support
Once the website is live, we provide ongoing support and maintenance to ensure smooth performance.
Why Choose Us for News Website Designing?

🚀 Industry Expertise – Years of experience in designing news websites for global clients. 📈 SEO-Focused Approach – We prioritize SEO to drive more traffic and improve visibility. 💰 Affordable Packages – Custom pricing plans to fit every budget. 🛠 Technical Support & Maintenance – 24/7 assistance for updates and issue resolution. ⏳ Fast Turnaround Time – Get your news website ready within weeks.
Conclusion
A professionally designed news website is essential for delivering real-time updates, engaging readers, and monetizing content effectively. Whether you’re starting a news portal or revamping an existing one, our News Website Designing Services ensure a fast, secure, and SEO-friendly platform that drives traffic and maximizes engagement.
0 notes
Text
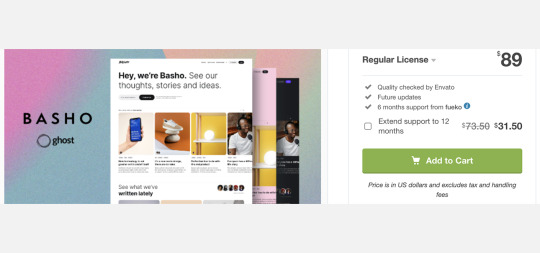
Basho Theme Review: Best Pick for Ghost Users 2025
Basho Theme is a simple and clean Ghost blog theme for writers, creators, and publishers. It loads fast, looks great on all screens, and is easy to customize. You don’t need coding skills just install, tweak, and start sharing your content.
Visit Our Official Website
Introduction to Basho Theme
So, you’re thinking about getting a Ghost theme for your blog? Maybe you’ve scrolled through tons of options and stumbled upon Basho Theme. It looks sleek, modern, and promises high performance. But is it really worth your money?

What Makes It Stand Out?
Basho Theme isn’t your typical blog theme. First off, let’s clear something up, it’s not a WordPress theme. It’s built exclusively for Ghost, a modern publishing platform designed for speed and simplicity.
Here’s what makes Basho Theme different:
Lightweight & Minimalist: It loads fast, keeping your blog smooth and responsive.
SEO Friendly: The clean design ensures search engines can easily crawl and rank your content.
Fully Responsive: Works great on mobile, tablets, and desktops.
Customizable Layouts: Change fonts, colors, and layouts without touching code.
Membership & Subscription Ready: Built-in support for Ghost’s membership features.
If you love flexibility but don’t want to deal with complicated setups, Basho Theme is worth considering.
Visit Our Official Website
Features of Basho Theme
Speed & Performance
Nobody likes a slow website. A slow-loading blog means higher bounce rates and lost readers. Basho Theme is optimized for speed and scores 99/100 on PageSpeed Insights, which is impressive.
With its lightweight structure, it ensures your blog runs smoothly, even with heavy images or multimedia content.
Customization Options
If you like to tweak things to match your style, Basho Theme gives you 15+ font pairs, custom background colors, and different layouts for headers and posts. You don’t need coding skills, just adjust settings, and you’re good to go.
Membership & Subscriptions
This feature is a game-changer. If you plan to monetize your blog through memberships, Basho Theme has custom sign up, login, and pricing pages. Plus, there’s an option to create exclusive content for paid subscribers.
SEO & Readability
Search engines love clean and structured websites. Basho Theme ensures your content is properly formatted, making it easy to read for both humans and search engines.
It also supports:
SEO-friendly URLs
Responsive images
Optimized metadata
Social sharing buttons
Is Basho Theme Easy to Use?
Yes, and here’s why.
Installation is simple upload the theme, activate it, and start customizing. Even if you’re not tech savvy, you’ll have no trouble setting it up. The navigation is intuitive, and everything feels organized and structured.
Want to switch fonts? Change colors? Adjust layouts? You can do all this without writing a single line of code.
Visit Our Official Website
Pricing & Licensing
Let’s talk about cost. Basho Theme offers two pricing plans:
Regular License ($89): For personal blogs or business sites without paid access.
Extended License ($699): For sites that charge users for content.
CHECK OUT BASHO
For a premium Ghost theme with regular updates and strong support, the price is reasonable. If you want a theme that works out of the box without endless tweaking, Basho Theme is worth considering.
Pros and Cons
Pros:
Fast & Lightweight – Helps improve SEO and user experience.
Easy Customization – No coding needed.
Built-in Membership Support – Great for bloggers who want to monetize.
Regular Updates & Support – Ensures long-term usability.
Optimized for Ghost 5.x – Works seamlessly with the latest version.
Optimized for Ghost 5.x – Works seamlessly with the latest version.
Cons:
Not a WordPress Theme – If you use WordPress, this isn’t for you.
Limited to Ghost Users – You need to be on the Ghost platform.
Who Should Use Basho Blog Theme?
If you’re running a Ghost-powered blog and want a theme that’s fast, customizable, and supports memberships, then Basho Theme is a solid choice.
Here’s who will benefit the most:
Writers & Bloggers – Looking for a distraction-free and easy-to-use design.
Tech Enthusiasts – Who want a modern, high-performance theme.
Membership-Based Sites – Need built-in support for subscriptions.
However, if you’re using WordPress, you’ll need to look elsewhere.
Visit Our Official Website
Final Verdict
If you’re on Ghost and need a theme that’s fast, customizable, and supports memberships, Basho Theme is a great investment.
It’s built for performance, works seamlessly with Ghost 5.x, and comes with all the essential features a blogger needs.
So, should you buy it? If you want a hassle free blogging experience with a clean and professional design, yes absolutely!
Note: You can read more about similar products and explore all other software related reviews available on the Vidmate.
0 notes
Text
Data Science & Analytics Saas WordPress Responsive Website
Creating a WordPress website for a Data Science & Analytics SaaS can be a fantastic way to showcase your services and connect with potential clients. Here are some steps and tips to help you get started:
1. Choose a Domain Name and Hosting
Domain Name: Pick a domain name that reflects your brand and is easy to remember.
Hosting: Choose a reliable hosting provider that supports WordPress. Some popular options include Bluehost, SiteGround, and WP Engine.
2. Install WordPress
Installation: Most hosting providers offer one-click WordPress installation. Follow the instructions provided by your hosting service to get WordPress up and running.
3. Select a Theme
Theme: Choose a WordPress theme that suits the style and tone of your Data Science & Analytics SaaS. Look for themes that are responsive, SEO-friendly, and customizable. Some popular themes include Xamin Lite, Divi, and Pivotal.
4. Customize Your Website
Header and Footer: Customize the header and footer to include your logo, contact information, and social media links.
Navigation Menu: Create a clear and easy-to-navigate menu that includes sections like Home, About, Services, Blog, and Contact.
Color Scheme: Choose a color scheme that aligns with your brand identity.
5. Add Essential Plugins
SEO Plugin: Use an SEO plugin like Yoast SEO to optimize your website for search engines.
Security Plugin: Install a security plugin like Wordfence to protect your website from cyber threats.
Analytics Plugin: Use Google Analytics to track and analyze your website traffic.
Social Media Plugins: Add social media sharing buttons to encourage visitors to share your content.
0 notes
Text
The Ultimate Guide to Building a Website: From Planning to Launch

Building a website is an exciting yet complex process that requires careful planning, execution, and maintenance. Whether you're creating a personal blog, an e-commerce store, or a corporate website, this guide will walk you through every step—from planning to launch—to ensure your website is functional, user-friendly, and optimized for success.
1. Planning Your Website
Before diving into design or development, it’s crucial to lay a solid foundation for your website. Here’s how to get started:
Define Your Goals and Target Audience
Identify the purpose of your website (e.g., selling products, sharing information, building a community).
Understand your target audience’s needs, preferences, and behaviors.
Choose a Domain Name and Hosting Provider
Select a domain name that is short, memorable, and relevant to your brand.
Choose a reliable hosting provider that offers good speed, uptime, and customer support.
Create a Sitemap and Wireframe
A sitemap outlines the structure of your website, including all pages and their hierarchy.
A wireframe is a visual blueprint of your website’s layout, helping you plan the placement of elements like headers, images, and buttons.
2. Choosing the Right Platform
The platform you choose will determine how your website is built and managed. Here are some popular options:
Content Management Systems (CMS)
WordPress: Highly customizable and beginner-friendly, ideal for blogs, portfolios, and business websites.
Wix: Drag-and-drop builder, perfect for small businesses and personal websites.
Squarespace: Known for its stunning templates, great for creatives and small businesses.
Shopify: Designed for e-commerce, offering robust features for online stores.
Custom Development
If you need a highly unique or complex website, consider hiring a web development company in Kochi to build a custom solution tailored to your needs.
3. Designing Your Website
Design plays a critical role in user experience (UX) and engagement. Follow these tips to create a visually appealing and functional design:
Responsive Design
Ensure your website looks great on all devices (desktop, tablet, mobile).
Use a mobile-first approach to prioritize mobile users.
User Interface (UI) and User Experience (UX)
Keep the design clean and intuitive, with easy navigation.
Use consistent fonts, colors, and styles to maintain brand identity.
Visual Elements
Use high-quality images and videos to enhance your content.
Optimize visuals for fast loading times.
4. Development Process
Once the design is finalized, it’s time to bring your website to life. Here’s what the development process involves:
Front-End Development
Focuses on the visual and interactive aspects of your website.
Uses languages like HTML, CSS, and JavaScript.
Back-End Development
Handles the server-side functionality, such as databases and user authentication.
Uses languages like PHP, Python, or Ruby.
Frameworks and Libraries
Use frameworks like Bootstrap (for front-end) or Laravel (for back-end) to streamline development.
Leverage libraries like React or Angular for dynamic, interactive features.
5. Adding Functionality
Your website needs more than just a pretty design—it needs functionality to meet user needs. Here’s how to enhance your site:
Plugins and Widgets
Add features like contact forms, social media integration, and SEO tools using plugins.
Use widgets to display dynamic content, such as recent posts or testimonials.
E-Commerce Features
If you’re building an online store, integrate payment gateways, product catalogs, and shopping carts.
Platforms like WooCommerce (for WordPress) or Shopify make this process easier.
SEO Best Practices
Optimize your website for search engines by using proper meta tags, alt text, and structured data.
Ensure your site is fast, mobile-friendly, and secure (HTTPS).
6. Testing and Debugging
Before launching, thoroughly test your website to ensure it works flawlessly:
Cross-Browser and Cross-Device Testing
Check how your website performs on different browsers (Chrome, Safari, Firefox) and devices (desktop, tablet, mobile).
Performance Optimization
Use tools like Google PageSpeed Insights or GTmetrix to identify and fix performance issues.
Compress images, minify CSS/JavaScript, and enable caching.
Debugging
Fix any bugs or errors that could affect user experience.
Test forms, links, and interactive elements to ensure they work as intended.
7. Launching Your Website
Once your website is ready, it’s time to go live. Follow these steps for a smooth launch:
Final Checks
Review all content for accuracy and consistency.
Test all functionalities, including forms, buttons, and navigation.
Set Up Analytics
Install tools like Google Analytics and Google Search Console to track traffic, user behavior, and performance.
Submit to Search Engines
Submit your sitemap to Google and Bing to ensure your site is indexed quickly.
8. Post-Launch Maintenance
Your work doesn’t end after the launch. Regular maintenance is essential to keep your website running smoothly:
Content Updates
Regularly publish new content or update existing pages to keep your site fresh and relevant.
Security
Use security plugins or services to protect your site from threats.
Regularly update your CMS, plugins, and themes to patch vulnerabilities.
Backups
Schedule regular backups to prevent data loss in case of technical issues.
Why Choose Professional Web Development Services?
While DIY website builders are great for beginners, professional services offer unparalleled expertise and customization. If you’re looking for web development in Kochi, consider partnering with a trusted agency like SvaHub Media. Their team of experts can help you design, develop, and launch a website that meets your unique needs.
For businesses in Kochi, web development services in Kochi provide end-to-end solutions, from planning and design to post-launch support. Whether you need a simple blog or a complex e-commerce platform, professional developers can deliver a high-quality website that drives results.
Final Thoughts
Building a website is a multi-step process that requires careful planning, execution, and ongoing maintenance. By following this guide, you can create a website that not only looks great but also performs well and meets your goals. Whether you choose to build your site yourself or hire a professional team, the key to success lies in understanding your audience, optimizing for usability, and staying committed to continuous improvement.
If you’re ready to take your online presence to the next level, consider partnering with a web development company in Kochi to bring your vision to life. With the right strategy and expertise, your website can become a powerful tool for growth and success.
0 notes
Text
How to Make a FREE Business Website in 2025 (WordPress & Elementor Tutorial for Beginners)
Creating a professional business website for free in 2025 is simpler than ever with tools like WordPress and Elementor. Here’s a step-by-step guide tailored for beginners:
Step 1: Choose a Free Hosting Platform
Platforms like InfinityFree, 000webhost, or WordPress.com (free plan) allow you to host your site for free.
Register an account on your chosen platform. Note that free plans may have limitations like ads or a subdomain (e.g., yoursite.wordpress.com).
Step 2: Install WordPress
If your free hosting service doesn’t automatically install WordPress, access the hosting dashboard and use the 1-click WordPress installer.
Log in to your WordPress admin panel at yourdomain.com/wp-admin.
Step 3: Select a Free Theme
Go to Appearance > Themes > Add New in your WordPress dashboard.
Search for a business-friendly, responsive theme like Astra, OceanWP, or Neve.
Install and activate your chosen theme.
Step 4: Install Elementor (Free Version)
Navigate to Plugins > Add New in the WordPress dashboard.
Search for "Elementor" and click Install Now, then Activate.
Elementor allows drag-and-drop design, making it easy for beginners.
Step 5: Create Essential Pages
Home Page
Go to Pages > Add New, name it "Home," and click Edit with Elementor.
Use Elementor templates or build a custom design using widgets like headings, images, and buttons.
About Page
Highlight your business mission, values, and team.
Use Elementor to add an engaging layout.
Contact Page
Include a contact form (use the free WPForms plugin), business address, phone number, and a Google Map (via Elementor widgets).
Service/Products Page
Showcase your offerings with images, descriptions, and links.
Use Elementor’s pricing table or image gallery widgets.
Step 6: Customize Site Settings
Go to Appearance > Customize to modify:
Site Identity: Add your logo and site title.
Colors and Fonts: Match your brand aesthetic.
Menu: Create and organize your navigation menu under Appearance > Menus.
Step 7: Optimize for Mobile
Use Elementor’s responsive mode to ensure your site looks great on mobile devices.
Adjust text sizes, spacing, and layouts as needed.
Step 8: Publish Your Website
Set your homepage: Go to Settings > Reading and select the static page option, then choose "Home."
Click Publish on each page to make your site live.
Step 9: Promote Your Website
Share your site on social media, Google My Business, and email signatures.
Encourage clients to visit and provide feedback.
Bonus: Upgrade as Needed
For more features like a custom domain, advanced themes, or premium Elementor widgets, consider upgrading to paid plans when your budget allows.
By following these steps, you can build a professional-looking business website for free using WordPress and Elementor in 2025!
For Get More Information then click here - https://digisequel.com/
0 notes
Text
How to Create Your Free Website: A Step-by-Step Guide
In today’s digital age, having an online presence is crucial for both individuals and businesses. Whether you're a freelancer, a blogger, or a small business owner, creating a website can help you showcase your skills, products, or ideas to a wider audience. Luckily, you don’t need to be a tech expert or spend a fortune to get started. With free website builders, you can create your own website in just a few simple steps.
Here’s a step-by-step guide on how to create your free website:
1. Choose a Website Builder
The first step in creating your free website is selecting a website builder. There are several platforms available that allow you to create websites without needing any coding knowledge. Some popular free website builders include:
Wix: Known for its drag-and-drop interface, Wix offers a user-friendly platform with customizable templates.
Weebly: This builder is great for beginners, with easy-to-use tools and a variety of design options.
WordPress.com: Perfect for blogs and more complex websites, WordPress offers a free plan that provides many features, including themes and plugins.
Google Sites: Ideal for simple websites, Google Sites offers basic functionality and integrates well with other Google tools.
Each of these builders has a free plan, but keep in mind that free websites may come with limitations like ads, subdomains (e.g., yoursite.wix.com), and fewer customization options. However, they’re a great starting point.
2. Sign Up and Choose a Template
Once you've selected a website builder, sign up for an account. Most platforms will ask you for basic details such as your email address and password. After signing up, you’ll typically be prompted to choose a template or theme for your website.
Templates serve as pre-designed frameworks that make it easier for you to get started. You can choose a template that matches the purpose of your website, whether it’s a blog, portfolio, business site, or personal project. Most website builders offer various templates, and you can preview them before selecting the one you like.
3. Customize Your Website
After choosing a template, you’ll have the option to customize it. This is where you can make the website your own. The customization options vary depending on the website builder, but typically include:
Changing text: Update the placeholder text with your own content, such as your name, bio, services, or blog posts.
Uploading images: Add photos or images to make your website visually appealing.
Modifying colors and fonts: Customize the color scheme and fonts to match your brand or style.
Adding new sections: Add new pages, sections, or widgets to enhance the functionality of your site.
Most free website builders offer drag-and-drop functionality, which makes it easy to move elements around the page. If you want to make more advanced changes, some platforms also allow you to edit the HTML or CSS.

4. Set Up a Domain Name
With most free website builders, you’ll receive a subdomain (e.g., yourname.wixsite.com). While this is fine for personal or experimental websites, using a custom domain (e.g., yourname.com) can make your website look more professional. You can upgrade to a paid plan to get a custom domain, or if you prefer to stick with the free version, choose a subdomain that reflects your brand or name.
5. Publish and Promote Your Website
Once you're satisfied with how your website looks, it’s time to publish it. Simply click the “publish” button, and your website will go live! Now, it's time to share it with the world. Promote your website on social media platforms, email signatures, and any other channels to drive traffic.
Conclusion
Creating a website doesn’t have to be a complicated or costly process. With free website builders, you can get your website up and running in no time. By choosing a user-friendly platform, customizing a template, and publishing your content, you’ll be well on your way to establishing a professional online presence.
Remember, as your website grows and your needs evolve, you can always upgrade to a paid plan for more features, including custom domains, advanced customization options, and additional storage. Happy building!
1 note
·
View note