#ec2instances
Explore tagged Tumblr posts
Visit Tumblr Blog
Explore Tumblr blogs with no restrictions, modern design and the best experience.
Last Seen Tumblr Blogs


Fun Fact
US Tumblr user growth rate is estimated to slow down to 4.1%.
Text
Amazon DCV 2024.0 Supports Ubuntu 24.04 LTS With Security
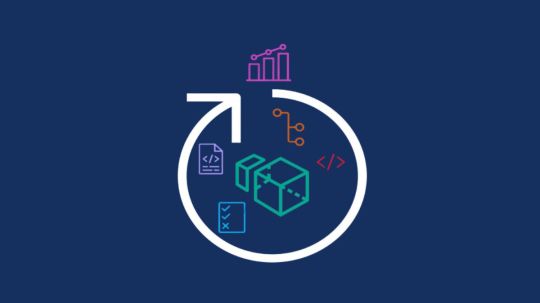
NICE DCV is a different entity now. Along with improvements and bug fixes, NICE DCV is now known as Amazon DCV with the 2024.0 release.
The DCV protocol that powers Amazon Web Services(AWS) managed services like Amazon AppStream 2.0 and Amazon WorkSpaces is now regularly referred to by its new moniker.
What’s new with version 2024.0?
A number of improvements and updates are included in Amazon DCV 2024.0 for better usability, security, and performance. The most recent Ubuntu 24.04 LTS is now supported by the 2024.0 release, which also offers extended long-term support to ease system maintenance and the most recent security patches. Wayland support is incorporated into the DCV client on Ubuntu 24.04, which improves application isolation and graphical rendering efficiency. Furthermore, DCV 2024.0 now activates the QUIC UDP protocol by default, providing clients with optimal streaming performance. Additionally, when a remote user connects, the update adds the option to wipe the Linux host screen, blocking local access and interaction with the distant session.
What is Amazon DCV?
Customers may securely provide remote desktops and application streaming from any cloud or data center to any device, over a variety of network conditions, with Amazon DCV, a high-performance remote display protocol. Customers can run graphic-intensive programs remotely on EC2 instances and stream their user interface to less complex client PCs, doing away with the requirement for pricey dedicated workstations, thanks to Amazon DCV and Amazon EC2. Customers use Amazon DCV for their remote visualization needs across a wide spectrum of HPC workloads. Moreover, well-known services like Amazon Appstream 2.0, AWS Nimble Studio, and AWS RoboMaker use the Amazon DCV streaming protocol.
Advantages
Elevated Efficiency
You don’t have to pick between responsiveness and visual quality when using Amazon DCV. With no loss of image accuracy, it can respond to your apps almost instantly thanks to the bandwidth-adaptive streaming protocol.
Reduced Costs
Customers may run graphics-intensive apps remotely and avoid spending a lot of money on dedicated workstations or moving big volumes of data from the cloud to client PCs thanks to a very responsive streaming experience. It also allows several sessions to share a single GPU on Linux servers, which further reduces server infrastructure expenses for clients.
Adaptable Implementations
Service providers have access to a reliable and adaptable protocol for streaming apps that supports both on-premises and cloud usage thanks to browser-based access and cross-OS interoperability.
Entire Security
To protect customer data privacy, it sends pixels rather than geometry. To further guarantee the security of client data, it uses TLS protocol to secure end-user inputs as well as pixels.
Features
In addition to native clients for Windows, Linux, and MacOS and an HTML5 client for web browser access, it supports remote environments running both Windows and Linux. Multiple displays, 4K resolution, USB devices, multi-channel audio, smart cards, stylus/touch capabilities, and file redirection are all supported by native clients.
The lifecycle of it session may be easily created and managed programmatically across a fleet of servers with the help of DCV Session Manager. Developers can create personalized Amazon DCV web browser client applications with the help of the Amazon DCV web client SDK.
How to Install DCV on Amazon EC2?
Implement:
Sign up for an AWS account and activate it.
Open the AWS Management Console and log in.
Either download and install the relevant Amazon DCV server on your EC2 instance, or choose the proper Amazon DCV AMI from the Amazon Web Services Marketplace, then create an AMI using your application stack.
After confirming that traffic on port 8443 is permitted by your security group’s inbound rules, deploy EC2 instances with the Amazon DCV server installed.
Link:
On your device, download and install the relevant Amazon DCV native client.
Use the web client or native Amazon DCV client to connect to your distant computer at https://:8443.
Stream:
Use AmazonDCV to stream your graphics apps across several devices.
Use cases
Visualization of 3D Graphics
HPC workloads are becoming more complicated and consuming enormous volumes of data in a variety of industrial verticals, including Oil & Gas, Life Sciences, and Design & Engineering. The streaming protocol offered by Amazon DCV makes it unnecessary to send output files to client devices and offers a seamless, bandwidth-efficient remote streaming experience for HPC 3D graphics.
Application Access via a Browser
The Web Client for Amazon DCV is compatible with all HTML5 browsers and offers a mobile device-portable streaming experience. By removing the need to manage native clients without sacrificing streaming speed, the Web Client significantly lessens the operational pressure on IT departments. With the Amazon DCV Web Client SDK, you can create your own DCV Web Client.
Personalized Remote Apps
The simplicity with which it offers streaming protocol integration might be advantageous for custom remote applications and managed services. With native clients that support up to 4 monitors at 4K resolution each, Amazon DCV uses end-to-end AES-256 encryption to safeguard both pixels and end-user inputs.
Amazon DCV Pricing
Amazon Entire Cloud:
Using Amazon DCV on AWS does not incur any additional fees. Clients only have to pay for the EC2 resources they really utilize.
On-site and third-party cloud computing
Please get in touch with DCV distributors or resellers in your area here for more information about licensing and pricing for Amazon DCV.
Read more on Govindhtech.com
#AmazonDCV#Ubuntu24.04LTS#Ubuntu#DCV#AmazonWebServices#AmazonAppStream#EC2instances#AmazonEC2#News#TechNews#TechnologyNews#Technologytrends#technology#govindhtech
2 notes
·
View notes
Text
Unlock the full potential of #AWS with comprehensive courses at your fingertips. Stay updated on cloud advancements and harness the power of Amazon Web Services for your projects. https://www.dclessons.com/amazon-virtual-private-cloud
#aws#amazonwebservices#amazonvpc#virtualprivatecloud#cloudcomputing#networking#security#ec2#elasticcomputecloud#ec2instances#virtualmachines#linux#windows#ubuntu#centos#subnets#routetables#securitygroups#acls#natgateway#igw#vpn#directconnect#vpcpeering#dhcpoptionssets#dns#vpcflowlogs#availabilityzones#region#learnaws
0 notes
Photo

(via Fix Elastic IP Address Could not be Associated)
0 notes
Link
Services Related Elastic Compute Cloud (EC2) in this article you will learn different types of EC2 Services like AWS Systems Manager, Placement Groups, AWS Elastic Beanstalk and Amazon Elastic Container Service and AWS Far gate etc.
Read More : https://www.info-savvy.com/services-related-elastic-compute-cloud-ec2/
#AmazonElasticContainerService#application#AutoScaling#aws#AWSElasticBeanstalk#EC2instances#awscertification#onlinetraining&certification#AWSOnlinetraining#AWSTraining
0 notes
Video
youtube
AWS EC2 VM Setup | Run Springboot Microservice and Postgres DB in EC2 Se...
Hello friends, a new #video on #aws #cloud #ec2 #server setup #springboot #microservice setup in #ec2server #postgres setup in #ec2instance is published on #codeonedigest #youtube channel. Learn #awsec2 #postgressetup #java #programming #coding with codeonedigest.
@java #java #awscloud @awscloud @AWSCloudIndia #Cloud #CloudComputing @YouTube #youtube #springbootmicroservices #springbootmicroservicesproject #springbootmicroservicestutorial #springbootmicroservicesfullcourse #springbootmicroservicesexample #springbootmicroservicesarchitecture #aws #awscloud #cloud #createawsec2server #createawsec2instance #createawsec2 #awsmanagementconsole #createec2instanceinaws #createec2 #createec2instanceandconnect #createec2instanceinawslinux #awsec2 #awsec2instance #awsec2interviewquestionsandanswers #awsec2instancecreation #awsec2deploymenttutorial #installpostgresec2install #installpostgresec2linux #awsec2connect #awsec2statuschecks #awsec2project #awsec2full #awsec2createinstance #awsec2interviewquestionsandanswersforfreshers #awsec2instancedeployment #awsec2 #awsec2serialconsole #awsec2consolewindows #awsec2serverrefusedourkey #awsec2serialconsolepassword #awsec2serviceinterviewquestions #awsec2serialconsoleaccess #awsec2serialrefusedourkeyputty #awsec2serverconfiguration #awsec2serialconnect #awsec2 #awsec2instance #awsec2instancecreation #awsec2instanceconnect #awsec2instancedeployment #awsec2instancelinux #awsec2instancelaunch #awsec2instanceconnectnotworking #awsec2instanceinterviewquestions #awsec2instancecreationubuntu #awstutorial #awsec2tutorial #ec2tutorial #postgresandpgadmininstall #postgresandpgadmininstallwindows #postgresandpgadmininstallubuntu #postgresandpgadmininstallwindows11 #postgresandpgadmininstallmacos #postgresandpgadmininstallwindows10 #postgrespasswordreset #postgrestutorial #postgresdocker #postgresinstallationerror #postgres #postgresdatabase #rdbms #postgresdatabasesetup #postgresdatabaseconfiguration #database #relationaldatabase #postgresconfiguration #postgresconfigurationfile #postgresconfigurationparameters #postgresconfigfilelocation #postgresconfigurationinspringboot #postgresconfigfilewindows #postgresconfigfilemax #postgresconfigfileubuntu #postgresconfigurereplication #postgresconfigurationsettings #postgresconnectiontoserver #postgresconnectioninjava #postgresconnectioncommandline #postgresconnectioninnodejs#postgrestutorial #postgresdocker #postgresinstallationerror #postgres #postgresdatabase #rdbms #postgresdatabasesetup #postgresdatabaseconfiguration #database #relationaldatabase #postgresconfiguration #postgresconfigurationfile #postgresconfigurationparameters #postgresconfigfilelocation #postgresconfigurationinspringboot #postgresconfigfilewindows #postgresconfigfilemax #postgresconfigfileubuntu #postgresconfigurereplication #postgresconfigurationsettings #postgresconnectiontoserver #postgresconnectioninjava #postgresconnectioncommandline #postgresconnectioninnodejs
Hello Friend, Thanks for following us here.
#youtube#aws#ec2#aws ec2#aws cloud#cloud#s3 bucket#aws s3 bucket#postgres db#postgresdb#postgres#rdbms#spring#springboot#microservice#springboot microservice#spring boot#microservices
2 notes
·
View notes
Video
youtube
🔶AWS EC2 INSTANCES TYPES
https://youtu.be/R4492RA5lV4 🔶AWS EC2 INSTANCES TYPES Amazon EC2 provides a wide selection of instance types optimized to fit different use cases. Instance types comprise varying combinations of CPU, memory, storage, and networking capacity and give you the flexibility to choose the appropriate mix of resources for your applications. So AWS EC2 instances of various types. Each instance type includes one or more instance sizes, allowing you to scale your resources to the requirements of your target workload. #awsec2instancestypes #typesofawsinstances #awsec2instance #ec2instance #aws
0 notes
Text
Vantage Has Acquired Ec2instances.info
https://www.vantage.sh/blog/vantage-has-acquired-ec2instances-info Comments
0 notes
Photo

Lecture 019- AWS EC2 Instance Types | AWS Cloud Practitioner Course http://ehelpdesk.tk/wp-content/uploads/2020/02/logo-header.png [ad_1] I hope everyone will be fine and... #amazon #amazonwebservices #aws #awscertification #awscertifiedcloudpractitioner #awscertifieddeveloper #awscertifiedsolutionsarchitect #awscertifiedsysopsadministrator #awscloudpractitionercourse #awsec2 #awsec2instancetypes #awsinstancetypes #awstraininginenglish #awstutorials #ciscoccna #cloud #cloudcomputing #comptiaa #comptianetwork #comptiasecurity #console #cybersecurity #ec2 #ec2instance #ec2instancetypes #ethicalhacking #instancetypes #it #kubernetes #linux #microsoftaz-900 #microsoftazure #networksecurity #software #theworldofit #theworldofit #windowsserver #worldofitech.com #www.worldofitech.com
0 notes
Photo

AWS CDKでAWS::CloudFormation::Init タイプを使ってEC2インスタンスの環境構築ができるようにしてみた https://ift.tt/2lkBYUK
前回、AWS Cloud Development Kit(AWS CDK)を利用してEC2インスタンスを立ち上げてみたのですが、AWS CDKでAWS::CloudFormation::Initタイプが利用できるのかも確認してみました。
AWS Cloud Development Kit(AWS CDK)でEC2インスタンスを立ち上げてみる – Qiita https://cloudpack.media/48912
AWS::CloudFormation::Init タイプについては下記をご参考ください。
AWS::CloudFormation::Init タイプを使ってEC2インスタンスの環境構築ができるようにしてみた – Qiita https://cloudpack.media/48540
前提
AWSアカウントがある
AWS CLIが利用できる
Node.jsがインストール済み
実装
前回記��の実装をベースにしてAWS::CloudFormation::Initタイプの定義を追加しました。
AWS Cloud Development Kit(AWS CDK)でEC2インスタンスを立ち上げてみる – Qiita https://cloudpack.media/48912
import cdk = require('@aws-cdk/core'); import ec2 = require('@aws-cdk/aws-ec2/lib'); export class UseCdkEc2Stack extends cdk.Stack { constructor(scope: cdk.Construct, id: string, props?: cdk.StackProps) { super(scope, id, props); let vpc = ec2.Vpc.fromLookup(this, 'VPC', { vpcId: this.node.tryGetContext('vpc_id') }); const cidrIp = this.node.tryGetContext('cidr_ip'); const securityGroup = new ec2.SecurityGroup(this, 'SecurityGroup', { vpc }); securityGroup.addEgressRule(ec2.Peer.anyIpv4(), ec2.Port.allTraffic()); securityGroup.addIngressRule(ec2.Peer.ipv4(cidrIp), ec2.Port.tcp(22)); let ec2Instance = new ec2.CfnInstance(this, 'myInstance', { imageId: new ec2.AmazonLinuxImage().getImage(this).imageId, instanceType: new ec2.InstanceType('t3.small').toString(), networkInterfaces: [{ associatePublicIpAddress: true, deviceIndex: '0', groupSet: [securityGroup.securityGroupId], subnetId: vpc.publicSubnets[0].subnetId }], keyName: this.node.tryGetContext('key_pair') }); ec2Instance.addOverride('Metadata', { 'AWS::CloudFormation::Init': { 'config': { 'commands': { 'test': { 'command': "echo $STACK_NAME test", 'env': { 'STACK_NAME': this.stackName } } }, } } }); let userData = ec2.UserData.forLinux(); userData.addCommands( '/opt/aws/bin/cfn-init', `--region ${this.region}`, `--stack ${this.stackName}`, `--resource ${ec2Instance.logicalId}` ); userData.addCommands('echo', 'hoge!'); ec2Instance.userData = cdk.Fn.base64(userData.render()); new cdk.CfnOutput(this, 'Id', { value: ec2Instance.ref }); new cdk.CfnOutput(this, 'PublicIp', { value: ec2Instance.attrPublicIp }); } }
公式ドキュメントを漁ってみたものの良い情報が得られず、下記Issueを参考にしました。
Add support for AWS::CloudFormation::Init · Issue #777 · aws/aws-cdk https://github.com/aws/aws-cdk/issues/777
ec2: cfn-init support in ASGs · Issue #1413 · aws/aws-cdk https://github.com/aws/aws-cdk/issues/1413
feat(aws-ec2): add support for CloudFormation::Init by rix0rrr · Pull Request #792 · aws/aws-cdk https://github.com/aws/aws-cdk/pull/792
追加した実装は以下となります。 ポイントとしてec2Instance.addOverride()でメタデータを追加してAWS::CloudFormation::Initタイプで定義を追加します。 /opt/aws/bin/cfn-initの--resourceオプションでリソース名を指定するのにec2Instanceを作ってからuserDataを設定することで、ec2Instance.logicalIdが利用できるようにしています。ベタ書きでもいいっちゃいいですね。
ec2Instance.addOverride('Metadata', { 'AWS::CloudFormation::Init': { 'config': { 'commands': { 'test': { 'command': "echo $STACK_NAME test", 'env': { 'STACK_NAME': this.stackName } } }, } } }); let userData = ec2.UserData.forLinux(); userData.addCommands( '/opt/aws/bin/cfn-init', `--region ${this.region}`, `--stack ${this.stackName}`, `--resource ${ec2Instance.logicalId}` ); userData.addCommands('echo', 'hoge!'); ec2Instance.userData = cdk.Fn.base64(userData.render()); (略)
デプロイしてみる
> cdk deploy \ -c vpc_id=vpc-xxxxxxxx \ -c key_pair=cdk-test-ec2-key \ -c cidr_ip=xxx.xxx.xxx.xxx/32 This deployment will make potentially sensitive changes according to your current security approval level (--require-approval broadening). Please confirm you intend to make the following modifications: Security Group Changes ┌───┬──────────────────────────┬─────┬────────────┬────────────────────┐ │ │ Group │ Dir │ Protocol │ Peer │ ├───┼──────────────────────────┼─────┼────────────┼────────────────────┤ │ + │ ${SecurityGroup.GroupId} │ In │ TCP 22 │ xxx.xxx.xxx.xxx/32 │ │ + │ ${SecurityGroup.GroupId} │ Out │ Everything │ Everyone (IPv4) │ └───┴──────────────────────────┴─────┴────────────┴────────────────────┘ (NOTE: There may be security-related changes not in this list. See http://bit.ly/cdk-2EhF7Np) Do you wish to deploy these changes (y/n)? y UseCdkEc2Stack: deploying... useCdkEc2Stack: creating CloudFormation changeset... 0/4 | 14:30:29 | CREATE_IN_PROGRESS | AWS::CDK::Metadata | CDKMetadata 0/4 | 14:30:30 | CREATE_IN_PROGRESS | AWS::EC2::SecurityGroup | SecurityGroup (SecurityGroupDD263621) 0/4 | 14:30:32 | CREATE_IN_PROGRESS | AWS::CDK::Metadata | CDKMetadata Resource creation Initiated 1/4 | 14:30:32 | CREATE_COMPLETE | AWS::CDK::Metadata | CDKMetadata 1/4 | 14:30:35 | CREATE_IN_PROGRESS | AWS::EC2::SecurityGroup | SecurityGroup (SecurityGroupDD263621) Resource creation Initiated 2/4 | 14:30:37 | CREATE_COMPLETE | AWS::EC2::SecurityGroup | SecurityGroup (SecurityGroupDD263621) 2/4 | 14:30:39 | CREATE_IN_PROGRESS | AWS::EC2::Instance | myInstance 2/4 | 14:30:40 | CREATE_IN_PROGRESS | AWS::EC2::Instance | myInstance Resource creation Initiated`` 3/4 | 14:30:56 | CREATE_COMPLETE | AWS::EC2::Instance | myInstance 4/4 | 14:30:59 | CREATE_COMPLETE | AWS::CloudFormation::Stack | UseCdkEc2Stack

︎ UseCdkEc2Stack Outputs: UseCdkEc2Stack.PublicIp = xxx.xxx.xxx.xxx UseCdkEc2Stack.Id = i-xxxxxxxxxxxxxxxxx Stack ARN: arn:aws:cloudformation:us-east-1:xxxxxxxxxxxx:stack/UseCdkEc2Stack/72304c90-b41d-11e9-b604-129cd46a326a
デプロイできたらSSHアクセスして実行ログを確認してみます。
> ssh -i cdk-test-ec2-key \ [email protected] $ cat /var/log/cfn-init.log 2019-08-01 05:31:11,740 [INFO] -----------------------Starting build----------------------- 2019-08-01 05:31:11,740 [INFO] Running configSets: default 2019-08-01 05:31:11,741 [INFO] Running configSet default 2019-08-01 05:31:11,742 [INFO] Running config config 2019-08-01 05:31:11,746 [INFO] Command test succeeded 2019-08-01 05:31:11,746 [INFO] ConfigSets completed 2019-08-01 05:31:11,746 [INFO] -----------------------Build complete----------------------- $ cat /var/log/cfn-init-cmd.log 2019-08-01 05:31:11,742 P2090 [INFO] ************************************************************ 2019-08-01 05:31:11,742 P2090 [INFO] ConfigSet default 2019-08-01 05:31:11,743 P2090 [INFO] ++++++++++++++++++++++++++++++++++++++++++++++++++++++++++++ 2019-08-01 05:31:11,743 P2090 [INFO] Config config 2019-08-01 05:31:11,743 P2090 [INFO] ============================================================ 2019-08-01 05:31:11,743 P2090 [INFO] Command test 2019-08-01 05:31:11,746 P2090 [INFO] -----------------------Command Output----------------------- 2019-08-01 05:31:11,746 P2090 [INFO] UseCdkEc2Stack test 2019-08-01 05:31:11,746 P2090 [INFO] ------------------------------------------------------------ 2019-08-01 05:31:11,746 P2090 [INFO] Completed successfully. $ cat /var/log/cloud-init-output.log (略) Updated: bind-libs.x86_64 32:9.8.2-0.68.rc1.60.amzn1 bind-utils.x86_64 32:9.8.2-0.68.rc1.60.amzn1 kernel-tools.x86_64 0:4.14.133-88.105.amzn1 python27-jinja2.noarch 0:2.7.2-3.16.amzn1 vim-common.x86_64 2:8.0.0503-1.46.amzn1 vim-enhanced.x86_64 2:8.0.0503-1.46.amzn1 vim-filesystem.x86_64 2:8.0.0503-1.46.amzn1 vim-minimal.x86_64 2:8.0.0503-1.46.amzn1 Complete! Cloud-init v. 0.7.6 running 'modules:final' at Thu, 01 Aug 2019 05:31:11 +0000. Up 18.18 seconds. hoge! Cloud-init v. 0.7.6 finished at Thu, 01 Aug 2019 05:31:11 +0000. Datasource DataSourceEc2. Up 18.77 seconds
ユーザーデータの/opt/aws/bin/cfn-initコマンド実行でメタデータにAWS::CloudFormation::Initタイプで指定したコマンド���実行されました。やったぜ。
まとめ
メタデータの指定について、もっと良い実装ができそうですが、ひとまずAWS CDKでもAWS::CloudFormation::Initタイプを利用できるのが確認できたので満足です。
参考
AWS Cloud Development Kit(AWS CDK)でEC2インスタンスを立ち上げてみる – Qiita https://cloudpack.media/48912
AWS::CloudFormation::Init タイプを使ってEC2インスタンスの環境構築ができるようにしてみた – Qiita https://cloudpack.media/48540
Add support for AWS::CloudFormation::Init · Issue #777 · aws/aws-cdk https://github.com/aws/aws-cdk/issues/777
ec2: cfn-init support in ASGs · Issue #1413 · aws/aws-cdk https://github.com/aws/aws-cdk/issues/1413
feat(aws-ec2): add support for CloudFormation::Init by rix0rrr · Pull Request #792 · aws/aws-cdk https://github.com/aws/aws-cdk/pull/792
元記事はこちら
「AWS CDKでAWS::CloudFormation::Init タイプを使ってEC2インスタンスの環境構築ができるようにしてみた」
September 02, 2019 at 04:00PM
0 notes
Text
Migrating a Neo4j graph database to Amazon Neptune with a fully automated utility
Amazon Neptune is a fully managed graph database service that makes it easy to build and run applications that work with highly connected datasets. You can benefit from the service’s purpose-built, high-performance, fast, scalable, and reliable graph database engine when you migrate data from your existing self-managed graph databases, such as Neo4j. This post shows you how to migrate from Neo4j to Amazon Neptune by using an example AWS CDK app that utilizes the neo4j-to-neptune command-line utility from the Neptune tools GitHub repo. The example app completes the following tasks: Set up and configure Neo4j and Amazon Neptune databases Exports the movies graph from the example project on the Neo4j website as a CSV file Converts the exported data to the bulk load CSV format in Amazon Neptune by using the neo4j-to-neptune utility Imports the converted data into Amazon Neptune Architecture The following architecture shows the building blocks that you need to build a loosely coupled app for the migration. The app automates the creation of the following resources: An Amazon EC2 instance to download and install a Neo4j graph database, and Apache TinkerPop Gremlin console for querying Amazon Neptune. This instance acts both as the migration source and as a client to run AWS CLI commands, such as copying exported files to an Amazon S3 bucket and loading data into Amazon Neptune. An Amazon S3 bucket from which to load data into Neptune. An Amazon Neptune DB cluster with one graph database instance. Running the migration Git clone the AWS CDK app from the GitHub repo. After ensuring you meet the prerequisites, follow the instructions there to run the migration. The app automates the migration of the Neo4j movies graph database to Amazon Neptune. After you run the app successfully, you see an output similar to the following screenshot in your terminal: Record the values, such as NeptuneEndpoint, to use in later steps. The app provisions the Neo4j and Amazon Neptune databases and performs the migration. The following sections explain how the app provisions and runs the migration, and shows you how to use the Gremlin console on the EC2 instance to query Neptune to validate the migration. Migration overview The AWS CDK app automates three essential phases of the migration: Provision AWS infrastructure Prepare for the migration Perform the migration Provisioning AWS infrastructure When you run the app, it creates the following resources in your AWS account. Amazon VPC and subnets The app creates an Amazon VPC denoted by VPCID. You must create Neptune clusters in a VPC, and you can only access their endpoints within that VPC. To access your Neptune database, the app uses an EC2 instance that runs in the same VPC to load data and run queries. You create two /24 public subnets, one in each of two Availability Zones. EC2 instance A single EC2 instance denoted by EC2Instance performs the following functions: Download and install a Neo4j community edition graph database (version `4.0.0`), Runs AWS CLI commands to copy local files to Amazon S3 Runs AWS CLI commands to load data into Neptune Runs Apache TinkerPop Gremlin commands to query and verify the data migration to Neptune S3 bucket The app creates a single S3 bucket, denoted by S3BucketName, to hold data exported from Neo4j. The app triggers a bulk load of this data from the bucket into Neptune. Amazon S3 gateway VPC endpoint The app creates a Neptune database cluster in a public subnet inside the VPC. To make sure that Neptune can access and download data from Amazon S3, the app also creates a gateway type VPC endpoint for Amazon S3. For more information, see Gateway VPC Endpoints. A single-node Neptune cluster This is the destination in this migration—the target Neptune graph database denoted by NeptuneEndpoint. The app loads the exported data into this database. You can use the Gremlin console on the EC2 instance to query the data. Required AWS IAM roles and policies To allow access to AWS resources, the app creates all the required roles and policies necessary to perform the migration. Preparing for the migration After provisioning the infrastructure, the app automates the steps shown in the diagram below: Create a movie graph in Neo4j The app uses bootstrapping shell scripts to install and configure Neo4j community edition 4.0 on the EC2 instance. The scripts then load the Neo4j movies graph into this database. Export the graph data to a CSV file The app uses the following Neo4j Cypher script to export all nodes and relationships into a comma-delimited file: CALL apoc.export.csv.all('neo4j-export.csv', {d:','}); The following code shows the location of the saved exported file: /var/lib/neo4j/import/neo4j-export.csv As part of automating the Neo4j configuration, the app installs the APOC library, which contains procedures for exporting data from Neo4j, and edits the neo4j.conf file with the following code so that it can write to a file on disk: apoc.export.file.enabled=true The app also whitelists Neo4j’s APOC APIs in the neo4j.conf file to use them. See the following code: dbms.security.procedures.unrestricted=apoc.* Performing the migration In this phase, the app migrates the data to Neptune. This includes the following automated steps. Transform Neo4j exported data to Gremlin load data format The app uses the neo4j-to-neptune command-line utility to transform the exported data to a Gremlin load data format with a single command. See the following code: $ java -jar neo4j-to-neptune.jar convert-csv -i /var/lib/neo4j/import/neo4j-export.csv -d output --infer-types The neo4j-to-neptune utility creates an output folder and copies the results to separate files: one each for vertices and edges. The utility has two required parameters: the path to the Neo4j export file (/var/lib/neo4j/import/neo4j-export.csv) and the name of a directory (output) where the converted CSV files are written. There are also optional parameters that allow you to specify node and relationship multi-valued property policies and turn on data type inferencing. For example, the --infer-types flag tells the utility to infer the narrowest supported type for each column in the output CSV as an alternative to specifying the data type for each property. For more information, see Gremlin Load Data Format. The neo4j-to-neptune utility addresses differences in the Neo4j and Neptune property graph data models. Neptune’s property graph is very similar to Neo4j’s, including support for multiple labels on vertices, and multi-valued properties (sets but not lists). Neo4j allows homogeneous lists of simple types that contain duplicate values to store as properties on both nodes and edges. Neptune, on the other hand, provides for set and single cardinality for vertex properties, and single cardinality for edge properties. The neo4j-to-neptune utility provides policies to migrate Neo4j node list properties that contain duplicate values into Neptune vertex properties, and Neo4j relationship list properties into Neptune edge properties. For more information, see the GitHub repo. Copy the output data to Amazon S3 The export creates two files: edges.csv and vertices.csv. These files are located in the output folder. The app copies these files to the S3 bucket created specifically for this purpose. See the following code: $ aws s3 cp /output/ s3:///neo4j-data --recursive Load data into Neptune The final step of the automated migration uses the Neptune bulk load AWS CLI command to load edges and vertices into Neptune. See the following code: curl -X POST -H 'Content-Type: application/json' -d ' { "source": "s3:///neo4j-data", "format": "csv", "iamRoleArn": "arn:aws:iam:::role/", "region": "", "failOnError": "FALSE" }' For more information, see Loading Data into Amazon Neptune. Verifying the migration After the automated steps are complete, you are ready to verify that the migration was successful. Amazon Neptune is compatible with Apache TinkerPop3 and Gremlin 3.4.5. This means that you can connect to a Neptune DB instance and use the Gremlin traversal language to query the graph. To verify the migration, complete the following steps: Connect to the EC2 instance after it passes both the status checks. For more information, see Types of Status Checks. Use the value of NeptuneEndpoint to execute the following commands: $ docker run -it -e NEPTUNE_HOST= sanjeets/neptune-gremlinc-345:latest At the prompt, execute the following command to send all your queries to Amazon Neptune. :remote console Execute the following command to see the number of verticies migrated. g.v() .count() The following screenshot shows the output of the command g.V().count(). You can now, for example, run a simple query that gives you all the movies in which Tom Cruise acted. The following screenshot shows the intended output. Cleaning up After you run the migration, clean up all the resources the app created with the following code: npm run destroy Conclusion Neptune is a fully managed graph database service that makes it easy to focus on building great applications for your customers instead of worrying about database management tasks like hardware provisioning, software patching, setup, configuration, or backups. This post demonstrated how to migrate Neo4j data to Neptune in a few simple steps. About the Author Sanjeet Sahay is a Sr. Partner Solutions Architect with Amazon Web Services. https://probdm.com/site/MTg5MzY
0 notes
Text
What Is Amazon Virtual Private Cloud VPC? Benefits, Features

What is Amazon VPC?
AWS resources can be launched in a logically isolated virtual network that you specify using the Amazon Virtual Private Cloud (VPC) service. You are in total control of your virtual networking environment, including choosing your own range of IP addresses, setting up subnets, and configuring network gateways and route tables. The majority of the resources in your VPC are compatible with both IPv4 and IPv6, which helps to provide safe and convenient access to resources and apps.
Customizing the network setup of your VPC is simple using Amazon VPC, one of AWS’s core services. For your web servers with internet connection, you can set up a subnet that is visible to the public. Additionally, it enables you to locate your backend systems like databases or application servers in a subnet that faces the private sector and is not connected to the internet. Several security layers, such as network access control lists and security groups, can be used with Amazon VPC to assist manage access to Amazon Elastic Compute Cloud (Amazon EC2) instances within each subnet.
Benefits of Amazon VPC
Increase security
Within your virtual network, secure and keep an eye on connections, filter traffic, and limit instance access.
Save time
Reduce the amount of time you spend configuring, maintaining, and verifying your virtual network.
Manage and control your environment
Create subnets, configure route tables, and select your own IP address range to personalize your virtual network.
How it works
You have complete control over your virtual networking environment with Amazon Virtual Private Cloud (Amazon VPC), including connectivity, security, and resource placement. Set up your VPC in the AWS service panel to get started. Add resources like Amazon Relational Database Service (RDS) instances and Amazon Elastic Compute Cloud (EC2) after that. Lastly, specify how your VPCs interact with one another across AWS Regions, Availability Zones, and accounts.
Use cases
Launch a simple website or blog
Enforce restrictions on inbound and outbound connections to strengthen the security posture of your web application.
Host multi-tier web applications
Establish network connectivity and limitations among your databases, application servers, and web servers.
Create hybrid connections
Create and oversee a VPC network that works with both your on-premises and AWS services.
Amazon virtual private cloud pricing
Why Amazon Virtual Private Cloud?
Although setting up and utilizing an Amazon Virtual Private Cloud (VPC) is free, you can pay for its extra features using usage-based fees. You may modify your Amazon VPC’s control, connectivity, monitoring, and security with the help of AWS’s tools and services. Please refer to the following for precise pricing rates for these components.
There are still usage fees associated with other Amazon Web Services products, like Amazon Elastic Compute Cloud (Amazon EC2), which include data transfer fees. Pricing is per VPN connection-hour if you use the optional hardware virtual private network (VPN) connection to link your VPC to your corporate data center. Data transported across VPN connections will be invoiced at standard AWS Data Transfer rates, and partial hours are billed as full hours.
Amazon VPC features
Logs of Flow
To get operational insight into your network dependencies and traffic patterns, identify irregularities and stop data leaks, and troubleshoot network connectivity and configuration issues, you can keep an eye on your Amazon Virtual Private Cloud (VPC) flow logs that are sent to Amazon Simple Storage Service (Amazon S3) or Amazon CloudWatch. You can discover more about who started your TCP connections and the packet-level source and destination of traffic passing through intermediary layers by examining the expanded information in flow logs. To help you ful fill some compliance obligations, you can additionally archive your flow logs.
IP Address Manager (IPAM)
Planning, tracking, and monitoring IP addresses for your AWS workloads is made simpler with IPAM. IPAM eliminates the need for spreadsheet-based or in-house planning software by automating IP address assignments to your Amazon Virtual Private Cloud VPC. Additionally, it improves network observability by displaying IP utilization across several VPCs and accounts in a single operational view.
IP Addressing
Resources in your VPC can communicate with resources over the internet and with each other thanks to IP addresses. Both IPv4 and IPv6 addressing protocols are supported by Amazon Virtual Private Cloud (VPC). IPv4-only, dual-stack, and IPv6-only subnets can be created in a VPC, and Amazon EC2 instances can be started in these subnets. Additionally, Amazon offers you a variety of choices for giving your instances public IP addresses. You can use an IP address from the Amazon-provided IPv6 CIDRs, Elastic IPv4 addresses, or public IPv4 addresses. In addition, you have the choice to assign these instances your own IPv4 or IPv6 addresses within the Amazon VPC.
Ingress Routing
This functionality allows you to redirect all incoming and outgoing traffic to and from a virtual private gateway or internet gateway to the elastic network interface of a particular Amazon EC2 instance. Before any traffic reaches your business workloads, route it to a gateway or an Amazon EC2 instance in your Amazon Virtual Private Cloud (VPC).
Network Access Analyzer
You can confirm that your network on AWS complies with your network security and compliance requirements by using Network Access Analyzer. With the help of Network Access Analyzer, you may define your standards for network security and compliance and find unauthorized network access that doesn’t fit your needs. With the help of Network Access Analyzer, you can comprehend network access to your resources, find ways to strengthen your cloud security posture, and quickly show compliance.
Network Access Control List
An optional security feature for your VPC is a network access control list (network ACL), which functions as a firewall to regulate traffic entering and leaving one or more subnets. Network ACLs can be configured using rules that are comparable to those in your security groups.
Manager of Networks
To assist you in managing and keeping an eye on your network on AWS, Network Manager offers capabilities and tools. IP administration, network security and governance, connectivity management, and network monitoring and troubleshooting are all made simpler with Network Manager.
Analyzer of Reachability
You can examine and troubleshoot network reachability between two resources in your VPC using this static configuration analysis tool. When the source and destination resources are reachable, Reachability Analyzer generates hop-by-hop information about the virtual path between them; when they are not, it identifies the blocking factor.
Security Groups
Establish security groups to regulate incoming and outgoing traffic at the instance level, serving as a firewall for related Amazon EC2 instances. An instance can be linked to one or more security groups at the time of launch. The instance is automatically linked to the VPC’s default group if you don’t specify a group. In your VPC, each instance may be a member of a distinct group.
Mirroring of Traffic
With this capability, you can transfer network traffic to out-of-band security and monitoring appliances for deep packet inspection after copying it from an elastic network interface of Amazon EC2 instances. You may create security and compliance controls, troubleshoot problems, obtain operational insights, and identify network and security anomalies. You can directly view the network packets passing through your VPC with traffic mirroring.
Lattice
You can reliably connect, keep an eye on, and protect conversations between your apps with the aid of this service. Network traffic control, access, and monitoring policies can simplify and standardize compute service connections across instances, containers, and serverless apps.
Public Access Is Blocked by VPC
This feature ensures that resources in your Amazon Virtual Private Cloud (VPC) are not accidentally exposed to the public by offering a single declarative control that makes it simple to prevent direct Internet access VPCs via the Internet Gateway or Egress-only Gateway. You can choose to ban only ingress Internet connections or both egress and ingress Internet connections in the VPC.
Read more on Govidhtech.com
#AmazonEC2#AmazonVirtualPrivateCloud#VPC#AmazonVPC#IPaddresses#EC2instances#News#Technews#Technology#Technologynews#Technologytrends#Govindhtech
0 notes
Text
Amazon EC2 專家課程(使用自動擴展和負載平衡器)
課程簡介
成為 AWS EC2 專家。 了解自動擴展( AutoScaling ),AWS 負載平衡,EBS Volume,網路和安全組,EC2Instance 類型
從這 5 小時的課程,你會學到
你將能夠以最佳成本在 EC2 上完全部署應用程式
你將能夠為你的應用程式選擇完美的 EC2 Instance
你可以使用 Load Balancer 在 EC2 上完全部署應用程式
你將能夠在 EC2 上完全部署自動擴展( Auto Scaling ) 的應用程式
你將了解 EC2 的所有運作元件,並成為 EC2 專家
你將了解一些最新的 EC2 功能!
要求
! 本課程僅涉及運行 Linux 的 EC2,而不是Windows!
有 AWS 的基礎知識比較好,但不是必需的
電腦/應用程式的基本知識是必備的
Linux 的基本知識是必備的(我們將執行一些 Linux 命令)
任何 Mac /…
View On WordPress
0 notes
Photo

(via Convert a PEM Key to a PPK Key on a Linux and Windows)
0 notes
Text
What Is Amazon EBS? Features Of Amazon EBS And Pricing

Amazon Elastic Block Store: High-performance, user-friendly block storage at any size
What is Amazon EBS?
Amazon Elastic Block Store provides high-performance, scalable block storage with Amazon EC2 instances. AWS Elastic Block Store can create and manage several block storage resources:
Amazon EBS volumes: Amazon EC2 instances can use Amazon EBS volumes. A volume associated to an instance can be used to install software and store files like a local hard disk.
Amazon EBS snapshots: Amazon EBS snapshots are long-lasting backups of Amazon EBS volumes. You can snapshot Amazon EBS volumes to backup data. Afterwards, you can always restore new volumes from those snapshots.
Advantages of the Amazon Elastic Block Store
Quickly scale
For your most demanding, high-performance workloads, including mission-critical programs like Microsoft, SAP, and Oracle, scale quickly.
Outstanding performance
With high availability features like replication within Availability Zones (AZs) and io2 Block Express volumes’ 99.999% durability, you can guard against failures.
Optimize cost and storage
Decide which storage option best suits your workload. From economical dollar-per-GB to high performance with the best IOPS and throughput, volumes vary widely.
Safeguard
You may encrypt your block storage resources without having to create, manage, and safeguard your own key management system. Set locks on data backups and limit public access to prevent unwanted access to your data.
Easy data security
Amazon EBS Snapshots, a point-in-time copy that can be used to allow disaster recovery, move data across regions and accounts, and enhance backup compliance, can be used to protect block data storage both on-site and in the cloud. With its integration with Amazon Data Lifecycle Manager, AWS further streamlines snapshot lifecycle management by enabling you to establish policies that automate various processes, such as snapshot creation, deletion, retention, and sharing.
How it functions
A high-performance, scalable, and user-friendly block storage solution, Amazon Elastic Block Store was created for Amazon Elastic Compute Cloud (Amazon EC2).Image credit to AWS
Use cases
Create your cloud-based, I/O-intensive, mission-critical apps
Switch to the cloud for mid-range, on-premises storage area network (SAN) applications. Attach block storage that is both high-performance and high-availability for applications that are essential to the mission.
Utilize relational or NoSQL databases
Install and expand the databases of your choosing, such as Oracle, Microsoft SQL Server, PostgreSQL, MySQL, Cassandra, MongoDB, and SAP HANA.
Appropriately scale your big data analytics engines
Detach and reattach volumes effortlessly, and scale clusters for big data analytics engines like Hadoop and Spark with ease.
Features of Amazon EBS
It offers the following features:
Several volume kinds: Amazon EBS offers a variety of volume types that let you maximize storage efficiency and affordability for a wide range of uses. There are two main sorts of volume types: HDD-backed storage for workloads requiring high throughput and SSD-backed storage for transactional workloads.
Scalability: You can build Amazon EBS volumes with the performance and capacity requirements you want. You may adjust performance or dynamically expand capacity using Elastic Volumes operations as your needs change, all without any downtime.
Recovery and backup: Back up the data on your disks using Amazon EBS snapshots. Those snapshots can subsequently be used to transfer data between AWS accounts, AWS Regions, or Availability Zones or to restore volumes instantaneously.
Data protection: Encrypt your Amazon EBS volumes and snapshots using Amazon EBS encryption. To secure data-at-rest and data-in-transit between an instance and its connected volume and subsequent snapshots, encryption procedures are carried out on the servers that house Amazon EC2 instances.
Data availability and durability: io2 Block Express volumes have an annual failure rate of 0.001% and a durability of 99.999%. With a 0.1% to 0.2% yearly failure rate, other volume types offer endurance of 99.8% to 99.9%. To further guard against data loss due to a single component failure, volume data is automatically replicated across several servers in an Availability Zone.
Data archiving: EBS Snapshots Archive provides an affordable storage tier for storing full, point-in-time copies of EBS Snapshots, which you must maintain for a minimum of ninety days in order to comply with regulations. and regulatory purposes, or for upcoming project releases.
Related services
These services are compatible with Amazon EBS:
In the AWS Cloud, Amazon Elastic Compute Cloud lets you start and control virtual machines, or EC2 instances. Like hard drives, EBS volumes may store data and install software.
You can produce and maintain cryptographic keys with AWS Key Management Service, a managed service. Data saved on your Amazon EBS volumes and in your Amazon EBS snapshots can be encrypted using AWS KMS cryptographic keys.
EBS snapshots and AMIs supported by EBS are automatically created, stored, and deleted with Amazon Data Lifecycle Manager, a managed service. Backups of your Amazon EC2 instances and Amazon EBS volumes can be automated with Amazon Data Lifecycle Manager.
EBS direct APIs: These services let you take EBS snapshots, write data to them directly, read data from them, and determine how two snapshots differ or change from one another.
Recycle Bin is a data recovery solution that lets you recover EBS-backed AMIs and mistakenly erased EBS snapshots.
Accessing Amazon EBS
The following interfaces are used to build and manage your Amazon EBS resources:
Amazon EC2 console
A web interface for managing and creating snapshots and volumes.
AWS Command Line Interface
A command-line utility that enables you to use commands in your command-line shell to control Amazon EBS resources. Linux, Mac, and Windows are all compatible.
AWS Tools for PowerShell
A set of PowerShell modules for scripting Amazon EBS resource activities from the command line.
Amazon CloudFormation
It’s a fully managed AWS service that allows you describe your AWS resources using reusable JSON or YAML templates, and then it will provision and setup those resources for you.
Amazon EC2 Query API
The HTTP verbs GET or POST and a query parameter called Action are used in HTTP or HTTPS requests made through the Amazon EC2 Query API.
Amazon SDKs
APIs tailored to particular languages that let you create apps that interface with AWS services. Numerous well-known programming languages have AWS SDKs available.
Amazon EBS Pricing
You just pay for what you provision using Amazon EBS. See Amazon EBS pricing for further details.
Read more on Govindhtech.com
#AmazonEBS#ElasticBlockStore#AmazonEC2#EBSvolumes#EC2instances#EBSSnapshots#News#Technews#Technology#Technologynews#Technologytrends#Govindhtech
0 notes
Text
Amazon CloudFront VPC Origins: Improved CloudFront Security
Introducing the Amazon CloudFront VPC Origin: Improved protection and more efficient use of your apps
I’m happy to inform you that the Amazon CloudFront Virtual Private Cloud (VPC) origins has launched, a new feature that allows businesses to serve content from apps housed in private subnets inside their Amazon VPC. This makes it simple to protect web apps, so you can concentrate on expanding your company while enhancing security and preserving great speed and worldwide scalability with CloudFront.
Origin Access Control is a managed service that allows customers to safeguard their origins and make CloudFront the only front-door to your application when serving content via Amazon Simple Storage service (Amazon S3), AWS Elemental Services, and AWS Lambda Function URLs. For apps that employ load balancers or are hosted on Amazon Elastic Compute Cloud (Amazon EC2), this was more challenging to accomplish because you had to come up with your own method to get the same outcome. To guarantee that the endpoint remained exclusive to CloudFront, you would need to employ a variety of strategies, including monitoring firewall rules, employing logic like header validation, and using access control lists (ACLs).
By providing a managed solution that can be used to send CloudFront distributions to Application Load Balancers (ALBs), Network Load Balancers (NLBs), or EC2 instances inside your private subnets, CloudFront VPC origins eliminates the requirement for this type of undifferentiated effort. Because it also removes the need for public IP addresses, this guarantees that CloudFront will be the only point of entry for those resources with the least amount of configuration work, giving you better performance and the chance to save money.
Setting up CloudFront VPC Origin
The fact that CloudFront VPC origins is free of charge means that any AWS client can use it. Using the AWS Command Line Interface (AWS CLI) or the Amazon CloudFront console, it may be linked with both new and pre-existing CloudFront distributions.
Consider that you have a private AWS Fargate application for Amazon ECS that is fronted by an ALB. Using the ALB directly within the private subnet, let’s build a CloudFront distribution.
To begin, open the CloudFront dashboard and choose the newly added VPC origins menu item.Image credit to AWS
It’s easy to create a new VPC origin. There aren’t many options for you to choose from. You can either input the Origin ARN directly or search for resources hosted in private subnets. You pick the resources you want, give your VPC origin a catchy name, set up some security settings, and then confirm. Although support for resources across all accounts is on the horizon, please take note that the VPC origin resource must be in the same AWS Account as the CloudFront distribution at launch.
Your VPC origin will be deployed and operational after the creation procedure is finished! On the VPC origins page, you can see its current state.
By doing this, it has developed a CloudFront distribution that, with just a few clicks, can serve content straight from a resource hosted on a private subnet! Once your VPC origin has been built, you can go to your Distribution window and copy and paste the ARN or choose it from the dropdown menu to add the VPC origin to your Distribution.
To achieve full-spectrum protection, keep in mind that you should still layer your application’s security using services like AWS Web Application Firewall (WAF) to guard against web vulnerabilities, AWS Shield for managed DDoS protection, and others.
In conclusion
By allowing CloudFront distributions to serve content directly from resources hosted within private subnets, CloudFront VPC Origins provides a new means for enterprises to create high-performance, secure applications. This keeps your application safe while lowering the difficulty and expense of maintaining sources that are visible to the public.
Read more on govindhtech.com
#AmazonCloudFront#VPCOrigins#CloudFrontSecurity#AmazonSimpleStorageservice#AmazonS3#EC2instances#AmazonElasticComputeCloud#AmazonEC2#DDoSprotection#technology#technews#news#govindhtech
0 notes
Text
What Is Auto Scaling? And Advantages Of Auto Scaling

What is Auto Scaling?
A cloud computing approach called autoscaling automatically modifies a server farm’s resource allocation according to the load it is experiencing. Another name for it is automated scaling.
Auto scaling, also known as autoscaling, auto-scaling, and occasionally automatic scaling, is a method for dynamically assigning computational resources in cloud computing. The number of servers that are active will usually change automatically as user needs change, depending on the demand to a server farm or pool.
Because load balancing providing capacity is usually the basis for an application’s scalability, auto scaling and load balancing are related. In other words, the auto scaling policy is influenced by a number of factors, including the load balancer’s serving capacity, cloud monitoring metrics, and CPU utilization.
Advantages of Auto scaling in cloud computing
Companies can scale cloud services like virtual machines or server capacity up or down based on traffic or consumption levels using cloud computing technologies like autoscaling. Google Cloud Platform (GCP), Microsoft Azure, and Amazon Web Services offer autoscaling.
Additionally, core autoscaling features enable dependable, low-cost performance by smoothly adding and reducing new instances in response to fluctuations in demand. Therefore, even though the demand for applications is dynamic and even unpredictable, autoscaling offers consistency.
The main advantage of autoscaling is that it automatically adjusts the number of servers that are active, removing the need to react manually in real-time to traffic surges that call for additional resources and instances. These servers must be configured, monitored, and decommissioned for autoscaling.
DDoS attacks might make it hard to spot this kind of rise. A system may occasionally be able to react to this problem more rapidly with improved autoscaling settings and more effective monitoring of autoscaling data. The same is true for auto-scaling databases, which dynamically adjust capacity, start up, and stop depending on the demands of an application.
Important Terms for Auto Scaling
Autoscaling group
An instance is a single server or computer that is governed by auto-scaling rules designed for a collection of computers. The group is auto-scaling, and the auto-scaling policies apply to every instance within the group.
The AWS ecosystem’s compute platform, for instance, is called Elastic Compute Cloud (EC2). Scalable and adaptable server solutions are provided by EC2 instances in the AWS cloud. For the end user, Amazon EC2 instances are seamless, elastically scaled on demand, and virtual.
For the purpose of automatic scaling, a logical group of Amazon EC2 instances is called an auto scaling group. The same auto scaling rules will apply to all of the group’s Amazon EC2 instances.
The quantity of instances within the auto scaling group is referred to as its size. In that auto scaling group, the desired capacity or size is the optimal number of instances. The auto scaling group can either instantiate (provision and attach) new instances or delete (detach and terminate) instances if those two numbers differ.
A certain auto scaling group’s minimum and maximum size threshold values establish cutoff points above and below which instance capacity shouldn’t increase or decrease, depending on the rules and auto scaling algorithms in place. Any modifications to the auto scaling group’s intended capacity in reaction to metrics exceeding predetermined criteria are frequently outlined in an auto scaling policy.
In order to guarantee that the system as a whole can continue to handle traffic, auto scaling strategies frequently include cooldown periods. Auto scaling cooldown periods provide newly instantiated instances more time to start managing traffic after certain scaling activities.
Modifications to the intended capacity of an auto scaling group may be fixed or gradual. Just a required capacity value is provided by fixed alterations. Rather than specifying an end value, incremental modifications cause a certain amount to decline or rise. Policies that increase desired capacity are referred to as scaling up or scaling out policies. Desired capacity is reduced when policies are scaled down, also known as scaled in.
A health check is performed by an auto scaling group to see if attached instances are operating correctly. It is necessary to flag unhealthy occurrences for replacement.
Health checks can be carried out via elastic load balancing software. Additionally available are custom health checks and Amazon EC2 status checks. A successful health check can be determined by whether the instance is still reachable and operational, or by whether it is still registered and operational with its related load balancer.
Launch setup explains the parameters and scripts required to start a new instance. This comprises the machine image, instance type, possible launch availability zones, purchasing options (such on-demand vs. spot), and scripts to execute at launch.
Advantages of Auto Scaling
Autoscaling offers a number of benefits.
The price: Businesses that depend on cloud infrastructure as well as those who manage their own infrastructure can put some servers to sleep when loads are light with auto scaling. This lowers the cost of water and electricity when cooling is done with water. Moreover, cloud auto scaling entails paying for overall utilization rather than maximum capacity.
Safety: While maintaining application availability and resilience, auto scaling also guards against hardware, network, and application failures by identifying and replacing problematic instances.
Accessibility: Autoscaling increases uptime and availability, particularly in situations when production workloads are unpredictable.
Autoscaling lowers the possibility of having too many or too few servers for the actual traffic load, which is distinct from the daily, monthly, or annual cycle that many firms use to control server use. This is due to auto scaling’s ability to adapt to real usage patterns, unlike static scaling.
A static scaling approach, for instance, might send certain servers to sleep at 2:00 am based on the notion that traffic is normally lower at that time. But in reality, there can be increases at that moment possibly during a news event that becomes viral or at other unforeseen moments.
Read more on Govindhtech.com
#AutoScaling#cloudcomputing#AmazonWebServices#GoogleCloud#MicrosoftAzure#EC2instances#News#Technews#Technology#Technologynews#Technologytrends#govindhtech
1 note
·
View note