#exploringlighttravel
Explore tagged Tumblr posts
Visit Tumblr Blog
Explore Tumblr blogs with no restrictions, modern design and the best experience.
Last Seen Tumblr Blogs


Fun Fact
1,644 Tumblr posts in 1 second.
Text
Reflection
Reflection of buildings in a waterdrop on an oregano leaf
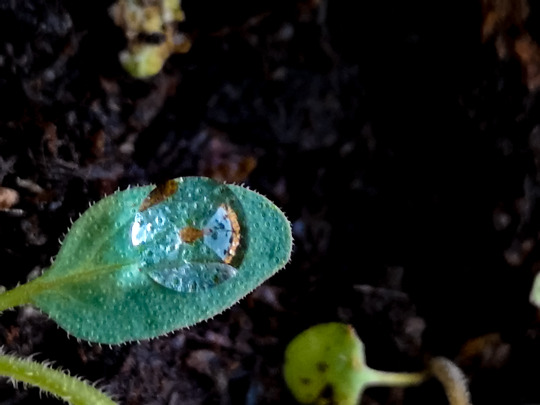
I used Huawei P20 Pro to take this image
Aperture - f1.8
Iso - 200
Shutter speed - 3 sec
#nqphotography2021#nqphotography#nqphotoblog#student photographer#reflection#location#nature#leaf#water drops#waterdroplets#exploring light travel#exploringlighttravel
7 notes
·
View notes
Photo


Exploring Light Travel Practical Research - Pinhole Digital Camera (Part 2) The results of my Pinhole Digital Camera experiment. I took about 100 photos in total, all at various different settings, in an attempt to get something that looked vaguely like....well, something! These are the photos that came out the best from the bunch. I first tried to photograph some flowers in my garden, followed by the house across the street, and lastly, my paper recycling bin. I’m not actually sure I was doing it right, but the tutorial videos provided to me along with my own furious google researching on my phone, tells me that I wasn’t actually doing anything wrong, and this is just how it’s supposed to look.
8 notes
·
View notes
Photo


CAMERA OBSCURA 2 TASK. POSTED ON 18TH SEPTEMBER 2020
9 notes
·
View notes
Text
Task:
create a digital pinhole lens and shot photographs. Challenge accepted 💪
Step by step:
My shots 🙈🤯


And a mess... Who will clean it up 🙈😂😂
8 notes
·
View notes
Text
EXPLORING LIGHT TRAVEL BTS

2 notes
·
View notes
Text
Replicating Portraits
31st October 2019

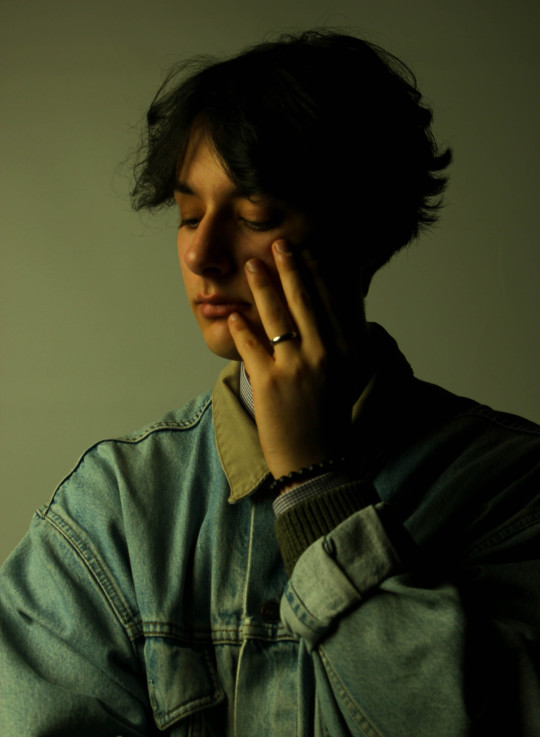
For this mornings studio class I replicated a Portrait of Noel Gallagher from the front cover of the Telegraph Magazine February 2015, the photograph was taken by portrait photographer Nadav Kander.
The subject was positioned away from the background and I turned my camera round so that it was in portrait position and the tripod was pulled back so that the subject would fit the frame from the shoulders upwards.
I only used one light source and attached a Soft Box to it.
My camera settings were 1/125, F8, ISO 100.
The photographs were then taken into the download room and edited using Lightroom I chose one photograph and applied a warm filter to it, the bottom part of the frame was also cropped.
25 notes
·
View notes
Text
Dream a little dream of me Make me into something sweet Turn the radio on, dancing to a pop song...
#stars#sea#isla mujeres#cancun#mexico#nature#exploringlighttravel#styleblogger#sunrise#outfit inspiration#pencil#wanderlust#lunch#low carb#shoes#food photography#original photographers#photoshoot#photography#photographers on tumblr#landscape#instax#aesthetic#travel#travel photography#roadtrip#familia
9 notes
·
View notes
Text
Victorian portrait

FINAL RESULT
On our last studio class we were doing Victorian inspired portraits, and as this was just a first try we were just discovering how to, edit these to make them look more like the old ages.
I found this very interesting and creative, as it is something different to try on and this was our first hand on these and it was fun.
So this was my final result of Jessica’s Victorian portrait.

EDIT IMAGE
So, after shooting, choosing and editing the adjustments on Lightroom from my Victorian portraits, I have decided this image would be my final result for this.
In Lightroom , I had double clicked and selected Edit in > Photoshop
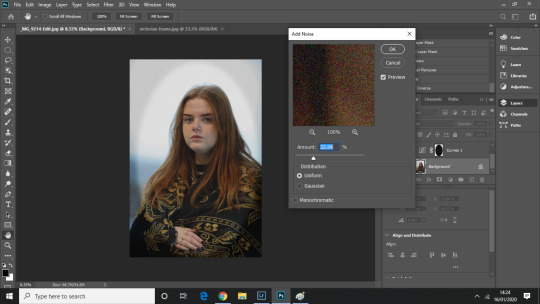
Once this opened in Photoshop, I have selected Filter > Noise > Add Noise
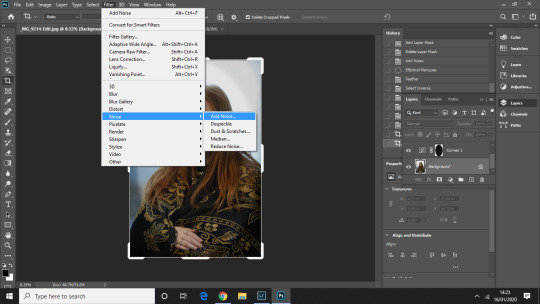
Once selected this you can choose what amount of noise do you want to integrate in the image. There is a close- up preview to see how it will look before doing it.
After this I had proceed to add the Vignette effect that a lot of the Victorian photos have.
To do this I had to select the tool of Elliptical Marquee Tool on the right side of the tool’s side. It is the second starting from the top.
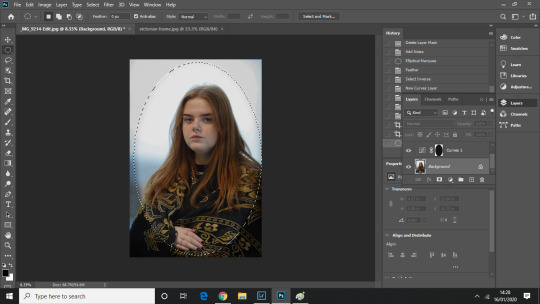
Once I made the oval , I have double click > Feather and added 75 Feather Radius pixel.

Then we double click again > Select Invert
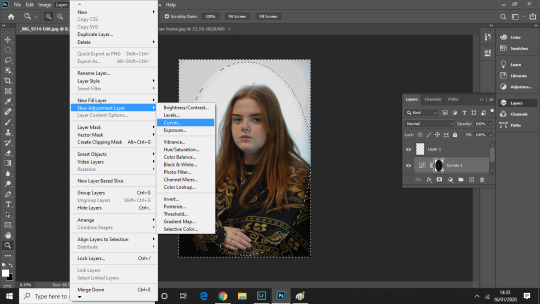
We then select Layer > New Adjustment Layer> Curves
After we do this and press ok, a square on the right should appear like seen on the image below.
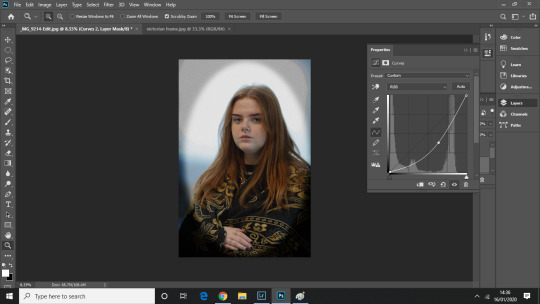
On that properties panel curve, we can move it around. As we can appreciate, the vignette in here is dark as the curve is down.
The opposite would happen if we turn the curve up.

4 notes
·
View notes
Text
Distortion Photography

Laurence Dimason
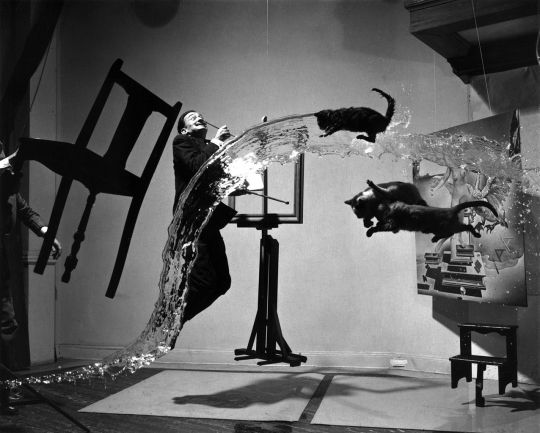
Philippe Halsman - Dali Atomicus, 1948
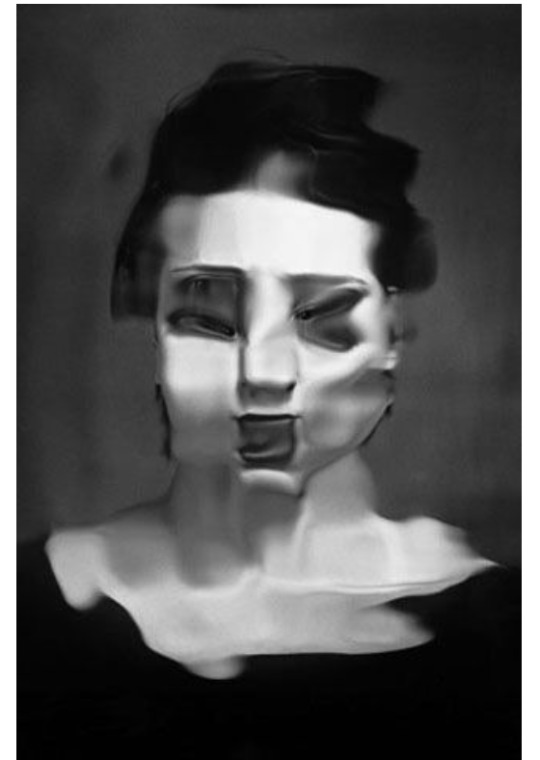
Laurence Demaison, A Wrinkle in Space-Time
3 notes
·
View notes
Photo
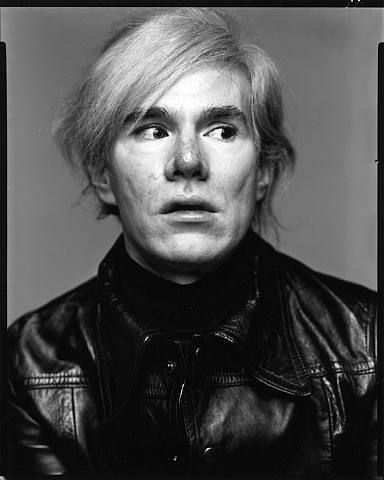
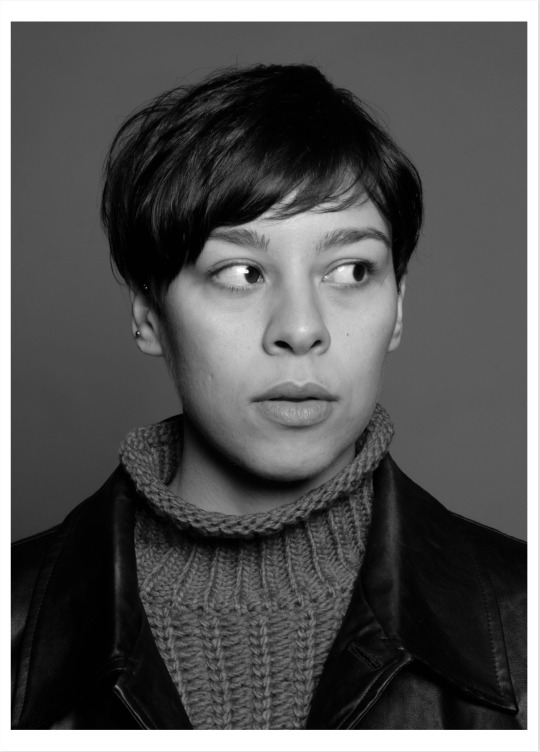
My recreation of Richard Avedon’s portrait of Andy Warhol.
6 notes
·
View notes
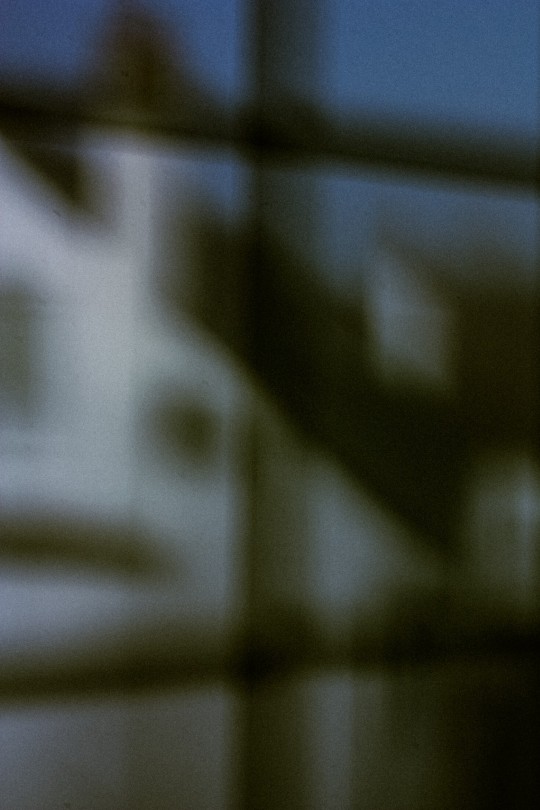
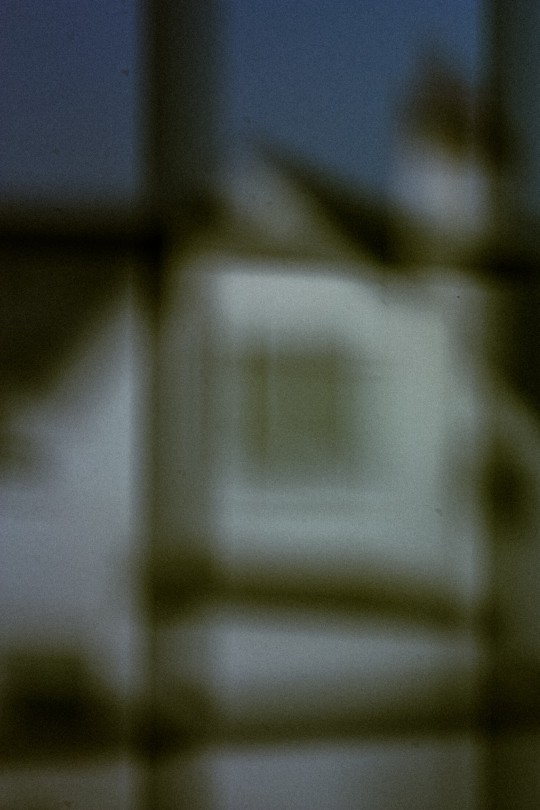
Text
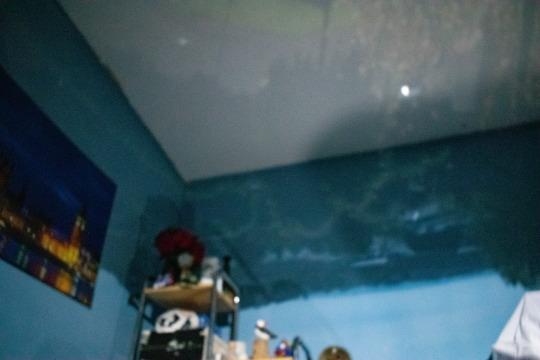
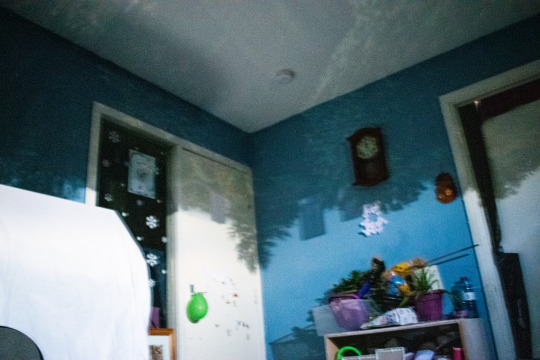
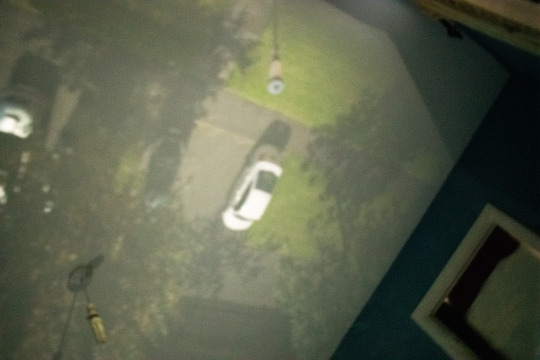
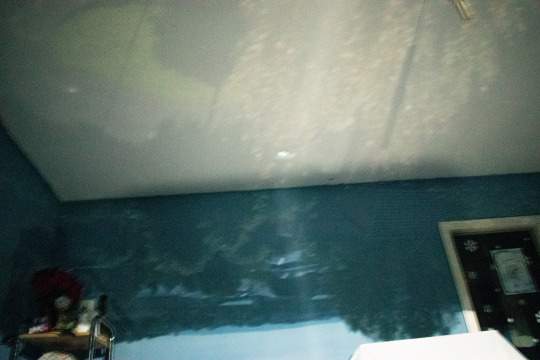
Camera Obscura experiment
I covered the window with black bags using black electrical tape.
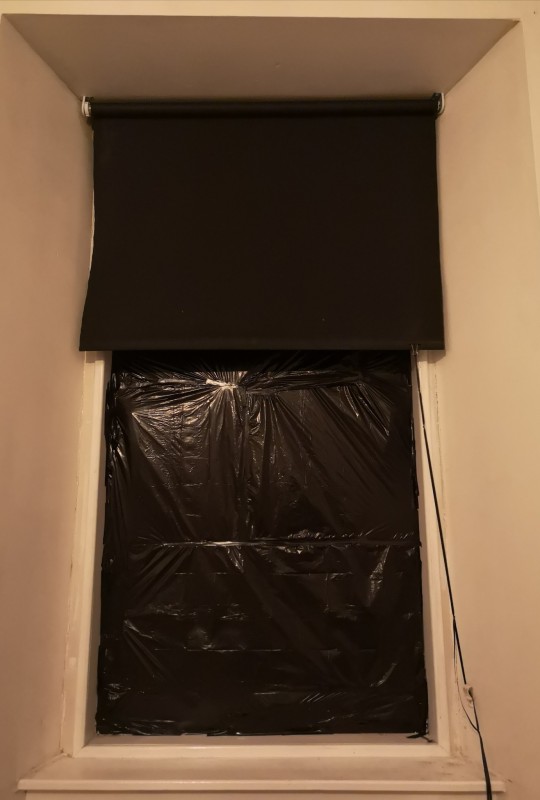
I then cut a small hole into the bag to allow some light in, as you can see there wasn't much of a difference
Small tip if you want to try this I'd advise putting a little tape around the hole to secure the cut bag(s) closer to the window


I then made the hole a little bigger and the sky began to appear on the opposite wall
After making the hole bigger again about 2.5cm x 1.5cm the building opposite started to appear and as I watched I could see the seagulls fly over the sky, then I noticed that on the ceiling I could see the cars parked at the opposite building.
The image appears flipped and upside down because the light passing through the hole is travelling in a straight line.
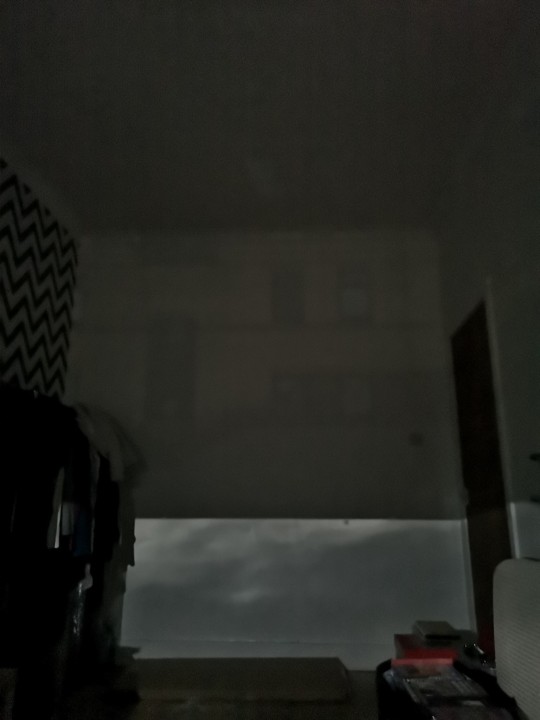

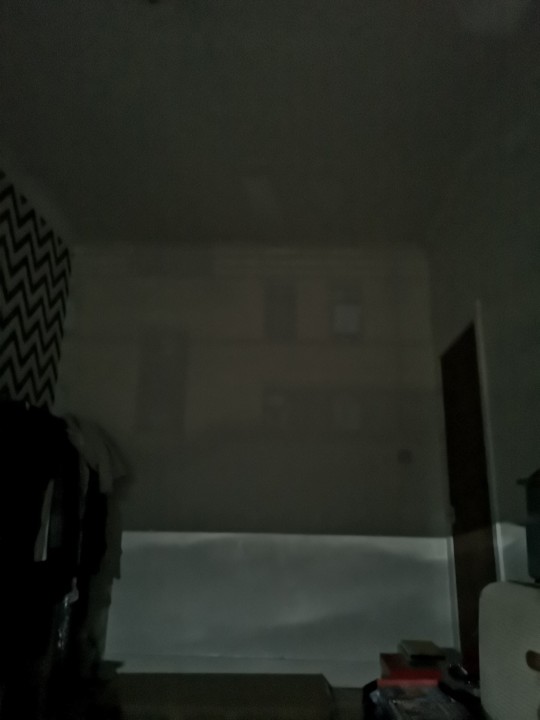
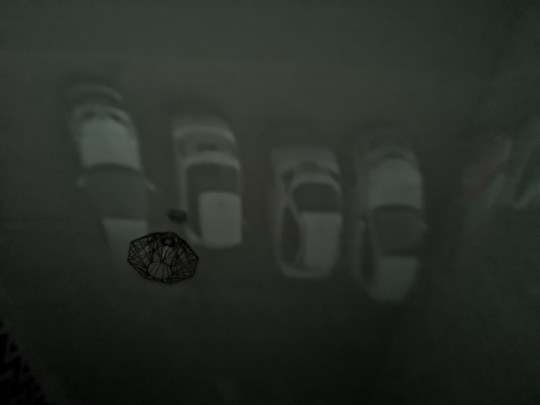
I didn't do any editing on these images as I wanted to show what I was seeing.
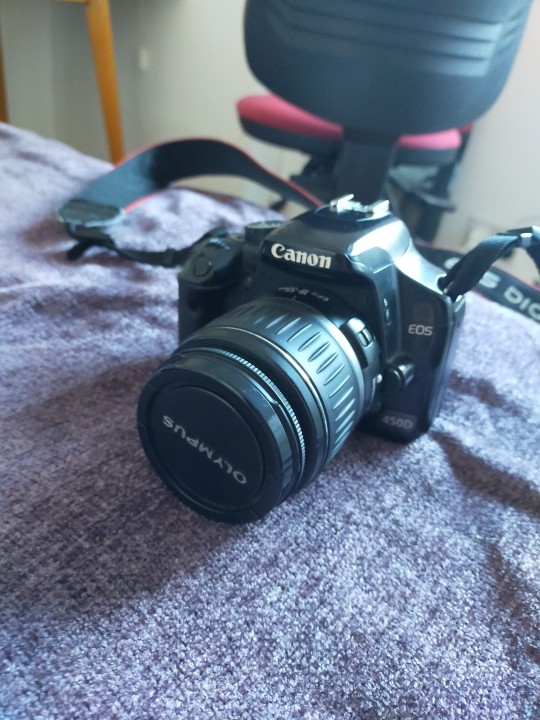
Used the HuaweiP20Pro to photograph without flash as the Eos 460D doesn't handle dark lighting situations very well
That was fun 😊😊
#camera obscura#nqphotography2021#nqphotography#nqphotoblog#photography student#photosafari#studio#Exploringlighttravel
5 notes
·
View notes
Text
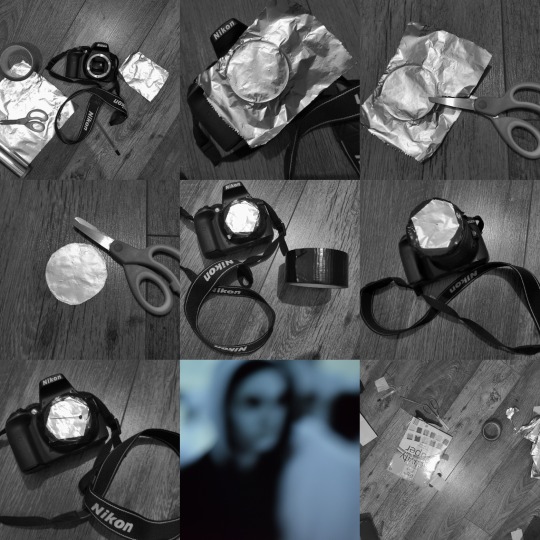
Exploring Light Travel Practical Research - Pinhole Digital Camera (Part 1)
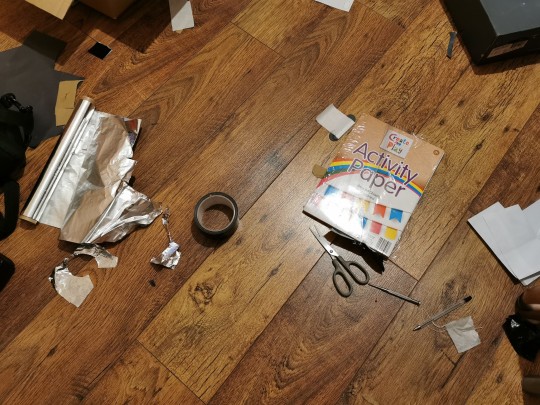
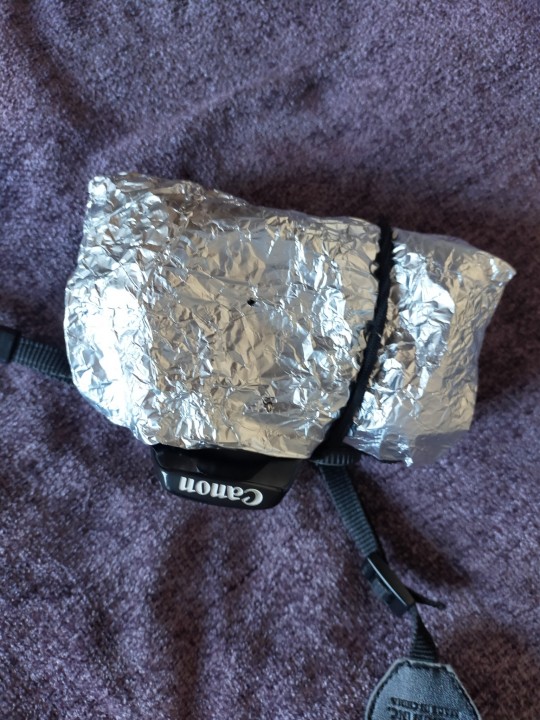
I decided to give the Pinhole Digital Camera a try for three reasons. 1 - I did not have a suitable box/tub/thing at home to make a regular pinhole camera 2 - My windows in my house are huge, and I currently don’t have enough binbags I’m willing to waste at the moment to cover them up. 3 - The view outside is entirely uninteresting, and my house looks like a bomb hit it and I don’t want to show you that. After watching the tutorial videos provided to us I decided that I really didn’t like the idea of putting sticky tape anywhere on the body of my lovely expensive camera. So I complained about it enough that my husband found this 3D model online of a cap specifically for pinhole digital camera purposes, and printed it out for me.
Isn’t the internet a magical place?
So after a bit of faffing about, trying to find my tripod, dropping the aluminium foil all over the kitchen floor and threatening the camera a little bit, It all eventually wound up looking a little bit like this.


Isn’t that lovely? I’m going to put the photos I took in a separate post, Because I took a fair few of them.
8 notes
·
View notes
Photo

Absurd Art Project
5 notes
·
View notes
Photo


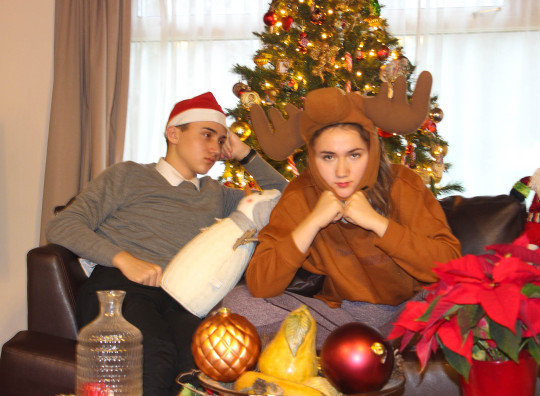

GRUMPY FAMILY
You can not always make your family dress as you want or pose until yo have the perfect picture, but i think it was a good practice because It gave me the opportunity to take many indoor pictures. When the photo session began they were very happy ( i have many pictures of them with a happy faces) But at the end of this activity i think they were really angry.
3 notes
·
View notes
Text
EXPLORING LIGHT TRAVEL PINHOLE
1 note
·
View note
Text
Absurd Sculpture Project
28th November 2019
For this mornings studio class I was given the opportunity create an Absurd Sculpture using a box unused cables from home I took series of Portraits and Erin was my model for the photoshoot.
The original plan was to use the cables as the design element for the sculpture but it was suggested to me that the cables would not work on their on as the design of the sculpture so myself and a group of classmates got together to enhance my original idea and we decided to include wooden pegs and cardboard tubes to the sculpture.
My final set of photographs contain a series of different poses both standing up and kneeling down.
I began taking photographs using a tripod but I struggled to fix the composition so i decided to take the photographs hand held.
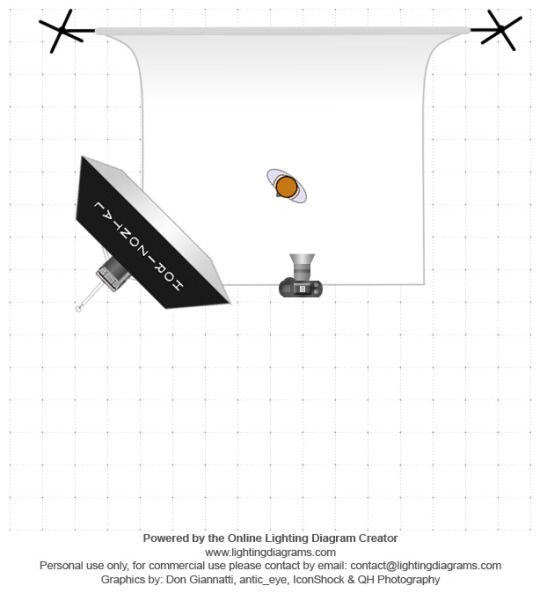
I wanted an even source of light so I used both the key light and the backlight for this photoshoot a large soft box was used as an attachment for the key light.

Pose one standing up
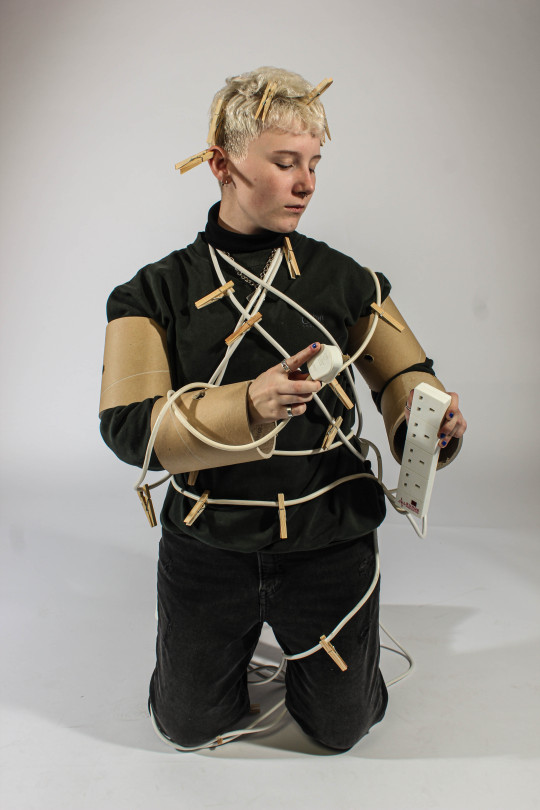
Pose two kneeling down.
My final set of images were optimised using Lightroom I changed the exposure and contrast and increased the clarity by +23 some of the images had to be cropped due to problems setting the composition with a tripod. Overall I am really happy with the final set of optimised photographs.
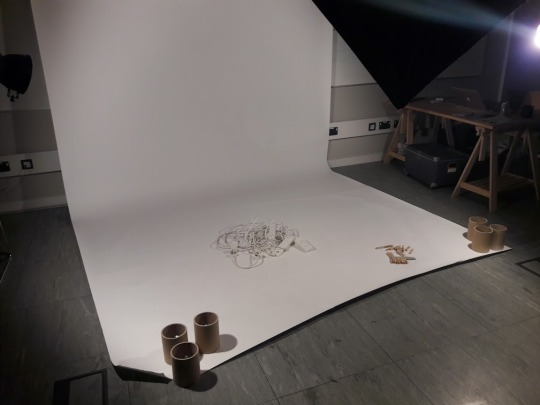
This was the setup for my Sculpture Photoshoot.
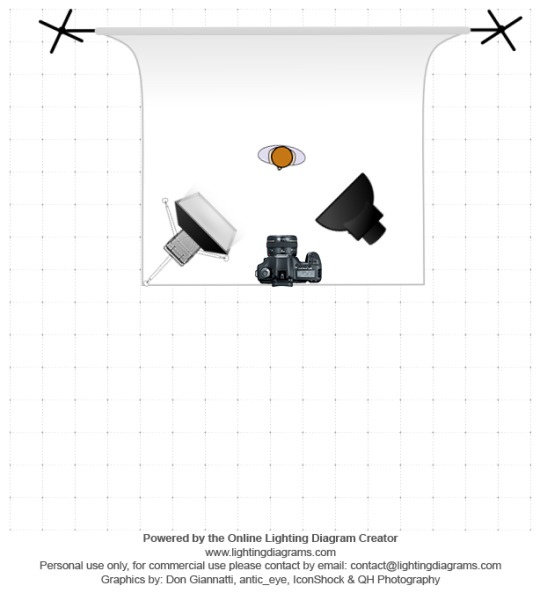
Here is an Online Lighting Diagram showing the lighting setup and the position of the camera and the subject matter.
Credit to Erin Wick for agreeing to be my model for this photoshoot.
5 notes
·
View notes